Herunterladen Inhalt Inhalt Diese Seite drucken
Inhaltsverzeichnis

Werbung

Verfügbare Sprachen
  • DE

Verfügbare Sprachen

  • DEUTSCH, seite 1
LCD-FUNKUHR / RADIO-CONTROLLED LCD
CLOCK / HORLOGE LCD RADIO-PILOTÉE
LCD-FUNKUHR
Bedienungs- und Sicherheitshinweise
HORLOGE LCD RADIO-PILOTÉE
Instructions d'utilisation et consignes de sécurité
RELÓGIO COM VISOR LCD
Instruções de utilização e de segurança
IAN 271042
RADIO-CONTROLLED LCD CLOCK
Operation and Safety Notes
LCD-RADIOWEKKER
Bedienings- en veiligheidsinstructies

Werbung

Inhaltsverzeichnis
loading

Inhaltszusammenfassung für Auriol HG00596 - IAN 271042

  • Seite 1 LCD-FUNKUHR / RADIO-CONTROLLED LCD CLOCK / HORLOGE LCD RADIO-PILOTÉE LCD-FUNKUHR RADIO-CONTROLLED LCD CLOCK Bedienungs- und Sicherheitshinweise Operation and Safety Notes HORLOGE LCD RADIO-PILOTÉE LCD-RADIOWEKKER Instructions d‘utilisation et consignes de sécurité Bedienings- en veiligheidsinstructies RELÓGIO COM VISOR LCD Instruções de utilização e de segurança IAN 271042...
  • Seite 2 DE / AT / CH Bedienungs- und Sicherheitshinweise Seite GB / IE Operation and Safety Notes Page FR / BE Instructions d‘utilisation et consignes de sécurité Page NL / BE Bedienings- en veiligheidsinstructies Pagina 26 Instruções de utilização e de segurança Página 33...
  • Seite 3 27 28...
  • Seite 5: Inhaltsverzeichnis

    Einleitung Bestimmungsgemäße Verwendung ....................Seite Teilebeschreibung ..........................Seite Technische Daten ..........................Seite Sicherheit Allgemeine Sicherheitshinweise ......................Seite Sicherheitshinweise für Batterien ......................Seite Vor der Inbetriebnahme Gerät aufstellen ...........................Seite Batterien einlegen und wechseln .......................Seite Bedienung DCF-Funksignal empfangen ........................Seite Grundeinstellungen vornehmen ......................Seite 12 / 24-Stundenanzeige verwenden ....................Seite Alarm einstellen ...........................Seite Alarm aktivieren / deaktivieren ......................Seite Terminerinnerung (TA) einstellen ......................Seite...
  • Seite 6: Einleitung

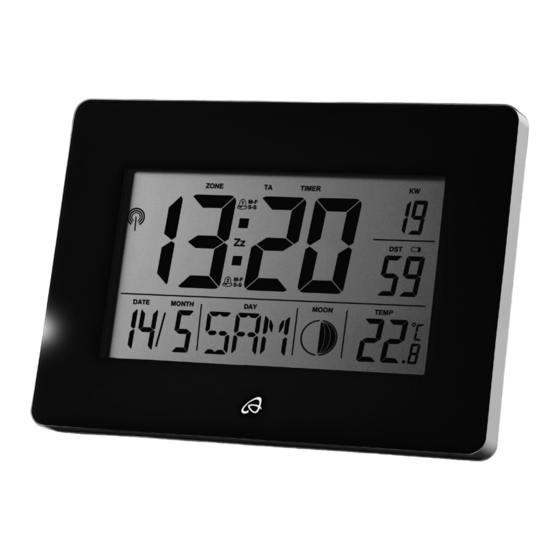
    LCD-Funkuhr °C / °F-Taste Batteriefach Batteriefachdeckel Einleitung Ausklappbarer Standfuß DOWN-Taste („abwärts“) Wir beglückwünschen Sie zum Kauf Ihres neuen UP-Taste („aufwärts“) Gerätes. Sie haben sich damit für ein hochwertiges SET-Taste Produkt entschieden. Die Bedienungsanleitung ist ALARM SET-Taste („Wecker stellen“) Teil dieses Produkts. Sie enthält wichtige Hinweise für Aufhängevorrichtung Sicherheit, Gebrauch und Entsorgung.
  • Seite 7: Sicherheitshinweise Für Batterien

    Vor der Inbetriebnahme Lassen Sie Reparaturen nur von Fachkräften durchführen. Entfernen Sie vor dem ersten Gebrauch die Schutzfolie. Sicherheitshinweise Ziehen Sie den Kunststoffstreifen, der aus dem für Batterien Batteriefach ragt, heraus. LEBENSGEFAHR! Gerät aufstellen Batterien gehören nicht in Kinderhände. Suchen Sie im Falle eines Verschluckens sofort einen Arzt auf! Stellen Sie die LCD-Funkwanduhr auf den VORSICHT! EXPLOSIONSGEFAHR!
  • Seite 8: Bedienung

    Halten Sie dazu die WAVE-Taste 3. Drücken Sie die SET-Taste und halten Sie 3 Sekunden lang gedrückt. sie für ca. 3 Sekunden gedrückt. Die Abkür- zung für die aktuell eingestellte Sprache blinkt Der Empfang kann durch Hindernisse (z.B. Beton- im Wochentags-Anzeige wände) oder Störquellen (z.B.
  • Seite 9: Alarm Aktivieren / Deaktivieren

    Terminerinnerung (TA) Drücken und halten Sie die ALARM SET-Taste einstellen ca. 2 Sekunden lang gedrückt. Die Stunden- anzeige blinkt. Drücken Sie die UP- bzw. DOWN-Taste 1. Drücken Sie dreimal die ALARM SET-Taste um den gewünschten Wert einzustellen. Im Display erscheint die Anziege „TA“. Drücken Sie die ALARM SET-Taste, um Ihre Ein- 2.
  • Seite 10: Mondphasen

    Drücken Sie die °C / °F-Taste , um zwischen Drücken Sie jederzeit die WAVE-Taste, um den den Temperaturskalen Celsius und Fahrenheit Timer anzuhalten. Drücken Sie die WAVE-Taste hin- und herzuschalten. erneut, um die Timerfunktion fortzusetzen. Nach Ablauf der eingestellten Zeit ertönt ca. eine Minute lang ein Signalton.
  • Seite 11: Konformitätserklärung

    Garantie Möglichkeiten zur Entsorgung des ausgedienten Produkts erfahren Sie bei Ihrer Gemeinde oder Stadtverwaltung. Das Produkt wurde nach strengen Qualitätsrichtlinien sorgfältig produziert und vor Anlieferung gewissen- Werfen Sie Ihr Produkt, wenn es ausge- haft geprüft. Im Falle von Mängeln dieses Produkts dient hat, im Interesse des Umweltschutzes stehen Ihnen gegen den Verkäufer des Produkts nicht in den Hausmüll, sondern führen...
  • Seite 12 Introduction Proper Use ............................Page 13 Description of Parts ..........................Page 13 Technical data .............................Page 13 Safety General Safety Information ........................Page 13 Battery safety information ........................Page 14 Before Initial Use Setting up Devices ..........................Page 14 Inserting or replacing batteries......................Page 14 Operation Reception of DCF radio signal ......................Page 15 Changing basic settings ........................Page 15 Using the 12 / 24-hour display ......................Page 15 Setting the alarm ..........................Page 15...
  • Seite 13: Proper Use

    Radio-controlled LCD Clock Battery compartment cover Folding stand DOWN button Introduction UP button SET button We congratulate you on the purchase of your new ALARM SET button device. You have chosen a high quality product. The Hanger instructions for use are part of the product. They contain important information concerning safety, Technical data use and disposal.
  • Seite 14: Battery Safety Information

    Setting up Devices Battery safety information Stand the radio-controlled clock on its folding DANGER TO LIFE! Batteries stand or mount it on the wall. are not intended for children. If accidentally Place the clock on a level, horizontal surface. swallowed seek immediate medical attention! Do not place the device anywhere near to sources CAUTION! EXPLOSION HAZARD! Never of interference such as televisions, computers,...
  • Seite 15: Operation

    Operation The following languages are available: GER = German Reception of DCF radio signal ENG = English = Italian The radio-controlled clock automatically starts to = French DUT = Dutch search for the DCF radio signal. The radio icon on the LCD indicates that the clock is searching for the SPA = Spanish radio signal.
  • Seite 16: Activating / Deactivating The Alarm

    Activating / deactivating 2. Press the ALARM ON / OFF button once. the alarm The Schedule alarm symbol will be dis- played to indicate that the Schedule alarm is Press the ALARM SET button once or twice activated. to select alarm 1 or alarm 2. 3.
  • Seite 17: Displaying Summertime

    Displaying summertime Electrostatic discharges may cause malfunctions. In the event of such malfunctions, remove the Summertime is automatically indicated on the LCD batteries briefly and reinsert them. by the summertime icon . The clock receives the information as to whether it is summertime or not Cleaning and Maintenance from the DCF radio signal.
  • Seite 18: Declaration Of Conformity

    Declaration of Conformity We, OWIM GmbH & Co. KG, Stiftsbergstraße 1, D-74167 Neckarsulm, hereby declare under our sole responsibility that the product: Radio-controlled LCD clock, Model No.: HG00596A / HG00596B / HG00596C, Version: 01 / 2016, to which this declaration refers, complies with the standards / normative documents of 1999 / 5 / EC.
  • Seite 19 Introduction Utilisation conforme ..........................Page 20 Description des pièces ........................Page 20 Caractéristiques...........................Page 20 Sécurité Instructions générales de sécurité ......................Page 20 Consignes de sécurité relatives aux piles ..................Page 21 Avant la mise en service Installation de l’appareil ........................Page 21 Insertion et remplacement des piles ....................Page 21 Utilisation Réception du signal radio DCF ......................Page 22 Opérer le paramétrage de base .......................Page 22...
  • Seite 20: Utilisation Conforme

    Horloge LCD radio-pilotée Touche °C/°F Compartiment à piles Couvercle du compartiment à piles Introduction Pied rabattable Touche DOWN (bas) Félicitations pour l‘acquisition de votre nouvel ap- Touche UP (haut) pareil ! Vous avez opté pour un produit de grande Touche SET qualité.
  • Seite 21: Consignes De Sécurité Relatives Aux Piles

    Consignes de sécurité Avant la mise en service relatives aux piles Avant la première utilisation, enlever le film DANGER DE protecteur. MORT ! Ne laissez pas les piles à la portée Retirez les bandes plastiques dépassant du des enfants. En cas d’ingestion, consultez compartiment à...
  • Seite 22: Utilisation

    La réception peut être limitée de manière majeure 4. Appuyez sur la touche UP ou DOWN par des obstacles (par exemple des murs en béton) pour régler la langue souhaitée. ou des sources de parasites (par exemple d’autres 5. Validez votre sélection en appuyant sur la appareils électriques).
  • Seite 23: Activer / Désactiver L'alarme

    Paramétrer le rappel d‘événe- Appuyer sur la touche UP ou DOWN ment (TA) pour régler la valeur désirée. Appuyer sur la touche ALARM SET pour valider votre entrée. L’affichage des minutes 1. Appuyez trois fois sur la touche ALARM SET clignote.
  • Seite 24: Affichage De Température En °C / °F

    Affichage de température DOWN , afin de paramétrer les minutes. en °C / °F Astuce : Maintenez enfoncée la touche UP ou DOWN, afin d‘accélérer le paramétrage. La température intérieure actuelle est affichée Appuyez sur la touche WAVE , afin de lan- dans l’ACL.
  • Seite 25: Traitement Des Déchets

    Traitement des déchets Q  L‘emballage et son matériel sont exclusivement composés de matières écologiques. Les matériaux peuvent être recyclés dans les points de collecte locaux. Vous pouvez au besoin télécharger ces documents sur le site www.owim.com. Les possibilités de recyclage des produits usés sont à...
  • Seite 26 Inleiding Doelmatig gebruik........................... Pagina 27 Onderdelenbeschrijving ......................... Pagina 27 Technische gegevens ........................Pagina 27 Veiligheid Algemene veiligheidsinstructies ...................... Pagina 27 Veiligheidsinstructies voor het gebruik van batterijen ..............Pagina 28 Vóór de ingebruikname Apparaten plaatsen ........................Pagina 28 Batterijen plaatsen en vervangen....................Pagina 28 Bediening DCF-signaal ontvangen ........................
  • Seite 27: Doelmatig Gebruik

    LCD-radiowekker °C / °F-knop Batterijvak Batterijvakdeksel Inleiding Uitklapbare voet DOWN-knop („omlaag“) Gefeliciteerd met de koop van uw nieuwe appa- UP-knop („omhoog“) raat. U heeft voor een hoogwaardig product geko- SET-knop zen. De gebruiksaanwijzing is een deel van het ALARM SET-knop („wekker instellen“) product.
  • Seite 28: Veiligheidsinstructies Voor Het Gebruik Van Batterijen

    Vóór de ingebruikname voor letsel voor de gebruiker ontstaan. Laat reparaties alleen uitvoeren door een vakman. Verwijder vóór het eerste gebruik de bescherm- folie. Veiligheidsinstructies voor Trek de kunststof strook, die uit het batterijvak het gebruik van batterijen steekt, eruit. LEVENSGEVAAR! Apparaten plaatsen Q ...
  • Seite 29: Bediening

    Start de radiografische klok eventueel opnieuw radiosignaal te onderbreken. wanneer het niet optimaal functioneert. Houd 3. Druk op de SET-knop en houd deze gedu- daartoe gedurende 3 seconden de WAVE- rende ca. 3 seconden ingedrukt. De afkorting toets ingedrukt. voor de actueel ingestelde taal knippert in de dagweergave De ontvangst kan door hindernissen (bijv.
  • Seite 30: Wekfunctie Activeren / Deactiveren

    Termijnherinnering (TA) Houd gedurende 2 seconden de ALARM SET- instellen knop ingedrukt. De uurweergave knippert. Druk dienovereenkomstig vaak op de UP- of DOWN-toets om de gewenste waarde 1. Druk drie keer op de ALARM SET-knop in te stellen. Op het display verschijnt de weergave „TA“. Druk op de ALARM SET-knop om uw invoer te 2.
  • Seite 31: Maanfasen

    Druk op de °C / °F-knop om tussen de tem- en op het display knippert het timersymbool TIMER peratuurscala’s Celsius en Fahrenheit heen en weer te schakelen. Druk op een willekeurig tijdstip op de WA- VE-knop om de timer te onderbreken. Druk nogmaals op de WAVE-knop om de timerfunc- Maanfasen tie weer op te pakken.
  • Seite 32: Conformiteitsverklaring

    Garantie Informatie over de mogelijkheden om het uitgediende artikel na gebruik af te voeren, verstrekt uw gemeen- telijke overheid. Het apparaat wordt volgens strenge kwaliteitsricht- lijnen zorgvuldig geproduceerd en voor levering Gooi het produkt als U het niet meer grondig getest. In geval van schade aan het product gebruikt met het oog op milieu-bescher- kunt u rechtmatig beroep doen op de verkoper van ming niet bij het huisvuil, maar verwijder...
  • Seite 33 Introdução Utilização correcta.......................... Página 34 Descrição das peças ........................Página 34 Dados técnicos ..........................Página 34 Segurança Indicações gerais de segurança ....................Página 34 Indicações de segurança relativas às pilhas ................Página 35 Antes da colocação em funcionamento Posicionamento do aparelho ......................Página 35 Inserir e substituir pilhas ........................
  • Seite 34: Utilização Correcta

    Relógio com visor LCD Tampa do compartimento das pilhas Base articulada Botão DOWN („para baixo“) Introdução Botão UP („para cima“) Botão SET Congratulamo-lo pela compra do seu novo aparelho. Botão ALARM SET („acertar o despertador“) Acabou de adquirir um produto de grande qualidade. Dispositivo de suspensão O manual de instruções é...
  • Seite 35: Indicações De Segurança Relativas Às Pilhas

    Indicações de segurança Retire as riscas plásticas que saiem do compar- relativas às pilhas timento das pilhas PERIGO DE MORTE! As pilhas Posicionamento do aparelho não devem ser manuseadas por crianças. Se a pilha for ingerida, contacte imediatamente um médico! Coloque o relógio de parede rádio-desperta- CUIDADO! PERIGO DE EXPLOSÃO! dor LCD no pé...
  • Seite 36: Utilização

    A recepção pode ser limitada de forma significa- 2. Mantenha o botão WAVE premida durante tiva por obstáculos (por ex. paredes em betão) ou cerca de 3 segundos para interromper a rece- fontes de interferência (por ex. outros aparelhos ção do sinal de radiofrequência. eléctricos).
  • Seite 37: Activar / Desactivar Alarme

    Ajustar o lembrete Mantenha o botão ALARM SET premido du- de evento (TA) rante aprox. 2 segundos. A indicação das ho- ras fica intermitente. Prima o botão UP ou DOWN para 1. Prima três vezes o botão ALARM SET . No configurar o valor pretendido.
  • Seite 38: Fases Da Lua

    Prima o botão °C / °F para comutar entre visor começa a piscar o símbolo de temporiza- dor TIMER as escalas de temperatura Celsius e Fahrenheit. Prima a cada momento o botão WAVE para parar o temporizador. Volte a premir o botão Fases da lua WAVE para continuar a função do temporiza- dor.
  • Seite 39: Declaração De Conformidade

    Garantia As possibilidades de reciclagem dos artigos utiliza- dos poderão ser averiguadas no seu Município ou Câmara Municipal. O aparelho foi cuidadosamente fabricado segundo rigorosas directivas de qualidade e meticulosamente Não deposite o produto utilizado no testado antes da sua distribuição. Em caso de falhas lixo doméstico, a favor da protecção do deste aparelho, possui direitos legais relativamente ambiente.
  • Seite 40 OWIM GmbH & Co. KG Stiftsbergstraße 1 D-74167 Neckarsulm Model-No.: HG00596A / HG00596B / HG00596C Version: 01 / 2016 Stand der Informationen · Last Information Update Version des informations · Stand van de informatie Estado das informações: 05 / 2016 · Ident.-No.: HG00596A / B / C052016-OS IAN 271042...

Inhaltsverzeichnis