Inhaltsverzeichnis
Werbung
Verfügbare Sprachen
Verfügbare Sprachen
Quicklinks
Werbung
Inhaltsverzeichnis

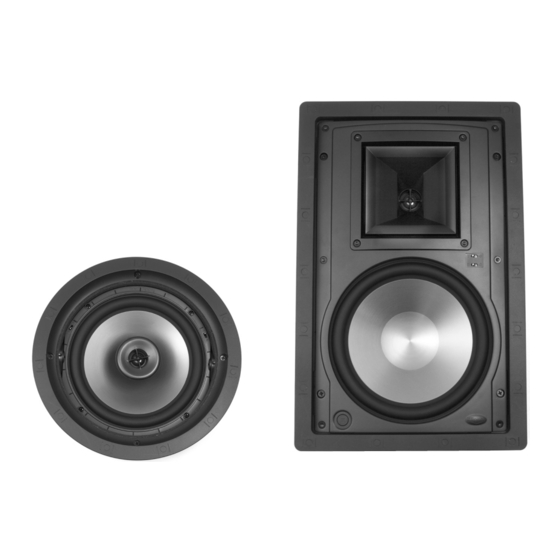
Verwandte Anleitungen für Klipsch CDT-3800-C II


Inhaltszusammenfassung für Klipsch CDT-3800-C II
-
Seite 2: Important Safety Instructions
IN-CEILING SPEAKER PLACEMENT WARNING: To reduce the risk of fire or electrical shock, do not Designed to function in any drywall or drop ceiling, Klipsch in- expose this apparatus to rain or moisture. ceiling speakers are engineered for years of performance. -
Seite 3: Operating Controls
If the template is not available, cutout dimensions are provided on the Klipsch website, www.klipsch.com. Sizes listed are minimum. If accuracy of cut cannot be achieved, you may add 1/4" to each dimension. Be careful not to cut through any existing wiring or plumbing. - Seite 4 If your dealer is not equipped to perform the repair of your KLIPSCH product, it can be returned, freight paid, to KLIPSCH for repair. Please call KLIPSCH at 1-800-KLIPSCH for instructions. You will need to ship this product in either its original packaging or packaging affording an equal degree of protection.
-
Seite 5: Consignes De Securite Importantes
6. NETTOYER UNIQUEMENT avec un chiffon sec. ABOUT YOUR KLIPSCH PURCHASE 7. NE PAS OBSTRUER les orifices de ventilation. Installer conformé Ces nouvelles enceintes architecturales Klipsch ont été conçues ment aux instructions du constructeur. pour offrir un son d’excellente qualité tout en restant discrètes où... -
Seite 6: Installation Des Enceintes
5. Vous pouvez maintenant peindre les grilles avant de les insérer coupe-feu entre poteaux d’ossature murale. dans les enceintes. Les grilles Klipsch ont été conçues de façon à être compatibles avec la plupart des types de peintures. Si 2. Introduisez dans l’ouverture les fils de l’enceinte (calibre 18 vous le souhaitez, vous pouvez retirer le canevas avant de minimum). -
Seite 7: Commandes De Fonctionnement
GARANTIE (ÈTATS-UNIS ET CANADA UNIQUEMENT) KLIPSCH, LLC (« KLIPSCH ») garantit ce produit contre tout vice de matériaux et de fabrication (sous réserve des termes établis ci-dessous) pendant une période d’un (1) an à partir de la date d’achat. - Seite 8 UBICACIÓN DE LOS ALTAVOCES EN EL CIELO RASO cio calificado Los altavoces empotrados en el cielo raso de Klipsch han sido dis- eñados para funcionar en cualquier pared de pirca o cielo raso col- PRECAUCIÓN. Los cambios o modificaciones no aprobados expre- gante y para rendir durante muchos años.
- Seite 9 Si el altavoz se ubica en 5. Las rejillas de Klipsch han sido diseñados para aceptar la may- una esquina y produce demasiados bajos, puede ser necesario oría de los tipos de pintura.
- Seite 10 Tweeter con trompeta basculante (modelos empotrados en el cielo raso) Los modelos de altavoces Reference de Klipsch empotrados en el cielo raso tienen un tweeter basculante para dirigir las frecuencias altas. Para apuntar el sonido directamente hacia el área de audi- ción, ajuste cuidadosamente la trompeta para lograr el ángulo...
-
Seite 11: Wichtige Sicherheitshinweise
WANDEINBAU DER LAUTSPRECHER Klipsch-Wandlautsprecher können in jede normale Wand, Decke Dieses Symbol weist darauf hin, dass die dieser Einheit oder Zwischendecke eingebaut werden und bieten Ihnen jahre- beiliegenden Anleitungen wichtige Betriebs- und lang Höchstleistungen. -
Seite 12: Deckeneinbau Der Lautsprecher
Größe in die Wand oder Decke. Wenn die in die Lautsprecher einsetzen. Die Lautsprechergrills von Schablone nicht verfügbar ist, finden Sie deren Maße auf der Klipsch können mit praktisch jeder Farbe lackiert werden. Sie Klipsch-Website: www.klipsch.com. Die angegebenen Größen sollten vor dem Lackieren den Stoffeinsatz herausnehmen. Er sind Minimalwerte. -
Seite 13: Garantie Ausserhalb Der Usa Und Kanada
Installation ist der Hornlautsprecher sorgfältig auf den Hörbereich auszurichten. Schwenkbarer Hornhochtöner (Deckenmodelle) Klipsch Reference-Deckenlautsprecher besitzen einen schwenkbaren Hochtöner, um die Hochfrequenzen besser ausrichten zu können. Um den Sound direkt auf den Hörbereich auszurichten, drehen Sie vor der Installation des Grills das Horn vorsichtig im gewünschten Winkel. - Seite 14 INFORMAZIONI IMPORTANTI PER LA SICUREZZA IL VOSTRO NUOVO PRODOTTO KLIPSCH 1. LEGGERE queste istruzioni. I diffusori da incasso Klipsch sono stati concepiti per fornire un 2. CONSERVARE queste istruzioni. audio eccezionale in maniera discreta ed in qualunque instal- 3. PRESTARE ATTENZIONE alle avvertenze.
-
Seite 15: Funzionamento
Per mas- simizzare le prestazioni acustiche dei diffusori montati in un con- trosoffitto, Klipsch consiglia di sostituire il pannello originale con uno in compensato o in fibra a media densità (MDF) da 12-18 mm (figura 2). - Seite 16 ARCHITECTURAL SPEAKERS Tweeter con tromba girevole (modelli per montaggio nel soffitto) I modelli Klipsch Reference per incasso nel soffitto includono un tweeter girevole per posizionare le alte frequenze. Per dirigere il suono verso la posizione di ascolto, posizionare delicatamente la tromba nell'angolo desiderato prima di installare la mascherina.
-
Seite 17: Instruções De Segurança Importantes
SOBRE SUA AQUISIÇÃO DE PRODUTOS DA KLIPSCH 5. NÃO use este aparelho perto de água. As caixas acústicas de linhas arquitetônicas da Klipsch que você 6. LIMPE APENAS com um pano seco. adquiriu foram projetadas para produzir excelente som sem 7. -
Seite 18: Posicionamento Das Caixas Acusticas Nos Tetos
ARCHITECTURAL SPEAKERS Figure 2 POSICIONAMENTO DAS CAIXAS ACUSTICAS NOS TETOS As caixas acústicas de teto da Klipsch foram projetadas para ter ótimo desempenho em qualquer teto de gesso acartonado (drywall) ou teto suspenso, e foram fabricadas para durarem muitos anos. O perfil das unidades requer que as superfícies de instalação, quer sejam de gesso acartonado –... - Seite 19 à área ocupada pelos ouvintes. Tweeter articulado (nos modelos de teto) Os modelos da série Klipsch Reference para instalação em teto possuem um tweeter articulado para direcionar as altas freqüên- cias. Para direcionar o som diretamente para a área ocupada pelos ouvintes, coloque o tweeter no ângulo desejado antes de...
- Seite 20 ARCHITECTURAL SPEAKERS Figure 1 Figure 2 Chinese...
- Seite 21 Figure 3...
- Seite 22 ARCHITECTURAL SPEAKERS Figure 1 Figure 2 Japanese...
- Seite 23 Figure 3...