Werbung
Quicklinks
Lok mit LED-Beleuchtung/loco with LED light/loco avec illumination LED
a (2x)
Fig. 2
Öffnen der Lok: Ein Öffnen der Lok ist nur zum Einbau eines digitalen Decoders, zum Motorwechsel und Ölen des
Getriebes erforderlich. Schrauben a (2x) und b entfernen (bei Art. 405501/105501 Griffstangen (s. Fig. 2a) herauszie-
hen) und Lokgehäuse nach oben abnehmen (Fig. 2).
a
a
942701
Fig. 3
Ersatzhaftreifen:
An der runden schraffierten Stelle kann ein Schaltmagnet Art.-Nr. 942701 eingebaut werden (Fig. 3).
Ölen: Geölt werden Lagerstellen und Getriebe nur an den gekennzeichneten Lagerstellen (Fig. 2/3).
Nur FLEISCHMANN-ÖL 6599 verwenden. Nur ein kleiner Tropfen pro Schmierstelle (
Überölung. Zur Dosierung die in der Verschlusskappe der Ölflasche angebrachte Nadel verwenden.
21-4055-0102.indd 1-3
Fig. 4
NEM
Brückenstecker
Jumper
Fiche de pontage
Fig. 5
b
Fig. 2a
Bitte beachten Sie bei Digitalbetrieb: FLEISCHMANN Digital Komponenten sind komplexe elektronische Systeme.
Die Kompatibilität und Funktionssicherheit kann daher nur bei Verwendung von Original FLEISCHMANN Bauteilen
und Komponenten gewährleistet werden. Bei Verwendung von nicht Original FLEISCHMANN Bauteilen oder von uns
nicht freigegebenen Komponenten erlischt die Garantieverpflichtung. Ebenso können wir dann die Einhaltung der
EMV-Richtlinien nicht mehr garantieren.
Die Garantieansprüche erlöschen, wenn Sie
A) die Artikel zu einem anderen, als von uns
als Einsatzzweck vorgesehenen, Zweck
verwendet haben, B) die in den Betriebs-
anleitungen stehenden Hinweise nicht be-
achten, C) Folgefehler auf Grund des Ein-
baus/Umbaus von/mit Fremdkompo nen ten,
für die von uns keine Freigabe erteilt wurde
und/oder unsachgemäß ein gebaut wurden,
erleiden. Die Garantie erstreckt sich auch
nicht auf verschleiß bedingte Störungen, die
durch den Betrieb entstehen.
b
Motor ist wartungsfrei!
Schaltmagnet/switching
magnet/aimant permanent
Motortausch: Motorhalteklammern seitlich
aufspreizen, ausrasten und nach oben ab-
00544006
nehmen. Motor nach oben herausnehmen
(Fig. 6).
Beim Einbau eines neuen Motors auf die
richtige Lage achten. Die flache Seite der
Motoraufnahme muss nach oben zeigen
(Fig. 6).
), sonst
Wiedereinbau in umgekehrter Reihenfolge.
rt
Tauschmotor: 00504055
Einbau eines digitalen Empfängerbausteins
1
(Decoders): Die Lage der Schnittstelle entneh-
men Sie bitte Fig. 2/5/6. Auf die schraffierte
Fläche der Kesselbeschwerung (s. Fig. 4) kann
1
ein DECODER z.B. Fleischmann 687403 mit
6-poligem Stecker (NEM 651) geklebt werden.
Brückenstecker nach oben abziehen (gut auf-
heben, die Lok kann so auf Gleichstrombetrieb
zurückgebaut werden). Stecker des Decoders
dafür einstecken, wobei auf Gleichlage der mit
„1" gekennzeichneten Kontakte an Stecker und
Schnittstelle zu achten ist.
Beim Einbau auch die Betriebsanleitung des je-
weiligen DECODERs beachten.
Fig. 6
flache Seite
flat side
côté plat
NEM
1. In Pfeilrichtung abziehen
Steck-Tauschkupplung
6511
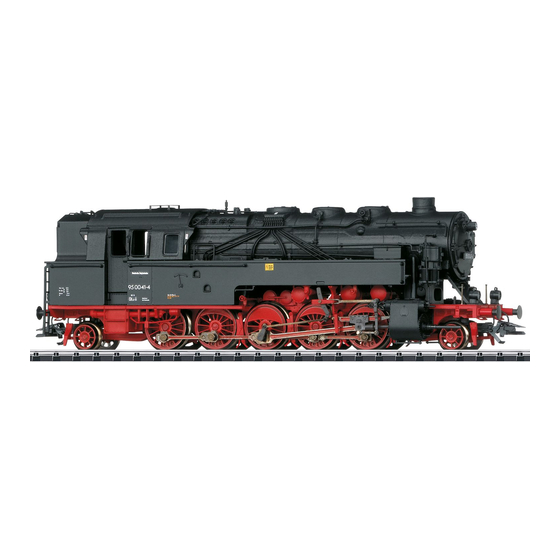
Class 95.0 with variants
The mighty steam engines of the Prussian class T 20, later known as class 95.0, first introduced into service in 1922, were ranked as Giants
among the German tank engines. 14 of them survived to see service on the DB, stationed at the Aschaffenburg loco depot particularly for use as
bankers on the steep gradient through the Spessart forest between Laufach and Heigenbrücken.(Fig. 1).
The locomotive is equipped with non serviceable LED lighting.
Opening the loco: Opening the loco is only necessary to install a digital receiver, to change the motor and to oil the gear. Remove screws
a (2x) and b (for art.no. 405501/105501additionally removethe 2 handrailsas shown in fig. 2a). Lift the loco body gentle upwards (Fig. 2).
Installing the digital decoder: The position of the interface is shown in figures 2, 5 and 6. On boiler weight indicated by the cross-hatched
section shown in fig. 4, a decoder e.g. Fleischmann 687403 with a 6-pole plug (NEM 651) can be glued on. Pull the jumper out of the
interface socket. Plug in the connector of the decoder instead, taking care that the pins marked „1" on the socket and the connector are
situated on the same side. Keep the jumper, so you can restore the loco to the D.C. current version. Please consult the instructions inclu-
ded with the DECODER for fitting advice.
The indicated point can be used for locating the switching magnet art.no. 942701 (Fig. 3). Spare traction tyres: 00544006 (Fig. 3).
In digital operation please observe the following important notes on the Guarantee: FLEISCHMANN Digital Components are com-
plex electronic systems. Their compatability and functionality can only be guaranteed when used with original FLEISCHMANN parts and
components. The conditions of the guarantee will be considered void if non-original FLEISCHMANN parts or other unauthorised parts
have been used. The conditions of the guarantee will be considered void, if • you have used the article for a purpose for which it was not
intended, • you have not taken due care of the instructions written in the instruction leaflets, • damage occurs as a consequence of in-
stallation or conversion using components of other manufacture which have not been authorised by us, or components which have been
incorrectly installed or converted. The guarantee will also not cover preventable incidents occuring during operation. The guarantee-pe-
riod is not extended by repairs or spare part delivery. You can either claim your guarantee directly at your dealer or by sending in the de-
fectous part, together with a damage report and the customers receipt, directly to FLEISCHMANN.
Lubrication: The bearings and gear-box need only be lightly oiled at the bearing points marked (Fig. 2 and 3). Only use FLEISCHMANN-
oil 6599. Only put a tiny drop in each place (rt), otherwise it will be overoiled. An applicator needle is located in the cap of the oil
bottle for your use.
Changing the Motor: Pull gently outwards the motor retainer clips to disengage and lift them up. Lift up the motor and take it out (Fig. 6).
When installing the new motor, please take care to insert the new motor the right way round. The flat side of the motor shield must be po-
Exchange Motor: 00504055
Motor is maintenance free!
sitioned on the top side (fig. 6).
Exchange coupling: Clip exchange coupling: 6511 · FLEISCHMANN- PRO FI Clip coupling: 6515. 1. Pull off in direction of arrow. ·
2. Insert exchange coupling in direction of arrow until clipped in position.
Série 95.0 avec variantes
Les locomotives de la version T 20 prussienne (ultérieurement série 95.0), faisaient partie de la famille des locos-tenders géantes allemandes et
leurs premiers exemplaires sont entrés en service en 1922. 14 unités ont été acquises par la DB. Elles étaient rattachées au dépôt
d'Aschaffenburg et poussaient de lourds convois sur la côte "Spessartrampe" entre Laufach et Heigenbrücken.(Fig. 1).
La locomotive est équipée avec l'éclairage LED.
Ouverture de la locomotive : Vous n'avez besoin d'ouvrir la locomotive que pour monter un module récepteur digital, changement de
moteur ainsi que pour le graissage des engrenages. Dévisser les vis a (2 fois), b (pour article 405501 / 105501 seulement: retirez le main
courante ( 2 fois), voir Fig. 2a) et soulever verticalement la carosserie (Fig. 2).
Montage d'un module récepteur digital : La position de l'interface, voyez Fig. 2, 5, 6, s.v.p. On peut coller un décodeur par ex.
Fleischmann 687403 avec fiche à 6 pôles (NEM 651) sur la zone hachurée du lestage de la chaudiere. Extraire le fiche de pontage. Con-
duire le fiche à 6 pôles `du décodeur à l'interface remarquant que les repères "1" soient au même côté. Garder le fiche de pontage qui
peut être utilisé pour trouver un défaut potentiel du décodeur (conversion en modèle avec courant continu). Pour le montage, en plus se
référer au mode d'emploi du décodeur.
S'il vous plaît observer en operation digitale des remarques importantes sur la garantie :
Les composants FLEISCHMANN Digital sont des systèmes électroniques complexes. Leur compatibilité et leur sécurité de fonctionne-
ment ne peuvent donc être assurées qu'avec l'utilisation de modules et composants FLEISCHMANN d'origine. L'utilisation de modules
non FLEISCHMANN et de composants non homologués par FLEISCHMANN entraîne l'extinction de toute prétention à garantie et de la
garantie de conformité aux directives CEM. Les prétentions à garantie s'éteignent dans les cas suivants : • Utilisation d'articles à des fins
2. Ersatzkupplung in Pfeil-
richtung einstecken, bis
Halteklammern einrasten
PROFI-Steckkupplung
6515
11.04.2018 11:33:03
Werbung

Verwandte Anleitungen für FLEISCHMANN 95.0 Serie


Inhaltszusammenfassung für FLEISCHMANN 95.0 Serie
- Seite 1 Installing the digital decoder: The position of the interface is shown in figures 2, 5 and 6. On boiler weight indicated by the cross-hatched section shown in fig. 4, a decoder e.g. Fleischmann 687403 with a 6-pole plug (NEM 651) can be glued on. Pull the jumper out of the Schnittstelle zu achten ist.
- Seite 2 Never turn the driven wheels by hand, only by connecting two wires with mente. di caldaia (Fig. 4), un DECODER per es. Fleischmann 687403 con spina di 6 poli (NEM 651) può essere incollato. Estrarre la spina a the operating voltage to them. Wheels not driven can be turned by hand.