Herunterladen Inhalt Inhalt Diese Seite drucken
Grundig Digta 7 Kurzanleitung
Vorschau ausblenden Andere Handbücher für Digta 7:

Werbung

Verfügbare Sprachen

Verfügbare Sprachen

>> Kurzanleitung
>> Quick Reference Guide
>> Notice abrégée

Werbung

Inhaltsverzeichnis
loading

Inhaltszusammenfassung für Grundig Digta 7

  • Seite 1 >> Kurzanleitung >> Quick Reference Guide >> Notice abrégée...
  • Seite 2 In der Hilfefunktion des Digta (untere seitliche Funktionstaste) finden Sie eine kurze Erklärung der zur Verfügung stehenden Funktionen. INFORMATION You will find the comprehensive user guide for your Digta 7 on the internet at www.grundig-gbs.com In the help function (lower lateral function button) you will find a short description of the enabled functions.
  • Seite 3 Fig. 1: Fig. 3: Variante I / Option I Variante II / Option II FFWD FFWD STOP STOP START PLAY Fig 4: 29 30 11 10 Fig. 2:...
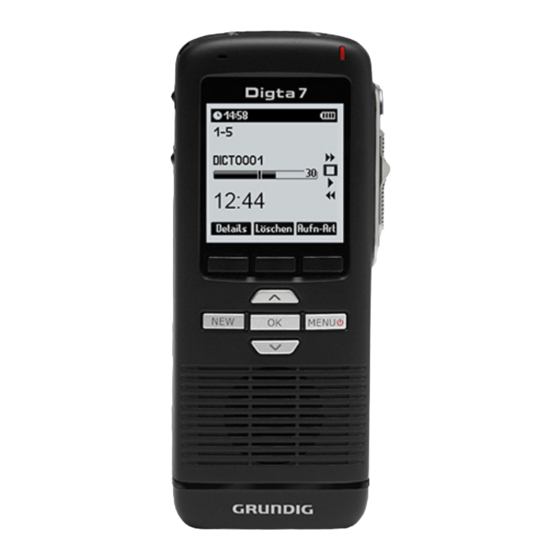
  • Seite 4: Erläuterung Bedienelemente Und Anschlüsse

    Anschluss für Ohrhörer oder Kopfhörer Ein-Aus-Taste Digta ein- und ausschalten Kontaktleiste Anschluss für Dockingstation Batteriefach Fach für AAA-Batterien oder Akkupack 962* USB-Anschluss Schnittstelle für PC und Grundig Netzteil Entriegelungstaste Entriegelungstaste für Batteriefachdeckel Batteriefach Batteriefach mit Akku* Menu-Taste Zugang zum Menü des Digta Daumentaste Funktion abhängig von Variante...
  • Seite 5 Erläuterung Bedienelemente und Anschlüsse Nr. Bezeichnung Bedeutung Nr. Bezeichnung Bedeutung Einstellschraube Varianteneinstellung für Schiebeschalter und Schiebeschalterfunk- Funktionen der Schalterstellungen an der Stell- Daumentaste tionen schraube und im Menü konfigurierbar Aufnahme Schiebeschalter Schiebeschalterfunktion abhängig von Variante Aufnahmepause Touch Pin fühlbare Schiebeschalterstellung Rückspulen/Rücklauf Ende Rückspulen Uhrzeit in Stunden und Minuten...
  • Seite 6: Registrierung Im Kundencenter

    Zubehör sind in dieser Anleitung mit einem Stern „*“ WARNUNG gekennzeichnet. Weist auf mögliche Verletzungsgefahr hin. Registrierung im Kundencenter VORSICHT Registrieren Sie ihr Digta 7 auf der folgenden Website: Weist auf mögliche Gefährdungen für das Gerät, http://www.grundig-gbs.com/kundencenter. Dateiinhalte oder andere Gegenstände hin.
  • Seite 7: Bestimmungsgemäße Verwendung

    Sie es zu Ihrem Fachhändler. Verwenden Sie das Digta ausschließlich für den in dieser Anlei- Adressen von Fachhändlern finden Sie unter: tung und in der Langanleitung beschriebenen Gebrauch. Jede www.grundig-gbs.com weitere Verwendung gilt als nicht bestimmungsgemäß und ist untersagt. •...
  • Seite 8: Gefahren Durch Strom

    Betreiben Sie das Netzteil nur, wenn die auf dem dung von Zubehör zurückzuführen sind, das nicht Originalzu- Typenschild angegebene elektrische Spannung mit behör von Grundig Business Systems ist, bzw. nicht von Grundig der Spannung Ihrer Steckdose übereinstimmt. Business Systems empfohlen oder freigegeben ist, können keine Eine falsche Spannung kann das Gerät stören.
  • Seite 9: Akku Laden

    inbetriebnahme inbetriebnahme Das Digta wechselt nach wenigen Sekunden in den Haupt- bildschirm und ist betriebsbereit. Akku laden Ausschalten x Schalten Sie Ihr Digta aus. x Drücken Sie die Taste „MENU“ bis das Gerät ausgeschaltet x Stecken Sie den Stecker des Netzteils* in die Steckdose. ist.
  • Seite 10: Bedienung

    Bedienung Bedienung interner/Externer Speicher Ihre Diktate werden auf dem internen Speicher des Digta ge- Varianten der Schiebeschalterbedienung speichert, solange keine externe, wechselbare Speicherkarte Das Digta hält zwei Varianten für die Bedienung des Schiebe- (Digta Card*) eingesteckt ist. Wenn Sie eine Digta Card verwen- schalters bereit (siehe auch Fig.
  • Seite 11: Neues Diktat Aufnehmen

    Bedienung x Zum Beenden der Hilfe drücken Sie erneut die untere Im Menü des Easy Mode können Sie unter „Geräteinfo“ wich- Funktionstaste oder die Taste „OK“. tige Informationen über Ihr Digta einsehen, z.B. Seriennummer, Version der Geräte-Software (Firmware) oder der aktuelle Stand Sie gelangen zur Ausgangssituation zurück.
  • Seite 12: Diktat Auswählen Und Anhören

    Bedienung x Starten Sie die Aufnahme, indem Sie den Schiebeschalter auf Diktat auswählen und anhören » « schieben. Sprechen Sie den neuen Text. x Schieben Sie den Schiebeschalter auf » «. Die Aufnahmeanzeige leuchtet rot. Der Fortschrittsbalken x Drücken Sie eine der Auf-Ab-Tasten. wird länger und die Diktatlänge erhöht sich.
  • Seite 13: Schneller Vorlauf Und Rücklauf

    Bedienung Im Display läuft der Fortschrittsbalken vorwärts. Die Anzeige WARnung der aktuellen Diktatposition in Minuten und Sekunden erhöht Gefahr einer Gehörschädigung sich. Halten Sie das Diktiergerät bei lauter Wiedergabe, ins- x Drücken Sie die Taste „Tempo“. besondere bei maximaler Lautstärke, nicht an ein x Beeinflussen Sie die Wiedergabegeschwindigkeit wie Ohr, um sicher zu sein, dass das Gehör nicht geschä- gewünscht mit den Auf-Ab-Tasten.
  • Seite 14: Diktatteil Überschreiben

    Bedienung Falls diese Displaytaste nicht angezeigt wird, stellen Sie x Wählen Sie das gewünschte Diktat mit den Auf-Ab-Tasten im Menü (siehe Kapitel „Profile“) unter „Aufnahme“ die aus. Aufnahmeart um. x Schieben Sie den Schiebeschalter auf » «, um das Diktat anzuhören.
  • Seite 15: Diktatteil Anhängen

    Bedienung x Starten Sie die Aufnahme, indem Sie x Drücken Sie die Taste » « (Sprung ans Ende). die Aufnahmetaste drücken und den Schiebeschal- ter auf » « schieben. Sprechen Sie den geänderten HinWEiS (II) Text. Sprungziel den Schiebeschalter auf » «...
  • Seite 16: Diktateigenschaften Ändern

    Bedienung x Drücken Sie die Menü-Taste. HinWEiS x Navigieren Sie im Hauptmenü (siehe Kapitel „Profile“) mit Diktateigenschaften den Auf-Ab-Tasten zum Menüpunkt „Aufnahme“ und Die Diktateigenschaften sind nur im Menu Mode ver- bestätigen mit der Taste „OK“. fügbar. x Navigieren Sie im Aufnahmemenü mit den Auf-Ab-Tasten zum Menüpunkt „Aufnahmeart“...
  • Seite 17: Diktat Löschen

    Bedienung info/index-funktion Löschbare Elemente Sie können jedem Diktat spezifische Informationen* und Anwei- Die Liste der löschbaren Elemente sungen für Ihre Sekretärin aufsprechen oder Indexmarkierungen ist nur im Menu Mode verfügbar. für bestimmte Diktatstellen setzen. HinWEiS Menu Mode Die Info/Index-Funktion ist nur im Menu Mode bei laufender Aufnahme und Wiedergabe verfügbar.
  • Seite 18 Digta On- and Off switching Contact strip Docking station connection Battery case For rechargeable 962- or AAA-batteries USB-connection Interface for PC and Grundig power supply Unlocking button Unlocking button for the battery compartment Battery case Battery case with rechargeable batteries*...
  • Seite 19 Comment Controls/Keys and Connections No Description Meaning No Description Meaning Adjustment screw Option setting for slide switch and thumb grasp Slide switch functions Switch-setting functions are configurable by button means of the adjustment screw and in the menu Slide switch Slide switch function depends on the option ll Record pause Recording...
  • Seite 20 This operating manual contains important instructions for safe such conduct. The agreed upon obligations in the delivery contract, the and efficient handling of the Grundig Business Systems Digta 7 general terms and conditions, the manufacturer’s delivery conditions, (hereinafter referred to as “device”). This operating manual is a part of...
  • Seite 21 introduction Explanation of signalwords and symbols in this operating instruction WARning Important notes for your safety are highlighted. Please pay par- Indicates a hazardous situation which, if not avoided, could ticular attention to these notes in order to avoid accidences and result in death or serious injury.
  • Seite 22: Scope Of Supply

    For the latest accessories like Digta Card, Digta Station 447, Scope of supply rechargeable battery pack 962, power supply, foot control and earphone, please visit the Grundig Website on the internet at • Dictation machine Digta 7 • USB-cable www.grundig-gbs.com.
  • Seite 23: Safety Information

    Please use your Digta only for such purposes as described in this Quick Reference Guide or in the comprehensive user guide. You DAngER will find this manual for your Digta 7 on the internet at: Danger of life due to electric shock! www.grundig-gbs.com The power supply* operates with 230 V alternating current.
  • Seite 24 -4°F (-20°C) to 158°F (70°C) for storage shock. 5°F (-15 °C) to 95°F (35°C) for operation • Grundig Business Systems power supplies are only to be used with Grundig Business Systems office equipment. WARning • Pull the power supply out of the socket to separate the Danger of fire, explosion and overheating! device from the power grid.
  • Seite 25 Safety information Rechargeable batteries traffic WARning WARning Danger of explosion and burns! Danger of accidents! • Do not use the device while operating vehicles (such as The device operates with batteries and rechargeable batteries*. cars, bicycles, motorcycles, ATVs, etc.). Follow all safety precautions as follows to avoid accidences: •...
  • Seite 26 Safety information Disregarding these precautions means risking injury. Electronic components obstacle noticE cAution Risk of damage and void warranty! • Protect the device from moisture (such as rain or water Stumbling hazard! spray). • Ensure that the power supply is always in a safe positi- •...
  • Seite 27 Clean the device only on the outside with a dry, soft cloth. A list of the specialised dealers is available on our website: Do not use any chemical cleaning agents such as alcohol, thinner, gasoline or the like. www.grundig-gbs.com Disregarding these instructions can cause the device to be damaged.
  • Seite 28: Initial Setup

    initial setup initial setup x Disconnect the power supply* from the socket and the USB plug from the “USB-connection” of your device. charging of rechargeable batteries Switching off/on Switching on WARning x Press the “MENU” button until the initial display view appears Danger of explosion and burns! on the display.
  • Seite 29 initial setup briefcase. When the device is switched on, the message “Device locked” is displayed. You can remove this lock by pressing the lower function button until the main screen is fully visible. The buttons are now unlocked. If you do not deactivate this function, the device switches off automatically.
  • Seite 30: Help Function

    operating operating internal/external memory Dictations are stored on the internal memory of the Digta as long Slide switch operation options as no external, removable memory card (Digta Card*) is inserted. There are different options when using the Digta slide switch As soon as a Digta Card is inserted, all dictations will be stored (see also Fig.
  • Seite 31 operating Profiles change of profile x Press “MENU”. Default settings of profiles x Use the up-down buttons to navigate to the “Profile” menu item and confirm by pressing “OK”. The Easy Mode and the Menu Mode are available in form of A list of possible profiles appears on the display.
  • Seite 32: Setting The Volume

    operating The dictation machine switches over to the recording pause The progress bar on the display increases. The minutes (II) “ll”, the LED-indicator blinks red. and seconds of the current dictation position shown on the display increase. move the slide switch to the “ ”...
  • Seite 33: Fast Play-Back

    operating (II) ” (rewind) or press the button “Fast Forward”. insertion of a dictation part ” Additional dictation parts can be inserted at any position desired. The progress bar increases or decreases and the dictation position changes. x Move the slide switch to the “ ”...
  • Seite 34 operating x Stop the insertion by Overwriting of data pressing the recording button or by moving the slide (II) switch either to the “ ” or “ ” position. The dictation will be overwritten from the selected dictation move the slide switch to the “ ”...
  • Seite 35 operating x Accomplish the attachment by x Move the slide switch to the “ ” position. pressing the recording button or by moving the x Select the desired dictation by using the up-down navigation slide switch either to the “ ”...
  • Seite 36 operating changing of dictation features info/index function The dictation features of stored dictations can be adapted Additionally you can include specific information* and index mar- subsequently. kings for the typist to specified dictation parts. Menu Mode Dictation features The info/index function is only available in Menu Mode during The dictation features are only available in the Menu Mode.
  • Seite 37 operating Deletable elements The deletable elements list is only available in the Menu Mode. x Control if “Delete dictation” has been selected and confirm it by pressing the “OK” button. A security question promt appears, to prevent deleting dictation parts by mistake. x Confirm the question by pressing the “OK”...
  • Seite 38: Technical Data

    technical data technical data Battery operation up to 25 hours (recording format DSS) The storage capacity for Dimensions (W x H x D, approx. 130 x 52 x 22 mm / 5.12 x recording: 10 minutes without protruding opera- 2.05 x 0.87 inch DSS Standard Play (SP): approx.
  • Seite 39: Troubleshooting

    trouble shooting trouble shooting Electrical devices can bring along malfunctions. These malfunctions cannot necessarily be referred to the device. You can check if you can remedy the errors by means of the following table. Malfunctions Possible reasons Removal of defect The devices cannot be switched on.
  • Seite 40 Explications des éléments de commande et des connexions N° Désignation Signification N° Désignation Signification DEL d’enregistrement DEL (diode électroluminescente) multicolore Compartiment pour Logement de piles AAA ou de bloc allumée en continu lors de l’enregistrement et pile d’accumulateurs 962’ clignotant régulièrement en cas de pause Touche de Débloque le compartiment d’alimentation • rouge = écraser / joindre...
  • Seite 41 Barrette de contacts Pour raccorder une station d’accueil Ligne d’état Réglages de l’appareil (voir N° 28-33) Prise USB Interface de PC et bloc d’alimentation Grundig Ligne d’état étendue • Nom de dossier Compartiment pour Compartiment à piles avec le bloc • Format de fichier/ qualité pour de nouvelles pile d’accumulateurs*...
  • Seite 42 Explications des éléments de commande et des connexions N° Désignation Signification Durée de la dictée • Après le choix de la dictée : longueur totale de la dictée • En cas d’enregistrement et de lecture : durée de la dictée au point d’enregistrement / de lecture actuel Barre de progression Indique l’état d’avancement actuel de la dictée...
  • Seite 43: Matériel Livré

    à dicter et de ses éléments de commande. Symboles utilisés dans cette notice DANGER Matériel livré Indique un risque potentiel d’accident mortel. • Dictaphone Digta 7 • Câble USB AVERTISSE- Indique un risque potentiel de blessure. MENT •...
  • Seite 44 Enregistrement service clients nettoyage Nettoyez l’appareil uniquement avec un chiffon doux et sec. Enregistrez votre appareil Digta 7 sur le site web: N’utilisez aucun détergent chimique. http://www.grundig-gbs.com/fr/service-clients/. Défectuosités Vous pourrez utiliser service clients pour la gestion de votre technique de dictée et recevoir des mises à jour du firmware.
  • Seite 45 à l’utilisation d’accessoires qui ne sont pas des acces- véhicule ni le mettre en contact avec des sources soires originaux de la société Grundig Business Systems ou qui de chaleur. n’ont pas été recommandés ni autorisés par ses soins ne saurait •...
  • Seite 46: Mise En Marche / Arrêt

    Mise en service Mise en service Mise en marche / Arrêt Mise en marche chargeur d’accumulateurs x Pressez la touche « MENU » jusqu’à ce que le premier x Arrêtez votre machine à dicter Digta. indicateur soit incrusté sur l’afficheur. x Enfichez le connecteur du bloc secteur* dans la prise La machine à...
  • Seite 47 Mise en service Le verrouillage des touches permet d’éviter une remise en marche involontaire de votre Digta lorsqu’il est éteint, par ex. s’il est rangé dans votre porte-documents. Lorsque vous allumez l’appareil, le message « Utilisation impossible » s’affiche. Pour déverrouiller les touches, appuyez sur la touche de fonc- tion inférieure jusqu’à...
  • Seite 48 Emploi Emploi Mémoire interne / externe Vos dictées sont stockées sur la mémoire interne de la machine La machine à dicter Digta dispose de deux variantes pour utili- à dicter Digta, tant qu’aucune carte mémoire interchangeable ser le bouton coulissant. La variante souhaitée peut être définie à externe (Digta Card*) n’est insérée.
  • Seite 49 Emploi x Pour achever l’aide, réappuyez sur la touche fonctionnelle Dans le menu en mode Easy, vous pouvez accéder sous « inférieure. Information sur l’appareil » à des informations importantes concernant votre Digta, par ex. le numéro de série, la version Vous retournez dans la situation d’origine.
  • Seite 50: Réglage Du Volume Sonore

    Emploi x Démarrez l’enregistrement, en faisant coulisser le commuta- Sélection et écoute d’une dictée teur sur « ». Dictez le nouveau texte. x Positionnez le bouton coulissant sur « ». L’indicateur d’enregistrement s’allume en rouge. La barre de x Pressez l’une des touches de montée-descente. progression s’allonge à...
  • Seite 51: Avance Rapide Et Retour

    Emploi La barre de progression évolue vers l’avant sur l’afficheur. La AVERtiSSEMEnt valeur exprimant la position de la dictée actuelle en minutes Risque d’atteintes de la fonction auditive et en secondes augmente sur l’indicateur correspondant. x Appuyez sur la touche « Vitesse ». Ne tenez pas la machine à...
  • Seite 52 Emploi x Déplacez le bouton coulissant au niveau de la position de la Mode d’insertion dictée requise sur « ». Le mode d’insertion est matérialisé Mode d’écrasement par un triangle dans la barre de progression. Le mode d’écrasement est matéria- lisé...
  • Seite 53 Emploi Ajout d’un passage de la dictée x Lancez l’enregistrement en appuyant sur la touche d’enregistrement et en Vous pouvez attacher un texte additionnel à la fin des dictées faisant coulisser le commutateur sur « ». Dictez déjà enregistrées. (II) le texte à...
  • Seite 54 Emploi x Naviguez dans le menu « Type d’enregistrement » à l’aide des Le menu servant à changer les propriétés de la dictée est touches montée-descente vers la rubrique « Joindre » et incrusté sur l’afficheur. Le curseur est positionné sur la confirmez avec la touche «...
  • Seite 55 Emploi Eléments effaçables REMARquE Menu Mode Liste des éléments effaçables La fonction info/index est disponible uniquement en mode Menu pendant un enregistrement ou une lec- ture. Un signal sonore retentit lors de la lecture des informations et des index dans la dictée. Les informations et les index sont transférés sur le PC avec la dictée.
  • Seite 56 Die Konformität mit den für das Gerät relevanten EU-Richtlinien wird durch das CE-Zeichen bestätigt. Find out more details on the regulations of the Grundig Business Systems’ manufacturer guarantee on the internet: www.grundig-gbs.com The CE mark confirms that the device corresponds to the relevant guidelines of the European Union.
  • Seite 57 Consult the dealer or an experienced radio/TV technician for help. Changes or modifications not expressly approved by the party responsible for compliance could void the user’s authority to operate the equipment. Grundig Business Systems GmbH, Weiherstraße 10, D-95448 Bayreuth, Germany Email: info@grundig-gbs.com, Internet: www.grundig-gbs.com...

Inhaltsverzeichnis