Inhaltsverzeichnis
Werbung
Verfügbare Sprachen
Verfügbare Sprachen
SBM 37
D Blutdruckmessgerät
Gebrauchsanweisung ............................................ 2 – 17
G Blood pressure monitor
Instructions for use ..............................................18– 31
F Tensiomètre
Mode d'emploi ....................................................32 – 46
I Misuratore di pressione
Istruzioni per l'uso .............................................. 47 – 61
r Прибор для измерения кровяного давления в
плечевой артерии
Инструкция по применению .............................62 – 78
Electromagnetic Compatibility Information ........ 79 – 82
Werbung
Kapitel
Inhaltsverzeichnis
Fehlerbehebung

Verwandte Anleitungen für Sanitas SBM 37


Inhaltszusammenfassung für Sanitas SBM 37
- Seite 1 SBM 37 D Blutdruckmessgerät Gebrauchsanweisung ..........2 – 17 G Blood pressure monitor Instructions for use ..........18– 31 F Tensiomètre Mode d’emploi ............32 – 46 I Misuratore di pressione Istruzioni per l’uso ..........47 – 61 r Прибор для измерения кровяного давления в...
-
Seite 2: Inhaltsverzeichnis
Die ermittelten Werte werden eingestuft und grafisch beurteilt. 1. Kennenlernen 2. Wichtige Hinweise Überprüfen Sie das Sanitas SBM 37 Blutdruckmessgerät auf äußere Unversehrtheit der Verpackung und auf die Vollständig- Zeichenerklärung keit des Inhalts. Vor dem Gebrauch ist sicherzustellen, dass das In der Gebrauchsanweisung, auf der Verpackung und auf dem Gerät und Zubehör keine sichtbaren Schäden aufweisen und... - Seite 3 Vorsicht Die CE-Kennzeichnung bescheinigt die Konformität mit den grundlegenden Anforde- rungen der Richtlinie 93/42/EEC für Medizin- Hinweis produkte. Hinweis auf wichtige Informationen Hinweise zur Anwendung Gebrauchsanweisung beachten • Um eine Vergleichbarkeit der Werte zu gewährleisten, messen Sie Ihren Blutdruck immer zu gleichen Tageszeiten. Anwendungsteil Typ BF •...
- Seite 4 Diabetes, Durchblutungs- und Rhythmusstörungen sowie bei erhält. Sobald die Batterien leer sind, verliert das Blutdruck- Schüttelfrost oder Zittern. messgerät Datum und Uhrzeit. • Das Blutdruckmessgerät darf nicht im Zusammenhang mit ei- • Die Abschaltautomatik schaltet das Blutdruckmessgerät zur nem Hochfrequenz-Chirurgiegerät verwendet werden. Schonung der Batterien aus, wenn innerhalb 30 Sekunden •...
- Seite 5 Hinweise zu Reparatur und Entsorgung • Verschluckungsgefahr! Kleinkinder könnten Batterien verschlucken und daran ersticken. Daher Batterien für Klein- • Batterien gehören nicht in den Hausmüll. Bitte entsorgen Sie kinder unerreichbar aufbewahren! die verbrauchten Batterien an den dafür vorgesehenen Sam- • Auf Polaritätskennzeichen Plus (+) und Minus (-) achten. melstellen.
-
Seite 6: Gerätebeschreibung
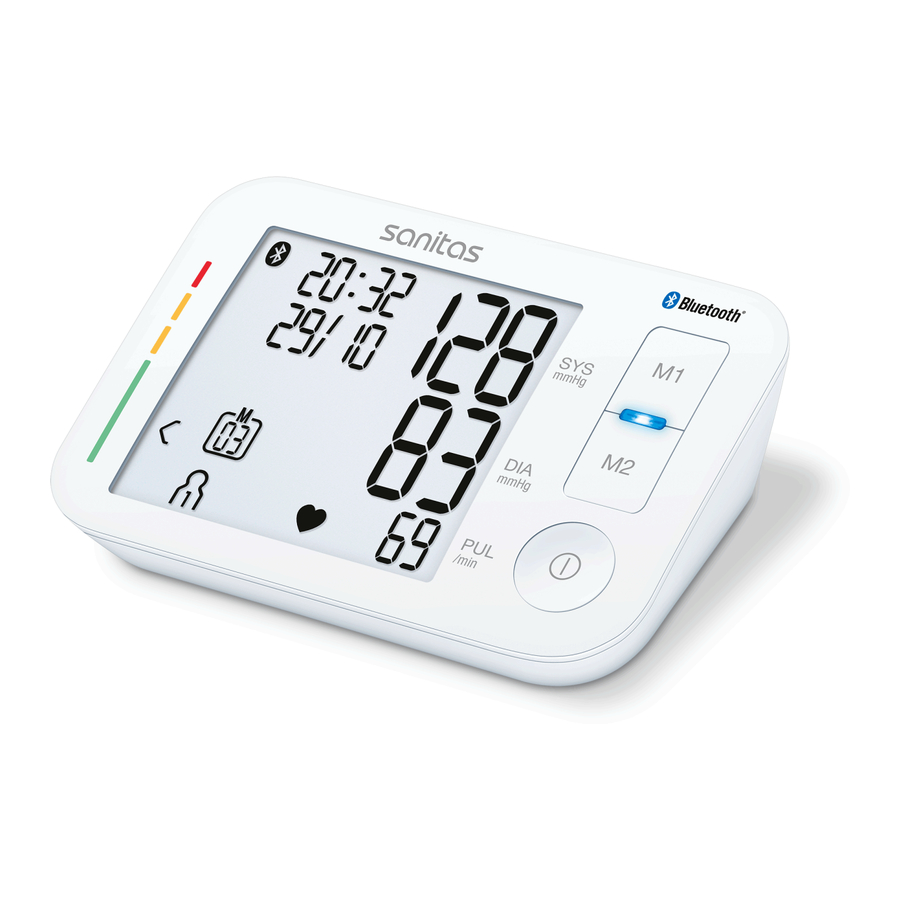
3. Gerätebeschreibung Anzeigen auf dem Display: mmHg mmHg /min 1. Manschette 2. Manschettenschlauch 3. Manschettenstecker 1. Uhrzeit/Datum 4. Display 2. Systolischer Druck 5. Speichertasten M1/M2 3. Diastolischer Druck 6. START/STOPP-Taste 4. Ermittelter Pulswert 7. Risiko-Indikator 5. Symbol Puls 8. Anschluss für Manschettenstecker (linke Seite) 6. -
Seite 7: Messung Vorbereiten
Systemvoraussetzungen für die „HealthCoach“ App müssen das Datum und die Uhrzeit neu eingestellt werden. Die gespeicherten Messwerte gehen nicht verloren. – iOS ≥ 8.0 / Android ≥ 4.4 – Bluetooth ≥ 4.0 ® Stundenformat, Datum, Uhrzeit und Bluetooth einstellen ® Liste der kompatiblen Geräte: Im Folgenden wird beschrieben, welche Funktionen und Einstel- lungen Sie am Blutdruckmessgerät vornehmen können. -
Seite 8: Blutdruck Messen
Im Display blinkt die Jahreszahl. Im Display blinkt das Bluetooth Symbol. ® • Wählen Sie mit den Speichertasten M1/M2 • Wählen Sie mit den Speichertasten M1/M2, ob die au- die Jahreszahl und bestätigen Sie mit der tomatische Bluetooth Datenübertragung aktiviert (Blue- ®... - Seite 9 Stecken Sie nun den Manschetten - • Sie können die Messung im Sitzen schlauch in den Anschluss für den Man schetten stecker. oder im Liegen durchführen. Achten Sie in jedem Falle darauf, dass sich Wenn Sie die Messung am rechten Oberarm durchführen, be- die Manschette in Herzhöhe befindet.
-
Seite 10: Blutdruckmessung Durchführen
Blutdruckmessung durchführen • Wählen Sie nun durch Drücken der Speichertasten M1 oder M2 den gewünschten Benutzerspeicher aus. Wenn Legen Sie, wie zuvor beschrieben, die Manschette an und Sie keine Auswahl des Benutzerspeichers vornehmen, nehmen Sie die Haltung ein, in der Sie die Messung durch- wird das Messergebnis dem zuletzt verwendeten Benut- führen wollen. -
Seite 11: Ergebnisse Beurteilen
maß, Stress oder Mangel an Schlaf herrühren. Arrhythmie kann Beachten Sie, dass Sie zur Übertragung der Daten in nur durch eine Untersuchung bei Ihrem Arzt festgestellt werden. der „HealthCoach“ App das Blutdruckmessgerät un- Wiederholen Sie die Messung, wenn das Symbol nach der ter „Meine Geräte“... -
Seite 12: Messwerte Abrufen Und Löschen
7. Messwerte abrufen und löschen Bereich der Systole Diastole Maßnahme Blutdruckwerte (in mmHg) (in mmHg) Die Ergebnisse jeder erfolgreichen Messung werden zu- Stufe 3: sammen mit Datum und Uhrzeit abgespeichert. Bei mehr einen Arzt aufsu- starke ≥ 180 ≥ 110 als 60 Messdaten wird jeweils die älteste Messung über- chen Hypertonie... - Seite 13 Wenn Sie den Benutzerspeicher 1 ausgewählt haben • Wenn Sie die jeweilige Speichertaste (M1 ist die Speichertaste M1 zu betätigen. oder M2) erneut drücken, wird im Display Wenn Sie den Benutzerspeicher 2 ausgewählt haben ist die letzte Einzelmessung angezeigt (hier im die Speichertaste M2 zu benutzen.
- Seite 14 (abhängig davon in welchem Benutzersepei- cher Sie sich befinden). Fügen Sie in der „HealthCoach“ App unter „Ein- stellungen / Meine Geräte“ das SBM 37 hinzu. • Der ausgewählte Wert wird gelöscht. Das Gerät zeigt kurzzeitig CL 00 an. • Sollen weitere Werte gelöscht werden, wiederholen Sie den oben beschriebenen Vorgang.
-
Seite 15: Gerät Und Manschette Reinigen Und Aufbewahren
• Reinigen Sie Gerät und Manschette vorsichtig nur mit einem 10. Technische Angaben leicht angefeuchteten Tuch. Modell-Nr. SBM 37 • Verwenden Sie keine Reinigungs- oder Lösungsmittel. Messmethode Oszillometrisch, nicht invasive Blut- • Sie dürfen das Gerät auf keinen Fall unter Wasser halten, da druckmessung am Oberarm sonst Flüssigkeit eindringen kann und das Gerät beschädigt. - Seite 16 dabei, dass tragbare und mobile HF-Kommunikationseinrich- Zul. Betriebs- + 5 °C bis + 40 °C, 15-93 % relative Luft- tungen dieses Gerät beeinflussen können. Genauere Angaben bedingungen feuchte (nicht kondensierend) können Sie unter der angegebenen Kundenservice-Adresse Zul. Aufbewahrungs- -25 °C bis + 70 °C, ≤ 93 % relative Luft- anfordern oder am Ende der Gebrauchsanweisung nachlesen.
-
Seite 17: Garantie
11. Garantie Wir leisten 2 Jahre Garantie für Material- und Fabri kationsfehler des Produktes. Die Garantie gilt nicht: • im Falle von Schäden, die auf unsachgemäßer Bedienung be- ruhen, • für Verschleißteile, • für Mängel, die dem Kunden bereits beim Kauf bekannt waren, •... -
Seite 18: Important Notes
1. Getting to know your device The following symbols are used in these instructions for use, Check that the packaging of the Sanitas SBM 37 blood pres- on the packaging and on the type plate for the device and the... - Seite 19 Note Notes on use Note on important information • In order to ensure comparable values, always measure your blood pressure at the same time of day. Observe the instructions for use • Before every measurement, relax for about five minutes. •...
- Seite 20 • Avoid any mechanical restriction, compression or bending of — Do not drop the device. the cuff line. — Do not use the device in the vicinity of strong electroma- • Do not allow sustained pressure in the cuff or frequent meas- gnetic fields and keep it away from radio systems or mobile urements.
-
Seite 21: Device Description
3. Device description Battery disposal • The empty, completely discharged batteries must be disposed of through specially designated collection boxes, recycling points or electronics retailers. You are legally required to dispose of the batteries. • The codes below are printed on batteries containing harmful mmHg substances: Pb = Battery contains lead,... -
Seite 22: Preparing The Measurement
Information on the display: System requirements for the „HealthCoach“ app – iOS ≥ 8.0 / Android ≥ 4.4 – Bluetooth ≥ 4.0 ® List of compatible devices: 4. Preparing the measurement Inserting the batteries • Remove the battery compartment lid on the rear of the device. - Seite 23 Set the hour format, date, time and Bluetooth settings ® The year flashes on the display. The following section describes the functions and settings avail- • Select the year using the M1/M2 memory able on the blood pressure monitor. buttons and confirm with the START/STOP button Hour format Date...
-
Seite 24: Measuring Blood Pressure
Now insert the cuff line into the The Bluetooth symbol flashes on the display. ® connection for the cuff connector. • Use the M1/M2 memory buttons to select whether au- tomatic Bluetooth data transfer is activated (Bluetooth ® ® symbol flashes) or deactivated (Bluetooth symbol is not ®... - Seite 25 • You can take the measurement while sitting or lying down. • Now select the desired user memory by pressing the Always make sure that the cuff is at heart level. M1 or M2 memory buttons. If you do not select a user •...
-
Seite 26: Evaluating Results
If the symbol is shown on the display after the measurement • Please note that you must add the blood pres- has been taken, repeat the measurement. Please ensure that you sure monitor in "My devices" in the "Health- rest for 5 minutes beforehand and do not speak or move during Coach"... -
Seite 27: Display And Delete Measured Values
7. Display and delete measured values Blood pressure Systole Diastole Action value category (in mmHg) (in mmHg) The results of every successful measurement are stored Setting 3: together with the date and time. The oldest measurement seek medical severe ≥ 180 ≥... - Seite 28 Press the M1 button if you have selected user memory 1. • When the relevant memory button (M1 or Press the M2 memory button if you have selected user M2) is pressed again, the last individual memory 2. measurement is displayed (in this example, measurement 03).
- Seite 29 (depending on the user memory you are in). Step 2: “HealthCoach” app • The selected value is deleted. The device briefly dis- In the “HealthCoach” app, add the SBM 37 under plays CL 00. "Settings/My devices". • If you would like to delete other values, repeat the pro- cess described above.
-
Seite 30: Cleaning And Storing The Device And Cuff
“HealthCoach” app. 10. Technical specifications 8. Cleaning and storing the device and cuff Model No. SBM 37 • Clean the device and cuff carefully using a slightly damp cloth only. Measurement me- Oscillometric, non-invasive blood pres- •... - Seite 31 • The device complies with the EU Medical Devices Directive Permissible storage -25°C to + 70°C, ≤ 93% relative humidity, 93/42/EEC, the German Medical Devices Act (Medizinproduk- conditions 800 – 1050 hPa ambient pressure tgesetz) and the standards EN1060-1 (non-invasive sphyg- Power supply 4x 1.5 V AAA batteries...
-
Seite 32: Présentation
2. Conseils importants 1. Présentation Symboles utilisés Vérifiez que l’emballage du tensiomètre SBM 37 de Sanitas est Les symboles suivants sont utilisés sur le mode d’emploi, sur intact et que tous les éléments sont inclus. Avant l’utilisation, l’emballage et sur la plaque signalétique de l’appareil et des ac- assurez-vous que l’appareil et les accessoires ne présentent au-... - Seite 33 Remarque Le sigle CE atteste de la conformité aux exi- Indication d’informations importantes gences fondamentales de la directive 93/42/ EEC relative aux dispositifs médicaux. Respecter les consignes du mode d’emploi Conseils d’utilisation Appareil de type BF • Mesurez toujours votre tension au même moment de la journée afin que les valeurs soient comparables.
- Seite 34 • Le tensiomètre ne doit pas être utilisé parallèlement à un ap- • L’appareil est conçu pour l’utilisation décrite dans ce mode pareil chirurgical haute fréquence. d’emploi. Le fabricant ne peut être tenu pour responsable des • Utilisez uniquement l’appareil sur des personnes dont le péri- dommages causés par une utilisation inappropriée ou non mètre du bras correspond à...
- Seite 35 • Si une pile a coulé, enfilez des gants de protection et nettoyez • Vous ne devez pas réparer ou ajuster l’appareil vous-même. le compartiment à piles avec un chiffon sec. Le bon fonctionnement de l’appareil n’est plus garanti si tel •...
-
Seite 36: Description De L'appareil
3. Description de l’appareil Données affichées à l’écran : mmHg mmHg /min 1. Manchette 2. Tuyau de manchette 3. Connexion à la manchette 1. Heure/Date 4. Écran 2. Pression systolique 5. Touches mémoire M1/M2 3. Pression diastolique 6. Touche MARCHE/ARRÊT 4. Valeur du pouls mesurée 7. -
Seite 37: Préparer La Mesure
Configuration requise pour l’application „HealthCoach“ Paramétrer le format de l’heure, la date, l’heure et la connexion Bluetooth ® – iOS ≥ 8.0 / Android ≥ 4.4 – Bluetooth ≥ 4.0 Dans la section suivante, les fonctions et réglages possibles du ®... -
Seite 38: Mesurer La Tension
L’année clignote à l’écran. Le symbole Bluetooth clignote à l’écran. ® • À l’aide des touches mémoire M1/M2, sé- • À l’aide des touches mémoire M1/M2, déterminez si le lectionnez l’année et confirmez votre choix transfert automatique des données via Bluetooth doit ®... - Seite 39 Insérez maintenant le tuyau de la • La mesure peut se faire en position manchette dans la prise de raccord de la manchette. assise ou allongée. Faites attention, dans tous les cas, à ce que la man- chette se trouve au niveau du cœur. Si vous effectuez la mesure sur le bras droit, le tuyau se •...
- Seite 40 Mesurer la tension artérielle • En appuyant sur la touche mémoire M1 ou M2, sélection- nez maintenant la mémoire utilisateur de votre choix. Si Positionnez la manchette tel que décrit plus haut et instal- vous ne choisissez pas de mémoire utilisateur, le résultat lez-vous dans la position de votre choix pour effectuer la de la mesure est attribué...
-
Seite 41: Évaluer Les Résultats
Veuillez tenir compte du fait qu’il vous faut ajou- turelles, par une alimentation trop riche, par le stress ou encore ter un tensiomètre dans l’application Sanitas par un manque de sommeil. Une arythmie ne peut être établie „HealthCoach“ à la rubrique « Mes appareils »... -
Seite 42: Récupérer Et Supprimer Les Valeurs De Mesure
7. Récupérer et supprimer les valeurs de mesure Plage des va- Systole Diastole Mesures leurs de tension (en mmHg) (en mmHg) Le résultat de chaque mesure réussie est enregistré avec la Niveau 3 : consulter un date et l’heure. Lorsqu’il y a plus de 60 données de mesure, ≥... - Seite 43 Si vous avez sélectionné la mémoire utilisateur 1, • Si vous appuyez de nouveau sur la touche vous devez actionner la touche mémoire M1. mémoire (M1 ou M2), la dernière mesure Si vous avez sélectionné la mémoire utilisateur 2, vous s’affiche à l’écran (ici par exemple la me- devez actionner la touche mémoire M2.
- Seite 44 • Maintenez la touche mémoire M1 ou M2 enfoncée pen- dant 5 secondes. (Selon la mémoire que vous utilisez). Étape 2 : Application „HealthCoach“ Ajoutez le SBM 37 dans l’application Sanitas « HealthCoach » à la section « Réglages/Mes ap- • La valeur sélectionnée est supprimée. L’appareil affiche pareils ».
-
Seite 45: Nettoyage Et Rangement De L'appareil Et De La Manchette
8. Nettoyage et rangement de l‘appareil et de 10. Caractéristiques techniques la manchette N° du modèle SBM 37 • Nettoyez soigneusement l’appareil et la manchette, unique- Mode de mesure Mesure de la tension artérielle au bras, ment à l’aide d’un chiffon légèrement humide. - Seite 46 sont susceptibles d’influer sur cet appareil. Pour plus de dé- Conditions de sto- -25 °C à + 70 °C, ≤ 93 % d’humidité de tails, veuillez contacter le service après-vente à l’adresse men- ckage admissibles l’air relative, 800 –1 050 hPa de pression tionnée ou vous reporter à la fin du mode d’emploi. ambiante •...
-
Seite 47: Introduzione
I seguenti simboli sono utilizzati nelle istruzioni per l‘uso, sull‘im- Controllare l‘integrità esterna della confezione e del contenuto ballo e sulla targhetta dell‘apparecchio e degli accessori: del misuratore di pressione Sanitas SBM 37. Prima dell‘uso assi- curarsi che l‘apparecchio e gli accessori non presentino nessun Attenzione danno palese e che il materiale di imballaggio sia stato rimosso. - Seite 48 Indicazioni per l‘uso Seguire le istruzioni per l'uso • Misurare la pressione sempre allo stesso orario della giornata, affinché i valori siano confrontabili. Parte applicativa tipo BF • Prima di ogni misurazione rilassarsi per ca. 5 minuti. • Per effettuare più misurazioni su una stessa persona, attendere 5 minuti tra una misurazione e l‘altra.
- Seite 49 • La misurazione delle pressione non deve impedire inutilmente Indicazioni per la conservazione e la cura la circolazione del sangue per un tempo troppo lungo. In caso • Il misuratore di pressione è composto da moduli elettronici di di malfunzionamento dell‘apparecchio, rimuovere il manicotto precisione.
-
Seite 50: Descrizione Dell'apparecchio
• Qualora l‘apparecchio non dovesse essere utilizzato per un • A tutela dell‘ambiente, al termine del suo utilizzo l‘apparecchio periodo prolungato, rimuovere le batterie dal vano batterie. non deve essere smaltito nei rifiuti domestici. Lo smaltimento • Utilizzare solo tipologie di batterie uguali o equivalenti. deve essere effettuato negli appositi centri di raccolta. -
Seite 51: Preparazione Della Misurazione
Indicatori sul display: Requisiti di sistema per l‘app „HealthCoach“ – iOS ≥ 8.0 / Android ≥ 4.4 – Bluetooth ≥ 4.0 ® Elenco dei dispositivi compatibili: 4. Preparazione della misurazione Inserimento delle batterie • Rimuovere il coperchio del vano bat- terie sul retro dell’apparecchio. - Seite 52 Impostazione di data, ora, formato ora e Bluetooth ® Sul display lampeggia il numero dell'anno. Di seguito sono descritte le funzioni e le impostazioni disponibili • Con i pulsanti per la memorizzazione M1/ nel misuratore di pressione. M2 selezionare l'anno e confermare con il pulsante START/STOP Formato ora Data...
-
Seite 53: Misurazione Della Pressione
Inserire l‘attacco del tubo del manicotto Sul display lampeggia l'icona Bluetooth ® nel relativo ingresso sull‘apparecchio. • Con i pulsanti per la memorizzazione M1/M2, scegliere se attivare la trasmissione dati automatica via Bluetooth ® (l'icona Bluetooth lampeggia) o disattivarla (l'icona Blue- ®... - Seite 54 • La misurazione può essere effettuata da seduti o da sdraiati. Esecuzione della misurazione della pressione Verificare sempre che il manicotto si trovi all‘altezza del cuore. Applicare il manicotto e sistemarsi nella posizione in cui si • Sedersi in posizione comoda per la misurazione della pres- desidera eseguire la misurazione.
-
Seite 55: Interpretazione Dell'esito
• Con il pulsante per la memorizzazione M1 o M2 im- Tenere presente che per trasmettere i dati all'app postare quindi la memoria utente desiderata. Se non si „HealthCoach“, è necessario aggiungere il misura- sceglie alcuna memoria utente, la misurazione viene sal- tore di pressione in "Miei dispositivi". - Seite 56 Ripetere la misurazione nel caso compaia sul display l‘icona Intervallo dei va- Sistole Diastole Misura da adottare dopo una prima misurazione. Assicurarsi di aver osservato 5 mi- lori di pressione (in mmHg) (in mmHg) nuti di riposo prima di effettuare la misurazione e di non parlare Livello 3: Rivolgersi a un ≥...
-
Seite 57: Ricerca E Cancellazione Dei Valori Misurati
7. Ricerca e cancellazione dei valori misurati Se è stata selezionata la memoria utente 1, occor- re premere il pulsante per la memorizzazione M1. Gli esiti di ogni misurazione corretta vengono memorizzati Se è stata selezionata la memoria utente 2, occorre con data e ora. - Seite 58 • Premendo nuovamente il pulsante per la • Per cancellare singole misurazioni di una determinata memorizzazione corrispondente (M1 o M2), memoria utente, è necessario innanzitutto selezionare il display visualizza l'ultima misurazione sin- la memoria utente. gola (nell'esempio la misurazione 03). •...
-
Seite 59: Pulizia E Conservazione Dell'apparecchio E Del Manicotto
8. Pulizia e conservazione dell‘apparecchio e del manicotto Fase 2: App „HealthCoach“ • Pulire con attenzione l‘apparecchio e il manicotto utilizzando Aggiungere SBM 37 nell'app „HealthCoach“ in solo un panno leggermente inumidito. "Impostazioni/Miei dispositivi". • Non utilizzare detergenti o solventi. -
Seite 60: Dati Tecnici
Durata della batteria Ca. 200 misurazioni, in base alla 10. Dati tecnici pressione sanguigna e di gonfiaggio, Codice SBM 37 così come al numero di connessioni Bluetooth ® Metodo di misura- Oscillometrico, misurazione non invasi-... - Seite 61 dettagliate, rivolgersi all’Assistenza clienti oppure consultare la parte finale delle istruzioni per l’uso. • L’apparecchio è conforme alla direttiva CE per i dispositivi medici 93/42/EEC, alla legge sui dispositivi medici e alle nor- me europee EM1060-1 (Sfigmomanometri non invasivi Parte 1: Requisiti generali), EN1060-3 (Sfigmomanometri non inva- sivi Parte 3: Requisiti integrativi per sistemi elettromeccanici per la misurazione della pressione arteriosa) e IEC80601-2-30...
-
Seite 62: Комплект Поставки
бражаются в графическом виде. 1. Знакомство с прибором Проверьте комплектность поставки прибора для измерения артериального давления Sanitas SBM 37 и убедитесь в том, что на упаковке нет внешних повреждений. Перед использо- ванием убедитесь в том, что прибор и его принадлежности не имеют видимых повреждений, и удалите все упаковочные... -
Seite 63: Важные Указания
2. Важные указания Допустимая рабочая температура Operating и влажность воздуха Пояснения к символам В инструкции по применению, на упаковке и на типовой та- Хранить в сухом месте бличке прибора и принадлежностей используются следую- щие символы: Серийный номер Осторожно! Символ CE подтверждает соответствие Указание основным требованиям директивы Важная... - Seite 64 вать для принятия самостоятельных решений относительно доступа или внутрисосудистой терапии, а также артериове- лечения (например, о приеме лекарств и их дозировке)! нозный шунт). • Не используйте прибор для измерения кровяного давления • Не используйте манжету у женщин, перенесших ампута- у новорожденных детей и у женщин, страдающих преэ- цию...
- Seite 65 — Не используйте прибор вблизи сильных электромагнит- • Заменяйте все батарейки сразу. ных полей, держите его на значительном расстоянии от • Не используйте перезаряжаемые аккумуляторы! радиоаппаратуры или мобильных телефонов. • Не разбирайте, не открывайте и не разбивайте батарейки. • Используйте только входящие в комплект или оригинальные Утилизация...
-
Seite 66: Описание Прибора
• В интересах защиты окружающей среды по окончании Индикация на дисплее: срока службы следует утилизировать прибор отдельно от бытового мусора. Утилизация должна производиться через соответствующие пункты сбора в Вашей стране. Прибор следует утилизировать согласно Директиве ЕС по отходам электрического и электронного оборудования – WEEE (Waste Electrical and Electronic Equipment). При появлении... -
Seite 67: Подготовка К Измерению
Требования к системе для использования приложения все батарейки. После извлечения батареек из прибора дату „HealthCoach“ и время необходимо устанавливать заново. Сохраненные в памяти результаты измерений не исчезают. – iOS ≥ 8.0 / Android ≥ 4.4 – Bluetooth ≥ 4.0 ® Настройка часового формата, даты, времени и Bluetooth ®... -
Seite 68: Измерение Кровяного Давления
На дисплее замигает индикация года. На дисплее замигает символ Bluetooth ® • С помощью кнопок сохранения M1/M2 • С помощью кнопок сохранения M1/M2 включите выберите нужный год и подтвердите (замигает символ Bluetooth ) или отключите (символ ® выбор нажатием кнопки START/STOP Bluetooth не... - Seite 69 Плотно, но не слишком туго оберните Правильное положение тела свободный конец манжеты вокруг руки и застегните с помощью застежки-липучки. Манжета должна прилегать так, чтобы под нее можно было просунуть два пальца. Вставьте шланг манжеты в разъем для штекера манжеты. • Отдыхайте в течение 5 минут перед каждым измерением mmHg давления! В противном...
- Seite 70 Измерение кровяного давления • Теперь при помощи кнопок сохранения M1 или M2 выберите пользовательскую память. Если Вы не Наложите манжету, как описано выше, и займите выбрали пользовательскую память, то результат удобное для измерения положение. измерения будет сохранен в пользовательской • Для запуска прибора для измерения памяти...
-
Seite 71: Оценка Результатов
Это может указывать на аритмию. Аритмия — это болезнь, • Если в течение 30 секунд прибор не сможет при которой возникает аномальный сердечный ритм, вы- установить соединение с приложением, символ званный ошибками в биоэлектрической системе, регули- Bluetooth погаснет и прибор для измерения ® рующей биение сердца. Симптомы (неравномерное или кровяного... -
Seite 72: Просмотр И Удаление Результатов Измерения
7. Просмотр и удаление результатов Градация на дисплее и шкала на приборе показывают, в ка- ком диапазоне находится измеренное давление. Если значе- измерения ния систолического и диастолического давления находятся Результаты каждого успешного измерения сохраняются в разных диапазонах (например, систолическое давление с указанием даты и времени измерения. Когда —... - Seite 73 Если Вы выбрали пользовательскую память 1, • – Для просмотра сохраненных нажмите кнопку сохранения M1. в пользовательской памяти Если Вы выбрали пользовательскую память 2, результатов измерений нажмите кнопку нажмите кнопку сохранения M2. сохранения M2. • На дисплее появится среднее значение На дисплее замигает A. всех...
- Seite 74 • П р и п о в т о р н о м н а ж а т и и • Для удаления отдельных результатов измерений соответствующей кнопки сохранения (M1 соответствующей пользовательской памяти сначала или M2) на дисплее отобразится результат выберите...
-
Seite 75: Очистка И Хранение Прибора И Манжеты
через Bluetooth будет ® Шаг 2: Приложение „HealthCoach“ ВЫКЛ. начнется запущена автоматически. Добавьте SBM 37 в разделе «Настройки/Мои передача данных. устройства» приложения „HealthCoach“. Для передачи данных необходимо запустить приложение „HealthCoach“. Чтобы обеспечить передачу данных без помех, снимите че- Шаг 3: SBM 37 хол... -
Seite 76: Сообщение Об Ошибке/Устранение Ошибок
образования конденсата) 10. Технические данные Допустимые От -25 °C до 70 °C, относительная условия хранения влажность воздуха ≤ 93 %, давление № модели SBM 37 окружающей среды 800–1050 гПа Метод измерения Осциллометрическое, неинвазивное Электропитание 4 батарейки типа ААА по 1,5 В измерение кровяного давления на... - Seite 77 учесть, что переносные и мобильные высокочастотные Срок службы Примерно 200 измерений, коммуникационные устройства могут повлиять на работу в зависимости от кровяного данного прибора. Более точные данные можно запросить давления и давления накачивания, по указанному адресу сервисной службы или найти в конце а также от количества соединений инструкции...
-
Seite 78: Гарантия
• Обратитесь в сервисный центр по указанному адресу для Дата продажи получения подробных сведений — например, о соответ- ствии директивам ЕС. 11. Гарантия Подпись продавца Мы предоставляем гарантию на дефекты материалов и изго- товления этого прибора на срок 24 месяца со дня продажи через... -
Seite 79: Electromagnetic Compatibility
Guidance and manufacturer’s declaration – electromagnetic emissions for all EQUIPMENT and SYSTEMS The Blood pressure monitor (SBM 37) is intended for use in the electromagnetic environment specified below. The customer of the user of the Blood pressure monitor (SBM 37) should assure that it is used in such and environment. - Seite 80 SUPPORTING The Blood pressure monitor (SBM 37) is intended for use in the electromagnetic environment specified below. The customer or the user of Blood pressure monitor (SBM 37) should assure that it is used in such an environment. Immunity test...
- Seite 81 To assess the electromagnetic environment due to fixed RF transmitters, an electromagnetic site survey should be con- sidered. If the measured field strength in the location in which the Blood pressure monitor (SBM 37) is used exceeds the applicable RF compliance level above, the Blood pressure monitor (SBM 37) should be observed to verify normal operation.
- Seite 82 The Blood pressure monitor (SBM 37) is intended for use in an electromagnetic environment in which radiated RF disturbances are controlled. The customer or the user of the Blood pressure monitor (SBM 37) can help prevent electromagnetic interference by maintaining a minimum distance between portable and mobile RF communications equipment (transmitters) and the Blood pressure monitor (SBM 37) as recommended below, according to the maximum output power of the communications equipment.
- Seite 84 - Apple and the Apple logo are trademarks of Apple Inc., registered in the U.S. and other countries. App Store is a service mark of Apple Inc., registered in the U.S. and other countries. - Google Play and the Google Play logo are trademarks of Google Inc. - Android is a trademark of Google Inc. Hans Dinslage GmbH, Riedlinger Straße 28, 88524 Uttenweiler, Germany www.sanitas-online.de...