Herunterladen Diese Seite drucken
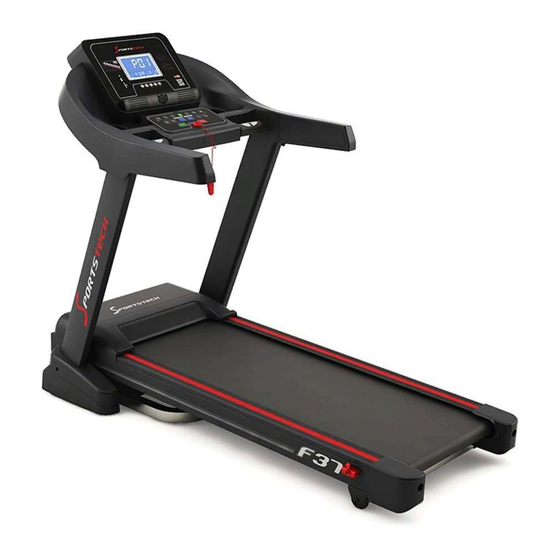
SPORTSTECH F37 Benutzerhandbuch
Vorschau ausblenden Andere Handbücher für F37:

Werbung

Verfügbare Sprachen
  • DE

Verfügbare Sprachen

  • DEUTSCH, seite 1
F37
Laufband
1
DE
EN
ES
FR
IT
NL

Werbung

loading

Inhaltszusammenfassung für SPORTSTECH F37

  • Seite 1 Laufband...
  • Seite 3 Sehr geehrter Kunde wir freuen uns, dass Sie sich für ein Gerät aus der SPORTSTECH Produktpalette entschieden haben. SPORTSTECH Sportgeräte bieten Ihnen hohe Qualität und neue Technologie. Um die Leistungsfähigkeit des Gerätes voll nutzen zu können und viele Jahre Freude an Ihrem Gerät zu haben, lesen Sie bitte vor der Inbetriebnahme und dem Beginn des Trainings dieses Benutzerhandbuch sorgfältig durch und ver-...
  • Seite 4: Video Tutorials

    Aufbau, Benutzung, Abbau. 1. QR-Code scannen 2. Videos anschauen 3. Schnell und sicher starten Link zu den Videos: https://service.innovamaxx.de/f37_video Uns gibt es auch auf Social Media! Hol dir die neuesten Produktinfos, Trainingsinhalte uvm. auf unserer: Instagram-Seite Facebook-Seite https://www.instagram.com/sportstech.de https://www.facebook.com/sportstech.de...
  • Seite 5: Inhaltsverzeichnis

    INHALTSVERZEICHNIS WICHTIGE SICHERHEITSHINWEISE ....................6 AUFSTELLUNG DES GERÄTS ......................8 EXPLOSIONSZEICHNUNG/ERSATZTEILLISTE ..................8 GEBRAUCHSANWEISUNG ........................9 MONTAGEANLEITUNG ........................10 BEDIENUNGSANLEITUNG ........................13 ANLEITUNG FÜR TRANSPORT UND LAGERUNG ..................15 DEHNUNGSÜBUNGEN ........................16 WARTUNGSHINWEISE ........................17 ANWENDUNGSSOFTWARE (APP) ......................18 DECLARATION OF CONFORMITY .......................110...
  • Seite 6: Wichtige Sicherheitshinweise

    WICHTIGE SICHERHEITSHINWEISE Diese allgemeinen Sicherheitsinformationen müssen unbedingt für die Benutzung dieses Produkts beachtet werden. Lesen Sie alle Hinweise, bevor Sie das Produkt in Benutzung nehmen. ACHTUNG: Um die Gefahr eines Stromschlags zu reduzieren, ziehen Sie den Stromstecker des Produkts nach der Benutzung, beim Auf- oder Abbau und für Wartungs- oder Reinigungszwecke.
  • Seite 7 Gegenstände während des Betriebs nicht unter den Laufgurt am hinteren Ende des Geräts geraten, um mög- licherweise schwerwiegende Verletzungen oder Schäden am Gerät zu vermeiden. • Steigen Sie niemals vom Gerät, während sich der Laufgurt bewegt. Schalten Sie das Gerät zuvor ab und halten Sie sich beim Abstieg am seitlichen Handlauf fest.
  • Seite 8: Aufstellung Des Geräts

    AUFSTELLUNG DES GERÄTS Stellen Sie das Gerät auf einer ebenen Fläche auf und achten Sie auf die Abstände: 0,3 m 1. Am hinteren Ende des Geräts muss sich ein Freiraum von mindestens 2 Metern befinden. 2. Auf beiden Seiten des Geräts muss der Freiraum mindestens 1 Meter be- tragen.
  • Seite 9: Gebrauchsanweisung

    GEBRAUCHSANWEISUNG Um einen Unfall zu vermeiden, vergewissern Sie sich bitte, dass Sie den Sicherheitsschlüssel zuvor sicher an Ihrer Kleidung befestigt haben. Für den Fall, dass Sie während des Gehens oder Laufens auf dem Gerät unvor- hergesehen stolpern oder ausrutschen, wird durch das Entfernen des Sicherheitsschlüssels aus der Konsole die Stromzufuhr zum Motor unterbrochen und der Laufgurt zum Halten gebracht.
  • Seite 10: Montageanleitung

    MONTAGEANLEITUNG Alle Bauteile und vormontierten Teile fest anziehen! Wir empfehlen 2 Personen für die Montage dieses Geräts. Breiten Sie alle Teile des Geräts auf einer freien Fläche aus und entfernen Sie das Verpackungsmaterial. Entsorgen Sie das Verpackungsmaterial erst, wenn die Montage abgeschlossen ist. Bevor Sie mit dem Zusammenbau beginnen, sollten Sie sämtliche in diesem Handbuch vorgestellten Teile und Schrauben überprüfen und bereitlegen.
  • Seite 11 SCHRITT 1 Montage des Stützrahmens Stellen Sie den Stützrahmen aufrecht und sichern Sie ihn in dem Stabilisator mit der Sechskantschraube M8x50mm Zähne 12mm (S2) und der Sechskantschraube M8x16mm (S3) an den Rückseiten. Wichtig: Während der Montage müssen zwei Personen zusammenarbeiten. Einer hält den Computer, der andere zieht die Schrauben mit dem beiliegenden Inbusschlüssel (S1) an.
  • Seite 12 SCHRITT 3 Montage der Abdeckungen Befestigen Sie die Abdeckung (S8) mit jeweils einer Sechskantschraube (S4) auf beiden Seiten, ziehen Sie die Schrauben mit dem Multi Sechskant-Werkzeug und dem mitgelieferten Philips Schraubendreher (S5) fest. NOTABSCHALTUNG SICHERHEITSSCHLÜSSEL Bevor Sie eine Trainingseinheit beginnen, vergewissern Sie sich, dass der Sicherheitsschlüssel ordnungsgemäß in der Halterung auf der Computerkonsole platziert und der Sicherheitsclip sicher an einem Stück Ihrer Kleidung befestigt ist.
  • Seite 13: Bedienungsanleitung

    BEDIENUNGSANLEITUNG TIME PULSE ANZEIGE-FUNKTIONEN TIME Keine Zeitvorgabe - die ZEIT wird von 00:00 bis maximal 99:00 in Schritten von jeweils einer Minute hochzählen. Mit Zeitvorgabe - die ZEIT wird von dem voreingestellten Wert heruntergezählt. Jeder voreingestellte Schritt entspricht einer Minute in einem Zeitfenster zwischen 5:00 bis 99:00 Minuten.
  • Seite 14 Funktionstasten 1. MODUS: Für sämtliche Einstellungen und die Eingabe Ihrer Trainings-Modi. 2. Geschwindigkeit +: Zur Auswahl des Trainingsmodus und Anpassung des Funktionswerts nach oben. 3. Geschwindigkeit -: Zur Auswahl des Trainingsmodus und Anpassung des Funktionswerts nach unten. 4. START/STOP: Um Ihr Training zu starten oder zu stoppen. ANSCHALTEN Stecken Sie das Stromkabel in eine geerdete Steckdose und stellen Sie sicher, dass die Spannungswerte über- einstimmen.
  • Seite 15: Anleitung Für Transport Und Lagerung

    ANLEITUNG FÜR TRANSPORT UND LAGERUNG Zusammenklappen Ihres Geräts A.) Stellen Sie das Gerät ab, schalten Sie die Stromzufuhr mit dem Hauptschalter aus und ziehen Sie den Stromstecker. B.) Heben Sie das Gerätedeck in Richtung der Computerkonsole an. Sie sollten spüren, dass das Gasfedersystem des Geräts eingreift. C.) Um das Gerätedeck abzusenken, drücken Sie das Gasfedersystem mit dem Fuß...
  • Seite 16: Dehnungsübungen

    DEHNUNGSÜBUNGEN Bevor Sie das Gerät benutzen, ist es am besten, 5 bis 10 Minuten zum Aufwärmen Stret- ching-Übungen durchzuführen. Dehnen vor dem Training hilft, die Flexibilität zu verbessern und das Verletzungsrisiko zu mindern. MIT DEM KOPF ROLLEN Drehen Sie den Kopf nach rechts für eine Sekunde, fühlen Sie die Streckung auf der linken Seite des Nackens, dann drehen Sie den Kopf zurück für eine Sekunde, recken Sie Ihr Kinn nach oben und lassen Sie Ihren Mund geöffnet.
  • Seite 17: Wartungshinweise

    WARTUNGSHINWEISE ACHTUNG: BEVOR SIE REINIGUNGS- ODER WARTUNGSARBEITEN AN IHREM GERÄT AUSFÜHREN, VERGEWISSERN SIE SICH, DASS DIE STROMZUFUHR AUSGESCHALTET IST UND DER STROMSTECKER DES STROMKABELS AUS DER STECKDOSE GEZOGEN WURDE. Mindestens einmal im Jahr sollte die Motorabdeckung des Geräts abgenommen und even- tuell vorhandener Staub oder Schmutz mit einem Staubsauger entfernt werden, um das reibungslose Funktionieren des Motors sowie des Antriebssystems weiterhin zu gewährleisten.
  • Seite 18: Anwendungssoftware (App)

    Android Kinomap Hinweise zur Nutzung der App: Sie sollten nur Apps installieren, deren Quellen Sie vertrauen. Sportstech Brands Holding kann keine Haftung für Software übernehmen, die von Drittanbietern bereitgestellt wird. Bitte denken Sie daran, die Bluetooth-Funktion auf Ihrem Gerät einzuschalten.
  • Seite 19 Recyclingkreislauf Verpackungsmaterialien können wieder dem Rohstoffkreislauf zugeführt werden. Entsorgen Sie die Verpackung gemäß den aktuellen Bestimmungen. Informationen erhalten Sie bei den Rückgabe- und Sammelsystemen Ihrer Gemeinde. Hinweise zum Elektro- und Elektronikgerätegesetz (ElektroG) Wir weisen Besitzer von Elektro- und Elektronikaltgeräten darauf hin, dass Elektroaltgeräte gemäß...
  • Seite 21 Dear customer, We are pleased you chose a device from the SPORTSTECH product range. SPORTSTECH sports equipment offers you high quality and new technology. In order to fully use the potential of your device and be able to enjoy it for many years, please read this manual ca- refully before starting up and beginning of training, and use the device according to the instructions.
  • Seite 22 1. Scan the QR code 2. Watch videos 3. Start fast and safely Link to the videos: https://service.innovamaxx.de/f37_video We are also on social media! Get the latest product information, training content and much more on our: Instagram-page Facebook-page https://www.instagram.com/sportstech.de https://www.facebook.com/sportstech.de...
  • Seite 23 INDEX IMPORTANT SAFETY INSTRUCTIONS ....................24 SETTING UP THE DEVICE ........................26 EXPLODED DRAWING/SPARE PARTS LIST ..................26 DIRECTIONS FOR USE ........................27 ASSEMBLY INSTRUCTIONS .......................28 OPERATION INSTRUCTIONS ......................31 MOVING & STORAGE INSTRUCTIONS ....................33 STRETCH EXERCISE .........................34 MAINTENANCE INSTRUCTIONS ......................35 APPLICATION SOFTWARE (APP) ......................36 DECLARATION OF CONFORMITY .......................110...
  • Seite 24: Important Safety Instructions

    IMPORTANT SAFETY INSTRUCTIONS It is essential to fully observe this safety information when using this product. Read all instructions thoroughly before using the product. DANGER: To reduce the risk of electric shock, unplug the product after use, during assembly or disassembly, and for maintenance or cleaning purposes.
  • Seite 25 • WARNING: Consult a doctor before exercising. This note must be observed by the elderly or people with limited health. Read all the safety instructions in this manual carefully before using the device. • The use of the device under the influence of alcohol, drugs or narcotics is strictly prohibited. •...
  • Seite 26: Setting Up The Device

    SETTING UP THE DEVICE Set up the device on a level surface and pay attention to the surrounding clear space: 0,3 m 1. There must be at least 2 meters of free space at the rear of the device. 2. There must be at least 1 meter of free space on both sides of the device. 3.
  • Seite 27: Directions For Use

    DIRECTIONS FOR USE In order to avoid an accident, please ensure you have the treadmill safety key securely attached to your clothing. In the event, that you accidently trip or slip whilst walking or running on the treadmill, removing the safety key from the console will ensure the power is paused to the motor bringing the belt to a stop.
  • Seite 28: Assembly Instructions

    ASSEMBLY INSTRUCTIONS Firmly tighten all component parts and pre-assembled parts! We recommend 2 people assist in assembling this unit. Place all parts of the Treadmill in a cleared area and remove the packing materials. Do not dispose of the packing materials until assembly is completed. Before you start installation inspect and prepare all parts and screws featured in this manual.
  • Seite 29 STEP 1 Installing the upright frame Upright and secure the upright frame into the stabilizer with Hex Bolt M8x50mm teeth 12mm (S2) and Hex Bolt M8x16mm(S3) back sides. Important: While assembly, it needs two persons to work together. One person holds the computer, and the second tightens the bolts with the Allen Wrench (S1) provided.
  • Seite 30 STEP 3 Installing the Covers Secure the cover (S8) to the upright frame with one Hex Bolt (S4) both sides, tighten the bolts with Multi Hex Tool with Philips Screwdriver (S5) provided. EMERGENCY STOP SAFETY KEY Before beginning a workout session ensure that the Safety Tether Key is properly placed onto the Computer Console and the Safety Clip is securely attached to an article of your clothing.
  • Seite 31: Operation Instructions

    OPERATION INSTRUCTIONS TIME PULSE DISPLAY FUNCTIONS TIME No Set Target Time - TIME will count up from 00:00 to maximum 99:00 with each in- crements is one minute. Using Set Target Time - TIME will count down from Preset Value . Each preset Increment is one minute between 5:00 to 99:00 minutes.
  • Seite 32 Function Buttons 1. MODE: To confirm all settings and to enter exercise modes. 2. SPEED +: To select training mode and adjust the function value up. 3. SPEED -: To select training mode and adjust the function value down. 4. START/STOP: To start or stop your workout. POWER ON Plug the main power cord in a grounded wall outlet, please make sure the power matched.
  • Seite 33: Moving & Storage Instructions

    MOVING & STORAGE INSTRUCTIONS Folding away your Treadmill A.) Turn off the treadmill, switch off at the main power switch and pull out the plug. B.) Lift the treadmill deck up towards the main console. You should feel the treadmill gas spring system engage. C.) To lower the treadmill deck, press the gas spring system in with your foot to disengage the lock.
  • Seite 34: Stretch Exercise

    STRETCH EXERCISE No matter how you do sports, please do some stretch at first, The warm muscle will extend easily, so warm up yourself with 5-10minutes, Then We suggest the following stretch exercise, five times.10 counts for each time or longer do these exercise again after sports. HEAD ROLLS Rotate your head to the right for one count, feeling the stretch up the left side of your neck, then rotate your head back for one count, stretching your chin to the ceiling and letting your...
  • Seite 35: Maintenance Instructions

    MAINTENANCE INSTRUCTIONS WARNING: BEFORE CLEANING OR CARRYING OUT ANY MAINTENANCE ON YOUR TREADMILL, EN- SURE THE POWER IS TURNED OFF AND THE POWER CORD REMOVED FROM THE PLUG SOCKET. At least once a year, the motor cover on your treadmill should be removed and any dust or debris vacuumed up to maintain the smooth operation of the motor and drive system.
  • Seite 36: Application Software (App)

    Android Kinomap Notes on using the App: You should only install apps from sources you trust. Sportstech Brands Holding cannot accept any liability for software provided by third parties. Please remember to turn on the Bluetooth feature on your device.
  • Seite 37 Recycling loop Packaging material can be conveyed back to the raw material cycle. Dispose of packaging material in accordance with legal provisions. Information can be retrieved from the return or collections systems of your community. Notes on the Electrical and Electronic Equipment Act (ElektroG) We would like to point out to owners of electrical and electronic equipment that, according to the applicable legal regulations, electrical devices must be disposed of separately from municipal waste.
  • Seite 39 Estimado cliente, Nos complace que haya elegido un dispositivo de la línea de productos SPORTSTECH. Las máquinas de deporte de SPORTSTECH ofrecen una gran calidad y una tecnología innovadora. Con el fin de usar todo el potencial de su dispositivo y para que pueda disfrutarlo durante muchos años, por favor lea este manual cuidadosamente antes de comenzar a ejercitarse, y use el dispositivo de acuerdo a las instrucciones.
  • Seite 40 Montaje, Utilizar, Desmontaje. 1. Escanear el código QR 2. Ver vídeos 3. Comienza rápido y seguro Enlace a los videos: https://service.innovamaxx.de/f37_video ¡También estamos en redes sociales! Obtenga la última información sobre nuestros productos, entrenamientos y mucho más aquí: Instagram Facebook https://www.instagram.com/sportstech.de https://www.facebook.com/sportstech.de...
  • Seite 41 ÍNDICE INSTRUCCIONES DE SEGURIDAD IMPORTANTES ................42 INSTALACIÓN DEL APARATO ......................44 DIBUJO DE EXPLOSIÓN/LISTA DE REPUESTOS ...................44 INSTRUCCIONES DE USO........................45 INSTRUCCIONES DE ENSAMBLAJE ....................46 INSTRUCCIONES DE USO........................49 INSTRUCCIONES DE TRANSPORTE Y ALMACENAMIENTO ..............51 EJERCICIOS DE ESTIRAMIENTO ......................52 INSTRUCCIONES DE MANTENIMIENTO ....................53 SOFTWARE (APLICACIÓN) ........................54 DECLARATION OF CONFORMITY .......................110...
  • Seite 42: Instrucciones De Seguridad Importantes

    INSTRUCCIONES DE SEGURIDAD IMPORTANTES Siga estos consejos de seguridad cada vez que utilice este producto. Lea todas las instrucciones antes de utilizarlo. ATENCIÓN: Para reducir el riesgo de descarga eléctrica, desenchufe el producto de la toma de corriente después de usarlo, al montarlo y desmontarlo y cuando vaya a limpiarlo. Ignorar este aviso puede provocar daños a su persona o al producto.
  • Seite 43 • No se baje nunca del aparato mientras la cinta de correr esté en movimiento. Apague el aparato con antelación y agárrese al pasamanos lateral cuando descienda. • No coloque el aparato sobre una alfombra que sea más alta que la superficie de rodadura o el mecanismo de plegado.
  • Seite 44: Instalación Del Aparato

    INSTALACIÓN DEL APARATO Coloque el aparato en una superficie plana y preste atención a las distancias: 0,3 m 1. Debe haber un espacio libre de al menos 2 metros libre detrás del aparato. 2. Debe haber un espacio libre de al menos 21 metro libre a ambos lados del aparato.
  • Seite 45: Instrucciones De Uso

    INSTRUCCIONES DE USO Para evitar accidentes, por favor asegúrese de tener la llave de seguridad de la caminadora unida a su ropa. En caso de que se caiga o se deslice accidentalmente sobre la caminadora, retirar la llave de seguridad de la consola garantizará...
  • Seite 46: Instrucciones De Ensamblaje

    INSTRUCCIONES DE ENSAMBLAJE Apriete todos los componentes y piezas premontadas! Es recomendable que 2 personas ensamblen esta máquina. Ubique todas las piezas de la caminadora en una zona despejada y retire los materiales de empaque. No se deshaga de los materiales de empaque hasta completar el ensamblaje.
  • Seite 47 PASO 1 Instalación de la estructura vertical Levante y asegure la estructura vertical en el estabilizador con tornillos hexagonales M8x50mm de 12mm (S2) y contornillos hexagonales M8x16mm (S3) en la parte posterior. Importante: Durante el ensamblaje, es necesario que dos personas trabajen juntas. Una persona sostiene la consola y la otra aprieta los tornillos con la llave Allen (S1) incluida.
  • Seite 48 PASO 3 Instalación de las cubiertas Asegure la cubierta (S8) a la estructura vertical con un tornillo hexagonal (S4) a ambos lados, Apriete los tornillos con la herramienta hexagonal multi con destornillador (S5) incluida. PARADA DE EMERGENCIA LLAVE DE SEGURIDAD Antes de comenzar una sesión de ejercicio, asegúrese de que la llave de seguridad esté...
  • Seite 49: Instrucciones De Uso

    INSTRUCCIONES DE USO TIME PULSE FUNCIONES DE LA PANTALLA TIME Tiempo no configurado - TIME contará desde 00:00 hasta máximo 99:00 con cada in- cremento de un minuto. Con tiempo configurado - TIME contará hacia atrás desde el valor configurado. Cada in- cremento configurado es de un minuto desde 5:00 hasta 99:00 minutos.
  • Seite 50 Botones de función 1. MODE: Para confirmar todos los ajustes y para entrar en los modos de ejercicio. 2. SPEED +: Para seleccionar el modo de ejercicio y ajustar el valor de la función en aumento. 3. SPEED -: Para seleccionar el modo de ejercicio y ajustar el valor de la función en descenso. 4.
  • Seite 51: Instrucciones De Transporte Y Almacenamiento

    INSTRUCCIONES DE TRANSPORTE Y ALMACENAMIENTO Plegar su caminadora A.) Apague la caminadora, apague el interruptor principal y desconéctela del tomacorriente. B.) Levante la plataforma de la caminadora hacia la consola principal desde atrás. Debe sentir como el sistema del resorte de gas se activa. C.) Para bajar la plataforma de la caminadora, presione el sistema del resorte de gas con su pie para desenganchar el seguro.
  • Seite 52: Ejercicios De Estiramiento

    EJERCICIOS DE ESTIRAMIENTO No importa cómo se ejercite, siempre haga algo de estiramiento primero. El calentamiento muscular hará que sus músculos se extiendan fácilmente, así que caliente al menos 5-10 mi- nutos. Luego le sugerimos hacer los siguientes ejercicios de estiramiento cinco veces. El esti- ramiento antes del ejercicio le ayuda a mejorar la flexibilidad y reduce los riesgos de lesiones.
  • Seite 53: Instrucciones De Mantenimiento

    INSTRUCCIONES DE MANTENIMIENTO ADVERTENCIA: ANTES DE LIMPIAR O LLEVAR A CABO CUALQUIER MANTENIMIENTO DE SU CAMINADO- RA, ASEGÚRESE DE QUE LA CORRIENTE ESTÉ APAGADA Y QUE EL CABLE ELÉCTRICO HAYA SIDO REMOVIDO DEL TOMACORRIENTE. La cubierta del motor de su caminadora debe removerse al menos una vez al año, y debe limpiar cualquier polvo o suciedad para mantener un funcionamiento fluido del motor y del sistema de tracción.
  • Seite 54: Software (Aplicación)

    Android Kinomap Consejos para el uso de las aplicaciones: Instale solo aplicaciones de fuentes de confianza. Sportstech Brands Holding no se hace responsable de soft- wares proporcionados por terceros. Por favor, recuerde activar la función Bluetooth en su dispositivo. El código QR al principio del manual le llevará varios tutoriales en YouTube. Allí encontrará más informa- ción sobre la aplicación y el dispositivo.
  • Seite 55 Reciclaje loop El material de empaque puede trasladarse de nuevo al ciclo de materias primas. Deshágase del material de empaque de acuerdo a las normativas legales. Puede encontrar información en los sistemas de recolección de su comunidad. Notas sobre la Ley sobre aparatos eléctricos y electrónicos (ElektroG) Quisiéramos señalar a los propietarios de aparatos eléctricos y electrónicos viejos que éstos deben desecarse por separado de los residuos municipales de conformidad con las normas legales aplicables.
  • Seite 57 FRANÇAIS Cher client, Nous sommes ravis que vous ayez choisi un appareil de la gamme de produits SPORTSTECH. Les équipements sportifs SPORTSTECH vous offrent une qualité élevée et une technologie innovante. Afin d'utiliser pleinement le potentiel de votre appareil et de pouvoir l'apprécier pendant de nombreuses années, lisez attentivement ce manuel avant l'utilisation et le début de votre entraînement et utilisez l'appareil conformément aux...
  • Seite 58 3. Démarrez rapidement et en toute sécurité Lien vers les vidéos: https://service.innovamaxx.de/f37_video Vous pouvez aussi nous trouver sur les réseaux sociaux! Retrouve les dernières informations sur les produits, le contenu des entraînements et bien plus encore sur notre: la page Instagram la page Facebook https://www.instagram.com/sportstech.de https://www.facebook.com/sportstech.de...
  • Seite 59 SOMMAIRE DES INFORMATIONS DE SÉCURITÉ IMPORTANTES ................60 INSTALLATION DE L‘APPAREIL ......................62 DESSIN ÉCLATÉ/LISTE DES PIÈCES DE RECHANGE ................62 MODE D‘EMPLOI ..........................63 INSTRUCTIONS DE MONTAGE ......................64 INSTRUCTIONS DE FONCTIONNEMENT....................67 INSTRUCTIONS DE DÉMÉNAGEMENT ET DE STOCKAGE ..............69 EXCERCICE D‘ÉTIREMENT ........................70 INSTRUCTIONS D‘ENTRETIEN ......................71 LOGICIEL D’APPLICATION (APP) ......................72 DECLARATION OF CONFORMITY .......................110...
  • Seite 60: Des Informations De Sécurité Importantes

    DES INFORMATIONS DE SÉCURITÉ IMPORTANTES Ces informations générales de sécurité doivent impérativement être respectées lors de l‘utilisation de ce produit. Lisez toutes les indications avant de mettre le produit en service. ATTENTION : Pour réduire le risque d‘électrocution, débranchez le produit après utilisation, lors de l‘assemblage ou du démontage, en cas de maintenance ou si vous souhaitez le nettoyer.
  • Seite 61 • Ne descendez jamais de l‘appareil lorsque la bande de course est en mouvement. Éteignez l‘appareil au préal- able et tenez-vous à la main courante latérale lorsque vous descendez. • Ne placez pas l‘appareil sur un tapis dont les poils sont plus hauts que la bande de course ou le mécanisme de pliage.
  • Seite 62: Installation De L'appareil

    INSTALLATION DE L‘APPAREIL Placez l‘appareil sur une surface plane et faites attention aux dégagements : 0,3 m 1. À l‘extrémité arrière de l‘appareil, l’espace restant libre doit être d‘au moins 2 mètres. 2. Des deux côtés de l‘appareil, cet espace doit être d‘au moins 1 mètre. 3.
  • Seite 63: Mode D'emploi

    MODE D‘EMPLOI Afin d‘éviter un accident, assurez-vous d‘avoir la clé de sécurité du tapis roulant bien attaché à vos vêtements. Dans le cas où vous trébuchez ou glissez accidentellement pendant que vous marchiez ou courriez sur le tapis roulant, le fait d‘enlever la clé de sécurité de la console assurera que le moteur s‘arrête ce qui amène la cour- roie à...
  • Seite 64: Instructions De Montage

    INSTRUCTIONS DE MONTAGE Serrez fermement tous les composants et les pièces préassemblées! Nous recommandons que 2 personnes soient présentes pour assister à l‘assemblage de cette unité. Placez toutes les parties du tapis roulant dans une zone dégagée et enlevez les matériaux de l‘emballage. Ne jetez surtout pas les matériaux de l‘emballage jusqu‘à...
  • Seite 65 ÉTAPE 1 Installation du cadre droit Fixez le cadre vertical dans le stabilisateur avec les vis arrière hexagonales M8x50mm 12mm (S2) et le bou- lon hexagonal M8x16mm (S3). Important: Lors de l‘assemblage, il faut que deux personnes travaillent ensemble. Une personne tient l‘ordi- nateur et une autre serre les boulons avec la clé...
  • Seite 66 ÉTAPE 3 Installation des couvercles Fixez le couvercle (S8) sur le cadre vertical avec un boulon hexagonal (S4) des deux côtés, serrez les boulons avec l‘outil Multi Hexagonal avec le tournevis Phillips (S5) fourni. ARRÊT D‘URGENCE CLÉ DE SÉCURITÉ Avant de commencer une séance d‘entraînement, assurez-vous que la clé de sécurité est correctement placée sur la console de l‘ordinateur et que le clip de sécurité...
  • Seite 67: Instructions De Fonctionnement

    INSTRUCTIONS DE FONCTIONNEMENT TIME PULSE AFFICHAGE DES FONCTIONS TIME Pas de valeur préréglée - TIME comptera de 00:00 à maximum 99:00 Chaque incrément est d‘une minute. À l‘aide de la valeur préréglée - TIME décompte de la valeur préréglée. Chaque incrément préréglé...
  • Seite 68 Botones de función 1. MODE: Pour confirmer tous les réglages et pour accéder aux modes d‘exercice. 2. VITESSE +: Pour sélectionner le mode de formation et ajuster la valeur de la fonction (+). 3. VITESSE -: Pour sélectionner le mode de formation et ajuster la valeur de la fonction (-). 4.
  • Seite 69: Instructions De Déménagement Et De Stockage

    INSTRUCTIONS DE DÉMÉNAGEMENT ET DE STOCKAGE Pliage du tapis roulant A.) Éteignez le tapis roulant, éteignez l‘interrupteur principal et retirez la prise. B.) Soulevez le tablier du tapis roulant vers le haut de la console princi- pale. Vous devriez sentir le système de ressort à gaz du tapis roulant se déclencher.
  • Seite 70: Excercice D'étirement

    EXCERCICE D‘ÉTIREMENT Peu importe comment vous pratiquez le sport, Veuillez faire quelques étirements avant de commencer votre entraî-nement, le muscle chaud s’étendra facilement, donc réchauffez vous durant 5-10minutes, nous suggérons l‘exercice d‘étirement suivant : 5 fois ,10 comptes pour chaque fois ou plus, faire ces exercices à nouveau après le sport. ROULER LA TÊTE Tournez la tête vers la droite une fois, en étirant le côté...
  • Seite 71: Instructions D'entretien

    INSTRUCTIONS D‘ENTRETIEN ATTENTION: AVANT DE NETTOYER OU D‘EFFECTUER TOUT ENTRETIEN SUR VOTRE TAPIS ROULANT, ASSUREZ-VOUS QUE L‘ALIMENTATION EST COUPÉE ET QUE LE CORDON D‘ALIMENTA- TION A ÉTÉ RETIRÉ DE LA PRISE. Au moins une fois par an, le capot moteur de votre tapis roulant doit être enlevé et toute poussière ou débris aspiré...
  • Seite 72: Logiciel D'application (App)

    Kinomap Informations sur l’utilisation de l’application : Vous ne devriez installer que des applications pour lesquelles vous êtes sûr des sources. Sportstech Brands Holding ne peut accepter aucune responsabilité pour les logiciels fournis par des tiers. N’oubliez pas d’activer la fonction Bluetooth de votre appareil.
  • Seite 73 Chaîne du recyclage Les matériaux d‘emballage peuvent être transportés vers le cycle des matières premières. La disposition des matériaux d‘emballage, conformément aux dispositions légales. Les informations peuvent être récupérées à partir des systèmes de retour ou de collections. Information relative à la législation sur les équipements électriques et électroniques (ElektroG) Nous tenons à...
  • Seite 75 ITALIANO Gentile cliente Siamo lieti che abbiate scelto un dispositivo della gamma SPORTSTECH. L'attrezzatura sportiva SPORTSTECH ti offre alta qualità e tecnologia innovativa. Per sfruttare a pieno il potenziale del dispositivo e poterlo utilizzare per molti anni, raccomandiamo di leggere attenta- mente questo manuale prima di iniziare l’allenamento e di utilizzare il dispositivo seguendo le istruzioni.
  • Seite 76 2. Guarda il video 3. Inizia ad allenarti veloce e sicuro Link per il Video: https://service.innovamaxx.de/f37_video Ci siamo anche sui social! Scopri le ultime novità sui prodotti, contenuti per l'allenamento e molto altro ancora sul nostro: pagina Instagram pagina Facebook https://www.instagram.com/sportstech.de https://www.facebook.com/sportstech.de...
  • Seite 77 INDICE IMPORTANTI ISTRUZIONI DI SICUREZZA ....................78 IMPOSTAZIONE DELL‘APPARECCHIO ....................80 DISEGNO ESPLOSO/LISTA DEI PEZZI DI RICAMBIO ................80 ISTRUZIONI PER L‘USO ........................81 ISTRUZIONI DI MONTAGGIO ......................82 ISTRUZIONI PER LE OPERAZIONI .......................85 ISTRUZIONI DI TRASPORTO E STOCCAGGIO ..................87 ESERCIZI DI STRETCHING .........................88 ISTRUZIONI SULLA MANUTENZIONE ....................89 SOFTWARE DI UTILIZZO (APP) ......................90 DECLARATION OF CONFORMITY .......................110...
  • Seite 78: Importanti Istruzioni Di Sicurezza

    IMPORTANTI ISTRUZIONI DI SICUREZZA È essenziale seguire queste informazioni generali di sicurezza quando si usa questo prodotto. Leggere tutte le istruzioni prima di utilizzare il prodotto. ATTENZIONE: Per ridurre il rischio di scosse elettriche, scollegare questo prodotto dopo l‘uso, quando si monta o si smonta, e per la manutenzione o la pulizia. Ignorare questo avviso può...
  • Seite 79 • Non scendere mai dal dispositivo mentre il nastro di scorrimento è in movimento. Spegnere il dispositivo in anticipo e tenersi al corrimano laterale durante la discesa. • Non posizionare l‘apparecchio su un tappeto più alto del battistrada o del meccanismo di piegatura. •...
  • Seite 80: Impostazione Dell'apparecchio

    IMPOSTAZIONE DELL‘APPARECCHIO Posizionare l‘apparecchio su una superficie piana e fare attenzione alle distanze: 0,3 m 1. Ci deve essere uno spazio libero di almeno 2 metri all‘estremità posteriore dell‘apparecchio. 2. Ci deve essere almeno 1 metro di spazio libero su entrambi i lati dell‘unità. 3.
  • Seite 81: Istruzioni Per L'uso

    ISTRUZIONI PER L‘USO Al fine di evitare incidenti, si prega di assicurarsi che la chiave di sicurezza tapis roulant sia legata saldamente al vostro abbigliamento. Nel caso in cui accidentalmente inciampiate o scivoliate mentre camminate o correte sul tapis roulant, estraendo la chiave di sicurezza dalla console farà in modo che il motore dell’apparecchio vada in pausa portando il nastro a fermarsi.
  • Seite 82: Istruzioni Di Montaggio

    ISTRUZIONI DI MONTAGGIO Avvitare bene tutti gli elementi e i pezzi preassemblati! È preferibile che 2 persone assistano nel montaggio di questa unità. Mettere tutte le parti del tapis roulant in una zona libera e rimuovere il materiale di imballaggio. Non gettare il materiale d‘imballaggio fino a montaggio completato.
  • Seite 83 PASSO 1 Installazione del telaio verticale Montare in posizione verticale e fissare il telaio verticale nello stabilizzatore con bullone Hex M8x50mm, denti 12mm. Importante: Durante l‘assemblaggio, è necessario che due persone lavorino insieme. Una persona tiene il computer. ATTENZIONE: ASSICURARSI CHE LE VITI SIANO AVVITATE CORRETTAMENTE IN MODO CHE LA FILETTATU- RA NON VENGA DANNEGGIATA.
  • Seite 84 PASSO 3 Installazione dei coperchi Fissare il coperchio (S8) al telaio verticale con un bullone esagonale (S4) da entrambi i lati, stringere i bulloni con l’attezzo Multi Hex con cacciavite a croce (S5) fornito. FERMATA D’EMERGENZA CHIAVE DI SICUREZZA Prima di iniziare una sessione di allenamento, accertarsi che la chiave di sicurezza sia correttamente posizio- nata sulla console del computer e la clip di sicurezza sia saldamente attaccata ad un capo di abbigliamento.
  • Seite 85: Istruzioni Per Le Operazioni

    ISTRUZIONI PER LE OPERAZIONI TIME PULSE FUNZIONI DEL DISPLAY TIME Nessuna impostazione del tempo di allenamento - Il TIMER parte da 00:00 e arriva fino 99:00 con incremento è di un minuto. Utilizzando l‘impostazione del tempo di allenamento – Il TIMER conta alla rovescia dal valore predefinito.
  • Seite 86 Pulsanti funzione 1. MODE: Per confermare tutte le impostazioni e per accedere alle modalità di esercizio. 2. SPEED +: Per selezionare la modalità di allenamento e regolare il valore della funzione verso l‘alto. 3. SPEED -: Per selezionare la modalità di allenamento e regolare il valore della funzione verso il basso. 4.
  • Seite 87: Istruzioni Di Trasporto E Stoccaggio

    ISTRUZIONI DI TRASPORTO E STOCCAGGIO Ripiegare il tuo tapis roulant A.) Spegnere il tapis roulant, spegnere l ‚interruttore principale e estrarre la spina. B.) Sollevare la piattaforma del tapis roulant verso la consolle principale. Dovreste sentire il sistema a molla a gas del tapis roulant attivarsi. C.) Per abbassare la piattaforma del tapis roulant, premere il sistema a molla a gas con il piede per sbloccare la serratura.
  • Seite 88: Esercizi Di Stretching

    ESERCIZI DI STRETCHING Non importa la ragione per cui fai sport, fai in modo di fare sempre esercizi di stretching prima di cominciare. Il uscolo riscaldato si allungherà facilmente, quindi scaldati con degli esercizi per 5-10 minuti. Ti suggeriamo di eseguire i seguenti esercizi cinque volte conta fino a dieci ogni volta o anche più...
  • Seite 89: Istruzioni Sulla Manutenzione

    ISTRUZIONI SULLA MANUTENZIONE AVVERTIMENTO: PRIMA DI PULIRE O DI EFFETTUARE QUALSIASI INTERVENTO DI MANUTENZIONE SUL TAPIS ROULANT, VERIFICARE CHE L’APPARECCHIO SIA SPENTO E IL CAVO DI ALIMEN- TAZIONE SIA STATO RIMOSSO DALLA PRESA DI CORRENTE. Almeno una volta l‘anno, il coperchio del motore del tapis roulant deve essere rimosso e devono essere aspirati polvere e detriti per mantenere un buon funzionamento e azionamento del sistema motore.
  • Seite 90: Software Di Utilizzo (App)

    Android Kinomap Note sull'uso dell'app: Si dovrebbero installare solo le applicazioni da una fonte affidabile. Sportstech Brands Holding non si assume alcuna responsabilità per software forniti da terzi. Ricordarsi di attivare la funzionalità Bluetooth sul dispositivo. Il codice QR all‘inizio del manuale ti guiderà a vari tutorial di YouTube. Lì otterrai maggiori informazioni sull‘app e sul dispositivo.
  • Seite 91 Riciclaggio dei rifiuti Il materiale di imballaggio può essere trasportato di nuovo al ciclo delle materie prime. Smaltire il materiale di imballaggio in conformità alle disposizioni di legge. Le informazioni possono essere recuperate dai sistemi di ritorno o di raccolta della vostra comunità. Avviso sulla legge degli apparecchi elettrici ed elettronici (ElektroG) Desideriamo far notare ai proprietari di vecchie apparecchiature elettriche ed elettroniche che le apparecchiature elettriche devono essere raccolte separatamente dai rifiuti urbani, in conformità...
  • Seite 93 NEDERLANDS Geachte klant, We zijn blij dat je een apparaat uit het SPORTSTECH-assortiment hebt gekozen. De sportuitrusting van SPORT- STECH brengt hoogwaardige apparaten met nieuwe technologieën. Lees vóór gebruik deze gebruikershandleiding aandachtig door en gebruik het apparaat zoals aangegeven. Zo zul je ten volle van de prestaties van het apparaat kunnen profiteren en er vele jaren geniet van hebben.
  • Seite 94 1. Scan de QR-code 2. Bekijk video‘s 3. Begin snel en veilig Link naar de video's: https://service.innovamaxx.de/f37_video We zijn ook actief op social media! Raadpleeg voor de meest recente productinformatie, trainingen en nog veel meer, onze: Instagram-pagina Facebook-pagina https://www.instagram.com/sportstech.de https://www.facebook.com/sportstech.de...
  • Seite 95 INHOUD BELANGRIJKE VEILIGHEIDSINSTRUCTIES ...................96 OPSTELLING VAN HET APPARAAT .....................98 EXPLOSIETEKENING/ONDERDELENLIJST ...................98 GEBRUIKSAANWIJZING ........................99 MONTAGE-INSTRUCTIES .........................100 BEDIENING VAN DE CONSOLE ......................103 INSTRUCTIES VOOR TRANSPORT EN OPSLAG ..................105 STRETCHOEFENINGEN ........................106 ONDERHOUDSINSTRUCTIES ......................107 APPLICATIESOFTWARE (APP) ......................108 DECLARATION OF CONFORMITY .......................110...
  • Seite 96: Belangrijke Veiligheidsinstructies

    BELANGRIJKE VEILIGHEIDSINSTRUCTIES Deze algemene veiligheidsinformatie moet bij het gebruik van dit apparaat strikt worden nageleefd. Lees alle instructies voordat je het apparaat gebruikt. LET OP: Trek de stekker uit het apparaat na gebruik, tijdens montage of demontage en voor onderhouds- of reinigingsdoeleinden om het risico op elektrische schokken te verminderen.
  • Seite 97 • Plaats het apparaat niet op een tapijt dat hoger is dan het loopvlak of het opklapmechanisme. • WAARSCHUWING: Raadpleeg een arts voordat je gaat sporten. Deze opmerking moet in acht worden genomen voor ouderen of personen met een beperkte gezondheidstoestand. Lees alle veiligheidsinstructies in deze handleiding zorgvuldig door voordat je het apparaat gebruikt.
  • Seite 98: Opstelling Van Het Apparaat

    OPSTELLING VAN HET APPARAAT Plaats het apparaat op een vlakke ondergrond en let op de afstanden: 0,3 m 1. Er moet een vrije ruimte van minstens 2 meter zijn aan de achterkant van het apparaat. 2. Er moet minstens 1 meter vrije ruimte zijn aan weerszijden van het apparaat. 3.
  • Seite 99: Gebruiksaanwijzing

    GEBRUIKSAANWIJZING Zorg ervoor dat je de veiligheidssleutel voor de loopband stevig aan je kleding bevestigt, om ongevallen te voorkomen. Als je onvoorzien struikelt of wegglijdt tijdens het lopen of rennen op het apparaat, wordt door het verwijderen van de veiligheidssleutel uit de console de stroomtoevoer naar de motor onderbroken en komt de loopband tot stilstand.
  • Seite 100: Montage-Instructies

    MONTAGE-INSTRUCTIES DRAAI Alle componenten en voorgemonteerde onderdelen GOED vast! Wij raden aan om het apparaat met 2 personen te monteren. Spreid alle onderdelen van de loopband op een vrij oppervlak uit en verwijder het verpakkingsmateriaal. Gooi het verpakkingsmateriaal pas weg nadat de montage is voltooid.
  • Seite 101 STAP 1 Montage van het steunframe Zet het steunframe rechtop en zet het aan de achterzijde vast in de stabilisator met zeskantschroef M8x50 mm tand 12 mm (S2) en zeskantschroef M8x16 mm (S3). Belangrijk: Er moeten twee personen tijdens de installatie samenwerken. De ene houdt de computer vast en de andere draait de schroeven aan met de meegeleverde inbussleutel (S1).
  • Seite 102 STAP 3 Montage van de afdekkingen Bevestig de afdekking (S8) met een zeskantschroef (S4) aan beide zijden, draai de schroeven vast met de Philips schroevendraaier (S5) van het meegeleverde multi-hexagonale gereedschap. NOODSTOP VEILIGHEIDSSLEUTEL Voordat je een trainingssessie begint, moet je ervoor zorgen dat de beveiligingssleutel goed in de houder op de computerconsole is geplaatst en dat de beveiligingsclip goed vastzit aan je kleding.
  • Seite 103: Bediening Van De Console

    BEDIENING VAN DE CONSOLE TIME PULSE WEERGAVEFUNCTIES TIME Geen tijdsinstelling: de tijd wordt van 00:00 tot maximaal 99:00 in stappen van één minuut opgeteld. Met tijdsinstelling: de tijd wordt van de vooraf ingestelde waarde afgeteld. Elke vooraf inge- stelde stap komt overeen met één minuut in een tijdvenster tussen 5:00 en 99:00 minuten. SPEED Weergave van de actuele trainingssnelheid van 1,0 tot maximaal 20,0 km/u.
  • Seite 104 FUNCTIETOETSEN 1. MODUS: Voor alle instellingen en de invoer van je trainingswaarden. 2. SPEED +: Om de trainingsmodus te selecteren en om de functiewaarde naar boven aan te passen. 3. SPEED -: Om de trainingsmodus te selecteren en om de functiewaarde naar beneden aan te passen. 4.
  • Seite 105: Instructies Voor Transport En Opslag

    INSTRUCTIES VOOR TRANSPORT EN OPSLAG De loopband opklappen A.) Schakel de loopband uit, schakel de stroomtoevoer uit met de hoofd- schakelaar en trek de stekker uit. B.) Hef het loopbandvlak in de richting van de hoofdconsole. Je moet het gasveersysteem van de loopband voelen. C.) Om het loopbandvlak te laten zakken, druk je het gasveersysteem met de voet in om de vergrendeling los te maken.
  • Seite 106: Stretchoefeningen

    STRETCHOEFENINGEN Voor je de loopband gebruikt, kun je het beste 5 tot 10 minuten stretchoefeningen doen voor de opwarming. Stretching voor de training helpt de flexibiliteit te verbeteren en het risico op letsel te verminderen. MET JE HOOFD ROLLEN Draai je hoofd een seconde naar rechts, voel de stretch aan de linkerkant van je nek, draai dan je hoofd een seconde terug, strek je kin omhoog en laat je mond open.
  • Seite 107: Onderhoudsinstructies

    ONDERHOUDSINSTRUCTIES LET OP: VOORDAT JE REINIGINGS- OF ONDERHOUDSWERKZAAMHEDEN AAN DE LOOPBAND UITVOERT, MOET JE ERVOOR ZORGEN DAT DE STROOM IS UITGESCHAKELD EN DE STEKKER UIT HET STOPCONTACT IS GETROKKEN. Om de goede werking van de motor en het aandrijfsysteem te garanderen, moet de motorkap van de loopband minstens één keer per jaar worden verwijderd en het eventueel aanwezige stof of vuil met een stofzuiger wor- den verwijderd.
  • Seite 108: Applicatiesoftware (App)

    Kinomap Opmerkingen over het gebruik van de app: Installeer alleen apps waarvan je de bronnen vertrouwt. Sportstech Brands Holding kan geen aansprakelijkheid aanvaarden voor software die door derden wordt geleverd. Vergeet niet om de Bluetooth-functie op je apparaat in te schakelen.
  • Seite 109 Recyclingcyclus Verpakkingsmaterialen kunnen worden teruggebracht in de grondstoffenkringloop. Voer de verpakking af volgens de geldende voorschriften. Informatie kan worden verkregen uit de retournerings- en ophaalsystemen van je gemeente. Informatie volgens de wet op elektrische en elektronische apparatuur (ElektroG - Duitse norm) We wijzen de eigenaren van elektrische en elektronische apparatuur erop dat oude elektrische apparatuur gescheiden van het gemeentelijk afval moet worden ingezameld volgens de geldende...
  • Seite 110: Declaration Of Conformity

    Harmonisierte Normen nach der Richtlinie 2014/35/EU (Niederspannungs-Richtlinie) o EN 60335-1:2012 /A13:2017/A14+A1+A2:2019 o EN 62233:2008/AC:2008 • Harmonisierte Normen und Prüfnormen nach der Richtlinie 2011/65/EU (RoHS-Richtlinie) o EN 50581:2012 Berlin,05.01.2021 Unterzeichnet für und im Namen der Sportstech Brands Holding GmbH von: Ali Ahmad (Geschäftsführer) Unterschrift...
  • Seite 112 Verkauf durch / Distributed by / Distribuido por / Distribué / Distribuito da / Verkoop via Sportstech Brands Holding GmbH Potsdamer Platz 11 10785 Berlin +49 30 220 663 569 http://www.sportstech.de...