Endress+Hauser Levelflex FMP50 Einbauanleitung
Vorschau ausblenden
Andere Handbücher für Levelflex FMP50:
- Betriebsanleitung (224 Seiten) ,
- Bedienungsanleitung (76 Seiten) ,
- Technische information (72 Seiten)
Verfügbare Sprachen
Verfügbare Sprachen
Quicklinks
Installation Instructions
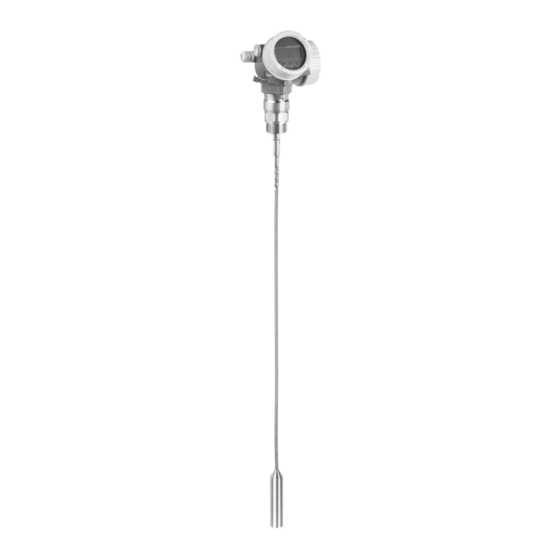
Levelflex FMP50, FMP51
Probe rod / rope without process connection
EA00043F/00/A2/02.11
71146085
Determining the correct spare part set
This method is used merely to determine whether the spare part set is suitable for the measuring device. Other conclusions drawn from the table are not applicable.
1. Read the order code from the nameplate on the measuring device and enter it in the fields below. The relevant features are marked with a star.
2. Select the order code of the spare part set in the table below and compare it, with the ordered spare part.
Levelflex
FMP50 -
FMP51 -
Order code, set original spare part
XPF0003 - Probe FMP50 without process connection
XPF0005 - Probe FMP51 without process connection
!
Note!
Use only the identical original Endress+Hauser spare part sets.
Additionally check the order code of the probe rod/rope with the aid of the serial number in the device viewer (www. endress.com/deviceviewer).
We recommend that the Installation Instructions be kept with the packaging label at all times.
Determining approval and authorized personnel category:
Any person who carries out repairs is responsible for safety during the work, the quality of work completed and safety of the device after repair.
Without approval
Approval
Competence level
1, 2, 3
1 = Trained specialist at customer site, 2 = Service technician authorized by Endress+Hauser, 3 = Endress+Hauser (return device to manufacturer)
* = It is recommended that devices with a design approval be repaired by skilled professionals who have been trained by E+H.
1 Safety Instructions
• Comply with national regulations governing mounting, electrical installation,
commissioning, maintenance and repair procedures.
• Requirements with regard to specialized technical staff for the mounting,
electrical installation, commissioning, maintenance and repair of the
measuring devices:
– trained in instrument safety
– familiar with the individual operation conditions of the devices
– for Ex-certified measuring devices: also trained in explosion protection
• The spare parts set and Installation Instructions are used to replace a faulty unit
with a functioning unit of the same type.
Only use original parts from Endress+Hauser.
• Using the material number and identification information, check whether the
spare part matches the identification label on the measuring device.
• If you have any questions, contact your E+H service organization.
• Modifications to the measuring device are not permitted.
• Follow the Operating Instructions for the device.
• Before removing the device, stop the process and purge the pipe of dangerous
gases and liquids.
• Hot surfaces! Risk of injury! Before commencing work: Allow the system and
measuring device to cool down to a touchable temperature.
• In the case of measuring devices in safety-related applications in accordance
with IEC 61508 or IEC 61511: Commissioning in according with Operating
Instructions after repair. Document the repair procedure.
10
20
30
40
50
60
*
*
*
*
10
60
*
*
*
*
With approval
(e.g. IECEx, ATEX, FM, CSA, TIIS, NEPSI)
1*, 2, 3
90
100
...
580
+
*
*
J*,K*
+
*
*
J*,K* L*
90
100
580 590 610 630
+
*
*
*
+
* *
*
*
*
• In the case of Ex-certified measuring devices: Only open in a de-energized
state (once a delay of 10 minutes has elapsed after switching off the power
supply) or in environments which do not have a potentially explosive
atmosphere.
• Service connector:
– do not connect in potentially explosive atmospheres.
– only connect to Endress+Hauser service devices.
• Only open housing for a brief period. Avoid the penetration of foreign bodies,
moisture or contaminants.
• Replace defective seal/gaskets by original parts from Endress+Hauser only.
• If threads are damaged or defective, the measuring device must be repaired.
• If spacing is reduced or the dielectric strength of the measuring device cannot
be guaranteed during repair work, perform a test on completion of the work
(e.g. high-voltage test in accordance with the manufacturer's instructions).
• Risk of damaging electronic components! Ensure you have a working
environment protected from electrostatic discharge.
• The measuring device is energized. Danger: Risk of electric shock! Only open
the measuring device in a de-energized state.
• Observe the instructions for transporting and returning the device outlined in
the Operating Instructions.
590
...
610
...
The features below the numbers in
the grey boxes (> 500) are
optional features with single or
multiple value.
O*
*
*
71146085

Verwandte Anleitungen für Endress+Hauser Levelflex FMP50


Inhaltszusammenfassung für Endress+Hauser Levelflex FMP50
- Seite 3 1*, 2, 3 1 = Ausgebildete Fachkraft des Kunden, 2 = von Endress+Hauser autorisierter Servicetechniker, 3 = Endress+Hauser (Gerät an Hersteller zurücksenden) * = Es wird empfohlen, Reparaturen, welche an Geräten mit Bauartzulassung vorgenommen werden, von ausgebildeten Fachleuten durchführen zu lassen, die von E+H geschult wurden Sicherheitshinweise •...
- Seite 4 Levelflex FMP50, FMP51 Sondenstab / Sondenseil ohne Prozessanschluss Werkzeugliste 7mm, 3,5 Nm 7 mm, 5 Nm 10 mm, 10Nm 14 mm, 10/15 Nm 3 mm, 5 Nm (FMP50: GDJ, RDJ) (FMP51: GDJ,RDJ) (GGJ,RGJ,A**,C**) (teilbarer Sondenstab) (Kürzung Sondenseil) 2 Austausch Sondenstab / Sondenseil...