Inhaltsverzeichnis
Werbung
Verfügbare Sprachen
Verfügbare Sprachen
Quicklinks
Mod.
1092
DS1092-159
TELECAMERA COMPATTA DAY & NIGHT
700 TVL, OTTICA VARIFOCAL 2.8-12MM
700TVL DAY & NIGHT WEATHERPROOF CAMERA
2.8-12MM VARIFOCAL LENS BUILT-IN
WETTERGESCHÜTZTE 700TVL TAG & NACHT KAMERA
MIT EINGEBAUTEM 2,8-12MM VARIFOKAL OBJEKTIV
Sch./Ref. 1092/218A
MANUALE D'USO
USER MANUAL
BEDIENUNGSANLEITUNG
Werbung
Inhaltsverzeichnis

Verwandte Anleitungen für urmet domus 1092/218A


Inhaltszusammenfassung für urmet domus 1092/218A
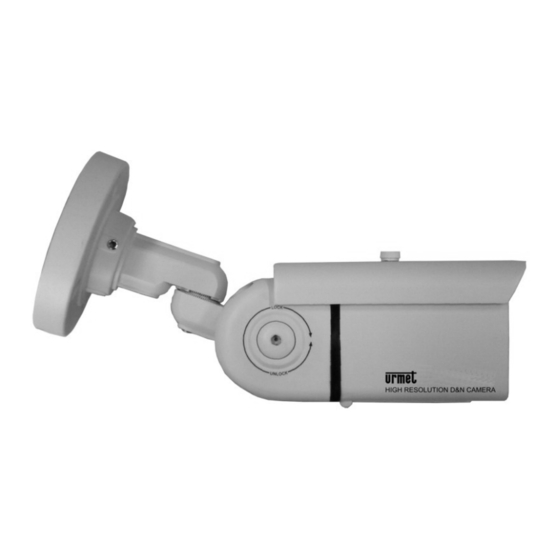
- Seite 1 1092 DS1092-159 TELECAMERA COMPATTA DAY & NIGHT 700 TVL, OTTICA VARIFOCAL 2.8-12MM 700TVL DAY & NIGHT WEATHERPROOF CAMERA 2.8-12MM VARIFOCAL LENS BUILT-IN WETTERGESCHÜTZTE 700TVL TAG & NACHT KAMERA MIT EINGEBAUTEM 2,8-12MM VARIFOKAL OBJEKTIV Sch./Ref. 1092/218A MANUALE D’USO USER MANUAL BEDIENUNGSANLEITUNG...
-
Seite 2: Caratteristiche Tecniche
ITALIANO PRECAUZIONI D’USO Assicurarsi dell’integrità dell’apparecchio dopo averlo tolto dall’imballo. • Prima di effettuare qualsiasi operazione di pulizia o di manutenzione disinserire l’apparecchio dalla • rete di alimentazione elettrica. Non usare prodotti spray per la pulizia dell’apparecchio. Controllare che la temperatura d’esercizio sia nei limiti indicati e che l’ambiente non sia •... -
Seite 3: Contenuto Della Confezione
CONTENUTO DELLA CONFEZIONE N° 1 Telecamera con staffa per installazione a parete. • N° 1 Chiave a brugola. • N° 1 Manuale d’uso. • Nota Bene La composizione degli accessori a corredo può essere variata senza alcun preavviso. NORME D’INSTALLAZIONE Evitare di puntare direttamente l’obiettivo contro il sole o contro luci intense, anche se la telecamera è... - Seite 4 INSTALLAZIONE Prima d’iniziare l’installazione, assicurarsi che tutte le unità da collegare non siano alimentate. Posizionare la base della staffa sulla superficie di appoggio per marcare i 4 fori da eseguire per il fissaggio tenendo in considerazione la posizione dell’asola pretranciata per il passaggio cavo posizionata sulla staffa (vedi foto).
- Seite 5 Effettuare la regolazione della lente per la ripresa voluta. Ⓑ Anteriore ∞ Ⓐ Ghiera di regolazione VARIFOCAL Ⓑ Ghiera di regolazione della messa a fuoco Ⓐ Posteriore Ruotare la vite di regolazione (Ⓐ) in senso orario o antiorario per allontanare o avvicinare la •...
-
Seite 6: Utilizzo Del Menu
UTILIZZO DEL MENU La telecamera1092/218A utilizza un menù a più livelli che consente di abilitare/disabilitare o variare le impostazioni. Per accedere al tasto che consente l’accesso al menù principale è necessario, a telecamera accesa e funzionante, svitare e rimuovere il coperchio posto nella parte inferiore della stessa, dietro il quale è situato il tasto di regolazione. - Seite 7 Opzione Valore Spiegazione Questa opzione consente di selezionare il tipo di lente DC ÷ MANUAL ÷ utilizzata (selezionare sempre MANUAL) e la regolazione LENS VIDEO della luminosità nel sotto-menu (Vedi oltre) Questa opzione consente di eseguire le regolazioni EXPOSURE relative all’esposizione della telecamera. (Vedi oltre) Questa opzione consente di selezionare un valore di ATW1 ÷...
- Seite 8 EXPOSURE– ESPOSIZIONE Questa funzione consente di variare le funzioni relative all’ottica della telecamera. Selezionando questa voce di menù si accede al seguente sottomenù: EXPOSURE SHUTTER AUTO MIDDLE DWDR RETURN SHUTTER– ESPOSIZIONE ELETTRONICA Selezionando SHUTTER è possibile impostare manualmente la velocità dello Shutter. Riducendo la velocità...
-
Seite 9: White Bal - Bilanciamento Del Bianco
WHITE BAL – BILANCIAMENTO DEL BIANCO Questa funzione consente di selezionare la modalità del bilanciamento del bianco. Selezionando questa voce di menù è possibile scegliere fra le opzioni ATW1, ATW2, AWC-SET e MANUAL. Opzione Valore Spiegazione Le modalità Auto Tracking White Balance permettono una regolazione automatica basata sulla rilevazione dell’ambiente circostante (esterno o interno) in due ATW1 e ATW2... - Seite 10 AREAL SEL AREA1 AREA STATE GAIN ■■■■■■█■■■042 HEIGHT ■■■■█■■■■■004 WIDTH ■■■■■■■█■■003 LEFT/RIGHT ■■■■■█■■■■006 TOP/BOTTOM ■■■■■■■█■■005 RETURN Opzione Valore Spiegazione Questa opzione consente di selezionare una delle 2 aree AREA SEL AREA1 ÷ AREA2 disponibili per la programmazione . Questa opzione consente di attivare (ON) o disattivare (OFF) l’area selezionata.
- Seite 11 DAY/NIGHT - VARIAZIONE DEL FUNZIONAMENTO DELLA TELECAMERA IN FUNZIONE DELLA VARIAZIONE DI LUCE PRESENTE SULLA SCENA La telecamera, che normalmente riprende le immagini a colori, in condizioni di scarsa illuminazione, commuta automaticamente il suo funzionamento da “colore” a “bianco/nero”, in questo modo viene ottimizzata la qualità...
- Seite 12 IR SMART – REGOLAZIONE DELL’ILLUMINAZIONE IR La funzione IR SMART, da utilizzarsi con l’opzione EXT e B/W, consente di selezionare un’area della scena ripresa nella quale la telecamera realizza un adeguamento automatico della luminosità. Selezionando ON si accede al seguente sottomenù: IR SMART IR GAIN ■■■■■■█■■■122...
- Seite 13 AUTO - AUTOMATICO Questa opzione seleziona la modalità automatica di commutazione colore-bianco/nero della telecamera ma senza l’uso sincronizzato dell’illuminazione infrarossa. Questa modalità può essere utilizzata solo con variazioni di luce non repentine. NON SI CONSIGLIA L’USO DI QUESTA OPZIONE. Selezionando AUTO si accede al seguente sottomenù NON OPERATIVO SU QUESTA TELECAMERA: D&N AUTO D-N LEVEL ■■■■■■█■■■240...
- Seite 14 SPECIAL– REGOLAZIONI SPECIALI Questa funzione consente di variare le funzioni relative ai parametri della telecamera. Selezionando questa voce di menu si accede al seguente sottomenu: SPECIAL CAM TITLE MOTION PRIVACY PARK LINE IMAGE ADJ COMM ADJ VERSION XX XX XX RETURN Opzione Valore...
- Seite 15 CAM TITLE–NOME TELECAMERA Questa funzione consente di “nominare” la telecamera e di visualizzare l’identificativo a monitor nella posizione preferita. Selezionando ON si accede al seguente sottomenù nel quale è possibile nominare la telecamera. ABCDEFGHIJKLMNO PQRSTUVWXYZabcd efghijklmnopqrs tuvwxyz01234567 89 ()<>-/#*!?,. CLR POS END _ _ _ _ _ _ _ _ _ _ _ _ _ _ _ _ _ _ _ _ _ _ Utilizzare il tasto premendolo nelle varie posizioni per spostarsi sopra il carattere voluto.
- Seite 16 Opzione Valore Spiegazione La scena ripresa viene suddivisa in settori che possono AREA1 ÷ AREA2 ÷ AREA SEL. essere attivati dall’utente. (Vedi oltre) AREA3 ÷ AREA4 Selezionando questa opzione è possibile attivare (ON) o disattivare (OFF) al movimento, le aree selezionate AREA STATE ON ÷...
- Seite 17 PRIVACY – OSCURAMENTO DI UNA O PIU PARTI DELLA SCENA INQUADRATA. La funzione PRIVACY permette di specificare fino a otto zone di riservatezza (privacy zone) che mascherano determinate aree della scena alla vista dall’operatore. Una privacy zone appare sul monitor come un rettangolo di dimensioni, colore e livello di trasparenza precedentemente impostato dall’utente.
-
Seite 18: Image Adj
IMAGE ADJ Questa funzione consente di accedere al sottomenù relativo alle modalità di visualizzazione delle immagini. Selezionando questa voce del menù si accede al seguente sottomenù: IMAGE ADJ. LENS SHAD 2DNR MIRROR FONT COLOR CONTRAST ■■■■■■█■■143 SHARPNESS ■■■■█■■■■020 DISPLAY NEG.IMAGE RETURN Opzione Valore... -
Seite 19: Lcd Adjust
LCD (configurazione di default) Questa opzione predispone la telecamera per la miglior resa con utilizzo di un monitor LCD. Selezionando questa opzione si accede al seguente sottomenù: LCD ADJUST GAMMA 0.55 PED LEVEL ■■■■█■■■■■028 COLOR GAIN ■■■■■■■█■■199 RETURN Opzione Valore Spiegazione Impostazione del valore di Gamma (default = 55) GAMMA... -
Seite 20: Pulizia Del Dispositivo
USER Questa opzione consente di personalizzare la tonalità dei colori in base alle proprie preferenze. Selezionando questa opzione si accede al seguente sottomenù: USER ADJ. GAMMA 0.45 PED LEVEL ■■■■█■■■■■028 COLOR GAIN ■■■■■■■█■■176 RETURN Opzione Valore Spiegazione Impostazione del valore di Gamma GAMMA USER ÷... -
Seite 21: Technical Specification
ENGLISH PRECAUTIONS Make sure that the device is intact after removing it from the package. • Disconnect the device from the mains before cleaning or maintenance. Do not use spray products to • clean the device. Check that the working temperature is within the indicated range and that the environment is not •... -
Seite 22: Accessories Provided
ACCESSORIES PROVIDED N° 1 Camera with bracket for wall mounting. • N° 1 wall mounting bracket. • N° 1 BNC cable for auxiliary output • Instruction manual. • Important note: Accessories may be changed without prior notice. INSTALLATION SPECIFICATIONS Avoid pointing the lens directly towards the sun or intense sources of light also when the camera is •... - Seite 23 INSTALLATION Before installation, make sure that all devices to be connected are not powered. Place the bracket base on the supporting surface to mark the 4 fixing holes. Consider the position of the slot placed on the bracket, used for the passage of the cable (see photo). Use the base as drilling template.
- Seite 24 Unscrew the screw on the bottom of the camera to access to the adjustment screws and to the OSD menu button. Unscrew to access to the settings Perform lens adjustment for the desired image. ∞ Ⓑ Front Ⓐ VARIFOCAL adjustment ring Ⓑ...
- Seite 25 MENU USE The camera ref. 1092/218A uses a multi-level menu that allows to enable/disable or change camera settings. To access the key used to access the main menu is needed, a camera up and running, unscrew and remove the cover located on the bottom side of the room, adjusting the button is behind the lid.
- Seite 26 Option Value Description This option allows to select the type of lens (always select DC ÷ MANUAL ÷ MANUAL) and to adjust the image brightness in its sub- LENS VIDEO menu (See below) This option allows to make adjustments regarding the EXPOSURE exposure of the camera.
- Seite 27 EXPOSURE This function lets you vary the options of the camera optics. Select this menu item to access the following submenus: EXPOSURE SHUTTER AUTO MIDDLE DWDR RETURN SHUTTER Selecting SHUTTER you can manually set the shutter speed; reducing the speed of the shutter the sensitivity of the CCD gets reduced, but it extends the capabilities of rapid movement to shoot scenes.
-
Seite 28: Blc - Back Light Compensation
WHITE BAL – WHITE BALANCING This function is used to select white balancing mode. Select this menu item to choose among modes. ATW1, ATW2, AWC-SET MANUAL Option Value Description Auto Tracking White Balance modes allow an automatic adjustment based on surrounding environment detection ATW1 and ATW2 (outdoor or indoor) in 2 different configurations, to be chosen according to the image result. - Seite 29 Option Value Description This option allows to select one of the 2 areas available AREA SEL AREA1 ÷ AREA2 for programming. This option allows to enable (ON) or disable (OFF) the selected area (it is possible to enable or disable only the AREA STATE ON ÷...
- Seite 30 DAY/NIGHT – CAMERA OPERATION CHANGE ACCORDING TO VARIATION OF LIGHT PRESENT IN THE SCENE The camera usually captures color images, but under poor light conditions it automatically switches its operation mode from “color” to “black/white”. In this way the captured image quality is optimized. Selecting DAY / NIGHT, you can choose from the options EXT, AUTO (automatic), Color and B / W (black and white).
- Seite 31 IR SMART – IR LIGHTING ADJUSTING IR SMART function, to be used with EXT and B/W options, allows to select an area of the scene, in which the camera performs an automatic brightness adjustment, in presence of IR lighting. Select ON to access the following submenu: IR SMART IR GAIN ■■■■■■█■■■170...
- Seite 32 DPC (Dead Pixel Compensation – damaged pixel compensation) This function allow to repair CCD single pixels under low light condition, reducing the brightness of the too bright pixels. Press the button “START”, the message “Cover the lens then press Enter key” will be displayed. Cover the lens with a black lid to prevent light from passing through.
- Seite 33 SPECIAL– SPECIAL ADJUSTMENTS This function allows to change the functions concerning camera parameters. Select this menu item and press the button OPEN to gain access to the following submenu: SPECIAL CAM TITLE MOTION PRIVACY PARK LINE IMAGE ADJ COMM ADJ VERSION 21 01 10 RETURN...
- Seite 34 CAM TITLE– CAMERA NAME This option allows to give a name to the camera and display this name on the desired position of the monitor. Select ON to access the following submenu, where it is possible to assign a name to the camera. ABCDEFGHIJKLMNO PQRSTUVWXYZabcd efghijklmnopqrs...
- Seite 35 Option Value Description The scene is split up into areas that can be activated by AREA1 ÷ AREA2 ÷ AREA SEL. the user (see below) AREA3 ÷ AREA4 Select this option to enable (ON) or disable (OFF) motion AREA STATE ON ÷...
- Seite 36 PRIVACY – MASKING ONE OR MORE ZONES OF THE SCENE The PRIVACY function allows to define up to eight privacy zones that mask specific areas. A privacy zone is displayed on the monitor as a rectangle, with dimensions, colour and transparence level previously set by the user.
- Seite 37 IMAGE ADJ This function allows to access the submenu concerning image display mode. Select this menu item to access the following submenu: IMAGE ADJ. LENS SHAD 2DNR MIRROR FONT COLOR CONTRAST ■■■■■■█■■125 SHARPNESS ■■■■█■■■■025 DISPLAY NEG.IMAGE RETURN Option Value Description If active, this option perform a brightness correction on LENS SHAD ON ÷...
- Seite 38 LCD (default configuration) This option allows to obtain the best performance of the camera when used with an LCD monitor. Select this option to access the following submenu: LCD ADJUST GAMMA 0.55 PED LEVEL ■■■■█■■■■■028 COLOR GAIN ■■■■■■■█■■186 RETURN Option Value Description Gamma value setting (default = 55)
-
Seite 39: Cleaning The Device
USER This option allow to custom the colour hue according to preference. Select this option to access the following submenu: USER ADJ. GAMMA 0.55 PED LEVEL ■■■■█■■■■■028 COLOR GAIN ■■■■■■■█■■128 RETURN Option Value Description Gamma value setting GAMMA USER ÷ 1.00 Change the value only for shooting in special conditions PED LEVEL 000 ÷... -
Seite 40: Technische Eigenschaften
DEUTSCH VORSICHTSMASSNAHMEN Nach dem Auspacken des Gerätes muss sichergestellt werden, dass es sich in einwandfreiem • Zustand befindet. Ausführen jeglicher Reinigungs- oder Wartungsarbeiten, Gerät • Stromversorgungsnetz trennen. Für die Reinigung des Geräts keine Sprays verwenden. Wenn extern installiert, ist die Positionierung in einer geschützten Umgebung vorzuziehen, d.h., nicht •... -
Seite 41: In Der Lieferung Enthaltenes Zubehör
IN DER LIEFERUNG ENTHALTENES ZUBEHÖR Kamera mit Befestigung für Wandmontage. • Wandhalter. • Inbusschlüssel • Koaxialkabel mit BNC-Anschluss für den Hilfs-Videoausgang • Bedienungsanleitung. • Beachten: Zubehör kann ohne vorherige Ankündigung geändert werden. INSTALLATIONSBESTIMMUNGEN Vermeiden Sie es, das Objektiv direkt gegen die Sonne oder intensive Lichteinstrahlung zu richten, •... -
Seite 42: Einstellschraube
INSTALLATION Vor der Installation sicherstellen, dass alle anzuschließenden Einheiten von der Versorgung getrennt sind. Die Wandhalterung an der gewählten Position auflegen und die Löcher am Befestigungsort markieren. Bitte bei Festlegen der Bohrlöcher auf den Kabelaustritt der Kamera achten. Die Kamera an der festgelegten Position mit vier Schrauben ggf. Dübel (nicht im Lieferumfang) befestigen. - Seite 43 Die Schraube auf der Unterseite der Kamera lösen um an die Bedientaste des OSD-Menüs zu gelangen. Die Schraube lösen um an die Bedienelemente für die Fokussierung und des OSD-Menü zu gelangen. Einstellung des Objektives für die gewünschte Aufnahme vornehmen. ∞ Ⓐ...
-
Seite 44: Nutzung Des Kameramenüs
NUTZUNG DES KAMERAMENÜS Die Kamera Typ 1092/218A verfügt über ein Multi-Level Menü, in dem es möglich verschiedenste Kameraeinstellungen vorzunehmen. Um Zugriff auf die Menütaste zu bekommen, die Abdeckung auf der Rückseite der Kamera abschrauben. Hinweis: Zur Erleichterung der Menüsteuerung wurde die Taste mit einer Joystick-Funktion ausgeführt. -
Seite 45: Beschreibung
Option Wert Beschreibung DC ÷ MANUAL ÷ Auswahl immer MANUAL LENS VIDEO Gestattet die Optimierung der Belichtungseinstellungen EXPOSURE (siehe unten) Gestattet die Einstellung des Weißabgleichs ATW1 ÷ ATW2 ÷ WHITE BAL. (siehe unten) AWC-SET ÷ MANUAL Gestattet die Aktivierung der Gegenlichtkompensation BACKLIGHT OFF ÷... - Seite 46 EXPOSURE (BELICHTUNG) Diese Funktion erlaubt die Einstellung verschiedenster Optionen der Kameraoptik. Bei Auswahl dieses Menüpunktes können, wie unten beschrieben, folgende Einstellungen ausgeführt werden: EXPOSURE SHUTTER AUTO MIDDLE DWDR RETURN SHUTTER (BLENDE) Bei der Auswahl SHUTTER kann die Blende auch manuell eingestellt werden, d. h. Reduzieren der Blendengeschwindigkeit bewirkt, dass die Sensibilität des CCD-Sensors heruntergesetzt wird, aber auch eine mögliche Erhöhung von schnellen Bewegungen im Bild zulässt.
-
Seite 47: Blc - Back Light Compensation (Gegenlichtkompensation)
WHITE BAL – WHITE BALANCING This function is used to select white balancing mode. Select this menu item to choose among modes. ATW1, ATW2, AWC-SET MANUAL Option Wert Beschreibung Auto Tracking White Balance: Automatischer Abgleich indem eine breitere Farbpalette analysiert wird (Außen ATW1 and ATW2 oder Innen). - Seite 48 Option Wert Beschreibung Gestattet die Auswahl von einem der zwei Bereiche für AREA SEL AREA1 ÷ AREA2 die Programmierung. Gestattet die Aktivierung (ON) oder Deaktivierung (OFF) des Bereichs 2 (AREA 2). Der Bereich 1 (AREA 1) ist AREA STATE ON ÷ OFF immer aktiviert bei BLC ON und deaktiviert bei BLC OFF Gestattet die Anpassung des Helligkeitswertes im GAIN...
-
Seite 49: Day/Night - Änderung Der Bilddarstellung Bei Änderung Der Lichtverhältnisse
DAY/NIGHT – ÄNDERUNG DER BILDDARSTELLUNG BEI ÄNDERUNG DER LICHTVERHÄLTNISSE Die Kamera erfasst normalerweise Farbbilder, aber unter schlechten Lichtbedingungen schaltet die Kamera automatisch von „Farbe“ auf „Schwarz-Weiß“ um. Auswahl DAY / NIGHT um unter folgenden Optionen auszuwählen: EXT, AUTO (automatisch), Color (Farbe) und B / W (schwarz/weiß). -
Seite 50: Ir Smart - (Einstellung Ir Licht)
IR SMART – (EINSTELLUNG IR LICHT) Die Funktion IR SMART wird bei den Optionen EXT und B/W genutzt, sie gestattet die Auswahl eines Bereichs im Bild bei dem eine automatische Helligkeitsanpassung mit eingeschaltetem IR-Licht ausgeführt werden soll. Auswahl ON um ins folgende Untermenü zu gelangen: IR SMART IR GAIN ■■■■■■█■■■170... - Seite 51 AUTO Diese Option wählt den automatischen Umschaltmodus von Farbe zu Schwarz/Weiß, ohne das synchronisierte Einschalten der IR-LEDs. Dieser Modus kann nur bei kleineren Lichtänderungen eingesetzt werden. DIE NUTZUNG DIESER OPTION WIRD DAHER NICHT EMPFOHLEN! Auswahl AUTO um ins folgende Untermenü zu gelangen – NICHT FUNKTIONSFÄHIG: D&N AUTO D-N LEVEL ■■■■■■█■■■033...
-
Seite 52: Special- Special Adjustments (Spezialeinstellungen)
SPECIAL– SPECIAL ADJUSTMENTS (SPEZIALEINSTELLUNGEN) Diese Funktion gestattet die Änderungen von Funktionen von speziellen Kameraparametern. Auswahl des Menüpunktes und die Schaltfläche OPEN betätigen um ins folgende Untermenü zu gelangen: SPECIAL CAM TITLE MOTION PRIVACY PARK LINE IMAGE ADJ COMM ADJ VERSION 21 01 10 RETURN Option... -
Seite 53: Motion - (Bewegungserkennung)
CAM TITLE– (KAMERA NAME) Diese Option gestattet die Vergabe eines Kameranamens und die Bestimmung der Position des Namens im Bild. Auswahl ON um ins folgende Untermenü der Namensvergabe zu gelangen: ABCDEFGHIJKLMNO PQRSTUVWXYZabcd efghijklmnopqrs tuvwxyz01234567 89 ()<>-/#*!?,. CLR POS END _ _ _ _ _ _ _ _ _ _ _ _ _ _ _ _ _ _ _ _ _ _ Die Menü-Taste auf der Rückseite nach links oder rechts betätigen um zum gewünschten Zeichen zu steuern. -
Seite 54: Area Sel - (Auswahl Der Bewegungsbereichs)
Option Wert Beschreibung Die Bewegungserkennung kann in vier Bereiche eingeteilt AREA1 ÷ AREA2 ÷ AREA SEL. werden (siehen unten). AREA3 ÷ AREA4 Auswahl (ON) zur Aktivierung oder (OFF) zur Deaktiverung der Bewegungserkennung des gewählten AREA STATE ON ÷ OFF Bereichs. Diese Funktion gestattet die Festlegung der Höhe des HEIGHT 000 ÷... -
Seite 55: Privacy - (Privatzonenmaskierung)
PRIVACY – (PRIVATZONENMASKIERUNG) Die Funktion der Privatzonemaskierung gestattet die Überblendung von bestimmten Zonen im Bild. Es können bis zu acht Privatzonen definiert werden. Eine Privatzone wird im Bild rechteckig mit der benutzerdefinierten Abmessung, Farbe und Transparenz dargestellt. BEMERKUNGEN ZUR PRIVATZONE Es wird empfohlen bei Definierung der Privatzonen, diese leicht größer festzulegen. -
Seite 56: Image Adj (Bildeinstellungen)
IMAGE ADJ (BILDEINSTELLUNGEN) Diese Funktion gestattet die Änderungen des Bildanzeigemodus. Auswahl des Menüpunktes um in das folgende Untermenü zu gelangen: IMAGE ADJ. LENS SHAD 2DNR MIRROR FONT COLOR CONTRAST ■■■■■■█■■125 SHARPNESS ■■■■█■■■■025 DISPLAY NEG.IMAGE RETURN Option Wert Beschreibung Gestattet eine Helligkeitskorrektur in den Bildecken. LENS SHAD ON ÷... - Seite 57 LCD (Standard Konfiguration) Diese Option gestattet die Anpassung des Bildes an einen angeschlossenen LCD-Monitor. Auswahl dieser Option um in das folgende Untermenü zu gelangen: LCD ADJUST GAMMA 0.55 PED LEVEL ■■■■█■■■■■028 COLOR GAIN ■■■■■■■█■■186 RETURN Option Wert Beschreibung Einstellung Gammawert (Standard = 55) GAMMA USER ÷...
-
Seite 58: Reinigung Des Gerätes
USER Diese Option gestattet die Einstellung einer benutzerdefinierten Farbtonabweichung für das angeschlossene Anzeigegerät. Auswahl dieser Option um ins folgende Untermenü zu gelangen: USER ADJ. GAMMA 0.55 PED LEVEL ■■■■█■■■■■028 COLOR GAIN ■■■■■■■█■■128 RETURN Option Wert Beschreibung Einstellung Gammawert GAMMA USER ÷ 1.00 Diesen Wert nur Ändern, wenn spezielle Lichtbedingungen herrschen oder wenn ein Monitor PED LEVEL... - Seite 59 DS 1092-159...
- Seite 60 DS1092-159 URMET S.p.A. Area tecnica 10154 TORINO (ITALY) servizio clienti +39. 011.23.39.810 VIA BOLOGNA 188/C http://www.urmet.com Telef. +39. 011.24.00.000 (RIC.AUT.) e-mail: info@urmet.com +39. 011.24.00.300 - 323 DS1092-159 MADE IN CHINA...