Herunterladen Inhalt Inhalt Diese Seite drucken

Werbung

Verfügbare Sprachen

Verfügbare Sprachen

Montage und Bedienungsanleitung
Installation, use and maintenance instructions
Instrucciones de instalación, montaje y funcionamiento
Öl-Gebläsebrenner
D
Light oil burners
GB
Quemadores de gasóleo
E
Einstufiger Betrieb
One stage operation
Funcionamiento de una sola llama
CODE - CÓDIGO
3739370 - 3739380
MODELL - MODEL
MODELO
RG3F
TYPE - TIPO
393T1
2902862 (4) - 03/2012

Werbung

Inhaltsverzeichnis
loading

Inhaltszusammenfassung für Riello 393T1

  • Seite 1 Instrucciones de instalación, montaje y funcionamiento Öl-Gebläsebrenner Light oil burners Quemadores de gasóleo Einstufiger Betrieb One stage operation Funcionamiento de una sola llama MODELL - MODEL CODE - CÓDIGO TYPE - TIPO MODELO 3739370 - 3739380 RG3F 393T1 2902862 (4) - 03/2012...
  • Seite 2: Konformitätserklärung

    KONFORMITÄTSERKLÄRUNG RIELLO S.p.A. erklärt unter ihrer Haftung, dass der Brenner der Serie Gulliver Modell RG3F mit folgenden Europäischen Richtlinien konform ist: - EWG-Richtlinie 2006/95/CE – Elektrisches Material - EWG-Richtlinie 2006/42/CE – Maschinenrichtlinie - EWG-Richtlinie 2004/108/CE – Elektromagnetische Verträglichkeit und mit folgenden Technischen Normen konform sind: EN 267.
  • Seite 3: Inhaltsverzeichnis

    Zur Kombination mit Warmlufterzeugern müssen in Deutschland (WLE gemäß DIN 4794) das Steuergerät mit dem Typ Riello 550 SMD (die Brücke entfernen) und der Flammenfühler mit dem verstärkten Typ aus- gewechselt werden (beide voll austauschbar). Mit diesem Steuergerät kann in Kombination mit dem "Kit Fernentriegelung"...
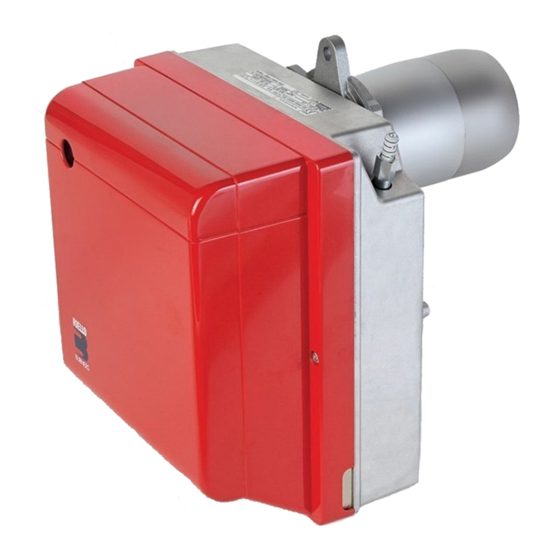
  • Seite 4: Technische Merkmale

    TECHNISCHE MERKMALE 2.1 TECHNISCHE DATEN 393T1   Durchsatz - Brennerleistung 15 kg/h – 178 kW  Brennstoff Heizöl-EL, Viskosität 4 6 mm /s bei 20°C Einphasig, Einphasig, Stromversorgung ± ± 50Hz 220/230 V 60Hz 220/230 V Stromaufnahme 1,7 A...
  • Seite 5: Abmessungen

    2.3 ABMESSUNGEN D5353 2.4 ARBEITSFELD Der Arbeitsfeld ist in Übereinstimmung mit den Vorschriften der Norm EN 267 festgelegt (bis 1,9 zum - 0,3 mbar). Der Brenner ist nach den von Norm EN 746-2 für das ganze ausgerüstete Gerät vorgesehenen Genehmi- gungsbedingungen für einen Betrieb mit Brennkammer auf Unterdruck (bis zu - 2 mbar) anwendbar.
  • Seite 6: Installation

    INSTALLATION DIE INSTALLATION DES BRENNERS MUSS IN ÜBEREINSTIMMUNG MIT DEN ÖRTLICHEN GESETZEN UND VORSCHRIFTEN AUSGEFÜHRT WERDEN. 3.1 EINBAU VOM HEIZKESSEL Die Schraube und die beiden Muttern am Flansch (1) montieren, (siehe Abb. 3).  Falls erforderlich, die Bohrungen der Isolierdichtung (4) erweitern. ...
  • Seite 7: Brennstoffversorgung

    3.3 BRENNSTOFFVERSORGUNG Die Ölschläuche werden mit den Winkelanschlüssen an der Ölpumpe montiert, wobei die Ölschläuche nach links oder nach rechts aus dem Brenner herausgeführt werden können. Es muß jeweils die Halteschelle (1) bzw. der Verschlußwinkel (2) gewechselt werden. (Siehe Abb. 5). Abb.
  • Seite 8: Unter Druck Stehende Einrohr-Anlagen

    IN DEUTSCHLAND NICHT UNTER DRUCK STEHENDE EINROHR-ANLAGEN (Abb. 7) ZULÄSSIGE ANLAGE Die unter Druck stehenden Einrohr-Anlagen haben einen positiven Druck des Brennstoffs am Brennereingang. Abb. 7 Der Tank liegt gewöhnlich höher als der Brenner oder Brennstoff-Pumpsysteme außerhalb des Brenners. Für die Anlage in Abb. 7, sind die ungefähren Höchstlängen der Zuleitung in Abhängigkeit vom Höhenunterschied, der Länge und des Durchmessers der Kraftstoffleitung in der Ta- belle angegeben.
  • Seite 9: Elektrisches Verdrahtungsschema

    3.5 ELEKTRISCHES VERDRAHTUNGSSCHEMA ANMERKUNGEN: WICHTIGER HINWEIS – Leiterdurchmesser: min. 1 mm NULLEITER NICHT MIT DER PHASE VERWECHSELN (Außer im Falle anderslautender Angaben durch Normen und örtliche Gesetze). – Die vom Installateur ausgeführten elektrischen 50/60Hz 220/230V Verbindungen müssen den lokalen Bestimmu- ngen entsprechen.
  • Seite 10: Betrieb

    BETRIEB 4.1 EINSTELLUNG DER BRENNERLEISTUNG In Konformität mit der Wirkungsgradrichtlinie 92/42/EWG müssen die Anbringung des Brenners am Heizkessel, die Einstellung und die Endprüfung unter Beachtung der Betriebsanleitung des Heizkessels ausgeführt werden, einschließlich Kontrolle der Konzentration von CO und CO in den Abgasen, ihrer Temperatur und der durchschnittlichen Wasser- oder Lufttemperatur des Heizkessels.
  • Seite 11: Elektrodeneinstellung

    Die Düse (11) auswechseln und korrekt anschrauben, anziehen wie in  Abbildung 11 Seite 8 gezeigt. D5684 ACHTUNG Für die erneute Montage des Düsenstocks (1, Abb. 11) die Mutter (3) mit einem Anzugsmoment von 15 Nm anschrauben, ohne diese bis zum An- schlag zu bringen , wie in der seitlichen Abbildung gezeigt.
  • Seite 12: Betriebsablauf

    4.7 BETRIEBSABLAUF Störabschaltung wegen Nichtzündung Normal Thermostat Motor Zündtransformator Ölventil Flamme Störlampe D5029 Wird durch die Kontrollampe am Steuer- und Überwachungsgerät signalisiert (3, Abb. 1, S. 1). WARTUNG Der Brenner muß in regelmäßigen Zeitabständen und in Übereinstimmung mit den örtlichen Gesetzen und Vorschriften vom Kundendienst gewartet werden.
  • Seite 13: Störungen / Abhilfe

    STÖRUNGEN / ABHILFE Nachfolgend finden Sie einige denkbare Ursachen und Abhilfemöglichkeiten für Störungen, die den Betrieb des Brenners beeinflussen oder einen nicht ordnungsgemäßen Betrieb des Brenners verursachen könnten. In den meisten Fällen führt eine Störung zum Aufleuchten der Kontrolleuchte in der Entstörtaste des Steuergeräts (3, Abb.
  • Seite 15: Burner Description

    If the burner is to be combined with a hot air generator in Germany (WLE according to DIN 4794), the con- trol box must be replaced with a Riello 550 SMD control box (remove the bridge), and the flame sensor must be replaced with the amplified type (both fully interchangeable).
  • Seite 16: Technical Data

    TECHNICAL DATA 2.1 TECHNICAL DATA TYPE 393T1 – – Output - Thermal power 15 kg/h – 178 kW  Fuel Light oil, viscosity 4 – 6 mm /s at 20 °C Single phase, Single phase, Electrical supply ± ± 50Hz 220/230 V 60Hz 220/230 V Run current 1.7 A...
  • Seite 17: Overall Dimensions

    2.3 OVERALL DIMENSIONS D5353 2.4 FIRING RATE Firing rate has been determined in conformity with the provision of standard EN 267 (from 1.9 to - 0.3 mbar). In addition, burner can be applied for operation with the combustion chamber featuring negative pressure (up to - 2 mbar) according to the approval terms provided for in standard EN 746-2 for the whole unit com- plete with equipment.
  • Seite 18: Heat Generator Fixing

    INSTALLATION THE BURNER MUST BE INSTALLED IN CONFORMITY WITH LEGISLATION AND LOCAL STANDARDS. 3.1 HEAT GENERATOR FIXING Put on the flange (1) the screw and two nuts, (see fig. 3).  Widen, if necessary, the insulating gasket holes (4).  Fix the flange (1) to the heat generator door (3) using screws (5) and (if necessary) the nuts (2) inter- ...
  • Seite 19: Fuel Supply

    3.3 FUEL SUPPLY The burner is designed to allow entry of the oil supply pipes on either side. Depending on the oil supply pipes position (to the right or to the left hand side of the burner) the fixing plate (1) and closing plate (2) should be reversed, (see fig.
  • Seite 20: Priming Pump

    SYSTEM NOT PERMITTED PRESSURISED ONE PIPE SYSTEMS (fig. 7) IN GERMANY Pressurised systems have a positive fuel pressure on in- take to the burner. Usually the tank is higher than the Fig. 7 burner, or the fuel pumping systems are on the outside of the heat generator.
  • Seite 21: Electrical Wiring

    3.5 ELECTRICAL WIRING NOTES: WARNING – Wires of min. 1 mm section. DO NOT EXCHANGE NEUTRAL WITH PHASE (Unless requested otherwise by local standards and legislation). – The electrical wiring carried out by the installer 50/60Hz 220/230V must be in compliance with the rules in force in PE L the Country.
  • Seite 22: Combustion Adjustment

    WORKING 4.1 COMBUSTION ADJUSTMENT In conformity with Efficiency Directive EEC/92/42, the installation of the burner to the heat generator, setting and testing must all be performed in respect of the instruction manual for the heater, including the controls on the concentration of CO and CO in the flue gases, the flue gas temperature and the average water and air temperatures in the generator.
  • Seite 23: Pump Pressure

    Replace nozzle (11) and screw new one on properly, holding it as illus-  trated in figure 11 at page 8. D5684 ATTENTION When refitting the nozzle-holder assembly (1, fig. 11), screw on nut (3) without tightening it all the way with a driving torque of 15 Nm, as illus- trated on the right.
  • Seite 24: Burner Start-Up Cycle

    4.7 BURNER START-UP CYCLE Normal Lock-out due to failure to light Thermostat Motor Ignition transformer Valve Flame Lock-out lamp D5029 Lock out is indicated by a lamp on the control box (3, fig. 1, page 1). MAINTENANCE The burner requires periodic maintenance carried out by a qualified and authorised technician in conform- ity with legislation and local standards.
  • Seite 25 FAULTS / SOLUTIONS Here below you can find some causes and the possible solutions for some problems that could cause a fail- ure to start or a bad working of the burner. A fault usually makes the lock-out lamp light which is situated inside the reset button of the control box (3, fig.
  • Seite 27: Descripción Del Quemador

    Para combinar el generador con generadores de aire caliente en Alemania (WLE según DIN 4794) hay que sustituir la caja de control por la de tipo Riello 550 SMD (quitar el puente) y el sensor llama por el tipo am- plificado (ambos intercambiables totalmente).
  • Seite 28: Datos Técnicos

    DATOS TÉCNICOS 2.1 DATOS TÉCNICOS TIPO 393T1   Caudal - Potencia térmica 15 kg/h – 178 kW  Combustible Gasóleo, viscosidad 4 6 mm /s a 20 °C Monofásica, Monofásica, Alimentación eléctrica ± ± 50Hz 220/230V 60Hz 220/230V 1,7A absorbidos...
  • Seite 29: Campo De Trabajo

    2.3 DIMENSIONES D5353 2.4 CAMPO DE TRABAJO Los campos de trabajo han sido definidos según las disposiciones de la norma EN 267 (de 1,9 a - 0,3 mbar). El quemador puede utilizarse para funcionamiento con cámara de combustión bajo vacío (hasta - 2 mbar), según las condiciones de aprobación previstas por la norma EN 746-2 para el aparato entero equipado.
  • Seite 30: Posición De Funcionamiento

    INSTALACIÓN EL QUEMADOR SE DEBE INSTALAR DE CONFORMIDAD CON LAS LEYES Y NORMATIVAS LOCALES. 3.1 FIJACIÓN AL GENERADOR DE CALOR Introducir en la brida (1) el tornillo y las dos tuercas, (ver fig. 3).  Alargar, si es necesario, el orificio de la junta aislante (4). ...
  • Seite 31: Instalación Hidráulica

    3.3 ALIMENTACIÓN DEL COMBUSTIBLE El quemador va equipado para recibir los tubos de alimentación de combustible por ambos lados. Según si la salida de los flexibles es a la derecha o a izquierda, puede ser necesario cambiar el emplaza- miento de la placa de fijación (1) con la de obturación (2), (ver fig. 5). Fig.
  • Seite 32: Cebado De La Bomba

    INSTALACIÓN NO PERMITIDA INSTALACIONES DE UN TUBO BAJO PRESIÓN (fig. 7) EN ALEMANIA Las instalaciones de un tubo bajo presión presentan una presión del combustible positiva en la entrada del quemador. Fig. 7 Generalmente tienen el depósito más alto que el quemador o sistemas de bombeo con combustible afuera del quemador.
  • Seite 33: Conexiones Eléctricas

    3.5 CONEXIONES ELÉCTRICAS NOTAS: ATTENCIÓN – Sección de los conductores: 1 mm mín. NO INVERTIR EL NEUTRO CON LA FASE (Salvo indicaciones diferentes de normas y leyes locales). – Las conexiones eléctricas efectuadas por el 50/60Hz 220/230V instalador deben cumplir la normativa vigente en PE L el país.
  • Seite 34 FUNCIONAMENTO AJUSTE DE LA COMBUSTIÓN De conformidad con la Directiva Rendimientos 92/42/CEE, la aplicación del quemador al generador de calor, la regulación y el ensayo deben ser efectuados observando el manual de instrucciones del mismo generador, in- cluido el control de la concentración de CO y CO en el humo, su temperatura y aquella media del agua o del aire del generador.
  • Seite 35: Regulación De Los Electrodos

    estabilizador (10) del grupo portaboquilla (1). Sustituya la boquilla (11) y enrósquela correctamente, apretándola como  se muestra en la figura 11, pág. 8. D5684 ATENCIÓN Al reinstalar el grupo portaboquilla (1, fig. 11), enrosque la tuerca (3) sin apretarla hasta el fondo, con un par de torsión de 15 Nm, como se mues- tra en la figura de aquí...
  • Seite 36 4.7 CICLO DE PUESTA EN MARCHA Normal Bloqueo por falta de encendído Termostato Motor Transf. encendido Electroválvula Llama Señal bloqueo D5029 El bloqueo está señalizado por una lámpara en la caja de control (3, fig. 1, pág. 1). MANTENIMIENTO El quemador precisa un mantenimiento periódico que debe ser ejecutado por personal especializado y de conformidad con las leyes y normativas locales.
  • Seite 37 ANOMALÍAS / SOLUCIÓNES En la lista siguiente se ofrecen algunas causas de anomalías o averías y sus soluciones, situaciones que se traducen en un funcionamiento anormal del quemador. Una anomalía, en la gran mayoría de los casos, da lugar a que se encienda la señal del botón de rearme de la caja de control (3, fig.
  • Seite 40 RIELLO S.p.A. I-37045 Legnago (VR) Tel.: +39.0442.630111 http:// www.riello.it http:// www.rielloburners.com Änderungen vorbehalten! - Subject to modifications - Con la posibilidad de modificación...

Diese Anleitung auch für:

Gulliver rg3f

Inhaltsverzeichnis