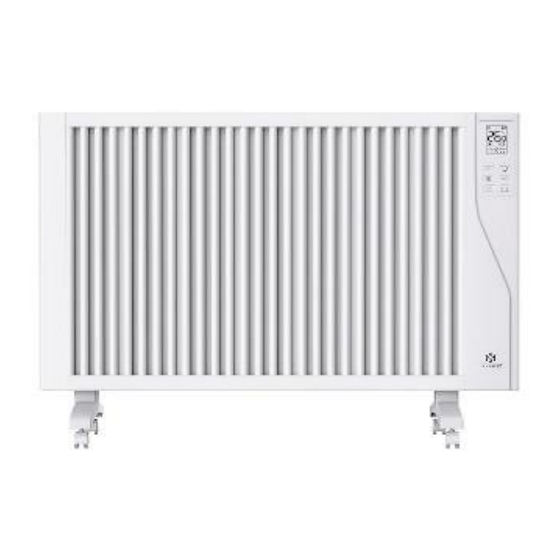
Seite 1
Bedienungsanleitung/instruction manual manuel d'instructions/ manuale d'istruzioni/ manual de instrucciones K-KR-5148 www.eshopping.de Hergestellt für Dilaw Warehouse GmbH // Fuggerstraße 15a // 48165 Münster // Germany...
Seite 2
Liebe Kundin, Lieber Kunde, danke, dass Sie sich für unser Produkt entschieden haben. Bitte lesen Sie die Bedienungsanleitung aufmerksam durch, bevor Sie das Produkt montieren oder benutzen, um Schäden durch nicht sachgemäßen Gebrauch zu vermeiden. Sollten Sie dieses Produkt an Dritte weitergeben, muss diese Bedienungsanleitung mit ausgehändigt werden. Dear Customer, Thank you for choosing our product.
Seite 3
Bitte lesen Sie das Handbuch vor dem Gebrauch sorgfältig durch Sicherheitshinweise • Lesen Sie das Handbuch, bevor Sie das Heizgerät benutzen. Bewahren Sie die Anleitung auf und stellen Sie sicher, dass sie beim Heizgerät verbleibt, wenn Sie es an einen neuen Besitzer weitergeben. •...
Seite 4
• Dieses Heizgerät ist nicht für die Verwendung in Badezimmern, Waschküchen oder ähnlichen Bereichen, in denen Feuchtigkeit auftreten kann, vorgesehen. Stellen Sie das Heizgerät niemals so auf, dass es • in eine Badewanne oder ein anderes Wassergefäß fallen kann. • Verwenden Sie das Heizgerät nicht in unmittelbarer Nähe einer Badewanne, einer Dusche oder eines Schwimmbeckens.
Seite 5
Markieren Sie die Wand entsprechend den unten angegebenen Maßen für die von Ihnen gekauften Heizkörpermodelle, bohren Sie die Wand an und stecken Sie die Kunststoffdübel in die Löcher, befestigen Sie die Wandhalterung mit den mitgelieferten Schrauben. Abstand K-KR-5148 K-KR-5148 K-KR-5148 1500W...
Seite 6
3.2. fixed the heater Tilting the heater so that the lower hole of the heater is aligned with the bracket P1 and hooked. After hanging, rotate the heater until entering the bracket P2, descend the heater downward and fasten the lock catch on the heater. HINWEISE: Vergewissern Sie sich vor dem Bohren der Wand, dass sich keine Kabel oder Rohre in der Wand befinden, und stellen Sie sicher, dass die Befestigungsschrauben fest...
Seite 7
Benutzerhandbuch für das Model K-KR-5148 Bedienfeld Standby-Taste: Taste Zeit: Wochenprogrammschlüss Ein- und Einstellung el: Einstellung des Ausschalten der der Uhrzeit Programms Heizung Taste nach Modus- Abwärtstaste: Wert nach oben: Wert Taste: unten korrigieren nach oben Einstellung korrigieren Modus Symbol für den Symbol für...
Seite 8
1. das Heizgerät ein-/ausschalten: Drücken Sie die Standby-Taste, um die Heizung ein- bzw. auszuschalten. 2. Temperatureinstellung: Das Produkt zeigt standardmäßig die eingestellte Temperatur, drücken Sie die Aufwärts- und Abwärts-Taste, um die Temperatur einzustellen, der Temperatur-Einstellbereich ist 5-45, Komfort-Modus und der wirtschaftlichen Modus Temperatur ist unabhängig, die komfortable Temperatur ist immer höher als die wirtschaftliche Temperatur 1 °...
Seite 9
9. Fenster-Funktion Drücken Sie lange auf die Modus-Taste, um die Fensterfunktion zu öffnen, auf dem Bildschirm erscheint das Fensterfunktionssymbol, öffnen Sie den Fenstermodus, wenn die Umgebungstemperatur um 4 Grad sinkt, wird die Fensterfunktion aktiviert, das Produkt hört auf zu heizen, das Symbol blinkt, wenn Sie das Produkt in den vorherigen Arbeitszustand zurückkehren lassen wollen, müssen Sie lange auf die Modus-Taste drücken, das Symbol hört auf zu schlagen, das Produkt kehrt in den vorherigen Arbeitszustand zurück! 10.
Seite 10
4. um den Timer einzustellen, drücken Sie die Taste Zeit einstellen, die Ziffern blinken während der Einstellung. verwenden Sie die Tasten Auf und Ab, um die Zeit einzustellen. Der Timer kann zwischen 1-24 Stunden eingestellt werden, danach kehrt der Bildschirm in den Heizmodus zurück.
Seite 11
3. Sobald das Symbol blinkt, gehen Sie zur App und drücken Sie auf ein Gerät. Wählen Sie den Gerätetyp (Kleingeräte > Heizgerät) und bestätigen Sie, dass die Anzeige blinkt. Sie werden dann aufgefordert, Ihr WiFi-Passwort einzugeben. So kann die App Ihr Heizgerät über Ihr WLAN finden.
Seite 12
Verwendung der Smart Life App Sie können die App verwenden, um mehrere Geräte zu steuern. Der Status Ihrer Geräte wird in der Geräteliste angezeigt: - Offline (Gerät ist an der Wand/am Wippschalter ausgeschaltet) - Ausgeschaltet (Gerät befindet sich im Standby-Modus) - Eingeschaltet (Gerät befindet sich im Heizmodus) Wenn das Heizgerät online ist, tippen Sie auf den Gerätenamen, um zur Steuerungsoberfläche zu gelangen.
Seite 13
Wenn das Heizgerät online ist, tippen Sie auf den Gerätenamen, um zur Steuerungsoberfläche zu gelangen. Hinweis: Wenn das Heizgerät offline ist, können Sie es nicht mit der App steuern, und Sie können den aktuellen Modus des Heizgeräts ändern, indem Sie auf die Modustasten tippen. Sie können die Temperatur des Modus mit den Tasten + und - einstellen, wenn Sie sich in diesem Modus befinden usw.! Planen Ihrer Heizung 1.
Seite 14
Intelligente Funktionen Der "Smart"-Bereich der SmartLife-App ermöglicht es Ihnen, Funktionen aufzurufen, mit denen Sie Ihre Heizung einfacher und intuitiver steuern können. Der Smart-Bereich kann durch Drücken des Smart-Symbols am unteren Rand der App erreicht werden. Szenarien sind anpassbare Befehle, die alle Ihre Geräte zusammenbringen, um bestimmte Aktionen auszuführen.
Seite 15
Die Automatisierung ermöglicht es Ihnen, Aktionen einzurichten, die durch externe Ereignisse ausgelöst werden. Zu den Auslösern gehören Wetter, Temperatur, Luftfeuchtigkeit, Sonnenuntergang, Sonnenaufgang und Ihr Standort. Sie können für jedes Automatisierungsereignis mehrere Aktionen und mehrere Auslöser festlegen. So können Sie z. B.
Seite 16
50/60 Hz 1500W 1500W K-KR-5148 230V 50/60 Hz 2000W 2000W K-KR-5148 230V 50/60 Hz 2500W 2500W Modellkennung(en): K-KR-5148 Artikel Symbol Wert Einheit Artikel Einheit Heizleistung Art der Wärmezufuhr, nur für elektrische Speicher- Einzelraumheizgeräte (wählen Sie einen) manuelle Wärmeladungsregelung, mit Nennwärmeleistung Pnom...
Seite 17
Raumtemperaturregelung, mit Erkennung Nein offener Fenster mit Abstandsregelungsoption mit adaptiver Startsteuerung Nein mit Arbeitszeitbegrenzung Nein mit schwarzem Glühbirnensensor Nein Reinigung und Pflege Wartung Schalten Sie das Gerät immer aus und lassen Sie es vollständig abkühlen, bevor Sie es warten. Verwenden Sie einen Staubsauger, um Staub auf den Gittern zu entfernen. Reinigen Sie die Außenseite des Geräts mit einem feuchten Tuch und trocknen Sie es anschließend mit einem trockenen Tuch ab.
Seite 18
Der Hersteller / Inverkehrbringer DILAW Warehouse GmbH Fuggerstaße 15a 48169 Münster, Deutschland Tel. (+49) (0) 2505 - 80294 – 91 erklärt hiermit, dass folgendes Produkt Produktbezeichnung: Kesser Keramik Radiator Modellbezeichnung: K-KR-5148 Baujahr: 2022 allen einschlägigen Bestimmungen der angewandten Rechtsvorschriften (nachfolgend) - einschließlich deren zum Zeitpunkt der Erklärung geltenden Änderungen - entspricht.
Seite 19
Please read the manual carefully before use Safety • Read the manual before using the heater. Keep the instructions and make sure they stay with the heater when you pass it on to a new owner. • Before use, make sure that the heater and all supplied accessories are complete and intact.
Seite 20
• CAUTION: Never cover the oven. If you cover the device, there is a risk of overheating and fire. • The heater must not be placed directly under a socket. • If the power cord is damaged, it must be replaced by the manufacturer, their customer service or a similarly qualified person to avoid hazard.
Seite 21
Mark the wall according to the dimensions given below for the radiator models you purchased, drill the wall and plug the plastic dowels into the holes, attach the wall bracket with the included screws. Distance K-KR-5148 K-KR-5148 K-KR-5148 1500W 2000W...
Seite 22
3.2. fixed the heater Tilting the heater so that the lower hole of the heater is aligned with the bracket P1 and hooked. After hanging, rotate the heater until entering the bracket P2, descend the heater downward and fasten the lock catch on the heater. HINTS: Before drilling the wall, make sure there are no cables or pipes in the wall, and make sure the mounting screws are tightly tightened to ensure that the stove is securely...
Seite 23
K-KR-5148 Model User Manual Control panel Sleep/Wake Time button: Weekly button: Turn Setting the program key: the heating time Setting the on and off program Up button: Mode Down Correct button: button: value up Setting the Correct mode value down...
Seite 24
Press the Sleep/Wake button to turn the heating on or off. 2. Temperature setting: The product shows by default the set temperature, press the up and down button to set the temperature, the temperature setting range is 5-45, comfort mode and the economic mode temperature is independent, the comfortable temperature is always higher than the economic temperature 1 °...
Seite 25
return the product to the previous working state, you need to press the mode button for a long time, the symbol stops hitting, the product returns to the previous working state! 10. Wifi function: Long press the button up, the product in the APP distribution network mode! The network configuration can be divided into two modes: flash fast and slow.
Seite 26
7.To turn off the display lights during operation, press and hold the button and press again to turn the display lights back on. Connecting to WiFi To connect your heater to Wi-Fi, you must first download the Smart Life app to your smartphone or tablet.
Seite 27
4. The app will then display the connection screen. NOTE: If the heater does not connect, press and hold press and hold the up button for three more seconds. The device then switches to secondary connection mode. The heater has two connection modes: one where the icon flashes slowly (once per second) and one in which the symbol flashes quickly (three times per second).
Seite 28
Using the Smart Life App You can use the app to control multiple devices. The status of your devices is displayed in the device list: - Offline (device is switched off on the wall/at the rocker switch) - Turned off (device is in standby mode) - On (device is in heating mode) When the heater is online, tap the device name to go to the control interface.
Seite 29
When the heater is online, tap the device name to go to the control interface. Note: If the heater is offline, you cannot control it with the app, and you can change the current mode of the heater by tapping the mode buttons. You can set the temperature of the mode with the + and - buttons when you are in this mode, etc.! Planning your heating 1.
Seite 30
The "Smart" section of the SmartLife app allows you to access features that make it easier and more intuitive to control your heating. The smart area can be reached by pressing the smart icon at the bottom of the app. Scenarios are customizable commands that bring all your devices together to perform specific actions.
Seite 31
• Frequently Asked Questions Find the answer to many troubleshooting issues in the app's FAQ to then v Specifications Model Voltage Frequency Achievement Category K-KR-5148 230V 50/60 Hz 1500W 1500W K-KR-5148 230V 50/60 Hz 2000W 2000W www.eshopping.de...
Seite 32
K-KR-5148 230V 50/60 Hz 2500W 2500W Model ID(s): K-KR-5148 Article Symbol Value Unit Article Unit Heat output Type of heat supply, only for electric storage local space heaters (choose one) Power of 1/1.5/2 manual heat charge control, with Nominal heat output Pnom...
Seite 33
Room temperature control, with detection of open windows with distance control option with adaptive start control with working time limit with black light bulb sensor Cleaning and care Maintenance Always turn off the device and let it cool down completely before servicing it. Use a vacuum cleaner to remove dust on the grids.
Seite 34
Veuillez lire attentivement le manuel avant utilisation Sécurité • Lisez le manuel avant d’utiliser l’appareil de chauffage. Conservez les instructions et assurez-vous qu’elles restent avec l’appareil de chauffage lorsque vous le transmettez à un nouveau propriétaire. • Avant utilisation, assurez-vous que le chauffage et tous les accessoires fournis sont complets et intacts.
Seite 35
• Il est strictement interdit de démonter le radiateur électrique sans autorisation. Si l’appareil de chauffage est endommagé, contactez le personnel de service professionnel. • Le produit est destiné à un usage domestique seulement. • Ne touchez pas la surface de l’appareil avec la peau nue pendant l’utilisation: risque de brûlures.
Seite 36
2. Fixez les pieds à la base de l’appareil de chauffage avec les vis fournies. Alignez les trous dans la base avec les trous dans les pieds, insérez les vis à travers les trous et serrez-les avec un tournevis. Installation murale 1.
Seite 37
Distance K-KR-5148 K-KR-5148 K-KR-5148 1500W 2000W 2500W 218mm 218mm 218mm 218mm 218mm 218mm 130mm 402mm 562,5 mm 3.2. fixé le dispositif de chauffage Incliner le chauffage de manière à ce que le trou inférieur du radiateur soit aligné avec le support P1 et accroché.
Seite 38
K-KR-5148 Modèle Manuel de l’utilisateur www.eshopping.de Hergestellt für Dilaw Warehouse GmbH // Fuggerstraße 15a // 48165 Münster // Germany...
Seite 39
Panneau de configuration Bouton Veille / Bouton Clé de Réveil: Allumez Heure : programme et éteignez le Réglage de hebdomadaire chauffage l’heure : Définition du programme Bouton Haut : Bouton Bouton Bas : Valeur Mode : Valeur correcte vers Définition du correcte vers le haut mode...
Seite 40
le bouton de temps en mode programme hebdomadaire, réglez l’heure actuelle par les boutons haut et bas. 5. Réglage du programme en mode hebdomadaire: Laissez le programme en mode programme hebdomadaire via le bouton de mode, si le P (icône de programme hebdomadaire) à l’écran signifie dans le mode de programme de la semaine, puis appuyez sur le produit du bouton de réglage du mode de programme hebdomadaire dans le mode hebdomadaire, puis appuyez sur le bouton de mode pour sélectionner le mode, appuyez sur les boutons haut et bas au mode de temps approprié!
Seite 41
12. Chauffage de l’icône Le symbole de chauffage apparaît lorsque le produit est chauffé! Utilisation de la télécommande 1. Appuyez sur le bouton ON / OFF pour démarrer le chauffage. 2. Utilisez les boutons de mode pour basculer entre les modes de chauffage: Eco , Confort, Mode Anti-Gel et Programme.
Seite 42
1. Téléchargez et installez l’application. Si vous n’avez pas encore de compte Smart Life, vous devez créer un compte en appuyant sur S’inscrire. L’appareil détectera automatiquement votre pays, mais vous pouvez le modifier si nécessaire. Entrez votre numéro de téléphone ou votre adresse e-mail. Lorsque vous entrez un numéro de téléphone, un numéro de vérification est envoyé...
Seite 43
4. L’application affichera alors l’écran de connexion. REMARQUE: Si le chauffage ne se connecte pas, maintenez enfoncé appuyez sur le bouton haut et maintenez-le enfoncé pendant trois secondes supplémentaires. L’appareil passe ensuite en mode de connexion secondaire. Le chauffage dispose de deux modes de connexion: un où l’icône clignote lentement (une fois par seconde) et un dans lequel le symbole clignote rapidement (trois fois par seconde).
Seite 44
- Hors ligne (l’appareil est éteint sur le mur / à l’interrupteur à bascule) - Éteint (l’appareil est en mode veille) - Activé (l’appareil est en mode chauffage) Lorsque le chauffage est en ligne, appuyez sur le nom de l’appareil pour accéder à l’interface de contrôle.
Seite 45
Lorsque le chauffage est en ligne, appuyez sur le nom de l’appareil pour accéder à l’interface de contrôle. Remarque: Si le chauffage est hors ligne, vous ne pouvez pas le contrôler avec l’application et vous pouvez modifier le mode actuel du chauffage en appuyant sur les boutons de mode.
Seite 46
Les scénarios sont des commandes personnalisables qui rassemblent tous vos appareils pour effectuer des actions spécifiques. Ils apparaissent sous forme de raccourcis dans l’application que vous pouvez déclencher en appuyant sur l’image, offrant un moyen rapide et facile de coordonner votre chauffage. Par exemple, vous pouvez créer un scénario « Heat Boost »...
Seite 47
1500W K-KR-5148 230V 50/60 Hz 2000W 2000W K-KR-5148 230V 50/60 Hz 2500W 2500W ID(s) du modèle: K-KR-5148 Article Symbole Valeur Unité Article Unité Production de chaleur Type d’alimentation en chaleur, uniquement pour les radiateurs locaux à accumulation électrique (choisissez-en un) www.eshopping.de...
Seite 48
Puissance calorifique Procuratio 1/1,5/2 contrôle manuel de la charge Pnom nominale thermique, avec thermostat intégré Contrôle manuel de la charge de Capacité de Demi- 1/1,5/2 chauffage avec rétroaction de la chauffage minimale Pmin puissance température ambiante et / ou (à titre indicatif) extérieure Contrôle électronique de la charge Capacité...
Seite 49
Contrôle de la température ambiante, avec détection des fenêtres ouvertes avec option de contrôle de distance avec contrôle de démarrage adaptatif avec limite de temps de travail avec capteur d’ampoule noire Nettoyage et entretien Entretien Éteignez toujours l’appareil et laissez-le refroidir complètement avant de l’entretenir. Utilisez un aspirateur pour enlever la poussière sur les grilles.
Seite 50
Si prega di leggere attentamente il manuale prima dell'uso Sicurezza • Leggere il manuale prima di utilizzare il riscaldatore. Mantieni le istruzioni e assicurati che rimangano con il riscaldatore quando lo passi a un nuovo proprietario. • Prima dell'uso, assicurarsi che il riscaldatore e tutti gli accessori in dotazione siano completi e intatti.
Seite 51
• Il prodotto è solo per uso domestico. • Non toccare la superficie del dispositivo con la pelle nuda durante l'uso: rischio di ustioni. • Non condividere la presa della stufa con altri dispositivi: Rischio di incendio dovuto a sovraccarico. •...
Seite 52
Installazione a parete 1. Rimuovere la staffa Si consiglia di posizionare il riscaldatore a faccia in giù, aprire il fermo superiore con un cacciavite e spostare la staffa a parete verso il basso per rimuoverlo. (1) Rompere la fibbia di blocco della staffa (2) premere la staffa nella direzione della freccia (3) sollevare la staffa(4) estrarre e rimuovere la staffa 2.Montaggio della staffa a parete Contrassegnare la parete in base alle dimensioni indicate di seguito per i modelli di radiatori...
Seite 53
Distanza K-KR-5148 · K-KR-5148 · K-KR-5148 · 1500W 2000W 2500W 218 millimetri 218 millimetri 218 millimetri 218 millimetri 218 millimetri 218 millimetri 130 millimetri 402 millimetri 562,5 millimetri 3.2. fissato il riscaldatore Inclinare il riscaldatore in modo che il foro inferiore del riscaldatore sia allineato con la staffa P1 e agganciato.
Seite 54
K-KR-5148 Model Manuale d'uso Pannello di controllo Pulsante Pulsante Chiave del Sospensione/Riattivazion Ora: programma e: accendere e Impostazion settimanale: spegnere il e dell'ora impostazione riscaldamento programma Pulsante Su: Correggi il Pulsante Pulsante Giù: valore su Modalità: Correggi il Impostazion valore verso il...
Seite 55
Settimana dello Icona Icona di spettacolo bloccata riscaldament Mostra ora Mostra temperatura 1. Accendere / spegnere il riscaldatore: Premere il pulsante Sospensione/Riattivazione per accendere o spegnere il riscaldamento. 2. Impostazione della temperatura: Il prodotto mostra di default la temperatura impostata, premere il pulsante su e giù per impostare la temperatura, l'intervallo di impostazione della temperatura è...
Seite 56
6. Controllo genitori: Premere a lungo il pulsante Sospensione / Riattivazione per bloccare e sbloccare il dispositivo; l'icona del lucchetto appare sullo schermo, l'icona scompare quando viene sbloccata. 7. Compensazione della temperatura: Premere a lungo il pulsante del tempo per avviare la compensazione della temperatura, con un intervallo di compensazione della temperatura da 9 a 9, e impostare la temperatura di compensazione spostando il pulsante su e giù.
Seite 57
1. Premere il pulsante ON / OFF per avviare il riscaldamento. 2. Utilizzare i pulsanti della modalità per passare da una modalità di riscaldamento all'altra: Modalità Eco , Comfort, Anti-Frost e Programma. Le icone delle modalità lampeggiano mentre le attraversi. Dopo alcuni secondi, l'icona della modalità smetterà di lampeggiare e il dispositivo si riscalderà...
Seite 58
1. Scarica e installa l'app. Se non disponi già di un account Smart Life, dovrai creare un account toccando Iscriviti. Il dispositivo rileverà automaticamente il tuo paese, ma puoi modificarlo se necessario. Inserisci il tuo numero di telefono o indirizzo email. Quando inserisci un numero di telefono, al tuo telefono viene inviato un numero di verifica: inserisci quel numero per la verifica, quindi crea una password.
Seite 59
NOTA: se il riscaldatore non si collega, tenere premuto tieni premuto il pulsante su per altri tre secondi. Il dispositivo passa quindi alla modalità di connessione secondaria. Il riscaldatore ha due modalità di connessione: una in cui l'icona lampeggia lentamente (una volta al secondo) e una in cui il simbolo lampeggia rapidamente (tre volte al secondo).
Seite 60
Quando il riscaldatore è online, tocca il nome del dispositivo per accedere all'interfaccia di controllo. Nota: se il riscaldatore è offline, non sarai in grado di controllarlo dall'app. Quando il riscaldatore è online, tocca il nome del dispositivo per accedere all'interfaccia di controllo.
Seite 61
possibile impostare la temperatura della modalità con i pulsanti + e - quando si è in questa modalità, ecc.! Pianificazione del riscaldamento 1. Quando si accede al pannello di controllo, è possibile scegliere la modalità programma giornaliero e la modalità programma settimanale! 2.
Seite 62
Per creare nuovi scenari, premere il pulsante nella schermata Scenario. È possibile includere tutti i riscaldatori desiderati in uno scenario. Possono controllare se si accendono o si spengono, in quale modalità funzionano e la temperatura a cui sono impostati. Qualsiasi dispositivo controllato tramite l'app SmartLife può...
Seite 63
1500W K-KR-5148 230V 50/60 Hz 2000W 2000W K-KR-5148 230V 50/60 Hz 2500W 2500W ID modello: K-KR-5148 Articolo Simbolo Valore Unità Articolo Unità Potenza termica Tipo di alimentazione termica, solo per riscaldatori d'ambiente locali ad accumulo elettrico (sceglierne uno) Potenza termica...
Seite 64
Consumo di energia Potenza di riscaldamento assistita da ausiliaria ventilatore Alla potenza termica Tipo di potenza termica/controllo della Elmax · Chilowatt temperatura ambiente (selezionare) nominale Con potenza di Capacità di riscaldamento riscaldamento | Elmin Chilowatt monostadio e nessun controllo della minima temperatura ambiente Due o più...
Seite 65
Pulizia e cura Manutenzione Spegnere sempre il dispositivo e lasciarlo raffreddare completamente prima di eseguirne la manutenzione. Utilizzare un aspirapolvere per rimuovere la polvere sulle griglie. Pulire l'esterno del dispositivo con un panno umido e quindi asciugarlo con un panno asciutto. Non immergere mai il dispositivo in acqua e non lasciare che l'acqua goccioli nel dispositivo.
Seite 66
Por favor, lea el manual detenidamente antes de su uso Seguridad • Lea el manual antes de usar el calentador. Mantenga las instrucciones y asegúrese de que permanezcan con el calentador cuando se lo pase a un nuevo propietario. • Antes de usarlo, asegúrese de que el calentador y todos los accesorios suministrados estén completos e intactos.
Seite 67
• Está estrictamente prohibido desmontar el calentador eléctrico sin permiso. Si el calentador está dañado, comuníquese con el personal de servicio profesional. • El producto es solo para uso doméstico. • No toque la superficie del dispositivo con la piel desnuda durante el uso: riesgo de quemaduras.
Seite 68
Instalación de montaje en pared 1. Retire el soporte Se recomienda colocar el calentador boca abajo, abrir el pestillo superior con un destornillador y mover el soporte de pared hacia abajo para retirarlo. (1) Rompa la hebilla de bloqueo del soporte (2) presione el soporte en la dirección de la flecha (3) levante el soporte(4) extraiga y retire el soporte 2.Montaje del soporte de pared...
Seite 69
Distancia K-KR-5148 K-KR-5148 K-KR-5148 1500 W 2000 W 2500W 218 mm 218 mm 218 mm 218 mm 218 mm 218 mm 130 mm 402 mm 562,5 mm 3.2. se ha fijado el calentador Inclinar el calentador para que el orificio inferior del calentador esté alineado con el soporte P1 y enganchado.
Seite 70
Manual de usuario del modelo K-KR-5148 Panel de control Botón de Botón de Clave de reposo/activación: tiempo: programa enciende y apaga Establecer la semanal: la calefacción hora Configuración del programa Botón Arriba: Botón de Botón abajo: Corregir valor modo: Corregir valor arriba Configuración...
Seite 71
Mostrar semana Icono Icono de bloqueado calefacción Hora del Mostrar espectáculo temperatura 1. Encienda / apague el calentador: Pulse el botón de reposo/activación para encender o apagar la calefacción. 2. Ajuste de temperatura: El producto muestra por defecto la temperatura establecida, presione el botón arriba y abajo para establecer la temperatura, el rango de ajuste de temperatura es 5-45, el modo de confort y la temperatura del modo económico es independiente, la temperatura cómoda siempre es más alta que la temperatura económica 1 °...
Seite 72
Mantenga presionado el botón de reposo / activación para bloquear y desbloquear el dispositivo; el icono de candado aparece en la pantalla, el icono desaparece cuando se desbloquea. 7. Compensación de temperatura: Mantenga presionado el botón de tiempo para iniciar la compensación de temperatura, con un rango de compensación de temperatura de 9 a 9, y configure la temperatura de compensación moviendo el botón hacia arriba y hacia abajo.
Seite 73
1. Presione el botón ON / OFF para iniciar la calefacción. 2. Utilice los botones de modo para cambiar entre los modos de calefacción: Eco, Comfort , Anti-Frost mode y Program. Los iconos de los modos parpadean a medida que avanzas por ellos.
Seite 74
1. Descargue e instale la aplicación. Si aún no tiene una cuenta de Smart Life, deberá crear una cuenta tocando Registrarse. El dispositivo detectará automáticamente su país, pero puede cambiarlo si es necesario. Ingrese su número de teléfono o dirección de correo electrónico. Cuando ingresa un número de teléfono, se envía un número de verificación a su teléfono: ingrese ese número para la verificación y, a continuación, cree una contraseña.
Seite 75
NOTA: Si el calentador no se conecta, mantenga presionado mantén pulsado el botón hacia arriba durante tres segundos más. A continuación, el dispositivo cambia al modo de conexión secundario. El calentador tiene dos modos de conexión: uno donde el icono parpadea lentamente (una vez por segundo) y otro en el que el símbolo parpadea rápidamente (tres veces por segundo).
Seite 76
Cuando el calentador esté en línea, toque el nombre del dispositivo para ir a la interfaz de control. Nota: Si el calentador está desconectado, no podrá controlarlo desde la aplicación. Cuando el calentador esté en línea, toque el nombre del dispositivo para ir a la interfaz de control.
Seite 77
puede cambiar el modo actual del calentador tocando los botones de modo. ¡Puede configurar la temperatura del modo con los botones + y - cuando esté en este modo, etc.! Planificación de la calefacción 1. Cuando ingrese al panel de control, ¡puede elegir el modo de programa diario y el modo de programa semanal! 2.
Seite 78
Para crear nuevos escenarios, presione el botón en la pantalla Escenario. Puede incluir tantos calentadores como desee en un escenario. Pueden controlar si se encienden o apagan, en qué modo se ejecutan y la temperatura a la que están configurados. Cualquier dispositivo controlado a través de la aplicación SmartLife se puede encender en un escenario.
Seite 79
K-KR-5148 230V 50/60 Hz 2000 W 2000W K-KR-5148 230V 50/60 Hz 2500W 2500W ID del modelo: K-KR-5148 Artículo Símbolo Valor Unidad Artículo Unidad Salida de calor Tipo de suministro de calor, solo para calentadores locales de almacenamiento eléctrico (elija uno)
Seite 80
de temperatura ambiente y / o exterior Máxima capacidad Control electrónico de carga de Poder 1/1,5/2 de calentamiento Pmax, c calor con retroalimentación de legal continuo temperatura ambiente y /o exterior Consumo de energía Potencia de calefacción asistida por auxiliar ventilador A la salida calorífica Tipo de potencia de calefacción/control de...
Seite 81
Limpieza y cuidado Mantenimiento Siempre apague el dispositivo y deje que se enfríe por completo antes de repararlo. Use una aspiradora para eliminar el polvo en las rejillas. Limpie el exterior del dispositivo con un paño húmedo y luego séquelo con un paño seco. Nunca sumerja el dispositivo en agua y no permita que el agua gotee en el dispositivo.