Harvia Legend 150 Anleitung
Holzbeheizte saunaofen
Vorschau ausblenden
Andere Handbücher für Legend 150:
- Anleitung für montage und gebrauch (100 Seiten) ,
- Anleitung (21 Seiten) ,
- Montageanleitung (20 Seiten)

Verwandte Anleitungen für Harvia Legend 150


Inhaltszusammenfassung für Harvia Legend 150
- Seite 1 150, 240, 300 150 SL, 240 SL, 300 Duo Instructions for Installation and Use of Woodburning Stove Anleitung für Montage und Gebrauch des holzbeheizten Saunaofens Legend 150 Legend 240 Legend 300 Legend 150 SL Legend 240 SL Legend 300 Duo 31032009...
-
Seite 2: Inhaltsverzeichnis
4.3.3. Connecting the Stove to a Harvia Steel Rauchfang ............15 Chimney ............. 16 4.3.3. Anschluss des Ofens an einen Harvia- 4.3.4. Legend 150 SL, 240 SL ......17 Stahlschornstein ..........16 4.3.5. Legend 300 Duo ........17 4.3.4. Legend 150 SL, 240 SL ......17 4.4. -
Seite 3: Harvia Legend
You can also visit our website www.harviasauna.com for further Wenn Sie wünschen, kann Ihnen Ihr Händler oder details. Vertreter des Herstellers bei der Auswahl des Ofens helfen. Weitere Informationen finden Sie auch auf unserer Website unter www.harvia.de. -
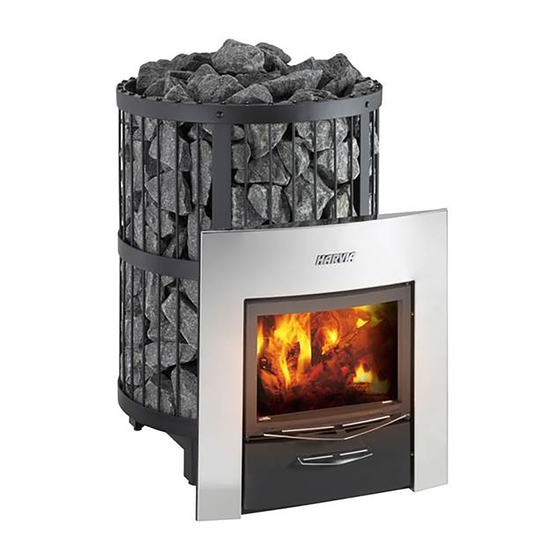
Seite 4: Stove Parts (Figure 1)
1.2. Stove Parts (figure 1) 1.2. Ofenteile (Abbildung 1) Steel frame Stahlrahmen Stone grate (only Legend 300) Steinrost (nur Legend 300) Stove body Ofenkorpus Rear connection opening Hintere Anschlussöffnung Upper connection opening Obere Anschlussöffnung Soot opening Rußöffnung Firing chamber door Tür zur Brennkammer Ash box Aschekasten... -
Seite 5: Instructions For Use
2. INSTRUCTIONS FOR USE 2. BEDIENUNGSANLEITUNG Note! Read the instructions carefully before using Achtung! Lesen Sie die Anweisungen vor der Inbe- the stove. triebnahme des Ofens aufmerksam durch. 2.1. Warnings 2.1. Warnungen Staying in the hot sauna for long periods of Ein langer Aufenthalt in einer heißen Sauna •... -
Seite 6: Sauna Stones
Do not burn the following materials in the stove: Verbrennen Sie folgende Materialien nicht im Ofen: Burning materials that have a high thermal va- Brennmaterialien, die einen hohen Wärmewert • • lue (such as chipboard, plastic, coal, brickets, haben (wie etwa Spanplatten, Plastik, Kohle, pellets) Briketts, Pellets usw.) Painted or impregnated wood... -
Seite 7: Heating The Stove
2.5. Heating the Stove 2.5. Heizen des Ofens Before heating the stove make sure that there are Sorgen Sie vor dem Heizen des Ofens dafür, dass no unnecessary items in the sauna or inside the sich keine unnötigen Gegenstände in der Sauna stove's safety distances. -
Seite 8: Sauna Water
2.6. Sauna Water 2.6. Saunawasser The water that is thrown on the stones should be Bei dem Wasser, das auf die Steine geschüttet wird, clean household water. Make sure the water is of sollte es sich um klares Haushaltswasser handeln. high enough quality, because water containing salt, Sorgen Sie für Wasser mit ausreichender Qualität, lime, iron or humus may prematurely corrode the... -
Seite 9: Troubleshooting
2.8. Troubleshooting 2.8. Störungen See table 1. Siehe Tabelle 1. Description Possible cause Beschreibung Mögliche Ursache There is no draught in the There are leaks in the flue connection. Seal the connection ( 4.3.2.). flue. Smoke comes into the The brick flue is cold. sauna. -
Seite 10: Sauna Room
3. SAUNA ROOM 3. SAUNAKABINE 3.1. Effects that Heating the Stove has on 3.1. Folgen des Aufheizens des Ofens in der the Sauna Room Saunakabine Light-coloured floor materials will become dirty from Helle Böden werden durch Asche, Steinpartikel und the ash, particles of stone and metal flakes that fall aus dem Ofen fallende Metallsplitter verunreinigt. -
Seite 11: Instructions For Installation
Protect the floor with the Harvia protective alien können der Wärmestrahlung des Ofens bedding ( 4.4.) or similar heat radiation protec- nicht standhalten. Schützen Sie den Boden mit tion. der Schutzplatte von Harvia ( 4.4.) oder einem ähnlichen Hitzeschutz. min. 60 min. 60 Figure 7. -
Seite 12: Safety Distances (Figure 8)
4.1.2. Safety Distances (figure 8) 4.1.2 Sicherheitsabstände (Abbildung 8) Note! Incorrect stone placement can cause the sur- Achtung! Durch eine falsche Stapelung der Steine rounding structures to heat up to dangerous tem- können die umgebenden Strukturen sogar außerhalb peratures even outside the safety distances. The der Sicherheitsabstände auf gefährliche Tempera- defined safety distances are valid only when the turen erhitzt werden. -
Seite 13: Protective Covers
4.2. Protective Covers 4.2. Schutzabdeckungen The specified safety distances from inflammable Die angegebenen Sicherheitsabstände zu brennba- materials can be reduced to half with a single pro- ren Materialien können durch einen einfachen Schutz tective cover and to one-fourth with a double pro- um die Hälfte und mit einem doppelten Schutz auf tective cover. -
Seite 14: Installing The Stove
Connecting the stove to a masonry flue via the zusätzliches Zubehör zur Verfügung ( 4.4.). rear connection opening (figure 10) Remove the removable bars (Legend 150: Anschluss des Ofens an einen gemauerten Rauchfang 3 pcs, Legend 240/300: 2 pcs). über die hintere Anschlussöffnung (Abbildung 10) -
Seite 15: Connecting The Stove To A Harvia Steel Chimney
Connecting the stove to a masonry flue via the upper connection opening (all dimensions in millimeters) Abbildung 11. Anschluss des Ofens an einen gemauerten Rauchfang über die obere Anschlussöffnung (alle Abmessungen in Millimetern) 4.3.3. Connecting the Stove to a Harvia Steel 4.3.3. Anschluss des Ofens an einen Harvia-Stahl- Chimney... -
Seite 16: Legend 150 Sl, 240 Sl
Rauchfangs auf Höhe der Oberkante des Schutz- cover or underneath it. mantels oder darunter anfangen. 4.3.4. Legend 150 SL, 240 SL 4.3.4. Legend 150 SL, 240 SL The stove is installed in an opening in a concrete Der Saunaofen wird in einer Öffnung in einer Wand or brick wall. -
Seite 17: Accessories (Figure 14)
4.4. Accessories (figure 14) 4.4. Zubehör (Abbildung 14) Harvia steel chimney. 4.3.3. Harvia-Stahlschornstein. 4.3.3. Water heater (pipe model). Installed on the top Warmwasserbehälter (Schornsteinmodell). of the upper connection opening. The smoke Montiert oben auf der oberen Anschlussöff- pipe that goes through the container serves as nung. -
Seite 18: Changing The Opening Direction Of The Stove Door
4.5. Changing the Opening Direction of the 4.5. Änderung der Öffnungsrichtung der Stove Door Ofentür The door to the firing chamber can be installed to Der Ofentür kann so montiert werden, dass sie ent- open either to the right or to the left. See figure 15. weder nach links oder nach rechts zu öffnen ist.