Akrapovic Slip-On Line Einbauanleitung
Auspuffanlage honda crf1100l africa twin honda crf1100l africa twin adventure sports
Vorschau ausblenden
Andere Handbücher für Slip-On Line:
- Einbauanleitung (172 Seiten) ,
- Installationsanweisungen (96 Seiten) ,
- Benutzerhandbuch (90 Seiten)

Verwandte Anleitungen für Akrapovic Slip-On Line


Inhaltszusammenfassung für Akrapovic Slip-On Line
- Seite 1 Installation instructions Akrapovič Exhaust System Slip-On Line for the Honda CRF1100L Africa Twin Honda CRF1100L Africa Twin Adventure Sports *507647* Revision 1.0 07/2020 www.akrapovic.com...
-
Seite 2: General Information
Akrapovič takes all copyright and other rights infringement cases under serious consideration. If you have any reason to believe that your exhaust system is not an original Akrapovič product, please contact our local partners or Akrapovič at info@akrapovic.com. 2 / 20... - Seite 3 (PLEASE USE THE QR CODE ON THE FRONT PAGE OR LOOK FOR “SCHEMATIC VIEW” IN THE RESPECTIVE PRODUCT PAGE ON WWW.AKRAPOVIC.COM). MAKE SURE THAT YOU HAVE ALL THE PARTS NECESSARY FOR THE INSTALLATION OF YOUR NEW AKRAPOVIČ EXHAUST SYSTEM. IF ANY OF THE PARTS IS MISSING, PLEASE DO NOT PROCEED WITH UNINSTALLING YOUR STOCK EXHAUST SYSTEM/ INSTALLING THE AKRAPOVIČ...
-
Seite 4: General Note
Please consult the appropriate laws in your area before installing any aftermarket part or system on your vehicle to ensure compliance with all applicable laws. Neither Akrapovic d.d. nor any of their subsidiaries or the sellers of the parts or systems make any representation that any of their parts or systems comply with any such laws. -
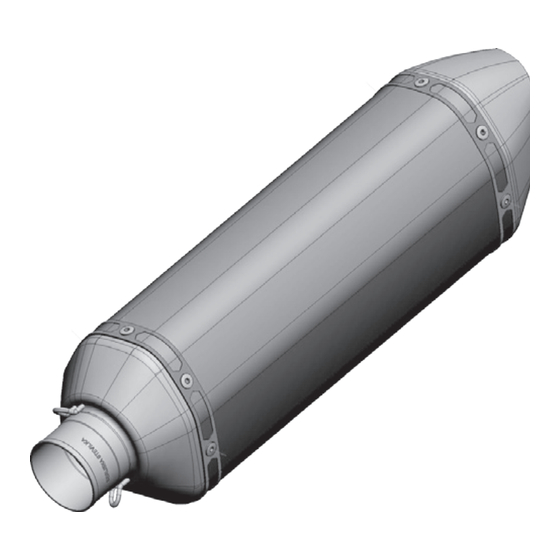
Seite 5: Parts List
Muffler and pipes Detailed list of parts can be found on the Akrapovič website (please use the QR code on the front page or look for “Schematic view” in the respective product page on www.akrapovic.com). REMOVAL OF STOCK EXHAUST SYSTEM: The process of uninstalling the original exhaust system may vary depending on the existing exhaust system. - Seite 6 REMOVAL OF STOCK EXHAUST SYSTEM: Put the motorcycle on a side stand, we recommend a central racing stand. Make sure, that surface is solid and flat. Unscrew marked bolt and carefully slide plastic heat shield off the motorcycle in marked direction (F 01).
- Seite 7 Unscrew marked bolts and carefully remove right passenger foot peg off the motorcycle (F 03). IMPORTANT: be careful not to damage any part of the motorcycle during this procedure! F 03 Unscrew marked bolts and carefully remove the exhaust valve cover (F 04). CAUTION: be careful not to injure yourself or damage any part of the motorcycle during this procedure! F 04 7 / 20...
- Seite 8 Untighten marked nuts and carefully remove cables off the exhaust valve (F 05). CAUTION: be careful not to injure yourself or damage any part of the motorcycle during this procedure! F 05 Untighten marked clamp bolts, unscrew the muffler’s bracket bolt and carefully remove stock muffler off the motorcycle (F 06).
- Seite 9 Undo marked plastic fasteners, unscrew marked bolts, than carefully remove plastic mudguard (F 07, 08). CAUTION: be careful not to injure yourself or damage any part of the motorcycle during this procedure! F 07 F 08 9 / 20...
- Seite 10 Disconnect the exhaust valve’s servo motor connector (F 09). CAUTION: be careful not to injure the exhaust valve servo motor’s connector during this procedure! F 09 Undo the marked plastic fastener and carefully remove the exhaust valve’s servo motor off the motorcycle (F 10).
- Seite 11 Unscrew marked bolts and carefully remove the plastic cover off the servo motor (F 11). CAUTION: be careful not to injure yourself or any part of the servo motor during this procedure! F 11 Remove both cables off the servo wheel and reverse the original position on the servo motor (F 12). CAUTION: be careful not to injure yourself or any part of the servo motor during this procedure! F 12 11 / 20...
- Seite 12 Reinstall the plastic cover onto the servo motor and tighten the bolts; check the manufacturers workshop manual for the right tightening torques (F 13). CAUTION: be careful not to injure yourself or any part of the servo motor during this procedure! F 13 INSTALLATION OF THE AKRAPOVIČ...
- Seite 13 Screw Akrapovič heat shield’s M5 bolts and heat-resistant washers from Akrapovič installation kit on Akrapovič heat shield (F 15). IMPORTANT: make sure to place the heat resistant washers between the brackets and carbon fiber heat shield and between bolts’ heads and heat shield! INSTALLATION TIP: screw the heat resistant washers onto the bolts;...
- Seite 14 Correctly attach the cables onto the exhaust valve and tighten the cable elbow nuts to the specified torque. During tightening of nuts, make sure that the cable retainers sit tight at the marked points of the valve housing (F 17).
- Seite 15 Position the muffler correctly and slide it onto the stock exhaust outlet, hand tight the muffler’s bracket (using bolt and washer from Akrapovič installation kit) onto the sub frame. Reinstall the servo motor in the reverse order from the order in which it was removed. Check motorcycle manufacturer manual for correct tightening torques (F 19). IMPORTANT: be careful not to damage the exhaust or any other part of the motorcycle during this process! IMPORTANT: do not fully tighten the bracket bolt yet! F 19...
- Seite 16 Align the muffler in respect to the motorcycle tighten the clamp and mufflers bracket bolt to the specified torques (F 21, 22). IMPORTANT: be careful not to damage the exhaust or any other part of the motorcycle during this process!
- Seite 17 Replace all dismounted stock parts in the reverse order from the order in which they were removed. Check motor- cycle manufacturer workshop manual for correct tightening torques. IMPORTANT: make sure not to damage any part of the exhaust system or motorcycle during this procedure! 17 / 20...
- Seite 18 FINAL INSTALLATION AND MAINTENANCE: Clean grease spots off all exhaust system surfaces, when installation is finished. Cleaning will prevent spots from burning onto the surface. Do not use aggressive chemical cleaners, because they can damage the surface or sticker.
- Seite 19 TROUBLESHOOTING: Problem Possible cause Solution tighten the clamp to specified loosened clamp torque Exhaust gas leaks out of the muffler/pipe clamp connections tap the connection into place and connection is not completely tighten the clamp to specified joined torque 19 / 20...
- Seite 20 www.akrapovic.com...
- Seite 22 Einbauanleitung Akrapovič-Auspuffanlage Slip-On Line Istruzioni per il montaggio Impianto di scarico Akrapovič Slip-On Line Instructions d‘installation Système d‘échappement d‘Akrapovič Slip-On Line Instrucciones de montaje Sistema de escape Akrapovič Slip-On Line Instruções de montagem Sistema de Escape Akrapovič Slip-On Line Navodila za namestitev Izpušni sistem Akrapovič...
- Seite 23 www.akrapovic.com...
- Seite 24 Einbauanleitung Akrapovič-Auspuffanlage Slip-On Line für Honda CRF1100L Africa Twin Honda CRF1100L Africa Twin Adventure Sports Version 1.0 07/2020 www.akrapovic.com...
-
Seite 25: Allgemeine Informationen
Akrapovič unterzieht alle Fälle von Verstößen gegen Urheber- und andere Rechte einer eingehenden Prüfung. Sollten Sie Grund zu der Annahme haben, dass es sich bei Ihrer Auspuffanlage nicht um ein Originalprodukt von Akrapovič handelt, wenden Sie sich bitte an unsere Partner vor Ort oder an Akrapovič unter info@akrapovic. com. - Seite 26 TEILELISTE AB (BITTE VERWENDEN SIE DEN QR-CODE AUF DER VORDERSEITE ODER SUCHEN SIE NACH „SCHEMATISCHE ÜBERSICHT“ AUF DER JEWEILIGEN PRODUKTSEITE UNTER WWW. AKRAPOVIC.COM). STELLEN SIE SICHER, DASS IHNEN ALLE ERFORDERLICHEN TEILE FÜR DEN EINBAU IHRER NEUEN AKRAPOVIČ-AUSPUFFANLAGE ZUR VERFÜGUNG STEHEN. SOLLTE EIN TEIL FEHLEN, BAUEN SIE IHRE ORIGINAL-AUSPUFFANLAGE BITTE NICHT AB/BAUEN SIE DIE AKRAPOVIČ-AUSPUFFANLAGE NICHT EIN UND WENDEN SIE SICH AN DEN HÄNDLER, BEI DEM SIE...
-
Seite 27: Warnungen Zu Lärm Und Emissionen
Sie einige grundlegende Hinweise zur Konformität Ihrer Akrapovič-Auspuffanlage mit verschiedenen gesetzlichen Anforderungen im produktbezogenen Teil unserer Website (bitte verwenden Sie den QR-Code auf der Vorderseite oder suchen Sie auf www.akrapovic.com nach der jeweiligen Produktseite). Die EG- und ECE-Betriebserlaubnis finden Sie auf dem Zertifikat, das Ihrem Produkt beiliegt. -
Seite 28: Teileliste
Eine detaillierte Teileliste finden Sie auf der Website von Akrapovič (bitte verwenden Sie den QR-Code auf der Vorderseite oder suchen Sie nach „Schematische Übersicht“ auf der jeweiligen Produktseite unter www. akrapovic.com). AUSBAU DER ORIGINAL-AUSPUFFANLAGE: Der Vorgang des Ausbaus der Original-Auspuffanlage kann je nach der bestehenden Auspuffanlage variieren. - Seite 29 AUSBAU DER ORIGINAL-AUSPUFFANLAGE: Stellen Sie das Motorrad auf einen Seitenständer, wir empfehlen einen Zentralständer. Achten Sie darauf, dass die Fläche fest und eben ist. Lösen Sie die markierte Schraube und schieben Sie das Kunststoff-Hitzeschutzblech in markierter Richtung vorsichtig vom Motorrad (F 01).
- Seite 30 EINBAU DER AKRAPOVIČ-AUSPUFFANLAGE: Montieren Sie den Schalldämpfer wie gezeigt mit der Graphitdichtung und Klemme aus dem Akrapovič-Ein- bausatz (F 14). VORSICHT: Achten Sie darauf, dass Sie sich während dieses Vorgangs keinen Teil der Auspuffs verletzen oder beschädigen! Schrauben Sie die M5-Schrauben und hitzebeständigen Unterlegscheiben des Akrapovič-Hitzeschutzblechs aus dem Akrapovič-Einbausatz am Akrapovič-Hitzeschutzblech fest (F 15).
-
Seite 31: Endmontage Und Wartung
ENDMONTAGE UND WARTUNG: Entfernen Sie nach dem abgeschlossenen Einbau Fettflecken von allen Oberflächen der Auspuffanlage. Die Reinigung verhindert ein Einbrennen der Flecken in die Oberfläche. Verwenden Sie keine aggressiven chemischen Reinigungsmittel, da diese die Oberfläche oder den Aufkleber beschädigen können. - Seite 32 FEHLERBEHEBUNG: Problem Mögliche Ursache Lösung Ziehen Sie die Klemme mit dem gelockerte Klemme vorgegebenen Drehmoment fest Abgase treten aus den Verbindungen von Schalldämpfer Klopfen Sie die Verbindung an und Rohrklemmen aus Die Verbindung ist nicht die richtige Stelle und ziehen vollständig verbunden Sie die Klemme mit dem vorgegebenen Drehmoment fest...
- Seite 33 www.akrapovic.com...
-
Seite 34: Istruzioni Per Il Montaggio
Istruzioni per il montaggio Impianto di scarico Akrapovič Slip-On Line per il modello Honda CRF1100L Africa Twin Honda CRF1100L Africa Twin Adventure Sports Revisione 1.0 07/2020 www.akrapovic.com... -
Seite 35: Informazioni Generali
Akrapovič prende in seria considerazione tutti i casi di violazione del copyright e degli altri diritti. Se per qualsiasi motivo ritieni che il tuo impianto di scarico non sia un prodotto originale Akrapovič ti preghiamo di contattare i nostri partner locali o direttamente Akrapovič all’indirizzo info@akrapovic.com. 14 / 62... - Seite 36 SUL NOSTRO SITO WEB (SI PREGA DI UTILIZZARE IL CODICE QR RIPORTATO IN COPERTINA O DI CERCARE LA “VISUALIZZAZIONE SCHEMATICA” NELLA RISPETTIVA PAGINA DEL PRODOTTO SU WWW.AKRAPOVIC.COM). ACCERTATI DI AVERE TUTTI I COMPONENTI NECESSARI PER IL MONTAGGIO DEL TUO NUOVO IMPIANTO DI SCARICO AKRAPOVIČ. SE DOVESSE MANCARE UNO QUALSIASI DEI COMPONENTI SI PREGA DI NON PROCEDERE CON LO SMONTAGGIO DELL’IMPIANTO DI SCARICO DI SERIE/MONTAGGIO DELL’IMPIANTO DI SCARICO AKRAPOVIČ...
-
Seite 37: Lubrificazione
Akrapovič a diversi requisiti di legge (si prega di utilizzare il codice QR riportato in copertina o di cercare la rispettiva pagina del prodotto su www.akrapovic.com). Per le omologazioni EC ed ECE si prega di consultare il certificato allegato al prodotto. -
Seite 38: Elenco Dei Componenti
L’elenco dettagliato dei componenti è disponibile sul sito web di Akrapovič (si prega di utilizzare il codice QR riportato in copertina o di cercare la “Visualizzazione schematica” nella rispettiva pagina del prodotto su www. akrapovic.com). RIMOZIONE DELL'IMPIANTO DI SCARICO DI SERIE: La procedura di smontaggio dell'impianto di scarico di serie può... - Seite 39 RIMOZIONE DELL'IMPIANTO DI SCARICO DI SERIE: Posizionare la moto sul cavalletto laterale; consigliamo di utilizzare un cavalletto centrale da corsa. Accertar- si che la superficie sia solida e in piano. Svitare il bullone contrassegnato e con cautela sfilare lo scudo termico in plastica nella direzione indicata (F 01).
- Seite 40 MONTAGGIO DELL'IMPIANTO DI SCARICO AKRAPOVIČ: Montare il silenziatore con la guarnizione in grafite e la fascia del kit di montaggio di Akrapovič, come mo- strato (F 14). ATTENZIONE: durante questa procedura prestare attenzione a non ferirsi o a non danneggiare nessun componente dello scarico! Avvitare i bulloni M5 e le rondelle termoresistenti del kit di montaggio Akrapovič...
- Seite 41 INSTALLAZIONE FINALE E MANUTENZIONE: A montaggio terminato eliminare le macchie di grasso da tutte le superfici dell'impianto di scarico. Questo evita che le macchie brucino sulla superficie. Non utilizzare detergenti chimici aggressivi che potrebbero danneggiare la superficie o l'adesivo.
-
Seite 42: Risoluzione Problemi
RISOLUZIONE PROBLEMI: Problema Possibile causa Soluzione serrare la fascia alla coppia fascia allentata specificata I gas di scarico fuoriescono dalle connessioni tra silenziatore e tubi spingere i componenti in i componenti non sono posizione e serrare la fascia alla sufficientemente connessi coppia specificata 21 / 62... - Seite 43 www.akrapovic.com...
- Seite 44 Instructions d'installation Système d'échappement d'Akrapovič Slip-On Line pour la Honda CRF1100L Africa Twin Honda CRF1100L Africa Twin Adventure Sports Révision 1.0 07/2020 www.akrapovic.com...
-
Seite 45: Informations Générales
Akrapovič prend très au sérieux tous les cas d'infraction du copyright et des autres droits. Si vous avez des raisons à croire que votre système d'échappement n'est pas un produit d'origine Akrapovič, veuillez contactez nos partenaires locaux ou Akrapovič en envoyant un e-mail à info@akrapovic.com. 24 / 62... - Seite 46 SUR NOTRE SITE (VEUILLEZ UTILISER LE CODE QR FIGURANT SUR LA PREMIÈRE PAGE OU CHERCHER LA « VUE SCHÉMATIQUE » QUE VOUS TROUVEREZ SUR LA PAGE CORRESPONDANTE DU PRODUIT SUR WWW.AKRAPOVIC.COM). ASSUREZ-VOUS DE DISPOSER DE TOUTES LES PIÈCES NÉCESSAIRES POUR L'INSTALLATION DE VOTRE NOUVEAU SYSTÈME D'ÉCHAPPEMENT D'AKRAPOVIČ.
-
Seite 47: Remarque Générale
Ni Akrapovic d.d., ni aucune de ses filiales ne déclarent que leurs pièces ou systèmes aient reçu un tel ordre exécutif, ou que leurs pièces ou systèmes sont conformes à... -
Seite 48: Liste De Pièces
Une liste détaillée des pièces peut être trouvée sur le site web d'Akrapovič (veuillez utiliser le code QR figurant sur la première page ou chercher la « vue schématique » sur la page correspondante du produit sur www. akrapovic.com). ENLÈVEMENT DU SYSTÈME D'ÉCHAPPEMENT DE SÉRIE : La procédure de désinstallation du système d'échappement d'origine peut varier en fonction du système... - Seite 49 RETRAIT DU SYSTÈME D'ÉCHAPPEMENT DE SÉRIE : Placez la moto sur une béquille latérale, nous vous recommandons d'utiliser une béquille de course cen- trale. Assurez-vous que la surface est solide et plane. Dévissez le boulon indiqué et faites glisser avec précaution la protection thermique de la moto en direction indiquée (F 01).
- Seite 50 INSTALLATION DU SYSTÈME D'ÉCHAPPEMENT D'AKRAPOVIČ : Installez le silencieux avec le joint d'étanchéité en graphite et le collier du kit d'installation d'Akrapovič, tel qu'indiqué (F 14). ATTENTION : veillez à ne pas vous blesser ou endommager une partie du système d'échappement au cours de cette procédure ! Vissez les boulons M5 de la protection thermique d'Akrapovič...
- Seite 51 INSTALLATION FINALE ET ENTRETIEN : Nettoyez les taches de graisse de toutes les surfaces du système d'échappement, lorsque l'installation est terminée. En nettoyant les taches, vous éviterez qu’elles brûlent sur la surface. N'utilisez pas de nettoyants chimiques agressifs, car ils peuvent endommager la surface ou l'étiquette.
- Seite 52 DÉPANNAGE : Problème Cause possible Solution serrer le collier au couple collier desserré spécifié Fuites du gaz d'échappement hors des raccords de colliers de silencieux/tuyaux mettre le raccord en place le raccord n'est pas et serrer le collier au couple complètement serré...
- Seite 53 www.akrapovic.com...
- Seite 54 Instrucciones de montaje Sistema de escape de Akrapovič Slip-On Line para el modelo Honda CRF1100L Africa Twin Honda CRF1100L Africa Twin Adventure Sports Revisión 1.0 07/2020 www.akrapovic.com...
-
Seite 55: Información General
En caso de que tenga algún motivo para sospechar que su sistema de escape no sea un producto original de Akrapovič, por favor póngase en contacto con nuestros distribuidores oficiales locales o con Akrapovič mediante la dirección de correo electrónico info@akrapovic.com. 34 / 62... - Seite 56 PIEZAS DISPONIBLE EN NUESTRA PÁGINA WEB (POR FAVOR UTILICE EL CÓDIGO QR DE LA PÁGINA PRINCIPAL O BUSQUE «VISTA FRONTAL» EN LA PÁGINA DEL PRODUCTO CORRESPONDIENTE EN WWW.AKRAPOVIC.COM). COMPRUEBE QUE TENGA TODAS LAS PIEZAS NECESARIAS PARA EL MONTAJE DE SU NUEVO SISTEMA DE ESCAPE AKRAPOVIČ. EN CASO DE QUE LE FALTE ALGUNA DE LAS PIEZAS, POR FAVOR NO EMPIECE A DESMONTAR SU SISTEMA DE ESCAPE ORIGINAL / MONTAR EL SISTEMA DE ESCAPE DE AKRAPOVIČ, CONTACTE CON EL DISTRIBUIDOR QUE LE HA...
- Seite 57 Akrapovič respecto de varios requisitos legales en la parte de productos de nuestra página web (por favor utilice el código QR de la página principal o consulte la página del producto correspondiente en www. akrapovic.com). Para las homologaciones de tipo CE y CEE por favor consulte el certificado que acompaña a su producto.
-
Seite 58: Lista De Piezas
Puede encontrar una lista detallada de piezas en la página web de Akrapovič (por favor use el código QR en la página principal o busque «vista frontal» en la página del producto correspondiente en www.akrapovic.com). RETIRADA DEL SISTEMA DE ESCAPE ORIGINAL: El proceso para desmontar el sistema de escape original puede variar según el tipo de sistema de escape... - Seite 59 RETIRADA DEL SISTEMA DE ESCAPE ORIGINAL: Coloque la moto sobre un caballete lateral, recomendamos el uso de un caballete de carreras central. Ase- gúrese de que la superficie es plana y sólida. Desenrosque el tornillo indicado y deslice con cuidado el protector térmico de plástico de la moto en la dirección indicada (F 01).
- Seite 60 MONTAJE DEL SISTEMA DE ESCAPE DE AKRAPOVIČ: Ensamble el silenciador con la junta de grafito y la abrazadera del kit de montaje de Akrapovič, tal y como se muestra (F 14). ATENCIÓN: ¡Preste atención a no lesionarse, ni dañar ninguna pieza del escape durante este proceso! Enrosque los tornillos M5 del protector térmico de Akrapovič...
- Seite 61 INSTALACIÓN FINAL Y MANTENIMIENTO: Limpie las manchas de grasa de las superficies del sistema de escape al terminar con la instalación. La limpieza impedirá que las manchas de grasa puedan inflamarse en la superficie. No utilice agentes químicos agresivos durante la limpieza, ya que podrían provocar daños en ella o en los adhesivos.
-
Seite 62: Resolución De Problemas
RESOLUCIÓN DE PROBLEMAS: Problema Posible causa Solución apretar la abrazadera con el par abrazadera suelta especificado El gas de escape sale por las conexiones de abrazadera de silenciador/tubo poner la conexión en su sitio y la conexión no está totalmente apretar la abrazadera con el par unida especificado... - Seite 63 www.akrapovic.com...
-
Seite 64: Instruções De Montagem
Instruções de montagem Sistema de escape Akrapovič Slip-On Line para Honda CRF1100L Africa Twin Honda CRF1100L Africa Twin Adventure Sports Revisão 1.0 07/2020 www.akrapovic.com... -
Seite 65: Informação Geral
Akrapovič é rígida no que diz respeito a todos os casos de violação de direitos de autor e de outros direitos. Caso tenha motivos para acreditar que o seu sistema de escape não é um produto original da Akrapovič, contacte os nossos representantes locais ou a Akrapovič para info@akrapovic.com. 44 / 62... - Seite 66 VERIFIQUE AS PEÇAS QUE RECEBEU NA LISTA DE PEÇAS DISPONÍVEL NO NOSSO SÍTIO WEB (USE O CÓDIGO QR NA CAPA OU PESQUISE A «VISUALIZAÇÃO ESQUEMÁTICA» NA PÁGINA CORRESPONDENTE DO PRODUTO EM WWW.AKRAPOVIC.COM). CERTIFIQUE-SE DE QUE TEM TODAS AS PEÇAS NECESSÁRIAS PARA A INSTALAÇÃO DO SEU NOVO SISTEMA DE ESCAPE AKRAPOVIČ.
- Seite 67 Web (use o código QR na capa ou pesquise a página de produto correspondente em www.akrapovic.com). Para aprovações de tipo CE e ECE, consulte o certificado anexo ao seu produto.
-
Seite 68: Lista De Peças
Silenciador e tubos A lista detalhada das peças pode ser consultada no sítio Web da Akrapovič (utilize o código QR na capa ou pesquise «Visualização esquemática» na página do produto correspondente em www.akrapovic.com). REMOÇÃO DO SISTEMA DE ESCAPE INSTALADO: O processo de desmontagem do sistema de escape original pode variar dependendo do sistema de escape original. - Seite 69 REMOÇÃO DO SISTEMA DE ESCAPE INSTALADO: Coloque o motociclo no descanso lateral, recomendamos um descanso de competição central. Certifique-se de que a superfície é estável e plana. Desaperte o parafuso marcado e retire cuidadosamente a proteção térmica em plástico do motociclo, desli- zando na direção marcada (F 01).
- Seite 70 MONTAGEM DO SISTEMA DE ESCAPE AKRAPOVIČ: Monte o anel de grafite e a braçadeira do kit de montagem Akrapovič no silenciador, conforme mostrado (F 14). CUIDADO: tenha cuidado para não se magoar, nem danificar qualquer peça do escape durante este procedimento! Aperte os parafusos M5 da proteção térmica e as anilhas resistentes ao calor do kit de instalação Akrapovič...
- Seite 71 INSTALAÇÃO FINAL E MANUTENÇÃO: Limpar as manchas de gordura de todas as superfícies do sistema de escape, quando a instalação estiver concluída. A limpeza irá prevenir manchas de queimadura na superfície. Não usar produtos químicos de limpeza agressivos, pois podem danificar a superfície ou o autocolante.
-
Seite 72: Resolução De Problemas
RESOLUÇÃO DE PROBLEMAS: Problema Possível causa Solução aperte a braçadeira ao torque braçadeira solta especificado Fugas de gás de escape do silenciador/das ligações das braçadeiras de tubulação pressione a ligação no lugar e a ligação não está aperte a braçadeira ao torque completamente unida especificado 51 / 62... - Seite 73 www.akrapovic.com...
-
Seite 74: Navodila Za Namestitev
Navodila za namestitev Izpušni sistem Akrapovič Slip-On Line za modela Honda CRF1100L Africa Twin Honda CRF1100L Africa Twin Adventure Sports Različica 1.0 07/2020 www.akrapovic.com... -
Seite 75: Splošne Informacije
Podjetje Akrapovič bo resno obravnavalo vsako kršitev avtorskih ali drugih pravic. Če sumite, da vaš izpušni sistem ni originalni izdelek podjetja Akrapovič, se obrnite na lokalnega partnerja podjetja Akrapovič ali na podjetje Akrapovič na naslovu info@akrapovic.com. 54 / 62... - Seite 76 DELE, KI STE JIH PREJELI, PRIMERJAJTE S SEZNAMOM DELOV NA SPLETNI STRANI PODJETJA AKRAPOVIČ (UPORABITE KODO QR NA SPREDNJI STRANI ALI POIŠČITE SHEMATSKI PRIKAZ NA STRANI POSAMEZNEGA IZDELKA NA NASLOVU WWW.AKRAPOVIC.COM). PREPRIČAJTE SE, DA STE PREJELI VSE DELE, KI JIH POTREBUJETE ZA NAMESTITEV NOVEGA IZPUŠNEGA SISTEMA AKRAPOVIČ.
-
Seite 77: Opozorila Glede Hrupa In Izpustov
(uporabite kodo QR na sprednji strani ali pa poiščite stran določenega izdelka na naslovu www.akrapovic.com). Za homologaciji ES in EGS si oglejte certifikat, ki je priložen izdelku. -
Seite 78: Seznam Delov
Dušilec in cevi Podroben seznam delov je na voljo na spletni strani podjetja Akrapovič (uporabite kodo QR na sprednji strani ali poiščite shematski prikaz na strani posameznega izdelka na naslovu www.akrapovic.com). ODSTRANJEVANJE TOVARNIŠKEGA IZPUŠNEGA SISTEMA: Postopek odstranjevanja originalnega izpušnega sistema se lahko med izpušnimi sistemi razlikuje. Originalni izpušni sistem odstranite skladno z navodili proizvajalca. - Seite 79 ODSTRANJEVANJE TOVARNIŠKEGA IZPUŠNEGA SISTEMA: Motorno kolo postavite na nogo. Priporočamo uporabo sredinskega dirkalnega stojala. Prepričajte se, da je podlaga trdna in ravna. Odvijte označeni vijak in plastično toplotno zaščito previdno potisnite z motornega kolesa v označeno smer (F 01).
- Seite 80 NAMESTITEV IZPUŠNEGA SISTEMA AKRAPOVIČ: Namestite dušilec z grafitnim tesnilom in objemko iz kompleta pritrdilnega materiala Akrapovič, kot je prika- zano (F 14). POZOR: pazite, da med tem postopkom ne boste poškodovali sebe ali katerega koli dela izpušnega sistema. Privijte toplotno odporne vijake M5 in toplotno odporne podložke toplotne zaščite iz kompleta pritrdilnega materiala Akrapovič...
- Seite 81 KONČNA NAMESTITEV IN VZDRŽEVANJE: Z vseh površin izpušnega sistema po zaključku namestitve očistite vse mastne madeže. Če jih ne očistite, se bodo madeži vžgali v površino. Ne uporabljajte agresivnih čistil, saj lahko poškodujejo površino oz. nalepko. 1. Dušilec – zunanji ovoj iz titana: očistite ga z mehko krpo, ki jo navlažite z univerzalnim mazivom v razpršilu (WD-40 ali podobnim)*.
-
Seite 82: Odpravljanje Težav
ODPRAVLJANJE TEŽAV: Težava Možen vzrok Ukrep Objemko privijte s predpisanim Premalo privita objemka. zateznim momentom. Izpušni plin uhaja iz spojev med dušilcem/cevjo, zatesnjenih z Spoj do konca potisnite v objemkami. položaj, objemko pa privijte Spoj ni pravilno sestavljen. s predpisanim zateznim momentom. - Seite 83 www.akrapovic.com...