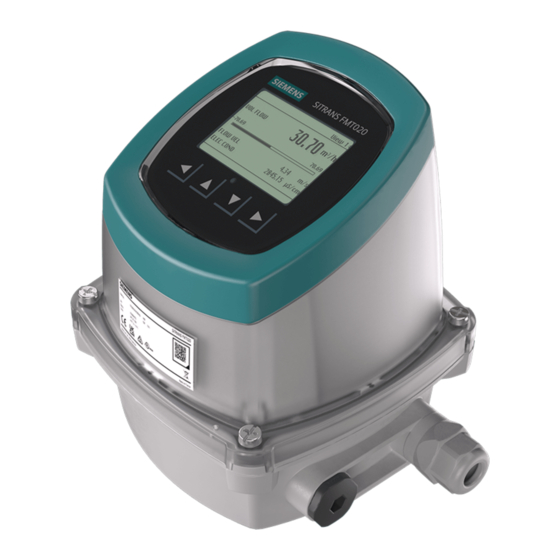
Siemens SITRANS FMT020 Kompaktmontageanleitung
Vorschau ausblenden
Andere Handbücher für SITRANS FMT020:
- Kompaktmontageanleitung (2 Seiten) ,
- Kompaktmontageanleitung (2 Seiten) ,
- Betriebsanleitung (168 Seiten)
Werbung
Verfügbare Sprachen
Verfügbare Sprachen
Quicklinks
Transmitter conversion kit remote design
Items supplied
• 1 wall mounting kit
• 4 cable glands (M20 or NPT with adapter)
• SENSORPROM (programmed)
Dimensions in cm (inch)
∅ Drill size 8 - 12 mm (0.315 - 0.472)
Note
Scan QR code for further information
Consult the Operating Instructions for
further information and instructions in
other languages.
Disassembling existing transmitter for remote version
1. Isolate the device from power.
2. Remove the transmitter from the existing wall mounting kit.
3. Remove all cables from the existing connection board.
Keep the existing cable connections on sensor side.
4. Remove the existing wall mounting kit.
Notice
Only use cable glands provided by Siemens for this device
The usage of other cable glands can damage the device. For restrictions
regarding certification refer to the Operating Instructions.
Installing the FMT020 conversion kit for remote design
1. Install the new wall mounting kit on a wall or pipe.
•
Mount the wall bracket on a vertical or horizontal pipe by using ordinary
hose clips or duct straps.
•
Mount the wall bracket on a wall or on the back of a panel using
mounting screws.
5
2. Mount the grounding wire and coil cable shield to the grounding screw on the
connection board of the transmitter ②.
3. Mount the connection board into the wall mounting kit.
4. Plug the SENSORPROM on the connection board ①. Ensure that the serial
number on the SENSORPROM label is identical to the sensor serial number.
5. Fit M20 or ½" NPT cable glands for supply, coil, electrode and output cables.
For NPT cable glands use the M20 to NPT adapter.
6. Fit the coil cable ④ through the cable gland on the wall mounting kit.
•
Connect the blue wire of the coil cable to terminal 85 and the brown wire
to terminal 86.
6
•
Cut off the outer shield, if not done so in prior installation.
7. Fit the electrode cable ③ through the cable gland on the wall mounting kit.
Cut off the outer shield on transmitter side.
Note
Special type electrode cable
9
For special type electrode cables connect the individual wire shields to
terminals 0, 81 and 84 instead. Consult Operating Instructions for details.
•
Connect the brown wire of the electrode cable to terminal 82, the black
wire to terminal 0 and the blue wire to terminal 83.
8. Fit the supply ⑥ and output cables ⑤ through the cable glands.
•
Connect the supply cable to the provided power supply connector.
•
Connect the outputs to the connection board according to your needs.
9. Mount the transmitter by cross tightening as indicated. To avoid damage to the
device do not tighten fully at first.
10. To obtain optimum sealing, tighten cable glands.
Note
Flowmeter performance
To ensure the accuracy specification it may be necessary to make appropriate
adjustments. For guidance and examples to achieve the optimum product
performance, please refer to the SITRANS FMT020 Operating Instructions or
consult Siemens Support for further details.
A5E52050706-AA
INSTALLATION INSTRUCTIONS
1
2
3 4
6 7
7
6
8
8
Preinstalled:
• 1 grounding cable
• 8 blanking plugs
1
3
6
5
7
6
9
SITRANS FMT020
96 (37.80)
181,8 (71.57)
161,3 (63.50)
2
6
4
4
6
8
2 2
3 3
3
5
1 1
09/2023
Werbung

Inhaltszusammenfassung für Siemens SITRANS FMT020
- Seite 1 Flowmeter performance To ensure the accuracy specification it may be necessary to make appropriate adjustments. For guidance and examples to achieve the optimum product performance, please refer to the SITRANS FMT020 Operating Instructions or consult Siemens Support for further details. A5E52050706-AA...
- Seite 2 10. Ziehen Sie die Kabelverschraubungen fest, um eine optimale Abdichtung zu erhalten. Hinweis Leistung des Durchflussmessers Um die Genauigkeitsspezifikation zu gewährleisten, können Anpassungen erforderlich sein. Für weitere Informationen lesen Sie die SITRANS FMT020 Bedienungsanleitung oder wenden Sie sich an den Siemens Support. A5E52050706-AA 09/2023...


