Inhaltsverzeichnis
Werbung
Quicklinks
Bedienungsanleitung - Produkt 1:
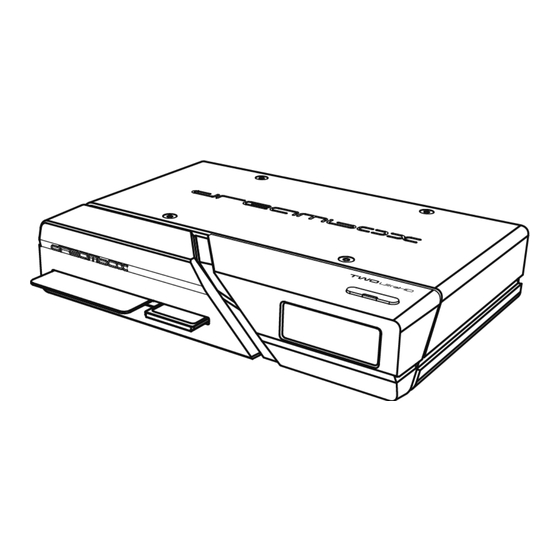
Dreambox 13590 Two Ultra HD BT 2X DVB-S2X MIS Tuner 4K
2160p E2 Linux Dual WiFi H.265 HEVC, schwarz
Bedienungsanleitung - Produkt 2:
Samsung Portable SSD T7 (MU-PC1T0T/WW), 1 TB, USB 3.2
Gen.2, 1.050 MB/s Lesen, 1.000 MB/s Schreiben, externe
Festplatte für Mac, PC, Smartphone und Spielekonsole, Grau
Werbung
Inhaltsverzeichnis

Verwandte Anleitungen für Siemens Dreambox Two UltraHD

Inhaltszusammenfassung für Siemens Dreambox Two UltraHD
- Seite 1 Bedienungsanleitung - Produkt 1: Dreambox 13590 Two Ultra HD BT 2X DVB-S2X MIS Tuner 4K 2160p E2 Linux Dual WiFi H.265 HEVC, schwarz Bedienungsanleitung - Produkt 2: Samsung Portable SSD T7 (MU-PC1T0T/WW), 1 TB, USB 3.2 Gen.2, 1.050 MB/s Lesen, 1.000 MB/s Schreiben, externe Festplatte für Mac, PC, Smartphone und Spielekonsole, Grau...
- Seite 2 Dreambox Two UltraHD User Manual Digital satellite receiver to receive free and 1x Smartcard-Reader Dreamcrypt encrypted DVB programs. 1x Common Interface slot UltraHD 1x USB 2.0 Twin DVB-S2x tuner 1x USB 3.0 Gigabit network interface HDMI 2.0 out WIFI 2.4 / 5 GhZ...
- Seite 3 Foreword Dear Customer, Congratulations on the purchase of your Dreambox Two UltraHD. These operating instructions should help you to connect your Dreambox correctly to learn basic operation and also to get to know the numerous functions. Please note that the functional scope of your Dreambox is constantly expanding through software updates.
-
Seite 4: Inhaltsverzeichnis
Contents 1 Before starting up the receiver 1.1 Safety instructions ........................1 1.2 Scope of delivery........................3 1.3 Device views .......................... 4 1.3.1 Front view ........................4 1.3.2 Rear view........................5 2 Start up ..........................6 Connecting 2.1.1 ....................6 Satellite Dish (DVB-S/S2) 2.1.2 ........................ - Seite 5 4.7 Parental control ........................4.8 Common-Interface ........................5 Setup 5.1 Language ..........................5.2 Customize ........................... 5.2.1 Simple Mode ....................... 5.2.2 Intermediate mode: ....................5.3 Timezone ..........................5.4 A/V Settings ........................... 5.5 Network ..........................5.5.1 Connection via network cable ..................5.5.2 Integrated wireless (WLAN) ..................
- Seite 6 8 Updating the software 8.1 Backing up your settings ....................... 52 8.2 Restoring your settings ......................... 52 8.3 Updating a new software ......................53 8.3.1 With browser ........................53 9 Troubleshooting 10 Technical data 11 Features 12 Service & Support Information...
-
Seite 8: Before Starting Up The Receiver
Chapter 1 Before initial operation of the receiver Safety instructions Please read the safety instructions completely and carefully, before using the Dreambox. The Manufacturer takes no responsibility for damages as a result of incorrect handling of the Dreambox. • Make sure to have enough space around the Dreambox for sufficient ventilation. •... -
Seite 9: Additional Safety Instructions
Shut down • In case your Dreambox is in use for a longer period of time disconnect the power plug from the power outlet. • During thunder storm the unit should also be physically disconnected from the power outlet. Additional safety instructions •... -
Seite 10: Disposal Instructions
Disposal instructions The packaging of the Dreambox only consists of reusable materials. Please recycle if possible. This symbol on the product or on its packaging indicates that this product must not be disposed of with your other household waste. Instead, it is your responsibility to dispose of your waste equipment by handing it over to a designated collection point for the recycling of waste electrical and electronic equipment. -
Seite 11: Device Views
1.3 Views 1.3.1 Front view 1x smart card reader Insert your Dreamcrypt smart card with the chip facing downwards and forwards into the smart card reader. IR-Sensor receives the infrared signals from your Dreambox remote control. SD-Card reader standby button switches your Dreambox on or off Status LED indicates the standby status of the Dreambox. -
Seite 12: Rear View
1.3.2 Rear view LNB-Input (2x DVB-S2x Tuner) Connect the coaxial cable from your LNB here. HDMI -Output You can connect a TV to the HDMI® out of your Dreambox if your TV has the right input. S/PDIF optical audio You can connect your Dreambox with an optical (Toslink) cable to your HiFi- Amplifier or DSP. -
Seite 13: Start Up
Chapter 2 Start-up 2.1 Connecting Before using the Dreambox, please read the safety instructions under Chapter Safety instructions on page In the following is described how to connect the dreambox to , an a/v receiver, a tv-device and a network. 2.1.1 Satellite Dish (DVB-S/S2) Connect the (LNB) with a suitable coax cable to the LNB-Input of your Dreambox. -
Seite 14: Television
Anschluss über HDMI-Kabel 2.1.2 Connection via HDMI cable HDMI Verbinden Sie mit Hilfe eines HDMI-Kabels den HDMI-Ausgang der Dreambox mit dem HDMI-Eingang Ihres AV-Receivers. Verbinden Sie dann mit einem weiteren HDMI-Kabel einen HDMI-Ausgang Ihres AV-Receivers Connect the dreambox with the hdmi-cable to the TV-input of your television. mit ein At least use the hdmi-interface for getting the best picture quality (through digital transmission). -
Seite 15: Turning The Device On
2.2 Turning the device on 1. Place the batteries inside the battery compartment of the remote control keeping in mind the right polarity. 2. Plug in the power cable into the supplied power supply and connect it to the Dreambox. The power plug has to be plugged into a 110V/60Hz or 230V/50Hz power socket. -
Seite 16: Language Selection
Language selection Navigation-Buttons ( ▲▼) OK-Button With the choose your desired language and confirm with the Tuner Detailed information about the tuner setup can be found in chapter DVB-S2 Tuner-Configuration on page Default services list/Service scan Depending on your tuner configuration in the previous step, you might be o.ered to install default services lists. -
Seite 17: Basic Operation
Chapter 3 Basic operation 3.1 Turning your Dreambox on and off Your Dreambox has an idle mode and an standby mode. Both functions di.er in their power consumption and the time which is needed until the box has booted. • Idle about 1 Second (higher power consumption) •... -
Seite 18: Service Selection
Sleep Timer Put your Dreambox into Standby after a duration of time that can be chosen freely. (See Chapter 3.12 Sleep timer on page Idle Mode Puts your Dreambox into Idle mode. Restart Your Dreambox will be rebooted. Standby Puts your Dreambox into Standby-Mode. 3.2 Service selection Pressing the Navigation-Buttons on your Dreambox remote control will take you to the previous... -
Seite 19: Controlling The Volume
3.4 Controlling the volume The Volume +/- Buttons control the volume of the audio. Pressing + will make turn it up and pressing - will turn it down. downdown Pressing the MUTE-Button mutes the volume. A crossed speaker symbol will appear on the screen. 3.5 Changing the audio track Pressing the AUDIO-Button in TV or Radio Mode. -
Seite 20: Subtitles
3.8 Subtitles Follow these steps: 1. In TV- or Radio Mode press the AUDIO-Button. 2. By pressing the yellow Options-Button a list with the available subtitles will show up. 3. With the Navigation-Buttons ( ▲▼) select a desired subtitle and press the OK-Button to activate. The screenshot on the left shows you an example how a subtitle looks. -
Seite 21: Infobar
3.9 Infobar The Infobar appears when switching a channel and shows all necessary information about the selected service. By pressing the OK-Button you can open the Infobar if needed! INFO MENU... -
Seite 22: Electronic Program Guide - Epg
3.10 EPG – Electronic Program Guide The Electronic Program Guide (EPG) shows information regarding the current tv service (similar to a TV guide). By pressing the INFO-Button in TV-Mode you are supplied with detailed information about the current show and by pressing the Navigationbutton (I) afterwards about the next show. - Seite 23 Single-EPG In this view you are supplied with detailed information about the currently selected channel’s programming. Follow this steps: 1. Press the INFO-Button. 2. Press the yellow Options-Button for getting the “Single-EPG” view. You can also access this view by pressing: 1.
- Seite 24 Multi-EPG Follow these steps: 1. Press the Info-Button. 2. Press the blue Options-Button for switching to “Multi-EPG” view. Use the blue and yellow Options-Buttons to switch between the now, next and more views. Pressing the green Options-Button will give you the possibility to automatically copy the start and end time of the selected show into a recording timer.
- Seite 25 Time/Date Input Press the Menu-Button in the Multi-EPG view. A window will appear where you can enter a time and date. After you have entered the desired time and date press the OK-Button to activate your selection. Graphical Multi-EPG You have another option to view the EPG of di.erent services and successive shows. The Graphical Multi- EPG displays the EPG overview for the upcoming hours (can be set to 1-5 hours with the Buttons 1-5 on the Numeric-Keypad) for the chosen bouquet.
-
Seite 26: Teletext (Videotext)
Time/Date Input Press the Menu-Button in the Multi-EPG view. A window will appear where you can enter a time and date. After you have entered the desired time and date press the OK-Button to activate your selection. 3.11 Teletext (Videotext) TEXT-Button 1. - Seite 27 Teletext Konfigurationsmenü: If the Teletext page 100 is shown you can press the MENU- Button to enter the Teletext configuration menu. You have the following options: Scale filter and Scale filter zoom You can choose between following scale options: • bilinear •...
- Seite 28 TeleText and Picutre TeleText on the left and TV picture on the right side of your TV. TeleText in Picture TeleText will be shown as small picture in graphics (pig). Position and size (see "‘Position and size"’). Background caching If you switch o. background caching, searching for the page will not start before you entered the last number.
-
Seite 29: Sleep Timer
3.12 Sleep timer Using the sleep timer you can put your Dreambox into standby or turn it o. after a predetermined amount of time. Follow these steps: 1. Press the Menu-Button to open the main OSD menu. 2. With the Navigation-Buttons ( ▲▼) choose the option “Standby / Restart” and press the OK- Button. -
Seite 30: Edit The Channellist
Chapater 4 Edit the channellist What is a bouquet? A bouquet can be thought of something like a folder. Every channel equals a page in this folder and the pages are sorted into categories. This way you can create a bouquet called “Kids”, for example, under which you “file” all children’s stations. Another example would be to create a bouquet called “Sports”... -
Seite 31: Add A Service To Favorites
4.2 Add a service to favorites If you want to add a service to your Favorites-view you can choose from services in the All-, Satellitesand Provider-views. You can switch views by pressing the red, green, yellow and blue Options- Buttons. At this point we only describe the process from the All-Bouquet since it is the same for the others. -
Seite 32: Remove A Service From Favorites
4.4 Remove a service from favorites 1. Press the Navigation-Buttons ( ▲▼) to open the channellist. 2. With the Navigation-Buttons ( ▲▼) choose the channel you want to delete. 3. By pressing the MENU-Button the “Channellist menu” will open up. 4. -
Seite 33: Parental Control
5. Use the Numeric-Keypad on your remote control to enter the name for the new bouquet. The according letters are printed on button. The Mute-Button deletes a character. 6. Press the OK-Button, to add the marker to your favorites list. If you have added two markers use the Arrow-Left and Arrow-Right-Buttons to jump between those two markers. - Seite 34 If you have selected whitelist under the “Parental control type” then this channel will be the only one that can be viewed without entering the right pincode. Change service pin 1. With the Navigation-Buttons ( ▲▼) choose the option “Change service PIN” and press the OK- Button.
-
Seite 35: Common-Interface
4.8 Common Interface 1. Press the Menu-Button to open the main OSD menu. 2. Withthe Navigation-Buttons ( ▲▼) chooset he option “Setup” and press the OK-Button. 3. With the Navigation-Buttons ( ▲▼) choose the option “Devices” and press the OK-Button. 4. -
Seite 36: Setup
Chapter 5 Setup 5.1 Language 1. If no OSD menu is visible on your screen, press the Menu-Button to open the main OSD menu. 2. With the Navigation-Buttons ( ▲▼) choose the option “Setup” and press the OK-Button. 3. With the Navigation-Buttons ( ▲▼) choose the option “System” and press the OK-Button. 4. -
Seite 37: Simple Mode
5.2.1 Simple Mode Shutdown when no button has been pressed for Set dreambox into standby mode when no button has been pressed for a configured time. You can choose between 1-5 hours or disable this feature. Margin before record (in Minutes) Set the desired forerun in minutes for a recording. Margin after record Set the desired lag in minutes for a recording. -
Seite 38: Timezone
Alternative radio mode Set this option to “Yes” if you want the handling in the Radio mode to be the same as in the TV mode. Action on long powerbutton press Set your desired option what is supposed to happen if you push the Standby-Button for a few seconds. -
Seite 39: Video Output
Video output This option selects to which output the video signal will be sent to. HDMI® If you have connected your TV to the HDMI® output of your Dreambox set the “Output type” option to “HDMI”. Modus Use the Navigation-Buttons to select the desired screen resolution (◄►) Display 4:3 content as:/Display 16:9 content as:... -
Seite 40: Network
OSD visibility With the Navigation-Buttons (◄►) you can change the transparency of the gui. Scaler sharpness With the Navigation-Buttons (◄►) you can change the sharpness of the screen. 5.6 Network 5.6.1 Connect via network cable Adapter-Settings 1. Press the Menu-Button to open the main OSD menu. 2. -
Seite 41: Manually Setting An Ip Adress
Manually setting an IP adress These settings are only needed if you want to configure your Network manually. 1. With the Navigation-Buttons ( ▲▼) choose the cable based network “Wired” and press the OK- Button. 2. Press the yellow Options-Button. 3. -
Seite 42: Integrated Wireless (Wlan)
5.6.2 Integrated wireless (WLAN) 1. Press the Menu-Button to open the main OSD menu. 2. With the Navigation-Buttons ( ▲▼) choose the option “Setup” and press the OK-Button. 3. With the Navigation-Buttons ( ▲▼) choose the option “Network” and press the OK-Button. 4. -
Seite 43: Skin
5.7 Skin 1. Press the Menu-Button to open the main OSD menu. 2. With the Navigation-Buttons ( ▲▼) choose the option “Setup” and press the OK-Button. 3. With the Navigation-Buttons ( ▲▼) choose the option “Picture and Sound” and press the OK- Button. -
Seite 44: Service Searching
Chapter 6 Service searching In this chapter you will learn how to setup the tuner configuration for the reception with a satellite-dish (DVB-S/S2), via cable television (DVB-C) or via digital terrestrial television (DVB-T/T2) in your dreambox and how to perform a service scan. 6.1 DVB-S2 Tuner-Configuration 6.1.1 Single satellite –... -
Seite 45: Dvb-S2 Tuner-Configuration
6. With the Navigation-Buttons ( ▲▼) choose the option “DVB-S2 Tuner” and press the OK-Button. 7. With the Navigation-Buttons ( ▲▼) choose the option “Mode”. 8. With the Navigation-Buttons (◄►) choose the option “Single”. 9. With the Navigation-Buttons ( ▲▼) choose the option“Satellite”. 10. -
Seite 46: Two Satellites Via Diseqc A/B
6. With the Navigation-Buttons ( ▲▼) choose the option “DVB-S2 Tuner” and press the OK-Button. 7. With the Navigation-Buttons ( ▲▼) choose the option “Mode”. 8. With the Navigation-Buttons (◄►) choose the option “Toneburst A/B”. 9. With the Navigation-Buttons ( ▲▼) choose the option “Port A”. 10. -
Seite 47: Four Satellites Via Diseqc A/B/C/D
2. With the Navigation-Buttons ( ▲▼) choose the option “Setup” and press the OK-Button. 3. With the Navigation-Buttons ( ▲▼) choose the option “Services and Recordings” and press the OK-Button. 4. With the Navigation-Buttons ( ▲▼) choose the option “Service Searching” and pressthe OK-Button. 5. -
Seite 48: Stab Positioner Using Usals
Follow these steps: 1. Press the Menu-Button to open the main OSD menu. 2. With the Navigation-Buttons ( ▲▼) choose the option “Setup” and press the OK-Butto. 3. With the Navigation-Buttons ( ▲▼) choose the option “Services and Recordings” and press the OK-Button. - Seite 49 Stab Positioner using USALS This menu is meant for a Stab positioner. You only have to enter the geographical details of your residence. http://www.heavens-above.com you can find the coordinates of your residence. The rest is done automatically by your Dreambox with build-in USALS. USALS is a model for calculating the position of all satellites in orbit with a margin of error less than 0.1 degrees.
-
Seite 50: Stab Positioner Without Usals
6.1.6 Stab Positioner without USALS Use this type of configuration if you want to receive many satellites without a Stab positioner from a Single Universal LNB. The coax cable is directly connected from your Dreambox to the LNB. Stab Positioner without USALS Follow this steps: 1. -
Seite 51: Dvb-C Tuner-Configuration
12. Press the Navigation-Button ( ►). 13. With the Navigation-Buttons ( ▲▼) choose the option “DiSEqC-Modus”. 14. With the Navigation-Buttons (◄►) choose the option “1.2”. 15. With the Navigation-Buttons ( ▲▼) choose the option “Use usals for this sat”. 16. With the Navigation-Buttons (◄►) choose the option “No”. 17. -
Seite 52: Dvb-T Tuner-Configuration
Frequency bands This type of searching scans the frequencies used by most cable providers. This setting is the default. 1. With the Navigation-Buttons ( ▲▼) choose the option “Used service scan type”. 2. With the Navigation-Buttons (◄►) choose the option “Frequency bands”. 3. -
Seite 53: Automatic Scan
4. With the Navigation-Buttons ( ▲▼) choose the option “Service Searching” and press the OK-Button. 5. With the Navigation-Buttons ( ▲▼) choose the option “Tuner configuration” and press the OK-Button. 6. With the Navigation-Buttons ( ▲▼) choose the “DVB-T/T2 Tuner” and press the OK-Button. 7. - Seite 54 Use the Navigation-Buttons (▲▼◄►) to set the “Clear before scan” option to “Yes” if you want to delete all services before the scan starts. Otherwise leave the setting to “No” which results in only new services being added to the channel list. In order to find the new services, follow this steps: 1.
- Seite 55 You can see the progress of the scan here. The scan is done once you see this menu. It shows how many channels were found during the scan Press the OK-Button to store the found channels or the EXIT-Button to cancel.
-
Seite 56: Manual Scan
7.5 Manual scan Follow this steps: 1. Press the Menu-Button to open the main OSD menu. 2. With the Navigation-Buttons ( ▲▼) choose the option “Setup” and press the OK-Button. 3. With the Navigation-Buttons ( ▲▼) choose the option “Services and Recordings” and press the OK-Button. 4. -
Seite 57: Systeminformation
Systeminformation 7.1 Service This window shows detailed technical information about the current service. Channel-Information Follow this steps: 1. Press the MENU-Button in order to open the main menu. 2. Navigate to the option “Information” and press theOK-Button. The “Information” menu will open up. 3. - Seite 59 7.2 About (Hard- and Sotware ) This window shows all relevant information about the Hard- and Software of your Dreambox. Hardware- und Software-Informationen Follow this steps: 1. Press the MENU-Button in order to open the main menu. 2. Navigate to the option “Information” and press theOK-Button. The “Information”...
-
Seite 60: Updating The Software
Chapter 8 Updating the software 8.1 Backing up your setting Before installing newer software on your Dreambox you should backup your settings, otherwise they will be lost. 1. Press the Menu-Button to open the main OSD menu. 2. With the Navigation-Buttons ( ▲▼) choose the option “Setup” and press the OK-Button. 3. -
Seite 61: With Browser
8.3 Updating a new software 8.3.1 With browser Requirements: • PC with browser like Firefox, Opera, Internet Explorer • latest Software for your Dreambox, download at http://www.dreambox.de • 1 networkcable • DHCP-Server If you connect your dreambox directly to the pc you need a “Cross-Over” networkcable, if you connect your Dreambox to a switch/hub/router you need a “common”... - Seite 62 • Install new software • Backup your dreambox Now, open a browser on your PC (Firefox, Opera, Internet Explorer). 1. Enter the address from the Display or “http://IP-Adress”. “IP-Adress” has to be replaced by the ip-address shown in the display of your box. In our example it would look like this: 2.
-
Seite 63: Troubleshooting
Chapter 9 Troubleshooting Problem Possible cause Solution No audio, no video, OLED- Faulty wiring Check wiring and Display lit connections Faulty LNB Exchange LNB Wrong Tuner setting Review settings (see chapter DVB-S2 Tuner-Configuration on page Dish aligned incorrectly Realign dish Beamlike blackouts in the video Heavy rain or snow Remove snow from dish... -
Seite 64: Technical Data
Chapter 10 Technical data Dreambox OS Dreambox API 53.000 DMIPS 6 Core Prozessor MPEG2 / H.265 Hardware decoding (DVB compliant) 1x Smartcard-Reader (DreamcryptTM) 1x HDMI 2.0 Connector 10/100/1000 MBit/s compatible Gigabit Ethernet Port ... -
Seite 65: Additional Information
Additional information: DVB-S Tuner with DVB-S2x: Input Frequenzy 950 ... 2150 MHz Demodulation DVB-S (QPSK); DVB-S2x ((8PSK,QPSK) Symbolrate DVB-S: 2 ... 45 Mbaud/s, SCPC/ MCPC DVB-S2: 10 – 31 Mbaud/s (8PSK) , 10 –30 Mbaud/s (QPSK) Videode decoder: Videocompression MPEG-2 und MPEG-1 compatible, H.265 Video Formats 4:3 / 16:9 Letterbox for 4:3 TV-Device Audio decoder:... - Seite 66 Mini-USB Service-Connector: Function: Update of Firmware Ethernet: Gigabit compatible Ethernet-Port Function: Update of Firmware WIFI: 2.4 GHz 2400MHz-2483MHz 5 GHz 5150MHz-5848MHz Bluetooth: 2.4GHz Class2 2402MHz-2480MHz USB: 1x USB 2.0 Host Anschluss 1x USB 3.0 Host Anschluss SD-Card reader LNB power and polarisation per tuner: LNB Current 400mA max.
-
Seite 67: Features
Kapitel 11 Features • Single-EPG (Electronic Program Guide): sortable by date or alphabetically • Automatic search for additional air dates of a show and easy recording them by timer • Multi-EPG: graphically and text-based • Timer programming manually or by EPG •... -
Seite 68: Contact & Support Information
Chapter 12 Contact & Support Information Headquater & Distribution: Leontech Limited 10/F, North Point Goodview Centre 4 Kam Hong Street North Point Hong Kong Technical Support E-Mail: support@dreambox.de Tel.: +49 (0)180 - 3 44 11 30 990 0,09 euro/min from germany, mobile tari.s max. 42 ct/min on the phone: Mo. - Seite 69 VS Z3 siemens-home.bsh-group.com/welcome...
- Seite 70 Sicherheitshinweise ..................11 Safety information ..................13 Consignes de sécurité .................. 15 Veiligheidsvoorschriften................17 Sikkerhedsanvisninger .................. 19 Sikkerhetshenvisninger ................. 21 Säkerhetsanvisningar ..................22 fi Turvallisuusohjeet ..................24 Consejos de seguridad ................. 26 Instruções de segurança ................28 Υποδείξεις ασφαλείας ..................30 Güvenlik bilgiler ....................
- Seite 72 de * Optionales Zubehör * Lisävarusteet fi en * Optional accessories pt * Acessórios opcionais * Accessoires en option es * Accesorio opcional * Εναλλακτικά εξαρτήματα * Optionele toebehoren * İsteğe bağlı aksesuarlar da * Ekstra tilbehør no * Valgfritt tilbehør sv * Extratillbehör...
- Seite 75 VZ41GPLUS...
- Seite 76 Drying...
- Seite 77 VZ153HFB VZ41GPLUS...
-
Seite 79: Sicherheitshinweise
oder Mangel an Erfahrung und / oder Wissen benutzt Die Gebrauchsanweisung bitte aufbewahren. werden, wenn sie beaufsich- Bei Weitergabe des Staubsaugers an Dritte bitte Ge- tigt werden oder bezüglich brauchsanweisung mitgeben. des sicheren Gebrauchs des Bestimmungsgemäße Verwendung Gerätes unterwiesen wurden Dieses Gerät ist nur für den privaten Haushalt und das und die daraus resultieren- häusliche Umfeld bestimmt. -
Seite 80: Allgemeine Hinweise
Nur die Verwendung von hochwertigen Staubbeuteln, wie insbesondere den Original-Staub- = Einsaugen von Bauschutt kann zur Beschädigung > beuteln von Siemens, stellt sicher, dass die im EU des Gerätes führen. Energie-Label angegebenen Werte zu Energieeffizi- Gerät ausschalten und Netzstecker ziehen, wenn nicht enzklasse, Staubaufnahme und Staubrückhaltever-... - Seite 81 The appliance may be used by children over the age of 8 years and by persons with Please keep this instruction manual. When passing the vacuum cleaner on to a third party, please also pass on reduced physical, sensory or this instruction manual.
-
Seite 82: Disposal Information
Only by using high-qua- Protect the vacuum cleaner from the weather, moistu- lity dust bags (such as Siemens original dust bags) can you ensure that your vacuum cleaner is working re and sources of heat. -
Seite 83: Consignes De Sécurité
L'appareil peut être utilisé par des enfants à partir de 8 ans et par des personnes aya- Conservez cette notice d'utilisation. Si vous remettez l'aspirateur à une tierce personne, veuillez-y joindre sa nt des capacités physiques, notice d'utilisation. sensorielles ou mentales re- Utilisation conforme aux prescriptions streintes ou ayant un man- et à... -
Seite 84: Consignes Pour La Mise Au Rebut
Seule l'utilisation de sacs aspirateur de tion du moteur, filtre de sortie d'air etc.). qualité supérieure tels que plus particulièrement les L'aspirateur n'est pas approprié au travail de chantier. sacs aspirateur Siemens d'origine garantit que les = L ’aspiration > gravats risque d’endommager... -
Seite 85: Veiligheidsvoorschriften
Indications concernant le label énergé- Veiligheidsvoorschriften tique Deze stofzuiger voldoet aan de Cet aspirateur avec tube primaire est destiné à un usa- erkende regels van de techniek ge général. Pour atteindre l’efficacité énergétique et la classe de en de betreffende veiligheids- performance de nettoyage déclarées sur des tapis et sols durs, veuillez utiliser la brosse universelle adapta- bepalingen. -
Seite 86: Instructies Voor Recycling
= Leid het elektriciteitssnoer met behulp van de > ge stofzakken, met name de originele stofzuigerzak- netstekker. ken van Siemens, worden de waarden bereikt die Voor alle werkzaamheden aan de stofzuiger de stekker op het EU energie-label staan aangegeven voor de uit het stopcontact halen. -
Seite 87: Sikkerhedsanvisninger
ker brug af apparatet og har forstået de farer og risici, der kan være forbundet med bru- Opbevar brugsanvisningen. Sørg for, at brugsanvis- ningen medfølger, hvis De giver støvsugeren videre til gen af apparatet. andre. Børn må ikke bruge apparatet Anvendelse iht. -
Seite 88: Anvisninger Om Bortskaffelse
Kun ved anven- delse af støvposer af høj kvalitet, og herunder især originale støvposer fra Siemens, kan det sikres, at værdierne for energieffektivitsklasse, støvoptagelse og støvabsorptionsevne, som er angivet i EU ener- gimærket, bliver opnået. - Seite 89 Apparatet skal bare brukes av barn over åtte år og personer med nedsatt fysisk, sensorisk Ta godt vare på bruksanvisningen. Bruksanvisningen må følge med når støvsugeren skifter eier. eller mental funksjonsevne Tiltenkt bruk eller manglende erfaring og/ eller kunnskap dersom de er Dette apparatet er bare ment for bruk i private hushold- ninger.
-
Seite 90: Generell Informasjon
Bare bruk av kvalitetsstøvposer, Undvik person- och sakskador, använd inte dammsu- som spesielt originalstøvposene fra Siemens, sikrer garen: at verdiene for energieffektklasse, støvopptak og för att dammsuga av människor och djur. -
Seite 91: Säkerhetsanvisningar
Reservdelar, tillbehör, dammsugarpåsar Är sladden till enheten skadad, så är det bara tillver- karen, service eller behörig elektriker som får byta ut Våra reservdelar, tillbehör och extratillbehör är origi- den, allt för att undvika skador. naldelar precis som dammsugarpåsarna avsedda för att Dra ut sladden helt om du ska dammsuga längre än passa våra dammsugares egenskaper och krav. - Seite 92 Dammsugaren är mycket effektiv och om du använ- der kvalitetsdammsugarpåsar får du mycket bra Määräystenmukainen käyttö slutresultat. Använder du bara kvalitetsdammsugar- påsar som originalpåsarna från Siemens, så uppnår Tämä laite on tarkoitettu käytettäväksi yksityisessä koti- enheten den energieffektivitetsklassning, dammupp- taloudessa ja kodinomaisessa ympäristössä. Tämä laite tagning och det partikelutsläpp som EU-energimärk-...
-
Seite 93: Asianmukainen Käyttö
Vain korkealaatuisten pöly- Jos käytät laitetta yli 30 minuutin ajan, vedä verkkolii- pussien, kuten erityisesti Siemens in alkuperäisten täntäjohto kokonaan ulos. pölypussien, käyttö takaa EU:n energiamerkissä an- Irrota laite sähköverkosta vetämällä pistoke irti pistora- nettujen tehokkuusluokkaa, pölynimukykyä... -
Seite 94: Uso De Acuerdo Con Las Especificaciones
Energiamerkkiä koskevat huomautukset Tämä pölynimuri on yleiskäyttöön tarkoitettu letkulla va- rustettu pölynimuri. Conservar las instrucciones de uso. En caso de entre- Käytä mattojen ja kovien lattioiden imurointiin vaihdet- gar el aspirador a una tercera persona, adjuntar las in- tavaa yleiskäyttöön tarkoitettua suulaketta ilmoitetun strucciones de uso. -
Seite 95: Uso Adecuado
Extraer el enchufe antes de realizar cualquier trabajo polvo solo está garantizado con el uso de bolsas para en el aspirador. polvo originales de Siemens. -
Seite 96: Uso A Que Se Destina
− cinzas, fuligem de lareiras e de instalações de aque- Encontrará más información al respecto en cimento central. www.siemens-home.bsh-group.com/dust-bag. Allí − pó de toner de impressão e cópia. también podrá solicitar nuestras bolsas originales para la aspiradora. -
Seite 97: Utilização Correta
ficha. ra qualidade, como, nomeadamente, os sacos de as- Antes de efectuar quaisquer trabalhos no aspirador, piração originais da Siemens, garante o cumprimen- desligue sempre a ficha da tomada. to dos valores indicados na etiqueta energética EU Se o aspirador estiver danificado, não o coloque em relativos à... -
Seite 98: Υποδείξεις Ασφαλείας
Símbolos Ανταλλακτικά, εξαρτήματα, σακούλες Para a aspiração de mobiliário estofado, almo- σκόνης fadas e cortinas. Τα γνήσια ανταλλακτικά μας, τα γνήσια εξαρτήματά μας Para a aspiração de tapetes e alcatifas και τα γνήσια ειδικά αξεσουάρ είναι όπως και οι γνήσι- ες... -
Seite 99: Ενδεδειγµένη Χρήση
τραβήξτε το φις από την πρίζα. όπως ιδιαιτέρως οι γνήσιες σακούλες σκόνης της Οι επισκευές και η αντικατάσταση των ανταλλακτικών Siemens, εξασφαλίζει, ότι επιτυγχάνονται οι τιμές στην ηλεκτρική σκούπα επιτρέπεται να πραγµατοποιού- που αναφέρονται στην ενεργειακή ετικέτα ΕΕ σχε- νται µόνο από εξουσιοδοτηµένο σέρβις πελατών. -
Seite 100: Güvenlik Bilgileri
Εξαρτήματα Yedek parçalar, aksesuarlar, toz torbası Η εμφάνιση των εξαρτημάτων σας (στόμια αναρρό- φησης, σωλήνας αναρρόφησης, κλπ.) σε περίπτωση Orijinal yedek parçalarımız, orijinal aksesuarlarımız, ίδιου τρόπου λειτουργίας μπορεί να αποκλίνει από özel aksesuarlarımız ve orijinal toz torbalarımız kendi elektrik süpürgelerimizin özelliklerine ve gereksinimle- τις... -
Seite 101: Usulüne Uygun Kullanım
çok iyi temizleme sonuçları veren, yüksek çekip çıkarınız. verimliliğe sahip bir elektrik süpürgesidir. Sadece Tehlikeli durumları engellemek için elektrikli süpürge- yüksek kaliteli toz torbalarının, özellikle Siemens deki onarım ve yedek parça değişim işlemleri sadece orijinal toz torbalarının kullanılması durumunda AB yetkili müşteri hizmetleri tarafından yürütülmelidir. - Seite 102 Enerji etiketine ilişkin uyarılar Bu elektrik süpürgesi, birincil hortumlu üniversal elekt- rik süpürgesidir. Halılarda ve sert zeminlerde belirtilen en yüksek ener- ji verimliliğine ve temizlik performans sınıfına ulaşmak için lütfen değiştirilebilir genel ağzı kullanınız. İlgili hesaplama değerleri aşağıdaki hususları temel almaktadır: Talep düzenlemesi (AB) No.
- Seite 103 .www.siemens-home.bsh-group.com/dust-bag...
- Seite 106 Service Tel.: 0848 840 040 Service Fax: 0848 840 041 www.siemens-home.bsh-group.es Sie erreichbar. mailto:ch-reparatur@bshg.com Ersatzteile Tel.: 0848 880 080 Ersatzteile Fax: 0848 880 081 mailto:ch-ersatzteil@bshg.com www.siemens-home.bsh-group.ch BSH group is a Trademark Licensee of Siemens AG. 01/17 Manufacturer´s Service for Siemens Home Appliances.
- Seite 107 Via. M. Nizzoli 1 mailto:siemens.hk.service@bshg.com 1004 Riga www.siemens-home.bsh-group.com/hk Tel.: 067 717 060 mailto:info.it@siemens-home.com Hrvatska, Croatia www.siemens-home.bsh-group.com/it mailto:serviss@elektronika.lv www.elektronika.lv 10000 Zagreb Fax: 01 640 36 03 mailto:informacije.servis-hr@bshg.com www.siemens-home.bsh-group.com/hr BSH group is a Trademark Licensee of Siemens AG. 01/17 Manufacturer´s Service for Siemens Home Appliances.
- Seite 108 Fax: 086 617 1780 mailto:informacije.servis@bshg.com mailto:applianceserviceza@bshg.com www.siemens-home.bsh-group.com/si www.siemens-home.bsh-group.com/za Slovensko, Slovakia Polska, Poland Domowego Sp. z o.o. Galvaniho 17/C Al. Jerozolimskie 183 Centrala Serwisu mailto:opravy@bshg.com www.siemens-home.bsh-group.com/sk mailto:Serwis.Fabryczny@bshg.com www.siemens-home.bsh-group.pl BSH group is a Trademark Licensee of Siemens AG. 01/17 Manufacturer´s Service for Siemens Home Appliances.
- Seite 109 Dit apparaat is gekenmerkt in overeenstemming met de Europese richtlijn 2012/19/EU betreffende afgedankte elektrische en elektronische apparatuur (waste electrical and electronic equipment - WEEE). De richtlijn geeft het kader aan voor de in de EU geldi- ge terugneming en verwerking van oude apparaten. Dette apparat er klassificeret iht.
- Seite 110 Este aparelho está marcado em conformidade com a Directiva 2012/19/UE relativa aos resíduos de equipa- mentos eléctricos e electrónicos (waste electrical and electronic equipment - WEEE). A directiva estabelece o quadro para a criação de um sistema de recolha e valorização dos equipamentos usados válido em todos os Estados Membros da União Europeia.
- Seite 111 SE Konsumentbestämmelser DE Garantie I Sverige gäller av EHL antagna konsument- Bundesrepublik Deutschland bestämmelser. siehe letzte Seite. Ausland: Für dieses Gerät gelten die von der Vertretung unseres Hauses in dem Kaufland Takuuaika herausgegebenen Garantiebedingungen. Kodintekniikan tuotteille annetaan vähintään Einzelheiten hierüber teilt Ihnen der Händler, bei kahdentoista (12) kuukauden takuu tuotteesta dem Sie das Gerät gekauft haben, auf Anfrage riippuen.
- Seite 120 Fabricado por BSH Hausgeräte GmbH bajo licencia de marca de Siemens AG Fabricado pela BSH Hausgeräte GmbH sob licença de marca comercial da Siemens AG BSH Ev Aletleri Sanayi ve Ticaret A.Ş. tarafından Siemens AG‘nin Ticari Marka Lisansı ile üretilmiştir 8001052257...