Herunterladen Inhalt Inhalt Diese Seite drucken
Gaggia RI8263 Benutzerhandbuch
Vorschau ausblenden Andere Handbücher für RI8263:
Inhaltsverzeichnis

Werbung

Verfügbare Sprachen

Verfügbare Sprachen

Type RI8263, SUP047RG
GAGGIA
VELASCA PRESTIGE
USER MANUAL
BENUTZERHANDBUCH
MANUALE UTENTE

Werbung

Inhaltsverzeichnis
loading

Inhaltszusammenfassung für Gaggia RI8263

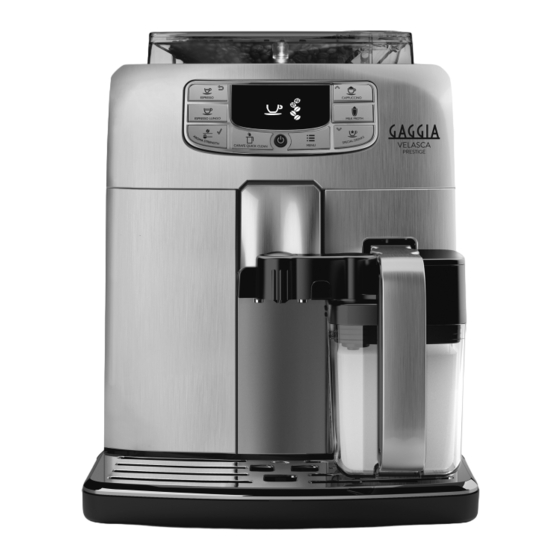
  • Seite 1 Type RI8263, SUP047RG GAGGIA VELASCA PRESTIGE USER MANUAL BENUTZERHANDBUCH MANUALE UTENTE...
  • Seite 3 ESPRESSO CAPPUCCINO ESPRESSO LUNGO MILK FROTH CARAFE QUICK CLEAN MENU...
  • Seite 5: Inhaltsverzeichnis

    Warning icons and error codes ______________________________________________________ Meaning of error codes_____________________________________________________________ Ordering accessories_______________________________________________________________ Guarantee and support ____________________________________________________________ Recycling________________________________________________________________________ Troubleshooting___________________________________________________________________ Introduction Congratulations on buying this Gaggia Velasca Prestige full automatic espresso machine! The machine is suitable for preparing espresso coffee using whole coffee beans.
  • Seite 6: Important

    - Do not make any modifications to the machine or its power cord. - Only have repairs carried out by a service center authorized by Gaggia to avoid a hazard. - The machine should not be used by children younger than 8 years old.
  • Seite 7: Caution

    English - Cleaning and user maintenance shall not be made by children unless they are older than 8 and supervised. - Keep the machine and its cord out of the reach of children aged less than 8 years. - Children should be supervised to ensure that they do not play with the machine.
  • Seite 8: Electromagnetic Fields (Emf)

    The water can be contaminated. Use fresh water every time you use the machine. Electromagnetic fields (EMF) This Gaggia appliance complies with all applicable standards and regulations regarding exposure to electromagnetic fields. Machine overview (Fig. 1)
  • Seite 9: First Installation

    English - AROMA STRENGTH button = OK button: press this button to select, confirm or stop a function. - CAPPUCCINO button = UP button: press this button to scroll up through the display menu. CAPPUCCINO - SPECIAL DRINKS button = DOWN button: press this button to scroll down through the display menu.
  • Seite 10 English 11 The machine heats up and the display shows the temperature icon. - The machine starts rinsing water through the coffee dispensing spout. The display shows the rinsing icon and a progress bar. 12 The display shows the following icon to indicate you have to install the AquaClean filter.
  • Seite 11: Manual Rinsing Cycle

    English 16 Remove the water tank from the machine, empty it and insert the filter vertically onto the filter connection. 17 Fill the water tank with fresh water to the MAX level indication. 18 Press the OK button. 19 Select ON on the display and confirm the activation by pressing the OK button A Q U A CLEAN...
  • Seite 12: Aquaclean Filter

    English 5 Repeat steps 1-3 twice. 6 Press the SPECIAL DRINKS button. Place a container under the hot water dispensing spout. 7 Press the UP/DOWN buttons to scroll through the options of the display. Press the OK button to select ‘hot water’. 8 Press the OK button to start hot water dispensing.
  • Seite 13: Replacing The Aquaclean Filter

    English 7 Select ON on the display and confirm the activation by pressing the OK button. A Q U A CLEAN Note: The display shows a tick icon to confirm the activation. 8 To rinse the filter, press the SPECIAL DRINKS button, select the HOT WATER option and press the OK button twice.
  • Seite 14: Adjusting The Coffee Quantity

    English Adjusting the coffee quantity 1 Press and hold the ESPRESSO button or ESPRESSO LUNGO button until the display shows the word MEMO. 2 When the cup contains the desired amount of coffee, press the OK button to save the selected quantity. Adjusting the grind setting Note: You can only adjust the grinder settings when the machine is grinding coffee beans.
  • Seite 15: Brewing Special Drinks

    English 6 Insert the milk carafe into the machine. Make sure the carafe is inserted properly. 7 Place a cup under the coffee and milk dispensing spouts. 8 Choose your milk-based beverage. - Press the CAPPUCCINO button to brew a cappuccino. - Press the LATTE MACCHIATO button to brew a latte macchiato.
  • Seite 16 English 5 To place the brew group back, make sure that the lever is in contact with the base of the brewing unit. Note: If it is not in contact with the base, push it down. 6 Make sure the locking hook of the brew group is in the correct position. To position the hook correctly, push it upwards until it is in uppermost position.
  • Seite 17: Lubrication

    English 7 The hook is not correctly positioned if it is still in bottommost position. 8 Slide the brew group back into the machine along the guiding rails on the sides until it clicks into position. Then place the coffee residues drawer back in the machine.
  • Seite 18: Milk Carafe Quick Clean

    English 2 Apply lubricant to the rails on both sides, as shown in the illustration. 3 Slide the brew group back into the machine along the guiding rails on the sides until it clicks into position. Then place the coffee residues drawer back in the machine.
  • Seite 19: Weekly Cleaning Of The Milk Carafe

    English 3 Lift the milk carafe dispenser to remove it from the lid and wash it with lukewarm water. Remove all milk residues. 4 Put the milk dispensing spout back onto the milk carafe lid. To insert it, align the dot on the spout with the indication on the lid. Weekly cleaning of the milk carafe 1 Press the release buttons to remove the lid.
  • Seite 20 English 15 To remove the cover, press the sides of the dispensing spout lightly and pull the cover downwards off the dispensing spout. 16 Pull the milk frothing unit upwards. 17 Pull the fitting outwards from the milk frothing device. 18 Remove the suction tube.
  • Seite 21: Monthly Full Milk Carafe Cleaning With Milk Circuit Cleaner

    The use of other products may damage the machine and leave residues in the water. You can buy Gaggia descaling solution from your local reseller or from the authorized service centers. Contact details are included in the warranty booklet supplied separately or visit www.gaggia.com/n-m-...
  • Seite 22 If you want to exit the descaling cycle, press the ESC button. 5 Pour the entire bottle of Gaggia descaling solution (250ml) into the water tank. 6 Add water to the descaling solution in the water tank up to the CALC CLEAN indication.
  • Seite 23: Interruption Of The Descaling Cycle

    English 17 The display shows the following icon to indicate that the machine is heating up. - The machine performs an automatic rinsing cycle. 18 Remove and clean the milk carafe see chapter ‘Cleaning and maintenance’, section ‘Weekly cleaning of the milk carafe’. Insert the water dispensing spout into the machine.
  • Seite 24: Meaning Of Error Codes

    English - The brew group is not in the machine. Insert the group. - Close the service door. - Remove the coffee grounds container and empty it. - There is too much powder in the brew group. Clean the brew group. - If an error code is triggered, check the section 'Meaning of error codes' to see what the code on the display means and what you can do.
  • Seite 25: Ordering Accessories

    If the above solutions do not help to remove the error code icon from the display and bring the machine back to normal working order, contact the Gaggia hotline. Contact details can be found in the warranty booklet or or visit www.gaggia.com/n-m-co/espresso/world-wide or www.gaggia.it/n- m-co/espresso/contact.
  • Seite 26: Recycling

    English Recycling - This symbol means that this product shall not be disposed of with normal household waste (2012/19/EU). - Follow your country's rules for the separate collection of electrical and electronic products. Correct disposal helps prevent negative consequences for the environment and human health. Troubleshooting Problem Cause...
  • Seite 27 English The brew group cannot be The brew group is not in the correct The brew group was not put in rest inserted. position. position before it was placed back. Make sure that the lever is in contact with the base of the brew group and that the hook of the brew group is in the correct position.
  • Seite 28 English The coffee exit duct is blocked. Clean the coffee exit duct with the handle of the multifunctional tool or a spoon handle. The coffee comes out The grind is ground too finely. Change the coffee blend or adjust slowly. the grinder.
  • Seite 29 English The AquaClean filter A filter has just been activated. You have to dispense at least 10 cannot be activated as the cups (100of 100ml each before tick does not appear on you can activate a new filter. Be the display. careful as you activate a new filter, the filter counter will increase automatically.You have to...
  • Seite 30 AquaClean filter. Note: If you are unable to solve the problem with the information in this table, contact your local reseller or an authorized service center. Contact details are included in the warranty booklet supplied separately or visit www.gaggia.com/n-m-co/espresso/world-wide www.gaggia.it/n-m-co/espresso/contact...
  • Seite 31: Einführung

    Unterbrechung des Entkalkungsvorgangs _____________________________________________ Warnsymbole und Fehlercodes _____________________________________________________ Bedeutung der Fehlercodes_________________________________________________________ Bestellen von Zubehör_____________________________________________________________ Garantie und Support ______________________________________________________________ Recycling________________________________________________________________________ Fehlerbehebung__________________________________________________________________ Einführung Herzlichen Glückwunsch zum Kauf dieses Espresso-Vollautomaten Gaggia Velasca Prestige. Die Maschine ist geeignet zur Vorbereitung von Espressokaffee unter Verwendung von ganzen Kaffeebohnen.
  • Seite 32: Wichtig

    Netzkabel oder die Maschine selbst defekt oder beschädigt ist.. - Nehmen Sie an der Maschine und an dem Netzkabel keine Veränderungen vor. - Lassen Sie Reparaturen ausschließlich von einem Gaggia- Vertragskundendienst durchführen, um Gefahren zu vermeiden. . - Die Maschine soll nicht von Kindern unter 8 Jahren bedient...
  • Seite 33: Achtung

    Deutsch - Dieses Gerät kann von Kindern ab 8 Jahren und Personen mit eingeschränkten physischen, sensorischen oder geistigen Fähigkeiten oder ohne Erfahrung und besondere Kenntnisse verwendet werden, wenn sie beim Gebrauch des Geräts beaufsichtigt werden oder in den sicheren Gebrauch des Geräts unterwiesen wurden und die verbundenen Gefahren verstanden haben.
  • Seite 34: Elektromagnetische Felder

    Zeit nicht in Gebrauch sein wird. Das Wasser kann verschmutzen. Verwenden Sie bei jedem Gebrauch Ihrer Maschine frisches Wasser. Elektromagnetische Felder Dieses Gaggia-Gerät erfüllt sämtliche Normen und Vorschriften bezüglich Gefährdung durch elektromagnetische Felder. Übersicht über das Gerät (Abb. 1) Deckel des Kaffeebohnenbehälters 2 Kaffeebohnenbehälter...
  • Seite 35: Das Display

    Deutsch 20 Netzkabel 21 Reinigungsbürste (nur für bestimmte Gerätetypen) 22 Fett (nur für bestimmte Gerätetypen) 23 Messlöffel für vorgemahlenen Kaffee 24 Wasserhärtetester 25 Kaffeeresteschublade 26 Brühgruppe 27 Schutzgriff 28 Automatischer Milchaufschäumer Das Display Mit diesen Tasten navigieren Sie durch die Menüs: - ESPRESSO-Taste = ESC-Taste: Drücken Sie diese Taste, um zum Hauptmenü...
  • Seite 36 Deutsch 2 Wählen Sie als Aufstellungsort für die Maschine einen Platz auf einem Tisch oder einer Arbeitsfläche ohne Wasserhahn, Spülbecken oder Wärmequellen in der Nähe. Ескертпе: Машинаның үстінде, артында және екі жағында кемінде 15 см бос орын қалдырыңыз. 3 Schieben Sie die Tropfschale mit dem Tropfschalendeckel in das Gerät. 4 Nehmen Sie den Wassertank vom Gerät.
  • Seite 37 Deutsch 13 Drücken Sie die OK-Taste. Das Display zeigt das folgende Symbol an. 14 Nehmen Sie den AquaClean-Filter aus der Verpackung. Schütteln Sie den Filter ca. 5 Sekunden. AQUA INSTALL CLEAN FILTER 15 Setzen Sie den AquaClean-Filter kopfüber in einen Behälter mit kaltem Wasser, und warten Sie, bis keine Luftblasen mehr austreten.
  • Seite 38: Manueller Spülzyklus

    Deutsch 20 Das Display zeigt das Symbol „Filter bereit“ an, wenn der AquaClean- Filter korrekt installiert wurde. 21 Um den Filter zu spülen, drücken Sie die SPECIAL DRINKS-Taste (Spezialgetränke), wählen Sie die Option HOT WATER (Heißwasser) aus 100% und drücken zur Bestätigung die OK-Taste zwei Mal. Aus dem AQUA Heißwasserauslauf fließt Wasser.
  • Seite 39 Deutsch mehr als 50 Tassen (mit 100 ml Kapazität) gebrüht haben, müssen Sie die Maschine entkalken, bevor Sie den Filter aktivieren. 1 Nehmen Sie den AquaClean-Filter aus der Verpackung. Schütteln Sie den Filter ca. 5 Sekunden. 2 Setzen Sie den AquaClean-Filter kopfüber in einen Behälter mit kaltem Wasser, und warten Sie, bis keine Luftblasen mehr austreten.
  • Seite 40: Aquaclean-Filter Austauschen

    Deutsch AquaClean-Filter austauschen Ersetzen Sie den Filter alle 3 Monate oder nach Aufforderung durch das Gerät. Anzeigesymbol AquaClean-Filter Das müssen Sie tun 10 % + Symbol blinkt Die Leistung dieses Filters wird schwächer. Es wird empfohlen, den alten Filter zu entfernen und den neuen Filter wie im Abschnitt „Installation AquaClean- Filter“...
  • Seite 41: Cappuccino, Baby-Cappuccino Und Milchschaum

    Deutsch 5 Es stehen 10 verschiedene Mahleinstellungen zur Auswahl. Je kleiner der Punkt, desto stärker der Kaffee. - Grobe Mahlung: leichterer Geschmack, für dunkelgeröstete Kaffeemischungen - Feine Mahlung: stärkerer Geschmack, für leichtgeröstete Kaffeemischungen. 6 Brühen Sie 2-3 Tassen Kaffee, um den Unterschied zu schmecken. Cappuccino, Baby-Cappuccino und Milchschaum Hinweis: Sie können die Menge an Cappuccino und Milchschaum einstellen.
  • Seite 42: Reinigung Und Pflege

    Deutsch 2 Drücken Sie die Pfeiltasten nach oben/unten, um durch die Optionen des Menüs zu scrollen. 3 Drücken Sie die OK-Taste, um das gewünschte Getränk zu bestätigen. 4 Wenn Sie HOT WATER (Heißwasser) auswählen, setzen Sie den Heißwasserauslauf in das Gerät ein und verriegeln Sie ihn. Wenn Sie Cappuccino, Milchschaum oder Baby-Cappuccino auswählen, stellen Sie die Milchkanne in das Gerät.
  • Seite 43 Deutsch 6 Stellen Sie sicher, dass der Verriegelungshaken der Brühgruppe in der richtigen Position ist. Um den Haken in die richtige Position zu bringen, schieben Sie ihn so weit wie möglich nach oben.
  • Seite 44: Monatliche Reinigung Der Brühgruppe Mit Der Entfettungstablette

    Deutsch 7 Der Haken ist nicht richtig positioniert, wenn er noch in der untersten Position ist. 8 Schieben Sie die Brühgruppe entlang der Führungsschienen an den Seiten wieder in das Gerät, bis sie hörbar einrastet. Setzen Sie dann die Kaffeeresteschublade wieder in das Gerät ein. Monatliche Reinigung der Brühgruppe mit der Entfettungstablette - Führen Sie diesen Reinigungszyklus aus, nachdem das Gerät 500 Tassen...
  • Seite 45: Schnellreinigung Der Milchkanne

    Deutsch 1 Tragen Sie etwas Schmiermittel rund um den Schaft an der Unterseite der Brühgruppe auf. 2 Tragen Sie wie in der Abbildung dargestellt etwas Schmiermittel auf den beidseitigen Schienen auf. 3 Schieben Sie die Brühgruppe entlang der Führungsschienen an den Seiten wieder in das Gerät, bis sie hörbar einrastet.
  • Seite 46: Wöchentliche Reinigung Der Milchkanne

    Deutsch 2 Stellen Sie den Milchauslauf auf die Referenzmarkierung (angegeben durch einen Punkt). 3 Heben Sie den Milchkannenauslauf an, um ihn vom Deckel abzunehmen, und waschen Sie ihn mit lauwarmem Wasser. Entfernen Sie sämtliche Milchrückstände. 4 Setzen Sie den Milchauslauf wieder auf den Deckel der Milchkanne. Um ihn einzusetzen, richten Sie den Punkt am Auslauf an der Markierung am Deckel aus.
  • Seite 47 Deutsch 13 Entfernen Sie den Ring vom Auslauftrichter der Milchkanne. 14 Drücken Sie die mit Pfeil markierte Taste, um die Abdeckung des Milchauslaufs zu entriegeln. 15 Um die Abdeckung zu entfernen, drücken Sie leicht auf die Seiten des Auslauftrichters und ziehen Sie die Abdeckung nach unten vom Auslauftrichter ab.
  • Seite 48: Monatlicher Vollständiger Milchkannen-Reinigungszyklus Mit Milchkreislauf-Reiniger

    Deutsch 18 Entfernen Sie das Saugrohr. 19 Ziehen Sie die Fassung heraus und trennen Sie sie von dem übrigen Teil. 20 Reinigen Sie alle Teile mit lauwarmem Wasser. 21 Setzen Sie alle Teile in umgekehrter Reihenfolge wieder zusammen. Monatlicher vollständiger Milchkannen-Reinigungszyklus mit Milchkreislauf-Reiniger Sie können einen Milchkreislauf-Reiniger bei Ihrem lokalen Händler oder von den autorisierten Kundenzentren erwerben.
  • Seite 49: Entkalken

    Funktion der Maschine. Der Gebrauch von anderen Produkten kann zu Schäden an der Maschine führen und Rückstände im Wasser hinterlassen. Sie können Gaggia-Entkalkungslösung bei Ihrem lokalen Händler oder von den autorisierten Kundenzentren erwerben. Die Anschriften und Rufnummern finden Sie in dem getrennt beiliegenden Garantieheft oder auf www.gaggia.com/n-m-co/espresso/world-wide oder www.gaggia.it/n-...
  • Seite 50 4 Das Display zeigt das folgende Symbol an, um anzuzeigen, dass das Gerät den Entkalkungsvorgang startet. Wenn Sie den Entkalkungsvorgang abbrechen möchten, drücken Sie die ESC-Taste. 5 Gießen Sie die gesamte Flasche Gaggia Entkalkungslösung (250 ml) in den Wasserbehälter. 6 Füllen Sie die Entkalkungslösung im Wasserbehälter bis zur Markierung CALC CLEAN mit Wasser auf.
  • Seite 51: Unterbrechung Des Entkalkungsvorgangs

    Deutsch 17 Das folgende Symbol in der Anzeige zeigt an, dass sich das Gerät aufheizt. - Die Maschine führt einen automatischen Spülzyklus durch. 18 Entfernen und spülen Sie die Milchkanne (siehe Kapitel „Reinigung und Pflege", Abschnitt „Wöchentliches Reinigen der Milchkanne"). Setzen Sie den Wasserauslauf in das Gerät ein.
  • Seite 52: Bedeutung Der Fehlercodes

    Deutsch - Die Brühgruppe ist nicht in der Maschine. Setzen Sie die Einheit ein. - Schließen Sie die Serviceklappe. - Entnehmen Sie den Kaffeesatzbehälter, und leeren Sie den Behälter. - Es ist zu viel Pulver in der Brühgruppe. Reinigen Sie die Brühgruppe. - Wenn ein Fehlercode ausgelöst wird, sehen Sie im Abschnitt „Bedeutung der Fehlercodes“...
  • Seite 53: Bestellen Von Zubehör

    Wenn die obigen Lösungen nicht helfen, die Maschine in den normalen Betriebszustand zurückzuholen, und der Fehlercode im Display bleibt, wenden Sie sich an die Gaggia-Hotline. Die Anschriften und Rufnummern finden Sie in dem Garantieheft oder auf www.gaggia.com/n-m- co/espresso/world-wide oder www.gaggia.it/n-m-co/espresso/contact.
  • Seite 54: Garantie Und Support

    Deutsch Garantie und Support Informationen oder Unterstützung finden Sie in dem getrennt beiliegenden Garantieheft oder auf www.gaggia.com/n-m-co/espresso/world-wide oder www.gaggia.it/n-m-co/espresso/contact. Recycling - Dieses Symbol bedeutet, dass das Produkt nicht mit dem normalen Hausmüll entsorgt werden kann (2012/19/EU). - Beachten Sie die örtlichen Vorschriften zur getrennten Entsorgung von elektrischen und elektronischen Produkten.
  • Seite 55 Deutsch Die Brühgruppe lässt sich Die Brühgruppe ist nicht richtig Schließen Sie die Serviceklappe. nicht entnehmen. positioniert. Schalten Sie die Maschine aus und wieder ein. Warten Sie, bis der Bildschirm „Machine ready“ (Gerät bereit) angezeigt wird, und entnehmen Sie die Brühgruppe dann Der Kaffeesatzbehälter ist nicht Entnehmen Sie den...
  • Seite 56 Deutsch Der Kaffee ist nicht heiß Die Tassen sind kalt. Wärmen Sie die Tassen vor, indem genug. Sie sie mit heißem Wasser ausspülen. Die Temperatur ist zu niedrig Setzen Sie die Temperatur im eingestellt. Prüfen Sie die Menü höher. Einstellungen im Menü. Sie haben Milch hinzugefügt.
  • Seite 57 Deutsch Die verwendete Milchsorte eignet Wir haben die folgenden sich nicht zum Aufschäumen. Milcharten getestet und sie lassen sich gut aufschäumen: fettarme Milch oder Vollmilch von der Kuh, Sojamilch und laktosefreie Milch. Andere Milcharten wurden nicht getestet und ergeben eventuell weniger Schaum.
  • Seite 58 Hinweis: Wenn Sie das Problem mit den Informationen in dieser Tabelle nicht beheben können, wenden Sie sich an Ihren lokalen Händler oder ein autorisiertes Kundendienstzentrum. Die Anschriften und Rufnummern finden Sie in dem getrennt beiliegenden Garantieheft oder auf www.gaggia.com/n-m-co/espresso/world-wide oder www.gaggia.it/n-m-co/espresso/contact...
  • Seite 59: Introduzione

    Significato dei codici di errore________________________________________________________ Ordinazione degli accessori_________________________________________________________ Garanzia e assistenza ______________________________________________________________ Riciclaggio_______________________________________________________________________ Risoluzione dei problemi___________________________________________________________ Introduzione Congratulazioni per l'acquisto della macchina per caffè espresso superautomatica Gaggia Velasca Prestige. La macchina consente di preparare caffè espresso utilizzando il caffè in grani.
  • Seite 60: Importante

    - Non apportate modifiche alla macchina o al cavo di alimentazione. - In caso di riparazioni rivolgetevi esclusivamente a un centro di assistenza autorizzato Gaggia per evitare pericoli. - La macchina non deve essere usata da bambini di età inferiore agli...
  • Seite 61: Attenzione

    Italiano - Questa macchina può essere usata da bambini di età superiore agli 8 anni e da persone con capacità mentali, fisiche o sensoriali ridotte, prive di esperienza o conoscenze adatte, a condizione che tali persone abbiano ricevuto assistenza o formazione per utilizzare la macchina in maniera sicura e capiscano i potenziali pericoli associati a tale uso.
  • Seite 62: Campi Elettromagnetici (Emf)

    Utilizzate acqua fresca tutte le volte che usate la macchina. Campi elettromagnetici (EMF) Questo apparecchio Gaggia è conforme a tutti gli standard e alle norme applicabili relativi all'esposizione a campi elettromagnetici. Panoramica della macchina (Fig. 1) Coperchio del contenitore caffè in grani 2 Contenitore caffè...
  • Seite 63: Il Display

    Italiano 20 Cavo 21 Spazzolina per la pulizia (solo per alcuni modelli) 22 Lubrificante (solo per alcuni modelli) 23 Misurino per caffè pre-macinato 24 Tester della durezza dell'acqua 25 Cassetto residui di caffè 26 Gruppo infusore 27 Impugnatura protettiva 28 Pannarello automatico Il display Utilizzate questi pulsanti per navigare nei menu.
  • Seite 64 Italiano Nota: lasciate almeno 15 cm di spazio libero in alto, dietro e ai lati della macchina. 3 Inserite il vassoio antigoccia e il relativo coperchio nella macchina. 4 Rimuovete il serbatoio dell'acqua. 5 Riempite il serbatoio di acqua fresca fino all'indicazione del livello MAX. 6 Aprite il coperchio del contenitore del caffè...
  • Seite 65 Italiano 15 Immergete il filtro AquaClean capovolto in una caraffa di acqua fredda e attendete la completa fuoriuscita delle bolle d'aria. 16 Estraete il serbatoio dell'acqua dalla macchina, svuotatelo e inserite il filtro verticalmente sul punto di aggancio del filtro. 17 Riempite il serbatoio di acqua fresca fino all'indicazione del livello MAX.
  • Seite 66: Ciclo Di Risciacquo Manuale

    Italiano 20 Il display mostra l'icona del filtro pronto per indicare che il filtro AquaClean è stato installato correttamente. 21 Per sciacquare il filtro, premete il pulsante SPECIAL DRINKS (Bevande speciali), selezionate l'opzione HOT WATER (Acqua calda) e premete 100% due volte il pulsante OK.
  • Seite 67 Italiano preparato più di 50 tazze (della capacità di 100 ml), dovete rimuovere il calcare dalla macchina prima di attivare il filtro. 1 Rimuovete il filtro AquaClean dalla confezione. Scuotetelo per circa 5 secondi. 2 Immergete il filtro AquaClean capovolto in una caraffa di acqua fredda e attendete la completa fuoriuscita delle bolle d'aria.
  • Seite 68: Sostituzione Del Filtro Aquaclean

    Italiano Sostituzione del filtro AquaClean Sostituite il filtro ogni 3 mesi o quando necessario. Simbolo del filtro AquaClean Azione Il simbolo 10% + lampeggia Le prestazioni del filtro sono diminuite. Si raccomanda di rimuovere il vecchio filtro e di sostituirlo con quello nuovo come descritto nella sezione "Installazione del filtro AquaClean"...
  • Seite 69: Cappuccino, Cappuccino Piccolo E Schiuma Di Latte

    Italiano 4 While the machine grinds the coffee, place the end of the measuring spoon handle on the grinder adjustment knob in the coffee bean hopper. Use the spoon to press and turn the knob to the left or to the right one notch a time.
  • Seite 70: Pulizia E Manutenzione

    Italiano 1 Premete il pulsante SPECIAL DRINKS (Bevande speciali) per entrare nel menu. Il display mostra le opzioni per le bevande speciali. 2 Premete i pulsanti SU/GIÙ per scorrere le opzioni del menu. 3 Premete il pulsante OK per confermare la bevanda desiderata. 4 Quando selezionate HOT WATER (Acqua calda), inserite l'erogatore di acqua calda nella macchina e bloccatelo in posizione.
  • Seite 71 Italiano 6 Assicuratevi che il gancio di bloccaggio del gruppo infusore sia nella posizione corretta. Per posizionare il gancio correttamente, spingetelo verso l'alto fino alla posizione più alta raggiungibile. 7 Se il gancio è ancora in posizione inferiore significa che non è posizionato correttamente.
  • Seite 72: Lubrificazione

    Italiano Lubrificazione Lubrificate il gruppo infusore dopo la preparazione all'incirca di 500 tazze di caffè o una volta al mese. 1 Applicate del lubrificante intorno al perno di inserimento nella parte inferiore del gruppo infusore. 2 Applicate del lubrificante alle guide su entrambi i lati, come mostrato nell'illustrazione.
  • Seite 73: Pulizia Settimanale Della Caraffa Del Latte

    Italiano 1 Premete i pulsanti di sgancio per rimuovere il coperchio. 2 Ruotate l'erogatore del latte verso l'alto sul segno di riferimento (indicato da un puntino). 3 Sollevate l'erogatore della caraffa del latte per rimuoverlo dal coperchio e sciacquatelo con acqua tiepida. Rimuovete i residui di latte. 4 Riposizionate l'erogatore del latte nel coperchio della caraffa del latte.
  • Seite 74 Italiano 4 Rimuovete la parte superiore del coperchio e riempite la caraffa del latte con acqua pulita fino al livello MAX. 5 Riposizionate la parte superiore del coperchio sulla caraffa del latte. 6 Inserite la caraffa del latte nella macchina. Posizionate un recipiente sotto il beccuccio di erogazione del latte.
  • Seite 75: Pulizia Mensile Completa Della Caraffa Del Latte Con Il Prodotto Per La Pulizia Del Circuito Latte

    Italiano 16 Tirate l'unità della schiuma di latte verso l'alto. 17 Tirate il supporto verso l'esterno rispetto al dispositivo della schiuma di latte. 18 Rimuovete il tubo di aspirazione. 19 Tirate il supporto verso l'esterno e separatelo dalla parte restante. 20 Pulite tutte le parti con acqua tiepida.
  • Seite 76: Rimozione Del Calcare

    La procedura anticalcare richiede circa 30 minuti. Utilizzate solo la soluzione anticalcare Gaggia per rimuovere il calcare dalla macchina. La soluzione anticalcare Gaggia è stata progettata per garantire le prestazioni ottimali della macchina. L'uso di altri prodotti potrebbe danneggiare la macchina e lasciare residui nell'acqua.
  • Seite 77 4 Il display mostra l'icona seguente per indicare che la macchina ha avviato il ciclo di pulizia anticalcare. Per interrompere il ciclo, premere il pulsante ESC. 5 Versate l'intero contenuto della soluzione anticalcare Gaggia (250 ml) nel serbatoio dell'acqua. 6 Aggiungete l'acqua alla soluzione anticalcare nel serbatoio dell'acqua fino all'indicazione CALC CLEAN.
  • Seite 78: Interruzione Del Ciclo Di Pulizia Anticalcare

    Italiano - Il display mostra l'icona seguente per indicare che il ciclo di risciacquo è terminato. 14 Sciacquate il serbatoio dell'acqua e riempitelo con acqua pulita fino al livello MAX. Fate scorrere il serbatoio dell'acqua nella macchina. CALC CLEAN 15 Per terminare il ciclo di pulizia anticalcare, premete il pulsante OK. 16 Posizionate un recipiente sotto i beccucci di erogazione del caffè...
  • Seite 79 Italiano - Il contenitore del caffè in grani è vuoto. Inserite chicchi di caffè nel contenitore del caffè in grani. - Il gruppo infusore non è nella macchina. Inserite il gruppo. - Chiudete lo sportello di servizio. - Rimuovete il recipiente dei fondi di caffè e svuotatelo. - Il gruppo infusore contiene una quantità...
  • Seite 80: Significato Dei Codici Di Errore

    Se le soluzioni indicate risultano inefficaci in quanto il display continua a visualizzare l'icona del codice di errore e la macchina non torna a funzionare correttamente, contattate il numero Gaggia. I recapiti sono riportati nell'opuscolo della garanzia; in alternativa visitate il sito Web www.gaggia.com/n-m-co/espresso/world-wide o www.gaggia.it/n-m-...
  • Seite 81: Ordinazione Degli Accessori

    Italiano Ordinazione degli accessori Per la pulizia della macchina e la rimozione del calcare, utilizzate solo prodotti per la manutenzione Gaggia. Potete acquistare questi prodotti dal vostro rivenditore locale o dai centri assistenza autorizzati. Prodotti per la manutenzione: - Soluzione anticalcare...
  • Seite 82 Italiano Il vassoio antigoccia si Si tratta di un fenomeno del tutto Svuotate il vassoio antigoccia riempie velocemente. normale. La macchina utilizza acqua quando l'apposito indicatore per sciacquare il circuito interno e il scatta attraverso il coperchio del gruppo infusore. Una parte vassoio.
  • Seite 83 Italiano Reimpostate la macchina accendendola e spegnendola. Riposizionate il vassoio antigoccia e il recipiente dei fondi di caffè. Non inserite il gruppo infusore. Chiudete lo sportello di manutenzione e accendete e spegnete la macchina. Quindi provate a reinserire il gruppo infusore.
  • Seite 84 Italiano Il condotto di uscita del caffè è Pulite il condotto di uscita del bloccato. caffè con l'impugnatura dell'utensile multifunzione o con il manico di un cucchiaio. Il caffè fuoriesce La macinatura è troppo fine. Cambiate la miscela di caffè o lentamente.
  • Seite 85 Italiano Impossibile attivare il filtro È già stato attivato un filtro. Dovete preparare almeno 10 tazze AquaClean in quanto il da 100 ml ciascuna prima di poter display non visualizza il attivare un nuovo filtro. Fate segno di spunta. attenzione quando attivate un nuovo filtro, poiché...
  • Seite 86 Nota: se non riuscite a risolvere il problema con l'aiuto di questa tabella, contattate il vostro rivenditore locale o un centro assistenza autorizzato. I recapiti sono riportati nell'opuscolo della garanzia fornito a parte; in www.gaggia.com/n-m- alternativa visitate il sito Web co/espresso/world-wide www.gaggia.it/n-m-...
  • Seite 88 GAGGIA S.p.A. reserves the right to make any necessary modifi cation. S.p.A. GAGGIA Sede Legale/Registered Offi ce Piazza Eleonora Duse, 2 20122 MILANO Sede Amministrativa/Administrative Offi ce Via Torretta, 240 40041 Gaggio Montano (BO) +39 0534 771111 www.gaggia.com...

Diese Anleitung auch für:

Sup047rgVelasca prestige

Inhaltsverzeichnis