MHZ zip 2.0 Montageanleitung
Vorschau ausblenden
Andere Handbücher für zip 2.0:
- Montageanleitung (16 Seiten) ,
- Montageanleitung (24 Seiten) ,
- Bedienungs- und wartungsanleitung (13 Seiten)
Inhaltsverzeichnis
Verfügbare Sprachen
Verfügbare Sprachen
Quicklinks
DE
FR
NL
EN
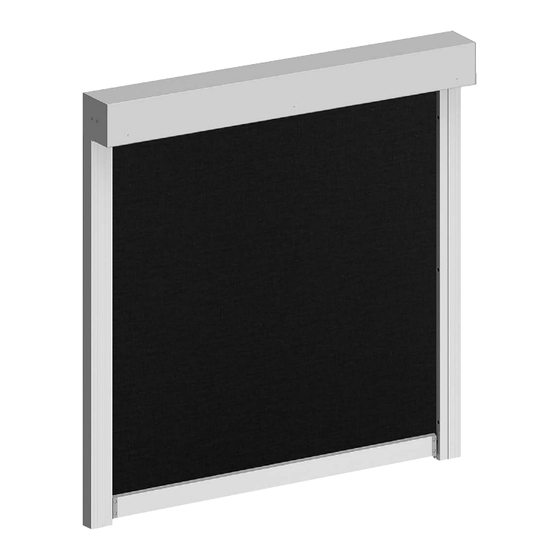
Fenstermarkise zip_2.0
Montageanleitung I
Ausgabe 06.2023
ES
STORE ZIP_2.0 I Notice de montage I
Édition 06.2023
RAAMSCHERM ZIP_2.0 I Montagehandleiding I
Uitgave 06.2023
ZIP_2.0 WINDOW AWNING I Installation instructions I
Edition 06.2023
TOLDO DE VENTANA ZIP_2.0 I Instrucciones de montaje I
Edición 06.2023
TENDA A CADUTA ZIP_2.0 I Istruzioni di montaggio I
Edizione 06.2023
IT
Kapitel
Inhaltsverzeichnis

Verwandte Anleitungen für MHZ zip 2.0


Inhaltszusammenfassung für MHZ zip 2.0
- Seite 1 Fenstermarkise zip_2.0 Montageanleitung I Ausgabe 06.2023 STORE ZIP_2.0 I Notice de montage I Édition 06.2023 RAAMSCHERM ZIP_2.0 I Montagehandleiding I Uitgave 06.2023 ZIP_2.0 WINDOW AWNING I Installation instructions I Edition 06.2023 TOLDO DE VENTANA ZIP_2.0 I Instrucciones de montaje I Edición 06.2023 TENDA A CADUTA ZIP_2.0 I Istruzioni di montaggio I Edizione 06.2023...
- Seite 2 Seite 3 - 14 page 15 - 26 page 27 - 38 page 39 - 50 página 51 - 62 pagina 63 - 74...
- Seite 3 Fenstermarkise zip_2.0 Montageanleitung I Ausgabe 06.2023...
-
Seite 4: Inhaltsverzeichnis
Montageanleitung zip_2.0 Modell 48-1067 / 1068 / 1070 / 1071 / 1072 / 1073 / 1074 / 1075 Inhaltsverzeichnis Sicherheitshinweise zur Montage 3 - 5 Vorbereitung 1.1 Vorbereitung Standard 1.2 Vorbereitung Trägerplatte PR50/PR60 1.3 Vorbereitung Abstandshalter L=45-150mm 1.4 Vorbereitung Pfosten-Riegel-Fassaden 11 - 12 1.5 Vorbereitung bei Einputz (+Rückseitige Dämmung) 1.6 150 er Kassette, Befestigungspunkte der... -
Seite 5: Sicherheits- Und Warnhinweise Für Montageanleitungen
Montageanleitung zip_2.0 Modell 48-1067 / 1068 / 1070 / 1071 / 1072 / 1073 / 1074 / 1075 Wichtige Sicherheitshinweise zur Montage Lesen der Montage- und Bedienungsanleitungen 4. Transport Die Montage- und Bedienungsanleitungen müssen vor der Die zulässigen Achslasten und das zulässige Gesamtgewicht Montage gelesen und beachtet werden. -
Seite 6: Aufstiegshilfen
Verwendungszweck eingesetzt werden und ist als senkrechter Sonnenschutz konzeptioniert. Die Kassette ist waag- recht und die Führungsschienen sind senkrecht zu montieren. MHZ Hachtel GmbH & Co. KG Veränderungen, wie An- und Umbauten, die nicht vom Hersteller Sindelfinger Straße 21 vorgesehen sind, dürfen nur mit schriftlicher Genehmigung des... - Seite 7 Aufklärung zu den Sicherheitshinweisen schriftlich bestätigen. benutzen, bei denen die Markise nicht im Blickfeld des Bedieners liegt (Gefahr des unbeabsichtigten Anlaufes). Die Benutzung eines MHZ empfiehlt eine jährliche Reinigung und Wartung: Probekabels zum Motoranschluss wird empfohlen. Durch eine regelmäßige Instandhaltung (Inspektion, Wartung, Instandsetzung) und Reinigung/Pflege, erhöht sich die Lebensdauer...
- Seite 8 Montageanleitung zip_2.0 Modell 48-1067 / 1068 / 1070 / 1071 / 1072 / 1073 / 1074 / 1075 SW13 SW2,5 TX25 Technische Änderungen vorbehalten I Stand 06.2023...
- Seite 9 Montageanleitung zip_2.0 Modell 48-1067 / 1068 / 1070 / 1071 / 1072 / 1073 / 1074 / 1075 Frontmontage (F) Frontmontage Mitte (FM) Laibungsmontage (L) max. 44 max. 64 TX25 3d + (8/9) Technische Änderungen vorbehalten I Stand 06.2023...
-
Seite 10: Vorbereitung Standard
Montageanleitung zip_2.0 Modell 48-1067 / 1068 / 1070 / 1071 / 1072 / 1073 / 1074 / 1075 1.1 Vorbereitung Standard 110 er und 150 er Kassette, Befestigungspunkte der Führungsschiene < 1200 mm 1201 - 2200 mm 2201 - 3200 mm 3201 - 4200 mm 4201 - 5200 mm 5201 - 6200 mm... -
Seite 11: Vorbereitung Trägerplatte Pr50/Pr60
Montageanleitung zip_2.0 Modell 48-1067 / 1068 / 1070 / 1071 / 1072 / 1073 / 1074 / 1075 1.2 Vorbereitung Trägerplatte PR50/PR60 110 er und 150 er Kassette, Befestigungspunkte der Führungsschiene Max. AB = 3500 mm / Max. AH = 6000 mm Anzahl Halter (PR50/PR60) AH mm pro FS (bis AB 3500 mm) -
Seite 12: Vorbereitung Abstandshalter L=45-150Mm
Montageanleitung zip_2.0 Modell 48-1067 / 1068 / 1070 / 1071 / 1072 / 1073 / 1074 / 1075 1.3 Vorbereitung Abstandshalter L=45-150mm 110 er und 150 er Kassette, Befestigungspunkte der Führungsschiene Max. AB = 3500 mm / Max. AH = 6000 mm Anzahl Halter AH mm pro FS (bis AB 3500 mm) -
Seite 13: Vorbereitung Pfosten-Riegel-Fassaden
Montageanleitung zip_2.0 Modell 48-1067 / 1068 / 1070 / 1071 / 1072 / 1073 / 1074 / 1075 1.4 Vorbereitung Pfosten-Riegel-Fassaden 110 er und 150 er Kassette, Befestigungspunkte der Führungsschiene Anzahl M8 pro L-F 500 - 1200 mm 1201 - 2200 mm 2201 - 3200 mm 3201 - 4200 mm 4201 - 5200 mm... - Seite 14 Montageanleitung zip_2.0 Modell 48-1067 / 1068 / 1070 / 1071 / 1072 / 1073 / 1074 / 1075 1.4 Vorbereitung Pfosten-Riegel-Fassaden 110 er und 150 er Kassette, Einbau im Schacht 110 / 110 150 / 150 20 mm 110 / 110 150 / 150 Technische Änderungen vorbehalten I Stand 06.2023...
-
Seite 15: Vorbereitung Bei Einputz (+Rückseitige Dämmung)
Montageanleitung zip_2.0 Modell 48-1067 / 1068 / 1070 / 1071 / 1072 / 1073 / 1074 / 1075 1.5 Vorbereitung bei Einputz (+Rückseitige Dämmung) 110 er und 150 er Kassette, Befestigungspunkte der Führungsschiene < 1200 mm 1201 - 2200 mm 2201 - 3200 mm 3201 - 4200 mm 4201 - 5200 mm... -
Seite 16: Er Kassette, Befestigungspunkte Der Wand- Und Deckenwinkel
Montageanleitung zip_2.0 Modell 48-1067 / 1068 / 1070 / 1071 / 1072 / 1073 / 1074 / 1075 1.6 150 er Kassette, Befestigungspunkte der Wand- und Deckenwinkel 4a / 4b 2001 - 4800 mm 150 - 800 mm Bei Verwendung von Trägerplatten oder Abstandshaltern bis 3,5 m Breite ist dies nicht erforderlich. LL 7x13 LL 7x13 10 mm... -
Seite 17: Anbringen Der Basisprofile (2-Tlg., 2-Tlg. Einputz) Und Führungsschiene (1-Tlg.)
Montageanleitung zip_2.0 Modell 48-1067 / 1068 / 1070 / 1071 / 1072 / 1073 / 1074 / 1075 2. Anbringen der Basisprofile (2-tlg., 2-tlg. Einputz) und Führungsschiene (1-tlg.) 150er 2xM5x10 SW2,5 2xM5x10 3a, 3b SW2,5 Technische Änderungen vorbehalten I Stand 06.2023... - Seite 18 Montageanleitung zip_2.0 Modell 48-1067 / 1068 / 1070 / 1071 / 1072 / 1073 / 1074 / 1075 2. Anbringen der Basisprofile (2-tlg., 2-tlg. Einputz) und Führungsschiene (1-tlg.) 2B 110er 2xM5x10 SW2,5 3a, 3b 3a, 3b 2xM5x10 SW2,5 Technische Änderungen vorbehalten I Stand 06.2023...
-
Seite 19: Kontrolle Auf Parallelität Und Diagonale
Montageanleitung zip_2.0 Modell 48-1067 / 1068 / 1070 / 1071 / 1072 / 1073 / 1074 / 1075 3. Kontrolle auf Parallelität und Diagonale X = Y A = B 3a, 3b, 3c X / Y ≤ 2 mm A = B 3.1 Behang-Probelauf mit Basisprofile (2-tlg., 2-tlg Einputz) 3a, 3b Technische Änderungen vorbehalten I Stand 06.2023... -
Seite 20: Einsetzen Der Führungsschienen In
Montageanleitung zip_2.0 Modell 48-1067 / 1068 / 1070 / 1071 / 1072 / 1073 / 1074 / 1075 3.2 Einsetzen der Führungsschienen in Basisprofile (2-tlg., 2-tlg. Einputz) 3a, 3b 3a, 3b 3a, 3b 3a, 3b X = 25 3.3 Einstellen der Führungsschienen (2-tlg., 2-tlg. Einputz) X = 25 +3 mm -3 mm... -
Seite 21: Fixieren Der Führungsschienen (2-Tlg., 2-Tlg. Einputz)
Montageanleitung zip_2.0 Modell 48-1067 / 1068 / 1070 / 1071 / 1072 / 1073 / 1074 / 1075 3.4 Fixieren der Führungsschienen (2-tlg., 2-tlg. Einputz) ≥29 ± 3 4. Behang-Probelauf mit Führungsschienen 3a, 3b 3a, 3b Technische Änderungen vorbehalten I Stand 06.2023... -
Seite 22: Kontrolle Fallprofil/ Behang
Montageanleitung zip_2.0 Modell 48-1067 / 1068 / 1070 / 1071 / 1072 / 1073 / 1074 / 1075 5. Kontrolle Fallprofil/ Behang ± 3 ≥ 2 ± 3 6. Befestigung der Führungsschienen ± 3 3a, 3b, 3d ± 3 6.1 Sicherung der Führungsschienen (2-tlg., 2-tlg. Einputz) ≥29 Technische Änderungen vorbehalten I Stand 06.2023... -
Seite 23: Elektroantriebe
Montageanleitung zip_2.0 Modell 48-1067 / 1068 / 1070 / 1071 / 1072 / 1073 / 1074 / 1075 7. Elektroantriebe Die Modelle 48-1067; 48-1068; 48-1070; 48-1071; 48-1072; 48-1073; 48-1074; 48-1075 werden mit folgenden Antriebs- varianten ausgeliefert: Drahtgebundener Antrieb Funkantrieb Antriebe mit Bus-Systemen Becker R40-17;...