HomeMatic IP HmIP-eTRV-B-2 Installations- Und Bedienungsanleitung
Heizkörperthermostat – basic
Vorschau ausblenden
Andere Handbücher für HmIP-eTRV-B-2:
- Installations- und bedienungsanleitung (123 Seiten)
Inhaltsverzeichnis
Werbung
Verfügbare Sprachen
Verfügbare Sprachen
Quicklinks
Installations- und Bedienungsanleitung
Installation and operating manual
Notice d'installation et d'emploi
Manual de instalación y uso
Istruzioni per l'installazione e l'uso
Installatie- en bedieningshandleiding
DE
Heizkörperthermostat – basic
EN
Radiator Thermostat – basic
FR
Thermostat de radiateur – basic
ES
Termostato de radiador – basic
IT
Termostato per radiatori – basic
NL
Radiatorthermostaat – basic
HmIP-eTRV-B-2
S. 2
p.32
p.56
P. 80
pag. 104
Pag. 129
Werbung
Kapitel
Inhaltsverzeichnis
Fehlerbehebung

Verwandte Anleitungen für HomeMatic IP HmIP-eTRV-B-2


Inhaltszusammenfassung für HomeMatic IP HmIP-eTRV-B-2
- Seite 1 Istruzioni per l‘installazione e l‘uso Installatie- en bedieningshandleiding Heizkörperthermostat – basic S. 2 Radiator Thermostat – basic p.32 Thermostat de radiateur – basic p.56 Termostato de radiador – basic P. 80 Termostato per radiatori – basic pag. 104 Radiatorthermostaat – basic Pag. 129 HmIP-eTRV-B-2...
-
Seite 2: Lieferumfang
Lieferumfang Anzahl Bezeichnung Homematic IP Heizkörperthermostat – basic Adapter Danfoss RA Stützring Mutter M4 Zylinderkopfschraube M4 x 12 mm 1,5 V LR6/Mignon/AA Batterien Bedienungsanleitung Beiblatt mit Sicherheitshinweisen Dokumentation © 2022 eQ-3 AG, Deutschland Alle Rechte vorbehalten. Ohne schriftliche Zustimmung des Herausgebers darf diese Anleitung auch nicht auszugsweise in irgendeiner Form reproduziert werden oder unter Verwendung elektronischer, mechanischer oder chemischer Verfahren vervielfältigt oder... - Seite 5 Homematic IP...
-
Seite 9: Inhaltsverzeichnis
Hinweise zur Anleitung ................10 Gefahrenhinweise ..................10 Funktion und Geräteübersicht .............. 11 Allgemeine Systeminformationen ............13 Inbetriebnahme ..................13 Anlernen ....................13 5.1.1 Direktes Anlernen an ein Homematic IP Gerät ....13 5.1.2 Anlernen an den Access Point (alternativ) ......15 Montage ....................16 5.2.1 Heizkörperthermostat montieren .........17 5.2.2 Adapter für Danfoss RA ............ -
Seite 10: Hinweise Zur Anleitung
Hinweise zur Anleitung Hinweise zur Anleitung Lesen Sie diese Anleitung sorgfältig, bevor Sie Ihr Homematic IP Gerät in Betrieb nehmen. Bewahren Sie die Anleitung zum späteren Nachschlagen auf! Wenn Sie das Gerät anderen Personen zur Nutzung überlassen, überge- ben Sie auch diese Anleitung. -
Seite 11: Funktion Und Geräteübersicht
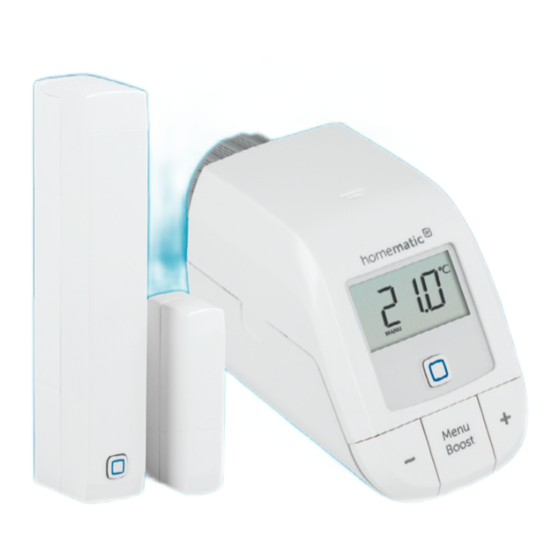
Ihre persönlichen Bedürfnisse anpassen. Alternativ haben Sie die Mög- lichkeit, den Heizkörperthermostat in Verbindung mit einem Homema- tic IP Access Point komfortabel über die kostenlose Smartphone App zu steuern. In Verbindung mit einem Homematic IP Fenster- und Türkontakt wird die Temperatur beim Lüften automatisch abgesenkt. - Seite 12 Funktion und Geräteübersicht Der Heizkörperthermostat passt auf alle gängigen Heizkörperventile und ist einfach zu montieren - ohne Ablassen von Heizungswasser oder Ein- griff in das Heizungssystem. Die zusätzliche Boost-Funktion ermöglicht ein schnelles, kurzzeitiges Aufheizen des Heizkörpers durch Öffnung des Ventils. Geräteübersicht (s.
-
Seite 13: Allgemeine Systeminformationen
Anlernen beginnen. Sie können den Heizkörperthermostat entweder direkt an ein oder meh- rere Homematic IP Geräte oder an den Homematic IP Access Point (HmIP-HAP) anlernen. Beim direkten Anlernen erfolgt die Konfiguration am Gerät und beim Anlernen an den Access Point über die kostenlose Homematic IP App. - Seite 14 Inbetriebnahme Um das Gerät an ein anderes Homematic IP Gerät anzulernen, müssen beide Geräte in den Anlernmodus gebracht werden. Gehen Sie dazu wie folgt vor: • Öffnen Sie das Batteriefach (B), indem Sie den Batteriefachdeckel nach unten abziehen (s. Abbildung 3).
-
Seite 15: Anlernen An Den Access Point (Alternativ)
Geräte aneinander anlernen. 5.1.2 Anlernen an den Access Point (alternativ) Falls Sie das Gerät bereits direkt an ein anderes Homematic IP Gerät angelernt haben, müssen Sie zum Anlernen des Heizkörperthermos- tats an den Homematic IP Access Point oder an die Zentrale CCU3 zunächst die Werkseinstellungen des Geräts wiederherstellen (s. -
Seite 16: Montage
Inbetriebnahme • Das Gerät erscheint automatisch in der Homematic IP App. • Zur Bestätigung geben Sie in der App die letzten vier Ziffern der Gerätenummer (SGTIN) ein oder scannen Sie den QR-Code. Die Gerätenummer finden Sie auf dem Aufkleber im Lieferumfang oder direkt am Gerät. -
Seite 17: Heizkörperthermostat Montieren
Inbetriebnahme • Wingenroth (Wiroflex) • R.B.M • Tiemme • Jaga • Siemens • Idmar Durch den im Lieferumfang enthaltenen Adapter ist das Gerät auch auf Heizkörperventile vom Typ Danfoss RA montierbar (s. „5.2.2 Adapter für Danfoss RA“ auf Seite 18). 5.2.1 Heizkörperthermostat montieren Bei erkennbaren Schäden am vorhandenen Thermostat, am Ventil... -
Seite 18: Adapter Für Danfoss Ra
Inbetriebnahme Nach der Demontage des alten Thermostatkopfes können Sie den Homematic IP Heizkörperthermostat mit der Überwurfmutter (A) auf das Heizkörperventil aufsetzen (s. Abbildung 7). Bei Bedarf verwenden Sie den beiliegenden Adapter für Danfoss RA-Ven- tile (s. „5.2.2 Adapter für Danfoss RA“ auf Seite 18) oder den beiliegen- den Stützring (s. -
Seite 19: Adaptierfahrt
Konfigurationsmenü Adaptierfahrt Nach dem Einlegen der Batterien fährt der Motor zunächst zurück, um die Montage zu erleichtern. Währenddessen wird „InS“ und das Aktivi- tätssymbol ( ) angezeigt (s. Abbildung 10). Nachdem der Heizkörperthermostat erfolgreich montiert wurde, muss im nächsten Schritt zur Anpassung ans Ventil eine Adaptierfahrt (AdA) durchgeführt werden. -
Seite 20: Automatischer Betrieb
IP App vornehmen. Falls Sie bereits Einstellungen im Konfigurationsmenü vorgenom- men oder das Gerät bereits direkt an ein anderes Homematic IP Ge- rät angelernt haben, müssen Sie zum Anlernen des Heizkörperther- mostats an einen Homematic IP Access Point oder an eine Zentrale CCU3 zunächst die Werkseinstellungen des Geräts wiederherstellen... -
Seite 21: Manueller Betrieb
Konfigurationsmenü Manueller Betrieb Im manuellen Betrieb erfolgt die Temperaturregelung gemäß der über die Tasten (E + F) eingestellten Temperatur. Die Temperatur bleibt bis zur nächsten manuellen Änderung erhalten. Um den manuellen Betrieb zu aktvieren, gehen Sie wie folgt vor: • Drücken Sie für ca. -
Seite 22: Programmierung Eines Heizprofils
Konfigurationsmenü Programmierung eines Heizprofils In diesem Menüpunkt können Sie ein Heizprofil mit Heiz- und Absenk- phasen nach Ihren eigenen Bedürfnissen erstellen. • Drücken Sie für ca. 2 s auf die Menü-Taste (G), um das Konfigu- rationsmenü zu öffnen. Wählen Sie über die Plus- oder Minus-Tasten (E + F) den Menü- •... -
Seite 23: Uhrzeit Und Datum
Konfigurationsmenü • Bestätigen Sie mit der Menü-Taste. • Wählen Sie über die Plus- oder Minus-Tasten „On“, um die Be- diensperre zu aktivieren oder „OFF“, um die Bediensperre zu de- aktivieren und bestätigen Sie mit der Menü-Taste. Zur Bestätigung blinkt die Auswahl zweimal kurz auf und das Gerät wech- selt zurück zur Standardanzeige. -
Seite 24: Urlaubsmodus
Bedienung Zur Bestätigung blinkt die Uhrzeit zweimal kurz auf und das Gerät wech- selt zurück zur Standardanzeige. Urlaubsmodus Der Urlaubsmodus kann genutzt werden, wenn für einen bestimmten Zeit- raum dauerhaft eine feste Temperatur gehalten werden soll (z. B. während eines Urlaubs oder einer Party). Um den Urlaubsmodus einzustellen, ge- hen Sie wie folgt vor: Drücken Sie für ca. -
Seite 25: Batterien Wechseln
Batterien wechseln körpers durch Öffnung des Ventils zu aktivieren. Dadurch wird sofort ein angenehmes Wärmegefühl im Raum erreicht. Batterien wechseln Erscheint das Symbol für leere Batterien ( ) im Display bzw. in der App, tauschen Sie die verbrauchten Batterien gegen zwei neue Batterien des Typs LR6/Mignon/AA aus. -
Seite 26: Fehlerbehebung
Fehlerbehebung Fehlerbehebung Schwache Batterien Wenn es der Spannungswert zulässt, ist der Heizkörperthermostat auch bei niedriger Batteriespannung betriebsbereit. Je nach Beanspruchung kann evtl. nach kurzer Erholungszeit der Batterien wieder mehrfach ge- sendet werden. Bricht beim Senden die Spannung wieder zusammen, wird das Symbol für leere Batterien ( ) und der Fehlercode am Gerät angezeigt (s. -
Seite 27: Fehlercodes Und Blinkfolgen
Fehlerbehebung linie, werden Homematic IP Geräte zu 100 % normenkonform entwickelt und produziert. Im normalen Betrieb wird der Duty Cycle in der Regel nicht erreicht. Dies kann jedoch in Einzelfällen bei der Inbetriebnahme oder Erstinstallation eines Systems durch vermehrte und funkintensive Anlernprozesse der Fall sein. - Seite 28 Direkter Anlern- Aktivieren Sie den Anlernmo- Blinken modus aktiv dus des anzulernenden Geräts (s. „5.1.1 Direktes Anlernen an ein Homematic IP Gerät“ auf Seite 13). Kurzes oranges Batterien leer Tauschen Sie die Batterien aus Leuchten (nach grü- (s. „8 Batterien wechseln“ auf ner oder roter Emp- Seite 25).
-
Seite 29: Wiederherstellung Der Werkseinstellungen
Wiederherstellung der Werkseinstellungen Wiederherstellung der Werkseinstellungen Die Werkseinstellungen des Geräts können wiederhergestellt wer- den. Dabei gehen alle Einstellungen verloren. Um die Werkseinstellungen des Geräts wiederherzustellen, gehen Sie wie folgt vor: • Öffnen Sie das Batteriefach (B), indem Sie den Batteriefachdeckel nach unten abziehen (s. -
Seite 30: Allgemeine Hinweise Zum Funkbetrieb
Gegebenheiten vor Ort eine wichtige Rolle. Hiermit erklärt die eQ-3 AG, Maiburger Str. 29, 26789 Leer, Deutsch- land, dass der Funkanlagentyp Homematic IP HmIP-eTRV-B-2 der Richtlinie 2014/53/EU entspricht. Der vollständige Text der EU-Kon- formitätserklärung ist unter der folgenden Internetadresse verfügbar: www.homematic-ip.com... - Seite 31 Technische Daten Software-Klasse: Klasse A Wirkungsweise: Typ 1 Anschluss: M30 x 1,5 mm Stellkraft: > 80 N Ventil-Hub: 4,3 ± 0,3 mm Maximale Hublage: 14,3 ± 0,3 mm Minimale Hublage: 10,0 ± 0,3 mm Technische Änderungen vorbehalten. Entsorgungshinweis Gerät nicht im Hausmüll entsorgen! Elektronische Geräte sind ent- sprechend der Richtlinie über Elektro- und Elektronik-Altgeräte über die örtlichen Sammelstellen für Elektronik-Altgeräte zu entsorgen.
-
Seite 32: Package Contents
Package contents Quantity Description Homematic IP Radiator Thermostat – basic Danfoss RA adapter Support ring Nut M4 Cylinder head screw M4 x 12 mm 1.5 V LR6/mignon/AA batteries User manual Supplement sheet with safety instructions Documentation © 2022 eQ-3 AG, Germany All rights reserved. - Seite 33 Function and device overview ..............35 General system information ..............36 Start-up ......................37 Pairing ....................37 5.1.1 Direct pairing with a Homematic IP device ....... 37 5.1.2 Adding to the Access Point (alternative)......38 Mounting .....................40 5.2.1 Mounting the radiator thermostat ........40 5.2.2...
-
Seite 34: Information About This Manual
Information about this manual Please read this manual carefully before beginning operation with your Homematic IP components. Keep the manual so you can refer to it at a later date if you need to. If you hand over the device to other persons for use, please hand over this manual as well. -
Seite 35: Function And Device Overview
Homematic IP Access Point comfortably via the free smartphone app. In connection with a Homematic IP Window and Door Contact the temperature is reduced automatically during ventilation. The radiator thermostat fits to all common radiator valves and is easy to mount - without having to drain any water or intervene in the heating system. -
Seite 36: General System Information
General system information This device is part of the Homematic IP smart home system and works with the Homematic IP protocol. All devices of the system can be configured comfortably and individually with the user interface of the Central Control Unit CCU3 or flexibly via the Homematic IP smartphone app in connection with the Homematic IP cloud. -
Seite 37: Start-Up
Please read this entire section before starting the add procedure. You can either pair the radiator thermostat directly with one or more Homematic IP devices or add the device to the Homematic IP Access Point (HmIP-HAP). After direct pairing, configuration has to be done directly on the device. -
Seite 38: Adding To The Access Point (Alternative)
If you have already connected the device to another Homematic IP device, you first have to restore the factory settings of the device before you can connect it to the Homematic IP Access Point or another Central Control Unit CCU3 (see see „1 Information about this manual“... - Seite 39 To integrate the device into your system and to enable control via the free Homematic IP app, you must add the device to your Homematic IP Access Point first. To add the device, please proceed as follows: •...
-
Seite 40: Mounting
Mounting Please read this entire section before starting to mount the device. The Homematic IP Radiator Thermostat is easy to install, and can be done without draining heating water or intervening in the heating system. No special tools are required, nor does the heating have to be switched off. -
Seite 41: Danfoss Ra Adapter
7). If required, you can use the supplied adapter for Danfoss RA valves (see see „5.1.1 Direct pairing with a Homematic IP device“ on page 37) or the supplied support ring (see see „5.2.3 Support ring“ on page 42). -
Seite 42: Support Ring
Start-up During installation, please ensure that the pins inside the adapter are lined up with the notches on the valve. Ensure that a suitable adapter for the valve is properly clipped on. Please ensure that you do not trap your fingers between the two halves of the adapter! After clipping onto the valve body, please attach the adapter using the provided screw and nut. -
Seite 43: Configuration Menu
Homematic IP device, you first have to restore the factory settings of the device before you can connect it to a Homematic IP Access Point or another Central Control Unit CCU3 (see see „10 Restore factory settings“ on... -
Seite 44: Automatic Operation
Configuration menu Automatic operation In automatic mode, the temperature is controlled in accordance with the set heating profile. Manual changes are activated until the next point at which the profile changes. Afterwards, the defined heating profile will be activated again. To activate the automatic mode, please proceed as follows: Press and hold down the menu button (G) to open the •... -
Seite 45: Programming A Heating Profile
Configuration menu Press and hold down the menu button (G) to open the • configuration menu. • Select “Offset” via the plus and minus buttons (E + F) in the menu. • Confirm with the menu button. • Select the desired offset temperature using the plus or minus button and confirm with the menu button. -
Seite 46: Operating Lock
Configuration menu Operating lock Operation of the device can be locked to avoid settings being changed unintended (e.g. through involuntary touch). To activate the operating lock, please proceed as follows: • Press and hold down the menu button (G) to open the configuration menu. -
Seite 47: Holiday Mode
Configuration menu confirm with the menu button. • Select the desired day using the plus or minus button and confirm with the menu button. • Select the desired hours using the plus or minus button and confirm with the menu button. •... -
Seite 48: Operation
Operation Operation After adding and mounting have been performed, simple operations are available directly on the device. • Temperature: Press the left (E) or right (F) push-button to manually change the temperature of the radiator. In automatic mode, the manually set temperature will remain the same until the next point at which the profile changes. -
Seite 49: Troubleshooting
Troubleshooting Caution! There is a risk of explosion if the battery is not replaced correctly. Replace only with the same or equivalent type. Never recharge non-rechargeable batteries. Do not throw the batteries into a fire. Do not expose batteries to excessive heat. Do not short- circuit batteries. -
Seite 50: Duty Cycle
1% of an hour (i.e. 36 seconds in an hour). Devices must cease transmission when they reach the 1% limit until this time restriction comes to an end. Homematic IP devices are designed and produced with 100% conformity to this regulation. During normal operation, the duty cycle is not usually reached. - Seite 51 Offset Mo Tu We Th Fr Sa Su AUTO Antenna Communication problem with Please check the BOOST MANU Homematic IP Access Point or connection with symbol ( ) flas- Offset connected device the Homematic IP hing Access Point or the connected devices.
-
Seite 52: Restore Factory Settings
Restore factory settings Short orange Batteries empty Replace the batte- lighting (after ries (see see „8 Re- green or red placing batteries“ confirmation) on page 48). 6x long red Device defective Please see your flashing app for error mes- sage or contact your retailer. -
Seite 53: Maintenance And Cleaning
Hereby, eQ-3 AG, Maiburger Str. 29, 26789 Leer/Germany declares that the radio equipment type Homematic IP HmIP-eTRV-B-2 is in compliance with Directive 2014/53/EU. The full text of the EU declaration of conformity is available at the following internet address:... -
Seite 54: Technical Specifications
Technical specifications Technical specifications Device short name: HmIP-eTRV-B-2 Supply voltage: 2x 1.5 V LR6/mignon/AA Current consumption: 100 mA max. Battery life: 2 years (typ.) Degree of protection: IP20 Degree of pollution: Ambient temperature: 0 to 50 °C Dimensions (W x H x D):... - Seite 55 Technical specifications Instructions for disposal Do not dispose of the device with regular domestic waste! Electronic equipment must be disposed of at local collection points for waste electronic equipment in compliance with the Waste Electrical and Electronic Equipment Directive. Information about conformity The CE sign is a free trading sign addressed exclusively to the authorities and does not include any warranty of any properties.
-
Seite 56: Contenu De La Livraison
Contenu de la livraison Nombre Désignation Homematic IP Thermostat de radiateur – basic Adaptateur Danfoss RA Bague d’appui Écrou M4 Vis à tête cylindrique M4 x 12 mm Piles 1,5 V LR6/Mignon/AA Mode d’emploi Fiche de consignes de sécurité Documentation © 2022 eQ-3 AG, Allemagne Tous droits réservés. - Seite 57 Table des matières Remarques sur la notice ................ 58 Mises en garde ..................58 Fonction et aperçu de l’appareil ............59 Informations générales sur le système ..........61 Mise en service ..................61 Apprentissage ..................61 5.1.1 Apprentissage direct sur un appareil Homematic IP ..61 5.1.2 Programmation sur l’Access Point (alternative) ....
-
Seite 58: Remarques Sur La Notice
Remarques sur la notice Remarques sur la notice Lisez attentivement la présente notice avant de mettre votre appareil Homematic IP en service. Conservez la notice pour pouvoir vous y référer ultérieurement ! Si vous laissez d’autres personnes utiliser l’appareil, n’oubliez pas de leur remettre également cette notice d’utilisation. -
Seite 59: Fonction Et Aperçu De L'appareil
à vos besoins personnels. Vous pouvez également commander facilement le thermostat de radiateur en association avec un Homematic IP Access Point via l’application gratuite pour smartphone En association avec un Homematic IP Contact pour fenêtre et porte, le dispositif abaisse automatiquement la température en situation d’aéra-... - Seite 60 Fonction et aperçu de l’appareil Le thermostat de radiateur programmable s’adapte à toutes les vannes de radiateurs courantes et se monte facilement – sans qu’il soit néces- saire de laisser couler l’eau de chauffage ou d’intervenir sur le système de chauffage.
-
Seite 61: Informations Générales Sur Le Système
Informations générales sur le système Informations générales sur le système Cet appareil fait partie du Homematic IP Système Smart-Home et com- munique par le biais du Homematic IP Protocole radio. Tous les appa- reils du système peuvent être configurés facilement et individuellement avec un smartphone à... - Seite 62 Mise en service Pour que l’appareil apprenne d’un autre appareil Homematic IP, les deux appareils doivent être placés en mode d’apprentissage. Procédez comme suit : • Ouvrez le compartiment à piles (B) en tirant le couvercle vers le bas (voir Figure 3). • Retirez la bandelette isolante du compartiment à piles. •...
-
Seite 63: Programmation Sur L'access Point (Alternative)
Restauration des réglages d’usine « à la page 77). Commencez par configurer le Homematic IP Access Point à l’aide de l’application Homematic IP afin de pouvoir utiliser d’autres appa- reils Homematic IP avec votre système. Vous trouverez des informa- tions détaillées à ce sujet dans le mode d’emploi de l’Access Point. -
Seite 64: Montage
Mise en service • L’appareil apparaît automatiquement dans l’application Home- matic IP. • Pour confirmer, saisissez les quatre derniers chiffres de l’appareil (SGTIN) dans l’application ou scannez le code QR. Le numéro de l’appareil se trouve sur l’autocollant contenu dans la livraison ou directement sur l’appareil. -
Seite 65: Monter Le Thermostat De Radiateur
Mise en service • Watts • Wingenroth (Wiroflex) • R.B.M • Tiemme • Jaga • Siemens • Idmar Les adaptateurs fournis permettent de monter l’appareil sur des vannes Danfoss RA. également (voir v. « 5.2.2 Adaptateur pour Danfoss RA « à la page 66). -
Seite 66: Adaptateur Pour Danfoss Ra
Mise en service Après le démontage de l’ancienne tête thermostatique, vous pouvez po- ser le Homematic IP Thermostat de radiateur avec l’écrou-chapeau (A) sur la vanne (voir Figure 7). Si nécessaire, utilisez l’adaptateur inclus pour vannes Danfoss RA (voir v. « 5.2.2 Adaptateur pour Danfoss RA « à la page 66) ou la bague de support incluse (voir v. -
Seite 67: Course D'adaptation
(F1, F2, F3), appuyez sur la touche Menu/ Boost Menu de configuration Lorsque vous utilisez l’appareil sans Homematic IP Access Point, vous pouvez sélectionner les modes suivants via le menu de configuration après la mise en service et effectuer des réglages pour adapter l’appareil aux besoins personnels. -
Seite 68: Mode Automatique
Offset Offset Offset Mode vacances Lorsque vous programmez le Homematic IP Access Point, vous pouvez effectuer facilement les réglages via l’application Homema- tic IP. Si vous avez déjà effectué des réglages dans le menu de configura- tion ou si vous avez déjà programmé l’appareil directement sur un autre appareil Homematic IP, vous devez d’abord restaurer les para-... -
Seite 69: Mode Manuel
Menu de configuration Mode manuel En mode manuel, le réglage de la température s’effectue conformément à la température réglée via les touches (E + F). La température reste active jusqu’à la prochaine modification manuelle. Afin d’activer le mode ma- nuel, procédez comme suit : •... -
Seite 70: Programmation D'un Profil De Chauffage
Menu de configuration Programmation d’un profil de chauffage Cette option de menu vous permet de réaliser un profil de chauffage avec des phases de chauffage et de diminution selon vos besoins. Appuyez pendant environ 2 s sur la touche Menu (G)pour ouvrir •... -
Seite 71: Heure Et Date
Menu de configuration rouillage de commande et confirmer avec la touche menu. Pour confirmer l’opération, la sélection clignote brièvement deux fois et l’appareil revient à l’affichage standard. Lors de l’activation du verrouillage de commande, le symbole « verrou » s’affiche à l’écran. Pour désactiver le verrouillage de commande, procédez comme suit : •... -
Seite 72: Mode Vacances
Utilisation Mode vacances Le mode vacances peut être utilisé lorsque, pour une période détermi- née, une température fixe doit être maintenue durablement (par ex. pen- dant les vacances ou une fête). Afin de régler le mode vacances, procé- dez comme suit : •... -
Seite 73: Remplacement Des Piles
Remplacement des piles Remplacement des piles Si le symbole de piles usagées ( ) apparaît à l’écran ou dans l’application, remplacez les piles usagées par deux piles neuves de type LR6/Mignon/ AA. Veillez à respecter la polarité des piles. Pour insérer des piles neuves, procédez comme suit : •... -
Seite 74: Correction Des Erreurs
Correction des erreurs Correction des erreurs Piles faibles Si la valeur de la tension le permet, le thermostat de radiateur est opé- rationnel même avec une tension des piles faible. Selon la sollicitation, il est éventuellement possible d’émettre à nouveau plusieurs fois après un court temps de récupération des piles. -
Seite 75: Codes D'erreur Et Séquences De Clignotement
Correction des erreurs Dans un fonctionnement normal, le Duty Cycle n’est en règle générale pas atteint. Ceci peut cependant être le cas lors de la mise en service ou de la première installation d’un système par des processus de program- mation multipliés et intensifs. - Seite 76 Correction des erreurs Bref clignotement Transmission Attendez que la transmission orange radio / Tenta- soit terminée. tive d’envoi ou données de configuration en cours de trans- mission 1 long éclairage vert Opération con- Vous pouvez poursuivre avec firmée la commande. 1 activation longue Opération Réessayez (voir v.
-
Seite 77: Restauration Des Réglages D'usine
Restauration des réglages d’usine Restauration des réglages d’usine Les réglages d’usine de l’appareil peuvent être rétablis. Dans ce cadre, tous les réglages antérieurs sont perdus. Afin de rétablir les réglages d’usine de l’appareil, procédez comme suit : • Ouvrez le compartiment à piles (B) en tirant le couvercle vers le bas (voir Figure 3). -
Seite 78: Remarques Générales Sur Le Fonctionnement Radio
Par la présente, eQ-3 AG, basée à Maiburger Str. 29, 26789 Leer, en Allemagne, déclare que l’équipement radioélectrique Homematic IP HmIP-WUA est conforme à la directive 2014/53/EU. L’intégralité de la déclaration européenne de conformité est disponible à l’adresse suivante : www.homematic-ip.com... - Seite 79 Caractéristiques techniques Catégorie du récepteur : SRD catégorie 2 Portée Portée radio en champ libre typ. : 250 m Duty Cycle : < 1 % par h / < 10 % par h Classe de logiciel : Classe A Mode d’action : Type 1 Raccordement : M30 x 1,5 mm Force de réglage : >...
-
Seite 80: Volumen De Suministro
Volumen de suministro Cantidad Componente Termostato de radiador Homematic IP – basic Adaptador Danfoss RA Material de montaje Pilas 1,5 V LR6/Mignon/AA Instrucciones de uso Hoja adjunta a las indicaciones de seguridad Documentación © 2022 eQ-3 AG, Alemania Todos los derechos reservados. Queda prohibida la reproducción total o parcial de estas instrucciones en todas las formas posibles o utilizando procedimientos electrónicos,... - Seite 81 Índice Advertencias sobre estas instrucciones ..........82 Advertencias de peligro ................. 82 Funciones y esquema del dispositivo ..........83 Información general del sistema ............85 Puesta en servicio ................... 85 Conexión ..................... 85 5.1.1 Conexión directa a un dispositivo Homematic IP .... 85 5.1.2 Programación en el Access Point (alternativa) ....
-
Seite 82: Advertencias Sobre Estas Instrucciones
Advertencias sobre estas instrucciones Advertencias sobre estas instrucciones Lea atentamente estas instrucciones antes de poner en servicio sus dis- positivos Homematic IP. ¡Conserve estas instrucciones para consultas posteriores! Si cede este dispositivo para que lo utilicen otras personas, entregue también estas Instrucciones junto con el dispositivo. -
Seite 83: Funciones Y Esquema Del Dispositivo
Para una configuración central y un cómodo control, también tiene la posibilidad de establecer la conexión del termostato del radiador con Homematic IP Access Point o CCU3 central. Combinado con un Homematic IP Contacto para puertas y ventanas, se reduce la temperatura ventilando automáticamente. - Seite 84 Funciones y esquema del dispositivo El termostato de radiador es compatible con todas las válvulas de radiador habituales y es muy fácil de montar. Para ello no es necesario vaciar el agua del radiador ni modificar nada en el sistema de calefacción. Con la función adicional Boost se puede calentar el radiador de forma rápida en poco tiempo abriendo la válvula al máximo.
-
Seite 85: Información General Del Sistema
Información general del sistema Información general del sistema Este dispositivo es parte del sistema smart home Homematic IP y se co- munica por el protocolo de radio Homematic IP. Se puede configurar todos los dispositivos del sistema confortablemente e indivualmente a travès la aplicación Homematic IP. - Seite 86 Puesta en servicio Para conectar el termostato de radiator a otro dispositivo Homematic IP es necesario activar el modo de conexión en los dos dispositivos. Modo de proceder: • Extraiga la tira aislante del compartimento de las pilas (B) del ter- mostato de radiador (véase la fig.
-
Seite 87: Programación En El Access Point (Alternativa)
Puede programar el aparato en el Homematic IP Access Point o en la central CCU3. Puede encontrar más información sobre este tema en el manual de usuario Homematic IP (lo encontrará en el área de descargas en el enlace www.homematic-ip.com). -
Seite 88: Montaje
Puesta en servicio • Por favor, espere a que finalice el proceso de programación. El LED (D) de color verde se enciende para confirmar que el pro- • ceso de programación ha finalizado con éxito. Ahora el disposi- tivo está listo para funcionar. •... -
Seite 89: Adaptador Para Danfoss Ra
(3). Después de desmontar el cabezal del termostato antiguo, puede fijar el termostato del radiador Homematic IP con la tuerca de racor (A) a la vál- vula del radiador (véase la fig. 7). -
Seite 90: Anillo De Soporte
Puesta en servicio Tenga cuidado para no pillarse los dedos entre las dos partes del adaptador. Después de encajar el adaptador en el cuerpo de la válvula, fíjelo con el tornillo y la tuerca que se adjuntan. 5.2.3 Anillo de soporte En las válvulas de algunos fabricantes, la parte de la válvula que se inserta en el aparato presenta un diámetro reducido que hace que su fijación esté... -
Seite 91: Menú De Configuración
Homematic IP, para programar el termostato de radiador con un Homematic IP Access Point o con una centralita CCU3 tiene que restaurar primero los ajustes de fábrica del dispositivo (v. „10 Resta-... -
Seite 92: Modo Automático
Menú de configuración Modo automático En modo automático, la regulación de temperatura se lleva a cabo según el perfil de calefacción configurado. Las modificaciones manuales per- manecen activas hasta el momento de la siguiente conexión. A continua- ción, se activa de nuevo el perfil de calefacción configurado. Para activar el modo automático, proceda del siguiente modo: Pulse el botón de menú... -
Seite 93: Programación De Un Perfil De Calefacción
Menú de configuración Pulse el botón de menú (G) durante al menos 2 seg. para abrir el • menú de configuración. • Seleccione la opción de menú “Offset” pulsando las teclas más o menos (E y F). • Confirme la selección con la tecla de menú. •... -
Seite 94: Bloqueo De Uso
Menú de configuración Para confirmar, la hora parpadea dos veces brevemente y el dispositivo vuelve a la pantalla estándar. Bloqueo de uso El uso del aparato puede bloquearse para evitar la modificación no de- seada de ajustes, por ejemplo al tocar el dispositivo accidentalmente. Para activar o desactivar el bloqueo de uso, proceda del siguiente modo: Pulse el botón de menú... -
Seite 95: Modo Vacaciones
Menú de configuración con el botón de menú. • Seleccione el mes con los botones de más o menos y confirme con el botón de menú. • Seleccione el día con los botones de más o menos y confirme con el botón de menú. •... -
Seite 96: Manejo
Manejo Manejo Después de la programación y el montaje, tiene a su disposición funcio- nes sencillas de manejo directamente en el dispositivo. • Temperatura: Pulse la tecla izquierda (E) o derecha (F) para cam- biar manualmente la temperatura del radiador. En modo automá- tico, la temperatura ajustada manualmente permanecerá... -
Seite 97: Reparación De Fallos
Reparación de fallos cabo la inicialización. El proceso termina con la indicación del test: luz naranja y verde. ¡Precaución! Peligro de explosión en caso de cambio incorrecto de las pilas. Cambiar únicamente por pilas del mismo tipo o equivalen- te. Las pilas no pueden ser recargadas nunca. No tirar las pilas al fuego. -
Seite 98: Duty Cycle
Los dispositivos dejan de emitir cuando alcanzan el límite del 1 % y hasta que haya finalizado el límite temporal. De conformidad con esa directiva, los dispositivos Homematic IP se desarrollan o producen con un 100 % de conformidad con esa norma. Generalmente, durante el funcionamiento normal no se alcanza el Duty Cycle. - Seite 99 Reparación de fallos Parpadeo breve de Modo de programación Introduzca las últimas color naranja activo cuatro cifras del número (cada 10 s) de serie del dispositi- vo para confirmarlo (v. „5.1.2 Programación en el Access Point (alternativa)“ en página 87) Parpadeo rápido Modo de programación Active el modo de pro-...
-
Seite 100: Restablecimiento De La Configuración De Fábrica
Restablecimiento de la configuración de fábrica 6 parpadeos lar- El dispositivo está ave- Compruebe las indicaci- riado ones de su aplicación y de color rojo póngase en contacto con su distribuidor. 1 encendido de Indicador de prueba Una vez se haya apagado color naranja y 1 el indicador de prueba, encendido de co-... -
Seite 101: Mantenimiento Y Limpieza
AG, Maiburger Str. 29, 26789 Leer, Alemania, declara que la instalación inalámbrica, Homematic IP HmIP-eTRV-B-2, cumple la Directiva 2014/53/UE. El texto de la declaración de conformidad CE está disponible al completo en la siguiente dirección de Internet:... -
Seite 102: Datos Técnicos
Datos técnicos Datos técnicos Nombre abreviado del dispositivo: HmIP-eTRV-B-2 Tensión de alimentación: 2 pilas LR6/Mignon/AA, 1,5 V Consumo de corriente: 100 mA máx. Duración de las pilas: 2 años (típ.) Tipo de protección: IP20 Grado de suciedad: Temperatura ambiente: de 0 a 50 °C... - Seite 103 Datos técnicos Indicaciones sobre la eliminación ¡No desechar el dispositivo en la basura doméstica! La eliminación de los equipos electrónicos debe efectuarse siguiendo la directiva de equipos eléctricos y electrónicos usados, en los puntos de reco- gida locales para ese tipo de aparatos. Información relativa a la conformidad El distintivo CE es un símbolo de mercado libre, dirigido exclusiva- mente a las autoridades y que no implica ninguna garantía de deter-...
- Seite 104 Fornitura Quantità Definizione Homematic IP Termostato per Radiatori – basic Adattatore Danfoss RA Anello di appoggio Dado M4 Vite a testa cilindrica con cava esagonale M4 x 12 mm Batterie LR6/mignon/AA da 1,5 V Istruzioni per l'uso Foglio allegato con le avvertenze di sicurezza Documentazione ©...
- Seite 105 Informazioni generali sul sistema ............109 Messa in funzione ................. 109 Accoppiamento ................109 5.1.1 Accoppiamento diretto di un apparecchio Homematic IP ................ 109 5.1.2 Accoppiamento con l’Access Point (alternativa) ..... 111 Montaggio ..................112 5.2.1 Montaggio del termostato per radiatore ......113 5.2.2...
-
Seite 106: Indicazioni Su Queste Istruzioni
Indicazioni su queste istruzioni Indicazioni su queste istruzioni Leggere attentamente queste istruzioni prima di mettere in funzione questo dispositivo Homematic IP. Conservare questo manuale per poterlo consultare anche in futuro! Se si affida l’utilizzo dell’apparecchio ad altre persone consegnare anche queste istruzioni per l’uso. -
Seite 107: Funzioni E Vista D'insieme Dell'apparecchio
Funzioni e vista d'insieme dell'apparecchio Il termostato per radiatori Homematic IP è in grado di regolare la tempe- ratura ambientale con un timer e in funzione delle esigenze mediante un profilo di riscaldamento organizzato secondo fasi di riscaldamento. - Seite 108 Funzioni e vista d'insieme dell'apparecchio Il termostato per radiatori è adatto a tutte le valvole per caloriferi attual- mente in uso e si installa facilmente poiché non è necessario scaricare acqua dal calorifero né intervenire sul sistema di riscaldamento. Inoltre la funzione Boost aggiunta consente di riscaldare rapidamente il radiatore per alcuni minuti aprendo la valvola.
-
Seite 109: Informazioni Generali Sul Sistema
Homematic IP. Tutti gli apparecchi del sistema possono essere configurati comodamente e singolarmen- te dallo smartphone tramite l'app Homematic IP. In alternativa gli appa- recchi Homematic IP possono essere gestiti tramite la centralina CCU3 oppure tramite un collegamento con numerosi sistemi di fornitori terzi. - Seite 110 • Premere il tasto di sistema dell’apparecchio da accoppiare (p. es. Contatto per Finestre e Porte con magnete Homematic IP) per almeno 4 secondi, per attivare la modalità di accoppiamento. Il LED dell’apparecchio diventa arancione e inizia a lampeggiare (v.
-
Seite 111: Accoppiamento Con L'access Point (Alternativa)
Nel caso l’utente abbia già accoppiato l’apparecchio direttamente con un altro apparecchio Homematic IP, per accoppiare il termosta- to per radiatore con l’Homematic IP Access Point o con la centralina CCU3 è necessario ripristinare innanzitutto le impostazioni di fabbri- ca dell’apparecchio (v. “10 Ripristino delle impostazioni di fabbrica“ a pag. -
Seite 112: Montaggio
Leggere interamente questo paragrafo prima di iniziare il montag- gio dell’apparecchio. Il montaggio del termostato per radiatore Homematic IP è semplice e può essere eseguito senza scaricare l'acqua o intervenire sul sistema di riscaldamento. Non è necessaria un'attrezzatura speciale o uno spegni- mento del riscaldamento. -
Seite 113: Montaggio Del Termostato Per Radiatore
Messa in funzione • Landis&Gyr (Duodyr) • Honeywell-Braukmann • Oventrop • Schlösser • Comap • Valf Sanayii • Mertik Maxitrol • Watts • Wingenroth (Wiroflex) • R.B.M • Tiemme • Jaga • Siemens • Idmar Con l'adattatore compreso nella fornitura l'apparecchio può inoltre esse- re montato su valvole per radiatore del tipo Danfoss RA (v. -
Seite 114: Adattatore Per Danfoss Ra
(3). Dopo aver smontato la vecchia testa del termostato è possibile posizio- nare il termostato per radiatori Homematic IP con il dado di raccordo (A) sulla valvola per radiatori (v. Figura 7). All’occorrenza è possibile usare l’adattatore per le valvole RA Danfoss (v. -
Seite 115: Anello Di Appoggio
Messa in funzione Dopo la chiusura a scatto sul corpo della valvola, fissare gli adattatori con la vite e il dado in dotazione. 5.2.3 Anello di appoggio Nelle valvole di alcuni produttori la parte della valvola all'interno dell'ap- parecchio ha solo un diametro limitato il che determina una sede lasca. In questo caso l'anello di appoggio in dotazione andrebbe applicato nella flangia dell’apparecchio prima del montaggio (v. -
Seite 116: Menu Di Configurazione
Homematic IP, è necessario prima di tutto ri- pristinare le impostazioni di fabbrica dell’apparecchio per accoppia- re il termostato del radiatore a un Homematic IP Access Point o a una centralina CCU3 (v. “10 Ripristino delle impostazioni di fabbrica“... -
Seite 117: Funzionamento Automatico
Menu di configurazione Funzionamento automatico Nel funzionamento automatico la regolazione della temperatura avviene secondo il profilo di riscaldamento impostato. Le modifiche manuali ri- mangono attive fino al punto di commutazione successivo. Poi il profilo di riscaldamento impostato viene riattivato. Per attivare il funzionamento automatico, procedere nel modo seguente: Premere per ca. -
Seite 118: Programmazione Di Un Profilo Di Riscaldamento
Menu di configurazione Premere per ca. 2 secondi il tasto Menu (G), per aprire il menu di • configurazione. • Selezionare attraverso i tasti Più o Meno (E + F) il punto del menu “Offset”. • Confermare con il tasto Menu. •... -
Seite 119: Blocco Comandi
Menu di configurazione Blocco comandi L'impiego sull'apparecchio può essere bloccato per impedire modifiche involontarie di impostazioni, ad esempio con un contatto fortuito. Per attivare e disattivare il Blocco comandi, procedere nel modo seguente: • Premere per ca. 2 secondi il tasto Menu (G), per aprire il menu di configurazione. -
Seite 120: Modalità Vacanza
Menu di configurazione tasto Menu. • Selezionare il giorno con i tasti Più o Meno e confermare con il tasto Menu. • Selezionare le ore con i tasti Più o Meno e confermare con il tasto Menu. • Selezionare i minuti con i tasti Più o Meno e confermare con il tasto Menu. -
Seite 121: Uso
Dopo l'accoppiamento e il montaggio sono disponibili semplici funzioni di comando direttamente sull'apparecchio: • Temperatura: Premere il tasto sinistro (E) o destro (F), per modi- ficare manualmente la temperatura del calorifero. Nel funziona- mento automatico la temperatura impostata manualmente rima- ne tale fino al successivo punto di commutazione. -
Seite 122: Risoluzione Dei Guasti
Risoluzione dei guasti Dopo aver inserito le batterie il termostato del radiatore effettua innan- zitutto un test autodiagnostico per ca. 2 secondi ed eventualmente un ciclo di adattamento. Dopo viene effettuato l’accoppiamento. La visua- lizzazione del test rappresenta la conclusione: luce arancione e verde. Attenzione! Rischio di esplosione se non si sostituiscono le batterie in modo appropriato. -
Seite 123: Duty Cycle
Quando raggiungono il limite dell’1% gli apparecchi non possono più trasmettere finché non sarà scaduto questo limite di tempo. Conformemente a questa direttiva gli apparecchi Homematic IP vengono sviluppati e prodotti nell’assoluto rispetto delle norme. Nel normale funzionamento di solito non si raggiunge il duty cycle. Tut-... -
Seite 124: Intervallo Di Impostazione Troppo Piccolo
Mo Tu We Th Fr Sa Su AUTO Il simbolo Errore di comu- Verificare il collegamento con BOOST MANU nicazione con Homematic IP Access Point e Antenna ( ) inizia a Offset l’Homematic IP con gli apparecchi accoppiati. lampeggiare Access Point o con l’apparecchio... -
Seite 125: Ripristino Delle Impostazioni Di Fabbrica
(v. „5.1.1 Accop- piamento diretto di un appa- recchio Homematic IP“ a pag. 109). Luce arancione Batteria scarica Sostituire le batterie (v. „8 Sos- accesa per breve tituzione delle batterie“ a pag. -
Seite 126: Manutenzione E Pulizia
Con la presente la eQ-3 AG, Maiburger Str. 29, 26789 Leer, Germania, dichiara che l’apparecchio radio Homematic IP modello HmIP-WUA è conforme alla Direttiva 2014/53/UE. Il testo integrale della dichia- razione di conformità UE è disponibile al seguente indirizzo internet:... -
Seite 127: Dati Tecnici
Dati tecnici Dati tecnici Sigla dell'apparecchio: HmIP-eTRV-B-2 Tensione di alimentazione: 2 batterie LR6/mignon/AA da 1,5 V Corrente assorbita 100 mA max. Durata batterie: 2 anni (tip.) Grado di protezione: IP20 Grado di contaminazione: Temperatura ambiente: tra 0 e 50 °C... - Seite 128 Dati tecnici Avvertenze per lo smaltimento Non smaltire l'apparecchio nei rifiuti domestici! Gli apparecchi elet- tronici devono essere smaltiti conformemente alla direttiva sui rifiu- ti di apparecchi elettrici ed elettronici ed essere consegnati presso un apposito centro di raccolta. Dichiarazione di conformità Il marchio CE è...
- Seite 129 Leveringsomvang Aantal Naam Homematic IP Radiatorthermostaat – basic Adapter Danfoss RA Steunring Moer M4 Cilinderkopschroef M4 x 12 mm 1,5V-batterij LR6/mignon/AA Handleiding Bijgesloten blad met veiligheidsinstructies Documentatie © 2022 eQ-3 AG, Duitsland Alle rechten voorbehouden. Zonder schriftelijke toestemming van de uitgever mogen...
- Seite 130 Werking en overzicht van het apparaat ..........132 Algemene systeeminformatie .............134 Inbedrijfstelling ..................134 Aanleren ..................... 134 5.1.1 Direct aanleren aan een Homematic IP apparaat ..134 5.1.2 Aanleren aan het Access Point (alternatief) ..... 136 Montage ....................137 5.2.1 Radiatorthermostaat monteren .......... 138 5.2.2...
-
Seite 131: Instructies Bij Deze Handleiding
Instructies bij deze handleiding Instructies bij deze handleiding Lees deze handleiding zorgvuldig door voordat u uw Homematic IP apparaat in gebruik neemt. Bewaar de handleiding, om ze ook later nog te kunnen raadplegen! Als u het apparaat door andere personen laat gebruiken, geef dan ook deze handleiding mee. -
Seite 132: Werking En Overzicht Van Het Apparaat
Homematic IP Access Point comfortabel te besturen via de gratis smartphone-app. In combinatie met een Homematic IP Raam- en Deurcontact wordt de temperatuur bij het ventileren automatisch verlaagd. De radiatorthermostaat past op alle gangbare radiatorkranen en is een- voudig te monteren –... - Seite 133 Werking en overzicht van het apparaat Overzicht van het apparaat (zie afbeelding 1): (A) Wartelmoer (B) Batterijvak(deksel) (C) Display (D) Systeemtoets (aanleertoets en led) (E) Min-toets (F) Plus-toets (G) Menu-/Boost-toets Overzicht van het display (zie afbeelding 2): o Tu We Th Fr Sa Su OOST Overzicht van de verwarmingsfasen u We Th Fr Sa Su...
-
Seite 134: Algemene Systeeminformatie
Homematic IP App worden geconfigureerd. U hebt ook de mogelijk- heid om de Homematic IP apparaten via de centrale CCU3 of in combina- tie met allerlei partneroplossingen te gebruiken. Welke functies binnen het systeem in combinatie met andere componenten mogelijk zijn, vindt u in het Homematic IP gebruikershandboek. - Seite 135 Inbedrijfstelling Om het apparaat op een ander Homematic IP apparaat aan te leren, moe- ten beide apparaten in de aanleermodus worden geschakeld. Ga hiervoor als volgt te werk: • Open het batterijvakje (B) door het deksel van het batterijvakje naar beneden weg te trekken (zie afbeelding 3).
-
Seite 136: Aanleren Aan Het Access Point (Alternatief)
5.1.2 Aanleren aan het Access Point (alternatief) Indien u het apparaat al direct aan een ander Homematic IP apparaat hebt aangeleerd, moet u voor het aanleren van de radiatorthermo- staat aan het Homematic IP Access Point of de centrale CCU3 eerst de fabrieksinstellingen van het apparaat herstellen (zie ‘10 Herstellen... -
Seite 137: Montage
Lees dit hoofdstuk volledig door, voordat u met de montage be- gint. De montage van de Homematic IP Radiatorthermostaat is eenvoudig en kan worden uitgevoerd zonder het verwarmingswater af te laten en zon- der ingreep in het verwarmingssysteem. Speciaal gereedschap of het uit- schakelen van de verwarming is hiervoor niet nodig. -
Seite 138: Radiatorthermostaat Monteren
(3). • Schroefverbinding met stiftschroef: Draai de stiftschroef los en verwijder de thermostaatkop (3). Na de demontage van de oude thermostaatkop kunt u de Homematic IP Radiatorthermostaat met de wartelmoer (A) op de radiatorthermostaat plaatsen (zie afbeelding 7). -
Seite 139: Adapter Voor Danfoss Ra
Inbedrijfstelling Gebruik zo nodig de bijgeleverde adapter voor Danfoss RA-kranen (zie ‘5.2.2 Adapter voor Danfoss RA’ op pagina 139) of de bijgeleverde steun- ring (zie ‘5.2.3 Steunring’ op pagina 139). 5.2.2 Adapter voor Danfoss RA Voor de montage op RA-kranen van Danfoss hebt u de bijgeleverde adapter nodig. -
Seite 140: Configuratiemenu
Configuratiemenu ('AdA') uitgevoerd worden Ga hiervoor als volgt te werk: Als op het display 'AdA' staat, drukt u op de Menu/Boost-toets (G) • om de adapteerbeweging te starten (zie afbeelding 11). radiatorthermostaat voert adapteerbewe- ging uit. Hierbij verschijnen 'AdA' activiteitsymbool ( ) op het display (zie afbeelding 11). -
Seite 141: Automatisch Bedrijf
Offset Offset Offset Vakantiemodus Als u het apparaat aan het Homematic IP Access Point aanleert, kunt u de instellingen gemakkelijk via de kosteloze Homematic IP App uitvoeren. Indien u al instellingen in het configuratiemenu hebt uitgevoerd of het apparaat al direct aan een ander Homematic IP apparaat hebt... -
Seite 142: Handmatig Bedrijf
Configuratiemenu Handmatig bedrijf In het handmatige bedrijf wordt de temperatuur geregeld volgens de temperatuur die met behulp van de toetsen (E + F) werd ingesteld. De temperatuur blijft behouden tot de volgende handmatige wijziging. Ga als volgt te werk om het handmatige bedrijf te activeren: •... -
Seite 143: Programmering Van Een Verwarmingsprofiel
Configuratiemenu Programmering van een verwarmingsprofiel In dit menupunt kunt u een verwarmingsprofiel instellen met verwar- mings- en verlaagde fasen, geheel volgens uw behoeften. Druk gedurende ca. 2 sec. op de Mode-toets (G) om het confi- • guratiemenu te openen. • Selecteer het menupunt 'Prg' met behulp van de plus- en min-toetsen (E + F) en bevestig uw keuze met de Menu-toets. -
Seite 144: Tijd En Datum
Configuratiemenu • Bevestig uw keuze met de Menu-toets. • Selecteer 'On' om de bedieningsvergrendeling te activeren of 'OFF' om de bedieningsvergrendeling te deactiveren en bevestig uw keuze met de Menu-toets. Ter bevestiging knippert de selectie twee keer kort en het apparaat scha- kelt terug naar de standaardweergave. -
Seite 145: Vakantiemodus
Bediening Ter bevestiging knippert de tijd twee keer kort en het apparaat schakelt terug naar de standaardweergave. Vakantiemodus De vakantiemodus kan worden gebruikt als gedurende een bepaalde pe- riode duurzaam een vaste temperatuur moet worden aangehouden (bijv. tijdens een vakantie of een feest). Ga als volgt te werk om de vakantie- modus in te stellen: •... -
Seite 146: Batterijen Vervangen
Batterijen vervangen activeren door de kraan te openen. Daardoor wordt direct een aangenaam warmtegevoel in het vertrek bereikt. Batterijen vervangen Als het symbool voor lege batterijen ( ) op het display of in de app ver- schijnt, dient u de verbruikte batterijen te vervangen door twee nieuwe batterijen van het type LR6/mignon/AA. -
Seite 147: Storingen Oplossen
1% van een uur (dus 36 seconden per uur). De apparaten mogen bij het bereiken van de 1%-limiet niet meer zenden, tot deze tijdelijke begrenzing weer voorbij is. In overeenstem- ming met deze richtlijn worden Homematic IP apparaten 100 % conform de norm ontwikkeld en geproduceerd. -
Seite 148: Foutcodes En Knipperreeksen
Mo Tu We Th Fr Sa Su AUTO Antenne- Communica- Controleer de verbinding naar BOOST MANU tiestoring naar het Homematic IP Access symbool ( ) knip- Offset het Homematic IP Point of de aangeleerde appa- pert Access Point of het raten. - Seite 149 Directe aanleermo- Activeer de aanleermodus van peren dus actief het aan te leren apparaat (zie ‘5.1.1 Direct aanleren aan een Homematic IP apparaat’ op pagina 134). Kort oranje op- Batterijen leeg Vervang de batterijen (zie ‘8 lichten (na groene Batterijen vervangen’ op pagi- of rode ont- na 146).
-
Seite 150: Herstellen Van De Fabrieksinstellingen
Herstellen van de fabrieksinstellingen Herstellen van de fabrieksinstellingen De fabrieksinstellingen van het apparaat kunnen worden hersteld. Hierbij gaan alle instellingen verloren. Om de fabrieksinstellingen van het apparaat te herstellen, gaat u als volgt te werk: • Open het batterijvakje (B) door het deksel van het batterijvakje naar beneden weg te trekken (zie afbeelding 3). -
Seite 151: Algemene Instructies Voor Het Draadloze Bedrijf
Hierbij verklaart eQ-3 AG, Maiburger Str. 29, 26789 Leer, Duitsland, dat het draadloze apparaattype Homematic IP HmIP-eTRV-B-2 in overeenstemming is met de richtlijn 2014/53/EU. De volledige tekst van de EU-conformiteitsverklaring is beschikbaar onder het volgende internetadres: www.homematic-ip.com... - Seite 152 Technische gegevens Duty cycle: < 1% per h / < 10% per h Softwareklasse: klasse A Werkwijze: type 1 Aansluiting: M30 x 1,5 mm Stelkracht: > 80 N Slaglengte kraan: 4,3 ± 0,3 mm Maximale slagpositie: 14,3 ± 0,3 mm Minimale slagpositie: 10,0 ±...
- Seite 153 Technische gegevens Kostenloser Download der Homematic IP App! Free download of the Homematic IP app! Bevollmächtigter des Herstellers: Manufacturer’s authorised representative: eQ-3 AG Maiburger Straße 29 26789 Leer / GERMANY www.eQ-3.de...