HomeMatic IP HmIP-WTH-1 Installations- Und Bedienungsanleitung
Wandthermostat mit luftfeuchtigkeitssensor
Vorschau ausblenden
Andere Handbücher für HmIP-WTH-1:
- Installations- und bedienungsanleitung (139 Seiten)
Inhaltsverzeichnis
Werbung
Verfügbare Sprachen
Verfügbare Sprachen
Quicklinks
Wandthermostat mit Luftfeuchtigkeitssensor
Wall Thermostat with Humidity Sensor
HmIP-WTH-1
Installations- und
DE
Bedienungsanleitung
Installation and operating
EN
manual
Notice d'installation et
FR
d'emploi
Manual de instalación
ES
y uso
Istruzioni per l'installazione
IT
e l'uso
Installatie- en
NL
bedieningshandleiding
Werbung
Kapitel
Inhaltsverzeichnis
Fehlerbehebung

Verwandte Anleitungen für HomeMatic IP HmIP-WTH-1


Inhaltszusammenfassung für HomeMatic IP HmIP-WTH-1
- Seite 1 Wandthermostat mit Luftfeuchtigkeitssensor Wall Thermostat with Humidity Sensor HmIP-WTH-1 Installations- und Manual de instalación Bedienungsanleitung y uso Installation and operating Istruzioni per l‘installazione manual e l‘uso Notice d‘installation et Installatie- en d‘emploi bedieningshandleiding...
-
Seite 2: Inhaltsverzeichnis
Installations- und Bedienungsanleitung Inhaltsverzeichnis Lieferumfang ....................3 Hinweise zur Anleitung ................3 Gefahrenhinweise ..................3 Funktion und Geräteübersicht ..............4 Allgemeine Systeminformationen .............5 Inbetriebnahme .....................5 Anlernen am Homematic IP Access Point ............5 Montage ........................ 6 6.2.1 Klebestreifenmontage ................7 6.2.2 Schraubmontage ................... 7 6.2.3 Montage auf einer Unterputzdose .............8 6.2.4 Montage in Mehrfachkombinationen ..........9 Bedienung ......................9... -
Seite 3: Lieferumfang
Lieferumfang Lieferumfang Ausgelaufene oder beschädigte Batterien können bei Berührung Homematic IP Wandthermostat mit der Haut Verätzungen verur- mit Luftfeuchtigkeitssensor sachen, benutzen Sie deshalb in 1x Wechselrahmen diesem Fall geeignete Schutz- 1x Montageplatte handschuhe. 2x Doppelseitige Klebestreifen Öffnen Sie das Gerät nicht. Es 2x Schrauben 3,0 x 30 mm enthält keine durch den Anwender 2x Dübel 5 mm... -
Seite 4: Funktion Und Geräteübersicht
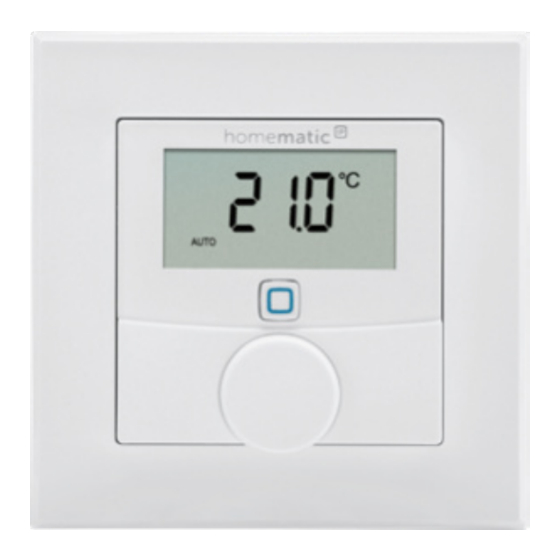
Funktion und Geräteübersicht Das Gerät ist nur für den Einsatz in sehr einfach. Zusätzlich ist es möglich, wohnungsähnlichen Umgebun- den Wandthermostat in bestehende gen geeignet. Schalterserien zu integrieren. Jeder andere Einsatz, als der in Geräteübersicht: dieser Bedienungsanleitung be- (A) Wechselrahmen schriebene, ist nicht bestim- (B) Elektronikeinheit (Thermostat) mungsgemäß... -
Seite 5: Allgemeine Systeminformationen
Allgemeine Systeminformationen 5 Allgemeine Anlernen am Homematic IP Access Point Systeminformationen Richten Sie zunächst Ihren Dieses Gerät ist Teil der Raumkli- Homematic IP Access Point über ma-Lösung von Homematic IP und die Homematic IP App ein, um kommuniziert über das HmIP Funk- weitere Homematic IP Geräte im protokoll. -
Seite 6: Montage
Inbetriebnahme Montage Sie können den Anlernmodus manuell für weitere 3 Minuten Bitte lesen Sie diesen Abschnitt starten, indem Sie die Systemtaste erst vollständig, bevor Sie mit der (D) kurz drücken. Montage beginnen. Sie können den Wandthermostat ent- weder im mitgelieferten Wechselrah- men (A) montieren oder ihn bequem in eine bestehende Schalterserie integrie- (s. -
Seite 7: Klebestreifenmontage
Inbetriebnahme 6.2.1 Klebestreifenmontage 6.2.2 Schraubmontage Um den zusammengesetzten Wand- Um den Wandthermostat mithilfe der thermostat mit den Klebestreifen zu Schrauben zu montieren, gehen Sie montieren, gehen Sie wie folgt vor: wie folgt vor: • Wählen Sie einen beliebigen Mon- • Wählen Sie einen geeigneten Mon- tageort aus. -
Seite 8: Montage Auf Einer Unterputzdose
Inbetriebnahme 6.2.3 Montage auf einer • Montieren Sie die Montageplatte Unterputzdose durch Eindrehen der mitgelieferten Dübel und Schrauben (K). Sie können den Wandthermostaten mithilfe der Löcher (I) auf einer Unter- putz-/Installationsdose montieren (siehe Abbildung). In der Unterputzdose dürfen sich keine offenen Leiterenden befin- den. -
Seite 9: Montage In Mehrfachkombinationen
Bedienung *Erforderliche Fachkenntnisse für die bündig neben bereits befestigte Mon- Installation: tageplatten/Tragringen angebracht und daran ausgerichtet wird. Für die Installation sind insbesondere folgende Fachkenntnisse erforderlich: • Die anzuwendenden „5 Sicher- Der Wandthermostat passt in die Rah- heitsregeln“: men folgender Hersteller: Freischalten;... -
Seite 10: Batterien Wechseln
Batterien wechseln • Boost-Funktion für Homematic IP • Legen Sie zwei neue 1,5 V LR03/ Heizkörperthermostate: Drücken Micro/AAA Batterien polungsrichtig Sie das Stellrad (E) des Wand- gemäß Markierung in die Batterie- thermostats kurz, um die Boost- fächer ein. Funktion für schnelles, kurzzeitiges Aufheizen des Heizkörpers durch Öffnung des Ventils zu aktivieren. -
Seite 11: Fehlerbehebung
Fehlerbehebung 9 Fehlerbehebung Duty Cycle Der Duty Cycle beschreibt eine ge- setzlich geregelte Begrenzung der Schwache Batterien Sendezeit von Geräten im 868-MHz- Wenn es der Spannungswert zulässt, ist Bereich. Das Ziel dieser Regelung ist es, der Wandthermostat auch bei niedriger die Funktion aller im 868-MHz-Bereich Batteriespannung betriebsbereit. -
Seite 12: Fehlercodes Und Blinkfolgen
Fehlerbehebung Fehlercodes und Blinkfolgen Blinkcode Bedeutung Lösung Tauschen Sie die Batterien des Gerätes aus (s. „8 Bat- Batterie-Symbol ( ) Batteriespannung gering terien wechseln“ auf Seite 10). Kommunikationsstörung Prüfen Sie die Verbindung Antennen-Symbol blinkt zum Homematic IP Ac- zum Homematic IP Ac- cess Point/Fußbodenhei- cess Point/Fußbodenhei- zungsaktor... -
Seite 13: Wiederherstellung Der Werkseinstellungen
Wiederherstellung der Werkseinstellungen Achten Sie auf die Anzeige in Ihrer App oder wenden 6x langes rotes Blinken Gerät defekt Sie sich an Ihren Fach- händler. Nachdem die Testanzeige 1x oranges und 1x grünes Leuchten (nach dem Ein- Testanzeige erloschen ist, legen der Batterien) können Sie fortfahren. -
Seite 14: Allgemeine Hinweise Zum Funkbetrieb
Str. 29, 26789 Leer, Deutschland, dass merksam, dass Sie als Endnutzer ei- der Funkanlagentyp Homematic IP genverantwortlich für die Löschung HmIP-WTH-1 der Richtlinie 2014/53/ personenbezogener Daten auf dem zu EU entspricht. Der vollständige Text entsorgenden Elektro- und Elektronik- der EU-Konformitätserklärung ist unter Altgerät sind. -
Seite 15: Technische Daten
Technische Daten 14 Technische Daten Geräte-Kurzbezeichnung: HmIP-WTH-1 Versorgungsspannung: 2x 1,5 V LR03/Micro/AAA Stromaufnahme: 50 mA max. Batterielebensdauer: 2 Jahre (typ.) Schutzart: IP20 Umgebungstemperatur: 0 bis 35 °C Abmessungen (B x H x T): Ohne Rahmen: 55 x 55 x 23,5 mm... - Seite 16 Installation and operating manual Table of contents Package contents..................17 Information about this manual ..............17 Hazard information ..................17 Function and device overview ..............18 General system information ..............19 Start-up ......................19 Pairing the Homematic IP Access Point ............19 Installation ......................20 6.2.1 Adhesive strip mounting ..............20 6.2.2 Screw mounting ...................
-
Seite 17: Package Contents
Package contents Package contents Doing so will present a risk of explosion. Wall Thermostat with Humidity Sensor Contact with batteries that are dead or damaged can cause skin 1x Wall mounting bracket irritation. Use protective gloves in 1x Double-sided adhesive strips this case. -
Seite 18: Function And Device Overview
Function and device overview Using the device for any purpose Device overview: other than that described in this (A) Clip-on frame operating manual does not fall (B) Electronic unit (thermostat) within the scope of intended use (C) Display and will invalidate any warranty or (D) System button (pairing button and liability. -
Seite 19: General System Information
General system information 5 General system information Pairing the Homematic IP Access Point This device is part of the climate con- First set up your Homematic IP trol solution of Homematic IP and Access Point via the Homematic IP works with the Homematic IP radio app to enable operation of other protocol. -
Seite 20: Installation
Start-up Installation You can manually start the pairing mode for another 3 minutes by Please read this entire section pressing the system button (D) before starting the installation. briefly. You can use the supplied clip-on frame (A) to mount the wall thermostat or ea- sily integrate it into an existing switch (see „6.2.4 Installation in multiple combi- nations“... -
Seite 21: Screw Mounting
Start-up • Use a pen to mark the positions of bore holes (J) (diagonally opposite) in the mounting plate on the wall. • Remove the protective film from the adhesive strips. • Press the assembled wall thermos- • Now drill the bore holes. tat with the back side to the wall in the position where it should subse- If you are working with a stone... -
Seite 22: Mounting On Flush-Mounted Boxes
Start-up • Place the electronic unit (B) back Incorrect installation can endanger into the frame. Make sure that • your own life, “TOP” and the arrows on the back • and the lives of other users of the side point upwards and that the electrical system. -
Seite 23: Installation In Multiple Combinations
Operation 6.2.4 Installation in multiple Operation combinations After configuration, simple operations You can mount the wall thermostat are available directly on the device. with the attachment frame (A) provided or use it with frames of other manu- If the wall thermostat is in standby facturers as well as integrate the elec- mode, please press the control tronic unit (B) into a multi-gang frame. -
Seite 24: Changing The Batteries
Changing the batteries 8 Changing the batteries • Please pay attention to the flashing signals of the device LED while in- If the symbol for empty batteries ( ) serting the batteries (see „9.4 Error appears in the display or in the app, codes and flashing sequences“... -
Seite 25: Troubleshooting
Troubleshooting 9 Troubleshooting Duty Cycle The duty cycle is a legally regulated li- mit of the transmission time of devices Low battery in the 868 MHz range. The aim of this Provided that the voltage value per- regulation is to safeguard the opera- mits it, the wall thermostat will remain tion of all devices working in the 868 ready for operation also if the battery... -
Seite 26: Error Codes And Flashing Sequences
Troubleshooting Error codes and flashing sequences Error and flashing codes Meaning Solution Replace the batteries of the device (see „8 Chan- Battery symbol ( ) Battery voltage too low ging the batteries“ on page 24). Communication error Please check the connec- Antenna symbol flashing with Homematic IP access tion to the Homematic IP... -
Seite 27: Restoring Factory Settings
Restoring factory settings Please try again (see „9.2 Command not confirmed“ Transmission failed or 1x long red flash on page 25) (see duty cycle limit is reached „9.3 Duty Cycle“ on page 25). Please see your app for 6x long red flashes Device defective error message or contact your retailer. -
Seite 28: General Information About Radio Operation
Leer, Germany hereby declares that the of it. radio equipment type Homematic IP HmIP-WTH-1 is compliant with Direc- tive 2014/53/EU. The full text of the EU Information about conformity declaration of conformity is available at The CE mark is a free trademark that is... -
Seite 29: Technical Specifications
Technical specifications 14 Technical specifications Device short description: HmIP-WTH-1 Supply voltage: 2x 1.5 V LR03/micro/AAA Current consumption: 50 mA max. Battery life: 2 years (typical) Protection rating: IP20 Ambient temperature: 0 to 35 °C Dimensions (W x H x D): Without frame: 55 x 55 x 23.5 mm... - Seite 30 Notice d‘installation et d‘emploi Table des matières Contenu de la livraison ................31 Remarques sur la notice ................31 Mises en garde .....................31 Fonction et aperçu de l’appareil ..............32 Informations générales sur le système ...........33 Mise en service ....................33 Apprentissage sur le Homematic IP Access Point ........33 Montage ......................
-
Seite 31: Contenu De La Livraison
Contenu de la livraison Contenu de la livraison Risque d’explosion ! Thermostat mural avec capteur Les piles usagées ou endomma- d‘humidité de l‘air gées risquant de provoquer des brûlures au contact de la peau, 1x Support mural portez des gants de protection le 1x Bandes adhésives double face cas échéant. -
Seite 32: Fonction Et Aperçu De L'appareil
Température de consigne/réelle re chauffage au sol en combinaison Hygrométrie avec les Homematic IP Actionneurs de Avertissement pour condensation chauffage au sol, ou vos radiateurs tra- Symbole de fenêtre ouverte ditionnels avec les Homematic IP Ther-... -
Seite 33: Informations Générales Sur Le Système
Informations générales sur le système 6 Mise en service Merci de lire attentivement cette section avant de procéder à l’apprentissage. Pour l’apprentissage et la configu- ration du thermostat mural à l’aide d’une CCU3, vous trouverez plus amples informations dans le ma- nuel WebUI sur notre page d’accueil sous www.homematic-ip.com. -
Seite 34: Montage
Mise en service • Sélectionnez l’option de menu • Pour confirmer, saisissez les quatre « Procéder à l’apprentissage de derniers chiffres de l’appareil (SG- l’appareil ». TIN) dans l’application ou scan- nez le code QR. Le numéro de • Saisissez le module électronique l’appareil se trouve sur l’autocollant (B) par le côté... -
Seite 35: Montage De La Bande Adhésive
Mise en service 6.2.2 Montage par vis Vous pouvez également monter le thermostat mural sur un boîtier encas- Afin de monter le thermostat mural tré. avec les vis, procédez comme suit : • Choisissez un lieu de montage ap- 6.2.1 Montage de la bande adhésive proprié. -
Seite 36: Montage Sur Un Boîtier Encastré
Mise en service Si des modifications ou des tra- vaux doivent être réalisés au ni- veau du bâtiment (par ex. extensi- on, pontage d’inserts d’interrupteurs ou de prises) ou du tableau basse tension en vue du montage ou de la pose de l’appareil, respectez impérative- ment les consignes de sécurité... -
Seite 37: Montage Dans Des Combinaisons Multiples
Utilisation mettre à la terre et court-circuiter ; Le thermostat mural convient aux cad- recouvrir ou protéger les parties res des fabricants suivants : sous tension situées à proximité ; Fabricant Cadre • choix de l’outil approprié, des Berker S.1, B.1, B.3, B.7 Glas appareils de mesure et, le cas ELSO échéant, de l’équipement de pro-... -
Seite 38: Remplacement Des Piles
Remplacement des piles à court terme du radiateur via ou- • Replacez le module électronique verture de la vanne. Une sensation dans le cadre. Veillez à ce que de chaleur agréable est ainsi immé- l’inscription « HAUT » et les flèches diatement obtenue dans la pièce. au dos du module électronique soient orientées vers le haut et que les pattes de fixation de la plaque... -
Seite 39: Correction Des Erreurs
Correction des erreurs 9 Correction des erreurs Duty Cycle Le Duty Cycle décrit une limitati- on réglementée par la loi du temps Pile faible d’émission des appareils dans une Si la valeur de la tension le permet, le plage de fréquences de 868 MHz. thermostat mural est opérationnel, L’objectif de ce règlement est de ga- même avec une faible tension des pi-... -
Seite 40: Codes D'erreur Et Séquences De Clignotement
Correction des erreurs Codes d’erreur et séquences de clignotement Codes d’erreur et codes Signification Solution de clignotement Remplacez les piles de l’appareil (v. „ 8 Remplace- Symbole de pile ( ) Tension de pile faible ment des piles „ à la page 38). -
Seite 41: Restauration Des Réglages D'usine
Restauration des réglages d’usine Réessayez (v. „ 9.2 Com- mande non confirmée „ à 1 activation longue en Opération échouée ou la page 39) (v. „ 9.3 rouge limite Duty Cycle atteinte Duty Cycle „ à la page 39). Tenez compte de 6 longs clignotements l’affichage dans votre Appareil défectueux rouges... -
Seite 42: Remarques Générales Sur Le Fonctionnement Radio
Str. 29, 26789 Leer, en Allema- qu’utilisateur final, vous êtes seul res- gne, déclare que l’équipement radioé- ponsable de la suppression des don- lectrique Homematic IP HmIP-WTH-1 nées à caractère personnel contenues est conforme à la directive 2014/53/ dans les appareils électriques et élect- EU. -
Seite 43: Caractéristiques Techniques
Caractéristiques techniques 14 Caractéristiques techniques Désignation abrégée de l’appareil : HmIP-WTH-1 Tension d’alimentation : 2x 1,5 V LR03/Micro/AAA Courant absorbé : 50 mA max. Durée de vie des piles : 2 ans (typiquement) Type de protection : IP20 Température ambiante : de 0 à 35 °C Dimensions (l x H x P) : Sans cadre :... - Seite 44 Manual de instalación y uso Índice Volumen de suministro ................45 Advertencias sobre estas instrucciones ..........45 Advertencias de peligro ................45 Funciones y esquema del dispositivo ............. 46 Información general del sistema .............47 Puesta en servicio ..................47 Conexión a Homematic IP Access Point ............47 Montaje .......................48 6.2.1 Montaje con tiras adhesivas .............
-
Seite 45: Volumen De Suministro
Volumen de suministro Volumen de suministro tocircuitar las pilas. ¡Existe peligro de explosión! Termostato de pared con sensor de humedad del aire Las pilas gastadas o dañadas pue- den causar quemaduras en con- 1x marco sumistritado tacto con la piel. En estos casos, 1x Soporte para pared utilice unos guantes de protecci- 2x Tiras adhesivas de doble cara... -
Seite 46: Funciones Y Esquema Del Dispositivo
Esquema de la pantalla: 4 Funciones y esquema del Temperatura nominal y realr dispositivo Humedad del aire Con Homematic IP Termostato de Mantenimiento por condensación pared puede regular por horas el su- Símbolo de ventana abierta elo radiante en combinación con los Símbolo de batería... -
Seite 47: Información General Del Sistema
Información general del sistema 5 Información general del Conexión a Homematic IP Access Point sistema En primer lugar tiene que configu- Este dispositivo forma parte del siste- rar su Homematic IP Access Point ma de climatización de Homematic IP desde la app Homematic IP para y se comunica mediante el protocolo poder utilizar otros dispositivos de radio de Homematic IP. -
Seite 48: Montaje
Puesta en servicio Montaje Puede activar manualmente el modo de conexión 3 minutos más Por favor, lea íntegramente este pulsado brevemente el botón de capítulo antes de realizar el mon- sistema (D). taje. Puede montar el termostato de pared con el marco (A) suministrado o integ- rarlo en una serie de interruptores exis- tente (v. -
Seite 49: Montaje Con Tornillos
Puesta en servicio • Retire la lámina de protección de • Taladre los orificios marcados. las tiras adhesivas. • Presione el termostato ya ensam- En paredes de piedra debe utilizar blado en el punto deseado con la una broca de 5 mm para los tacos. parte trasera contra la pared. -
Seite 50: Montaje En Cajetín Empotrado
Puesta en servicio • Inserte la unidad electrónica (A). ¡Aviso! ¡La instalación solo puede ser realizada por personas con la Asegúrese de que la inscripción «TOP» y la flecha de la parte trase- correspondiente cualificación y experiencia en electrotecnia!* ra apuntan hacia arriba, y que los corchetes de la placa de montaje Una instalación incorrecta pone en encajan en los orificios de la uni-... -
Seite 51: Montaje Con Combinaciones Múltiples
Manejo Manejo • Tipos de protección IP • Montaje del material de instalación Una vez realizada la configuración, us- electrónica ted dispone de sencillas funciones de • Tipo de red de suministro (sistema manejo directamente en el dispositivo. TN, sistema IT, sistema TT) y las condiciones de conexión corres- Si el termostato de pared se en- pondientes (ajuste a cero clásico,... -
Seite 52: Cambio De Pilas
Cambio de pilas 8 Cambio de pilas • Inserte la unidad electrónica de nuevo en el marco. Asegúrese de La aparición del símbolo de batería que la inscripción «TOP» y la flecha descargada ( ) en la pantalla o en la app de la parte trasera de la unidad indica que es necesario cambiar las electrónica apuntan hacia arriba,... -
Seite 53: Reparación De Fallos
Reparación de fallos 9 Reparación de fallos Duty Cycle Duty Cycle describe una limitación del tiempo de transmisión regulada por ley Pila descargada para dispositivos en la banda de 868 Si la carga disponible lo permite, el MHz. El objeto de esta regulación es termostato de pared puede funcionar garantizar el funcionamiento de todos también con baja tensión de las pilas. -
Seite 54: Códigos De Errores Y Secuencias Intermitentes
Reparación de fallos Códigos de errores y secuencias intermitentes Código de errores y se- Significado Solución cuencia intermitente Cambie las pilas del dis- Símbolo de Batería positivo (v. „8 Cambio de batería ( ) baja pilas“ en página 52). Error en la comunicación Compruebe la conexión Símbolo de antena con Homematic IP Access... -
Seite 55: Restablecimiento De La Configuración De Fábrica
Restablecimiento de la configuración de fábrica Consulte los mensajes de Luz roja intermitente larga Dispositivo defectuoso la aplicación o contacte (6 veces) con su proveedor. Cuando se apague 1 vez luz naranja y 1 vez luz verde (después de co- Indicación de prueba la indicación de prueba, locar las pilas) -
Seite 56: Eliminación
Leer, Alemania, declara que el tipo de Le advertimos expresamente sobre instalación por radio Homematic IP el hecho de que usted, como usuario HmIP-WTH-1 cumple la Directiva final, es responsable de eliminar los 2014/53/UE. El texto de la declaración datos personales de los aparatos eléc- de conformidad CE está... -
Seite 57: Datos Técnicos
Datos técnicos 14 Datos técnicos Nombre abreviado del dispositivo: HmIP-WTH-1 Tensión de alimentación: 2 pilas LR03/Micro/AAA, 1,5 V Consumo de corriente: máx. 50 mA Duración de las pilas: 2 años (típ.) Tipo de protección: IP20 Temperatura ambiente: de 0 a 35 °C... - Seite 58 Istruzioni per l‘installazione e l‘uso Indice Fornitura .......................61 Indicazioni su queste istruzioni ..............61 Indicazioni di pericolo................61 Funzioni e vista d’insieme dell’apparecchio Informazioni generali sul sistema ............63 Messa in funzione ..................63 Inizializzazione sul punto di accesso Homematic IP ......... 63 Montaggio ......................64 6.2.1 Montaggio con strisce adesive............64...
-
Seite 59: Fornitura
Fornitura Fornitura fuoco! Non esporre le batterie a un calore eccessivo. Non mettere Termostato a parete con sensore in cortocircuito le batterie. Rischio di umidità dell’aria di esplosione! 1x telaio intercambiabile Le batterie danneggiate o che 1x Supporto a parete perdono liquido possono provo- 2x Strisce bi-adesive care ustioni in caso di contatto... -
Seite 60: Funzioni E Vista D'insieme Dell'apparecchio
Temperatura nominale peratura interna. I termostati a parete possono essere inizializzati dalla CCU3 Homematic IP o in alternativa dal pun- to di accesso Homematic IP che con- sente di comandarli comodamente tramite l’app Homematic IP. Grazie al funzionamento a batteria, il termostato a parete consente di scegliere il luogo di installazione con grande flessibilità. -
Seite 61: Informazioni Generali Sul Sistema
Informazioni generali sul sistema 6 Messa in funzione Leggere interamente questo para- grafo prima di iniziare la procedu- ra di inizializzazione. Per inizializzare e configurare il termostato a parete servendosi di una CCU3, maggiori informazioni sono riportate nel manuale WebUI nella nostra home page sul sito www.homematic-ip.com. - Seite 62 Messa in funzione • Afferrare il gruppo elettronico (B) riportato nell’etichetta adesiva in- lateralmente ed estrarlo dal telaio. clusa nella fornitura o direttamente sull’apparecchio. • Attendere che la procedura di inizi- alizzazione sia conclusa. • A conferma dell’avvenuta inizializ- zazione il LED invia una luce verde. L’apparecchio è...
-
Seite 63: Montaggio
Messa in funzione 6.2.1 Montaggio con strisce adesive 6.2.2 Montaggio con viti Per montare il termostato a parete con Per montare il termostato a parete uti- le strisce adesive procedere come se- lizzando le viti procedere come segue: gue: • Scegliere un punto adatto per il •... -
Seite 64: Montaggio Su Una Presa Sotto Intonaco
Messa in funzione 6.2.3 Montaggio su una presa sotto • Montare la piastra di montaggio intonaco avvitando i tasselli e le viti fornite (K). Il termostato a parete può essere mon- tato su una presa sotto intonaco/di installazione utilizzando i fori (I) (v. -
Seite 65: Montaggio In Combinazioni Multiple
Modalità d’uso *Conoscenze tecniche necessarie per alla parete con strisce adesive o viti. l’installazione: Nel montaggio in combinazioni multi- ple si deve fare attenzione che la pi- • Per l’installazione sono necessarie astra di montaggio del termostato a in particolare le conoscenze tecni- parete sia applicata a livello accanto a che di seguito indicate: piastre di montaggio/reggispinta già... -
Seite 66: Sostituzione Delle Batterie
Sostituzione delle batterie impostato. Nel funzionamento ma- • Inserire due nuove batterie LR03/ nuale la temperatura viene mante- Micro/AAA da 1,5 V posizionando i nuta fino alla successiva modifica poli nel senso giusto come indicato manuale. nel vano batterie. • Funzione boost per i termostati per radiatori Homematic IP: Pre- mere brevemente la manopola di regolazione (E) del termostato a... -
Seite 67: Risoluzione Dei Guasti
Risoluzione dei guasti 9 Risoluzione dei guasti Duty Cycle Il ciclo di lavoro descrive una limita- zione regolamentata dalla legge del Batteria scarica tempo di trasmissione degli apparecchi Se il valore della tensione lo consente, nella gamma di 868 MHz. Lo scopo di il termostato a parete è... -
Seite 68: Codici Di Errore E Sequenze Di Spie Lampeggianti
Risoluzione dei guasti Codici di errore e sequenze di spie lampeggianti Codice di errore e di lam- Significato Soluzione peggio Sostituire le batterie Tensione dell’apparecchio ( (v. „8 Simbolo icona ( ) Sostituzione delle batterie“ ridotta della batteria a pag. 66). -
Seite 69: Ripristino Delle Impostazioni Di Fabbrica
Ripristino delle impostazioni di fabbrica Riprovare (v. „9.2 Coman- Procedura non riuscita o Luce rossa accesa a lungo do non confermato“ a raggiunto il limite del duty 1 volta pag. 67) (v. „9.3 Duty cycle Cycle“ a pag. 67). Prestare attenzione alle Luce rossa lampeggiante indicazioni nell’app o Dispositivo difettoso... -
Seite 70: Informazioni Generali Sul Funzionamento Via Radio
Informazioni generali sul funzionamento via radio 12 Informazioni generali sul in dotazione e le batterie presso un centro di raccolta comunale per ap- funzionamento via radio parecchi elettrici ed elettronici usati o La trasmissione radio viene attuata su batterie esauste. Anche i distributori di un canale di trasmissione non esclu- apparecchi elettrici ed elettronici o di sivo, pertanto non è... -
Seite 71: Dati Tecnici
Dati Tecnici 14 Dati Tecnici Sigla dell’apparecchio: HmIP-WTH-1 Tensione di alimentazione: 2 batterie LR03/micro/AAA da 1,5 V Corrente assorbita: 50 mA max. Durata batterie: 2 anni (tip.) Grado di protezione: IP20 Temperatura ambiente: tra 0 e 35 °C Dimensioni (L x A x P):... - Seite 72 Installatie- en bedieningshandleiding Inhoudsopgave Leveringsomvang ..................73 Instructies bij deze handleiding ...............73 Gevarenaanduidingen ................73 Werking en overzicht van het apparaat ..........74 Algemene systeeminformatie ..............75 Inbedrijfstelling ....................75 Inleren aan het Homematic IP Access Point ..........75 Montage ......................76 6.2.1 Montage met plakstrips ..............76 6.2.2 Montage met schroeven ..............
-
Seite 73: Leveringsomvang
Leveringsomvang Leveringsomvang niet kortsluiten. Er bestaat explo- siegevaar! Wandthermostaat met luchtvoch- tigheidssensor Uitgelopen of beschadigde batte- rijen kunnen bij aanraking met de 1x Wisselframe huid brandwonden veroorzaken; 1x Wandhouder gebruik daarom in dergelijk geval 2x Dubbelzijdige plakstrips geschikte veiligheidshandschoe- 2x Schroeven 3,0 x 30 mm nen. -
Seite 74: Werking En Overzicht Van Het Apparaat
U kunt de wandthermostaten aan een Homematic IP CCU3 of ook – voor een comfortabele besturing met de Home- matic IP App – aan het Homematic IP Access Point inleren. Dankzij de batte-... -
Seite 75: Algemene Systeeminformatie
Algemene systeeminformatie 5 Algemene Inleren aan het Homematic IP Access Point systeeminformatie Configureer eerst uw Dit apparaat is een onderdeel van Homematic IP Access Point via de Homematic IP en communiceert via Homematic IP App om nog ande- het Homematic IP Zendprotocol. Alle re Homematic IP apparaten in het apparaten van de binnenklimaatop- systeem te kunnen gebruiken. -
Seite 76: Montage
Inbedrijfstelling Montage U kunt de inleermodus handmatig voor nog eens 3 minuten starten Lees dit hoofdstuk volledig door, door kort op de systeemtoets (D) voordat u met de montage begint. te drukken. U kunt de wandthermostaat met het bijgeleverde wisselframe (A) monteren of comfortabel in een bestaande scha- kelaarserie integreren (zie ‚6.2.4 Mon-... -
Seite 77: Montage Met Schroeven
Inbedrijfstelling • Teken twee van de boorgaten (J) aan de hand van de montageplaat (diagonaal tegenoverliggend) met een pen af op de wand. • Verwijder de folie van de plakstrips. • Druk nu de in elkaar gezette wand- thermostaat met de achterzijde op de gewenste positie tegen de •... -
Seite 78: Montage Op Een Inbouwdoos
Inbedrijfstelling • Plaats de elektronische unit (B) (zie Door een onjuiste installatie brengt u afbeelding 1). Let op dat de tekst uw eigen ‘TOP’ en de pijlen aan de achterzi- • leven en jde naar boven wijzen en de klem- •... -
Seite 79: Montage In Meervoudige Combinaties
• Boost-functie voor Homematic IP wandthermostaat direct naast de reeds Radiatorthermostaten: druk kort bevestigde montageplaten/draagrin- op het instelwiel (E) van de wand-... -
Seite 80: Storingen Oplossen
Storingen oplossen 9 Storingen oplossen • Draai de elektronische unit om, zodat u de batterijen kunt verwij- deren resp. plaatsen. Zwakke batterij • Plaats twee nieuwe 1,5V-batterijen Als de spanningswaarde dit toestaat, LR03/micro/AAA in het batterijvak. kan de wandthermostaat ook bij een Let hierbij op de juiste polariteit, lage batterijspanning worden gebru- zoals gemarkeerd. -
Seite 81: Duty Cycle
Storingen oplossen Duty Cycle De duty cycle beschrijft een wettelijk geregelde begrenzing van de zendtijd van apparaten in het 868MHz-bereik. Het doel van deze regeling is om de werking van alle in het 868MHz-bereik werkende apparaten te garanderen. In het door ons gebruikte frequentie- bereik van 868 MHz bedraagt de ma- ximale zendtijd van elk apparaat 1 % van een uur (dus 36 seconden per uur). -
Seite 82: Foutcodes En Knipperreeksen
Storingen oplossen Foutcodes en knipperreeksen Fout- en knippercode Betekenis Oplossing Vervang de batterij van het apparaat (zie ‚8 Batte- Batterij-symbool ( ) Batterij-spanning gering rijen vervangen‘ op pagina 79). Communicatiestoring Controleer de verbinding Antenne-Symbool knip- naar het Homematic IP naar het Homematic IP pert ( ) Access Point/de vloerver- Access Point/de vloerver-... -
Seite 83: Herstellen Van De Fabrieksinstellingen
Herstellen van de fabrieksinstellingen Probeer het opnieuw (zie ‚9.2 Commando niet be- Proces mislukt of du- 1x lang rood oplichten vestigd‘ op pagina 80) ty-cycle-limiet bereikt (zie ‚9.3 Duty Cycle‘ op pagina 81). Controleer de weergave 6x lang rood knipperen Apparaat defect in uw app of neem con- tact op met uw dealer. -
Seite 84: Algemene Instructies Voor De Draadloze Werking
Str. 29, 26789 Leer, Duitsland, dat het Wij wijzen u er nadrukkelijk op dat u als draadloze apparaattype Homematic IP eindgebruiker verantwoordelijk bent HmIP-WTH-1 in overeenstemming is voor het verwijderen van persoonlijke met de richtlijn 2014/53/EU. De volle- gegevens uit de afgedankte elektrische dige tekst van de EU-conformiteitsver- en elektronische apparatuur. -
Seite 85: Technische Gegevens
Technische gegevens 14 Technische gegevens Apparaatcode: HmIP-WTH-1 Voedingsspanning: 2x 1,5 V LR03/micro/AAA Stroomopname: 50 mA max. Levensduur batterijen: 2 jaar (typ.) Beschermingsgraad: IP20 Omgevingstemperatuur: 0 tot 35 °C Afmetingen (b x h x d): Zonder frame: 55 x 55 x 23,5 mm... - Seite 86 Kostenloser Download der Homematic IP App! Free download of the Homematic IP app! Bevollmächtigter des Herstellers: Manufacturer’s authorised representative: eQ-3 AG Maiburger Straße 29 26789 Leer / GERMANY www.eQ-3.de...