Herunterladen Inhalt Inhalt Diese Seite drucken
Inhaltsverzeichnis

Werbung

Verfügbare Sprachen
  • DE

Verfügbare Sprachen

  • DEUTSCH, seite 1
All manuals and user guides at all-guides.com
DCF-Funkwecker
DCF Radio-controlled alarm clock | Despertador
radio controlado DCF | Réveil radio-piloté DCF |
Radiosveglia DCF | Budzik radiowy DCF
Bedienungsanleitung
CK 1808
Operating instructions | Instrucciones de operación |
Mode d'emploi Istruzioni per l'uso | Instrukcja obsługi

Werbung

Inhaltsverzeichnis
loading

Inhaltszusammenfassung für ADE CK 1808

  • Seite 1 All manuals and user guides at all-guides.com DCF-Funkwecker DCF Radio-controlled alarm clock | Despertador radio controlado DCF | Réveil radio-piloté DCF | Radiosveglia DCF | Budzik radiowy DCF Bedienungsanleitung CK 1808 Operating instructions | Instrucciones de operación | Mode d‘emploi Istruzioni per l‘uso | Instrukcja obsługi...
  • Seite 2 Liebe Kundin, lieber Kunde ! All manuals and user guides at all-guides.com Sie haben sich für den Kauf eines qualitativ hochwertigen Produkts der Marke ADE entschieden, das intelligente Funktionen mit einem außergewöhnlichen Design vereint. Mit diesem Funkwecker haben Sie die Uhrzeit stets präzise im Blick. Die langjährige Erfahrung der Marke ADE...
  • Seite 3: Allgemeines

    Allgemeines All manuals and user guides at all-guides.com Über diese Anleitung Diese Bedienungsanleitung be- schreibt den sicheren Umgang und die Pflege des Artikels. Bewahren Sie diese Bedienungsanleitung auf, falls Sie später etwas nachlesen möchten. Wenn Sie den Artikel an jemand anderen weitergeben, geben Sie auch diese Anleitung mit.
  • Seite 4: Zeichenerklärung

    Zeichenerklärung All manuals and user guides at all-guides.com Dieses Symbol in Verbindung mit dem Wort GEFAHR warnt vor schweren Verletzungen. Dieses Symbol in Verbindung mit dem Wort WARNUNG warnt vor Verletzungen mittleren und leich- ten Grades. Dieses Symbol in Verbindung mit dem Wort HINWEIS warnt vor Sachschäden.
  • Seite 5: Inhaltsverzeichnis

    Inhaltsverzeichnis All manuals and user guides at all-guides.com Allgemeines ............3 Bestimmungsgemäßer Gebrauch ....6 Sicherheit ............... 6 Auf einen Blick ...........10 Lieferumfang ............12 Inbetriebnahme ..........12 Zeitsignal empfangen ........13 Gebrauch ..............15 Über den Zeitzeichensender DCF77..18 Wecken..............19 Sonstige Funktionen ........21 Reinigen ..............22 Störung und Abhilfe ........22 Technische Daten ..........23 Konformitätserklärung ........24...
  • Seite 6: Bestimmungsgemäßer Gebrauch

    Bestimmungsgemäßer Gebrauch All manuals and user guides at all-guides.com Dieser Funkwecker empfängt sein Zeitzeichen vom deutschen Zeitzeichensender DCF77. Der Wecker ist ausschließlich für den Privatgebrauch in trockenen Innenräumen konzipiert. Sicherheit ‚ Dieser Artikel kann von Kindern ab 8 Jahren und darüber sowie von Personen mit verringerten physischen, sensorischen oder mentalen Fähigkeiten oder Mangel an Erfahrung und Wissen benutzt werden,...
  • Seite 7: Gefahr Von Brand/ Verbrennung Und/ Oder Explosion

    ‚ Reinigung und Benutzerwartung dürfen All manuals and user guides at all-guides.com nicht von Kindern vorgenommen werden, es sei denn, sie sind 8 Jahre oder älter und werden beaufsichtigt. ‚ Batterien können bei Verschlucken lebens- gefährlich sein. Artikel und Batterie für Kleinkinder unerreichbar aufbewahren.
  • Seite 8 ‚ Batterien dürfen nicht geladen, mit anderen All manuals and user guides at all-guides.com Mitteln reaktiviert, auseinander genommen, ins Feuer geworfen oder kurzgeschlossen werden. Ansonsten erhöhte Explosions- und Auslaufgefahr, außerdem können Gase entweichen! ‚ Kontakt der Batterieflüssigkeit mit Haut, Augen und Schleimhäuten vermeiden. Bei Kontakt betroffene Stellen sofort mit reichlich klarem Wasser ausspülen und umgehend Arzt aufsuchen.
  • Seite 9 ‚ Bein Einsetzen und Wechseln der Batterie All manuals and user guides at all-guides.com auf die richtige Polarität (+/-) achten. ‚ Batterie keinen extremen Bedingungen aussetzen, indem diese z. B. auf Heizkörpern oder unter direkter Sonneneinstrahlung gelagert werden. Erhöhte Auslaufgefahr! ‚ Batterie- und Gerätekontakte bei Bedarf vor dem Einlegen reinigen.
  • Seite 10: Auf Einen Blick

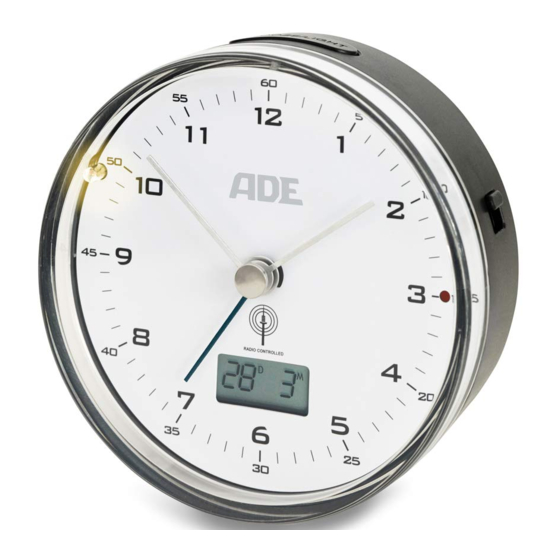
    Auf einen Blick All manuals and user guides at all-guides.com 1 Taste SNOOZE/LIGHT 2 Weckschalter ON/OFF 3 Display für Datum und Temperaturanzeige 4 Ziffernblatt-Beleuchtung...
  • Seite 11 All manuals and user guides at all-guides.com 5 Taste Reset 6 Taste M.Set 7 Taste Rec 8 Batteriefach für 1x LR03 (AAA), 1,5 V 9 Drehrad für Weckzeit-Einstellung...
  • Seite 12: Lieferumfang

    Lieferumfang All manuals and user guides at all-guides.com ‚ Funkwecker ‚ Batterie Typ LR03 (AAA), 1,5 V (1x) ‚ Bedienungsanleitung Inbetriebnahme Für den Gebrauch benötigen Sie eine Batterie des Typs LR03 (AAA), 1,5 V. 1. Batteriefachdeckel nach unten abschieben. 2. Batterie so einlegen, wie auf dem Boden des Batteriefachs abgebildet.
  • Seite 13: Zeitsignal Empfangen

    Hinweise zum Batterienwechsel: All manuals and user guides at all-guides.com ‚ Die Batterie muss gewechselt werden, wenn die Zeiger stehen bleiben. ‚ Nur den Batterietyp verwenden, der in den „Technischen Daten“ angegeben ist. ‚ Alte Batterie umweltgerecht entsorgen, siehe „Entsorgen“. Zeitsignal empfangen Nach dem Einlegen der Batterie: ‚...
  • Seite 14 aktuelle Uhrzeit an. Dieser Vorgang kann einige All manuals and user guides at all-guides.com Minuten dauern. Der Funkwecker schaltet ab sofort mehrmals täglich automatisch auf Empfang und ver- gleicht die eigene Uhrzeit mit der vom Zeit- zeichen-Sender empfangenen. Wenn es eine Differenz gibt, wird die angezeigte Uhrzeit des Weckers automatisch korrigiert.
  • Seite 15: Gebrauch

    Gebrauch All manuals and user guides at all-guides.com Ziffernblatt beleuchten − Taste SNOOZE/LIGHT drücken, um Zif- fernblatt-Beleuchtung für ca. 5 Sekunden einzuschalten. Temperatur- und Datumsanzeige In dem kleinen Display wird jeweils für ca. 20 Sekunden die Raumtemperatur in °C und das Datum im Format Tag/Monat abwechselnd angezeigt.
  • Seite 16: Uhrzeit Manuell Stellen

    ‚ Empfängt der Wecker ein ausreichend All manuals and user guides at all-guides.com starkes Funksignal, stellen sich die Zeiger auf die korrekte Uhrzeit. ‚ Empfängt der Wecker kein ausreichend star- kes Funksignal, stellt er sich auf die zuvor angezeigte Uhrzeit zurück. Uhrzeit manuell stellen Wenn ein Funkempfang nicht möglich ist, kön- nen Sie die Uhrzeit manuell einstellen.
  • Seite 17 Wenn M.SET mehr als 30 Sekun- All manuals and user guides at all-guides.com den nicht gedrückt wird, wird die aktuell eingestellte Uhrzeit gespeichert und Sie müssen den Vorgang wiederholen. Hinweise für einen guten Empfang ‚ Funkwecker möglichst in Fensternähe aufstellen. ‚...
  • Seite 18: Über Den Zeitzeichensender Dcf77

    ‚ Das Wetter, z. B. ein starkes Gewitter, kann All manuals and user guides at all-guides.com Empfangsstörungen verursachen. ‚ Es kann gelegentlich zu kurzzeitigen Abschaltungen des Senders kommen, z. B. wegen Wartungsarbeiten. Über den Zeitzeichensender DCF77 Dieser Funkwecker erhält seine Funksignale vom Zeitzeichensender DCF77.
  • Seite 19: Wecken

    wird, schaltet er auf Empfang und sucht das All manuals and user guides at all-guides.com Signal vom Sender DCF77. Wurde das Zeitsignal in ausreichender Stärke empfangen, stellen sich die Zeiger auf die korrekte Uhrzeit. Der Funk- wecker schaltet sich mehrmals täglich ein und synchronisiert die Uhrzeit mit dem Funksignal vom Sender DCF77.
  • Seite 20: Geweckt Werden

    2. Weckschalter so stellen, dass auf dem Schal- All manuals and user guides at all-guides.com ter ON zu sehen ist. Geweckt werden Zur eingestellten Zeit werden Sie von einem Wecksignal geweckt, wobei das Signal mit zu- nehmender Weckdauer immer intensiver wird. Autostopp-Funktion Wenn Sie keine Taste drücken, schaltet sich der Alarm nach ca.
  • Seite 21: Weckfunktion Ausschalten

    Weckfunktion ausschalten All manuals and user guides at all-guides.com − Weckschalter so stellen, dass auf dem Schalter OFF zu sehen ist. Sonstige Funktionen Zwischen Sommer- und Winterzeit umstellen Das Umstellen von Sommer- auf Winterzeit bzw. umgekehrt erfolgt bei gutem Zeitsignal-Emp- fang automatisch.
  • Seite 22: Reinigen

    klammer) die Taste RESET herunter. All manuals and user guides at all-guides.com Ein Piepton erklingt und die Uhrzeiger drehen Sie auf 12:00 Uhr, anschließend schaltet der We- cker auf Empfang. Reinigen Wecker nicht in Wasser oder andere Flüssigkeiten tauchen. Keine harten, kratzenden oder scheuernden Reini- gungsmittel verwenden.
  • Seite 23: Technische Daten

    Temperaturangabe erscheint zu hoch. All manuals and user guides at all-guides.com ‚ Prüfen, ob der Funkwecker direkter Sonnen- strahlung ausgesetzt ist. Technische Daten Modell: DCF-Funkwecker CK 1808 Batterie: 1x LR03 (AAA), 1,5 V Bemessungsstrom: < 180 μA Messbereich: ca. -10 °C - 60 °C...
  • Seite 24: Konformitätserklärung

    Konformitätserklärung All manuals and user guides at all-guides.com Hiermit erklärt die Waagen-Schmitt GmbH, dass der Funkwecker CK 1808 den Richtlinien 2014/53/EU und 2011/65/EU entspricht. Der vollständige Text der EU-Konformitätserklä- rung ist unter der folgenden Internetadresse verfügbar: www.ade-germany.de/doc Die Erklärung verliert ihre Gültigkeit, falls an dem Wecker eine nicht mit uns abgestimmte Änderung vorgenommen wurde.
  • Seite 25: Garantie

    Garantie All manuals and user guides at all-guides.com Die Firma Waagen-Schmitt GmbH garantiert für 2 Jahre ab Kaufdatum die kostenfreie Behebung von Mängeln aufgrund von Material- oder Fabri- kationsfehlern durch Reparatur oder Austausch. Bitte geben Sie den Artikel im Garantiefall mit dem Kaufbeleg (unter Angabe des Reklama- tionsgrundes) an Ihren Händler zurück.
  • Seite 26 Artikel entsorgen All manuals and user guides at all-guides.com Entsorgen Sie den Artikel entsprechend der Vor- schriften, die in Ihrem Land gelten. Geräte dürfen nicht im normalen Hausmüll entsorgt werden. Am Ende seiner Lebensdauer ist der Artikel einer geordneten Entsorgung zuzuführen. Dabei werden im Gerät enthaltene Wertstoffe der Wiederverwertung zugeführt und die Belastung der Umwelt vermieden.
  • Seite 27 All manuals and user guides at all-guides.com Batterien und Akkus gehören nicht in den Hausmüll Alle Batterien und Akkus müssen bei einer Sammelstelle der Gemeinde, des Stadtteils oder im Handel abgegeben werden. Dadurch können Batterien und Akkus einer umwelt- schonenden Entsorgung zugeführt werden.
  • Seite 28 With this radio- controlled alarm clock, you always have the exact time in view. The many years of experience of the brand ADE ensures a high technical standard and proven quality. We wish you easy timing at any time!
  • Seite 29: General Information

    General information All manuals and user guides at all-guides.com About this manual This operating manual describes how to safely use and care for your products. Keep this operating manual in a safe place in case you would like to refer to it later. If you pass this item on to someone else, pass on this manual as well.
  • Seite 30: Explanation Of Symbols

    Explanation of symbols All manuals and user guides at all-guides.com This symbol, combined with the word DANGER, warns against serious injury. This symbol, combined with the word WARNING, warns against moderate and mild injuries. This symbol, combined with the word NOTE, warns against material damage.
  • Seite 31 Table of Contents All manuals and user guides at all-guides.com General information ........29 Intended Use ............32 Safety ..............32 Overview ............. 36 Scope of delivery ..........38 Start-up ..............38 Receiving the time signal ......39 Use ................. 41 About the time signal transmitter DCF77 ..........
  • Seite 32: Intended Use

    Intended Use All manuals and user guides at all-guides.com This radio-controlled alarm clock receives its time signal from the German time signal transmitter DCF77. The alarm clock is designed exclusively for private use in dry indoor areas. Safety ‚ This item can be used by children 8 years of age and above, as well as by persons with reduced physical, sensory, or mental capacities or lacking experience and...
  • Seite 33 ‚ Cleaning and user maintenance must not be All manuals and user guides at all-guides.com carried out by children, unless they are 8 years of age or older and are being supervised. ‚ Batteries, when swallowed, can be life- threatening. Keep the item and batteries out of reach of small children.
  • Seite 34 ‚ Batteries must not be recharged, reactivated All manuals and user guides at all-guides.com by other means, dismantled, thrown into fire, or short-circuited. Otherwise there is an increased risk of explosion and leakage; furthermore, gases may escape! ‚ Avoid contact of the battery fluid with skin, eyes, and mucosa.
  • Seite 35 ‚ When inserting and changing batteries, pay All manuals and user guides at all-guides.com attention to the correct polarity (+/-). ‚ Do not expose batteries to extreme conditions, for example, by storing them on radiators or under direct sunlight. Increased risk of leakage! ‚...
  • Seite 36: Overview

    Overview All manuals and user guides at all-guides.com 1 SNOOZE/LIGHT button 2 Alarm switch ON/OFF 3 Date and temperature display 4 Dial lighting...
  • Seite 37 All manuals and user guides at all-guides.com 5 Reset button 6 M.Set button 7 Rec button 8 Battery compartment for 1x LR03 (AAA), 1.5 V 9 Alarm setting knob...
  • Seite 38: Scope Of Delivery

    Scope of delivery All manuals and user guides at all-guides.com ‚ Radio-controlled alarm clock ‚ Battery type LR03 (AAA), 1.5 V (1x) ‚ Operating Manual Start-up To use the device, you will need a LR03 (AAA), 1.5 V battery. 1. Slide the battery compartment cover downwards.
  • Seite 39: Receiving The Time Signal

    Notes on changing the battery: All manuals and user guides at all-guides.com ‚ The battery must be changed when the hands stop moving. ‚ Only use the battery type specified in the “Technical Data”. ‚ Dispose of old batteries in an environmentally friendly manner, see “Disposal”.
  • Seite 40 From now on the radio-controlled alarm clock All manuals and user guides at all-guides.com automatically switches to receiving mode several times a day and compares its own time with that received by the time signal transmitter. If there is a difference, the time displayed on the alarm clock will be automatically corrected.
  • Seite 41: Use

    All manuals and user guides at all-guides.com Dial lighting − Press the SNOOZE/LIGHT button to turn the dial lighting on for approx. 5 seconds. Temperature and date display The room temperature in °C and the date in the Day/Month format are displayed alternately for approx.
  • Seite 42: Set The Time Manually

    ‚ If the alarm clock receives a sufficiently All manuals and user guides at all-guides.com strong radio signal, the hands will be adjusted to the correct time. ‚ If the alarm clock fails to receive a sufficiently strong radio signal, it will revert to the previously displayed time.
  • Seite 43: Tips For Good Reception

    When M.SET is not pressed for All manuals and user guides at all-guides.com 30 seconds, the currently set time is stored and you have to repeat the process. Tips for good reception ‚ Set up the radio-controlled alarm clock as close to a window as possible. ‚...
  • Seite 44: About The Time Signal Transmitter Dcf77

    ‚ Temporary shutoffs of the transmitter All manuals and user guides at all-guides.com can sometimes happen, e.g. because of maintenance work. About the time signal transmitter DCF77 This radio-controlled alarm clock receives its radio signals from the time signal transmitter DCF77.
  • Seite 45: Alarm

    the signal from the DCF77 transmitter. If the time All manuals and user guides at all-guides.com signal has been received with sufficient strength, the hands set themselves to the correct time. The radio-controlled alarm clock switches on several times a day and synchronises the time with the radio signal from the transmitter DCF77.
  • Seite 46: Being Awakened

    Being awakened All manuals and user guides at all-guides.com At the set time you will be woken by an alarm signal, which will become more intense as the waking time increases. Auto-stop function If you do not press a button, the alarm switches off automatically after 30 minutes.
  • Seite 47: Other Functions

    Other functions All manuals and user guides at all-guides.com Switching between summer and winter time The switchover from summer to winter time or vice versa takes place automatically in case of good time signal reception. Reset the radio-controlled alarm clock to the default settings If the time is repeatedly displayed incorrectly, you can reset the alarm clock to the default...
  • Seite 48: Cleaning

    Cleaning All manuals and user guides at all-guides.com Do not immerse the alarm clock in water or other liquids. Do not use rough, scratching or abrasive cleaning agents. − If necessary, use a soft, dry cloth, or a slightly moistened one to wipe the alarm clock.
  • Seite 49: Technical Data

    Technical Data All manuals and user guides at all-guides.com Model: DCF Radio-controlled alarm clock CK 1808 Battery: 1x LR03 (AAA), 1.5 V Rated current: < 180 μA Measuring range: approx. -10 °C - 60 °C Distributor (no service address): Waagen-Schmitt GmbH...
  • Seite 50: Declaration Of Conformity

    Declaration of Conformity All manuals and user guides at all-guides.com Waagen-Schmitt GmbH hereby declares that the radio-controlled alarm clock CK 1808 is in compliance with EU directives 2014/53/EU and 2011/65/EU. The full text of the EU declaration of conformity is available at the following internet address: www.ade-germany.de/doc...
  • Seite 51: Guarantee

    Guarantee All manuals and user guides at all-guides.com The company Waagen-Schmitt GmbH guarantees for 2 years from the purchase date the cost-free rectification of defects on the basis of material or fabrication errors through repair or exchange. In the event of a guarantee claim, please return the product with the proof of purchase (stipulating the reason for claim) to your dealer.
  • Seite 52: Disposing Of The Product

    Disposing of the product All manuals and user guides at all-guides.com Dispose of the product in accordance with the regulations that apply in your country. Devices must not be disposed of in normal household waste. At the end of its life, the product must be disposed of in an appropriate way.
  • Seite 53 All manuals and user guides at all-guides.com Recyclable and disposable batteries do not belong in household waste All batteries must be handed in at a collection point in your community, suburb, or at the retailer. Such batteries can thus be disposed of in an environmentally friendly way.
  • Seite 54 ¡Estimada/o cliente! All manuals and user guides at all-guides.com Se ha decidido por la compra de un producto de gran calidad de la marca ADE, que aúna unas funciones inteligentes con un diseño extraordinario. Con este despertador radio controlado siempre tendrá...
  • Seite 55: Información General

    Información general All manuals and user guides at all-guides.com Acerca de estas instrucciones Este manual de instrucciones describe el manejo seguro y el cuidado del artículo. Conserve este manual de instrucciones por si necesita volver a consultarlas. Si le entrega el artículo a otra persona, acompáñelo también de estas instrucciones.
  • Seite 56: Explicación De Símbolos

    Explicación de símbolos All manuals and user guides at all-guides.com Este símbolo unido a la palabra PELIGRO advierte de heridas graves. Este símbolo unido a la palabra ADVERTENCIA advierte de heridas de grado medio o leve. Este símbolo unido a la palabra INDICACIÓN advierte de daños materiales.
  • Seite 57 Índice All manuals and user guides at all-guides.com Información general ........55 Uso adecuado ............ 58 Seguridad ............58 De un vistazo............62 Artículos incluidos en la entrega ....64 Puesta en funcionamiento ......64 Recepción de señal horaria ......65 Utilización ............
  • Seite 58: Uso Adecuado

    Uso adecuado All manuals and user guides at all-guides.com Este despertador radio controlado recibe la señal horaria de la emisora de señal horaria alemana DCF77. El despertador está concebido exclusivamente para el uso particular en un espacio interior seco. Seguridad ‚...
  • Seite 59 ‚ La limpieza y el mantenimiento por parte All manuals and user guides at all-guides.com del usuario no deben ser realizados por niños, salvo que sean mayores de 8 años y estén supervisados. ‚ Las pilas pueden suponer un peligro de muerte si se ingieren.
  • Seite 60 por otras del mismo tipo o equivalente. All manuals and user guides at all-guides.com Tenga en cuenta los "Datos técnicos". ‚ Las pilas no deben cargarse, reactivarse con otros medios, desmontarse, arrojarse al fuego o ponerse en cortocircuito. En caso contrario existe un riesgo mayor de explosión o derrame y además pueden producirse gases.
  • Seite 61 evitará los daños que pudieran producirse All manuals and user guides at all-guides.com por el derrame del líquido de las pilas. ‚ Cuando coloque y cambie las pilas, preste atención a la polaridad correcta (+/-). ‚ No someta las pilas a condiciones extremas, por ejemplo no las coloque sobre superficies calientes ni a la luz directa del sol.
  • Seite 62: De Un Vistazo

    De un vistazo All manuals and user guides at all-guides.com 1 Botón SNOOZE/LIGHT 2 Botón ON/OFF del despertador 3 Pantalla con la fecha y temperatura 4 Iluminación de la esfera del reloj...
  • Seite 63 All manuals and user guides at all-guides.com 5 Botón Reset 6 Botón M.Set 7 Botón Rec 8 Compartimento para una pila LR03 (AAA), 1,5 V 9 Rueda para ajustar la hora del despertador...
  • Seite 64: Artículos Incluidos En La Entrega

    Artículos incluidos en la entrega All manuals and user guides at all-guides.com ‚ Despertador radio controlado ‚ Pila tipo LR03 (AAA), 1,5 V (1x) ‚ Manual de instrucciones Puesta en funcionamiento Para su uso, es necesaria una pila de tipo LR03 (AAA), 1,5 V.
  • Seite 65: Recepción De Señal Horaria

    Indicaciones para la sustitución de las pilas: All manuals and user guides at all-guides.com ‚ Debe cambiarse la pila cuando se queden paradas las agujas. ‚ Utilice únicamente el tipo de pilas especificado en los "Datos técnicos". ‚ Elimine las pilas conforme a la normativa medioambiental, consulte "Eliminación".
  • Seite 66 girar nuevamente hasta que se colocan en la hora All manuals and user guides at all-guides.com actual. Este proceso puede durar unos minutos. A partir de este momento, el radio-despertador se conectará de forma automática a diario cuando comience la recepción y diferenciará entre la hora propia y la señal horaria de la emisora recibida.
  • Seite 67: Utilización

    Utilización All manuals and user guides at all-guides.com Iluminación de la esfera − Pulse el botón SNOOZE/LIGHT para encender la iluminación de la esfera durante aproximadamente 5 segundos. Pantalla con la fecha y temperatura En la pequeña pantalla, aparecerán durante unos 20 segundos de forma alterna la temperatura ambiente en °C y la fecha en formato día/mes.
  • Seite 68 ‚ En caso de que reciba una señal de radio All manuals and user guides at all-guides.com suficientemente fuerte, la manecilla se colocará en la hora correcta. ‚ Si por el contrario no recibe una señal con fuerza suficiente, volverá a ajustarse a la hora que indicaba anteriormente.
  • Seite 69: Indicaciones Para Una Buena Recepción

    Si no se presiona M.SET en All manuals and user guides at all-guides.com 30 segundos, se guarda la hora actual ajustada y hay que volver a repetir el proceso. Indicaciones para una buena recepción ‚ Preferiblemente, instale el radio- despertador cerca de una ventana. ‚...
  • Seite 70: Acerca Del Emisor De Señal Horaria Dcf77

    ‚ La meteorología, por ejemplo una tormenta All manuals and user guides at all-guides.com intensa, puede producir problemas en la recepción. ‚ Puede que la emisora se desconecte ocasionalmente durante breves periodos de tiempo, por ejemplo para realizar trabajos de mantenimiento. Acerca del emisor de señal horaria DCF77 Este despertador radio controlado recibe una...
  • Seite 71: Despertador

    Europa occidental. Cuando el radio-despertador All manuals and user guides at all-guides.com cuenta con alimentación eléctrica por medio de la pila, activa la recepción y busca la señal de la emisora DCF77. En cuanto se recibe la señal con la intensidad suficiente las agujas se colocan en la hora correcta.
  • Seite 72 2. Coloque el botón del despertador de forma All manuals and user guides at all-guides.com que se vea la señal ON. Despertarse A la hora establecida, le despertará un sonido de despertador que irá aumentando en volumen gradualmente. Función Autostop Si no presiona ningún botón, la alarma se detendrá...
  • Seite 73: Otras Funciones

    Apagar la función despertador All manuals and user guides at all-guides.com − Coloque el botón del despertador de forma que se vea la señal OFF. Otras funciones Cambiar de hora de verano a hora de invierno El cambio de la hora de verano a hora de invierno o viceversa tiene lugar de forma automática si se cuenta con una buena recepción de señal horaria.
  • Seite 74: Limpieza

    Sonará un pitido y la manilla se situará a las All manuals and user guides at all-guides.com 12 en punto; a continuación, el despertador comenzará la recepción. Limpieza No introduzca el despertador en agua ni en ningún otro líquido. No utilice productos de limpieza duros, que puedan rayar o que haya que frotar.
  • Seite 75: Datos Técnicos

    ‚ Compruebe si el sensor inalámbrico está colocado directamente a la luz del sol. Datos técnicos Modelo: Despertador radio controlado DCF CK 1808 Pila: 1x LR03 (AAA), 1,5 V Intensidad de corriente: < 180 μA Rango de medida: -10 °C - 60 °C...
  • Seite 76: Declaración De Conformidad

    Declaración de conformidad Por la presente, Waagen-Schmitt GmbH declara que despertador radio controlado CK 1808 cumple con la directiva 2014/53/EU y 2011/65/EU. Se encuentra disponible el texto completo de la declaración de conformidad de la UE en la siguiente dirección de Internet: www.ade-germany.de/doc.
  • Seite 77: Garantía

    Garantía All manuals and user guides at all-guides.com La empresa Waagen-Schmitt GmbH garantiza durante 2 años a partir de la fecha de compra, la eliminación de los defectos debidos a fallos de material o fabricación, mediante reparación o cambio del equipo. En caso de solicitar la aplicación de la garantía, lleve el artículo a su distribuidor con el justificante de compra (explicando el motivo de la reclamación).
  • Seite 78 Eliminación del artículo All manuals and user guides at all-guides.com Elimine el artículo conforme a la normativa correspondiente aplicable en su país. Los aparatos no deben eliminarse con la basura doméstica normal. El artículo debe ser eliminado de forma adecuada al final de su vida útil. Para ello se deben reciclar las piezas del aparato y así...
  • Seite 79 All manuals and user guides at all-guides.com Las pilas y baterías no son residuos domésticos Todas las pilas y baterías deben depositarse en los puntos de recogida del ayuntamiento, distrito o en los comercios. De este modo puede realizarse la eliminación de pilas y baterías de una forma respetuosa con el medio ambiente.
  • Seite 80 All manuals and user guides at all-guides.com Nous sommes ravis que vous ayez choisi un appareil de haute qualité de la marque ADE, qui allie des fonctions intelligentes à un design exceptionnel. Grâce à ce réveil radio-piloté, la ponctualité ne vous fera jamais défaut.
  • Seite 81: Généralités

    Généralités All manuals and user guides at all-guides.com À propos de ce mode d'emploi Ce mode d'emploi décrit l'utilisation conforme ainsi que les procédures d'entretien de l'article. Conservez ce manuel pour toute référence ultérieure. Si vous cédez l’article à une tierce personne, transmettez-lui également ce mode d’emploi.
  • Seite 82 Légende All manuals and user guides at all-guides.com Ce symbole, associé au mot DANGER, prévient de blessures graves. Ce symbole, associé au mot ATTENTION, prévient de blessures moyennes et légères. Ce symbole, associé au mot AVERTISSEMENT, prévient de dommages matériels. Ce symbole désigne des informations supplémentaires ainsi que des indications d'ordre...
  • Seite 83 Table des matières All manuals and user guides at all-guides.com Généralités ............81 Utilisation conforme ........84 Sécurité ..............84 Aperçu ..............88 Contenu de l’emballage ......... 90 Mise en marche ..........90 Réception du signal horaire......91 Utilisation ............93 Par l’émetteur de signal horaire DCF77 ..
  • Seite 84: Utilisation Conforme

    Utilisation conforme All manuals and user guides at all-guides.com Ce réveil radio-piloté reçoit son signal de l’émetteur horaire DCF77. Réservé à un usage privé, en intérieur et dans un milieu sec. Sécurité ‚ Cet article peut être utilisé par des enfants dès l’âge de 8 ans ainsi que par des personnes aux capacités physiques, sensorielles ou mentales limitées ou de peu...
  • Seite 85 qu’ils aient 8 ans révolus et soient sous All manuals and user guides at all-guides.com surveillance. ‚ Les piles peuvent être dangereuses pour la santé en cas d’ingestion. Placez l’appareil et ses piles hors de portée des petits enfants. Si la pile venait à être ingérée, demandez une aide médicale d’urgence.
  • Seite 86 ‚ Les piles ne doivent pas être chargées, All manuals and user guides at all-guides.com réactivées avec d’autres moyens, démontées, jetées au feu ou court- circuitées. Autrement, le risque d’explosion ou de fuite augmente, par ailleurs des gaz peuvent s’échapper ! ‚...
  • Seite 87 ‚ Respectez la polarité (+/-) lors du All manuals and user guides at all-guides.com changement des piles. ‚ Évitez de soumettre les piles à des conditions extrêmes, par ex. en les posant sur un objet chaud ou à la lumière directe du soleil.
  • Seite 88: Aperçu

    Aperçu All manuals and user guides at all-guides.com 1 Touche SNOOZE/LIGHT 2 Commutateur marche/arrêt 3 Écran d’affichage de la date et de la température 4 Éclairage du cadran...
  • Seite 89 All manuals and user guides at all-guides.com 5 Touche Reset (réinitialisation) 6 Touche M.Set (réglage manuel) 7 Touche Rec (réception) 8 Compartiment à piles pour LR03 (AAA), 1,5 V x 1 9 Molette de réglage de l’heure de réveil...
  • Seite 90: Contenu De L'emballage

    Contenu de l’emballage All manuals and user guides at all-guides.com ‚ Réveil radio-piloté ‚ Piles de type LR03 (AAA), 1,5 V (x 1) ‚ Mode d’emploi Mise en marche Cet appareil fonctionne avec une pile de type LR03 (AAA), 1,5 V. 1.
  • Seite 91: Réception Du Signal Horaire

    Indications pour remplacer les piles : All manuals and user guides at all-guides.com ‚ Lorsque les aiguilles s'immobilisent, la pile doit être remplacée. ‚ Utiliser seulement le type de pile indiqué dans les « Caractéristiques techniques ». ‚ Mettre les anciennes piles au rebut en respectant l‘environnement, voir « Mise au rebut ».
  • Seite 92 à tourner et indiquent l’heure actuelle. Ce All manuals and user guides at all-guides.com processus peut durer quelques minutes. Par la suite, le réveil radio-piloté passe automatiquement en mode de réception plusieurs fois par jour et compare son heure avec celle reçue de l’émetteur de signal horaire.
  • Seite 93: Utilisation

    Utilisation All manuals and user guides at all-guides.com Éclairage du cadran − Un appui sur la touche SNOOZE/LIGHT permet d’allumer l'éclairage du cadran pendant environ 5 secondes. Affichage de la date et de la température Le petit écran affiche en alternance et chaque fois pendant environ 20 secondes, la température ambiante en °C et la date en format jour/mois.
  • Seite 94: Réglage Manuel De L'horloge

    ‚ Si le signal radio reçu est suffisamment fort, All manuals and user guides at all-guides.com les aiguilles se placent automatiquement sur l’heure exacte. ‚ Si le signal reçu n’est pas assez fort, le réveil se remet à l’heure précédemment indiquée. Réglage manuel de l’horloge Si la réception du signal est impossible, vous pouvez régler l’heure manuellement.
  • Seite 95: Conseils Pour Améliorer La Réception

    Si la touche M.SET n’est pas All manuals and user guides at all-guides.com appuyée pendant plus de 30 secondes, l’heure actuellement réglée est enregistrée et vous devez recommencer la procédure. Conseils pour améliorer la réception ‚ Si possible, installer le réveil radio à proximité...
  • Seite 96: Par L'émetteur De Signal Horaire Dcf77

    ‚ La réception peut être perturbée par les All manuals and user guides at all-guides.com conditions météo (par exemple par un orage). ‚ Il peut arriver que l’émetteur soit mis à l’arrêt pour de courtes durées, par exemple pour des travaux d’entretien. Par l’émetteur de signal horaire DCF77 Ce réveil radio-piloté...
  • Seite 97: Réveil

    Dès que l'apareil est alimenté par la pile, il All manuals and user guides at all-guides.com passe en mode de réception et recherche le signal de l’émetteur DCF77. Dès qu’elle reçoit un signal horaire suffisamment fort, les aiguilles se règlent sur l’heure exacte. Le réveil se règle automatiquement plusieurs fois par jour et synchronise l’heure avec le signal de l’émetteur DCF77.
  • Seite 98: Être Réveillé

    2. Réglez le commutateur marche/arrêt de All manuals and user guides at all-guides.com manière à ce qu’il indique ON. Être réveillé À l'heure programmée, vous êtes réveillé par une sonnerie, le signal s’amplifiant avec le temps. Fonction d'arrêt automatique Si vous n'appuyez sur aucune touche, la sonnerie s'éteint automatiquement au bout de 30 minutes.
  • Seite 99: Autres Fonctions

    Désactivation de la fonction d’alarme All manuals and user guides at all-guides.com − Réglez le commutateur marche/arrêt de manière à ce qu’il indique OFF. Autres fonctions Passage de l’heure d’été à l’heure d’hiver et vice versa Le passage de l’heure d’été à l’heure d’hiver et vice versa s’effectue automatiquement si la réception du signal est bonne.
  • Seite 100: Nettoyage

    Un bip sonore retentit et vous pouvez régler les All manuals and user guides at all-guides.com aiguilles sur 12:00, puis le réveil repasse en mode de réception. Nettoyage Le réveil ne doit en aucun cas être plongé dans l’eau ni dans tout autre liquide.
  • Seite 101: Caractéristiques Techniques

    All manuals and user guides at all-guides.com ‚ Vérifier si l’appareil est exposé à la lumière directe du soleil. Caractéristiques techniques Modèle : Réveil radio-piloté CK 1808 à signal DCF Piles : 1x LR03 (AAA), 1,5 V Intensité nominale : < 180 μA Plage de mesure : env.
  • Seite 102: Déclaration De Conformité

    Déclaration de conformité All manuals and user guides at all-guides.com Waagen-Schmitt GmbH déclare que le réveil radio-piloté CK 1808 est conforme aux directives 2014/53/UE et 2011/65/UE. Le texte intégral de la déclaration de conformité UE est disponible à l’adresse Internet ci-dessous : www.ade-germany.de/doc...
  • Seite 103: Garantie

    Garantie All manuals and user guides at all-guides.com La société Waagen-Schmitt GmbH garantit la prise en charge gratuite de défauts matériels ou de fabrication pendant 2 ans à partir de la date d’achat, par une réparation ou un remplacement. Dans le cas où vous souhaitez faire usage de cette garantie, veuillez remettre l'article ainsi que la preuve d'achat (en indiquant les raisons de votre réclamation) à...
  • Seite 104 Mise au rebut de l'article All manuals and user guides at all-guides.com Veuillez éliminer l'article selon les prescriptions en vigueur dans votre pays en matière de traitement des déchets. Les appareils électriques ne doivent pas être éliminés avec les déchets ménagers classiques.
  • Seite 105 Les piles et batteries ne doivent All manuals and user guides at all-guides.com pas être éliminées avec les déchets ménagers. Toutes les piles et batteries doivent être déposées dans un point de collecte de votre localité ou rapportées à leur point d’achat. Les piles et batteries seront ainsi traitées dans le respect de l'environnement.
  • Seite 106 Gentile cliente, All manuals and user guides at all-guides.com La ringraziamo per aver scelto un prodotto di alta qualità della ADE che unisce funzioni intelligenti e un design fuori dal comune. Questa radiosveglia permette di vedere l'orario in modo preciso. La lunga esperienza della ADE garantisce standard tecnici elevati e qualità...
  • Seite 107: Informazioni Generali

    Informazioni generali All manuals and user guides at all-guides.com Informazioni sulle presenti istruzioni per l'uso Queste istruzioni per l'uso descrivono l'utilizzo sicuro e la cura del prodotto. Conservarle per eventuali consultazioni future. In caso di cessione del prodotto a terzi, consegnare anche le presenti istruzioni per l'uso.
  • Seite 108: Descrizione Dei Simboli

    Descrizione dei simboli All manuals and user guides at all-guides.com Questo simbolo accompagnato dalla parola PERICOLO mette in guardia contro il rischio di gravi lesioni. Questo simbolo accompagnato dalla parola AVVERTENZA indica il rischio di lesioni di lieve o media entità.
  • Seite 109 Indice dei contenuti All manuals and user guides at all-guides.com Informazioni generali ........107 Destinazione d'uso ........110 Sicurezza ............110 Descrizione ............114 Ambito della fornitura ........116 Messa in funzione...........116 Ricezione del segnale orario ......117 Uso ...............119 Informazioni sul trasmettitore di segnale orario DCF77 .......122 Sveglia ..............123 Altre funzioni ...........125 Pulizia ..............126...
  • Seite 110: Destinazione D'uso

    Destinazione d'uso All manuals and user guides at all-guides.com Questa radiosveglia riceve il segnale orario dal trasmettitore di segnale orario tedesco DCF77. La sveglia è progettata esclusivamente per uso privato in ambienti interni asciutti. Sicurezza ‚ Il dispositivo può essere utilizzato da bambini con un'età...
  • Seite 111 ‚ I bambini possono eseguire le operazioni All manuals and user guides at all-guides.com di pulizia e manutenzione solo se di età superiore agli 8 anni e sotto la supervisione di una persona adulta. ‚ L'ingestione delle batterie può costituire un pericolo mortale.
  • Seite 112 ‚ Le batterie non devono essere ricaricate, All manuals and user guides at all-guides.com riattivate con altri mezzi, smontate, buttate nel fuoco o messe in cortocircuito. Altrimenti, sussiste un forte rischio di esplosione o perdita e potrebbero svilupparsi vapori tossici! ‚...
  • Seite 113 ‚ Durante l'inserimento e la sostituzione delle All manuals and user guides at all-guides.com batterie, prestare attenzione alla corretta polarità (+/-). ‚ Non sottoporre le batterie a temperature estreme, ad esempio conservandole vicino a termosifoni o alla luce diretta del sole. Serio rischio di fuoriuscita di liquido! ‚...
  • Seite 114: Descrizione

    Descrizione All manuals and user guides at all-guides.com 1 Tasto SNOOZE/LIGHT 2 Interruttore ON/OFF della sveglia 3 Display di visualizzazione di data e temperatura 4 Illuminazione del quadrante...
  • Seite 115 All manuals and user guides at all-guides.com 5 Tasto Reset 6 Tasto M.Set 7 Tasto Rec 8 Vano per 1 batteria di tipo LR03 (AAA) da 1,5 V 9 Manopola girevole per impostare l'ora della sveglia...
  • Seite 116: Ambito Della Fornitura

    Ambito della fornitura All manuals and user guides at all-guides.com ‚ Radiosveglia ‚ 1 batteria di tipo LR03 (AAA) da 1,5 V ‚ Istruzioni per l'uso Messa in funzione Per l'utilizzo è necessaria una batteria di tipo LR03 (AAA) da 1,5 V. 1.
  • Seite 117: Ricezione Del Segnale Orario

    Indicazioni sulla sostituzione delle batterie: All manuals and user guides at all-guides.com ‚ La batteria deve essere cambiata quando le lancette si fermano. ‚ Utilizzare solo il tipo di batterie indicato nei “Dati tecnici”. ‚ Provvedere allo smaltimento corretto delle batterie, vedi “Smaltimento”.
  • Seite 118 a girare fino a mostrare l'ora corrente. Questo All manuals and user guides at all-guides.com processo può durare alcuni minuti. La sveglia ogni giorno passa subito automaticamente alla ricezione del segnale e confronta il proprio orario con quello del trasmettitore di segnale orario ricevuto. Se vi sono differenze, l'ora mostrata della sveglia viene automaticamente corretta.
  • Seite 119: Uso

    All manuals and user guides at all-guides.com Illuminazione del quadrante − Premere il tasto SNOOZE/LIGHT per accendere l'illuminazione del quadrante per circa 5 secondi. Visualizzazione di data e temperatura Nel display piccolo vengono visualizzate in modo alternato per circa 20 secondi ciascuna la temperatura ambientale in °C e la data in formato giorno/mese.
  • Seite 120: Impostazione Manuale Dell'ora

    ‚ Se la sveglia riceve un segnale radio All manuals and user guides at all-guides.com abbastanza forte, le lancette si posizionano nell'ora corretta. ‚ Se la sveglia non riceve un segnale radio abbastanza forte, viene nuovamente impostata l'ora precedentemente visualizzata. Impostazione manuale dell'ora Se non è...
  • Seite 121: Consigli Per Una Ricezione Ottimale

    Quando M.SET non viene All manuals and user guides at all-guides.com premuto per più di 30 secondi, l'ora attualmente impostata sarà memorizzata e sarà necessario ripetere la procedura. Consigli per una ricezione ottimale ‚ Possibilmente installare la radiosveglia in prossimità della finestra. ‚...
  • Seite 122: Informazioni Sul Trasmettitore Di Segnale Orario Dcf77

    ‚ Anche condizioni meteo avverse possono All manuals and user guides at all-guides.com produrre interferenze alla ricezione, ad esempio in caso di temporali. ‚ Occasionalmente, ad esempio in caso di lavori di manutenzione, possono verificarsi delle interruzione del segnale. Informazioni sul trasmettitore di segnale orario DCF77 Questa radiosveglia riceve il suo segnale radio dal trasmettitore di segnale orario DCF77.
  • Seite 123: Sveglia

    dalla batteria, viene avviata la ricezione e la All manuals and user guides at all-guides.com ricerca del segnale dal trasmettitore DCF77. Se il segnale è abbastanza forte, le lancette si imposteranno sull'ora corretta. La radio sveglia passa in modalità ricezione più volte al giorno, per sincronizzare l'orario con il segnale radio proveniente dal trasmettitore DCF77.
  • Seite 124: Disattivazione Della Sveglia

    2. Impostare l'interruttore della sveglia su ON. All manuals and user guides at all-guides.com Risveglio All'ora impostata, l'unità emetterà un segnale di sveglia la cui intensità aumenterà con la durata della sveglia. Funzione di interruzione automatica Se non viene premuto alcun tasto, la sveglia si spegne automaticamente dopo 30 minuti.
  • Seite 125: Altre Funzioni

    Altre funzioni All manuals and user guides at all-guides.com Impostazione dell'ora legale e dell'ora solare Il passaggio da ora legale a ora solare o viceversa avviene automaticamente attraverso una buona ricezione del segnale orario. Ripristino impostazioni di fabbrica della sveglia (Reset) Se viene mostrata di nuovo l'ora errata, è...
  • Seite 126: Pulizia

    Pulizia All manuals and user guides at all-guides.com Non immergere la sveglia in acqua o altri liquidi. Non utilizzare detergenti aggressivi o abrasivi. − Se necessario, strofinare la sveglia con un panno morbido e asciutto o pulirla con un panno leggermente inumidito. Risoluzione dei problemi Nessun funzionamento.
  • Seite 127: Dati Tecnici

    Dati tecnici All manuals and user guides at all-guides.com Modello: Radiosveglia DCF CK 1808 Batterie: 1x LR03 (AAA), 1,5 V Corrente nominale: < 180 μA Portata: ca. -10 °C - 60 °C Distributore (nessun servizio di assistenza): Waagen-Schmitt GmbH Hammer Steindamm 27-29...
  • Seite 128: Dichiarazione Di Conformità

    Dichiarazione di conformità All manuals and user guides at all-guides.com Con la presente, Waagen-Schmitt GmbH dichiara che la radiosveglia CK 1808 è conforme alle direttive 2014/53/EU e 2011/65/EU. Il testo completo della dichiarazione di conformità EU è disponibile al seguente indirizzo Internet: www.ade-germany.de/doc.
  • Seite 129: Garanzia

    Garanzia All manuals and user guides at all-guides.com La ditta Waagen-Schmitt GmbH garantisce la riparazione o la sostituzione gratuita dell'unità per un periodo di 2 anni a partire dalla data di acquisto, nel caso di difetti di materiale o fabbricazione del prodotto. A tale scopo, consegnare al rivenditore il prodotto e la prova di acquisto (citando i motivi del reclamo).
  • Seite 130: Smaltimento Del Prodotto

    Smaltimento del prodotto All manuals and user guides at all-guides.com Smaltire il prodotto secondo le norme vigenti nel proprio paese. Il dispositivo non deve essere smaltito con i normali rifiuti domestici. Al termine della sua vita utile, l'apparecchio deve essere smaltito in modo appropriato. In tal modo si rende possibile il riutilizzo del materiale riciclabile contenuto nell’apparecchio limitando l’impatto sull’ambiente.
  • Seite 131 Le batterie e gli accumulatori non All manuals and user guides at all-guides.com devono essere smaltiti con i rifiuti domestici Le batterie e gli accumulatori devono essere consegnati presso un centro di raccolta comunale o di quartiere, oppure presso il proprio rivenditore, al fine di garantire il loro smaltimento in modo rispettoso dell'ambiente.
  • Seite 132: Szanowny Kliencie

    Szanowny Kliencie! All manuals and user guides at all-guides.com Zakupiony wysokiej jakości produkt marki ADE łączy w sobie inteligentne funkcje z wyjątkową stylistyką. Dzięki niniejszemu budzikowi radiowemu godzina jest zawsze precyzyjnie w zasięgu wzroku. Wieloletnie doświadczenie marki ADE gwarantuje wysoki standard techniczny oraz sprawdzoną...
  • Seite 133: Informacje Ogólne

    Informacje ogólne All manuals and user guides at all-guides.com O instrukcji Niniejsza instrukcja obsługi zawiera opis bezpiecznej obsługi i pielęgnacji artykułu. Instrukcję obsługi należy przechowywać w celu jej późniejszego wykorzystania. Jeżeli produkt będzie przekazywany innej osobie, należy przekazać również tę instrukcję. Nieprzestrzeganie instrukcji obsługi może spowodować...
  • Seite 134: Objaśnienie Znaków

    Objaśnienie znaków All manuals and user guides at all-guides.com Ten symbol w połączeniu ze słowem NIEBEZPIECZEŃSTWO ostrzega przed poważnymi obrażeniami ciała. Ten symbol w połączeniu ze słowem OSTRZEŻENIE ostrzega przed obrażeniami ciała średniego i lekkiego stopnia. Ten symbol w połączeniu ze słowem WSKAZÓWKA ostrzega przed stratami materialnymi.
  • Seite 135 Spis treści All manuals and user guides at all-guides.com Informacje ogólne ..........133 Użycie zgodne z przeznaczeniem ....136 Bezpieczeństwo ..........136 W skrócie ............140 Zawartość dostawy ........142 Uruchomienie ..........142 Odbiór sygnału czasowego ......143 Użytkowanie ............145 Informacje o nadajniku znacznika czasu DCF77 .............148 Budzenie ............149 Pozostałe funkcje ..........151 Czyszczenie............152...
  • Seite 136: Użycie Zgodne Z Przeznaczeniem

    Użycie zgodne z przeznaczeniem All manuals and user guides at all-guides.com Budzik radiowy pobiera wzorzec czasu z niemieckiego nadajnika DCF77. Budzik jest przeznaczony wyłącznie do użytku prywatnego w suchych pomieszczeniach. Bezpieczeństwo ‚ Ten produkt może być używany przez dzieci w wielu do lat 8 oraz przez osoby z ograniczonymi zdolnościami fizycznymi, sensorycznymi lub umysłowymi, bądź...
  • Seite 137 ‚ Dzieci nie mogą czyścić ani serwisować All manuals and user guides at all-guides.com urządzenia, chyba że mają 8 lat lub więcej i są nadzorowane. ‚ Połknięcie baterii stanowi zagrożenie dla życia. Produkt i baterie należy przechowywać w miejscach niedostępnych dla dzieci. W przypadku połknięcia baterii należy natychmiast zwrócić...
  • Seite 138 ‚ Baterii nie wolno ładować, reaktywować w All manuals and user guides at all-guides.com inny sposób, rozkładać na części, wrzucać w ogień lub powodować ich zwarcia. W innym przypadku grozi niebezpieczeństwo wybuchu lub wycieku kwasu z baterii lub ulotnienia się gazów! ‚...
  • Seite 139 ‚ Wkładając baterie lub wymieniając je na All manuals and user guides at all-guides.com nowe, należy uważać na właściwe położenie biegunów (+/-). ‚ Nie przechowywać baterii w skrajnych warunkach, np. na grzejnikach lub w miejscach narażonych na bezpośrednie promieniowanie słoneczne. Podwyższone niebezpieczeństwo wycieku! ‚...
  • Seite 140: W Skrócie

    W skrócie All manuals and user guides at all-guides.com 1 Przycisk SNOOZE/LIGHT 2 Włącznik budzika ON/OFF 3 Wyświetlacz daty i wskaźnika temperatury 4 Podświetlenie tarczy zegara...
  • Seite 141 All manuals and user guides at all-guides.com 5 Przycisk Reset 6 Przycisk M.Set 7 Przycisk Rec 8 Komora na baterie 1x LR03 (AAA), 1,5 V 9 Pokrętło ustawienia czasu budzenia...
  • Seite 142: Zawartość Dostawy

    Zawartość dostawy All manuals and user guides at all-guides.com ‚ Budzik radiowy ‚ Baterii typu LR03 (AAA), 1,5 V (1x) ‚ Instrukcja obsługi Uruchomienie Do użytkowania urządzenia wymagana jest bateria typu LR03 (AAA), 1,5 V. 1. Pokrywę komory baterii zsunąć do dołu. 2.
  • Seite 143: Odbiór Sygnału Czasowego

    Wskazówki dotyczące wymiany baterii: All manuals and user guides at all-guides.com ‚ Jeżeli wskazówki się zatrzymają, należy wymienić baterię. ‚ Należy korzystać tylko z typu baterii podanego w „Dane techniczne”. ‚ Stare baterie należy utylizować zgodnie z zasadami ochrony środowiska, patrz „Utylizacja”.
  • Seite 144 Po odebraniu sygnału czasu o odpowiedniej sile, All manuals and user guides at all-guides.com wskazówki zaczną się obracać i wskażą aktualną godzinę. Niniejszy proces może potrwać kilka minut. Budzik od teraz przełącza się automatycznie na odbiór kilka razy dziennie i porównuje własny czas z czasem odebranym z nadajnika znacznika czasu.
  • Seite 145: Użytkowanie

    Użytkowanie All manuals and user guides at all-guides.com Podświetlanie tarczy zegara − Nacisnąć przycisk SNOOZE/LIGHT w celu włączenia podświetlenia tarczy zegara na ok. 5 sekund. Wskaźnik temperatury i daty Na małym wyświetlaczu naprzemiennie pojawia się przez ok. 20 sekund temperatura pomieszczenia w °C i data w formacie dzień/miesiąc. Ponowne uruchomienie transmisji radiowej 1.
  • Seite 146: Ręczne Ustawianie Godziny

    ‚ Jeśli odbierze wystarczająco silny sygnał All manuals and user guides at all-guides.com radiowy, wskazówki ustawią się na odpowiedniej godzinie. ‚ Jeśli sygnał radiowy jest niewystarczająco silny, budzik powraca do wcześniej wyświetlanej godziny. Ręczne ustawianie godziny Jeśli odbiór sygnału nie jest możliwy, godzinę można ustawić...
  • Seite 147: Wskazówki Dotyczące Dobrego Odbioru

    Jeżeli przycisk M.SET nie zostanie All manuals and user guides at all-guides.com naciśnięty przez ponad 30 sekund, aktualnie ustawiona godzina zostanie zapisana i trzeba będzie powtórzyć proces. Wskazówki dotyczące dobrego odbioru ‚ Ustawić budzik możliwie najbliżej okna. ‚ Zachować odstęp od telewizora, komputera i monitorów.
  • Seite 148: Informacje O Nadajniku Znacznika Czasu Dcf77

    ‚ Czasami może dochodzić do All manuals and user guides at all-guides.com krótkotrwałego wyłączania nadajnika, np. z powodu prac konserwacyjnych. Informacje o nadajniku znacznika czasu DCF77 Budzik otrzymuje sygnały dźwiękowe z nadajnika DCF77. Wysyła on na częstotliwości fal radiowych 77,5 kHz dokładny i oficjalny czas Republiki Federalnej Niemiec.
  • Seite 149: Budzenie

    Jeżeli odebrany zostanie sygnał o wystarczającej All manuals and user guides at all-guides.com sile, wskazówki przestawią się na prawidłową godzinę. Budzik włącza się kilkukrotnie w ciągu dnia i synchronizuje godzinę z sygnałem radiowym z nadajnika DCF77. W przypadku braku odbioru, np. podczas silnej burzy, urządzenie będzie działało precyzyjnie dalej i o najbliższej przewidzianej godzinie ponownie przełączy się...
  • Seite 150 2. Włącznik budzika ustawić tak, aby widać All manuals and user guides at all-guides.com było na nim ON. Budzenie W ustalonym czasie rozlegnie się sygnał budzenia, zyskując na intensywności wraz z upływem czasu budzenia. Funkcja automatycznego wyłączania Alarm wyłączy się automatycznie po 30 minutach, jeśli nie zostanie naciśnięty żaden przycisk.
  • Seite 151: Pozostałe Funkcje

    Wyłączanie funkcji budzenia All manuals and user guides at all-guides.com − Włącznik budzika ustawić tak, aby widać było na nim OFF. Pozostałe funkcje Przełączanie między czasem letnim i zimowym Przełączanie z czasu letniego na zimowy i odwrotnie przy dobrym odbiorze sygnału czasowego odbywa się...
  • Seite 152: Czyszczenie

    Rozlega się sygnał dźwiękowy, a wskazówki All manuals and user guides at all-guides.com obracają się na godzinę 12:00, po czym budzik przełącza się na odbiór. Czyszczenie Budzika nie zanurzać w wodzie ani innych płynach. Nie używać twardych, drapiących lub szorujących środków czystości.
  • Seite 153: Dane Techniczne

    Dane temperatury wydają się za wysokie. All manuals and user guides at all-guides.com ‚ Sprawdzić, czy budzik radiowy jest narażony na bezpośrednie promieniowanie słoneczne. Dane techniczne Model: Budzik radiowy DCF CK 1808 Bateria: 1x LR03 (AAA), 1,5 V Prąd znamionowy: < 180 μA Zakres pomiarowy: ok.
  • Seite 154: Deklaracja Zgodności

    Deklaracja zgodności All manuals and user guides at all-guides.com Niniejszym firma Waagen-Schmitt GmbH oświadcza, że budzik radiowy CK 1808 jest zgodna z dyrektywą 2014/53/UE i 2011/65/UE. Pełny tekst deklaracji zgodności UE jest dostępny pod poniższym adresem internetowym: www.ade-germany.de/doc. Deklaracja zgodności traci swoją ważność w przypadku dokonania nieuzgodnionych z nami zmian w budziku.
  • Seite 155: Gwarancja

    Gwarancja All manuals and user guides at all-guides.com Firma Waagen-Schmitt GmbH gwarantuje przez 2 lata od daty zakupu bezpłatne usuwanie braków z tytułu błędów materiałowych lub produkcyjnych w drodze naprawy lub wymiany. W przypadku korzystania z gwarancji prosimy o podanie sprzedawcy artykułu wraz z dowodem zakupu (podając również...
  • Seite 156: Utylizacja Produktu

    Utylizacja produktu All manuals and user guides at all-guides.com Produkt należy utylizować zgodnie z przepisami obowiązującymi w danym kraju. Urządzeń nie wolno wyrzucać razem ze zwykłymi odpadami domowymi. Po zakończeniu okresu użytkowania produkt należy przekazać do odpowiedniej utylizacji. Surowce wtórne znajdujące się w urządzeniu zostaną...
  • Seite 157 Baterii i akumulatorów nie wolno All manuals and user guides at all-guides.com wyrzucać razem z odpadami domowymi Wszystkie baterie i akumulatory należy oddawać do punktu zbiórki w gminie, dzielnicy lub sklepie. W ten sposób baterie i akumulatory mogą trafić do ekologicznej utylizacji.
  • Seite 158 All manuals and user guides at all-guides.com...

Inhaltsverzeichnis