Herunterladen Inhalt Inhalt Diese Seite drucken
Sharp PN-L752B Installationsanleitung
Vorschau ausblenden Andere Handbücher für PN-L752B:

Werbung

Verfügbare Sprachen

Verfügbare Sprachen

PN-L862B
PN-L752B
PN-L652B
LCD MONITOR
MONITEUR LCD
MONITOR LCD
LCD FARBMONITOR
SETUP MANUAL
MANUEL D'INSTALLATION
MANUAL DE INSTALACIÓN
INSTALLATIONSANLEITUNG
ENGLISH ...... E1
FRANÇAIS ..... F1
ESPAÑOL .... S1
DEUTSCH ..... D1

Werbung

Inhaltsverzeichnis
loading

Inhaltszusammenfassung für Sharp PN-L752B

  • Seite 1 PN-L862B PN-L752B PN-L652B LCD MONITOR MONITEUR LCD MONITOR LCD LCD FARBMONITOR SETUP MANUAL MANUEL D’INSTALLATION MANUAL DE INSTALACIÓN INSTALLATIONSANLEITUNG ENGLISH ..E1 FRANÇAIS ..F1 ESPAÑOL ..S1 DEUTSCH ..D1...
  • Seite 2 FOR CUSTOMERS IN U.K. IMPORTANT The wires in this mains lead are coloured in accordance with the following code: GREEN-AND-YELLOW: Earth BLUE: Neutral BROWN: Live As the colours of the wires in the mains lead of this apparatus may not correspond with the coloured markings identifying the terminals in your plug proceed as follows: •...
  • Seite 3: Inhaltsverzeichnis

    D-sub input terminal, RS-232C input terminal, USB Type C port, TOUCH PANEL terminal, and USB port. DEAR SHARP CUSTOMER Thank you for your purchase of a SHARP LCD product. To ensure safety and many years of trouble-free operation of your product, please read the Safety Precautions carefully before using this product.
  • Seite 4: Safety Precautions

    SAFETY PRECAUTIONS Electricity is used to perform many useful functions, but it can also cause personal injuries and property damage if improperly handled. This product has been engineered and manufactured with the highest priority on safety. However, improper use can result in electric shock and/or fire.
  • Seite 5: Safety Instruction

    LAN vary by country and region. Please request a cleaning of the inside of the monitor from an authorized SHARP servicing dealer or service center. - The power outlet shall be installed near the equipment and shall be easily accessible.
  • Seite 6: Mounting Precautions

    • Mounting the monitor on the wall requires special expertise and the work must be performed by an authorized SHARP dealer. You should never attempt to perform any of this work yourself. Our company will bear no responsibility for accidents or injuries caused by improper mounting or mishandling.
  • Seite 7: Supplied Components

     Power cord  Cover SHARP logo: 1  Remote control unit battery: 2 Place this sticker onto the SHARP logo to cover the logo.  Setup Manual (this manual): 1 * For environmental protection! Do not dispose of batteries in household waste. Follow the disposal instructions for your area.
  • Seite 8: Connections

    Connections Caution • Be sure to turn off the main power switch and disconnect the plug from the power outlet before connecting/disconnecting cables. Also, read the manual of the equipment to be connected. • Be careful not to confuse the input terminal with the output terminal when connecting cables. Accidentally reversing cables connected to the input and output terminals may cause malfunctions and the other problems.
  • Seite 9: Turning Power On/Off

    The touch panel and touch pen operate with the standard driver of each operating system. On the Mac, operation is only possible in mouse mode. • The Information Display Downloader can also be downloaded from the following website. https://www.sharp.eu/download-centre When the Information Display Downloader is installed, you can check and download the most recent versions of the software programs.
  • Seite 10 n O perations after first power-on n How to read the operation manual When you turn on the power for the first time, the language Touch “Operation Manual” on the home screen of settings screen appears. APPLICATION mode. 1. Select a language, and then touch “Next”. The “Date &...
  • Seite 11: Specifications

    As a part of our policy of continuous improvement, SHARP reserves the right to make design and specification changes for product improvement without prior notice. The performance specification figures indicated are nominal values of production units. There may be some deviations from these values in individual units.
  • Seite 12 n Attaching STB mount Attach the STB mount when installing an optional controller. 1. Remove the screws from this monitor. 2. Attach the STB mount with the STB mount screws (M3x6) (supplied) (x2). TIPS • Store the removed screws. After removing the STB mount, put back the removed screws.
  • Seite 13 D-sub, borne d’entrée RS-232C, port USB de type C, borne TOUCH PANEL, et port USB. CHER CLIENT Nous vous remercions d’avoir acheté cet appareil SHARP à écran LCD. Afin de garantir le bon fonctionnement de ce moniteur, nous vous conseillons de lire attentivement cette brochure et de la conserver pour toute référence ultérieure.
  • Seite 14: Précautions De Sécurité

    PRÉCAUTIONS DE SÉCURITÉ L’électricité remplit de nombreuses fonctions utiles, mais elle peut provoquer des blessures et des dégâts matériels si elle n’est pas utilisée correctement. Cet appareil a été conçu et fabriqué en attachant la plus grande importance à la sécurité. Cependant, une utilisation inadéquate peut entraîner une décharge électrique et/ou un incendie.
  • Seite 15: Mesures De Sécurité

    Faites nettoyer l’intérieur du moniteur par un revendeur région où vous l’avez acheté. SHARP ou un centre de services autorisé. - Les chaînes et les fréquences pouvant être utilisées pour - La prise d’alimentation secteur doit être installée près de le LAN sans fil varient selon le pays et selon la région.
  • Seite 16: Précautions Pour Le Montage

    • Lorsque vous utilisez plusieurs moniteurs à proximité l’un compétences techniques spéciales et le travail doit être de l’autre, assurez vous que les transmetteur/récepteur fait par un revendeur agréé par SHARP. Vous ne devez infrarouge ne se parasitent pas. jamais tenter de faire ce travail vous-même. Notre société...
  • Seite 17: Composants Fournis

     Logo SHARP sur le couvercle : 1  Manuel d’Installation (ce manuel) : 1 Placez cet autocollant sur le logo SHARP pour le couvrir. * Pensez à votre environnement ! Ne pas jeter les piles avec les ordures ménagères; la mise au rebut des piles exige un traitement spécial.
  • Seite 18: Connexions

    Connexions Attention • Veillez à bien mettre hors tension l’interrupteur principal puis débranchez la prise de l’alimentation secteur avant de connecter ou de déconnecter les câbles. Lisez également le manuel de l’équipement à connecter. • Veillez à ne pas confondre la borne d’entrée avec la borne de sortie quand vous connectez les câbles. En confondant les câbles branchés aux bornes d’entrée et de sortie, vous pouvez causer des dysfonctionnements et d’autres problèmes.
  • Seite 19: Mise Sous Tension Et Hors Tension

    • Le Information Display Downloader est également téléchargeable sur le site web suivant. https://www.sharp.eu/download-centre Une fois le Information Display Downloader installé, vous pouvez consulter et télécharger les dernières versions des logiciels. Pour installer le logiciel, reportez-vous au manuel de chacun.
  • Seite 20: Mise Hors Tension

    nOpérations après la première mise sous tension n Comment lire le manuel d’utilisation Touchez “Mode d’emploi” sur l’écran d’accueil du mode Lorsque vous mettez l’appareil sous tension pour la APPLICATION. première fois, l’écran des réglage langues s’affiche. 1. Sélectionnez une langue, puis touchez “Suivant”. L’écran “Paramètres de date et d’heure”...
  • Seite 21: Caractéristiques

    SHARP se réserve le droit d’apporter sans préavis des modifications à la présentation et aux caractéristiques des appareils aux fins d’amélioration. Les valeurs indiquées dans ce document sont les valeurs nominales des appareils de série mais de légères différences peuvent être constatées d’un appareil à...
  • Seite 22 nFixation du support de la STB Fixez le support de la STB lors de l’installation d’une contrôleur en option. 1. Retirez les vis de ce moniteur. 2. Fixez la support de la STB à l’aide des vis de la support de la STB (M3x6) (fournies) (x2).
  • Seite 23 USB tipo C, terminal TOUCH PANEL y puerto USB. ESTIMADO CLIENTE DE SHARP Gracias por adquirir un producto LCD de SHARP. Para garantizar la seguridad y muchos años de funcionamiento sin problemas, lea atentamente las Precauciones de seguridad antes de utilizar este producto.
  • Seite 24: Precauciones De Seguridad

    PRECAUCIONES DE SEGURIDAD La electricidad se emplea para muchas funciones útiles pero también puede causar lesiones personales y daños en la propiedad si se manipula de forma inadecuada. Este producto se ha diseñado y fabricado poniendo el máximo énfasis en la seguridad.
  • Seite 25: Instrucciones De Seguridad

    Solicite la limpieza del interior del monitor a un distribuidor o LAN inalámbrica varían según el país y la región. servicio técnico autorizado de SHARP. - La toma de corriente deberá estar instalada cerca del equipo y ser accesible fácilmente.
  • Seite 26: Precauciones De Montaje

    SHARP. Nunca deberá intentar realizar este trabajo usted mismo. Nuestra empresa no se hace responsable en caso de accidentes o lesiones causados por un montaje o una manipulación inadecuados.
  • Seite 27: Componentes Suministrados

     Cable USB: 1  Cable de alimentación  Tapa logo SHARP: 1  Pila del control remoto: 2 Coloque esta etiqueta sobre el logotipo de SHARP para  Manual de Instalación (este manual): 1 tapar el logotipo. * ¡Para protección medioambiental! No vierta las pilas en la basura doméstica.
  • Seite 28: Vista Frontal

    Conexiones Precaución • Asegúrese de apagar el interruptor primario y desconectar el enchufe de la toma de corriente antes de conectar/desconectar los cables. Asimismo, lea el manual del equipo que desea conectar. • Tenga cuidado de no confundir el terminal de entrada con el terminal de salida al conectar los cables. La inversión accidental de los cables conectados a los terminales de entrada y salida podría causar malfuncionamientos y otros problemas.
  • Seite 29: Encendido De La Alimentación Principal

    • Information Display Downloader también se puede descargar desde el siguiente sitio web. https://www.sharp.eu/download-centre Si está instalada la Information Display Downloader, podrá consultar y descargar las versiones más recientes de los programas de software.
  • Seite 30 n Cómo acceder al manual de instrucciones nOperaciones después del primer encendido Toque “Manual de uso” en la pantalla de inicio en el modo Al encender la alimentación por primera vez, aparecerá la pantalla de ajuste de idiomas. APPLICATION. 1. Seleccione un idioma, y después toque “Siguiente”. Aparecerá...
  • Seite 31 En dichos casos, compruebe las condiciones de temperatura especificadas por los equipos opcionales. Como parte de la política de mejoras continuas, SHARP se reserva el derecho de realizar cambios en el diseño y especificaciones para la mejora del producto sin previo aviso. Las figuras indicadas que especifican el rendimiento son valores nominales de los aparatos de producción.
  • Seite 32 n Coloque del soporte para STB Coloque el soporte para STB cuando desee instalar un controlador opcional. 1. Retire los tornillos de este monitor. 2. Coloque el soporte para STB con los tornillos de soporte para STB (M3x6) (suministrados) (x2). CONSEJOS •...
  • Seite 33 D-Sub-Eingangsanschluss, RS-232C-Eingangsanschluss, USB Buchse Typ C, TOUCH PANEL Anschluss und USB Buchse. VEREHRTE KUNDIN, VEREHRTER KUNDE Wir danken Ihnen für den Kauf eines SHARP LCD-Gerätes. Um Ihre Sicherheit sowie einen jahrelangen, störungsfreien Betrieb dieses Produkts zu gewährleisten, lesen Sie bitte den Abschnitt “Sicherheitsvorkehrungen” vor der Verwendung des Produkts...
  • Seite 34: Sicherheitsvorkehrungen

    SICHERHEITSVORKEHRUNGEN Elektrizität erfüllt viele nützliche Aufgaben, kann aber auch Personen- und Sachschäden verursachen, wenn sie unsachgemäß gehandhabt wird. Dieses Produkt wurde mit Sicherheit als oberster Priorität konstruiert und hergestellt. Dennoch besteht bei unsachgemäßer Handhabung u.U. Stromschlag- und Brandgefahr. Um mögliche Gefahren zu vermeiden, befolgen Sie beim Aufstellen, Betreiben und Reinigen des Produkts bitte die nachstehenden Anleitungen.
  • Seite 35: Sicherheitsanleitung

    Bitte lassen Sie das Innere des Monitors von einem autorisierten SHARP-Händler oder einem SHARP Servicecenter reinigen. - Die für WLAN verwendeten Kanäle und Frequenzen sind je nach Land und Region unterschiedlich.
  • Seite 36: Wichtige Hinweise Zur Befestigung

    Einheit oder Struktur keinem Druck aufgrund von thermischer Ausdehnung ausgesetzt werden kann. • Die Temperaturbedingungen können sich ändern, wenn der Monitor zusammen mit von SHARP empfohlenem Zubehör verwendet wird. Überprüfen Sie in diesem Fall bitte die für das Zubehör empfohlenen Temperaturbedingungen.
  • Seite 37: Mitgelieferte Komponenten

     USB-Kabel: 1  Netzkabel  SHARP-Logo-Aufkleber: 1  Batterie für Fernbedienung: 2 Um das Logo zu verdecken, überkleben Sie das SHARP-  Installationsanleitung (diese Anleitung): 1 Logo mit diesem Aufkleber. * Der Umwelt zuliebe ! Batterien dürfen nicht mit den Hausmüll entsorgt werden, sondern verlangen Sonderbehandlung.
  • Seite 38: Anschlüsse

    Anschlüsse Vorsicht • Schalten Sie unbedingt den Hauptnetzschalter aus und ziehen Sie den Netzstecker, bevor Sie Kabel anschließen oder abziehen. Lesen Sie auch das Handbuch des Gerätes, das Sie an den Monitor anschließen möchten. • Verwechseln Sie beim Anschließen nicht die Signaleingänge mit den Signalausgänge. Dies könnte zu Fehlfunktionen und anderen Problemen führen.
  • Seite 39: Ein- Und Ausschalten

    Das Touch-Panel und der Touch-Pen funktionieren mit dem standardmäßigen Treiber des jeweiligen Betriebssystems. • Der Information Display Downloader kann auch auf folgender Website heruntergeladen werden. https://www.sharp.eu/download-centre Wenn der Information Display Downloader installiert wurde, können Sie die neusten Versionen der Software prüfen und downloaden.
  • Seite 40: Ausschalten

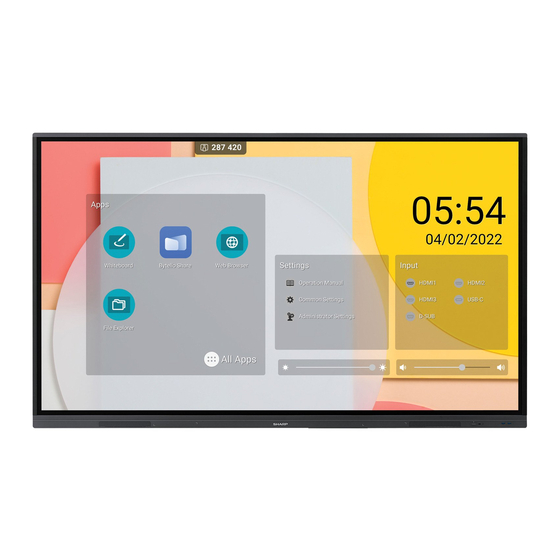
    n Lesen der Bedienungsanleitung nBetrieb nach dem ersten Einschalten Berühren Sie auf der Startseite des APPLICATION-Modus die Wenn Sie das Gerät erstmalig einschalten, wird der Bildschirm Spracheinstellungen angezeigt. Option “Bedienungsanleitung. 1. Wählen Sie eine Sprache und berühren Sie dann “Weiter”. Der Bildschirm “Datum &...
  • Seite 41: Technische Daten

    Ca. 49,5 Ca. 36,5 Die Temperaturbedingungen können sich ändern, wenn das Monitor zusammen mit von SHARP empfohlenem Zubehör verwendet wird. Überprüfen Sie in diesem Fall bitte die für das Zubehör empfohlenen Temperaturbedingungen. Bedingt durch fortlaufende technische Verbesserungen behält sich SHARP das Recht vor, das Design und die Spezifikationen ohne vorherige Ankündigung ändern zu können.
  • Seite 42: Befestigen Der Stb-Halterung

    n Befestigen der STB-Halterung Befestigen Sie der STB-Halterung beim Anschluss eines optionalen Controllers. 1. Lösen Sie die Schrauben von diesem Monitor. 2. Befestigen Sie die STB-Halterung mit den (mitgelieferten) Befestigungsschrauben für STB-Halterung (M3x6) (x2). TIPPS • Bewahren Sie die gelösten Schrauben auf. Wenn Sie die STB-Halterung abgenommen haben, bringen Sie die gelösten Schrauben wieder an.
  • Seite 43 MEMO...
  • Seite 44 MEMO...
  • Seite 45 MEMO...
  • Seite 46 WIRELESS ADAPTER SI07B is in compliance with Directive 2014/53/EU. raadioseadme tüüp JUHTMETA ADAPTER SI07B vastab direktiivi 2014/53/EL nõuetele. The full text of the EU declaration of conformity is available at the following internet address: ELi vastavusdeklaratsiooni täielik tekst on kättesaadav järgmisel internetiaadressil: https://www.sharp.eu/documents-of-conformity https://www.sharp.eu/documents-of-conformity • Specifications: • Spetsifikatsioone...
  • Seite 47 Guangzhou Shirui Electronics Co., Ltd. erklærer at radioutstyrstypen TRÅDLØS ADAPTER SI07B er i overensstemmelse med direktiv 2014/53/EU. Samsvarserklæringen i fulltekst er tilgjengelig på følgende internettadresse: https://www.sharp.eu/documents-of-conformity • Spesifikasjoner Frekvensområde: 2403 MHz til 2408 MHz / 2412 MHz til 2472 MHz /...
  • Seite 48 Printed in China Imprimé en Chine Impreso en China Gedruckt in China...

Diese Anleitung auch für:

Pn-l862bPn-l652b

Inhaltsverzeichnis