Electrolux EB6L80SP Benutzerinformation
Vorschau ausblenden
Andere Handbücher für EB6L80SP:
- Benutzerinformation (44 Seiten) ,
- Benutzerinformation (40 Seiten) ,
- Benutzerinformation (72 Seiten)

Verwandte Anleitungen für Electrolux EB6L80SP


Inhaltszusammenfassung für Electrolux EB6L80SP
- Seite 1 EB6L80SP Backofen Benutzerinformation Four Notice d'utilisation Forno Istruzioni per l’uso Oven User Manual...
-
Seite 2: Inhaltsverzeichnis
WIR DENKEN AN SIE Danke, dass Sie ein Gerät von Electrolux gekauft haben. Sie haben sich für ein Produkt entschieden, in dem jahrzehntelange Berufserfahrung und Innovation stecken. Bei der Entwicklung dieses genialen und eleganten Geräts haben wir an Sie gedacht. Wann immer Sie das Gerät verwenden, können Sie sicher sein, dass Sie jedes Mal großartige Ergebnisse... -
Seite 3: Sicherheitshinweise
SICHERHEITSHINWEISE 5.2 Erstes Vorheizen......12 10.3 Gartabellen für Prüfinstitute..25 6. TÄGLICHER GEBRAUCH......12 11. REINIGUNG UND PFLEGE..... 27 6.1 Einstellung: Ofenfunktionen...12 11.1 Hinweise zur Reinigung....27 6.2 Ofenfunktionen......13 11.2 Entfernen der: Einhängegitter ..27 6.3 Hinweise für: Feuchte Umluft..14 11.3 Benutzung: 6.4 Einstellung: VarioGuide.... -
Seite 4: Allgemeine Sicherheitshinweise
SICHERHEITSHINWEISE beaufsichtigt werden oder in die sichere Verwendung des Geräts eingewiesen wurden und die mit dem Gerät verbundenen Gefahren verstanden haben. Kinder unter 8 Jahren sowie Personen mit schweren Behinderungen oder Mehrfachbehinderung sollten vom Gerät ferngehalten werden, wenn sie nicht ständig beaufsichtigt werden. Kinder müssen beaufsichtigt werden, und es ist sicher zu •... -
Seite 5: Sicherheitsanweisungen
SICHERHEITSANWEISUNGEN Wenn das Netzkabel beschädigt ist, muss es vom • Hersteller, seinem autorisierten Kundenservice oder einer gleichermassen qualifizierten Person ausgetauscht werden, um Gefährdungen durch elektrischen Strom zu vermeiden. Die Mittel zum Trennen des Stromanschlusses müssen • gemäss den Verdrahtungsvorschriften in die feste Verdrahtung integriert sein. -
Seite 6: Elektroanschluss
SICHERHEITSANWEISUNGEN • Entfernen Sie die gesamte Verpackung. • Montieren oder verwenden Sie ein beschädigtes Gerät nicht. • Halten Sie sich an die mitgelieferte Montageanleitung. • Seien Sie beim Bewegen des Gerätes vorsichtig, da es sehr schwer ist. Tragen Sie stets Sicherheitshandschuhe und festes Schuhwerk. -
Seite 7: Bedienung
SICHERHEITSANWEISUNGEN • Achten Sie darauf, dass die Parameter auf dem Typenschild mit den elektrischen Werten der Netzstromversorgung übereinstimmen. • Schliessen Sie das Gerät unbedingt an eine sachgemäss installierte Schutzkontaktsteckdose an. • Verwenden Sie keine Mehrfachsteckdosen oder Verlängerungskabel. • Achten Sie darauf, Netzstecker und Netzkabel nicht zu beschädigen. Falls das Netzkabel des Geräts ersetzt werden muss, lassen Sie diese Arbeit durch unseren autorisierten Kundendienst durchführen. -
Seite 8: Reinigung Und Pflege
SICHERHEITSANWEISUNGEN • Um Beschädigungen oder Verfärbungen der Emaillebeschichtung zu vermeiden: – Stellen Sie feuerfestes Geschirr oder andere Gegenstände nicht direkt auf den Boden des Geräts. – Legen Sie keine Aluminiumfolie direkt auf den Garraumboden des Geräts. – Füllen Sie kein Wasser in das heisse Gerät. –... -
Seite 9: Innenbeleuchtung
SICHERHEITSANWEISUNGEN • Halten Sie Kinder während der Pyrolyse vom Gerät fern. Das Gerät wird sehr heiss und aus den vorderen Lüftungsöffnungen tritt heisse Luft aus. • Die pyrolytische Reinigung erfolgt bei sehr hoher Temperatur und kann Dämpfe von Lebensmittelrückständen und Gerätematerialen freisetzen. Beachten Sie unbedingt Folgendes: –... -
Seite 10: Gerätebeschreibung
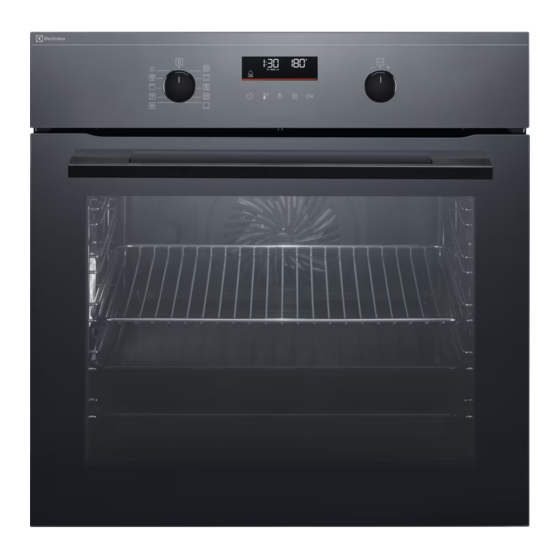
GERÄTEBESCHREIBUNG 3. GERÄTEBESCHREIBUNG 3.1 Gesamtansicht Bedienfeld Einstellknopf für Ofenfunktionen Display Einstellknopf Heizelement Lampe Umluft Einhängegitter, herausnehmbar Einschubebene 3.2 Zubehörteile Gitterrost Für Töpfe, Backformen, Roste. Backblech Für Kuchen und Biskuitboden. Kuchenblech hochrandig Zum Backen und Braten oder zum Auffangen von abtropfendem Fett. 4. -
Seite 11: Sensorfelder Im Bedienfeld
VOR DEM ERSTEN GEBRAUCH 4.2 Sensorfelder im Bedienfeld Back‐ Kurz‐ Schnell‐ ofen‐ Verriege‐ Einstellung Drehen Sie den zeitwe‐ aufhei‐ be‐ Drücken Sie lung bestätigen Knopf cker zung leuch‐ tung Wählen Sie eine Ofenfunktionen aus und schalten Sie den Backofen ein. Drehen Sie den Backofen-Einstellknopf in die Position Aus, um den Ofen auszuschalten. -
Seite 12: Erste Reinigung
TÄGLICHER GEBRAUCH 5.1 Erste Reinigung Vor der ersten Anwendung reinigen Sie den leeren Ofen und stellen die Zeit ein: 00:00 Stellen Sie die Zeit ein. Drücken Sie 5.2 Erstes Vorheizen Heizen Sie den leeren Ofen vor der ersten Inbetriebnahme auf. Schritt Entfernen Sie das gesamte Zubehör und die herausnehmbaren Einhängegitter aus dem Ofen. -
Seite 13: Ofenfunktionen
TÄGLICHER GEBRAUCH Stellen Sie die Temperatur ein. Wählen Sie eine Ofenfunktion aus. Drücken Sie - drücken und halten, um die Funktion einzuschalten: Schnellaufheizung. Dies ist für einige Ofenfunktionen verfügbar. 6.2 Ofenfunktionen Standard-Ofenfunktionen Ofenfunktion Anwendung Zum Backen und Braten auf drei Einschubebenen und zum Dörren von Lebensmitteln. -
Seite 14: Hinweise Für: Feuchte Umluft
TÄGLICHER GEBRAUCH Ofenfunktion Anwendung Zum Grillieren von dünnen Speisen und zum Toasten von Brot. Grill Zum Braten grosser Fleischstücke oder von Geflügel mit Knochen auf ei‐ ner Einschubebene. Zum Gratinieren und Bräunen. Heissluftgrillen Zur Menüeingabe: VarioGuide, Reinigung, Einstellungen. Menü 6.3 Hinweise für: Feuchte Umluft Diese Funktion wurde verwendet, um der Energieeffizienzklasse und den Ökodesign- Anforderungen gemäss EU 65/2014 und EU 66/2014 zu entsprechen. -
Seite 15: Varioguide
TÄGLICHER GEBRAUCH VarioGuide - kann zur schnellen Zubereitung einer Speise mit voreingestellten Funktionen verwendet werden: Rufen Sie das Menü Wählen Sie VarioGui‐ Wählen Sie die Spei‐ Stellen Sie die Speise auf. se aus. Drücken Sie in den Backofen. Be‐ de. Drücken Sie stätigen Sie die Ein‐... - Seite 16 TÄGLICHER GEBRAUCH Speise Gewicht Einschubebene/Zubehör Garzeit Rinderbraten/ 1,5–2 kg 120 Min. 2; Braten der Speise auf dem Git‐ Schmorbraten terrost (Hochrippe, Braten Sie das Fleisch einige Min.uten in Oberschale, di‐ einer heissen Pfanne an. Fügen Sie cke Spannrip‐ Flüssigkeit hinzu. Geben Sie es in den Ofen.
- Seite 17 TÄGLICHER GEBRAUCH Speise Gewicht Einschubebene/Zubehör Garzeit Schweinefleisch Schweinebra‐ 1,5–2 kg 120 Min. 2; Speise auf Gitterrost braten ten, Hals oder Wenden Sie das Fleisch nach der Hälfte Schulter der Garzeit. Pulled Pork 1,5–2 kg 215 Min. 2; Backblech (Niedertempe‐ Verwenden Sie Ihre liebsten Gewürze. ratur Garen) Wenden Sie das Fleisch nach der Hälfte der Garzeit für eine gleichmässige Bräu‐...
- Seite 18 TÄGLICHER GEBRAUCH Speise Gewicht Einschubebene/Zubehör Garzeit Pouletbrust 180–200 g 25 Min. 2; Auflaufform auf Gitterrost pro Stück Verwenden Sie Ihre liebsten Gewürze. Braten Sie das Fleisch einige Min.uten in einer heissen Pfanne an. Pouletschen‐ 30 Min. 3; Backblech kel, frisch Wenn die Pouletschenkel mariniert sind, garen Sie sie länger und bei niedrigerer Temperatur.
- Seite 19 TÄGLICHER GEBRAUCH Speise Gewicht Einschubebene/Zubehör Garzeit Käsekuchen 90 Min 28 cm Blech-Springform auf Gitterrost Apfelkuchen 45 Min. 3; Backblech Apfeltorte 40 Min. 2; Kuchenform Gitterrost Apfeltorte 60 Min. 22 cm Kuchenform auf Git‐ terrost Brownies 2 kg 30 Min. 3; tiefes Kuchenblech Schokoladen- 25 Min.
-
Seite 20: Uhrfunktionen
UHRFUNKTIONEN Speise Gewicht Einschubebene/Zubehör Garzeit Fleisch/ 1–1,5 kg 45 Min. 2; Auflaufform auf Gitterrost Gemüse-La‐ sagne mit tro‐ ckenen Nu‐ delplatten Kartoffelgra‐ 1–1,5 kg 50 Min. 1; Auflaufform auf Gitterrost tin (rohe Kar‐ Drehen Sie das Gratin nach der Hälfte toffeln) der Garzeit. -
Seite 21: Einstellung: Uhrfunktionen
UHRFUNKTIONEN Uhrfunktion Anwendung Uptimer. Max. 23 Std. 59 Min. Diese Funktion hat keine Auswirkung auf den Ofenbetrieb. Um die Uptimer ein- und auszustellen, wählen Sie: Menü, Einstellun‐ gen. 7.2 Einstellung: Uhrfunktionen Einstellung: Uhrzeit Schritt 1 Schritt 2 Schritt 3 Zum Festlegen der Tageszeit gehen Sie ins Menü... -
Seite 22: Verwendung: Zubehörteile
VERWENDUNG: ZUBEHÖRTEILE Einstellung: Garzeit Schritt 1 Schritt 2 Schritt 3 Schritt 4 Im Display er‐ scheint: 0:00 Stellen Sie eine Wiederholt drü‐ Drücken Sie: Ofenfunktion und Stellen Sie die die Temperatur Gardauer ein. cken: ein. Der Timer beginnt sofort mit dem Rückwärtszählen. Einstellung: Zeitverzögerung Schritt Schritt 2... -
Seite 23: Zusatzfunktionen
ZUSATZFUNKTIONEN Gitterrost: Schieben Sie den Gitterrost zwischen die Führungsstäbe des Einhängegitters. Backblech / tiefes Kuchenblech: Schieben Sie das Blech zwischen die Füh‐ rungsstäbe der Einhängegitter. 9. ZUSATZFUNKTIONEN 9.1 Verriegelung Diese Funktion verhindert eine versehentliche Änderung der Gerätefunktion. Schalten Sie sie ein, wenn das Gerät funktioniert – der eingestellte Garvorgang wird fortgesetzt, das Bedienfeld ist gesperrt. -
Seite 24: Kühlgebläse
RATSCHLÄGE UND TIPPS (°C) (Std.) 30 - 115 12.5 120 - 195 200 - 245 250 °C – Höchsttemperatur Die Abschaltautomatik funktioniert nicht mit den folgenden Funktionen: Backofenbeleuchtung, Zeitverzögerung. 9.3 Kühlgebläse Wenn das Gerät in Betrieb ist, wird das Kühlgebläse automatisch eingeschaltet, um die Geräteoberflächen zu kühlen. -
Seite 25: Feuchte Umluft - Empfohlenes Zubehör
RATSCHLÄGE UND TIPPS (°C) (Min.) Apfelkuchen aus Biskuitteig (runde Kuchen‐ 160 - 170 70 - 80 form) Weissbrot 190 - 200 55 - 70 10.2 Feuchte Umluft - empfohlenes Zubehör Verwenden Sie dunkle und nicht reflektierende Formen und Behälter. Diese nehmen die Wärme besser auf als helle und reflektierende Behälter. - Seite 26 RATSCHLÄGE UND TIPPS °C Buttergebäck Heissluft 25 - 35 Buttergebäck Ober-/Unterhitze 25 - 35 Backen auf einer Ebene - Kekse Nutzen Sie die dritte Einschubebene. °C Törtchen, 20 pro Blech, hei‐ Heissluft 20 - 30 zen Sie den leeren Back‐ ofen vor Törtchen, 20 pro Blech, hei‐...
-
Seite 27: Reinigung Und Pflege
REINIGUNG UND PFLEGE Toast Grill 1 - 2 Rindersteak, nach der Hälfte Grill 24 - 30 der Zeit wenden 11. REINIGUNG UND PFLEGE WARNUNG! Siehe Kapitel „Sicherheitshinweise“. 11.1 Hinweise zur Reinigung Reinigen Sie die Oberfläche des Geräts nur mit einem Mikrofasertuch, warmem Wasser und einem milden Reinigungsmittel. -
Seite 28: Benutzung: Pyrolytische Reinigung
REINIGUNG UND PFLEGE Schritt Schalten Sie den Backofen aus und warten Sie, bis er abge‐ kühlt ist. Schritt Ziehen Sie das Vordere der Einhängegitter von der Seiten‐ wand ab. Schritt Ziehen Sie das Einhängegitter hinten von der Seitenwand ab, und nehmen Sie es vollständig heraus. -
Seite 29: Erinnerungsfunktion Reinigen
REINIGUNG UND PFLEGE Pyrolytische Reinigung C2 - Normale Reinigung 1 h 30 min C3 - Gründliche Reinigung Schritt 2 - drücken zur Auswahl des Reinigungsprogramms. Schritt 3 – Drücken, um mit der Reinigung zu beginnen. Schritt 4 Drehen Sie nach der Reinigung den Einstellknopf für die Ofenfunktio‐ nen in die Position Aus. - Seite 30 REINIGUNG UND PFLEGE Schritt Öffnen Sie die Tür vollstän‐ dig. Schritt Heben Sie die Klemmhebel (A) an beiden Türscharnieren an und drücken Sie auf sie. Schritt Schliessen Sie die Backofentür bis zur ersten Öffnungsstellung (Winkel ca. 70°). Fas‐ sen Sie die Tür auf beiden Seiten und ziehen Sie sie schräg nach oben vom Ofen weg.
-
Seite 31: Wie Ersetzt Man: Lampe
REINIGUNG UND PFLEGE 11.6 Wie ersetzt man: Lampe WARNUNG! Stromschlaggefahr. Die Lampe kann heiss sein. Bevor Sie die Lampe austauschen: Schritt 1 Schritt 2 Schritt 3 Schalten Sie den Ofen aus. Trennen Sie den Ofen von der Legen Sie ein Tuch auf den Warten Sie, bis der Ofen kalt Stromversorgung. -
Seite 32: Fehlersuche
FEHLERSUCHE Seitliche Lampe Schritt Nehmen Sie das linke Einhängegit‐ ter heraus, um Zugang zur Lampe zu erhalten. Schritt Verwenden Sie einen schmalen, stumpfen Gegenstand (z. B. einen Teelöffel), um die Glasabdeckung zu entfernen. Schritt Säubern Sie die Glasabdeckung. Schritt Ersetzen Sie die Lampe durch eine bis 300 °C hitzebeständige Halo‐... -
Seite 33: Servicedaten
FEHLERSUCHE Der Backofen lässt sich nicht einschalten oder heizt nicht auf Der Backofen heizt nicht auf. Die Verriegelung ist offen. Komponenten Problem Prüfen Sie Folgendes: Die Lampe ist ausgeschaltet. Feuchte Umluft – ist eingeschaltet. Die Lampe funktioniert nicht. Die Lampe ist durchgebrannt. Fehlercodes Im Display wird Folgendes angezeigt: Prüfen Sie Folgendes:... -
Seite 34: Energieeffizienz
......... Produktnummer (PNC) ......... Seriennummer (S.N.) ......... 13. ENERGIEEFFIZIENZ 13.1 Produktinformationen und Produktinformationsblatt Name des Lieferanten Electrolux Modell-Kennzeichnung EB6L80SP 944271548 Energieeffizienzindex 81,2 Energieeffizienzklasse Energieverbrauch bei einer Standardlast, konventioneller 1,09 kWh/Programm Betrieb Energieverbrauch bei Standardbeladung, forcierte Heiss‐ 0,69 kWh/Programm luft Anzahl der Hohlräume Wärmequelle... -
Seite 35: Menüstruktur
MENÜSTRUKTUR Achten Sie darauf, dass die Gerätetür bei Betrieb des Geräts ordnungsgemäss geschlossen ist. Öffnen Sie während des Garens die Gerätetür nicht zu häufig. Halten Sie die Türdichtung sauber und achten Sie darauf, dass sie sicher sitzt. Verwenden Sie Metallgeschirr, um mehr Energie zu sparen. Wenn möglich, das Gerät vor dem Garen nicht vorheizen. -
Seite 36: Garantie
MENÜSTRUKTUR Passen Sie den Wählen Sie Me‐ Bestätigen Sie Wählen Sie die Bestätigen Sie Wert an und drü‐ nü, Einstellun‐ die Einstellung. Einstellung. die Einstellung. gen. cken Sie Einstellungen Uhrzeit Stellen Sie Helligkeit 1 - 5 Tastentöne 1 – Piepen Lautstärke 1 - 4 2 –... -
Seite 37: Umwelttipps
MENÜSTRUKTUR Servicestellen Morgenstrasse 131 3018 Bern Langgasse 10 9008 St. Gallen Am Mattenhof 4a/b 6010 Kriens Schlossstrasse 1 4133 Pratteln Comercialstrasse 19 7000 Chur Ersatzteilverkauf Industriestrasse 10, 5506 Mägenwil, Tel. 0848 848 111 Fachberatung/Verkauf Badenerstrasse 587, 8048 Zürich, Tel. 044 405 81 11 Garantie Für jedes Produkt gewähren wir ab Verkauf bzw. - Seite 38 NOUS PENSONS À VOUS Merci d’avoir choisi un appareil Electrolux. Vous avez choisi un produit qui bénéficie de décennies d'expérience professionnelle et d'innovation. Ingénieux et élégant, il a été pensé pour vous. C'est la raison pour laquelle vous pouvez avoir la certitude d'obtenir d'excellents résultats à...
-
Seite 39: Information Sur La Sécurité
INFORMATION SUR LA SÉCURITÉ 6. UTILISATION QUOTIDIENNE....48 11. ENTRETIEN ET NETTOYAGE....63 6.1 Comment régler : Modes 11.1 Remarques concernant le de cuisson..........48 nettoyage..........63 6.2 Modes de cuisson......49 11.2 Comment retirer : Supports de 6.3 Remarques sur : Circulation grille ............ -
Seite 40: Sécurité Générale
INFORMATION SUR LA SÉCURITÉ physiques, sensorielles ou mentales réduites ou dénuées d’expérience ou de connaissance, s'ils sont correctement surveillés ou si des instructions relatives à l'utilisation de l'appareil en toute sécurité leur ont été données et s’ils comprennent les risques encourus. Les enfants de moins de 8 ans et les personnes ayant un handicap très important et complexe doivent être tenus à... -
Seite 41: Consignes De Sécurité
CONSIGNES DE SÉCURITÉ Si le câble d’alimentation secteur est endommagé, son • remplacement doit être confié exclusivement au fabricant, à son service après-vente ou à toute autre personne qualifiée afin d’éviter tout danger électrique. Un moyen de déconnexion doit être prévu dans le câblage •... -
Seite 42: Branchement Électrique
CONSIGNES DE SÉCURITÉ • Installez l'appareil dans un lieu sûr et adapté répondant aux exigences d'installation. • Respectez l'espacement minimal requis par rapport aux autres appareils et éléments. • Avant de monter l'appareil, vérifiez si la porte de l'appareil s'ouvre sans retenue. •... -
Seite 43: Utilisation
CONSIGNES DE SÉCURITÉ • Ne laissez pas les câbles d'alimentation entrer en contact ou s'approcher de la porte de l'appareil ou de la niche d'encastrement sous l'appareil, particulièrement lorsqu'il est en marche ou que la porte est chaude. • La protection contre les chocs des parties sous tension et isolées doit être fixée de telle manière qu'elle ne puisse pas être enlevée sans outils. -
Seite 44: Entretien Et Nettoyage
CONSIGNES DE SÉCURITÉ – Installez ou retirez les accessoires avec précautions. • La décoloration de l'émail ou de l'acier inoxydable est sans effet sur les performances de l'appareil. • Utilisez un plat à rôtir pour des gâteaux moelleux. Les jus de fruits provoquent des taches qui peuvent être permanentes. -
Seite 45: Éclairage Interne
CONSIGNES DE SÉCURITÉ • Contrairement aux humains, certains oiseaux et reptiles sont extrêmement sensibles aux fumées pouvant se dégager lors du processus de nettoyage des fours à pyrolyse. – Ne laissez aucun animal, en particulier aucun oiseau, à proximité de l'appareil pendant et après un nettoyage par pyrolyse ;... -
Seite 46: Description De L'appareil
DESCRIPTION DE L'APPAREIL 3. DESCRIPTION DE L'APPAREIL 3.1 Vue d’ensemble Bandeau de commande Manette de sélection des modes de cuisson Affichage Manette de commande Résistance Éclairage Chaleur tournante Support de grille, amovible Niveaux de la grille 3.2 Accessoires Grille métallique Pour les plats de cuisson, les moules à... -
Seite 47: Touches Tactiles Du Bandeau De Commande
AVANT LA PREMIÈRE UTILISATION 4.2 Touches tactiles du bandeau de commande Pré‐ Eclai‐ Confirmez Minu‐ chauffa‐ Touches Appuyez sur Tournez la ma‐ rage la configu‐ teur ge rapi‐ Verrouil la touche nette four ration Sélectionnez un mode de cuisson pour allumer le four. Tournez la manette des modes de cuisson sur la position Arrêt pour mettre à... -
Seite 48: Nettoyage Initial
UTILISATION QUOTIDIENNE 5.1 Nettoyage initial Avant la première utilisation, nettoyez le four à vide et réglez la durée : 00:00 Réglez l’heure. Appuyez sur la tou‐ 5.2 Préchauffage initial Préchauffez le four à vide avant de l'utiliser pour la première fois. Étape 1 Retirez les supports de grille amovibles et tous les accessoires du four. -
Seite 49: Modes De Cuisson
UTILISATION QUOTIDIENNE Réglez la température. Sélectionnez un mode de cuisson. Appuyez sur la touche - maintenez la touche enfoncée pour activer la fonction : Préchauffage rapide. Disponible avec certaines fonctions du four. 6.2 Modes de cuisson Modes de cuisson standard Mode de cuisson Application Pour faire cuire sur 3 niveaux en même temps et pour sécher des ali‐... -
Seite 50: Remarques Sur : Circulation D'air Humide
UTILISATION QUOTIDIENNE Mode de cuisson Application Cette fonction est conçue pour économiser de l'énergie en cours de cuis‐ son. Lorsque vous utilisez cette fonction, la température à l’intérieur de la cavité peut différer de la température sélectionnée. La chaleur résiduelle Circulation d'air est utilisée. -
Seite 51: Cuisson Assistée
UTILISATION QUOTIDIENNE Cuisson assistée - vous pouvez l'utiliser pour préparer un plat rapidement avec les régla‐ ges par défaut : P1 - P45 Accédez au menu. Sélectionner Cuisson Sélectionnez le plat. Placez le plat dans le assistée. Appuyez Appuyez sur la tou‐ four. - Seite 52 UTILISATION QUOTIDIENNE Plat Poids Niveau/Accessoire Durée Bœuf rôti/ 1,5 - 2 kg 120 min 2 ; plat à rôtir sur grille métallique braisé (côte Faire frire la viande pendant quelques de bœuf, intér‐ minutes sur une poêle chaude. Ajoutez ieur de ronde, du liquide.
- Seite 53 UTILISATION QUOTIDIENNE Plat Poids Niveau/Accessoire Durée Rôti de porc - 1,5 - 2 kg 120 min 2 ; plat à rôtir sur grille métalli‐ collet ou épaule Retournez la viande à la moitié du temps de cuisson. Émincé de 1,5 - 2 kg 215 min 2 ;...
- Seite 54 UTILISATION QUOTIDIENNE Plat Poids Niveau/Accessoire Durée Cuisses de 30 min 3 ; plateau de cuisson poulet, fraî‐ Si vous avez mariné les cuisses de pou‐ ches let, réglez une température inférieure et faites-les cuire plus longtemps. Canard entier 2 - 3 kg 100 min 2 ;...
- Seite 55 UTILISATION QUOTIDIENNE Plat Poids Niveau/Accessoire Durée Tarte aux 60 min moule à tarte de 22 cm sur pommes grille métallique Brownies 2 kg 30 min 3 ; plat profond Muffins au 25 min 3 ; bac à muffins sur grille métalli‐ chocolat Quatre-quarts 50 min...
-
Seite 56: Fonctions De L'horloge
FONCTIONS DE L'HORLOGE Plat Poids Niveau/Accessoire Durée Gratin de 1 - 1,5 kg 50 min 1 ; cocotte sur grille métallique pommes de Tournez le plat après la moitié du temps terre (pommes de cuisson. de terre crues) Pizza fraîche, 2 ;... -
Seite 57: Comment Régler : Fonctions De L'horloge
FONCTIONS DE L'HORLOGE Fonctions de l’horlo‐ Application Compteur. Le maximum est de 23 h 59 min. Cette fonction n’a aucun effet sur le fonctionnement du four. Pour activer et désactiver le Compteur, sélectionnez : Menu , Configu‐ rations. 7.2 Comment régler : Fonctions de l’horloge Comment régler Heure actuelle Étape 1 Étape 2... -
Seite 58: Conseils D'utilisation : Accessoires
CONSEILS D'UTILISATION : ACCESSOIRES Comment régler Heure de cuisson Étape 1 Étape 2 Étape 3 Étape 4 L’affichage in‐ dique : 0:00 Choisissez le mo‐ Appuyez à plu‐ de de cuisson et Réglez le temps sieurs reprises : Appuyez sur réglez la tempéra‐... -
Seite 59: Fonctions Supplémentaires
FONCTIONS SUPPLÉMENTAIRES Grille métallique: Poussez la grille entre les barres de guida‐ ge des supports de grille. Plateau de cuisson / Plat à rôtir: Poussez la plaque entre les rails du sup‐ port de grille. 9. FONCTIONS SUPPLÉMENTAIRES 9.1 Touches Verrouil. Cette fonction permet d’éviter une modification involontaire de la fonction de l'appareil. -
Seite 60: Ventilateur De Refroidissement
CONSEILS (°C) 30 - 115 12.5 120 - 195 200 - 245 250 -maximum L'arrêt automatique ne fonctionne pas avec les fonctions : Eclairage four, Départ différé. 9.3 Ventilateur de refroidissement Lorsque l'appareil fonctionne, le ventilateur de refroidissement se met automatiquement en marche pour refroidir les surfaces de l'appareil. -
Seite 61: Circulation D'air Humide - Accessoires Recommandés
CONSEILS (°C) (min) Pain Blanc 190 - 200 55 - 70 10.2 Circulation d'air humide - accessoires recommandés Utilisez les moules et récipients foncés et non réfléchissants. Ils offrent une meilleure absorption de la chaleur que les plats réfléchissants de couleur claire. Ramequins Moule pour fond de Plaque à... - Seite 62 CONSEILS °C Sablé Chauffage Haut/Bas 25 - 35 Cuisson sur un niveau - biscuits Utilisez le troisième niveau de la grille. °C Petits gâteaux, 20 par pla‐ Chaleur tournante 20 - 30 teau, préchauffer le four à vide Petits gâteaux, 20 par pla‐ Chauffage Haut/Bas 20 - 30 teau, préchauffer le four à...
-
Seite 63: Entretien Et Nettoyage
ENTRETIEN ET NETTOYAGE Pain grillé Gril 1 - 2 Steak de bœuf, tourner à mi- Gril 24 - 30 cuisson 11. ENTRETIEN ET NETTOYAGE AVERTISSEMENT! Reportez-vous aux chapitres concernant la sécurité. 11.1 Remarques concernant le nettoyage Nettoyez l’avant de l’appareil uniquement avec un chiffon en microfibre imbibé d’eau tiède et d’un détergent doux. -
Seite 64: Comment Utiliser : Nettoyage Par Pyrolyse
ENTRETIEN ET NETTOYAGE Étape 1 Éteignez le four et attendez qu’il soit froid. Étape 2 Écartez l'avant du support de grille de la paroi latérale. Étape 3 Écartez l'arrière du support de grille de la paroi latérale et reti‐ rez-le. Étape 4 Installez les supports de grille dans l'ordre inverse. -
Seite 65: Nettoyage Conseillé
ENTRETIEN ET NETTOYAGE Nettoyage par pyrolyse C3 - Nettoyage complet Étape 2 - appuyez pour définir le programme de nettoyage. Étape 3 - appuyez pour démarrer le nettoyage. Étape 4 Après le nettoyage, tournez la manette des modes de cuisson sur la position Arrêt. -
Seite 66: Comment Remplacer : Éclairage
ENTRETIEN ET NETTOYAGE Étape 1 Ouvrez entièrement la porte. Étape 2 Soulevez et appuyez sur les leviers de blocage (A) sur les deux charnières de la porte. Étape 3 Fermez la porte du four à la première position (à un angle d'environ 70°). Tenez la porte des deux côtés et retirez-la du four en la soulevant. - Seite 67 ENTRETIEN ET NETTOYAGE Avant de remplacer l'éclairage : Étape 1 Étape 2 Étape 3 Éteignez le four. Attendez que Débranchez le four de l'ali‐ Placez un chiffon au fond de le four ait refroidi. mentation secteur. la cavité. Lampe supérieure Étape 1 Tournez le diffuseur en verre pour le retirer.
-
Seite 68: Dépannage
DÉPANNAGE 12. DÉPANNAGE AVERTISSEMENT! Reportez-vous aux chapitres concernant la sécurité. 12.1 Que faire si… Dans tous les cas ne figurant pas dans ce tableau, veuillez contacter un service après-vente agréé. Le four ne fonctionne pas ou ne chauffe pas Problème Vérifiez si... -
Seite 69: Données De Maintenance
Numéro de série (SN) ......... 13. RENDEMENT ÉNERGÉTIQUE 13.1 Informations produits et fiche d’informations produits Nom du fournisseur Electrolux Identification du modèle EB6L80SP 944271548 Indice d’efficacité énergétique 81.2 Classe d’efficacité énergétique Consommation d’énergie avec charge standard, en mode 1.09 kWh/cycle conventionnel... -
Seite 70: Économie D'énergie
RENDEMENT ÉNERGÉTIQUE Consommation d’énergie avec charge standard, en mode 0.69 kWh/cycle chaleur tournante Nombre de cavités Source de chaleur Électricité Volume 71 l Type de four Four encastrable Masse 34.0 kg IEC/EN 60350-1 - Appareils de cuisson domestiques électriques - Partie 1 : Cuisinières, fours, fours à... -
Seite 71: Structure Des Menus
STRUCTURE DES MENUS 14. STRUCTURE DES MENUS 14.1 Menu - sélectionnez pour accéder au Menu . Structure du Menu Cuisson assistée Nettoyage Configurations Étape 1 Étape 2 Étape 3 Étape 4 Étape 5 O1 -O11 Ajustez la valeur Sélectionnez le Confirmez la Sélectionnez la Confirmez la... -
Seite 72: Garantie
STRUCTURE DES MENUS Configurations Réinitialiser tous les Oui/Non réglages GARANTIE Service-clientèle Points de Service Industriestrasse 10 Le Trési 6 Via Violino 11 5506 Mägenwil 1028 Préverenges 6928 Manno Morgenstrasse 131 3018 Bern Langgasse 10 9008 St. Gallen Am Mattenhof 4a/b 6010 Kriens Schlossstrasse 1 4133 Pratteln... - Seite 73 STRUCTURE DES MENUS les ordures ménagères. Emmenez un tel produit dans votre centre local de recyclage ou contactez vos services municipaux. Pour la Suisse: Où aller avec les appareils usagés ? Partout où des appareils neufs sont vendus, mais aussi dans un centre de collecte ou une entreprise de récupération officiels SENS.
- Seite 74 PENSIAMO A TE Grazie per aver acquistato un elettrodomestico Electrolux. Hai scelto un prodotto che ha alle spalle decenni di esperienza professionale e innovazione. Ingegnoso ed elegante, è stato progettato pensando a te. Quindi, in qualsiasi momento lo utilizzi, avrai la certezza di ottenere sempre i migliori risultati.
-
Seite 75: Informazioni Di Sicurezza
INFORMAZIONI DI SICUREZZA 6. UTILIZZO QUOTIDIANO......84 11. PULIZIA E CURA........98 6.1 Come impostare: 11.1 Note sulla pulizia......99 Funzioni cottura........84 11.2 Come rimuovere: Supporti del 6.2 Funzioni cottura......85 ripiano ..........99 6.3 Note su: Cottura ventilata umida... 86 11.3 Istruzioni d'uso: Pulizia 6.4 Come impostare: Cottura guidata..86 per pirolisi.......... -
Seite 76: Avvertenze Di Sicurezza Generali
INFORMAZIONI DI SICUREZZA disabilità diffuse e complesse vanno tenuti lontani dall’elettrodomestico, a meno che non vi sia una supervisione continua. I bambini devono essere sorvegliati per assicurarsi che non • giochino con l’apparecchiatura. Tenere gli imballaggi lontano dai bambini e smaltirli in modo •... -
Seite 77: Istruzioni Di Sicurezza
ISTRUZIONI DI SICUREZZA autorizzato o da una persona qualificata per evitare situazioni di pericolo elettrico. I mezzi per lo scollegamento devono essere incorporati nel • cablaggio fisso conformemente alle regole di cablaggio. AVVERTENZA: Assicurarsi che l'elettrodomestico sia • spento prima di sostituire la lampadina per evitare la possibilità... -
Seite 78: Collegamento Elettrico
ISTRUZIONI DI SICUREZZA • È necessario rispettare la distanza minima dalle altre apparecchiature. • Prima di montare l'apparecchiatura controllare che la porta dell’apparecchio si apra senza limitazioni. • L'apparecchiatura è dotata di un sistema di raffreddamento elettrico. Quest’ultimo funziona a corrente elettrica. -
Seite 79: Utilizzo
ISTRUZIONI DI SICUREZZA • Evitare che i cavi entrino a contatto o si trovino vicino alla porta dell'apparecchiatura o sulla nicchia sotto all'apparecchiatura, in particolare quando il dispositivo è in funzione o la porta è calda. • I dispositivi di protezione da scosse elettriche devono essere fissati in modo tale da non poter essere disattivati senza l'uso di attrezzi. -
Seite 80: Pulizia E Cura
ISTRUZIONI DI SICUREZZA – Non conservare piatti e alimenti umidi all'interno dell'elettrodomestico dopo aver terminato la cottura. – Prestare attenzione in fase di rimozione o installazione degli accessori. • Lo scolorimento dello smalto o dell'acciaio inox non influisce sulle prestazioni dell'elettrodomestico. -
Seite 81: Illuminazione Interna
ISTRUZIONI DI SICUREZZA • A differenza delle persone, alcune specie di uccelli e rettili possono essere estremamente sensibili ai fumi che possono venire prodotti durante il processo di pulizia dei Forni Pirolitici. – Allontanare eventuali animali domestici (in particolare gli uccelli) dall'apparecchiatura durante e dopo la pulizia per Pirolisi e prevedere prima di tutto un funzionamento alla massima temperatura in un'area ben ventilata. -
Seite 82: Descrizione Del Prodotto
DESCRIZIONE DEL PRODOTTO 3. DESCRIZIONE DEL PRODOTTO 3.1 Panoramica generale Pannello dei comandi Manopola di regolazione delle funzioni cottura Display Manopola di regolazione Resistenza Lampadina Ventola Supporto ripiano, rimovibile Posizioni ripiano 3.2 Accessori Ripiano a filo Per stoviglie, stampi per dolci, arrosti. Lamiera dolci Per torte e biscotti. -
Seite 83: Tasti Sensore Pannello Dei Comandi
PRIMA DEL PRIMO UTILIZZO 4.2 Tasti sensore pannello dei comandi Riscal‐ Confermare Luce Ruotare la ma‐ Timer damento Blocco l'imposta‐ Premere forno nopola rapido zione Selezionare una funzione cottura per accendere il forno. Per spegnere il forno, ruotare la manopola delle funzioni di riscaldamento fino a portarla in posi‐ zione off. -
Seite 84: Pulizia Iniziale
UTILIZZO QUOTIDIANO 5.1 Pulizia iniziale Prima della messa in uso, pulire il forno vuoto e impostare l'ora: 00:00 Impostare l’ora. Premere 5.2 Preriscaldamento iniziale Preriscaldare il forno vuoto prima di utilizzarlo per la prima volta. Fase 1 Togliere gli accessori e i supporti ripiano amovibili dal forno. Fase 2 Impostare la temperatura massima.per la funzione: Lasciare in funzione il forno per un'ora. -
Seite 85: Funzioni Cottura
UTILIZZO QUOTIDIANO - tenere premuto per attivare la funzione: Riscaldamento rapido. È disponibile per alcune fun‐ zioni del forno. 6.2 Funzioni cottura Funzioni cottura standard Funzione cottura Applicazione Per cuocere su massimo tre posizioni della griglia contemporaneamente ed essiccare i cibi. Impostare la temperatura di 20 - 40°C inferiore rispetto a Cottura convenzionale. -
Seite 86: Note Su: Cottura Ventilata Umida
UTILIZZO QUOTIDIANO Funzione cottura Applicazione Per grigliare alimenti di ridotto spessore e tostare il pane. Grill Per arrostire grandi tagli di carne o pollame con ossa su una posizione della griglia. Per gratinare e dorare. Doppio grill venti‐ lato Per accedere al Menu: Cottura guidata, Pulizia, Impostazioni. Menu 6.3 Note su: Cottura ventilata umida Questa funzione è... -
Seite 87: Cottura Guidata
UTILIZZO QUOTIDIANO Cottura guidata - utilizzare per preparare un piatto rapidamente con le impostazioni prede‐ finite: Accedere al menu. Selezionare Cottura Selezionare la pietan‐ Inserire la pietanza guidata. Premere nel forno. Confermare za. Premere l'impostazione. 6.5 Cottura guidata Legenda Peso automatico disponibile. Preriscaldare il forno prima di iniziare a cucinare. - Seite 88 UTILIZZO QUOTIDIANO Piatto Peso Livello / Accessorio ripiano Durata Roast beef, al sangue (cottu‐ 75 min ra lenta) 2; lamiera dolci Roast beef, 1 - 1,5 kg; Utilizzare le spezie preferite o il semplice cottura media pezzi spessi 85 min pepe macinato.
- Seite 89 UTILIZZO QUOTIDIANO Piatto Peso Livello / Accessorio ripiano Durata Costolette di 2 - 3 kg; uti‐ 90 min 3; leccarda maiale lizzare pun‐ Aggiungere il liquido per coprire il fondo tine crude, 2 di un piatto. Girare la carne a metà cottu‐ - 3 cm Agnello Cosciotto d'a‐...
- Seite 90 UTILIZZO QUOTIDIANO Piatto Peso Livello / Accessorio ripiano Durata Altro Polpettone 1 kg 60 min 2; ripiano a filo Utilizzare le spezie preferite. Pesce Pesce intero, 0,5 - 1 kg 30 min 2 lamiera dolci grigliato per pesce Farcire il pesce con burro e utilizzare spezie ed erbe preferite.
- Seite 91 UTILIZZO QUOTIDIANO Piatto Peso Livello / Accessorio ripiano Durata Spicchi 1 kg 35 min 3 lamiera dolci rivestita con carta da forno Utilizzare le spezie preferite. Tagliare le patate a pezzi. Verdure miste 1 - 1,5 kg 30 min 3 lamiera dolci rivestita con carta da grigliate forno Utilizzare le spezie preferite.
-
Seite 92: Funzioni Del Timer
FUNZIONI DEL TIMER Piatto Peso Livello / Accessorio ripiano Durata Impasto per 1 kg 60 min 2; lamiera dolci rivestita con car‐ pane integra‐ ta da forno/ ripiano a filo le / pane di segale /pane nero in uno stampo per pane 7. - Seite 93 FUNZIONI DEL TIMER Come impostare: Contaminuti Passaggio 1 Passaggio 2 Passaggio 3 Il display vi‐ sualizza: 0:00 Imposta Contaminuti Premere: Premere: Il timer inizia subito il conto alla rovescia. Come impostare: Tempo di cottura Passaggio 1 Passaggio 2 Passaggio 3 Passaggio 4 Il display vi‐...
-
Seite 94: Come Usare: Accessori
COME USARE: ACCESSORI Come impostare: Ritardo Pas‐ Passag‐ Passag‐ Passag‐ Passag‐ Passag‐ saggio gio 2 gio 3 gio 4 gio 5 gio 6 Il di‐ Il display splay visualiz‐ mostra: l'ora del --:-- giorno Selezio‐ STOP Premere nare la Imposta‐ START Imposta‐... -
Seite 95: Funzioni Aggiuntive
FUNZIONI AGGIUNTIVE Lamiera dolci / Teglia profonda: Spingere la lamiera tra le guide del sup‐ porto ripiano. 9. FUNZIONI AGGIUNTIVE 9.1 Blocco Questa funzione evita che si cambi per sbaglio la funzione dell’apparecchiatura. Attivarla quando l’apparecchiatura è in funzione: la cottura impostata continua, il pannello dei co‐ mandi è... -
Seite 96: Ventola Di Raffreddamento
CONSIGLI E SUGGERIMENTI UTILI Lo spegnimento automatico non funziona con le funzioni: Luce forno, Ritardo. 9.3 Ventola di raffreddamento Quando l’apparecchiatura è in funzione, la ventola di raffreddamento si attiva in modo automatico per raffreddare le superfici. Dopo aver spento l’apparecchiatura, la ventola di raffreddamento continua a funzionare finché... -
Seite 97: Tabelle Di Cottura Per Gli Istituti Di Test
CONSIGLI E SUGGERIMENTI UTILI Pirofile mo‐ noporzione Teglia da pizza Pirofila Tortiera per flan Ceramica Scura, non riflettente Scura, non riflettente Scura, non riflettente diametro 8 cm, 28 cm di diametro 26 cm di diametro 28 cm di diametro altezza 5 cm 10.3 Tabelle di cottura per gli istituti di test Informazioni per gli istituti di test Test conformemente a: EN 60350, IEC 60350. -
Seite 98: Pulizia E Cura
PULIZIA E CURA °C Tortine, 20 per teglia, preri‐ Cottura ventilata 20 - 30 scaldare il forno vuoto Tortine, 20 per teglia, preri‐ Cottura convenzionale 20 - 30 scaldare il forno vuoto Cottura al forno multilivello - biscotti °C Frollini al burro Cottura ventilata 25 - 45 2 / 4... -
Seite 99: Note Sulla Pulizia
PULIZIA E CURA 11.1 Note sulla pulizia Pulire la parte anteriore dell’apparecchiatura solo con un panno in microfibra imbevuto di acqua tiepida e detergente delicato. Servirsi di una soluzione detergente per pulire le superfici metalliche. Agenti di pu‐ Pulire le macchie con un detergente delicato. lizia Pulire la cavità... -
Seite 100: Istruzioni D'uso: Pulizia Per Pirolisi
PULIZIA E CURA 11.3 Istruzioni d'uso: Pulizia per pirolisi Pulire il forno con Pulizia per pirolisi. AVVERTENZA! Rischio di ustioni. ATTENZIONE! Se nello stesso armadietto sono installate altre apparecchiature, non utilizzarle allo stesso tempo di questa funzione. Il forno potrebbe subire danni. Prima della Pulizia per pirolisi: Spegnere il forno e atten‐... -
Seite 101: Promemoria Pulizia
PULIZIA E CURA Al termine della pulizia: Spegnere il forno e atten‐ Pulire la cavità con un panno Rimuovere il residuo dal basso dere che si raffreddi. morbido. della cavità. 11.4 Promemoria Pulizia Il forno vi ricorda quando pulirlo con la pulizia pirolitica. Per disattivare il promemoria inserire il Menu e lampeggia sul display per 5 secondi dopo selezionare Impostazioni, Promemoria Pulizia. -
Seite 102: Come Sostituire: Lampadina
PULIZIA E CURA Pas‐ Tenere il rivestimento della saggio porta (B) sul bordo superiore della porta da entrambi i lati e spingere verso l'interno per sbloccare la guarnizione a clip. Pas‐ Rimuovere il rivestimento ti‐ saggio randolo in avanti. Pas‐ Afferrare uno ad uno i pannel‐... - Seite 103 PULIZIA E CURA Lampadina superiore Pas‐ Girare il rivestimento di vetro per saggio toglierlo. Pas‐ Pulire il coperchio in vetro. saggio Pas‐ Sostituire la lampadina con una adatta, alogena, termoresistente fino a 300°C, 230 V, saggio 40 W. Pas‐ Installare il coperchio in vetro. saggio Lampadina laterale Pas‐...
-
Seite 104: Risoluzione Dei Problemi
RISOLUZIONE DEI PROBLEMI 12. RISOLUZIONE DEI PROBLEMI AVVERTENZA! Fare riferimento ai capitoli sulla sicurezza. 12.1 Cosa fare se… Per tutti i casi non inclusi in questa tabella si prega di contattare un Centro di assistenza autorizzato. Il forno non si accende o non riscalda Problema Controllare se... -
Seite 105: Dati Dell'assistenza
......... 13. EFFICIENZA ENERGETICA 13.1 Informazioni sul prodotto e scheda informativa sul prodotto Nome del fornitore Electrolux Identificazione modello EB6L80SP 944271548 Indice di efficienza energetica 81.2 Classe di efficienza energetica Consumo energetico con carico standard, modalità tradi‐ 1.09 kWh/ciclo zionale... -
Seite 106: Risparmio Energetico
EFFICIENZA ENERGETICA Consumo di energia con un carico standard, modalità a 0.69 kWh/ciclo circolazione d'aria forzata Numero di cavità Fonte di calore Elettricità Volume 71 l Tipo di forno Forno da incasso Massa 34.0 kg IEC/EN 60350-1 - Apparecchiature elettriche per la cottura per uso domestico - Parte 1: Cucine, forni, forni a vapore e griglie - Metodi per la misura delle prestazioni. -
Seite 107: Struttura Del Menu
STRUTTURA DEL MENU 14. STRUTTURA DEL MENU 14.1 Menu - selezionare per accedere alla Menu. Menu struttura Cottura guidata Pulizia Impostazioni Passaggio 1 Passaggio 2 Passaggio 3 Passaggio 4 Passaggio 5 O1 - O11 Regolare il valo‐ Selezionare il Confermare l'im‐ Selezionare l'im‐... -
Seite 108: Garanzia
STRUTTURA DEL MENU GARANZIA Servizio clienti Servizio dopo vendita Industriestrasse 10 Le Trési 6 Via Violino 11 5506 Mägenwil 1028 Préverenges 6928 Manno Morgenstrasse 131 3018 Bern Langgasse 10 9008 St. Gallen Am Mattenhof 4a/b 6010 Kriens Schlossstrasse 1 4133 Pratteln Comercialstrasse 19 7000 Chur Vendita pezzi di ricambio Industriestrasse 10, 5506 Mägenwil,Tel. - Seite 109 WE’RE THINKING OF YOU Thank you for purchasing an Electrolux appliance. You’ve chosen a product that brings with it decades of professional experience and innovation. Ingenious and stylish, it has been designed with you in mind. So whenever you use it, you can be safe in the knowledge that you’ll get great results every time.
-
Seite 110: Safety Information
SAFETY INFORMATION 6.3 Notes on: Moist Fan Baking..120 11.2 How to remove: Shelf supports .132 6.4 How to set: Assisted Cooking..120 11.3 How to use: Pyrolytic Cleaning.. 133 6.5 Assisted Cooking......121 11.4 Cleaning Reminder....134 11.5 How to remove and install: Door134 7. -
Seite 111: General Safety
SAFETY INFORMATION Children should be supervised to ensure that they do not • play with the appliance. Keep all packaging away from children and dispose of it • appropriately. WARNING: The appliance and its accessible parts become • hot during use. Keep children and pets away from the appliance when in use and when cooling down. -
Seite 112: Safety Instructions
SAFETY INSTRUCTIONS WARNING: The appliance and its accessible parts become • hot during use. Care should be taken to avoid touching heating elements or the surface of the appliance cavity. Always use oven gloves to remove or insert accessories or •... -
Seite 113: Electrical Connection
SAFETY INSTRUCTIONS Height of the front of the appliance 594 mm Height of the back of the appliance 576 mm Width of the front of the appliance 596 mm Width of the back of the appliance 560 mm Depth of the appliance 567 mm Built in depth of the appliance 546 mm... -
Seite 114: Use
SAFETY INSTRUCTIONS 2.3 Use WARNING! Risk of injury, burns and electric shock or explosion. • Do not change the specification of this appliance. • Make sure that the ventilation openings are not blocked. • Do not let the appliance stay unattended during operation. •... -
Seite 115: Pyrolytic Cleaning
SAFETY INSTRUCTIONS • Clean the appliance with a moist soft cloth. Use only neutral detergents. Do not use abrasive products, abrasive cleaning pads, solvents or metal objects. • If you use an oven spray, follow the safety instructions on its packaging. 2.5 Pyrolytic cleaning WARNING! Risk of Injury / Fires / Chemical Emissions (Fumes) in Pyrolytic Mode. -
Seite 116: Disposal
PRODUCT DESCRIPTION 2.8 Disposal WARNING! Risk of injury or suffocation. • Contact your municipal authority for information on how to dispose of the appliance. • Disconnect the appliance from the mains supply. • Cut off the mains electrical cable close to the appliance and dispose of it. •... -
Seite 117: Control Panel
CONTROL PANEL Grill- / Roasting pan To bake and roast or as a pan to collect fat. 4. CONTROL PANEL 4.1 Retractable knobs To use the appliance press the knob. The knob comes out. 4.2 Control panel sensor fields Fast Confirm Timer Light... -
Seite 118: Before First Use
BEFORE FIRST USE Progress bar - for temperature or time. The bar is fully red when the oven reaches the set tempera‐ ture. 5. BEFORE FIRST USE WARNING! Refer to Safety chapters. 5.1 Initial cleaning Before first use clean the empty oven and set the time: 00:00 Set the time. -
Seite 119: How To Set: Heating Functions
DAILY USE 6.1 How to set: Heating functions Step 1 Step 2 Set the temperature. Select a heating function. Press - press and hold to turn on the function: Fast Heat Up. It is available for some oven functions. 6.2 Heating functions Standard heating functions Heating function Application... -
Seite 120: Notes On: Moist Fan Baking
DAILY USE Heating function Application To defrost food (vegetables and fruit). The defrosting time depends on the amount and size of the frozen food. Defrost This function is designed to save energy during cooking. When you use this function, the temperature in the cavity may differ from the set temper‐ ature. -
Seite 121: Assisted Cooking
DAILY USE Assisted Cooking - use it to prepare a dish quickly with default settings: P1 - P45 Enter the menu. Select Assisted Select the dish. Press Insert the dish to the oven. Confirm setting. Cooking. Press 6.5 Assisted Cooking Legend Weight Automatic available. - Seite 122 DAILY USE Dish Weight Shelf level / Accessory Duration time Beef roast / 1,5 - 2 kg 120 min 2; roasting dish on wire shelf braised (prime Fry the meat for a few minutes on a hot rib, top round, pan.
- Seite 123 DAILY USE Dish Weight Shelf level / Accessory Duration time Loin, fresh 1 - 1,5 kg; 5 55 min 2; roasting dish on wire shelf - 6 cm thick Use your favourite spices. pieces Spare Ribs 2 - 3 kg; use 90 min 3;...
- Seite 124 DAILY USE Dish Weight Shelf level / Accessory Duration time Goose, whole 4 - 5 kg 110 min 2; deep pan Use your favourite spices. Put the meat on deep baking tray. Turn the goose af‐ ter half of the cooking time. Other Meat loaf 1 kg...
- Seite 125 DAILY USE Dish Weight Shelf level / Accessory Duration time Baked pota‐ 1 kg 50 min 2; baking tray toes Put the whole potatoes with skin on bak‐ ing tray. Wegdes 1 kg 35 min 3; baking tray lined with baking pa‐ Use your favourite spices.
-
Seite 126: Clock Functions
CLOCK FUNCTIONS Dish Weight Shelf level / Accessory Duration time Baguette / 0,8 kg 30 min 3; baking tray lined with baking Ciabatta / paper White bread More time needed for white bread. All grain / 1 kg 60 min 2;... - Seite 127 CLOCK FUNCTIONS How to set: Minute minder Step 1 Step 2 Step 3 The display shows: 0:00 Set the Minute minder Press: Press: Timer starts counting down immediately. How to set: Cooking time Step 1 Step 2 Step 3 Step 4 The display shows: 0:00...
-
Seite 128: How To Use: Accessories
HOW TO USE: ACCESSORIES 8. HOW TO USE: ACCESSORIES 8.1 Inserting accessories A small indentation at the top increases safety. The indentations are also anti-tip devices. The high rim around the shelf prevents cookware from slipping of the shelf. Wire shelf: Push the shelf between the guide bars of the shelf support. -
Seite 129: Automatic Switch-Off
HINTS AND TIPS 9.2 Automatic switch-off For safety reasons the oven turns off after some time, if a heating function works and you do not change any settings. (°C) 30 - 115 12.5 120 - 195 200 - 245 250 - maximum The Automatic switch-off does not work with the functions: Light, Time Delay. -
Seite 130: Moist Fan Baking - Recommended Accessories
HINTS AND TIPS (°C) (min) Apple cake, made of sponge cake mixture 160 - 170 70 - 80 (round cake tin) White bread 190 - 200 55 - 70 10.2 Moist Fan Baking - recommended accessories Use the dark and non-reflective tins and containers. They have better heat absorption than the light colour and reflective dishes. - Seite 131 HINTS AND TIPS °C Short bread True Fan Cooking 25 - 35 Short bread Conventional Cook‐ 25 - 35 Baking on one level - biscuits Use the third shelf position. °C Small cakes, 20 per tray, True Fan Cooking 20 - 30 preheat the empty oven Small cakes, 20 per tray, Conventional Cooking...
-
Seite 132: Care And Cleaning
CARE AND CLEANING Toast Grill 1 - 2 Beef steak, turn halfway Grill 24 - 30 through 11. CARE AND CLEANING WARNING! Refer to Safety chapters. 11.1 Notes on cleaning Clean the front of the appliance only with a microfibre cloth with warm water and a mild detergent. -
Seite 133: How To Use: Pyrolytic Cleaning
CARE AND CLEANING Step 1 Turn off the oven and wait until it is cold. Step 2 Pull the front of the shelf sup‐ port away from the side wall. Step 3 Pull the rear end of the shelf support away from the side wall and remove it. -
Seite 134: Cleaning Reminder
CARE AND CLEANING Pyrolytic Cleaning C3 - Thorough cleaning Step 2 - press to select the cleaning programme. Step 3 - press to start the cleaning. Step 4 After cleaning, turn the knob for the heating functions to the off posi‐ tion. -
Seite 135: How To Replace: Lamp
CARE AND CLEANING Step 1 Fully open the door. Step 2 Lift and press the clamping levers (A) on the two door hinges. Step 3 Close the oven door to the first opening position (approximately 70° angle). Hold the door at both sides and pull it away from the oven at an upwards angle. Put the door with the outer side down on a soft cloth on a stable surface. -
Seite 136: Troubleshooting
TROUBLESHOOTING Before you replace the lamp: Turn off the oven. Wait until Disconnect the oven from the Put a cloth on the bottom of the oven is cold. mains. the cavity. Top lamp Step 1 Turn the glass cover to remove it. Step 2 Clean the glass cover. -
Seite 137: What To Do If
TROUBLESHOOTING 12.1 What to do if... In any cases not included in this table please contact with an Authorised Service Centre. The oven does not turn on or does not heat up Problem Check if... You cannot activate or operate the oven. The oven is correctly connected to an electrical supply. -
Seite 138: Service Data
Serial number (S.N.) ......... 13. ENERGY EFFICIENCY 13.1 Product Information and Product Information Sheet Supplier's name Electrolux Model identification EB6L80SP 944271548 Energy Efficiency Index 81.2 Energy efficiency class Energy consumption with a standard load, conventional 1.09 kWh/cycle mode Energy consumption with a standard load, fan-forced 0.69 kWh/cycle... -
Seite 139: Energy Saving
MENU STRUCTURE Volume 71 l Type of oven Built-In Oven Mass 34.0 kg IEC/EN 60350-1 - Household electric cooking appliances - Part 1: Ranges, ovens, steam ovens and grills - Methods for measuring performance. 13.2 Energy saving The appliance has features which help you save energy during everyday cooking. Make sure that the appliance door is closed when the appliance operates. -
Seite 140: Guarantee
MENU STRUCTURE Menu structure Assisted Cooking Cleaning Settings Step 1 Step 2 Step 3 Step 4 Step 5 O1 - O11 Adjust the value Select the Menu, Select the set‐ Confirm setting. Confirm setting. Settings. ting. and press Settings Time of day Change Display brightness 1 - 5... -
Seite 141: Environmental Concerns
Point of Service Morgenstrasse 131 3018 Bern Langgasse 10 9008 St. Gallen Am Mattenhof 4a/b 6010 Kriens Schlossstrasse 1 4133 Pratteln Comercialstrasse 19 7000 Chur Spare parts service Industriestrasse 10, 5506 Mägenwil, Tel. 0848 848 111 Specialist advice/Sale Badenerstrasse 587, 8048 Zürich, Tel. 044 405 81 11 Warranty For each product we provide a two-year guarantee from the date of purchase or delivery to the consumer (with a guarantee certificate, invoice or sales receipt serving as proof). - Seite 144 www.electrolux.com/shop...