
Verwandte Anleitungen für Blumfeldt 10041809


Inhaltszusammenfassung für Blumfeldt 10041809
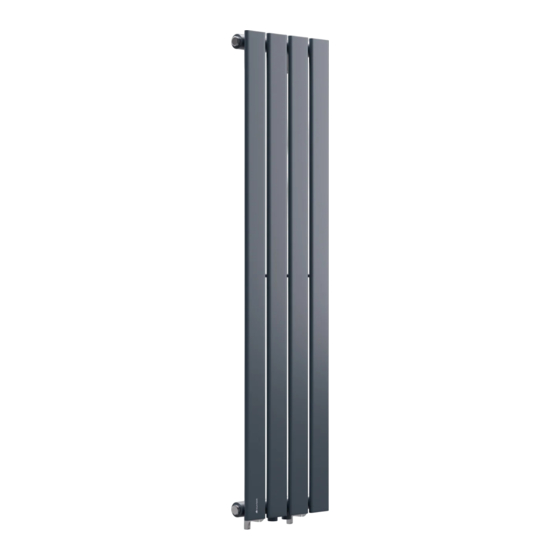
- Seite 1 Ontario Heizkörper Radiator Radiateur Radiador Radiatore 10041809 10041810 10041811 10041812 10041815...
-
Seite 3: Inhaltsverzeichnis
Nach der Installation 10 Reinigung und Pflege 10 Fehlersuche und Fehlerbehebung 10 Hersteller & Importeur (UK) 11 TECHNISCHE DATEN Artikelnummer Maße (H x B) 10041809 120 x 30 cm 10041810 120 x 30 cm 10041811 120 x 30 cm 10041812... -
Seite 4: Sicherheitshinweise
SICHERHEITSHINWEISE • Befolgen Sie die Installationsanweisungen sorgfältig, um sicherzustellen, dass das Gerät ordnungsgemäß an der Wand befestigt ist. • Um eine mögliche Brandgefahr zu vermeiden, ist es wichtig, dass das Gerät in Übereinstimmung mit den in der Anleitung angegebenen Vorgaben montiert wird. -
Seite 5: Erforderliche Werkzeuge
ERFORDERLICHE WERKZEUGE Schraubendreher Bleistift Verstellbarer Schraubenschlüssel Gummihammer Handschuhe Bandmaß Wasserwaage Elektrische Sauberer Lappen Bohrmaschine LIEFERUMFANG Entlüfter Blindstopfen Unterleg scheibe Silikon- (x1) (x3) (x8) Dichtung (x4) Abhängig von Ihrer Bestellung: Heizkörper Wandhalterung Mauerwerks dübel Lange Schraube (x1) (x4) (x8) (x8) -
Seite 6: Installation
INSTALLATION Schritt 1 Lassen Sie genügend Platz für den Einbau von Ventilen. • Positionieren Sie den Heizkörper an der gewünschten Stelle (orientieren Sie sich dabei an den Etiketten oben und unten) und markieren Sie vier gleiche Positionen für die Halterungen. •... - Seite 7 Schritt 2 • Bohren Sie Löcher in die Wand und setzen Sie Dübel ein. Hinweis: Für Zwischendecken oder Ständerwände können Sie in einem Baumarkt andere Befestigungen erwerben. Schritt 3 • Befestigen Sie die Halterungen so an der Wand, dass das runde Rohr auf der Rückseite des Heizkörpers waagerecht über den Halterungen sitzt.
- Seite 8 Schritt 4 Hinweis: Beachten Sie, dass die untere horizontale Schiene mit einem Umlenkblock versehen ist. Wickeln Sie PTFE-Band um Blindstopfen und Entlüftungsventil und schrauben Sie sie mit einem Schraubenschlüssel oben am Heizkörper fest. Tipp: Kleben Sie das PTFE- Band entgegengesetzt zur Einschraubrichtung der Ventile in den Heizkörper.
- Seite 9 Schritt 5 • Heben Sie den Heizkörper auf die Halterungen, so dass die Rohre auf der Rückseite des Heizkörpers waagerecht liegen, und schließen Sie die Ventile an die Hausinstallation an. Schritt 6 • Nachdem Sie die Ventile an die Hausinstallation angeschlossen haben, drehen Sie das Wasser auf und entlüften Sie den Heizkörper, um ihn mit Wasser zu füllen.
-
Seite 10: Nach Der Installation
NACH DER INSTALLATION • Verwenden Sie einen Schraubendreher, um den Entlüfter zu öffnen. Öffnen Sie das Ventil und lassen Sie das Wasser in den Heizkörper strömen. • Prüfen Sie alle Anschlüsse auf Dichtheit. • Wenn das Wasser aus dem Entlüfter austritt, befindet sich keine Luft mehr im Rohr. -
Seite 11: Hersteller & Importeur (Uk)
Leck am Heizkörper Die Ventilmutter ist Ziehen Sie die locker. Ventilmutter fest. Schweißfehler Tauschen Sie den Heizkörper aus. Pfeifgeräusche oder Der Heizkörper wurde Neuinstallation zischendes Wasser bei der Installation nicht korrekt ausgerichtet. Klirrendes Geräusch Der Heizkörper wurde Neuinstallation an einem Ort installiert, der keine Ausdehnung der Rohre zulässt. - Seite 13 After Installation 20 Cleaning and Care 20 Troubleshooting 20 Manufacturer & Importer (UK) 21 TECHNICAL DATA Item number Dimensions (H x W) 10041809 120 x 30 cm 10041810 120 x 30 cm 10041811 120 x 30 cm 10041812 120 x 45 cm...
-
Seite 14: Safety Instructions
SAFETY INSTRUCTIONS • Follow the installation instructions carefully to ensure that the unit is properly attached to the wall. • To avoid a possible fire hazard, it is important that the appliance is installed in accordance with the specifications given in the instructions . •... -
Seite 15: Required Tools
REQUIRED TOOLS Screwdriver Pencil Adjustable spanner Rubber mallet Gloves Tape measure Spirit level Electrical Clean rag drill SCOPE OF DELIVERY Venting valve Blanking plug Washer Silicone- (x1) (x3) (x8) seal (x4) Depending on your order: Radiator Wall mount Wall plug Long screw (x1) (x4) -
Seite 16: Installation
INSTALLATION Step 1 Leave enough space for the installation of valves. • Position the radiator at the desired location (orientate yourself by the labels above and below) and mark four equal positions for the brackets. • Before installation, place a painter's fleece on the floor to prevent the loss of small parts. - Seite 17 Step 2 • Drill holes in the wall and insert dowels. Note: For false ceilings or stud walls, you can purchase other fixings at a DIY store. Step 3 • Fix the brackets to the wall so that the round pipe on the back of the radiator sits horizontally above the brackets.
- Seite 18 Step 4 Note: Note that the lower horizontal rail is fitted with a deflection block. Wrap PTFE tape around the blanking plug and vent valve and screw them tight to the top of the radiator with a spanner. Tip: Stick the PTFE tape into the radiator in the opposite direction to the direction in which the...
- Seite 19 Step 5 • Lift the radiator onto the brackets so that the pipes on the back of the radiator are horizontal and connect the valves to the house wiring. Step 6 • After connecting the valves to the house plumbing, turn on the water and bleed the radiator to fill it with water.
-
Seite 20: After Installation
AFTER INSTALLATION • Use a screwdriver to open the air vent. Open the valve and let the water flow into the radiator. • Check all connections for leaks. • When the water comes out of the air vent, there is no more air in the pipe. •... -
Seite 21: Manufacturer & Importer (Uk)
Clanking noise The radiator has been New installation installed in a location that does not allow for expansion of the pipes. MANUFACTURER & IMPORTER (UK) Manufacturer: Chal-Tec GmbH, Wallstrasse 16, 10179 Berlin, Germany. Importer for Great Britain: Berlin Brands Group UK Ltd PO Box 1145 Oxford, OX1 9UW United Kingdom... -
Seite 23: Fiche Technique
Après l'installation 30 Nettoyage et entretien 30 Identification et résolution des problèmes 30 Fabricant et importateur (UK) 31 FICHE TECHNIQUE Numéro d'article Dimensions (H x L) 10041809 120 x 30 cm 10041810 120 x 30 cm 10041811 120 x 30 cm 10041812... -
Seite 24: Consignes De Sécurité
CONSIGNES DE SÉCURITÉ • Suivez attentivement les instructions d'installation pour vous assurer une fixation correcte de l'appareil au mur. • Afin d'éviter un éventuel risque d'incendie, il est important que l'appareil soit monté conformément aux spécifications indiquées dans le manuel. •... -
Seite 25: Outils Nécessaires
OUTILS NÉCESSAIRES Tournevis Crayon Réglable Clé plate Maillet en caoutchouc Gants Mètre à ruban Niveau à bulle Électrique Chiffon propre Perceuse CONTENU DE L'EMBALLAGE Soupape de Bouchon Rondelle Joint purge obturateur (x8) d'étanchéité (x1) (x3) en silicone (x4) En fonction de votre commande : Radiateur Support mural... -
Seite 26: Installation
INSTALLATION Étape 1 Laissez suffisamment d'espace pour l'installation des vannes. • Positionnez le radiateur à l'endroit souhaité (repérez vous grâce aux étiquettes en haut et en bas) et marquez quatre positions identiques pour les supports. • Avant l'installation, placez une toile de rénovation sur le sol afin d'éviter de perdre de petites pièces. - Seite 27 Étape 2 • Percez des trous dans le mur et insérez des chevilles. Remarque : pour les faux plafonds ou les parois à montants, vous pouvez acheter d'autres fixations dans un magasin de bricolage. Étape 3 • Fixez les supports au mur de manière à ce que le tube rond à l'arrière du radiateur soit à...
- Seite 28 Étape 4 Remarque : Notez que le rail horizontal inférieur est muni d'une poulie de renvoi. Enroulez du ruban PTFE autour du bouchon obturateur et de la soupape de purge et vissez-les en haut du radiateur à l'aide d'une clé. Conseil : collez le ruban PTFE dans le radiateur dans le sens opposé...
- Seite 29 Étape 5 • Soulevez le radiateur sur les supports de manière à ce que les tuyaux à l'arrière du radiateur soient horizontaux, puis raccordez les vannes à l'installation domestique. Étape 6 • Après avoir raccordé les vannes à l'installation domestique, ouvrez l'eau et purgez le radiateur pour le remplir d'eau.
-
Seite 30: Après L'installation
APRÈS L'INSTALLATION • Utilisez un tournevis pour ouvrir la soupape de purge. Ouvrez la vanne et laissez l'eau s'écouler dans le radiateur. • Vérifier l'étanchéité de tous les raccords. • Lorsque l'eau sort de la soupape de purge, il n'y a plus d'air dans le tuyau. •... -
Seite 31: Fabricant Et Importateur (Uk)
Fuite au niveau du L'écrou de la valve est Serrez l'écrou de la radiateur desserré. valve. Défauts de soudure Remplacez le radiateur. Sifflements ou Le radiateur n'a pas été Réinstallation sifflements d'eau correctement aligné lors de l'installation. Bruit de cliquetis Le radiateur a été... -
Seite 33: Datos Técnicos
Limpieza y cuidado 40 Detección y reparación de anomalías 40 Fabricante e importador (Reino Unido) 41 DATOS TÉCNICOS Número del artículo Medidas (alto x ancho) 10041809 120 x 30 cm 10041810 120 x 30 cm 10041811 120 x 30 cm... -
Seite 34: Indicaciones De Seguridad
INDICACIONES DE SEGURIDAD • Siga con atención las instrucciones de instalación para asegurarse de que la unidad quede correctamente instalada en la pared. • Para evitar un posible riesgo de incendio, es importante que el aparato se instale de acuerdo con las especificaciones indicadas en las instrucciones . •... -
Seite 35: Herramientas Necesarias
HERRAMIENTAS NECESARIAS Destornillador Lápiz Llave inglesa Llave inglesa Mazo de goma Guantes Cinta métrica Nivel de burbuja Taladro Trapo limpio Taladro CONTENIDO DEL ENVÍO Ventilación Tapón ciego Arandela Junta de de aire (x3) (x8) silicona (x1) (x4) En función de su pedido: Radiador Soporte de pared Taco de expansión... - Seite 36 INSTALACIÓN Paso 1 Deje espacio suficiente para la instalación de válvulas. • Coloque el radiador en el lugar deseado (use las etiquetas superiores e inferiores como guía) y marque cuatro posiciones iguales para el soporte. • Antes de la instalación, coloque una tela de pintor en el suelo para evitar la pérdida de piezas pequeñas.
- Seite 37 Paso 2 • Perfora la pared e inserta los tacos. Nota: para los falsos techos o las paredes con tabiques, puede adquirir sujeción adicional en la ferretería. Paso 3 • Fije los soportes a la pared de manera que el tubo redondo de la parte posterior del radiador quede en posición horizontal sobre ellos.
- Seite 38 Paso 4 Nota: tenga en cuenta que la aleta horizontal inferior está provista de un bloqueo de desviación. Envuelva el tapón ciego y la válvula de ventilación con cinta PTFE y atorníllelos a la parte superior del radiador con una llave. Consejo: pegue la cinta PTFE en el radiador en la dirección opuesta a la de...
- Seite 39 Paso 5 • Coloque el radiador sobre los soportes de manera que los tubos de la parte posterior de este queden en posición horizontal y conecte las válvulas a la instalación doméstica. Paso 6 • Tras conectar las válvulas a la instalación doméstica, abra el agua y airee el radiador para llenarlo de agua.
-
Seite 40: Después De La Instalación
DESPUÉS DE LA INSTALACIÓN • Utilice un destornillador para abrir el orificio de ventilación. Abra la válvula para que el agua fluya al radiador. • Compruebe que ninguna de las conexiones tiene fugas. • Cuando el agua salga por el respiradero, no quedará aire en la tubería. •... - Seite 41 Ruidos de silbidos o El radiador no se alineó Nueva instalación siseos del agua correctamente durante la instalación. Tintineo El radiador se ha Nueva instalación instalado en un lugar que no permite la expansión de las tuberías. FABRICANTE E IMPORTADOR (REINO UNIDO) Fabricante: Chal-Tec GmbH, Wallstraße 16, 10179 Berlín, Alemania.
- Seite 43 Dopo l’installazione 50 Pulizia e manutenzione 50 Ricerca e correzione degli errori 50 Produttore e importatore (UK) 51 DATI TECNICI Numero articolo Dimensioni (H x L) 10041809 120 x 30 cm 10041810 120 x 30 cm 10041811 120 x 30 cm 10041812...
-
Seite 44: Indicazioni Per La Sicurezza
INDICAZIONI PER LA SICUREZZA • Seguire attentamente le istruzioni di installazione per fissare correttamente l'unità alla parete. • Per evitare un possibile rischio di incendio, è importante che l'apparecchio sia installato in conformità alle indicazioni fornite nelle istruzioni . • Il riscaldatore è... -
Seite 45: Strumenti Necessari
STRUMENTI NECESSARI Cacciavite Matita Regolabile Chiave inglese Mazzuolo in gomma Guanti Metro a nastro Livella ad acqua Elettrica Panno pulito Perforatrice VOLUME DI CONSEGNA Bocchetta Vite cieca Rondella Guarnizione d'aria (x3) (x8) in silicone (x1) (x4) A seconda del prodotto ordinato: Radiatore Montaggio a... - Seite 46 INSTALLAZIONE 1° passaggio Lasciare spazio sufficiente per l'installazione di valvole. • Posizionare il radiatore dove desiderato (orientarsi utilizzando le etichette) e segnare quattro posizioni uguali per le staffe. • Prima dell'installazione, posizionare un telo protettivo sul pavimento per evitare di perdere i componenti più piccoli. •...
- Seite 47 2° passaggio • Praticare dei fori nella parete e inserire i tasselli. Nota: per i controsoffitti o le pareti con tubolari, è possibile acquistare altri elementi fissanti presso un negozio di bricolage. 3° passaggio • Fissare le staffe alla parete affinché il tubo rotondo sul retro del radiatore si trovi orizzontalmente al di sopra delle stesse.
- Seite 48 4° passaggio Nota: la guida orizzontale inferiore è dotata di un blocco di deviazione. Avvolgere il nastro di PTFE intorno al tappo cieco e alla valvola di sfiato e avvitarli saldamente alla parte superiore del radiatore con una chiave. Suggerimento: fissare il nastro di PTFE nel radiatore in direzione opposta a quella di...
- Seite 49 5° passaggio • Sollevare il radiatore sulle staffe affinché i tubi sul retro siano orizzontali e collegare le valvole all'impianto elettrico dell'abitazione. 6° passaggio • Dopo aver collegato le valvole all'impianto domestico, aprire l'acqua e spurgare il radiatore per riempirlo d'acqua. Nota: dopo l'installazione, riempire il sistema con il liquido inibitore.
-
Seite 50: Dopo L'installazione
DOPO L'INSTALLAZIONE • Utilizzare un cacciavite per aprire lo sfiato dell'aria. Aprire la valvola e far fluire l'acqua nel radiatore. • Controllare che i collegamenti non presentino perdite. • Quando l'acqua esce dallo sfiato, significa che nel tubo non è più presente aria. - Seite 51 Rumori di fischi o sibili Il radiatore non Nuova installazione d'acqua è stato allineato correttamente durante l'installazione. Rumore di Il radiatore è stato Nuova installazione sferragliamento installato in una posizione che non consente l'espansione dei tubi. PRODUTTORE E IMPORTATORE (UK) Produttore: Chal-Tec GmbH, Wallstraße 16, 10179 Berlino, Germania.