Kapitel
Inhaltsverzeichnis
Fehlerbehebung

Verwandte Anleitungen für Blumfeldt Tallheo


Inhaltszusammenfassung für Blumfeldt Tallheo
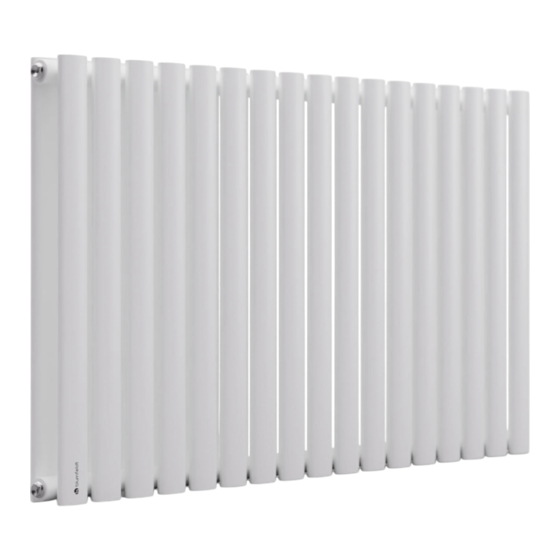
- Seite 1 Tallheo Heizkörper Radiator Radiateur Radiador Radiatore 10045402 10045403 10045404 10045405 10045406 10045407 10045408 10045409 10045410 10045411 10045412 10045413 10045414 10045415 10045416...
-
Seite 3: Inhaltsverzeichnis
Sehr geehrter Kunde, wir gratulieren Ihnen zum Erwerb Ihres Gerätes. Lesen Sie die folgenden Hinweise sorgfältig durch und befolgen Sie diese, um möglichen Schäden vorzubeugen. Für Schäden, die durch Missachtung der Hinweise und unsachgemäßen Gebrauch entstehen, übernehmen wir keine Haftung. Scannen Sie den folgenden QR-Code, um Zugriff auf die aktuellste Bedienungsanleitung und weitere Informationen rund um das Produkt zu erhalten: INHALTSVERZEICHNIS... -
Seite 4: Sicherheitshinweise
SICHERHEITSHINWEISE • Befolgen Sie die Installationsanweisungen sorgfältig, um sicherzustellen, dass das Gerät ordnungsgemäß an der Wand befestigt ist. • Um eine mögliche Brandgefahr zu vermeiden, ist es wichtig, dass das Gerät in Übereinstimmung mit den in der Anleitung angegebenen Vorgaben montiert wird. -
Seite 5: Erforderliche Werkzeuge
ERFORDERLICHE WERKZEUGE Schraubendreher Bleistift Verstellbarer Schraubenschlüssel PTFE-Band Handschuhe Bandmaß Wasserwaage Elektrische Malervlies Bohrmaschine LIEFERUMFANG Heizkörper (1x) Wandhalterung (4x) Silikondichtung (4x) Dübel (8x) Lange Schraube (8x) 57 mm x 10 mm Entlüfter (1x) Blindstopfen (3x) - Seite 6 Heizkörper Tallheo Einfach Doppelt...
-
Seite 7: Installation
INSTALLATION Vorbereitung • Überprüfen Sie, ob der Lieferumfang vollständig ist. • Stellen Sie sicher, dass der Heizkörper so positioniert ist, dass er leicht an das Zentralheizungssystem angeschlossen werden kann. Schritt 1 Hinweis: Diese Anleitung kann sowohl für senkrechte als auch für waagerechte Heizkörper verwendet... - Seite 8 Schritt 2 • Bohren Sie ein Loch und setzen Sie einen Dübel ein. Verwenden Sie für die Bohrmaschine einen Bohrer mit einem Durchmesser von 10 mm. Hinweis: Für Zwischendecken oder Ständerwände können Sie in einem Baumarkt andere Befestigungen erwerben. Schritt 3 •...
- Seite 9 Schritt 4 Hinweis: Beachten Sie, dass die untere horizontale Schiene mit einem Umlenkblock versehen ist. Wickeln Sie PTFE-Band um Blindstopfen und Entlüftungsventil und schrauben Sie sie mit einem Schraubenschlüssel oben am Heizkörper fest. Tipp: Kleben Sie das PTFE- Band entgegengesetzt zur Einschraubrichtung der Ventile in den Heizkörper.
- Seite 10 Schritt 5 • Hängen Sie den Heizkörper an die Wandhalterungen und schließen Sie ihn an Ihr Zentralheizungssystem an. Option • Optional können Sie den Heizkörper auch über die Unterseite an Ihr Zentralheizungssystem anschließen.
-
Seite 11: Nach Der Installation
Schritt 6 • Entlüften Sie eventuelle Luftblasen nach dem Anschließen des Heizkörpers mit dem Entlüftungsstopfen. Hinweis: Füllen Sie Ihr System nach dem Einbau mit Inhibitorflüssigkeit auf. NACH DER INSTALLATION • Verwenden Sie einen Schraubendreher, um den Entlüfter zu öffnen. Öffnen Sie das Ventil und lassen Sie das Wasser in den Heizkörper strömen. -
Seite 12: Fehlersuche Und Fehlerbehebung
FEHLERSUCHE UND FEHLERBEHEBUNG Wenn Ihr Heizkörper nicht funktioniert, kann Ihnen die Kenntnis grundlegender Fehlerbehebungsmaßnahmen bei Heizkörpern den Stress und die Schwierigkeiten ersparen, die ein nicht funktionierender Heizkörper mit sich bringt. Hier finden Sie einen Leitfaden zur Lösung der häufigsten Probleme im Zusammenhang mit elektrischen Heizkörpern. Problem Ursache Lösung... - Seite 13 Dear customer, Congratulations on your purchase. Please read the following instructions carefully and follow them to prevent potential damage. We accept no liability for damage caused by disregarding the instructions or improper use. Please scan the QR code to access the latest operating instructions and for further information about the product.
-
Seite 14: Safety Instructions
SAFETY INSTRUCTIONS • Follow the installation instructions carefully to ensure that the unit is properly attached to the wall. • To avoid a possible fire hazard, it is important that the appliance is installed in accordance with the specifications given in the instructions . •... -
Seite 15: Required Tools
REQUIRED TOOLS Screwdriver Pencil Adjustable Spanner PTFE tape Gloves Tape measure Spirit level Electrical Painter's fleece Drill SCOPE OF DELIVERY Radiator (1x) Wall mount (4x) Silicone seal (4x) Dowel (8x) Long screw (8x) 57 mm x 10 mm Air vent (1x) Blanking plug (3x) - Seite 16 Tallheo radiator Single Double...
-
Seite 17: Installation
INSTALLATION Preparation • Check whether the scope of delivery is complete. • Make sure the radiator is positioned so that it can be easily connected to the central heating system. Step 1 Note: These instructions can be used for both vertical and horizontal radiators. - Seite 18 Step 2 • Drill a hole and insert a dowel. Use a 10 mm diameter drill bit for the power drill. Note: For false ceilings or stud walls, you can purchase other fixings at a DIY store. Step 3 • Insert the screw through the silicone seal, then through the wall mount and into the dowel and screw the mount into place.
- Seite 19 Step 4 Note: Note that the lower horizontal rail is fitted with a deflection block. Wrap PTFE tape around the blanking plug and vent valve and screw them tight to the top of the radiator with a spanner. Tip: Stick the PTFE tape into the radiator in the opposite direction to the direction in which the valves are...
- Seite 20 Step 5 • Hang the radiator on the wall brackets and connect it to your central heating system. Option • Optionally, you can also connect the radiator through the bottom to your central heating system.
-
Seite 21: After Installation
Step 6 • After connecting the radiator, vent any air bubbles with the vent plug. Note: Fill your system with inhibitor fluid after installation. AFTER INSTALLATION • Use a screwdriver to open the air vent. Open the valve and let the water flow into the radiator. -
Seite 22: Troubleshooting
TROUBLESHOOTING If your radiator is not working, knowing basic radiator troubleshooting can save you the stress and hassle that a non-working radiator can bring. Here, you will find a guide to solving the most common problems associated with electric radiators. Problem Cause Solution... -
Seite 23: Fiche Technique
Cher client, chère cliente, Toutes nos félicitations pour l’acquisition de ce nouvel appareil. Lisez attentivement les consignes suivantes et suivez-les pour éviter d'éventuels dommages. Nous ne saurions être tenus pour responsables des dommages dus au non-respect des consignes et à la mauvaise utilisation de l’appareil. -
Seite 24: Consignes De Sécurité
CONSIGNES DE SÉCURITÉ • Suivez attentivement les instructions d'installation pour vous assurer une fixation correcte de l'appareil au mur. • Afin d'éviter un éventuel risque d'incendie, il est important que l'appareil soit monté conformément aux spécifications indiquées dans le manuel. •... -
Seite 25: Outils Nécessaires
OUTILS NÉCESSAIRES Tournevis Crayon Réglable Clé plate Ruban PTFE Gants Mètre à ruban Niveau à bulle Électrique Toile de protection Perceuse CONTENU DE L'EMBALLAGE Radiateur (1x) Support mural (4x) Joint en silicone (4x) Chevilles (8x) Vis longues (8x) 57 mm x 10 mm Bouchon de purge (1x) Bouchon obturateur (3x) - Seite 26 Radiateur Tallheo Simple Double...
-
Seite 27: Installation
INSTALLATION Préparatifs • Vérifiez que le contenu de la livraison est complet. • Assurez-vous que le radiateur est positionné de manière à pouvoir être facilement raccordé au système de chauffage central. Étape 1 Remarque : Ces instructions servent aussi bien pour les radiateurs ver- ticaux que pour les radiateurs... - Seite 28 Étape 2 • Percez un trou et insérez une cheville. Utilisez un foret de 10 mm de diamètre avec votre perceuse. Remarque : pour les faux plafonds ou les parois à montants, vous pouvez acheter d'autres fixations dans un magasin de bricolage. Étape 3 •...
- Seite 29 Étape 4 Remarque : Notez que le rail horizontal inférieur est muni d'une poulie de renvoi. Enroulez du ruban PTFE autour du bouchon obturateur et de la soupape de purge et vissez-les en haut du radiateur à l'aide d'une clé. Conseil : collez le ruban PTFE dans le radiateur dans le sens opposé...
- Seite 30 Étape 5 • Accrochez le radiateur sur les supports muraux et connectez-le à votre système de chauffage central. Facultatif • En option, vous pouvez également raccorder le radiateur à votre sys- tème de chauffage central par le dessous.
-
Seite 31: Après L'installation
Étape 6 • Après avoir raccordé le radiateur, évacuez les éventuelles bulles d'air avec le bouchon de purge. Remarque : remplissez votre système de liquide inhibiteur après l'installation. APRÈS L'INSTALLATION • Utilisez un tournevis pour ouvrir la soupape de purge. Ouvrez la vanne et laissez l'eau s'écouler dans le radiateur. -
Seite 32: Identification Et Résolution Des Problèmes
IDENTIFICATION ET RÉSOLUTION DES PROBLÈMES Si votre radiateur ne fonctionne pas, connaître les procédures de dépannage de base des radiateurs peut vous éviter le stress et les difficultés qu'engendre un radiateur qui ne fonctionne pas. Vous trouverez ici un guide pour résoudre les problèmes les plus courants liés aux radiateurs électriques. -
Seite 33: Datos Técnicos
Estimado cliente: Le felicitamos por la adquisición de este producto. Lea atentamente el siguiente manual y siga cuidadosamente las instrucciones de uso con el fin de evitar posibles daños. La empresa no se responsabiliza de los daños ocasionados por un uso indebido del producto o por haber desatendido las indicaciones de seguridad. -
Seite 34: Indicaciones De Seguridad
INDICACIONES DE SEGURIDAD • Siga atentamente las instrucciones de instalación para asegurarse de que el aparato queda bien fijado a la pared. • Para evitar un posible riesgo de incendio, es importante que el aparato se instale de acuerdo con las especificaciones indicadas en las instrucciones . •... -
Seite 35: Herramientas Necesarias
HERRAMIENTAS NECESARIAS Destornillador Lápiz Llave inglesa Llave inglesa Cinta PTFE Guantes Cinta métrica Nivel de burbuja Taladro Fieltro de pintor eléctrico CONTENIDO DEL ENVÍO Radiador (1x) Soporte de pared (4 x) Junta de silicona (4 x) Taco (8 x) Tornillo largo (8 x) 57 mm x 10 mm Purgador (1 x) Tapón ciego (3 x) - Seite 36 Radiador Tallheo Simple Doble...
- Seite 37 INSTALACIÓN Preparación • Compruebe que el volumen de suministro esté completo. • Asegúrese de que el radiador está colocado de forma que pueda conectarse fácilmente al sistema de calefacción central. Paso 1 Nota: Estas instruc- ciones sirven tanto para radiadores verticales como horizontales.
- Seite 38 Paso 2 • Taladre un agujero e inserte un taco. Utilice una broca de 10 mm de diámetro para el taladro. Nota: para los falsos techos o las paredes con tabiques, puede adquirir sujeción adicional en la ferretería. Paso 3 •...
- Seite 39 Paso 4 Nota: tenga en cuenta que la aleta horizontal inferior está provista de un bloqueo de desviación. Envuelva el tapón ciego y la válvula de ventilación con cinta PTFE y atorníllelos a la parte superior del radiador con una llave. Consejo: pegue la cinta PTFE en el radiador en la dirección opuesta a la de...
- Seite 40 Paso 5 • Cuelgue el radiador en los soportes murales y conéctelo a su sistema de calefacción central. Opción • Si lo desea, también puede conectar el radiador a su sistema de calefac- ción central a través de la parte inferior.
-
Seite 41: Después De La Instalación
Paso 6 • Después de conectar el radiador, purgue las burbujas de aire con el tapón de purga. Nota: llene el sistema con líquido inhibidor tras la instalación. DESPUÉS DE LA INSTALACIÓN • Utilice un destornillador para abrir el orificio de ventilación. Abra la válvula para que el agua fluya al radiador. -
Seite 42: Detección Y Reparación De Anomalías
DETECCIÓN Y REPARACIÓN DE ANOMALÍAS De no funcionar el radiador, saber cómo solucionar problemas a nivel básico puede ahorrarle el estrés y la molestia que conlleva un radiador inoperativo. Aquí encontrará una guía de soluciones a las anomalías más comunes de los radiadores eléctricos. - Seite 43 Gentile cliente, La ringraziamo per l'acquisto del dispositivo. La preghiamo di leggere attentamente le seguenti indicazioni e di seguirle per evitare eventuali danni. Non ci assumiamo alcuna responsabilità per danni scaturiti da una mancata osservanza delle indicazioni relative alla sicurezza e da un uso improprio del dispositivo. Scansionare il codice QR seguente per accedere al manuale d'uso più...
-
Seite 44: Avvertenze Di Sicurezza
AVVERTENZE DI SICUREZZA • Seguire attentamente le istruzioni di installazione per fissare correttamente il dispositivo alla parete. • Per evitare un possibile rischio di incendio, è importante che il dispositivo sia installato rispettando le indicazioni fornite nelle istruzioni . • Il radiatore è... -
Seite 45: Attrezzi Necessari
ATTREZZI NECESSARI Cacciavite Matita Chiave regolabile Nastro PTFE Guanti Metro a nastro Livella ad acqua Trapano elettrico Telo protettivo VOLUME DI CONSEGNA Radiatore (1x) Supporti a parete (4x) Guarnizioni in silicone (4x) Tasselli (8x) Viti lunghe (8x) 57 mm x 10 mm Sfiato dell'aria (1x) Tappi (3x) - Seite 46 Radiatore Tallheo Semplice Doppio...
- Seite 47 INSTALLAZIONE Preparazione • Controllare che il volume di consegna sia completo. • Assicurarsi che il radiatore sia posizionato in modo da poter essere collegato all'impianto di riscaldamento centrale. 1° passaggio Nota: queste istruzioni possono essere utilizzate per i radiatori verticali e per quelli orizzontali.
- Seite 48 2° passaggio • Realizzare un foro e inserire un tassello. Utilizzare un trapano con una punta del diametro di 10 mm. Nota: per i controsoffitti o le pareti con tubolari, è possibile acquistare altri elementi fissanti presso un negozio di bricolage. 3°...
- Seite 49 4° passaggio Nota: la guida orizzontale inferiore è dotata di un blocco di deviazione. Avvolgere il nastro di PTFE intorno al tappo cieco e alla valvola di sfiato e avvitarli saldamente alla parte superiore del radiatore con una chiave. Suggerimento: fissare il nastro di PTFE nel radiatore in direzione opposta a quella di...
- Seite 50 5° passaggio • Agganciare il radiatore ai supporti a parete e collegarlo all'impianto centrale di riscaldamento. Opzione • Opzionalmente, è possibile collegare il radiatore all'impianto centrale di riscaldamento anche dal lato inferiore.
-
Seite 51: Dopo L'installazione
6° passaggio • Sfiatare eventuali bolle d'aria con gli appositi tappi dopo aver collegato il radiatore. Nota: dopo l'installazione, riempire l'impianto con il liquido inibitore. DOPO L'INSTALLAZIONE • Utilizzare un cacciavite per aprire lo sfiato dell'aria. Aprire la valvola e far fluire l'acqua nel radiatore. -
Seite 52: Ricerca E Correzione Degli Errori
RICERCA E CORREZIONE DEGLI ERRORI Se il radiatore non funziona, la capacità di risolvere alcuni semplici problemi può evitare stress e fastidi. Qui è disponibile una guida per risolvere i problemi più comuni legati ai radiatori. Problema Causa Soluzione Punti freddi sul L'acqua non scorre Assicurarsi che non vi radiatore...