Inhaltsverzeichnis
Werbung
Verfügbare Sprachen
Verfügbare Sprachen
Quicklinks
Werbung
Inhaltsverzeichnis

Verwandte Anleitungen für mundoclima MUSER-12-H12


Inhaltszusammenfassung für mundoclima MUSER-12-H12
- Seite 1 MUSER-12-H12 Manual de instalación, usuario y seguridad Installation, owner and safety manual Manuel d'installation, l'utilisateur et de sécurité Benutzer- und Installationshandbuch und Sicherheitshinweise Manual de instalação, do utilizador e de segurança CL20101 www.mundoclima.com ES-EN-FR-DE-PT...
- Seite 3 Manual de instalación, usuario y seguridad........... Installation, owner and safety manual............Manuel d'installation, l'utilisateur et de sécurité..........Benutzer- und Installationshandbuch und Sicherheitshinweise..... Manual de instalação, do utilizador e de segurança........
- Seite 5 Manual de instalación, usuario y seguridad Lea este manual cuidadosamente antes de PRECAUCIÓN: Riesgo de Incendio instalar y usar su nuevo aire acondicionado. Asegúrese de guardar este manual como referencia futura.
-
Seite 7: Instrucciones De Seguridad
INSTRUCCIONES DE SEGURIDAD ¡IMPORTANTE! LOS AIRES ACONDICIONADOS DEBEN ALMACENARSE Y TRANSPORTARSE SIEMPRE EN POSICIÓN VERTICAL, YA QUE DE LO CONTRARIO PUEDEN PRODUCIRSE DAÑOS IRREPARABLES EN EL COMPRESOR; EN CASO DE DUDA, SE ACONSEJA ESPERAR AL MENOS 24 HORAS TRAS LA INSTALACIÓN ANTES DE PONER EN MARCHA LA UNIDAD. - Seite 8 • El R290 tiene un bajo PCA (Potencial de Calentamiento Global) de 3. • El acondicionador de aire contiene unos 290 g de gas refrigerante R290. • No instale o almacene en un espacio sin ventilación con una superficie inferior a 15 m unidad.
-
Seite 9: Resumen Del Producto
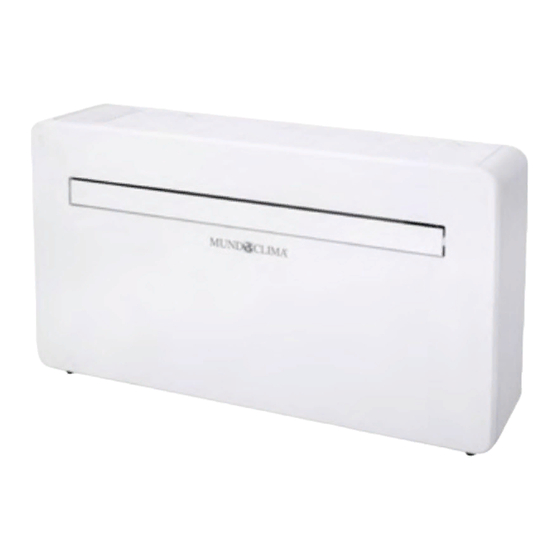
RESUMEN DEL PRODUCTO DIAGRAMA DEL PRODUCTO VISTA FRONTAL ENTRADA DE AIRE PANEL DE CONTROL LAMA PANEL DELANTERO VISTA TRASERA SOPORTES PARA COLGAR EN LA PARED PANEL TRASERO ENTRADA DE AIRE SALIDA DE AIRE TUBO DE DRENAJE... -
Seite 10: Características
CARACTERÍSTICAS Funcionamiento sencillo. Función auto-evaporativa con tecnología de ahorro de energía. Un diseño elegante que se adapta perfectamente a cualquier estilo de hogar. Pantalla LED brillante-indica la temperatura y el modo actual. Función de temporizador de encendido/apagado permite elegir cuándo funciona la unidad. Control de la aplicación WIFI que proporciona una funcionalidad adicional. -
Seite 11: Herramientas Necesarias
INSTALACIÓN HERRAMIENTAS NECESARIAS NIVEL TALADRO BROCA CORONA 180 mm CINTA MÉTRICA CÚTER BROCA HORMIGÓN 8 mm LÁPIZ BROCA HORMIGÓN 25 mm ANTES DE COMENZAR LA INSTALACIÓN, ASEGÚRESE DE QUE DISPONE DE TODO EL EQUIPO ADECUADO Y DE QUE COMPRENDE LOS PASOS DE LA INSTALACIÓN. EN CASO DE DUDA, SE DEBE SOLICITAR ASESORAMIENTO PROFESIONAL. - Seite 12 INSTALACIÓN Este aparato debe instalarse en una pared exterior, ya que ventila directamente por su parte trasera, y asegúrese de que la pared es plana, sólida y fiable. Deje al menos 10 cm de espacio a la izquierda, a la derecha y a la base de la máquina.
- Seite 13 Enrolle las láminas de plástico de ventilación en forma de tubo e introdúzcalas desde el interior en los agujeros previamente realizados. Asegú- rese de que los tubos quedan a ras de la pared interior. Salga y recorte el exceso de tubo de ventilación con un cuchillo afila- do, manteniendo el borde lo más limpio posible.
- Seite 14 Una vez que las cadenas estén colocadas y aseguradas, se debe eliminar el exceso de cadena cortándola. Levante la unidad en la pared, alinee los agujeros para colgar con los ganchos del riel para colgar y apoye suavemente la unidad en su lugar.
-
Seite 15: Panel De Control
OPERACIÓN PANEL DE CONTROL Pantalla digital Suministro de aire Refrigeración Velocidad Secado Silencio Calefacción Temporizador Aumentar/ Disminuir Encendido/Apagado Velocidad Modo CONTROL REMOTO El aire acondicionado se puede controlar con el mando a distancia. Se necesitan dos pilas AAA. NOTA: En la siguiente página encontrará más detalles sobre las funciones. Pulse el botón POWER para encender o apagar la unidad. - Seite 16 FUNCIONES Pulse "POWER" para encender o apagar la unidad. POWER Pulse para cambiar entre los 4 modos diferentes. En la pantalla aparecerá el símbolo del modo seleccionado en ese momento. La función de refrigeración permite al aire acondicionado enfriar la habitación y, al mismo tiempo, reducir la humedad del aire.
- Seite 17 Hay un retraso de 3 minutos en el encendido. Para proteger la vida útil del compresor y de los PROTECCIÓN componentes electrónicos, no encienda el aparato durante al menos 5 minutos después de haberlo COMPRESOR apagado. CONFIGURACIÓN DE WIFI Y FUNCIONES INTELIGENTES CONFIGURACIÓN WIFI ANTES DE EMPEZAR lAsegúrese de que su router proporciona una conexión estándar de 2,4 GHz.
- Seite 18 CAMBIAR ENTRE LOS TIPOS DE CONEXIÓN Para cambiar la unidad entre los dos modos de conexión WiFi, mantenga pulsado el botón de veloci- dad durante 3 segundos. REGISTRESE EN LA APP 1. Pulse el botón de registro en la 2. Lea la política de privacidad y pul- 3.
- Seite 19 CONFIGURAR SU CASA DENTRO DE LA APLICACIÓN SMART LIFE está diseñado para que pueda funcionar con un gran número de dispositivos inteli- gentes compatibles dentro de su hogar. También se puede configurar para que funcione con varios dispositivos en diferentes casas. Así, durante el proceso de configuración, la aplicación requiere que se creen diferentes áreas y se les asigne un nombre para facilitar la gestión de todos los dispositivos.
- Seite 20 CONEXIÓN MEDIANTE CONEXIÓN RÁPIDA Antes de iniciar la conexión, asegúrese de que la unidad está en modo de espera, con la luz WIFI parpadeando dos veces por segundo. En caso contrario, siga las instrucciones para cambiar el modo de conexión. Asegúrate también de que su teléfono está conectado a la red WiFi. (Aconsejamos desactivar los datos móviles durante la configuración) 1.
- Seite 21 CONEXIÓN EN MODO AP (MÉTODO ALTERNATIVO) Antes de iniciar la conexión, asegúrese de que la unidad está en modo de espera, con la luz del WiFi parpadeando una vez cada tres segundos. Si no es así, siga las instrucciones para cambiar el modo de conexión WiFi.
-
Seite 22: Pantalla De Inicio
CONTROLAR EL DISPOSITIVO A TRAVÉS DE LA APLICACIÓN PANTALLA DE INICIO Añadir dispositivo: Añade un nuevo dispositivo en la APP y sigue el proce- Cambie de casa "Home": Puede so de configuración . cambiar entre ellos si ha creado más de un hogar. - Seite 23 PANTALLA DEL DISPOSITIVO La pantalla del aparato es la principal pantalla de control del acondicionador de aire y permite acceder a los controles para modificar las funciones y los ajustes. Edita el nombre: Sirve para cambiar el Hacia atrás: nombre del aire acondicionado. Vuelve a la pantalla de inicio Temperatura ambiente deseada: Pantalla la temperatura ambiente deseada.
- Seite 24 ESCENAS INTELIGENTES Las escenas inteligentes son una potente herramienta que ofrece la opción de personalizar la operación del aire acondicionado basándose tanto en las condiciones de la habitación como en las influencias ex- ternas. Esto da al usuario la opción de especificar acciones mucho más inteligentes. Se dividen en dos categorías: Escena y Automatización.
- Seite 25 6. Una vez añadidas todas las funciones necesarias, pulse el botón “Guardar” en la esquina superior derecha para finalizar y guardar su nueva Escena. AUTOMATIZACIÓN La automatización permite establecer una acción automática para el dispositivo. Esto puede ser provocado por la hora, la temperatura interior, la humedad de la habitación, las con- diciones meteorológicas y una serie de otras influencias.
- Seite 26 6. Elija la función, y luego pulse la flecha en la esquina superior izquierda, para volver a la pantalla anterior. La pestaña de perfil le da la opción de editar tanto sus datos, como de utilizar las funciones añadidas de la unidad. CAMBIAR EL NOMBRE DE SU DISPOSITIVO En cualquiera de las pantallas del dispositivo se puede acceder a “otros ajus- tes”, pulsando los tres puntos de la esquina superior derecha.
-
Seite 27: Localización De Averías
INTEGRACIÓN Esto permite que la unidad se integre con su hardware domótico favorito, como Google Home y Amazon Echo. Seleccione "Más servicios", puede integrarse con otros servicios, como asistentes de voz, por favor, consulte la imagen de la izquierda. LOCALIZACIÓN DE AVERÍAS No repare ni desmonte el aire acondicionado. -
Seite 28: Códigos De Error
Acerque el control remoto al aire acondi- El mando a distancia no está alineado con cionado y asegúrese de que esté orientado la dirección del mando-receptor del man- El mando a distancia no hacia el receptor del aparato. do a distancia. funciona. - Seite 29 Instalación (espacio) - Que la instalación de tuberías se reduzca al mínimo. - Dicha tubería deberá estar protegida de daños físicos. - Donde las tuberías de refrigerante deberán cumplir con las regulaciones nacionales de gas. - Que las conexiones mecánicas sean accesibles para fines de mantenimiento. - En los casos que requieran ventilación mecánica, las aberturas de ventilación deberán mantenerse libres de obstrucciones.
- Seite 30 La carga máxima de refrigerante en la habitación se ajustará a lo siguiente: (5/4) Máx para instalar un equipo con carga de refrigerante o la superficie mínima requerida M(kg) se ajustará a lo siguiente: (5/4) donde es la carga máxima permitida en una habitación, en kg; M es la cantidad de carga de refrigerante en el aparato, en kg;...
- Seite 31 Esta fórmula no puede utilizarse para refrigerantes de menos de 42 kg/kmol. Algunos ejemplos de los resultados de los cálculos según la fórmula anterior figuran en los cuadros 1-1 y 1-2. En el caso de los aparatos sellados en fábrica, se puede utilizar la placa de características de la propia unidad que marca la carga de refrigerante para calcular el Para los productos cargados en campo, el cálculo de A puede basarse en la carga de...
- Seite 32 Antes de comenzar el trabajo en los sistemas que contengan refrigerantes inflamables, son necesarios los controles de seguridad para asegurar que el riesgo de incendio está minimizado. Para reparar el sistema refrigerante se deben cumplir las siguientes precauciones antes de realizar los trabajos en el sistema.
- Seite 33 8. Comprobaciones al equipo de aire acondicionado Si se cambian componentes eléctricos, deben ser solo los especificados. Siempre se deben cumplir las guías de mantenimiento y servicio del fabricante. Si tiene dudas, consulte el departamento técnico del fabricante para obtener asistencia. Los siguientes controles se deben realizar las siguientes comprobaciones a los equipos con refrigerantes inflamables: La cantidad de carga es según el tamaño del local dentro del cual se instalan el equipo...
- Seite 34 No aplique ningún inductor permanente o cargas de capacitancia al circuito sin asegurar que esto no excederá el voltaje ni la corriente permisible para el equipo en uso. Estos componentes seguros son los únicos con los que se puede trabajar en un ambiente de gases inflamables. El comprobador debe tener el rango correcto.
- Seite 35 La carga de refrigerante se debe recuperar dentro de los cilindros de recuperación apropiados. El sistema se debe « enjuagar » con OFN para que la unidad sea segura. Este proceso puede necesitar que se repita muchas veces. No se debe usar aire comprimido para sistemas de refrigerante. El enjuague se debe alcanzar entrando al sistema de vacío OFN y seguir llenando hasta lograr la presión de trabajo, la ventilación y después tirar hacia abajo al vacío.
- Seite 36 d) Purgue con una bomba el sistema refrigerante si es posible. e) Si el vacío no es posible, aplicar un separador hidráulico para que el refrigerante pueda extraerse desde varias partes del sistema. f) Asegúrese de que el cilindro está situado en las escalas antes de que se efectúe la recuperación. g) Encienda la máquina de recuperación y hágala funcionar según las instrucciones del fabricante h) No rellene los cilindros en exceso.
- Seite 37 20. Ventilación del refrigerante HC (R290) El venteo puede realizarse como alternativa a la recuperación del refrigerante. Dado que los refrigerantes HC no tienen ODP y tienen un GWP insignificante, en determinadas circunstancias puede considerarse aceptable ventilar el refrigerante. Sin embargo, si se considera esta posibilidad, debe hacerse de acuerdo con las normas o reglamentos nacionales pertinentes, si lo permiten.
- Seite 38 1. Transporte el equipo que contiene refrigerantes inflamables según indican las regulaciones vigentes. 2. Pegue etiquetas en el equipo con símbolos acorde a las regulaciones locales. 3. Deseche el equipo con gases refrigerantes como lo indican las normativas nacionales. 4. Almacenaje de equipos/accesorios El almacenaje debe ser acorde a las instrucciones del fabricante.
- Seite 39 Installation,owner and safety manual The design and specifications are subject to change without prior notice for product improvement. Consult with the sales agency or manufacturer for details. Any updates to the manual will be uploaded to the service website, please check for the latest version.
-
Seite 41: Safety Instructions
SAFETY INSTRUCTIONS IMPORTANT! AIR CONDITIONERS MUST ALWAYS BE STORED AND TRANSPORTED UPRIGHT, OTHERWISE IRREPARABLE DAMAGE MAY BE CAUSED TO THE COMPRESSOR; IF IN DOUBT WE SUGGEST WAITING AT LEAST 24 HOURS FOLLOWING INSTALLTION BEFORE STARTING THE UNIT. Carefully read the instructions before installing and/or operating the unit. This appliance is for indoor use only. This unit must be only connected to a 220‐240 V / 50 Hz earthed outlet. Installation must be in accordance with regulations of the country where the unit is used. If you are in any doubt about the suitability of your electrical supply have it checked and, if necessary, modified by a qualified electrician. This air conditioner has been tested and is safe to use. However, as with any electrical appliance ‐ use it with care. Disconnect the power from the appliance before dismantling, assembling or cleaning. Avoid touching any moving parts of the appliance. Never insert fingers, pencils or any other objects though the guard. This appliance is not intended for use by persons (including children) with reduced physical, sensory or mental capabilities. It is also not intended for use by those with a lack of experience and knowledge, unless they have been given supervision or instruction concerning the use of the appliance by a person responsible for their safety. Do not leave children unsupervised with this appliance. Do not clean the unit by spraying it or immersing it in water. Never connect the unit to an electrical outlet using an extension cord. If an outlet is not available, one should be installed by a qualified electrician. ... - Seite 42 R290 has a low GWP (Global Warming Potential) of 3. The air conditioner contains about 290g of R290 refrigerant gas. Do not install or store in an unventilated space with an area smaller than 15 m per unit. The room must be such as to prevent stagnation of possible leaks of refrigerant gas as there could be a danger of fire or explosion hazard should the refrigerant come into contact with electric heaters, stoves or other sources of ignition. If the appliance is installed, used or stored in an unventilated room, the room must be such as to prevent stagnation of possible leaks of refrigerant gas as there could be a danger of fire or explosion should the refrigerant come into contact with electric heaters, stoves or other sources of ignition. Refrigerant gas may be odourless. Do not use the product and contact the retailer for advice, if damage has occurred to the unit which may have compromised the refrigerant system. Any repairs or maintenance must only be carried out on the unit by a suitably qualified engineer. Before opening and servicing the unit the authorized engineer must be in possession of a copy of the manufacturer’s service manual and must follow the safety information contained within it to ensure all hazards are minimized. ...
-
Seite 43: Product Overview
PRODUCT OVERVIEW PRODUCT DIAGRAM FRONT AIR INLET CONTROL PANEL LOUVR FRONT PANEL BACK WALL HANGING MOUNTS BACK PANEL AIR INLET AIR OUTLET DRAINAGE PIPE ... -
Seite 44: What's Included
FEATURES Simple operation. Self‐evaporative function with energy saving technology. Sleek design that seamlessly fits into any style home. Bright LED screen‐indicates temperature and current mode. On / off timer function‐allows you to choose when the unit operates. WIFI App control providing additional functionality. Three fan speeds. Four modes to suit your every need including : Cooling / Heating / Fan / Dry Silent running option , perfect for a restful night sleep. WHATS INCLUDED WALL TEMPLATE AIR CONDITIONER 7 WALL PLUGS 7 SCREWS (5×60mm) (8×40mm) VENT COVER ASSEMBLY (X2) (CHAIN, INDOOR RING AND OUTDOOR COVER) PLASTIC DUCTING WALL BRACKET SHEET (X2) REMOTE CONTROL 2PCS TAPPING SCRE FIXED PLATE (4x10mm) ... -
Seite 45: Tools Required
INSTALLATION TOOLS REQUIRED SPIRIT LEVEL DRILL 180mm CORE DRILL TAPE MEASURE SHARP KNIFE 8mm MASONRY DRILL PENCI 25mm MASONRY DRILL BIT BEFORE STARTING INSTALLATION, PLEASE ENSURE YOU HAVE ALL SUITABLE EQUIPMENT AVAILABLE AND UNDERSTAND THE STEPS INVOLVED IN INSTALLATION. IF IN ANY DOUBT, PROFESSIONAL ADVICE SHOULD BE SOUGHT. THE INSTALLER MUST ENSURE THAT THE PLANNED POSITION OF THE AIR CONDITIONER IS SUITABLE, AND THAT THERE ARE NO CABLES AND PIPES INSIDE THE WALL, AND NO OTHER OBSTRUCTIONS FOXED ON THE WALL, WHICH WOULD PRESENT A DANGER AND/OR PREVENT COMPLETION OF INSTALLATION. ... - Seite 46 INSTALLATION This unit must be installed on an external wall, as it vents directly out of its rear and ensure the wall is flat, solid and reliable. Leave at least 10 cm of space to the left, right and base of the machine. At least 20cm of space must be left above the unit to help air flow smoothly and stay away from curtains, plants, faucets, furniture and others appliances etc. Paste the supplied installation template paper in position on the wall, ensuring that the reference line is level using a spirit level. The hole for the drainage pipe must be drilled using a 25mm Drill bit. Ensure the hole is at a downward angle (min 5 degrees) so that the water will drain correctly. Use a 180mm core drill to drill the two holes for the units ventillation, ensuring that both the holes are aligned with the template. Use the template to mark the position of the screws for the hanging rail, using a spirit level to ensure it is straight and level. Drill the marked holes using a suitable 8mm drill bit and insert wall plugs. Line the hanging rail with the holes, and fix the rail into position using the supplied screws. Ensure that the hanging rail is securely fastened onto the wall, and that there is no risk of the unit tipping or falling. ...
- Seite 47 Roll the plastic vent sheets into a tube and feed them from the inside into the holes previously made. Ensure the tubes sit flush to the interior wall. Go outside and trim off the excess vent tube using a sharp knife, keeping the edge as neat as possible. 、 Insert the indoor fixing ring from the vent cover onto the indoor side of the air vent. Then fold the external vent cover in half. Attach the chains to each side of the vent cover, before sliding the cover outside through the vent hole. Expand the external cover, before tightly fixing the chains by hooking onto the indoor fixing ring. This will hold the external cover firmly in position. Repeat for the second vent. ...
- Seite 48 Once the chains are fitted and secure, any excess chain should be removed by cutting the chain. Lift the unit onto the wall, align the hanging holes with the hooks on the hanging rail and gently rest the unit into place. At the same time, slide the drain pipe through the drainage hole. NOTE: : please ensure that the backside of product is tightly attached on the wall to avoid additional vibration and noise. : The end of the external water pipe must be placed in an open space or drain. Avoid damage or constriction to the drainage pipe to ensure the unit drains. Fixed plate 4x10 tapping screw...
-
Seite 49: Control Panel
OPERATION CONTROL PANEL Digital Display Air supply Cooling Speed y Silent Heating Timer Increase/ Decrease Power Speed Mode REMOTE CONTROL The air conditioner can be controlled with the remote control. Two AAA‐batteries are required. NOTE: Further details of the functions can be found on the following page. Press the POWER button to turn the machine on or POWER off. Press the MODE button to switch between cooling, MODE heating, fan and dry modes. Press the FAN button to change between high, medium and low fan speeds Press the LED button to open or close the LED background light of unit, it can be a choice for sleep ... - Seite 50 FUNCTIONS Press “POWER” to turn the unit On or Off. POWER Press to change between the 4 different modes. The display will show the symbol for the mode currently selected. The cooling function allows the air conditioner to cool the room and at the same time reduces air humidity. The desired temperature can be adjusted using the increase and decrease button between 16°C and 30°C. The fan speed can also be COOLING adjusted using the speed button. Dry mode will extract moisture from the air, which will be drained outside using th e installed drain pipe. The fan speed DRY cannot be adjusted in dry mode. In fan mode the appliance will recirculate the air within the room, and will not cool, MODE heat or dehumidify. The fan speed can be adjusted using the Speed button, But the FAN desired temperature can not be set. The heating function allows the air conditioner to heat the room.The desired temperature can be adjusted using the increase and decrease button between 16°C HEATING and 30°C. The fan speed can also be adjusted using the speed button. Silent mode can be activated from APP or the remote control, It can also be activated by pressing "...
- Seite 51 There is a 3 minutes delay on power on. In order to protect the life of the compressor and COMPRESSOR electronic components please do not switch on the unit for at least 5 minutes after you turned PROTECTION the unit off. WIFI SETUP AND SMART FEATURES WIFI SETUP BEFORE YOU START Ensure your router provides a standard 2.4 Ghz connection. If your router is dual band ensure that both networks have different network names (SSID). The provider of your router / Internet service provider will be able to provide advice specific to your router. Place the air conditioner as close as possible to the router during setup. Once the app has been installed on your phone, turn off the data connection, and ensure your phone is connected to your router via WIFI.
- Seite 52 CHANGING BETWEEN CONNECTION TYPES To change the unit between the two wifi connection modes, hold the Speed button for 3 seconds. REGISTER THE APP Enter your email address or Press on the register button at Read the Privacy policy and phone number and press the bottom of the screen. press the Agree Button. continue to register. A verification code will be sent Type in the password you The app is now registered. It by the method selected in step would like to create. This will automatically log you in 3. Enter the code into the app. needs to be 6‐20 characters, following registration. with letters and numbers.
- Seite 53 SETTING UP YOUR HOME WITHIN THE APP SMART LIFE is designed so it can work with a large number of compatible smart devices within your home. It can also be set up to work with multiple devices within different houses. As such during the setup process , the app requires that different areas are created and named to allow easy management of all your devices. When new devices are added, they are assigned to one of the rooms you have created. CREATING ROOMS 1. Press on the create a home 2. Type in a name for your home. button. 3. Press “home location” button to select the location of your home. (See SETTING YOUR LOCATION below) 4. New rooms can be added by pressing the ADD ROOM option at the bottom. (See ADD ANOTHER ROOM below).
- Seite 54 CONNECTING USING QUICK CONNECTION Before initiating the connection, make sure the unit is in standby mode, with the WIFI light flashing twice per second. If not follow the instructions for changing the connection mode. Also ensure your phone is connected to the wifi network. (We advise turning mobile data off during setup) Select the type of device as Connect a WIFI and enter the Open app and press “+” to add password. “Large Home Appliance” device, or use the add device button. Ensure the WIFI light on the air Click NEXT button to scan and conditioner is flashing twice connect a new device. Wait per second,then click NEXT for this process to complete. button to enter the next Please retry if this fails. setting. Review the troubleshooting section for further help if still unsuccessful...
- Seite 55 CONNECTING USING AP MODE (ALTERNATIVE METHOD) Before initiating the connection, make sure the unit is in standby mode, with the wifi light flashing once per three seconds. If not follow the instructions for changing the wifi connection mode. Also ensure your phone is connected to the wifi network. (We advise turning mobile data off during setup) Select the type of device as Enter your wifi password and Open app and press “+” to press confirm. “Large Home Appliance” add device, or use the add device button. Change to the AP mode in the Ensure the wifi light on the air Get into network settings in top right of the screen. conditioner is slowly flashing your phone and connect to the (once per three seconds), then “Smart Life xxx” connection. click NEXT button to enter the There is no password to enter. next setting. Then return back to the app to complete setup. Once the connection process has completed, go back to the network settings on your phone to ensure your phone has reconnected to your WIFI router. ...
- Seite 56 CONTROLLING YOUR DEVICE THROUGH THE APP THE HOME SCREEN Add Device: Add new device on the APP, and go through Change Home: You can the setup process . change between them if you created more than one Room Management: home. Use to view the units set up within each room. And Environmental information: Allows rooms to be added, shown outdoor temperature and removed or renamed. humidity based on the location details. Me: Provides the option for changing settings. Smart Scene: Allows you to program intelligent behaviour based on the internal and external environment. Each device has its own entry on the home screen to allow the user to either quickly turn the unit on or off, or to enter the device screen to make other changes. DEVICE SCREEN ON / OFF Button: Name of Air Conditioner: Click to quickly turn on or Click to enter the Device Screen. ...
- Seite 57 DEVICE SCREEN The device screen is the main control screen for the air conditioner, providing access to the controls to amend the functions and settings. Edit Name: Use to change the name of Back: the air conditioner. Returns to the Home Screen Desired Room Temperature: Displays the desired room temperature. Current Room Temperature: Displays the current room temperature. Current Mode: Shows the mode the air conditioner is currently in. MODE: Change the operating mode of the air SWING: Use to turn the oscillating swing conditioner between Cooling , function on and off. Heating ,Dehumidify and Fan. SCHEDULE: Use to add a set a scheduled operation . A number of these can be combined to specify automatic SPEED: ...
- Seite 58 SMART SCENES Smart Scenes is a powerful tool providing the option to customise the operation of the air conditioner based both on conditions within the room and outside influences. This gives the user the option of specifying much more intelligent actions. These are split into two catagories Scene and Automation. SCENE Scene allows for a one touch button to be added to the Home screen. The button can be used to change a number of settings in one go, and can change all the settings within the unit. A number of scenes can easily be setup, allowing the user to easily change between a number of preset configurations. Below is an example of how to set up a scene: ...
- Seite 59 Once all the functions required have been added, press the Save button in the top right corner to finalise and save your new Scene. AUTOMATION Automation allows an automatic action to be set up for the device. This can be triggered by the time, indoor temperature, humidity of the room, weather conditions, and a range of other influences. 3. Press on the Launch Tap‐to‐Run 1. Press on the Smart Scene tab at 2.
- Seite 60 6. Chose the function, and then press the arrow button in the top left corner, to return to the previous screen. ME The profile tab gives you the option to edit both your detail, and use the added features of the unit. CHANGING THE NAME OF YOUR DEVICE When in any of the device screens further settings for the device can be accessed, by pressing on the three dots in the top right hand corner. The top option within this allows you to change the name of the device to something relevant to the use of the product, such as “Living Room Air Conditioner”. Within the menu, you also have the option of setting up a pattern lock or change your password. DEVICE SHARING This allows you to share access to the controls of your air conditioner with friends and family. In page “Home Management”, select “My home”, you could“Add Member” there to share access to the controls of your air conditioner with friends and family, please refer to the left picture.
- Seite 61 INTEGRATION This allows the unit to be integrated with your favourite home automation hardware such as Google Home and the Amazon Echo. Select “More Services”, you could integrate with third‐party voice services, pls refer to the left picture. TROUBLESHOOTING Do not repair or disassemble the air conditioning. Unqualified repair will invalidate the warranty and may lead to failure, causing injuries and property damage. Only use it as directed in this user manual and only perform operations advised here. Problem Reasons Solutions Check the unit is plugged in, and the socket There is no electricity. is working normally. The ambient temperature is too low or Only use to use the machine with a room ...
-
Seite 62: Error Codes
Let the remote control get close to the air The remote control is not aligned with conditioner, and make sure that the the direction of the remote‐control The remote control remote control directly faces to the receiver. does not work. direction of the remote‐control receiver. Batteries poor. Replace batteries. If problems not listed in the table occur or recommended solutions do not work, please contact the service centre. ERROR CODES Fault Fault Fault Description Fault Description Code Code F1 Compressor IPM error Coil tube overload protection F2 PFC/IPM error Defrost protection on coil tube F3 Compressor start error Zero‐crossing fault detection Return air sensor temperature abnormal F4 Compressor running out of step protection F5 Location detection loop failure Abnormal refrigerant circulation F6 PCB communication error Exhaust temperature protection ... -
Seite 63: Safety Precautions
Safety Precautions Read Safety Precautions Before Operation and Installation Incorrect installation due to ignoring instructions can cause serious damage or injury. WARNING Installation (Space) - That the installation of pipe-work shall be kept to a minimum. - That pipe-work shall be protected from physical damage. - Where refrigerant pipes shall be compliance with national gas regulations. - Seite 64 The maximun charge in a room shall be in accordance with the following: (5/4) = 2,5 x (LFL) x h x (A) or the required minumum floor area to install an applicance with refrigerant charge M(kg) shall be in accordance with following: = (M/(2,5 x (LFL) x h )) (5/4)
- Seite 65 NOTE 1 This formula cannot be used for refrigerants lighter than 42 kg/kmol. NOTE 2 Some examples of the results of the calculations according to the above formula are given in Tables 1-1 and 1-2. NOTE 3 For factory sealed appliances, the nameplate on the unit itself marked the refrigerant charge can be used to calculate A NOTE 4 For field charged products, calculation of A can be based on the installed refrigerant...
-
Seite 66: Information Servicing
Information Servicing 1. Checks to the area Prior to beginning work on systems containing flammable refrigerants, safety checks are necessary to ensure that the risk of ignition is minimised. For repair to the refrigerating system, the following precautions shall be complied with prior to conducting work on the system. 2. - Seite 67 8. Checks to the refrigeration equipment Where electrical components are being changed, they shall be fit for the purpose and to the correct specification. At all times the manufacturer s maintenance and service guidelines shall be followed. If in doubt consult the manufacturer s technical department for assistance. The following checks shall be applied to installations using flammable refrigerants: the charge size is in accordance with the room size within which the refrigerant containing ...
- Seite 68 11. Repair to intrinsically safe components Do not apply any permanent inductive or capacitance loads to the circuit without ensuring that this will not exceed the permissible voltage and current permitted for the equipment in use. Intrinscially safe components are the only types that can be worked on while live in the presence of a flammable atmosphere.
- Seite 69 The refrigerant charge shall be recovered into the correct recovery cylinders. For appliances containing FLAMMBLE REFRIGERNATS, the system shall be “flushed” with OFN to render the unit safe. This process may need to be repeated several times. Compressed air or oxygen shall not be used for puring refrigerant systems.
- Seite 70 d) Pump down refrigerant system, if possible. e) If a vacuum is not possible, make a manifold so that refrigerant can be removed from various parts of the system. f) Make sure that cylinder is situated on the scales before recovery takes place. g) Start the recovery machine and operate in accordance with manufacturer s instructions.
- Seite 71 20. Venting of HC Refrigerant (R290) Venting may be carried out as an alternative to recovering the refrigerant. Because HC refrigerants have no ODP and negligible GWP, under certain circumstances it may be considered acceptable to vent the refrigerant. However, if this is to be considered, it should be done in accordance with the relevant national rules or regulations, if they permit.
- Seite 72 21. Transportation, marking and storage for units 1. Transport of equipment containing flammable refrigerants Compliance with the transport regulations 2. Marking of equipment using signs Compliance with local regulations 3. Disposal of equipment using flammable refrigerants Compliance with national regulations 4.
-
Seite 73: Observations Importantes
Manuel d'installation,l'utilisateur et de sécurité Le design et les spécifications de l'équipement peuvent être modifiés sans préavis pour son amélioration. Consultez votre revendeur ou fabricant pour plus de détails Toute mise à jour du manuel sera téléchargée sur le site Web, veuillez vérifier la dernière version. - Seite 75 INSTRUCTIONS DE SÉCURITÉ IMPORTANT ! LES CLIMATISEURS DOIVENT TOUJOURS ÊTRE STOCKÉS ET TRANSPORTÉS EN POSITION VERTICALE, SOUS PEINE D'ENDOMMAGER IRRÉMÉDIABLEMENT LE COMPRESSEUR ; EN CAS DE DOUTE, IL EST CONSEILLÉ D'ATTENDRE AU MOINS 24 HEURES APRÈS L'INSTALLATION AVANT DE METTRE L'APPAREIL EN MARCHE.
- Seite 76 lLe R290 a un faible PRG (potentiel de réchauffement planétaire) de 3. lLe climatiseur contient environ 290 g de gaz réfrigérant R290. l Ne pas installer ou stocker dans un espace non ventilé avec une surface au sol inférieure à 15 m par unité.
-
Seite 77: Aperçu Du Produit
APERÇU DU PRODUIT VUE AVANT ADMISSION D'AIR PANNEAU DE CONTRÔLE LAMA PANNEAU FRONTAL VUE ARRIÈRE SUPPORTS DE FIXATION MURALE PANNEAU ARRIÈRE ADMISSION D'AIR SORTIE D'AIR TUBE DE DRAINAGE... - Seite 78 CARACTÉRISTIQUES Utilisation simple. Fonction auto-évaporateur avec une technologie d'économie d'énergie. Un design élégant qui s'intègre parfaitement à tout style de maison. Écran LED lumineux-indique la température et le mode actuel. Fonction de minuterie marche/arrêt vous permet de choisir quand l'unité fonctionne fonctionne. Contrôle de l'application WIFI offrant des fonctionnalités supplémentaires.
-
Seite 79: Outils Nécessaires
INSTALLATION OUTILS NÉCESSAIRES NIVEAU DRILL COURONNE 180 mm RUBAN MÉTRIQUE CUTER FORET À BÉTON 8 mm CRAYON FORET À BÉTON 25 mm AVANT DE COMMENCER L'INSTALLATION, ASSUREZ-VOUS QUE VOUS DISPOSEZ DE TOUS LES ÉQUIPEMENTS APPROPRIÉS ET QUE VOUS COMPRENEZ LES ÉTAPES DE L'INSTALLATION. EN CAS DE DOUTE, IL CONVIENT DE DEMANDER L'AVIS D'UN PROFESSIONNEL. - Seite 80 INSTALLATION Cet appareil doit être installé ou mur extérieur, car la ventilation se fait directement par l'arrière de l'appareil, et assurez-vous que le mur est plat, solide et fiable. Laissez au moins 10 cm d'espace à gauche, à droite et à la base de la machine.
- Seite 81 Roulez les feuilles de ventilation en plastique pour former un tube et insérez-les de l'intérieur dans les trous pré-percés. Veillez à ce que les tuyaux soient au même niveau que la paroi intérieure. Sortez et coupez l'excès de tuyau d'évent avec un couteau aiguisé, en gardant le bord aussi propre que possible.
- Seite 82 Une fois les chaînes en place et fixées, il faut enlever l'excédent de chaîne en le coupant. Soulevez l'unité sur le mur, alignez les trous de suspension avec les crochets du rail de suspension et reposez doucement l'unité en place. En même temps, faites glisser le tuyau d'évacuation à travers le trou d'évacuation.
- Seite 83 OPERATION PANNEAU DE Affichage numérique CONTRÔLE Alimentation en air Refroidissement Vitesse Séchage Silence Chauffage Minuterie Augmentation/ Diminution On/Off Vitesse Mode TÉLÉCOMMANDE La climatisation peut être contrôlée à l'aide de la télécommande. Deux piles AAA sont nécessaires. NOTE : Vous trouverez plus de détails sur ces fonctions à la page suivante. Appuyez sur le bouton POWER pour allumer ou éteindre la machine.
- Seite 84 FONCTIONS Appuyez sur "POWER" pour allumer ou éteindre l'appareil. POWER Appuyez sur cette touche pour basculer entre les 4 modes différents. L'écran affiche le symbole du mode actuellement sélectionné. La fonction de refroidissement permet au climatiseur de rafraîchir la pièce et de réduire en même temps l'humidité...
- Seite 85 WIFI CONFIGURATION AND SMART FEATURES CONFIGURATION WIFI AVANT DE COMMENCER l Assurez-vous que votre routeur fournit une connexion standard de 2,4 GHz. l Si votre routeur est bi-bande, assurez-vous que les deux réseaux ont des noms de réseau (SSID) différents. Votre fournisseur de routeur/fournisseur de services Internet sera en mesure de vous fournir des conseils spécifiques pour votre routeur.
- Seite 86 COMMUTATION ENTRE LES TYPES DE CONNEXION Pour basculer l'appareil entre les deux modes de connexion WiFi, appuyez sur le bouton de vitesse pendant 3 secondes. ENREGISTRER L'APPLICATION 1. Appuyez sur le bouton 2. Lisez la politique de confidentialité 3. Saisissez votre adresse d'enregistrement en bas de l'écran.
- Seite 87 CONFIGURER VOTRE MAISON DANS L'APPLICATION SMART LIFE est conçu pour fonctionner avec un grand nombre d'appareils intelligents compatibles dans votre maison. Il peut également être configuré pour fonctionner avec plusieurs appareils dans différents foyers. Ainsi, au cours du processus de configuration, l'application exige que différentes zones soient créées et qu'un nom leur soit attribué...
- Seite 88 CONNEXION VIA UNE CONNEXION RAPIDE Avant de commencer la connexion, assurez-vous que l'appareil est en mode veille, le voyant WIFI clignotant deux fois par seconde. Si ce n'est pas le cas, suivez les instructions pour modifier le mode de connexion. Assurez-vous également que votre téléphone est connecté au réseau WiFi. (Nous vous conseillons de désactiver les données mobiles pendant la configuration) 1.
- Seite 89 CONNEXION EN MODE AP (MÉTHODE ALTERNATIVE) Avant de commencer la connexion, assurez-vous que l'appareil est en mode veille, le voyant WiFi clignotant une fois toutes les trois secondes. Si ce n'est pas le cas, suivez les instructions pour changer le mode de connexion WiFi. Assurez-vous également que leur téléphone est connecté au réseau WiFi.
-
Seite 90: Écran D'accueil
CONTRÔLER L'APPAREIL PAR LE BIAIS DE L'APPLICATION ÉCRAN D'ACCUEIL Ajouter un dispositif : Ajoutez un nouveau dispositif dans l'APP et Changer la maison "Home" : Vous suivez le processus de configuration . pouvez passer de l'un à l'autre si vous avez créé... - Seite 91 ÉCRAN DE L'APPAREIL L'écran de l'appareil est le principal écran de contrôle du climatiseur et permet d'accéder aux commandes pour modifier les fonctions et les réglages. Modifiez le nom : Permet de changer le A l'envers : Modèle du climatiseur. Retour à...
- Seite 92 DES SCÈNES INTELLIGENTES Les scènes intelligentes sont un outil puissant qui offre la possibilité de personnaliser le fonctionne- ment de la climatisation en fonction des conditions ambiantes et des influences extérieures. Cela donne à l'utilisateur la possibilité de spécifier des actions beaucoup plus intelligentes. Ils sont divisés en deux catégories : Scène et automatisation.
- Seite 93 AUTOMATION L'automatisation permet de définir une action automatique pour la déviation. Cela peut être dû à l'heure de la journée, à la température intérieure, à l'humidité ambiante, aux conditions météorologiques et à un certain nombre d'autres facteurs. 1. Tapez sur l'onglet Scène 2.
- Seite 94 6. Choisissez la fonction, puis appuyez sur la flèche dans le coin supérieur gauche, pour revenir à la page précédente écran précédent. L'onglet profil vous permet de modifier vos données et d'utiliser les fonctions supplémentaires de l'appareil. RENOMMER VOTRE APPAREIL Vous pouvez accéder aux autres paramètres de l'appareil à...
- Seite 95 INTEGRATION Cela permet à l'appareil de s'intégrer à votre matériel domotique préféré, comme Google Home et Amazon Echo. Sélectionnez "Plus de services"vous pouvez intégrer des tiers, services vocaux, veuillez vous référer à l'image de gauche. DÉPANNAGE Ne réparez pas et ne démontez pas le climatiseur. Une réparation non qualifiée invalidera la garantie et peut entraîner une défaillance, causant des blessures et des dommages matériels.
- Seite 96 CODES D'ERREUR Échec Échec Description du défaut Description du défaut Code Code Erreur IPM du compresseur Protection contre la surcharge de la batterie Erreur PFC/IPM Protection contre le dégivrage Erreur de démarrage du compresseur Zéro- détection des défauts croisés Abnormal return air sensor temperature Compresseur déphasé...
-
Seite 97: Mesures De Sécurité
Mesures de sécurité Lisez les consignes de sécurité avant de réaliser l'installation. Une installation incorrecte due au non-respect de ces mesures peut causer des blessures ou des dommages matériels. AVERTISSEMENT Installation (espace) - Que le travail d'installation de la tuyauterie soit réduit au minimum. - La tuyauterie doit être protégée contre les dommages physiques. - Seite 98 La charge maximale de réfrigérant dans la chambre doit être conforme à ce qui suit : (5/4) x h x (A) = 2,5 x (LFL) d'installer des équipements chargés en réfrigérant ou la surface minimale requise M(kg) est conforme à ce qui suit : (5/4) = (M/(2,5 x (LFL)) où...
- Seite 99 NOTE 1 Cette formule ne peut être utilisée pour les fluides frigorigènes de moins de 42 kg/kmol. NOTE 2 Quelques exemples de résultats des calculs effectués selon la formule ci-dessus sont donnés dans les tableaux 1-1 et 1-2. NOTE 3 Dans le cas d'unités scellées en usine, la plaque signalétique de l'unité elle-même indiquant la charge de réfrigérant peut être utilisée pour calculer l'A NOTE 4 Pour les produits chargés sur site, le calcul de l'A peut être basé...
-
Seite 100: Information De Maintenance
Information de maintenance 1. Vérifications de la zone de travaille Avant de commencer le travail dans les systèmes qui contiennent des réfrigérants inflammables, les contrôles de sécurité sont nécessaires pour s'assurer que les risques d'incendie soient minimisés. Pour réparer le système réfrigérant, les précautions suivantes doivent être prises avant de commencer les réparations. - Seite 101 8. Contrôles des équipements de climatisation Si vous changer les composants électriques, cela doit être uniquement ceux qui ont besoin d'être changés. Vous devez toujours suivre les manuels d'utilisateurs et de service du fabricant. Si vous avez des doutes, contactez le département technique du fabricant pour obtenir de l'aide et des informations.
- Seite 102 11. Réparation des composants de sécurité Ne pas appliquer un inducteur permanent ou des charges de capacitance au circuit sans assurer qu'il n'excédera pas le voltage et la tension admissible pour l'équipement utilisé. Ces composants de sécurité sont les seuls avec lesquels on peut travailler dans un environnement de gaz inflammables.
- Seite 103 La charge de réfrigérant doit être récupérer parmi les cylindres de récupération appropriés. Le système doit être vidangé avec du OFN pour que l'appareil soit sécurisé. Ce processus peut nécessiter d'être effectuée plusieurs fois. Vous ne devez pas utiliser de l'air comprimé pour cette activité.
- Seite 104 d) Avec une pompe, purgez le système réfrigérant si cela est possible. e) Si le vide n'est pas possible, appliquer un séparateur hydraulique pour que le réfrigérant puisse s'extraire depuis les différentes parties du système. f) Assurez-vous que le cylindre soit situé dans les barèmes avant que la récupération ne soit effectuée g) Allumez la machine de récupération et faites la fonctionner selon les instructions du fabricant h) Ne remplissez pas excessivement les cylindres.
- Seite 105 20. Ventilation du réfrigérant HC (R290) La ventilation peut être effectuée comme alternative à la récupération du réfrigérant. Étant donné que les réfrigérants HC n'ont pas de PDO et un PRP négligeable, l'évacuation du réfrigérant peut être considérée comme acceptable dans certaines circonstances. Toutefois, si cela est envisagé, cela doit être fait conformément aux règles ou réglementations nationales pertinentes, si cela est autorisé.
- Seite 106 Transport, étiquetage et les appareils de stockage 1. Transportez l'équipement qui contient des réfrigérants inflammables comme l'indiquent les règlements en vigueur. 2. Collez les étiquettes avec les symboles sur l'équipement conformément aux législations locales. 3. Jetez l'équipement avec du gaz réfrigérants comme l'indique les normes nationales. 4.
- Seite 107 Benutzer-undInstallationshandbuch und Sicherheitshinweise Lesen Sie diese Anleitung sorgfältig durch, bevor VORSICHT: Verbrennungsgegahr Sie Ihr neues Klimagerät installieren und benutzen. Bitte bewahren Sie dieses Benutzerhandbuch für späteres Nachschlagen auf.
-
Seite 109: Sicherheitsmaßnahmen
SICHERHEITSMAßNAHMEN WICHTIG! KLIMAGERÄTE MÜSSEN IMMER AUFRECHT GELAGERT UND TRANSPORTIERT WERDEN, DA SONST IRREPARABLE SCHÄDEN AM KOMPRESSOR AUFTRETEN KÖNNEN; IM ZWEIFELSFALL IST ES RATSAM, MINDESTENS 24 STUNDEN NACH DER INSTALLATION ZU WARTEN, BEVOR DAS GERÄT IN BETRIEB GENOMMEN WIRD. lBitte lesen Sie diese Anleitung vor der Installation und Benutzung der Anlage sorgfältig durch. - Seite 110 lR290 hat ein niedriges GWP (Global Warming Potential) von 3. lDas Klimagerät enthält etwa 290 g von R290-Kältemittelgas. l Nicht in einem unbelüfteten Raum mit einer Bodenfläche von weniger als 15 m pro Einheit. Der Raum muss so beschaffen sein, dass eine Stagnation möglicher Kältemittellecks vermieden wird, da Brand- oder Explosionsgefahr besteht, wenn das Kältemittel mit elektrischen Heizgeräten, Herden oder anderen Zündquellen in Berührung kommt.
-
Seite 111: Produktübersicht
PRODUKTÜBERSICHT VORDERANSICHT Lufteingang BEDIENFELD LAMELLE FRONTPLATTE RÜCKANSICHT HALTERUNG FÜR DIE WANDMONTAGE HINTERE ANSICHT LUFTEINGANG LUFTAUSLASS DRÄNAGEROHR... -
Seite 112: Eigenschaften
EIGENSCHAFTEN Einfache Bedienung. Auto-Verdunstung mit energiesparender Technik. Ein elegantes Design, das perfekt in jeden Wohnstil passt. Helle LED-Anzeigezeigt die Temperatur und den aktuellen Modus an. Ein/Aus-Timerfunktion. Sie können wählen, wann das Gerät arbeitet. WLAN-Anwendungssteuerung mit zusätzlichen Funktionen. Drei Lüfter-Geschwindigkeit Vier Modi für jeden Bedarf, darunter: Kühlung / Heizung / Lüftung / Trocknen Leiser Betrieb, perfekt für eine erholsame Nachtruhe. - Seite 113 INSTALLATION NOTWENDIGE INSTRUMENTE WASSERWAAGE BOHRMASCHINE KRONENBOHRER 180 mm MASSBÄNDER TEPPICHMESSER BETONBOHRER 8 mm BLEISTIFT BETONBOHRER 25 mm VERGEWISSERN SIE SICH VOR BEGINN DER INSTALLATION, DASS SIE ALLE ERFORDERLICHEN TEIGEN UND DIE INSTALLATIONSSCHRITTE VERSTANDEN HABEN. IM ZWEIFELSFALL SOLLTE PROFESSIONELLER RAT EINGEHOLT WERDEN. DER INSTALLATEUR MUSS SICH VERGEWISSERN, DASS DIE VORGESEHENE POSITION DES KLIMAGERÄTS GEEIGNET IST UND DASS SICH IN DER WAND KEINE KABEL ODER ROHRE ODER ANDERE HINDERNISSE BEFINDEN, DIE EINE GEFAHR DARSTELLEN UND/ODER DIE...
- Seite 114 INSTALLATION Dieses Gerät sollte an einer Außenwand installiert werden, da es direkt von der Rückseite des Geräts belüftet wird, und stellen Sie sicher, dass die Wand flach, fest und zuverlässig ist. Lassen Sie links, rechts und unten am Gerät mindestens 10 cm Platz.
- Seite 115 Rollen Sie die Kunststoffbelüftungsplatten zu einem Schlauch und stecken Sie sie von innen in die vorgebohrten Löcher. Achten Sie darauf, dass die Rohre bündig mit der Innenwand sind. Schneiden Sie das überschüssige Entlüftungsrohr mit einem scharfen Messer ab und halten Sie die Kante so sauber wie möglich. Setzen Sie den inneren Befestigungsring des Lüftungsdeckels an der Innenseite der Lüftungsöffnung ein.
- Seite 116 Sobald die Ketten angebracht und gesichert sind, sollte die überschüssige Kette durch Abschneiden entfernt werden. Heben Sie das Gerät an der Wand hoch, richten Sie die Aufhänge- löcher mit den Haken an der Aufhängeschiene aus und setzen Sie das Gerät vorsichtig auf. Gleichzeitig schieben Sie das Abflussrohr durch das Abflussloch.
-
Seite 117: Betrieb
BETRIEB BEDIENFELD Digitaler Display Luftzufuhr Kühlung Ventilatorgeschwindigkeit Trocknen Lautlosmodus Heizung Timer Zunahme / Abnahme Eingeschaltet/ Ausgeschaltet Ventilatorgeschwindigkeit Betriebsmodus FERNBEDIENUNG Die Klimaanlage kann mit der Fernbedienung gesteuert werden. Es werden zwei AAA-Batterien benötigt. HINWEIS: Weitere Einzelheiten zu den Funktionen finden Sie auf der nächsten Seite. Drücken Sie POWER um die Maschine ein- oder auszuschalten. -
Seite 118: Funktionen
FUNKTIONEN Drücken Sie "POWER", um das Gerät ein- oder auszuschalten. POWER Drücken Sie diese Taste, um zwischen den 4 verschiedenen Modi zu wechseln. Auf dem Display wird das Symbol des aktuell gewählten Modus angezeigt. Mit der Kühlfunktion kann das Klimagerät den Raum kühlen und gleichzeitig die Luftfeuchtigkeit reduzieren. - Seite 119 Es gibt eine 3-minütige Einschaltverzögerung. Um die Lebensdauer des Kompressors und der SCHUTZ elektronischen Bauteile zu schützen, schalten Sie das Gerät nach dem Ausschalten mindestens 5 KOMPRESSOR Minuten lang nicht ein. WIFI-KONFIGURATION UND INTELLIGENTE FUNKTIONEN WIFI-KONFIGURATION BEVOR SIE STARTEN lVergewissern Sie sich, dass Ihr Router eine Standard-2,4-Ghz-Verbindung bietet. lWenn Ihr Router über Dualband verfügt, stellen Sie sicher, dass beide Netzwerke unterschiedliche Netzwerknamen (SSIDs) haben.
-
Seite 120: Umschalten Zwischen Verbindungsarten
UMSCHALTEN ZWISCHEN VERBINDUNGSARTEN Um das Gerät zwischen den beiden WLAN-Verbindungsmodi umzuschalten, halten Sie die Speed- Taste 3 Sekunden lang gedrückt. IN DER APP REGISTRIEREN 1. Drücken Sie die Schaltfläche 2. Lesen Sie die Datenschutzbe- 3. Geben Sie Ihre E-Mail-Adresse "Registrieren" am unteren Rand des stimmungen und klicken Sie auf die oder Telefonnummer ein und klicken Bildschirms. -
Seite 121: Ihr Haus Innerhalb Der Anwendung Konfigurieren
IHR HAUS INNERHALB DER ANWENDUNG KONFIGURIEREN SMART LIFE ist so konzipiert, dass es mit einer Vielzahl von kompatiblen intelligenten Geräten in Ihrem Haus zusammenarbeitet. Es kann auch so konfiguriert werden, dass es mit mehreren Geräten in verschiedenen Haushalten funktioniert. So verlangt die Anwendung während des Konfigurationsprozesses, dass verschiedene Bereiche angelegt und mit einem Namen versehen werden, um die Verwaltung aller Geräte zu erleichtern. -
Seite 122: Anschluss Über Schnellverbindung
ANSCHLUSS ÜBER SCHNELLVERBINDUNG Vergewissern Sie sich vor dem Verbindungsaufbau, dass sich das Gerät im Standby-Modus befindet und die WLAN-Leuchte zweimal pro Sekunde blinkt. Wenn nicht, folgen Sie den Anweisungen, um den Verbindungsmodus zu ändern. Vergewissern Sie sich auch, dass Ihr Telefon mit dem WLAN- Netzwerk verbunden ist. -
Seite 123: Verbindung Im Ap-Modus (Alternative Methode)
VERBINDUNG IM AP-MODUS (ALTERNATIVE METHODE) Vergewissern Sie sich vor dem Verbindungsaufbau, dass sich das Gerät im Standby-Modus befin- det und die WLAN-Leuchte einmal alle drei Sekunden blinkt. Wenn nicht, folgen Sie den Anweisungen, um den WLAN-Verbindungsmodus zu ändern. Vergewissern Sie sich auch, dass ihr Telefon mit dem WLAN-Netzwerk verbunden ist. -
Seite 124: Steuerung Des Geräts Über Die Anwendung
STEUERUNG DES GERÄTS ÜBER DIE ANWENDUNG HAUSBILDSCHIRM Gerät hinzufügen: Fügen Sie ein Haus ändern in "Home": Sie können neues Gerät in der APP hinzu und zwischen ihnen wechseln, wenn Sie folgen Sie dem Konfigurationsprozess . mehr als einen Haushalt angelegt haben. - Seite 125 GERÄTEBILDSCHIRM Das Gerätebildschirm ist der Hauptbedienungsbildschirm des Klimageräts und bietet den Auruf zu den Bedienelementen für die Änderung von Funktionen und Einstellungen. Bearbeiten Sie den Namen: Ändern des Zurück: Namens der Klimaanlage. Kehren Sie zum Anfang Bildschirm zurück. Umgebungstemperatur (gewünschte): Display Die gewünschte Zimmertemperatur Aktuell Umgebungstemperatur: Zeigt die...
- Seite 126 INTELLIGENTE SZENEN Intelligente Szenen sind ein leistungsfähiges Werkzeug, das die Möglichkeit bietet, den Klimatisierungsbetrieb auf der Grundlage von Raumbedingungen und äußeren Einflüssen anzupassen. Dies gibt dem Benutzer die Möglichkeit, viel intelligentere Aktionen festzulegen. Sie werden in zwei Kategorien unterteilt: SZENE und Automatisierung. SZENE Die Szene ermöglicht das Hinzufügen einer One-Touch-Taste zum Display.
- Seite 127 6. Wenn Sie alle erforderlichen Funktionen hinzugefügt haben, klicken Sie auf "Speichern" in der oberen rechten Ecke, um Ihre neue Szene abzuschließen und zu speichern. AUTOMATION Mit der Automation können Sie eine automatische Aktion für das Gerät festlegen. Dies kann durch die Tageszeit, die Raumtemperatur, die Raumluftfeuchtigkeit, die Wetterbedingungen und viele andere Einflüsse verursacht werden.
- Seite 128 6. Wählen Sie die Funktion, und drücken Sie dann die Pfeiltaste in der oberen linken Ecke, um zur vorherigen Seite zurückzukehren. Auf der Registerkarte "Profil" können Sie sowohl Ihre Daten bearbeiten als auch die zusätzlichen Funktionen des Geräts nutzen. IHR GERÄT UMBENENNEN Andere Geräteeinstellungen können von jedem der Gerätebildschirme aus durch Drücken der drei Punkte in der oberen rechten Ecke aufgerufen werden.
-
Seite 129: Fehlersuche Und -Behebung
INTEGRATION Dadurch lässt sich das Gerät mit Ihrer bevorzugten Hausautomatisierungshardware wie Google Home und Amazon Echo integrieren. Wählen Sie "Mehr Dienstleistungen"und jetzt können Sie das Gerät mit Drittanbietern-Sprachdienste integrieren, siehe Sie das Bild links. FEHLERSUCHE UND -BEHEBUNG Reparieren oder zerlegen Sie das Klimagerät nicht. Eine nicht qualifizierte Reparatur führt zum Erlöschen der Garantie und kann zu einem Ausfall führen, der Verletzungen und Sachschäden verursacht. - Seite 130 Bringen Sie die Fernbedienung in die Nähe Die Fernbedienung ist nicht auf die der Klimaanlage und stellen Sie sicher, dass Richtung der Fernbedienung-Empfänger Die Fernbedienung funk- die Fernbedienung direkt in die Richtung ausgerichtet. tioniert nicht. des Fernbedienungsempfängers ist. Entladene Batterien. Wechsel Sie die Batterien.
- Seite 131 Installation (Raum) - Dass die Installation von Rohrleitungen auf ein Minimum beschränkt wird. - Das Rohr muss vor körperlichen Schäden geschützt werden. - Die Kältemittelleitungen müssen den nationalen Gasvorschriften entsprechen. - Mechanische Anschlüsse sind für Wartungszwecke zugänglich. - In Fällen, in denen eine mechanische Belüftung erforderlich ist, sollten Lüftungsöffnungen frei von Hindernissen gehalten werden.
- Seite 132 Die maximale Kältemittelfüllmenge im Raum muss mit den folgenden Werten übereinstimmen: (5/4) = 2,5 x (LFL) x h x (A) Amin oder die minimal erforderliche Fläche zur Installation von kältemittelbefüllten Geräten M(kg) muss mit den folgenden Werten übereinstimmen: = (M/(2,5 x (LFL) x h )) (5/4) wobei...
- Seite 133 Diese Formel kann nicht für Kältemittel unter 42 kg/kmol verwendet werden. Einige Beispiele für die Ergebnisse der Berechnungen nach der obigen Formel sind in den Tabellen 1-1 und 1-2 aufgeführt. Bei werkseitig versiegelten Geräten kann das Typenschild am Gerät selbst, auf dem die Kältemittelfüllung angegeben ist, zur Berechnung des Amin verwendet werden.
- Seite 134 Um die Brandgefahr bei Arbeiten an Kältemittel enthaltenden Systemen minimieren, sind Sicherheitskontrollen erforderlich. Um das Kältemittelsystem zu reparieren, treffen Sie zuvor folgende Sicherheitsvorkehrungen. Die Arbeit muss unter strengen Sicherheitskontrollen durchgeführt werden, sodass die Gefahr von brennbaren Gasen oder Dämpfen, die während der Arbeiten entstehen können, minimiert wird. Das technische Personal ist für den Betrieb, die Überwachung und die Wartung der Klimaanlagen verantwortlich.
-
Seite 135: Überprüfung Der Klimaanlagen
8. Überprüfung der Klimaanlagen Werden elektrische Bauteile verändert, so müssen sie für den Zweck und die richtige Spezifikation geeignet sein. Befolgen Sie stets die Wartung- und Betriebsanleitungen des Herstellers. Um Hilfestellung zu erhalten, wenden Sie sich an die technische Abteilung des Herstellers. An Geräten mit brennbaren Kältemitteln müssen folgende Kontrollen durchgeführt werden: Die Füllmenge hängt von der Größe des Raumes ab, in dem das Gerät mit Kältemittelgas installiert ... - Seite 136 Wenden Sie keinen dauernden Induktor oder keine Kapazitanzladung auf den Kreislauf an, ohne sich davor vergewissert zu haben, dass dies weder die Stromspannung noch den für das benutzte Gerät erlaubten Strom überschreitet. Diese sicheren Komponenten sind die einzigen, mit denen in einem Bereich mit brennbaren Gasen gearbeitet werden kann. Der Detektor muss richtig reguliert sein.
- Seite 137 Die Kältemittelladung muss in geeignete Rückgewinnungszylinder zurückgeführt werden. Das System muss mit sauerstofffreiem Stickstoff ausgespült werden, damit das Gerät sicher ist. Es kann vonnöten sein, diesen Prozess mehrere Male zu wiederholen. Für Kältemittelsysteme darf keine Druckluft verwendet werden. Spülen Sie das System, indem Sie in das Vakuumssystem sauerstoffreien Stickstoff einführen und es weiter befüllen, bis der Betriebsdruck erreicht ist.
- Seite 138 d) Wenn möglich, säubern Sie das Kühlungssystem mit einer Pumpe. e) Wenn das Vakuum nicht möglich ist, wenden Sie einen hydraulischen Separator an, damit das Kühlmittel aus verschiedenen Systemteilen entnommen werden kann. f) Vergewissern Sie sich, dass sich der Zylinder auf den Stufen befindet, bevor die Rückgewinnung ausgeführt wird.
- Seite 139 20. HC-Kältemittelentlüftung (R290) Die Belüftung kann als Alternative zur Kältemittelrückgewinnung erfolgen. Da HC- Kältemittel kein ODP und ein vernachlässigbares GWP haben, kann das Ablassen des Kältemittels unter bestimmten Umständen als akzeptabel angesehen werden. Wenn diese Möglichkeit jedoch in Betracht gezogen wird, sollte dies in Übereinstimmung mit den entsprechenden nationalen Vorschriften oder Bestimmungen geschehen, sofern dies zulässig ist.
- Seite 140 1. Transportieren Sie das Gerät, das brennbare Kühlmittel enthält, gemäß den geltenden Regelungen. 2. Kleben Sie Etiketten gemäß der örtlichen Regelungen auf das Gerät mit Symbolen. 3. Entsorgen Sie das Gerät mit Kühlgasen wie es die nationalen Vorschriften angegeben. 4. Lagerung von Geräten/Zubehör Die Lagerung muss den Anweisungen des Herstellers entsprechen.
- Seite 141 Manual de instalação,do utilizador e de segurança O desenho e as especificações do equipamento estão sujeitos a alterações sem aviso prévio para a melhoria do produto. Verifique com o seu revendedor ou o fabricante para mais detalhes Quaisquer actualizações do manual serão carregadas para o website do serviço, por favor verifique a versão mais recente.
-
Seite 143: Instruções De Segurança
INSTRUÇÕES DE SEGURANÇA IMPORTANTE! OS APARELHOS DE AR CONDICIONADO DEVEM SER SEMPRE ARMAZENADOS E TRANSPORTADOS NA VERTICAL, CASO CONTRÁRIO PODEM OCORRER DANOS IRREPARÁVEIS NO COMPRESSOR; EM CASO DE DÚVIDA, É ACONSELHÁVEL AGUARDAR PELO MENOS 24 HORAS APÓS A INSTALAÇÃO ANTES DE COLOCAR O APARELHO EM FUNCIONAMENTO. lLeia atentamente as instruções antes de instalar e/ou de colocar o aparelho em funcionamento. - Seite 144 lO gás R290 tem um PAG (Potencial de Aquecimento Global) baixo de apenas 3. lO ar condicionado contém cerca de 290 g de gás refrigerante R290. l Não instalar ou armazenar num espaço sem ventilação com uma área inferior a 15 m aparelho.
-
Seite 145: Resumo Do Produto
RESUMO DO PRODUTO DIA- GRAMA DO PRODUTO VISTA FRONTAL ENTRADA DE AR PAINEL DE CONTROLO DEFLETOR PAINEL DIANTEIRO VISTA TRASEIRA SUPORTES PARA PENDURAR NA PAREDE PAINEL TRASEIRO ENTRADA DE AR SAÍDA DE AR TUBO DE DRENAGEM... - Seite 146 CARACTERÍSTICAS Funcionamento simples. Função de auto-evaporação com tecnologia de poupança de energia. Um design elegante que se adapta perfeitamente a qualquer estilo de habitação. Visor LED brilhante que indica a temperatura e o modo atual. Função de temporização para ligar / desligar que lhe permite escolher quando o aparelho funciona.
-
Seite 147: Instalação
INSTALAÇÃO FERRAMENTAS NECESSÁRIAS NÍVEL DE BOLHA DE AR BERBEQUIM BROCA DE COROA 180 mm FITA MÉTRICA X-ATO BROCA PARA ALVENARIA 8 mm LÁPIS BROCA PARA ALVENARIA 25 mm ANTES DE INICIAR A INSTALAÇÃO, CERTIFIQUE-SE DE QUE DISPÕE DE TODO O EQUIPAMENTO APROPRIADO E DE QUE COMPREENDE OS PASSOS DA INSTALAÇÃO. - Seite 148 INSTALAÇÃO Deve instalar este aparelho numa parede exterior, uma vez que ventila diretamente através da parte traseira. Certifique-se de que a parede é plana, sólida e fiável. Deixar pelo menos 10 cm de espaço à esquerda, à direita e abaixo da máquina.
- Seite 149 Enrolar as lâminas plásticas em forma de tubo e, a partir do interior, introduzi-las nos orifícios previamente perfurados. Certifique-se de que os tubos estão alinhados com a parede interna. Sair e cortar o excesso dos tubos de ventilação com um x-ato, mantendo a aresta o mais direito possível.
- Seite 150 Quando as correntes estiverem colocadas e fixas, corte o excesso de corrente. Levantar o aparelho sobre a parede, alinhar os orifícios de suspensão com os ganchos na calha de suspensão e colocar suavemente o aparelho na posição correta. Deslizar simultaneamente o tubo de drenagem através do orifício de drenagem.
-
Seite 151: Controlo Remoto
FUNCIONAMENTO PAINEL DE Visor digital: CONTROLO Alimentação de ar Arrefecimento Velocidade Secagem Silencioso Aquecimento Temporizador Aumentar / Diminuir Ligar / Desligar Velocidade Modo CONTROLO REMOTO O ar condicionado pode ser controlado com o controlo remoto. São necessárias duas pilhas AAA. NOTA: Na página seguinte, poderá... - Seite 152 FUNÇÕES Premir o botão On/Off para ligar ou desligar o aparelho. On/Off Premir para alternar entre os 4 modos diferentes. O visor mostrará o símbolo do modo selecionado nesse momento. A função de arrefecimento permite ao ar condicionado arrefecer a divisão e, ao mesmo tempo, reduzir a humidade do ar.
-
Seite 153: Antes De Iniciar
Há um atraso de 3 minutos quando se liga o aparelho. Para proteger a vida útil do compressor e PROTEÇÃO DO dos componentes eletrónicos, não ligar o aparelho durante, pelo menos, 5 minutos depois de o COMPRESSOR desligar. CONFIGURAÇÃO DE WI-FI E FUNÇÕES INTELIGENTES CONFIGURAÇÃO WI-FI ANTES DE INICIAR lCertifique-se de que o seu router fornece uma ligação padrão de 2,4 GHz. - Seite 154 COMUTAÇÃO ENTRE TIPOS DE LIGAÇÃO Para comutar o aparelho entre os dois modos de ligação Wi-Fi, manter premido o botão de velocidade durante 3 segundos. REGISTO NA APLICAÇÃO 1. Premir o botão "Registar" na par- 2. Ler a política de privacidade e 3.
- Seite 155 CONFIGURAR A SUA CASA DENTRO DA APLICAÇÃO A SMART LIFE foi concebida para funcionar com vários dispositivos inteligentes compatíveis dentro da sua casa. Também pode ser configurada para funcionar com múltiplos dispositivos em diferentes casas. Assim sendo, durante o processo de configuração, a aplicação requer a criação de diferentes áreas e a atribuição de um nome para facilitar a gestão de todos os dispositivos.
- Seite 156 LIGAÇÃO ATRAVÉS DE LIGAÇÃO RÁPIDA Antes de iniciar a ligação, certifique-se de que o aparelho está em modo de espera, com a luz Wi-Fi a piscar duas vezes por segundo. Caso contrário, seguir as instruções para alterar o modo de ligação. Certifique-se também de que o seu telemóvel está...
- Seite 157 LIGAÇÃO ATRAVÉS DO MODO AP (MÉTODO ALTERNATIVO) Antes de iniciar a ligação, certifique-se de que o aparelho está em modo de espera, com a luz Wi- Fi a piscar uma vez cada três segundos. Caso contrário, seguir as instruções para alterar o modo de ligação Wi-Fi.
-
Seite 158: Ecrã Inicial
CONTROLAR O SEU DISPOSITIVO ATRAVÉS DA APLICAÇÃO ECRÃ INICIAL Adicionar Dispositivo: Adicione um novo dispositivo na aplicação e Alternar Casa: Se tiver criado mais complete o processo de configuração do que uma casa, pode alternar entre do mesmo . elas. Gestão de Salas: Utilize para visua- Informações Meteorológicas: lizar os aparelhos instalados em cada... - Seite 159 PÁGINA DO DISPOSITIVO A página do dispositivo é o painel de controlo principal do ar condicionado e permite o acesso aos con- trolos para alterar as funções e as configurações. Editar Nome: Alterar o nome do ar Retroceder: condicionado. Retrocede para "Minha Página". Temperatura Ambiente Desejada: Exibe a temperatura ambiente desejada.
- Seite 160 CENAS INTELIGENTES As Cenas Inteligentes são uma ferramenta poderosa que oferece a opção de personalizar o funciona- mento do ar condicionado com base tanto nas condições da divisão como nas condições exteriores. Deste modo, o utilizador pode especificar ações muito mais inteligentes. As ações estão divididas em duas categorias: Cena e Automação.
- Seite 161 Depois de adicionar todas as funções desejadas, premir "Guardar" no canto superior direito para finalizar e guardar a sua nova cena. AUTOMAÇÃO A automação permite configurar uma ação automática para o dispositivo. A ação pode ser ativada pelas horas, temperatura ambiente, humidade da divisão, condições me- teorológicas e uma série de outros fatores.
- Seite 162 6. Escolher a função, e, em segui- da, premir a seta no canto superior esquerdo para retroceder para a página anterior. O separador do perfil permite-lhe editar os seus dados, mas também utilizar as funcionalidades adicionadas do aparelho. MUDAR O NOME DO SEU DISPOSITIVO Pode aceder a quaisquer definições do dispositivo a partir de qualquer uma das páginas do dispositivo, premindo os três pontos no canto superior direito.
-
Seite 163: Reparação De Avarias
INTEGRAÇÃO O seu aparelho pode ser integrado com o seu hardware de domótica preferido, como o Google Home ou o Amazon Echo. Selecionar "Serviços de voz de terceiros" para poder integrar-se com serviços de voz de terceiros, consultar a imagem à esquerda. REPARAÇÃO DE AVARIAS Não reparar nem desmontar o ar condicionado. -
Seite 164: Códigos De Erro
Aproximar o controlo remoto do ar condi- O controlo remoto não está alinhado com cionado e certificar-se de que o controlo a direção do recetor do controlo remoto. O controlo remoto não remoto está virado diretamente para o funciona. recetor do controlo remoto. As pilhas estão gastas. -
Seite 165: Medidas De Segurança
Medidas de segurança Leia atentamente as precauções de segurança antes de instalar o dispositivo. Uma instalação incorreta devido à falta de cumprimento das instruções pode causar danos graves ou lesões. ADVERTÊNCIA Instalação (espaço) - Que a instalação de condutas seja mantida a um nível mínimo. - O referido tubo deve ser protegido contra danos físicos. - Seite 166 A carga máxima de refrigerante na sala deve estar em conformidade com o seguinte: (5/4) = 2,5 x (LFL) x (A) Máx para instalar uma aplicação carregada de refrigerante ou a área de superfície mínima requerida Amin M(kg) deve estar em conformidade com o seguinte: = (M/(2,5 x (LFL) (5/4) onde...
- Seite 167 NOTA 1 Esta fórmula não pode ser utilizada para refrigerantes com menos de 42 kg/kmol. NOTA 2 Alguns exemplos dos resultados dos cálculos de acordo com a fórmula acima são dados nas Tabelas 1-1 e 1-2. NOTA 3 No caso de unidades seladas de fábrica, a placa de identificação na própria unidade que marca a carga de refrigerante pode ser utilizada para calcular o Amin.
-
Seite 168: Informações De Manutenção
Informações de manutenção 1. Verificações da zona de trabalho Antes de iniciar o trabalho nos sistemas que contenham refrigerantes inflamáveis, será necessário realizar verificações de segurança para comprovar que o risco de incêndio é minimizado. Para preparar o sistema refrigerante, devem-se ter os seguintes cuidados antes de realizar qualquer trabalho no sistema. - Seite 169 8. Verificações do equipamento ar condicionado Se mudarem componentes elétricos, estes devem ser só os especificados. As instruções de manutenção e de serviço do fabricante devem ser sempre cumpridas. Se tiver dúvidas, consulte o departamento técnico do fabricante para obter assistência técnica. seguintes verificações devem ser efectuadas em equipamentos com refrigerantes inflamáveis: A quantidade de carg a dependerá...
- Seite 170 11. Reparação de componentes seguros Não aplique nenhum indutor permanente ou cargas de capacitância no circuito sem se certificar de que não excederá a tensão nem a corrente permitidas para o equipamento em utilização. Estes componentes seguros são os únicos que podem ser utilizados num ambiente de gás inflamável.
- Seite 171 A carga de refrigerante deve ser recuperada dentro dos cilindros de recuperação apropriados. O sistema deve ser "enxaguado" com OFN para que a unidade seja segura. Pode ser necessário repetir este processo algumas vezes. O ar comprimido não deve ser utilizado para sistemas de refrigeração.
- Seite 172 d) Realize uma purga do sistema refrigerante, se possível. e) Se não for possível, aplique um separador hidráulico para que o refrigerante possa ser extraído de várias partes do sistema. f) Certifique-se de que o cilindro está situado nas escalas antes de efetuar a recuperação. g) Ligar a máquina de recuperação e operá-la de acordo com as instruções do fabricante h) Não encha os cilindros em demasia.
- Seite 173 20. Ventilação do refrigerante HC (R290) A ventilação pode ser feita como uma alternativa à recuperação de refrigerante. Uma vez que os refrigerantes HC não têm PDO e PAG insignificante, a ventilação do refrigerante pode ser considerada aceitável em determinadas circunstâncias. Contudo, se esta possibilidade for considerada, deverá...
- Seite 174 Transporte, rotulagem e armazenamento das unidades Transporte o equipamento que contenha refrigerantes inflamáveis de acordo com as normas em vigor. Coloque os rótulos no equipamento com símbolos de acordo com as normas locais. Deite fora o equipamento com gases refrigerantes com indicado pelas normas nacionais.
- Seite 177 C/ NÁPOLES 249 P1 08013 BARCELONA ESPAÑA / SPAIN (+34) 93 446 27 80 SAT: (+34) 93 652 53 57 www.mundoclima.com...