Herunterladen Inhalt Inhalt Diese Seite drucken
AEG ATB48E1AW Benutzerinformation
Vorschau ausblenden Andere Handbücher für ATB48E1AW:
Inhaltsverzeichnis

Werbung

Verfügbare Sprachen

Verfügbare Sprachen

ATB48E1AW
USER
MANUAL
DE
Benutzerinformation
Gefriergerät
FR
Notice d'utilisation
Congélateur
IT
Istruzioni per l'uso
Congelatore
EN
User Manual
Freezer
2
21
39
58

Werbung

Inhaltsverzeichnis
loading

Inhaltszusammenfassung für AEG ATB48E1AW

  • Seite 1 ATB48E1AW Benutzerinformation Gefriergerät Notice d'utilisation Congélateur Istruzioni per l’uso Congelatore User Manual Freezer USER MANUAL...
  • Seite 2: Inhaltsverzeichnis

    13. UMWELTTIPPS....................20 FÜR PERFEKTE ERGEBNISSE Danke, dass Sie sich für dieses AEG Produkt entschieden haben. Wir haben es geschaffen, damit Sie viele Jahre von seiner ausgezeichneten Leistung und den innovativen Technologien, die Ihnen das Leben erleichtern, profitieren können. Es ist mit Funktionen ausgestattet, die in gewöhnlichen Geräten nicht vorhanden...
  • Seite 3: Sicherheitshinweise

    DEUTSCH SICHERHEITSHINWEISE Lesen Sie vor der Montage und dem Gebrauch des Geräts zuerst die Bedienungsanleitung. Bei Verletzungen oder Schäden infolge nicht ordnungsgemäßer Montage oder Verwendung übernimmt der Hersteller keine Haftung. Bewahren Sie die Anleitung zum Nachschlagen an einem sicheren und zugänglichen Ort auf.
  • Seite 4: Allgemeine Sicherheit

    1.2 Allgemeine Sicherheit Dieses Gerät ist für die Verwendung im Haushalt und • ähnliche Zwecke vorgesehen, wie z. B.: Bauernhöfe, Personalküchenbereiche in – Geschäften, Büros und anderen Arbeitsumfeldern; Für Gäste in Hotels, Motels, Pensionen und – anderen wohnungsähnlichen Räumlichkeiten.
  • Seite 5: Sicherheitsanweisungen

    DEUTSCH Bewahren Sie keine explosiven Substanzen wie • Aerosoldosen mit brennbarem Treibgas in diesem Gerät auf. Wenn das Netzkabel beschädigt ist, muss es vom • Hersteller, einem autorisierten Kundendienst oder einer ähnlich qualifizierten Person zur Vermeidung einer Gefahrenquelle ersetzt werden. 2.
  • Seite 6: Innenbeleuchtung

    Netzstecker nach der Montage • Frieren Sie aufgetaute Lebensmittel noch zugänglich ist. nicht wieder ein. • Ziehen Sie nicht am Netzkabel, wenn • Befolgen Sie die Hinweise auf der Sie das Gerät von der Verpackung zur Aufbewahrung Stromversorgung trennen möchten.
  • Seite 7: Entsorgung

    DEUTSCH ausschließlich Originalersatzteile • Trennen Sie das Gerät von der verwendet werden. Stromversorgung. • Bitte beachten Sie, dass eigene • Schneiden Sie das Netzkabel ab, und Reparaturen oder Reparaturen, die entsorgen Sie es. nicht von Fachkräften durchgeführt • Entfernen Sie die Tür, um zu werden, die Sicherheit des Geräts verhindern, dass sich Kinder oder beeinträchtigen und zum Erlöschen...
  • Seite 8: Abmessungen

    3.1 Abmessungen Gesamtabmessungen ¹ Platzbedarf insgesamt während des Betriebs ³ 1165 ¹ Höhe, Breite und Tiefe des Geräts ohne Griff ³ Höhe, Breite und Tiefe des Geräts einschließlich Griff plus des notwendigen Freiraums für die Zirkulation der Kühlluft, Platzbedarf während des Betriebs ²...
  • Seite 9: Elektroanschluss

    DEUTSCH Einhaltung des Platzbedarfs funktioniert Dieses Gerät ist für den Einsatz bei einer das Gerät korrekt, aber der Umgebungstemperatur von 10°C bis Energieverbrauch kann leicht ansteigen. 43°C vorgesehen. Um die beste Funktionalität des Gerätes Der ordnungsgemäße zu gewährleisten, sollten Sie das Gerät Betrieb des Geräts wird nur nicht in der Nähe von Wärmequellen innerhalb des angegebenen...
  • Seite 10: Wechselbare Anschlagseite Der Tür

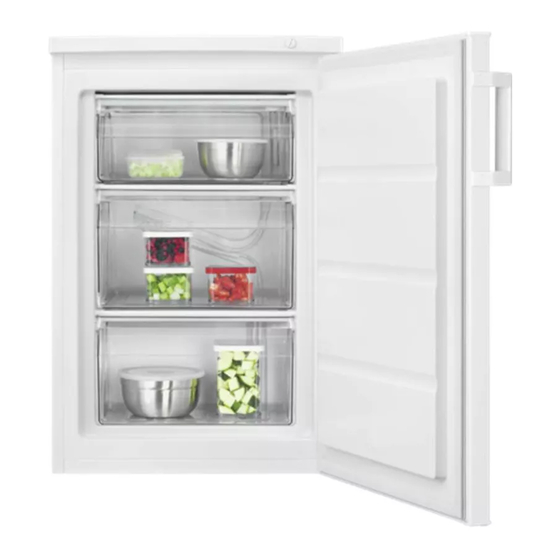
    3.5 Gummiunterlage 3. Lösen Sie die hinteren Schrauben der oberen Abdeckung. Es besteht keine Notwendigkeit, dieses in einem Beutel mitgelieferte Zubehör für den normalen Gebrauch an Ihrem Gerät anzubringen. Es besteht jedoch die Gefahr, dass das Gerät instabil wird, wenn alle Lebensmittel nur auf den Türablagen...
  • Seite 11: Montage Eines Türgriffs

    DEUTSCH 9. Setzen Sie den Stift in das gegenüberliegende Loch des Scharniers. 10. Schrauben Sie das untere Scharnier an der anderen Seite des Geräts an. 11. Montieren Sie die Gummiunterlage Bringen Sie die Türausstattung an. an der Seite ohne Scharnier. Warten Sie mindestens 4 Stunden, bevor 12.
  • Seite 12: Betrieb

    4. BETRIEB 4.1 Einschalten Temperatur im Inneren des Gerätes einstellen. Stecken Sie den Stecker in die Berücksichtigen Sie für eine exakte Wandsteckdose. Einstellung, dass die Temperatur im Inneren des Geräts von folgenden 4.2 Ausschalten Faktoren abhängt: Schalten Sie das Gerät durch Ziehen des •...
  • Seite 13: Tipps Und Hinweise

    DEUTSCH 6. TIPPS UND HINWEISE 6.1 Tipps zum Energiesparen sich, dass sie auf Raumtemperatur abgekühlt sind, bevor Sie sie in das • Die interne Konfiguration des Geräts Fach legen. gewährleistet die effizienteste • Um eine Erwärmung bereits Energienutzung. eingefrorener Lebensmittel zu •...
  • Seite 14: Reinigung Und Pflege

    Rückkehr aus dem Laden in das optimalen Bedingungen gelagert und Gefriergerät. das Auftauen hat eventuell bereits • Wenn Lebensmittel auch nur teilweise begonnen. aufgetaut sind, dürfen sie nicht wieder • Um den Auftauprozess zu minimieren, eingefroren werden.
  • Seite 15: Regelmäßige Reinigung

    DEUTSCH 7.3 Abtauen des und etwas neutraler Seife gewaschen werden, um den typischen Geruch eines Gefriergeräts brandneuen Produkts zu entfernen, und anschließend gründlich getrocknet VORSICHT! werden. Verwenden Sie niemals scharfe Metallwerkzeuge VORSICHT! zum Abkratzen von Reif aus Verwenden Sie keine dem Verdampfer, da Sie chemischen diese beschädigen könnten.
  • Seite 16: Fehlersuche

    3. Lassen Sie die Tür offen. Schützen drei Stunden mit dieser Einstellung Sie den Boden vor dem laufen. Abtauwasser, z. B. mit einem Tuch Legen Sie das Gefriergut erst nach oder einem flachen Behälter. dieser Zeit wieder in das Gefrierfach.
  • Seite 17 DEUTSCH Störung Mögliche Ursache Lösung Die Raumtemperatur ist zu Siehe Kapitel „Montage“. hoch. Die Lebensmittel, die im Ge‐ Lassen Sie die Lebensmittel rät aufbewahrt werden, wa‐ vor deren Aufbewahrung auf ren zu warm. Raumtemperatur abkühlen. Die Tür ist nicht richtig ge‐ Siehe Abschnitt „Schließen schlossen.
  • Seite 18: Schließen Der Tür

    Störung Mögliche Ursache Lösung Die Temperatur im Gerät ist Die Temperatur ist nicht rich‐ Stellen Sie eine höhere/nied‐ zu niedrig/zu hoch. tig eingestellt. rigere Temperatur ein. Die Tür ist nicht richtig ge‐ Siehe Abschnitt „Schließen schlossen. der Tür“. Die Temperatur der Lebens‐...
  • Seite 19: Geräusche

    DEUTSCH 9. GERÄUSCHE SSSRRR! BRRR! CLICK! HISSS! BLUBB! 10. TECHNISCHE DATEN Die technischen Daten befinden sich auf dem Typenschild innen im Gerät sowie Frequenz 50 Hz auf der Energieplakette. Spannung 220 - 240 V 11. INFORMATIONEN FÜR PRÜFINSTITUTE Die Installation und die Vorbereitung des sind in dieser Bedienungsanleitung in Geräts für eine eventuelle EcoDesign- Kapitel 3 beschrieben.
  • Seite 20: Garantie

    GARANTIE Kundendienst Servicestellen Industriestrasse 10 Le Trési 6 Via Violino 11 5506 Mägenwil 1028 Préverenges 6928 Manno Morgenstrasse 131 3018 Bern Langgasse 10 9008 St. Gallen Am Mattenhof 4a/b 6010 Kriens Schlossstrasse 1 4133 Pratteln Comercialstrasse 19 7000 Chur Ersatzteilverkauf Industriestrasse 10, Material, Arbeits- und Reisezeit.
  • Seite 21: Informations De Sécurité

    13. EN MATIÈRE DE PROTECTION DE L'ENVIRONNEMENT......38 POUR DES RÉSULTATS PARFAITS Merci d’avoir choisi ce produit AEG. Nous l’avons conçu pour qu’il vous offre des performances irréprochables pendant de nombreuses années, en intégrant des technologies innovantes vous simplifiant la vie – fonctions que vous ne trouverez peut-être pas sur des appareils ordinaires.
  • Seite 22: Sécurité Des Enfants Et Des Personnes Vulnérables

    être tenu pour responsable des blessures et dégâts résultant d'une mauvaise installation ou utilisation. Conservez toujours les instructions dans un lieu sûr et accessible pour vous y référer ultérieurement. 1.1 Sécurité des enfants et des personnes vulnérables Cet appareil peut être utilisé par des enfants âgés •...
  • Seite 23 FRANÇAIS l'utilisation par les clients des hôtels, motels, des – environnements du type chambres d’hôtes et autres environnements à caractère résidentiel. Pour éviter la contamination des aliments, respectez • les instructions suivantes : n’ouvrez pas la porte pendant de longues durées ; –...
  • Seite 24: Consignes De Sécurité

    2. CONSIGNES DE SÉCURITÉ 2.1 Installation AVERTISSEMENT! N'utilisez pas d'adaptateurs AVERTISSEMENT! multiprises ni de rallonges. L'appareil doit être installé uniquement par un • L’appareil doit être relié à la terre. professionnel qualifié. • Assurez-vous que les paramètres figurant sur la plaque signalétique •...
  • Seite 25: Éclairage Interne

    FRANÇAIS 2.5 Entretien et nettoyage l’absence de flammes et de sources d’ignition dans la pièce. Aérez la pièce. AVERTISSEMENT! • Évitez tout contact d’éléments chauds Risque de blessure avec les parties en plastique de corporelle ou de dommages l’appareil. matériels. •...
  • Seite 26: Installation

    • Coupez le câble d'alimentation et municipal pour obtenir des mettez-le au rebut. informations sur la marche à suivre • Retirez la porte pour empêcher les pour mettre l'appareil au rebut. enfants et les animaux de s'enfermer • N'endommagez pas la partie du dans l'appareil.
  • Seite 27: Emplacement

    FRANÇAIS minimale avec le haut de l’appareil doit être maintenue. Dans l’idéal, cependant, Espace requis en service ² l’appareil ne doit pas être placé sous des éléments suspendus. Pour garantir que l’appareil est de niveau, réglez le ou les pieds réglables sous l’appareil. ATTENTION! Si vous placez l’appareil ²...
  • Seite 28: Mise À Niveau

    à celles du réseau et le sol. électrique domestique. 2. Trouvez un orifice dans un cache de • L’appareil doit être relié à la terre. La base inférieur et insérez une vis dans fiche du câble d'alimentation...
  • Seite 29 FRANÇAIS 6. Soulevez la porte et posez-la sur une surface douce. 7. Inclinez délicatement l’appareil sur un emballage en mousse souple ou un élément similaire pour éviter d’endommager l’arrière de l’appareil et le sol. 8. Dévissez les vis de la charnière inférieure et des pieds réglables.
  • Seite 30: Fonctionnement

    4. FONCTIONNEMENT 4.1 Activation régler vous-même la température intérieure. Insérez la fiche dans la prise murale. Choisissez le réglage en tenant compte du fait que la température à l’intérieur de 4.2 Désactivation l’appareil dépend de plusieurs facteurs : Pour éteindre l’appareil, retirez la fiche •...
  • Seite 31: Conseils

    FRANÇAIS 6. CONSEILS 6.1 Conseils pour dioxyde de carbone : elles pourraient exploser pendant la congélation. économiser l’énergie • N'introduisez pas d'aliments chauds dans le compartiment du congélateur. • La configuration interne de l’appareil Laissez-les refroidir à température permet une consommation d’énergie ambiante avant de les placer dans le la plus efficace possible.
  • Seite 32: Durée De Conservation

    6.4 Conseils pour vos congelés à la fin de vos courses et transportez-les dans un sac courses isotherme. • Placez les aliments congelés dans le Après vos courses : congélateur immédiatement après • Assurez-vous que l’emballage n’est être revenu de vos courses.
  • Seite 33: Entretien Et Nettoyage

    FRANÇAIS 7. ENTRETIEN ET NETTOYAGE 7.3 Décongélation du AVERTISSEMENT! congélateur Reportez-vous aux chapitres concernant la sécurité. ATTENTION! N’utilisez jamais d’objets 7.1 Nettoyage de l’intérieur métalliques coupants pour gratter le givre de Avant d’utiliser l’appareil pour la l’évaporateur, car vous première fois, nettoyez l’intérieur et tous pourriez l’endommager.
  • Seite 34: Dépannage

    6. Mettez l’appareil en marche et ATTENTION! fermez la porte. Une élévation de la 7. Réglez le thermostat pour obtenir température des plus de froid et faites fonctionner denrées congelées, l’appareil pendant trois heures en pendant le dégivrage, utilisant ce réglage.
  • Seite 35 FRANÇAIS Problème Cause probable Solution Trop d’aliments ont été intro‐ Attendez quelques heures et duits simultanément. vérifiez de nouveau la tem‐ pérature. La température ambiante est Reportez-vous au chapitre trop élevée. « Installation ». Les aliments placés dans Laissez refroidir les aliments l’appareil étaient trop à...
  • Seite 36: Fermeture De La Porte

    Problème Cause probable Solution La température à l’intérieur La température n’est pas ré‐ Sélectionnez une températu‐ de l’appareil est trop basse/ glée correctement. re plus élevée/plus basse. élevée. La porte n’est pas correcte‐ Reportez-vous à la section ment fermée.
  • Seite 37: Bruits

    FRANÇAIS 9. BRUITS SSSRRR! BRRR! CLICK! HISSS! BLUBB! 10. DONNÉES TECHNIQUES Les caractéristiques techniques figurent sur la plaque signalétique située sur à Fréquence 50 Hz l’intérieur de l’appareil et sur l’étiquette énergétique. Tension 220 - 240 V 11. INFORMATIONS POUR LES LABORATOIRES D’ESSAIS L’installation et la préparation de aux indications du chapitre 3 de cette...
  • Seite 38: Garantie

    GARANTIE Service-clientèle Points de Service Industriestrasse 10 Le Trési 6 Via Violino 11 5506 Mägenwil 1028 Préverenges 6928 Manno Morgenstrasse 131 3018 Bern Langgasse 10 9008 St. Gallen Am Mattenhof 4a/b 6010 Kriens Schlossstrasse 1 4133 Pratteln Comercialstrasse 19...
  • Seite 39 13. CONSIDERAZIONI SULL'AMBIENTE.............. 57 PER RISULTATI PERFETTI Grazie per aver scelto di acquistare questo prodotto AEG. Lo abbiamo creato per fornirvi prestazioni impeccabili per molti anni, grazie a tecnologie innovative che vi semplificheranno la vita - funzioni che non troverete sulle normali apparecchiature.
  • Seite 40: Informazioni Di Sicurezza

    INFORMAZIONI DI SICUREZZA Leggere attentamente le istruzioni fornite prima di installare e utilizzare l'apparecchiatura. I produttori non sono responsabili di eventuali lesioni o danni derivanti da un'installazione o un uso scorretti. Conservare sempre le istruzioni in un luogo sicuro e accessibile per poterle consultare in futuro.
  • Seite 41 ITALIANO Case coloniche, cucine per il personale di negozi, – uffici e altri ambienti di lavoro; Clienti di hotel, motel, bed and breakfast e altri – ambienti residenziali. Per evitare la contaminazione degli alimenti rispettare • le seguenti istruzioni: non aprire la porta per lunghi periodi; –...
  • Seite 42: Istruzioni Di Sicurezza

    2. ISTRUZIONI DI SICUREZZA 2.1 Installazione 2.2 Collegamento elettrico AVVERTENZA! AVVERTENZA! L’installazione Rischio di incendio e scossa dell'apparecchiatura deve elettrica. essere eseguita da personale qualificato. AVVERTENZA! In fase di posizionamento •...
  • Seite 43: Illuminazione Interna

    ITALIANO 2.3 Utilizzo 2.4 Illuminazione interna AVVERTENZA! AVVERTENZA! Rischio di lesioni, scottature Pericolo di scosse elettriche. o scosse elettriche. • Per quanto riguarda la lampada o le lampade all'interno di questo prodotto e le lampade di ricambio vendute L'apparecchiatura contiene gas separatamente: Queste lampade infiammabile, isobutano (R600a), un gas sono destinate a resistere a...
  • Seite 44: Smaltimento

    • Tagliare il cavo di rete e smaltirlo. luminose, maniglie delle porte, • Rimuovere la porta per evitare che cerniere delle porte, vassoi e cestelli. bambini e animali domestici Si prega di notare che alcuni di questi rimangano chiusi all’interno...
  • Seite 45 ITALIANO 3.1 Dimensioni Dimensioni complessive ¹ Spazio complessivo necessario duran‐ te l’uso ³ 1165 ¹ l’altezza, la larghezza e la profondità dell’apparecchiatura senza l’impugnatura ³ l’altezza, la larghezza e la profondità dell’apparecchiatura, compresa la maniglia, più lo spazio necessario per la Spazio necessario durante l’uso ²...
  • Seite 46 In caso di installazione diversa da quella Quest’elettrodomestico è destinato a libera rispettando lo spazio richiesto dalle essere utilizzato a temperature ambiente dimensioni d’uso, l’apparecchiatura che vanno da 10°C a 43°C. funzionerà correttamente ma il consumo Il corretto funzionamento energetico potrebbe aumentare dell’apparecchiatura può...
  • Seite 47: Tampone Di Supporto In Gomma

    ITALIANO 3.5 Tampone di supporto in gomma Non è necessario installare questa apparecchiatura aggiuntiva fornita in una busta con l'apparecchiatura durante il normale utilizzo. Tuttavia, c'è il rischio che l'apparecchio diventi instabile quando tutti i prodotti alimentari sono collocati solo sugli scaffali delle porte.
  • Seite 48: Funzionamento

    9. Installare il perno nel foro opposto Installare le dotazioni della porta. della cerniera. Attendere almeno 4 ore prima di 10. Avvitare la cerniera inferiore sul lato collegare l'apparecchio alla rete elettrica. opposto dell'elettrodomestico. 11. Installare il supporto in gomma sul 3.7 Installazione di una...
  • Seite 49: Utilizzo Quotidiano

    ITALIANO 4.2 Spegnimento È importante ricordare che la temperatura all'interno Per spegnere l’elettrodomestico, dell'apparecchiatura è condizionata dai rimuovere la spina dalla presa di seguenti fattori: corrente. • temperatura ambiente, • frequenza di apertura della porta, 4.3 Regolazione della • quantità di alimenti conservati, temperatura •...
  • Seite 50: Consigli E Suggerimenti Utili

    6. CONSIGLI E SUGGERIMENTI UTILI 6.1 Consigli per il risparmio • Non congelare bottiglie o lattine con liquidi, in particolare bevande energetico contenenti anidride carbonica - potrebbero esplodere durante il • L’uso più efficiente dell’energia congelamento. dipende dalla configurazione interna •...
  • Seite 51: Pulizia E Cura

    ITALIANO 6.4 Consigli per l’acquisto trasportarli in un sacchetto termico e isolato. Dopo aver acquistato alimenti: • Mettete i surgelati immediatamente nel congelatore dopo essere tornati • Assicurarsi che l'imballaggio non sia dal negozio. danneggiato - il cibo potrebbe • Se il cibo si è scongelato anche solo deteriorarsi.
  • Seite 52: Pulizia Dell'interno

    7.1 Pulizia dell’interno Circa 12 ore prima dello sbrinamento, impostare una Prima di utilizzare l’elettrodomestico per temperatura più bassa per la prima volta, lavare l’interno e gli accumulare una riserva di accessori con acqua tiepida e sapone freddo sufficiente in caso di...
  • Seite 53: Risoluzione Dei Problemi

    ITALIANO 7.4 Periodi di non utilizzo 3. Sbrinare l'apparecchiatura. 4. Pulire l'apparecchiatura e tutti gli Se l'apparecchiatura non viene utilizzata accessori. per un lungo periodo, adottare le 5. Lasciare la porta socchiusa/e per seguenti precauzioni: evitare la formazione di odori sgradevoli.
  • Seite 54 Problema Causa possibile Soluzione La porta non si apre facil‐ Si è cercato di riaprire la por‐ Attendere alcuni secondi fra mente. ta subito dopo averla chiusa. la chiusura della porta e la sua riapertura. C’è una quantità eccessiva La porta non è...
  • Seite 55: Chiusura Della Porta

    ITALIANO Problema Causa possibile Soluzione Lo spessore della brina è Sbrinare l'apparecchiatura. maggiore di 4-5 mm. La porta viene aperta fre‐ Aprire la porta solo se ne‐ quentemente. cessario. Nell’apparecchiatura non cir‐ Verificare che l’aria fredda cola l’aria fredda. circoli nell’apparecchiatura. Fare riferimento al capitolo “Consigli e suggerimenti uti‐...
  • Seite 56: Dati Tecnici

    10. DATI TECNICI I dati tecnici sono riportati sulla targhetta dei dati applicata sul lato esterno Frequenza 50 Hz dell’apparecchiatura e sull’etichetta dei valori energetici. Tensione 220 – 240 V 11. INFORMAZIONI PER GLI ISTITUTI DI TEST L'installazione e la preparazione...
  • Seite 57: Considerazioni Sull'ambiente

    ITALIANO 13. CONSIDERAZIONI SULL'AMBIENTE Riciclare i materiali con il simbolo Per la Svizzera: Buttare l'imballaggio negli appositi Dove portare gli apparecchi contenitori per il riciclaggio. Aiutare a fuori uso? proteggere l’ambiente e la salute umana In qualsiasi negozio che e a riciclare rifiuti derivanti da vende apparecchi nuovi apparecchiature elettriche ed oppure si restituiscono ai...
  • Seite 58: Safety Information

    13. ENVIRONMENTAL CONCERNS..............74 FOR PERFECT RESULTS Thank you for choosing this AEG product. We have created it to give you impeccable performance for many years, with innovative technologies that help make life simpler – features you might not find on ordinary appliances. Please spend a few minutes reading to get the very best from it.
  • Seite 59: Children And Vulnerable People Safety

    ENGLISH responsible for any injuries or damage that are the result of incorrect installation or usage. Always keep the instructions in a safe and accessible location for future reference. 1.1 Children and vulnerable people safety This appliance can be used by children aged from 8 •...
  • Seite 60: Safety Instructions

    – with food and accessible drainage systems; WARNING: Keep ventilation openings, in the • appliance enclosure or in the built-in structure, clear of obstruction. WARNING: Do not use mechanical devices or other •...
  • Seite 61: Electrical Connection

    ENGLISH 2.3 Use • Do not expose the appliance to the rain. • Do not install the appliance where WARNING! there is direct sunlight. Risk of injury, burns, electric • Do not install this appliance in areas shock or fire. that are too humid or too cold.
  • Seite 62: Installation

    They are not...
  • Seite 63 ENGLISH 3.1 Dimensions Overall dimensions ¹ Overall space required in use ³ 1165 ¹ the height, width and depth of the ³ the height, width and depth of the appliance without the handle appliance including the handle, plus the space necessary for free circulation of the cooling air, plus the space necessary Space required in use ²...
  • Seite 64 To ensure appliance's best functionality, If you have any doubts you should not install the appliance in the regarding where to install the nearby of the heat source (oven, stoves, appliance, please turn to the radiators, cookers or hobs) or in a place vendor, to our customer with direct sunlight.
  • Seite 65: Door Reversibility

    ENGLISH 4. Lift the top cover and place it on a soft surface. 5. Unscrew the 4 screws that connect the upper hinge. Put the upper hinge in a safe place together with the screws. 1. Tilt the appliance carefully on a soft foam packaging or similar material to avoid any damage to the back of the appliance and the floor.
  • Seite 66: Operation

    Wait at least 4 hours before connecting the appliance to the power supply. 3.7 Installation of a door handle If there is a door handle separately provided in a bag, you can install it as follows: 1. Remove the screws from the holes on the side of the door.
  • Seite 67: Daily Use

    ENGLISH 5. DAILY USE 5.1 Freezing fresh food Keep the food no closer than 15 mm from the door. The freezer compartment is suitable for CAUTION! freezing fresh food and storing frozen In the event of accidental and deep-frozen food for a long time. defrosting, for example due Store the fresh food evenly distributed in to a power failure, if the...
  • Seite 68: Hints For Storage Of Frozen Food

    • Do not put hot food in the freezer • Leave enough space around the food compartment. Cool it down at room to allow air to circulate freely. temperature before placing it inside • For adequate storage refer to food the compartment.
  • Seite 69: Care And Cleaning

    ENGLISH Type of food Shelf life (months) Fatty fish (e.g. salmon, mackerel) 2 - 3 Lean fish (e.g. cod, flounder) 4 - 6 Shrimps Shucked clams and mussels 3 - 4 Cooked fish 1 - 2 Meat: Poultry 9 - 12 Beef 6 - 12 Pork...
  • Seite 70: Periods Of Non-Operation

    2. Remove any stored food, wrap it in 6. Switch on the appliance and close several layers of newspaper and put the door. it in a cool place. 7. Set the temperature regulator to obtain the maximum coldness and...
  • Seite 71 ENGLISH Problem Possible cause Solution The room temperature is too Refer to "Installation" chap‐ high. ter. Food products placed in the Allow food products to cool appliance were too warm. to room temperature before storing. The door is not closed cor‐ Refer to "Closing the door"...
  • Seite 72: Closing The Door

    Problem Possible cause Solution The food products' tempera‐ Let the food products tem‐ ture is too high. perature decrease to room temperature before storage. Many food products are stor‐ Store less food products at ed at the same time.
  • Seite 73: Noises

    ENGLISH 9. NOISES SSSRRR! BRRR! CLICK! HISSS! BLUBB! 10. TECHNICAL DATA The technical information is situated in the rating plate on the internal side of the Frequency 50 Hz appliance and on the energy label. Voltage 220-240 V 11. INFORMATION FOR TEST INSTITUTES Installation and preparation of the clearances shall be as stated in this User appliance for any EcoDesign verification...
  • Seite 74: Guarantee

    GUARANTEE Customer Service Centres Point of Service Industriestrasse 10 Le Trési 6 Via Violino 11 5506 Mägenwil 1028 Préverenges 6928 Manno Morgenstrasse 131 3018 Bern Langgasse 10 9008 St. Gallen Am Mattenhof 4a/b 6010 Kriens Schlossstrasse 1 4133 Pratteln...
  • Seite 76 www.aeg.com/shop...

Diese Anleitung auch für:

Atf851

Inhaltsverzeichnis