Herunterladen Inhalt Inhalt Diese Seite drucken
Hotpoint Ariston PK 644 D GH Bedienungsanleitung

Hotpoint Ariston PK 644 D GH Bedienungsanleitung

Kochmulde
Vorschau ausblenden Andere Handbücher für PK 644 D GH:
Inhaltsverzeichnis

Werbung

Verfügbare Sprachen
  • DE

Verfügbare Sprachen

  • DEUTSCH, seite 53
PK 644 D GH X /HA
PKQ 644 D GH /HA
PK 644 D GH E X/HA
PK 755 D GH X /HA
PKQ 755 D GH /HA
PK 755D GH E X/HA
Italiano
Istruzioni per l'uso
PIANO
Sommario
Istruzioni per l'uso,1
Installazione,17
English
Operating Instructions
HOB
Contents
Operating Instructions,1
Warnings,3
Assistance,10
Description of the appliance,12
Français
Mode d'emploi
TABLE DE CUISSON
Sommaire
Mode d'emploi,1
Avertissements,4
Assistance,10
Description de l'appareil,13
Español
Manual de instrucciones
ENCIMERA
Sumario
Manual de instrucciones,1
Advertencias,4
Asistencia,10
Descripción del aparato,13
Portuges
Instruções para a utilização
PLANO
Índice
Instruções para a utilização,1
Advertências,5
Assistência,11
Descrição do aparelho,14

Werbung

Inhaltsverzeichnis
loading

Inhaltszusammenfassung für Hotpoint Ariston PK 644 D GH

  • Seite 1: Inhaltsverzeichnis

    PK 644 D GH X /HA PKQ 644 D GH /HA PK 644 D GH E X/HA PK 755 D GH X /HA PKQ 755 D GH /HA PK 755D GH E X/HA Français Mode d’emploi TABLE DE CUISSON Sommaire Mode d’emploi,1...
  • Seite 2 Deutsch Türkçe Bedienungsanleitung KOCHMULDE SETÜSTÜ Inhaltsverzeichnis Bedienungsanleitung,2 Hinweise,6 Kundendienst,11 Teknik Servis,11 Beschreibung Ihres Gerätes,14 Installation,53 Montaj,75 Inbetriebsetzung und Gebrauch,57 Vorsichtsmaßregeln und Hinweise,57 Önlemler ve tavsiyeler,78 Störungen und Abhilfe,60 Nederlands Gebruiksaanwijzing KOOKPLAAT Inhoud Gebruiksaanwijzing,2 Belangrijk,7 Service,11 Beschrijving van het apparaat,15 Het installeren,61 Starten en gebruik,64 Voorzorgsmaatregelen en advies,64 Onderhoud en verzorging,65...
  • Seite 3: Avvertenze

    L’apparecchio non è destinato a essere messo in funzione per mezzo di un temporizzatore esterno oppure di un Avvertenze sistema di comando a distanza separato. ATTENZIONE: Questo apparecchio e le ATTENZIONE: l’uso di protezioni del sue parti accessibili diventano molto caldi piano inappropriate può...
  • Seite 4: Avertissements

    Never use steam cleaners or pressure ne doivent pas être effectuées par des cleaners on the appliance. enfants non surveillés. ATTENTION : Laisser un récipient de opening it. Do not close the glass cover (if cuisson avec de l’huile ou de la graisse present) when the gas burners or electric hotplates are still hot.
  • Seite 5 Mantenga alejados a los niños menores - apague inmediatamente todos los de 8 años si no son continuamente vigilados. El presente aparato puede ser calentadores eléctricos y desconecte el utilizado por niños mayores de 8 años y aparato de la red eléctrica. por personas con capacidades físicas, sensoriales o mentales disminuidas o sin experiencia ni conocimientos, si se...
  • Seite 6: Hinweise

    antes de abri-la. Não feche a tampa de ou a chapa eléctrica ainda estiverem ZUR BEACHTUNG: Lassen Sie keine Fette oder Öle unbewacht auf dem Herd stehen. Das ist gefährlich und kann O aparelho não é destinado a ser einen Brand verursachen. NIEMALS eine colocado em funcionamento por meio de um temporizador externo ou por Schalten Sie das Gerät aus und ersticken...
  • Seite 7 Het apparaat is niet geschikt om te worden ingeschakeld m.b.v. een externe timer of door een gescheiden Belangrijk afstandsbedieningssysteem. PAS OP: Dit apparaat en zijn bereikbare PAS OP: het gebruik van ongeschikte onderdelen worden tijdens gebruik zeer kookplaatbeschermingen kan ongelukken heet.
  • Seite 8 uzak tutunuz. itibaren çocuklar ve fiziksel, duyusal veya mental kapasitelerden yoksun veya olabilir. örtmek gerekir. neden olabilir.
  • Seite 9 görmesi halinde: kesiniz...
  • Seite 10: Assistenza

    Assistenza Assistance Comunicare: Communicating: Queste ultime informazioni si trovano sulla targhetta This information is found on the data plate located on the caratteristiche posta sull’apparecchio. sempre l’installazione di pezzi di ricambio non originali. Assistenza Attiva 7 giorni su 7 Assistance Indiquez-lui : Se nasce il bisogno di assistenza o manutenzione basta chiamare il Numero Unico Nazionale 199.199.199* per...
  • Seite 11: Kundendienst

    Assistência Comunique: Kundendienst Geben Sie bitte Folgendes an: Service U moet doorgeven: Deze informatie bevindt zich op het typeplaatje links onderin het koelgedeelte. Teknik Servis...
  • Seite 12: Descrizione Dell'apparecchio

    Descrizione dell’apparecchio Description of the appliance Vista d’insieme Overall view 1 Griglie di appoggio per RECIPIENTI DI COTTURA 1 Support Grid for COOKWARE 2 BRUCIATORI GAS 2 GAS BURNERS 3 Manopole di comando dei BRUCIATORI GAS 3 Control Knobs for GAS BURNERS 4 Candela di accensione dei BRUCIATORI GAS 4 Ignition for GAS BURNERS 5 DISPOSITIVO DI SICUREZZA...
  • Seite 13: Description De L'appareil

    Description de l’appareil Descripción del aparato Vue d’ensemble Vista en conjunto 1 Grilles support de CASSEROLES 1 Parrillas de apoyo para RECIPIENTES DE COCCIÓN 2 BRÛLEURS À GAZ 2 QUEMADORES A GAS 3 Manettes de commande des BRÛLEURS GAZ 3 Mandos de los QUEMADORES A GAS 4 Bougie d’allumage des BRÛLEURS GAZ 4 Bujía de encendido de los QUEMADORES A GAS 5 DISPOSITIF DE SÉCURITÉ...
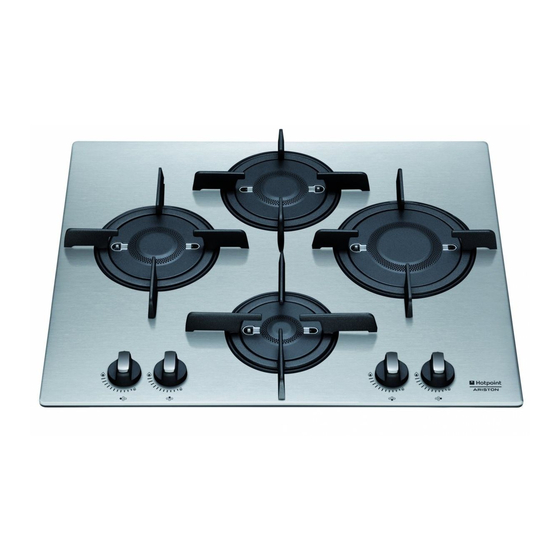
  • Seite 14: Beschreibung Ihres Gerätes

    Descrição do aparelho Beschreibung Ihres Gerätes Vista de conjunto Geräteansicht 1 Grades de suporte para RECIPIENTES DE COZEDURA 1 KOCHMULDENROSTE 2 QUEIMADORES DE GÁS 2 GASBRENNER 3 Manípulos de comando dos QUEIMADORES A GÁS 3 Reglerknöpfe GASBRENNER 4 Vela para acender os QUEIMADORES A GÁS 4 GASBRENNER-ZÜNDKERZE 5 DISPOSITIVO DE SEGURANÇA 5 SICHERHEITSVORRICHTUNG...
  • Seite 15: Beschrijving Van Het Apparaat

    Beschrijving van het apparaat Algemeen aanzicht 1 Roosters voor PANNEN 2 GASBRANDERS 3 Knoppen voor het regelen van de GASBRANDERS 4 Bougie voor ontsteking van de GASBRANDERS 5 VEILIGHEIDSMECHANISME GASBRANDERS hebben verschillende afmetingen en vermogen. Kies de brander die het best overeenkomt met de diameter van de pan die u wilt gebruiken.
  • Seite 16: Genel Görünüm

    Genel görünüm yakma bujis GAZ BRÜLÖRLERI GAZ BRÜLÖRLERI GAZ BRÜLÖRLERI ÇAKMAKLARI EMNIYET DONANIMI...
  • Seite 17 Installazione Incasso Per una corretta installazione del piano di cottura vanno osservate le seguenti precauzioni: consultare in ogni momento. In caso di vendita, di cessione piano di lavoro, debbono essere situati ad almeno 600 o di trasloco, assicurarsi che resti insieme all’apparecchio mm dal bordo del piano stesso.
  • Seite 18: Collegamento Gas

    Avanti Prima di effettuare l’allacciamento accertarsi che: di potenza della macchina, indicato nella targhetta prolunghe e multiple. Posizione gancio per Dietro top H=40mm ! Ad apparecchio installato, il cavo elettrico e la presa della corrente devono essere facilmente raggiungibili. ! Usare i ganci contenuti nella “confezione accessori” ! Il cavo non deve subire piegature o compressioni.
  • Seite 19: Caratteristiche Dei Bruciatori Ed Ugelli

    * A 15°C e 1013,25 mbar-gas secco Naturale P.C.S. = 37.78 MJ/m³ PK 644 D GH X/HA PK 755 D GH X/HA PKQ 644 D GH /HA PKQ 755 D GH /HA PK 755D GH E X /HA PK 644 D GH E X /HA...
  • Seite 20: Avvio E Utilizzo

    Avvio e utilizzo Corretto posizionamento dei bruciatori FTGH ! Su ciascuna manopola è indicata la posizione del bruciatore gas corrispondente. Bruciatori gas Il bruciatore prescelto può essere regolato dalla manopola corrispondente come segue: Massimo Minimo Per accendere uno dei bruciatori, avvicinare allo stesso posizione di massima potenza.
  • Seite 21: Smaltimento

    una carta assorbente per cucina. staccato la spina dalla rete elettrica. cura di eliminare le eventuali incrostazioni. I cappellotti NON devono essere messi in lavastoviglie meccanismi interni per tentare una riparazione. per evitare l’ opacizzazione della parte in alluminio. Contattare l’Assistenza (vedi Assistenza). verso l’interno del piano cottura per evitare che vengano parte terminale dei dispositivi di accensione istantanea urtati accidentalmente.
  • Seite 22 cream soap BRUSH SCRUB Strofinare Spazzolare Frotter Brosser Avoid soaking NO ammollo Ne pas laisser tremper Asciugare Sécher 40°C RINSE Risciacquare Rincer Cepillar Fregar Enjuagar No remojar Secar Escovar Esfregar Enxaguar Sem amolecimento Secar Borstelen Poetsen Spoelen Niet weken Drogen Fırçalayın Ovalayın Durulayın...
  • Seite 23: Manutenzione Rubinetti Gas

    Manutenzione rubinetti gas necessario provvedere alla sostituzione del rubinetto stesso. ! Questa operazione deve essere effettuata da un tecnico autorizzato dal costruttore. Anomalie e rimedi Può accadere che il piano non funzioni o non funzioni bene. Prima di chiamare l’assistenza, vediamo che cosa si può nelle reti di alimentazione gas ed elettrica, ed in particolare i rubinetti gas a monte del piano siano aperti.
  • Seite 24: Installation

    Installation installation instruction manuals and at a minimum ! Before operating your new appliance please read this instruction booklet carefully. It contains important information for safe use, installation and care of the appliance. If the hob is installed beneath a wall ! Please keep these operating instructions for future reference.
  • Seite 25: Gas Connection

    ! Use the hooks contained in the “accessory pack”. ! Once the appliance has been installed, the power supply cable and the electrical socket must be easily accessible. wooden panel must be installed as insulation. This must ! The cable must not be bent or compressed. be placed at a minimum distance of 20 mm from the lower part of the hob.
  • Seite 26: Burner And Nozzle Specifications

    * At 15°C and 1013,25 mbar-dry gas Natural P.C.S. = 37.78 MJ/m³ PK 644 D GH X/HA PK 755 D GH X/HA PKQ 755 D GH /HA PKQ 644 D GH /HA PK 644 D GH E X /HA PK 755D GH E X /HA...
  • Seite 27: Start-Up And Use

    Start-up and use Correct positioning of the FTGH burners ! The position of the corresponding gas burner is shown on every knob. Gas burners Each burner can be adjusted to one of the following settings using the corresponding control knob: Maximum Minimum To turn on one of the burners, place a lighted match or lighter...
  • Seite 28: Maintenance And Care

    the mains socket, do not pull on the cable. and dry it with absorbent kitchen roll. without having detached the plug from the mains. substances removed. you attempt to repair the appliance yourself. Repairs The burner caps should NOT be put in the dishwasher carried out by inexperienced persons may cause injury to prevent dulling of the aluminum part or further malfunctioning of the appliance.
  • Seite 29 cream soap BRUSH SCRUB Strofinare Spazzolare Frotter Brosser Avoid soaking NO ammollo Ne pas laisser tremper Asciugare Sécher 40°C RINSE Risciacquare Rincer Cepillar Fregar Enjuagar No remojar Secar Escovar Esfregar Enxaguar Sem amolecimento Secar Borstelen Poetsen Spoelen Niet weken Drogen Fırçalayın Ovalayın Durulayın...
  • Seite 30: Gas Tap Maintenance

    Gas tap maintenance If this happens, the tap must be replaced. technician authorised by the manufacturer. Troubleshooting It may happen that the appliance does not function properly or at all. Before calling the service centre for assistance, check if anything can be done. First, check to see that there are no interruptions in the gas and electrical supplies, and, in particular, that the gas valves for the mains are open.
  • Seite 31: Installation

    Installation ! Conservez ce mode d’emploi pour pouvoir le consulter à tout moment. En cas de vente, de cession ou de informer le nouveau propriétaire sur son fonctionnement En cas de cheminée ou conduit de fumée ramifié Directement et lui fournir les conseils correspondants. (réservé...
  • Seite 32: Raccordement Électrique

    Raccordement électrique joint (fourni) le long du périmètre de la table comme illustré. Les tables munies d’un cordon d’alimentation tripolaire, sont prévues pour un fonctionnement à courant alternatif cas d’installation au-dessus d’un four à encastrer, la connexion Branchement du câble d’alimentation au réseau électrique Montez sur le câble une prise normalisée adaptée à...
  • Seite 33 PLAQUETTE SIGNALETIQUE P o u r r e l i e r l ’ a p p a r e i l à l a Raccordements voir plaquette signalétique électriques installer le raccord “R” (disponible Cet appareil est conforme aux sur demande auprès du Service Directives Communautaires suivantes : - 2006/95/CEE du 12/12/06 (Basse...
  • Seite 34: Caractéristiques Des Brûleurs Et Des Injecteurs

    A 15°C et 1013,25 mbar-gaz sec Naturele P.C.S. = 37,78 MJ/m³ PK 755 D GH X/HA PK 644 D GH X/HA PKQ 644 D GH /HA PKQ 755 D GH /HA PK 644 D GH E X /HA PK 755D GH E X /HA...
  • Seite 35: Mise En Marche Et Utilisation

    Mise en marche et utilisation Le positionnement correct de la FTGH brûleur comme suit : Maximum Minimum allume-gaz, appuyez à fond sur la manette correspondante et tournez-la dans le sens contraire des aiguilles d’une Appuyez sur la manette pendant 2-3 secondes environ l’intérieur de la manette, dans ce cas, il y a une bougie à...
  • Seite 36: Mise Au Rebut

    la surface. de la prise de courant. ! Ne nettoyez jamais l’appareil avec des nettoyeurs vapeur ou haute pression. courant. sur la surface et séchez avec du papier essuie-tout. mécanismes internes pour tenter de réparer l’appareil. Contactez le service d’Assistance (voir Assistance). en éliminant soigneusement toute incrustation.
  • Seite 37 Nettoyage du brûleur FTGH cream soap BRUSH SCRUB Strofinare Spazzolare Frotter Brosser Avoid soaking NO ammollo Ne pas laisser tremper Asciugare Sécher 40°C RINSE Risciacquare Rincer Cepillar Fregar Enjuagar No remojar Secar Escovar Esfregar Enxaguar Sem amolecimento Secar Borstelen Poetsen Spoelen Niet weken Drogen...
  • Seite 38: Entretien Robinets Gaz

    Entretien robinets gaz ! Cette opération doit être effectuée par un technicien agréé par le fabricant. Anomalies et remèdes fonctionne pas très bien. Avant d’appeler le service après- a pas de coupure de gaz ou de courant, et si les robinets du gaz en amont de l’appareil sont bien ouverts.
  • Seite 39: Instalación

    Instalación Empotramiento Para una correcta instalación de la encimera se deben observar las siguientes precauciones: ! Es importante conservar este manual para poder consultarlo en todo momento. En caso de venta, de cesión mm., como mínimo, del borde de la misma. para informar al nuevo propietario sobre su funcionamiento y sobre las advertencias correspondientes.
  • Seite 40 Adelante ! El instalador es responsable de la correcta conexión eléctrica y del cumplimiento de las normas de seguridad. Posición del gancho para Atrás H=40mm ! Una vez instalado el aparato, el cable eléctrico y la toma es necesario introducir un panel de madera como de corriente deben ser fácilmente accesibles.
  • Seite 41: Características De Los Quemadores E Inyectores

    A 15°C y 1013,25 mbar-gas seco Natural P.C.S. = 37.78 MJ/m³ PK 644 D GH X/HA PK 755 D GH X/HA PKQ 644 D GH /HA PKQ 755 D GH /HA PK 644 D GH E X /HA PK 755D GH E X /HA...
  • Seite 42: Puesta En Funcionamiento Y Uso

    Puesta en funcionamiento y La colocación correcta del FTGH brucitore a gas correspondiente. Quemadores a gas correspondiente de la siguiente manera: Máximo Mínimo Para encender uno de los mecheros, acercar al mismo una llama o un encendedor, apretar a fondo y girar el botón correspondiente en sentido antihorario hasta la posición de máxima potencia.
  • Seite 43: Mantenimiento Y Cuidados

    ! No utilice nunca limpiadores a vapor o de alta presión ” cuando no se utiliza el aparato. para la limpieza del aparato. del cable sino sujetando el enchufe. desconectado primero el aparato de la red eléctrica. un papel absorbente para cocina. internos para intentar una reparación.
  • Seite 44 Limpieza del quemador FTGH cream soap BRUSH SCRUB Strofinare Spazzolare Frotter Brosser Avoid soaking NO ammollo Ne pas laisser tremper Asciugare Sécher 40°C RINSE Risciacquare Rincer Cepillar Fregar Enjuagar No remojar Secar Escovar Esfregar Enxaguar Sem amolecimento Secar Borstelen Poetsen Spoelen Niet weken Drogen...
  • Seite 45: Mantenimiento De Las Llaves De Gas

    Mantenimiento de las llaves de gas proceder a la sustitución de dicha llave. ! Esta operación la debe efectuar un técnico autorizado por el fabricante. Anomalías y soluciones bien. Antes de llamar al servicio de asistencia técnica, no hayan interrupciones en las redes de alimentación de arriba del aparato, estén abiertas.
  • Seite 46: Instalação

    Instalação Para instalar correctamente o plano de cozedura é necessário obedecer as seguintes regras: ! É importante guardar este folheto para poder consultá-lo a do plano de trabalho, devem ser situados ao menos 600 mm do bordo do mesmo plano. informar o novo proprietário sobre o funcionamento e sobre as respectivas advertências.
  • Seite 47: Ligação Do Gás

    Frente ! O técnico instalador é responsável pela realização certa da ligação eléctrica e da obediência das regras de segurança. Posição do gancho Atrás para H=40mm ! Utilize os ganchos fornecidos dentro da “embalagem dos ! Depois de ter instalado o aparelho, o acesso ao cabo acessórios”.
  • Seite 48: Características Dos Queimadores E Bicos

    A 15°C e 1013,25 mbars-gás seco Natural P.C.S. = 37,78 MJ/m³ PK 644 D GH X/HA PK 755 D GH X/HA PKQ 644 D GH /HA PKQ 755 D GH /HA PK 644 D GH E X /HA PK 755D GH E X /HA...
  • Seite 49: Início E Utilização

    Início e utilização Posicionamento correto do queimador FTGH de gás correspondente. Queimadores a gás respectivo botão da seguinte maneira : Máximo Mínimo chama ou um acendedor, premer até o fundo e girar o respectivo manípulo no sentido anti-horário até a posição de máxima potência.
  • Seite 50: Manutenção E Cuidados

    detergentes em pó e esponjas com superfície abrasiva. calor. podem arranhar irremediavelmente a superfície. pressão para limpar a aparelhagem. papel absorvente de cozinha. mecanismos internos para tentar repará-las. Contacte a Assistência Técnica (veja a Assistência técnica). tome cuidado para eliminar as eventuais crostas. viradas para o lado interno do plano de cozedura para evitar batidas acidentais.
  • Seite 51 Limpar o queimador FTGH cream soap BRUSH SCRUB Strofinare Spazzolare Frotter Brosser Avoid soaking NO ammollo Ne pas laisser tremper Asciugare Sécher 40°C RINSE Risciacquare Rincer Cepillar Fregar Enjuagar No remojar Secar Escovar Esfregar Enxaguar Sem amolecimento Secar Borstelen Poetsen Spoelen Niet weken Drogen...
  • Seite 52: Manutenção Das Torneiras Do Gás

    Manutenção das torneiras do gás necessário substituir a torneira mesma. ! Esta operação deve ser efectuada por um técnico autorizado pelo fabricador. Anomalias e soluções Pode acontecer do plano não funcionar ou não funcionar bem. Antes de chamar a assistência técnica, vejamos o não haja interrupções nas redes de alimentação de gás e electricidade, especialmente se as torneiras do gás antes do plano estão abertas.
  • Seite 53: Aufstellung

    Installation Oder auf indirekte Weise durch Angrenzender Zu belüftender Raum Raum angrenzende Räume, die mit ! Bewahren Sie diese Bedienungsanleitung bitte sorgfältig auf, damit Sie sie jederzeit zu Rate ziehen können. Sorgen angegeben, versehen sind, bei oder einer Übergabe an einen anderen Benutzer das Gerät denen es sich nicht um Gebäudeteile stets begleitet, damit auch der Nachbesitzer die Möglichkeit gemeinsamen Gebrauchs, noch...
  • Seite 54: Elektroanschluss

    Elektroanschluss Backofens getrennt voneinander vorgenommen werden. Dadurch wird eine ausreichende elektrische Sicherheit gewährleistet und das Herausziehen des Backofens erleichtert. Haken-Befestigungsschema Anschluss des Versorgungskabels an das Stromnetz die auf dem Typenschild angegebene Belastung (siehe nebenstehende Tabelle). Wird das Gerät direkt an das Stromnetz angeschlossen, ist zwischen Stromnetz und Gerät ein allpoliger, der Last und den einschlägigen Vorschriften entsprechender Schalter mit einer Mindestöffnung der Kontakte von 3 mm...
  • Seite 55 TYPENSCHILD Zum Anschluss des Gerätes an Elektrischer siehe Typenschild Anschluss “R” (auf Anfrage erhältlich in Dieses Gerät entspricht den folgenden Ariston-Kundendienststellen) mit EG-Richtlinien: der entsprechenden Dichtung “G” - 2006/95/EWG vom 12/12/06 an den am Gaszuleitungsschlauch (Niederspannung) und nachfolgenden Änderungen L” (siehe - 2004/108/EWG vom 15/12/04 Abbildung) zu montieren.
  • Seite 56: Merkmale Der Brenner Und Düsen

    Bie 15°C und 1013,25 mbar-Trockengas Erdgas oberer Heizwert = 37,78 MJ/m³ PK 755 D GH X/HA PK 644 D GH X/HA PKQ 644 D GH /HA PKQ 755 D GH /HA PK 644 D GH E X /HA PK 755D GH E X /HA...
  • Seite 57: Inbetriebsetzung Und Gebrauch

    Inbetriebsetzung und Gebrauch ! Achten Sie darauf, dass Kochtöpfe während der ! Auf jedem Reglerknopf ist gekennzeichnet, welcher Die richtige Positionierung des Brenners FTGH Gasbrenner Der gewählte Brenner kann mittels des entsprechenden Reglerknopfes auf folgende Einstellungen gedreht werden: Maximum Minimum drehen diesen dann gegen den Uhrzeigersinn auf Maximum.
  • Seite 58: Abschalten Ihres Gerätes Vom Stromnetz

    Das Gerät darf nur von Erwachsenen und gemäß den Hinweisen der vorliegenden Bedienungsanleitung zur Zubereitung von Lebensmitteln verwendet Abschalten Ihres Gerätes vom Stromnetz werden. Jeder andere Einsatz (zum Beispiel: zum Beheizen von Räumen) ist als unsachgemäß und zu trennen. gefährlich anzusehen. Der Hersteller haftet nicht für Reinigung Ihres Gerätes unangemessenen Gebrauch verursachte Schäden.
  • Seite 59 wischen. Sie werden mit dem Ergebnis zufrieden sein. Es wird von der Nutzung rauer Reinigungsschwämme Reinigung des Brenners FTGH cream soap BRUSH SCRUB Strofinare Spazzolare Frotter Brosser Avoid soaking NO ammollo Ne pas laisser tremper Asciugare Sécher 40°C RINSE Risciacquare Rincer Cepillar Fregar...
  • Seite 60: Wartung Der Gashähne

    Wartung der Gashähne Im Laufe der Zeit könnte der Gashahn blockieren oder sich nur schwer drehen lassen. In einem solchen Fall ist der Hahn auszutauschen. ! Diese Arbeit darf nur durch einen vom Hersteller anerkannten Techniker durchgeführt werden. Störungen und Abhilfe Bevor Sie bei eventuellen Betriebsstörungen den Kundendienst anfordern, sollten einige Kontrollen vorab Linie, dass auch keine Unterbrechung in der Strom-...
  • Seite 61: Het Installeren

    Het installeren Een andere manier is door op Aangrenzend Te ventileren vertrek vertrek indirecte wijze lucht te onttrekken ! Bewaar dit boekje zorgvuldig voor eventuele verdere aan de aangrenzende vertrekken die raadpleging. Wanneer u het product weggeeft, verkoopt, door middel van een ventilatiebuis, of wanneer u verhuist, dient u dit boekje bij het apparaat zoals boven beschreven, met te bewaren zodat alle nodige informatie voorhanden blijft.
  • Seite 62: Gasaansluiting

    Schema voor de bevestiging van de haken Wanneer het apparaat rechtstreeks op het net wordt aangesloten moet u tussen het apparaat en het net een meerpolige schakelaar aanbrengen met een afstand tussen de contacten van minstens 3mm, aangepast aan het elektrische vermogen en voldoend aan de geldende normen (de aarding mag niet worden onderbroken door de schakelaar).
  • Seite 63: Kenmerken Van De Branders En De Straalpijpjes

    A 15°C en 1013,25 mbar-droog gas P.C.S. Natuurlijk gas = 37,78 MJ/m³ PK 644 D GH X/HA PK 755 D GH X/HA PKQ 755 D GH /HA PKQ 644 D GH /HA PK 644 D GH E X /HA PK 755D GH E X /HA...
  • Seite 64: Starten En Gebruik

    Starten en gebruik Een correcte positionering van de brander FTGH ! Op iedere knop staat aangegeven waar de gasbrander zich precies bevindt. Gasbranders De gekozen brander kan met de betreffende knop als volgt worden geregeld: Maximum Minimum Voor het aansteken van één van de gasbranders houdt u er een vlammetje bij of een gasaansteker, drukt u de knop in en draait u hem tegen de klok in tot aan de positie van maximum sterkte.
  • Seite 65: Onderhoud En Verzorging

    schoonmaakmiddelen in poedervorm of schuursponzen: deze ” staan kunnen het oppervlak onherstelbaar krassen. als de oven niet wordt gebruikt. ! Gebruik nooit stoom- of hogedrukreinigers voor het snoer te trekken maar door de stekker zelf beet te pakken. reinigen van het apparaat. als de stekker nog in het stopcontact zit.
  • Seite 66 Het reinigen van de brander FTGH cream soap BRUSH SCRUB Strofinare Spazzolare Frotter Brosser Avoid soaking NO ammollo Ne pas laisser tremper Asciugare Sécher 40°C RINSE Risciacquare Rincer Cepillar Fregar Enjuagar No remojar Secar Escovar Esfregar Enxaguar Sem amolecimento Secar Borstelen Poetsen Spoelen...
  • Seite 67: Onderhoud Gaskranen

    Onderhoud gaskranen Met verloop van tijd kan een kraan stroef worden of vast blijven ! Dit moet worden uitgevoerd door een door de fabrikant bevoegde installateur. Storingen en oplossingen Het kan gebeuren dat het kookvlak niet (afdoende) functioneert. Voordat u de servicedienst belt dient u te te beginnen of er een correcte stroom- en gastoevoer is, en in het bijzonder of de hoofdgasleiding open staat.
  • Seite 68 600mm min. Σε κα ινάδα ή καπνοδόχο διακλαδω ένη Απ’ ευθεία̋ προ̋ (ειδική για συσκευέ̋ αγειρέ ατο̋) τα έξω Παραδείγ ατα ανοιγ άτων αερισ ού για τον αέρα καύση̋ Γειτονικό̋ Αεριζό ενο̋ χώρο̋ χώρο̋ Αύξηση τη̋ εσοχή̋ εταξύ πόρτα̋ και δαπέδου top H=20mm top H=30mm...
  • Seite 69 top H=40mm...
  • Seite 70 Σε 15°C και 1013,25 mbar- ξηρό αέριο Φυσικό P.C.S. = 37.78 MJ/m³ PK 644 D GH X/HA PK 755 D GH X/HA PKQ 644 D GH /HA PKQ 755 D GH /HA PK 755D GH E X /HA PK 644 D GH E X /HA...
  • Seite 71 Καυστήρα̋ ø ιά ετρο̋ σκευών (cm) Ταχύ̋ (R) 24 – 26 Η ι-ταχύ̋ (S) 16 – 20 Εφεδρικό̋ (Α) 10 – 14...
  • Seite 72 treatment).
  • Seite 73 cream soap BRUSH SCRUB Strofinare Spazzolare Frotter Brosser Avoid soaking NO ammollo Ne pas laisser tremper Asciugare Sécher 40°C RINSE Risciacquare Rincer Cepillar Fregar Enjuagar No remojar Secar Escovar Esfregar Enxaguar Sem amolecimento Secar Borstelen Poetsen Spoelen Niet weken Drogen Fırçalayın Ovalayın Durulayın...
  • Seite 75: Montaj

    Montaj Yuvaya oturtmae çöp için belirlenen kurallara uygun olarak imha edilmelidirler 600mm min. Doğrudan dışarı Bir baca veya dallı bir boru sistemiyle dışarı atılan dumanlar atılan dumanlar (fırın cihazları için saklanmıştır) Sistem, en az 100 cm kesitinde Yanıcı hava için havalandırma açma Bitişik Havalandırma...
  • Seite 76 Ön taraf ediniz: Arka taraf kanca pozisyonu H=40mm ! Cihaz monte edildikten sonra elektrik kablosu ve priz kolay ! Kablo periyodik olarak kontrol edilmeli ve sadece yetkili teknik kabul etmez. utma ve fan sistemi olan ankastre tirilebilir. normlara uygun nitelikte çok kutuplu bir anahtar takmak...
  • Seite 77 8,8 (838 l/h - G20) PKQ 755DGH /HA PK 755 D GH X/HA PK 644 D GH X/HA PKQ 644 D GH /HA PKQ 755 D GH /HA PK 644 D GH E X /HA PK 755D GH E X /HA...
  • Seite 78: Önlemler Ve Tavsiyeler

    Gaz brülörleri konumlara ayarlanabilir: Maksimum Minimum Atesleme bujisi mevcut olan modellerde, seçilen ocak gerekir. Önlemler ve tavsiyeler Genel emniyet Ocak Ø Kap çapı (cm) monte edilemez. Hızlı (R) 24 - 26 Yarı Hızlı (S) 16 - 20 Yardımcı (A) 10 - 14 zararlardan sorumlu tutulamaz.
  • Seite 79 emin olunuz. sembollü ocaklar için temizleme yöntemi yeterlidir.
  • Seite 80 Brülör FTGH Temizleme cream soap BRUSH SCRUB Strofinare Spazzolare Frotter Brosser Avoid soaking NO ammollo Ne pas laisser tremper Asciugare Sécher 40°C RINSE Risciacquare Rincer Fregar Enjuagar No remojar Cepillar Secar Esfregar Enxaguar Sem amolecimento Escovar Secar Poetsen Spoelen Niet weken Borstelen Drogen Ovalayın...
  • Seite 81 Kaplar tamamen oturmuyor.
  • Seite 82 С П а а З 600mm min. В а Б а а П а а...
  • Seite 83 H=20mm H=30mm H=40mm...
  • Seite 84 а Природний газ P.C.S. = 37.78 MJ/m PK 755 D GH X/HA PK 644 D GH X/HA PKQ 644 D GH /HA PKQ 755 D GH /HA PK 644 D GH E X /HA PK 755D GH E X /HA...
  • Seite 85 Bruciatore Ø Diametro recipienti (cm) Rapido (R) 24 - 26 Semi Rapido (S) 16 - 20 Ausiliario (A) 10 - 14...
  • Seite 87 cream soap BRUSH SCRUB Strofinare Spazzolare Frotter Brosser Avoid soaking NO ammollo Ne pas laisser tremper Asciugare Sécher 40°C RINSE Risciacquare Rincer Fregar Enjuagar No remojar Cepillar Secar Esfregar Enxaguar Sem amolecimento Escovar Secar Poetsen Spoelen Niet weken Borstelen Drogen Ovalayın Durulayın Islatmayın...
  • Seite 88 195089016.08 05/2013 - XEROX FABRIANO compongono il bruciatore.

Inhaltsverzeichnis