Inhaltsverzeichnis
Werbung
Verfügbare Sprachen
Verfügbare Sprachen
Quicklinks
®
PetSafe
Wireless
™
Pet Containment System
Operating Guide / Guide d'emploi
Betriebsanleitung / Bedieningsgids
Guía para el uso / Guida per l'uso
Please read this entire guide before beginning
Veuillez lire entièrement le guide avant de commencer
Bitte lesen Sie die gesamte Betriebsanleitung vor dem
Trainingsbeginn
Lees a.u.b deze gids in zijn geheel door voordat u begint
Por favor, antes de comenzar, lea completamente esta guía
Per favore leggere interamente questa guida prima d'iniziare
Werbung
Inhaltsverzeichnis

Verwandte Anleitungen für Petsafe Pet Containment System PIF-275-19


Inhaltszusammenfassung für Petsafe Pet Containment System PIF-275-19
- Seite 1 ® PetSafe Wireless ™ Pet Containment System Operating Guide / Guide d’emploi Betriebsanleitung / Bedieningsgids Guía para el uso / Guida per l’uso Please read this entire guide before beginning Veuillez lire entièrement le guide avant de commencer Bitte lesen Sie die gesamte Betriebsanleitung vor dem Trainingsbeginn Lees a.u.b deze gids in zijn geheel door voordat u begint...
-
Seite 2: How The System Works
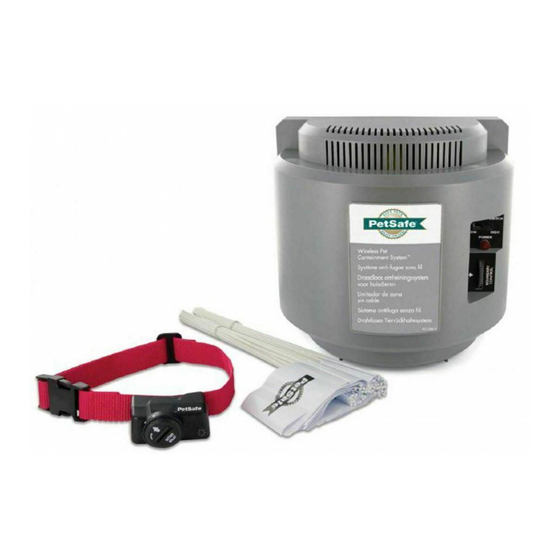
How the System Works ™ The PetSafe Wireless Pet Containment System has been proven safe, comfortable, and effective for all pets over 8 pounds. The system works by transmitting a radio signal up to 90 feet in all directions. You temporarily defi... -
Seite 3: To Insert And Remove The Battery
To Insert and Remove the Battery Note: Do not install the battery while the Receiver Collar is on your pet. ® This Receiver Collar utilizes a replaceable PetSafe battery (RFA-67). This unique battery is designed to make battery replacement easier and increase water protection. - Seite 4 To Set the Static Correction Level Note: Your Receiver Collar has been factory-set to Beep Only. Read all steps before attempting to set the Static Correction Level. 1. Remove the clear plastic cover with a coin to expose the Correction Level Button.
-
Seite 5: Function And Response Table
Static Correction Energy 6 Flashes High Static High Energy Correction Flashes once Indicates Low every 4 to 5 Battery seconds Note: Begin training with Correction Level 2 and only increase if your pet does not respond to the Static Correction. www.petsafe.net... -
Seite 6: Fit The Receiver Collar
Fit the Receiver Collar Important: The proper fit and placement of your Receiver Collar is important for effective training. The Contact Points must have direct contact with your pet’s skin on the underside of his neck. To assure a proper fit, please follow these steps: 1. - Seite 7 A condition called Pressure Necrosis, which is a devitalization of the skin due to excessive and prolonged contact against the Contact Points, may occur if the steps above are not followed. www.petsafe.net...
- Seite 8 To Re-Thread the Collar The slide buckle pre- Slide Buckle vents the collar from becoming loose around your pet’s neck. The ridges must be Ridges facing up; the collar will slip if it is not properly threaded. 1-800-732-2677...
-
Seite 9: Taking Your Pet Out Of The Pet Area
You may initially need to convince your pet to leave the Pet Area with a food treat and lots of praise. Note: You may also carry your pet out of the Pet Area. www.petsafe.net... -
Seite 10: Troubleshooting
Troubleshooting The Receiver • The beep may be difficult to hear in a noisy Collar is not environment. beeping when • Install Test Light as explained in the “Test Light setting up the Instructions” section, and use it to determine Boundary the location of Boundary Zone. - Seite 11 Receiver Collar. to the Static • Trim your pet’s fur where the Contact Points touch the neck and/or switch to the longer Correction. Contact Points. • Increase the Static Correction Level. • Repeat training steps to reinforce training. www.petsafe.net...
- Seite 12 My pet reacts • Lower the Static Correction Level. strongly to • Make sure you are in control of the situation the Static when your pet receives his first Static Corrections Correction and (have him on a leash attached to a separate, has become non-metallic collar) and lead him into the Pet fearful.
-
Seite 13: Test Light Instructions
Save the Test Light for future testing. Note: If the Test Light does not flash, install a new battery and re-test. If Test Light still does not flash, contact the Customer Care Center at 1-800-732-2677. www.petsafe.net... -
Seite 14: Terms Of Use And Limitation Of Liability
Terms of Use and Limitation of Liability 1. Terms of Use This Product is offered to you conditioned upon your acceptance without modification of the terms, conditions and notices contained herein. Usage of this Product implies acceptance of all such terms, conditions, and notices. 2. - Seite 15 Product is offered. Caution The PetSafe Wireless Pet Containment System™ is NOT a solid barrier. The system is designed to act as a deterrent to remind pets by Static Correction to remain in the boundary established. It is important that you reinforce training with your pet on a regular basis.
-
Seite 16: Préparation Du Collier Récepteur
Français Fonctionnement Le système de retenue sans fi l pour animaux domestiques PetSafe Wireless Pet Containment System est un système sûr, confortable et effi cace qui convient pour tous les animaux domestiques de plus de 3,6 kg. Son fonctionnement est simple: il envoie un signal radio dans toutes les directions avec une portée maximale de 27 mètres. -
Seite 17: Insertion Et Retrait De La Pile
Insertion et retrait de la pile Remarque: n’insérez jamais la pile lorsque votre animal porte le collier récepteur. Le collier récepteur fonctionne à l’aide d’une pile jetable PetSafe (RFA-67). Cette pile spécifi que garantit une plus grande facilité de remplacement de la pile et une meilleure étanchéité. - Seite 18 Réglage de l’intensité de la correction statique Remarque: le collier récepteur est réglé d’usine uniquement pour l’émission du signal sonore. Veuillez lire toutes les étapes ci-dessous avant de régler l’intensité de la correction statique. 1. A l’aide d’une pièce de monnaie, retirez la protection en plastique transparent pour exposer le bouton de réglage de l’intensité...
- Seite 19 Excité statique élevée Clignotement Indique que la pile toutes les 4 à 5 est faible secondes Remarque: Commencez le dressage au niveau de correction 2 et n’augmentez l’intensité que si votre animal ne réagit pas à la correction statique. www.petsafe.net...
- Seite 20 Mise en place du collier récepteur Important: il est important de mettre en place et de régler le collier récepteur de manière appropriée pour garantir un dressage efficace. Les points de contact doivent être en contact direct avec la peau du cou de l’animal, au niveau de sa gorge.
- Seite 21 • Si l’éruption ou l’irritation cutanée persiste au-delà de 48 heures, consultez un vétérinaire. • Il est important de laver, chaque semaine, le cou de l’animal et les points de contact à l’aide d’un gant de toilette et d’un savon doux, puis de les rincer abondamment. www.petsafe.net...
- Seite 22 Si vous ne respectez pas les consignes ci-dessus, il est possible que l’animal souffre d’une nécrose par compression, c’est-à- dire une dévitalisation de la peau survenant suite à un contact prolongé et excessif avec les points de contact du collier récepteur.
- Seite 23 à plusieurs reprises. Remarque: vous pouvez également porter l’animal dans vos bras pour quitter la zone qui lui est réservée. www.petsafe.net...
-
Seite 24: Résolution Des Problèmes
Résolution des problèmes Le collier • Le signal sonore peut être difficile à percevoir récepteur dans un environnement bruyant. n’émet pas de • Installez la lampe témoin comme expliqué signal sonore dans la section « Instructions relatives à la lors de la lampe témoin »... - Seite 25 • Augmentez le niveau d’intensité de la correction statique. • Répétez les étapes de dressage afin de renforcer l’apprentissage de votre animal. www.petsafe.net...
- Seite 26 Mon animal • Diminuez le niveau d’intensité de la correction réagit statique. fortement à • Veillez à bien maîtriser votre animal lorsqu’il la correction reçoit ses premières corrections statiques (tenez- statique le à l’aide d’une laisse attachée à un autre collier administrée non métallique).
- Seite 27 Conservez la lampe témoin pour tout test ultérieur. Remarque: si la lampe témoin ne clignote pas, remplacez la pile et procédez à un nouvel essai. Si la lampe témoin ne clignote toujours pas, contacter le service clientèle au numéro 1-800-732-2677. www.petsafe.net...
-
Seite 28: Conditions D'utilisation Et Limitation De Responsabilité
Conditions d’utilisation et limitation de responsabilité 1. Conditions d’utilisation Ce produit vous est livré dans l’emballage que vous acceptez en l’état, sans modification des conditions, clauses et avis joints. L’utilisation du produit implique l’acceptation de l’ensemble de ces conditions, clauses et avis. 2. - Seite 29 Mise en garde Le système PetSafe Wireless Pet Containment System est une barrière virtuelle. Les corrections statiques administrées par le système visent à rappeler à l’animal de rester dans les limites défi nies. Il est important que vous renforciez régulièrement le dressage de votre animal.
- Seite 30 Deutsch Wie das System funktioniert Das drahtlose Funkzaunsystem für Haustiere „Pet Containment System™“ ist erwiesenermaßen sicher, komfortabel und effektiv bei allen Hunden über 3,6 kg. Das System sendet ein Funksignal bis zu 27 Meter weit in alle Richtungen aus. Vorübergehend kennzeichnen Sie den Aufenthaltsbereich für das Tier mit Markierungsfähnchen als Orientierungshilfe für das Training des Hundes.
-
Seite 31: Batterie Einlegen Und Entnehmen
Batterie auf geeignete Weise. ® Eine Ersatzbatterie von PetSafe (RFA-67) fi nden Sie bei vielen Einzelhändlern. Nehmen Sie mit dem Kundenservicezentrum unter 1-800-732-2677 Kontakt auf oder besuchen Sie unsere Webseite unter www.petsafe.net, um einen Händler in Ihrer Nähe zu fi nden. www.petsafe.net... - Seite 32 Einstellen der Intensität des statischen Stromreizes Anmerkung:Die Batterie nicht einlegen, während Ihr Hund das Empfängerhalsband trägt. Lesen Sie alle Schritte durch, bevor Sie versuchen, die Intensität des statischen Stromreizes einzustellen. 1. Entfernen Sie die durchsichtige Plastikabdeckung mit einer Münze, um an den Einstellknopf für den Stromreiz zu gelangen.
-
Seite 33: Funktions- Und Reaktionsübersicht
Starker statischer Hohe Energie Blinken Stromreiz Zeigt eine schwache Blinkzeichen Batterie an alle vier bis fünf Sekunden Anmerkung: Beginnen Sie das Training bei Intensitätsstufe 2 und erhöhen Sie sie nur, wenn Ihr Hund nicht auf den statischen Stromreiz reagiert. www.petsafe.net... -
Seite 34: Das Empfängerhalsband Anpassen
Das Empfängerhalsband anpassen Wichtig: Der richtige Sitz und die richtige Platzierung des Empfängerhalsbandes sind wichtig für ein effektives Training. Die Kontaktstifte müssen direkten Kontakt mit der Haut an der Kehle des Hundes haben. Um den richtigen Sitz zu gewährleisten, befolgen Sie bitte folgende Schritte: 1. - Seite 35 • Überprüfen Sie den Sitz, um zu hohen Druck zu verhindern, indem Sie einen Finger zwischen den Kontaktstift und die Haut Ihres Hundes schieben. • Ihr Tier muss täglich sorgfältig auf Anzeichen eines Ausschlags oder wundgeriebene Stellen untersucht werden. www.petsafe.net...
-
Seite 36: Das Halsband Einfädeln
• Wenn Sie einen Ausschlag oder wundgeriebene Stellen entdecken, müssen Sie die Benutzung des Empfängerhalsbandes für einige Tage sein lassen. • Sollte der Zustand länger als 48 Stunden anhalten, suchen Sie bitte Ihren Tierarzt auf. • Der Hals Ihres Hundes und die Kontaktstifte müssen wöchentlich mit einem Waschlappen und milder Handseife gewaschen und dann gründlich gespült werden. - Seite 37 Ihr Hund das Verlassen seines Bereichs nur mit dieser Stelle, angeleint und in Begleitung eines Menschen. Eventuell müssen Sie den Hund anfänglich mit einem Leckerchen und viel Lob zum Verlassen seines Bereichs überreden. Anmerkung: Sie können Ihren Hund auch aus seinem Aufenthaltsbereich tragen. www.petsafe.net...
-
Seite 38: Problembewältigung
Problembewältigung • Vielleicht ist der Piepton aufgrund von Lärm in Empfängerhalsband der Umgebung nur schlecht hörbar. sendet beim Einstellen • Stellen Sie das Testlicht so ein, wie im Abschnitt der Grenzzone keinen „ Anleitung Testlicht“ beschrieben, und benutzen Piepton aus. Sie es, um festzustellen, wo die Grenzzone verläuft. - Seite 39 • Trimmen Sie das Fell Ihres Hundes dort, wo die Stromreiz. Kontaktstifte seinen Hals berühren und/oder benutzen Sie die längeren Kontaktstifte. • Erhöhen Sie die Intensität des statischen Stromreizes. • Wiederholen Sie das Training Schritt für Schritt, um es dem Hund in Erinnerung zu rufen. www.petsafe.net...
- Seite 40 Mein Hund reagiert • Verringern Sie die Intensität des statischen stark auf den Stromreizes. statischen Stromreiz • Achten Sie darauf, dass Sie die Situation und ist ängstlich in der Hand haben, wenn Ihr Hund seinen geworden. ersten statischen Stromreiz erhält (halten Sie ihn an einer Leine, die an einem zweiten nichtmetallischen Halsband befestigt ist), führen Sie ihn in seinen Aufenthaltsbereich und loben...
-
Seite 41: Anleitung Testlicht
Bewahren Sie das Testlicht für künftige Tests auf. Anmerkung: Wenn das Testlicht nicht blinkt, dann installieren Sie eine neue Bat- terie und wiederholen Sie den Test. Wenn das Licht immer noch nicht blinkt, dann nehmen Sie mit dem Kundendienstzentrum unter 1-800-732-2677 Kontakt auf. www.petsafe.net... -
Seite 42: Benutzungsbedingungen Und Haftungsbeschränkung
Benutzungsbedingungen und Haftungsbeschränkung 1. Benutzungsbedingungen Dieses Produkt wird Ihnen unter der Voraussetzung angeboten, dass Sie die hierin enthaltenen Verkaufs- und Lieferbedingungen und Hinweise ohne Änderung akzeptieren. Die Benutzung dieses Produkts unterstellt die Akzeptanz aller derartigen Verkaufs- und Lieferbedingungen und Hinweise. 2. - Seite 43 Grenzzone gehindert wird, dann sollten Sie sich nicht ausschließlich auf das drahtlose Funkzaunsystem für Haustiere „Pet Containment System™“ verlassen, um Ihr Tier zurückzuhalten. Radio Systems Corporation ist NICHT haftbar für eventuelle Sach-, Vermögens- oder Folgeschäden, die entstehen, falls ein Tier die Grenze überschreitet. www.petsafe.net...
-
Seite 44: Hoe Werkt Het Systeem
Nederlands Hoe werkt het systeem? ™ Het PetSafe Wireless Pet Containment System is veilig, comfortabel en doeltreffend voor alle huisdieren die meer dan 3,6 kg wegen. Het systeem zendt een radiosignaal uit in alle richtingen over een afstand van 27 meter. -
Seite 45: Batterij Plaatsen En Verwijderen
Ontdoe u op gepaste wijze van batterijen. ® Bij heel wat detailhandelaars vindt u een PetSafe batterij (RFA-67). Neem contact op met het Customer Care Center op het nummer 1-800-732-2677 of surf naar onze website: www.petsafe.net voor adressen in uw buurt. -
Seite 46: Elektrisch Correctieniveau Instellen
Elektrisch correctieniveau instellen Opmerking: de fabrieksinstelling voor uw halsbandontvanger is Enkel Piepen. Neem alle stappen door vooraleer u het elektrische correctieniveau probeert in te stellen. 1. Verwijder het doorzichtige plastic afdekplaatje met een muntstuk zodat de correctieniveauknop vrijkomt. 2. Zorg ervoor dat er een batterij in het apparaat zit, druk op de correctieniveauknop en laat die los wanneer het LED-verklikkerlampje op de ontvanger oplicht. - Seite 47 6 x knipperen Sterke elektrische Veel energie correctie Knippert om de 4 Batterij bijna leeg tot 5 seconden Opmerking: begin bij correctieniveau 2 en verhoog het niveau alleen als het dier niet op de elektrische correctie reageert. www.petsafe.net...
- Seite 48 De halsbandontvanger aanpassen Belangrijk: voor een doeltreffende africhting is het van belang om ervoor te zorgen dat de halsbandontvanger goed is aangebracht en goed past. De contactpunten moeten rechtstreeks in contact zijn met de huid van uw huisdier aan de onderkant van de nek. Voor een juiste pasvorm volgt u deze stappen: 1.
- Seite 49 • Uw huisdier moet dagelijks grondig onderzocht worden op tekenen van uitslag of irritatie. • Als u uitslag of irritatie opmerkt, gebruik de halsbandontvanger dan een paar dagen niet meer. • Als deze tekenen langer dan 48 uur zichtbaar blijven, raadpleeg uw dierenarts. www.petsafe.net...
- Seite 50 • De hals van het dier en de contactpunten moeten wekelijks worden gereinigd met een washandje en milde zeep, en grondig nagespoeld. Er bestaat een aandoening die drukletsel heet en inhoudt dat de huid als gevolg van overmatige en langdurige druk tegen de contactpunten afsterft.
- Seite 51 Aanvankelijk moet u uw hond misschien overtuigen om zijn gebied te verlaten met een snoepje en veel verbale beloningen. Opmerking: U kunt het dier ook het gebied uit dragen. www.petsafe.net...
-
Seite 52: Problemen Oplossen
Problemen oplossen • De pieptoon kan moeilijk hoorbaar zijn bij halsbandontvanger lawaai. piept niet wanneer • Plaats het testlampje zoals aangegeven bij de het grensgebied “Instructies testlampje” en gebruik het om wordt ingesteld. te bepalen waar het gebied zich bevindt. •... - Seite 53 • Knip de vacht van het dier bij waar de de elektrische correctie. contactpunten de nek raken en/of maak gebruik van de langere contactpunten. • Stel het elektrische correctieniveau hoger in. • Herhaal de africhtingstappen om de africhting te versterken. www.petsafe.net...
- Seite 54 Mijn hond • Stel het elektrische correctieniveau lager in. reageert heftig • Zorg ervoor dat u de situatie in de hand op de elektrische houdt wanneer uw hond zijn eerste correctie en is nu elektrische correcties krijgt (houd het dier aan erg bang.
-
Seite 55: Instructies Testlampje
Bewaar het testlampje voor eventueel later gebruik. Opmerking: als het testlampje niet knippert, plaats dan een nieuwe batterij en doe de test opnieuw. Als het testlampje dan nog steeds niet knippert, neemt u contact op met het Customer Care Center op het nummer 1-800-732-2677. www.petsafe.net... - Seite 56 Gebruiksvoorwaarden en aansprakelijkheid 1. Gebruiksvoorwaarden Dit product wordt u aangeboden op voorwaarde dat u zonder voorbehoud instemt met de genoemde voorwaarden en opmerkingen. Het gebruik van dit product houdt in dat u al deze voorwaarden en opmerkingen aanvaardt. 2. Gepast gebruik Dit product werd ontworpen voor gebruik met dieren die men wil africhten.
- Seite 57 Als u dus denkt dat uw dier een gevaar kan vormen voor anderen of zichzelf schade kan toebrengen als het een bepaald gebied verlaat, mag u NIET uitsluitend vertrouwen op het PetSafe Wireless Pet Containment System™ om het dier binnen dat bepaalde gebied te houden.
-
Seite 58: Cómo Funciona El Sistema
Espagñol Cómo funciona el sistema El PetSafe Wireless Pet Containment System ha demostrado ser seguro, cómodo y efi caz para todos los perros de más de 3,6 kg. El sistema funciona transmitiendo una señal de radio hasta 27 metros en todas direcciones. -
Seite 59: Para Instalar Y Extraer La Pila
Los repuestos de pilas PetSafe (RFA-67) pueden encontrarse en muchas tiendas. Póngase en contacto con el Centro de Asistencia al Cliente al 1-800-732-2677 o visite nuestra página Web en www.petsafe.net para localizar la tienda más cercana. www.petsafe.net... - Seite 60 Para ajustar el nivel de corrección estática Nota: El collar receptor viene ajustado de fábrica para sólo pitido. Lea todos los pasos antes de intentar ajustar el nivel de corrección estática. 1. Quite la cubierta de plástico transparente con una moneda para exponer el botón de nivel de corrección.
- Seite 61 6 Parpadeos Corrección Energía alta estática alta Parpadea una Indica pila baja vez cada 4 a 5 segundos Nota: Inicie el adiestramiento con el nivel de corrección 2 y aumente sólo si su perro no responde a la corrección estática. www.petsafe.net...
-
Seite 62: Ajuste Del Collar Receptor
Ajuste del collar receptor Importante: El ajuste y la colocación adecuados del collar receptor son importantes para un adiestramiento efectivo. Los puntos de contacto deben tocar directamente la piel del perro debajo del cuello. Para asegurar un ajuste correcto, siga los siguientes pasos: 1. - Seite 63 • Si esta situación persiste durante más de 48 horas, consulte a su veterinario. • Lave el cuello del perro y los puntos de contacto semanalmente con una toalla y jabón suave, luego enjuáguelo totalmente. www.petsafe.net...
- Seite 64 Si no se siguen los anteriores pasos, puede producirse lo que se conoce como necrosis por presión, que es una desvitalización de la piel debida a un excesivo y prolongado contacto contra los puntos de contacto. Para volver a pasar el collar La hebilla evita que Hebilla deslizable el collar se afl...
- Seite 65 Inicialmente puede que necesite convencer al perro de salir de la zona con un obsequio de comida y mucho encomio. Nota: Quizás tenga que sacar al perro en brazos de su zona. www.petsafe.net...
-
Seite 66: Solución De Problemas
Solución de problemas El collar • Puede ser difícil oír el pitido en un entorno receptor no ruidoso. emite pitidos • Instale la luz de prueba tal como se ha explicado cuando se en la sección “Instrucciones de luz de prueba”, y instala la zona utilícela para determinar el emplazamiento de la de límites. - Seite 67 • Recorte el pelo del perro allí donde los puntos de estática. contacto tocan con el cuello y/o cambie a puntos de contacto más largos. • Aumente el nivel de corrección estática. • Repita los pasos del adiestramiento para reforzarlo. www.petsafe.net...
- Seite 68 Mi perro • Disminuya el nivel de corrección estática. reacciona • Asegúrese de que está en control de la situación mucho a la cuando el perro recibe sus primeras correcciones corrección estáticas (llévelo en una correa unida a un estática y se collar separado, no metálico), condúzcalo hacia asusta.
- Seite 69 Guarde la luz de prueba para otras comprobaciones. Nota: Si la luz de prueba no parpadea, instale una nueva pila y vuelva a hacer la comprobación. Si la luz de prueba sigue sin parpadear, contacte con el Centro de Asistencia al Cliente al 1-800-732-2677. www.petsafe.net...
-
Seite 70: Condiciones De Uso Y Limitación De Responsabilidad
Condiciones de uso y limitación de responsabilidad 1. Condiciones de uso Este producto se ofrece bajo condición de su aceptación sin modificación de los términos, condiciones y avisos aquí contenidos. El uso de este producto implica la aceptación de estos términos, condiciones y avisos. 2. - Seite 71 NO debe confi ar solamente en el PetSafe Wireless Pet Containment System para confi narlo. Radio Systems Corporation NO se hace responsable de ningún daño a la propiedad, pérdida económica, o por cualquier otro...
-
Seite 72: Funzionamento Del Sistema
Italiano Funzionamento del Sistema ™ Petsafe Wireless Pet Containment System si è dimostrato sicuro, comodo ed effi cace per tutti i cani di peso superiore ai 3,6 chilogrammi. Il sistema funzione trasmettendo un segnale radio fi no ad un raggio di circa 30 metri in tutte le direzioni. -
Seite 73: Come Inserire E Rimuovere La Batteria
® La batteria di ricambio PetSafe (RFA-67) è reperibile presso numerosi rivenditori. Contattate il Centro di Assistenza Clienti al numero 1-800-732-2677 oppure visitate il nostro sito web www.petsafe.net per l’indirizzo del rivenditore più vicino. www.petsafe.net... - Seite 74 Come Impostare il Livello di Correzione Statica N.B.: Il Collare Ricevitore è stato impostato di fabbrica su Solo Tono. Leggete attentamente tutti i punti prima di passare all’impostazione del Livello di Correzione Statica. 1. Rimuovete il coperchio in plastica trasparente dal Pulsante del Livello di Correzione utilizzando una moneta.
- Seite 75 Energia Media o Medio-Alta Grande 6 Lampeggi Correzione Statica Grande Energia Alta Lampeggia Indica Batteria una volta Scarica ogni 4—5 secondi N.B.: Iniziate l’addestramento con il Livello di Correzione 2 ed aumentatelo solo se il cane non risponde alla Correzione Statica. www.petsafe.net...
- Seite 76 Posizionamento del Collare Ricevitore Importante: Il corretto posizionamento del Collare Ricevitore è fondamentale per un addestramento efficace. I Punti di Contatto devono essere direttamente a contatto con la pelle del cane nella parte inferiore del collo. Per assicurare un posizionamento adeguato, procedete come segue: 1.
- Seite 77 • Se osservate esantema o irritazione, non usate il Collare Ricevitore per alcuni giorni. • Se la condizione persiste dopo 48 ore, consultate il veterinario. • Lavate settimanalmente il collo del cane ed i Punti di Contatto con un panno bagnato e detergente delicato, risciacquate quindi abbondantemente. www.petsafe.net...
- Seite 78 In caso di mancato rispetto delle istruzioni sopra riportate, potrebbe verifi carsi una condizione detta Necrosi da Pressione che comporta una devitalizzazione della pelle dovuta al contatto eccessivo e prolungato della pelle contro i Punti di Contatto. Come Ri-regolare il Collare La fi...
- Seite 79 Riservata solo al guinzaglio, in quel punto e solo con una persona. Inizialmente, è possibile che dobbiate convincere il cane ad uscire dall’Area Riservata mostrandogli del cibo o lodandolo molto. N.B.: Potete anche trasportare il cane fuori dall’Area Riservata. www.petsafe.net...
-
Seite 80: Ricerca Guasti
Ricerca Guasti Il Collare • Potrebbe essere difficile sentire il segnale Ricevitore acustico in un ambiente rumoroso. non emette • Installate la Spia di Prova come spiegato il segnale nel capitolo “Istruzioni relative alla Spia di acustico Prova” ed utilizzatela per definire la Zona di durante Delimitazione. - Seite 81 • Tagliate il pelo del cane dove i Punti di Contatto risponde alla toccano il collo e/o utilizzate i Punti di Contatto più Correzione lunghi. Statica. • Aumentate il Livello di Correzione Statica. • Ripetete la fase di addestramento per una maggiore efficacia. www.petsafe.net...
- Seite 82 Il cane reagisce • Abbassate il Livello di Correzione Statica. molto alla • Assicuratevi di avere la situazione sotto controllo Correzione quando il cane riceve le prime Correzioni Statica Statiche (tenetelo al guinzaglio attaccato ad un diventando collare separato non in metallo) e dirigetelo verso pauroso.
- Seite 83 Conservate la Spia di Prova per utilizzo futuro. N.B.: Se la Spia di Prova non lampeggia, inserite una batteria nuova e riprovate. Se la Spia di Prova non lampeggia ancora, contattate il Centro di Assistenza Clienti al numero 1-800-732-2677. www.petsafe.net...
-
Seite 84: Condizioni Di Utilizzo E Limitazione Della Responsabilità
Condizioni di Utilizzo e Limitazione della Responsabilità 1. Condizioni di Utilizzo Questo Prodotto è offerto soggetto alla vostra accettazione incondizionata dei termini, delle condizioni e delle modifiche contenuti nel presente. L’uso di questo Prodotto implica l’accettazione di tutti questi termini, condizioni ed avvertenze. 2. - Seite 85 Prodotto. Avvertenza ™ Il PetSafe Wireless Pet Containment System NON è una barriera solida. Il sistema è stato studiato come deterrente per ricordare al cane tramite Correzione Statica di rimanere entro l’area delimitata stabilita.
- Seite 86 1-800-732-2677...
- Seite 87 www.petsafe.net...
- Seite 88 Transmitter away from places where they would be within 3 feet of the unit for prolonged periods, such as next to a bed. Recommended locations include closets or a garage. Radio Systems Corporation 10427 Electric Avenue Knoxville, TN 37932 1-800-732-2677 www.petsafe.net 400-686-19 ©Copyright 2004, Radio Systems Corporation...