Werbung
Verfügbare Sprachen
Verfügbare Sprachen
Quicklinks
1
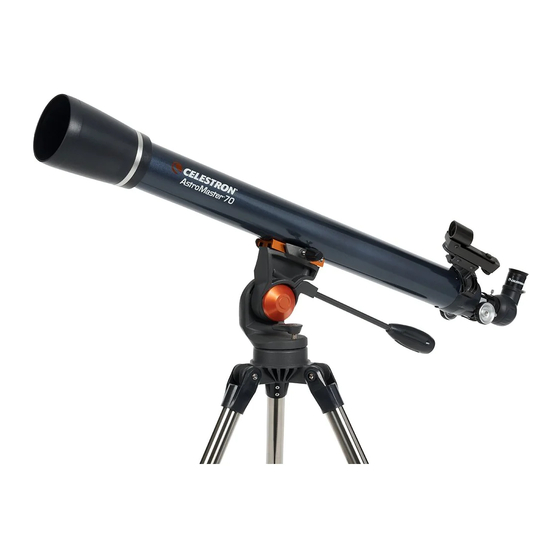
Your AstroMaster includes: Optical tube, StarPointer finderscope,
pre-assembled tripod with center leg brace and altazimuth mount
attached, two eyepieces, erect image diagonal, accessory tray, lens
cloth, battery, owner's manual, and a bonus Astronomy software.
4
All three legs should be the same length to provide a level platform
for the telescope.
7
Here is how the fully assembled tripod and mount should appear.
2
To set up the tripod, spread the legs outward until they are fully
extended. Extend each of the three tripod legs down 6-12".
5
To attach the accessory tray, line up notches and turn clockwise
until tray tabs lock into place with the tripod brackets.
8
Dovetail
Mount
Fastening
Screws
Next, slide telescope tube into the mount. Be sure to back out
fastening screws to allow enough clearance for the dovetail.
A Z T E L E S C O P E
MODELS #21061, 21082, 21063, 22065 (70AZ, 80AZS, 90AZ, 102AZ)
QUESTIONS OR PROBLEMS WITH SET-UP?
CONTACT CELESTRON TECHNICAL SUPPORT: 1(800) 421-9649
Q U I C K S E T - U P G U I D E
3
Use the three tightening screws located at the bottom of each leg
to secure the extended legs in place.
6
Properly assembled, the accessory tray should appear as
pictured above.
9
Center dovetail in the mount and tighten fastening screw. For
added security tighten the angled lock down screw next to the
fastening screw.
ENGLISH
Werbung

Inhaltszusammenfassung für Celestron AstroMaster 21061
- Seite 1 A Z T E L E S C O P E MODELS #21061, 21082, 21063, 22065 (70AZ, 80AZS, 90AZ, 102AZ) QUESTIONS OR PROBLEMS WITH SET-UP? CONTACT CELESTRON TECHNICAL SUPPORT: 1(800) 421-9649 Q U I C K S E T - U P G U I D E ENGLISH...
-
Seite 2: Solar Warning
Loosen the set screw on the focuser. Remove the plastic cap Insert the diagonal into the focuser and tighten the set screw. Insert the chrome barrel of the 20mm eyepiece into the diagonal covering the end of the focuser. and tighten the set screw. On/Off Battery Switch... - Seite 3 A Z T E L E S C O P E MODÈLES #21061, 21082, 21063, 22065 (70AZ, 80AZS, 90AZ, 102AZ) QUESTIONS OU PROBLÈMES AVEC L'INSTALLATION? CONTACTEZ LE SUPPORT TECHNIQUE CELESTRON: 1-800.421.9649 FRANÇAIS Votre AstroMaster inclus: tube optique, chercheur StarPointer, Pour installer le trépied, écartez complètement les pieds. Étendez Utilisez les trois vis de fixation situées au bas de chaque pied pour...
-
Seite 4: Avertissement Sur Le Soleil
Desserrez la vis de réglage sur le foyer. Enlevez le capuchon en Insérez la diagonale dans le foyer et serrez la vis de réglage. Insérez le barillet chromé de l’oculaire 20mm dans la diagonale et plastique qui couvre l’extrémité du porte-oculaire. serrez la vis de réglage. - Seite 5 A Z T E L E S K O P MODELLE #21061, 21082, 21063, 22065 (70AZ, 80AZS, 90AZ, 102AZ) FRAGEN ODER PROBLEME ZUM SETUP? KONTAKT CELESTRON TECHNISCHER SUPPORT: 1-800.421.9649 DEUTSCH Ihr AstroMaster beinhaltet: optischen Tubus, Starpointer Um das Stativ aufzustellen, spreizen Sie die Beine nach außen, bis...
- Seite 6 Lösen Sie die Einstellschraube am Okularauszug. Entfernen Sie die Setzen Sie den Zenitspiegel in den Okularauszug ein und ziehen die Setzen Sie das Chromrohr des 20mm-Okulars in die Diagonale ein Plastikabdeckung, die das Ende des Okularauszugs bedeckt. Einstellschraube fest. und ziehen die Einstellschraube fest. An/Aus Akku Schalter...
- Seite 7 AZ TELESCOPIO MODELOS #21061, 21082, 21063, 22065 (70AZ, 80AZS, 90AZ, 102AZ) ¿PREGUNTAS O PROBLEMAS CON LA INSTALACIÓN? CONTACTE CON EL SOPORTE TÉCNICO DE CELESTRON: 1-800.421.9649 ESPAÑOL Su AstroMaster incluye: tubo óptico, localizador StarPointer, trípode Para instalar el trípode, separe las patas hacia fuera hasta que estén Use los tres tornillos de fijación situados en la parte inferior de cada...
- Seite 8 Afloje el tornillo del enfoque. Saque la tapa de plástico que cubre Introduzca la diagonal en el enfoque y apriete el tornillo. Introduzca el cañón cromado del ocular de 20mm en la diagonal y el extremo del enfoque. fíjelo con el tornillo. Tapa de Interruptor para Batería...
- Seite 9 AZ TELESCOPIO MODELLI N. 21061, 21082, 21063, 22065 (70AZ, 80AZS, 90AZ, 102AZ) DOMANDE O PROBLEMI CON LA CONFIGURAZIONE? CONTATTA IL SUPPORTO TECNICO CELESTRON: 1-800.421.9649 ITALIANO L’AstroMaster include: tubo ottico, cercatore StarPointer, Per configurare il treppiede, allargare le gambe verso l’esterno fino...
- Seite 10 Allentare la vite sul focheggiatore. Rimuovere il tappo di plastica Inserire la diagonale nel focheggiatore e serrare la vite. Inserire il barilotto cromato dell’oculare da 20mm nella diagonale che copre l’estremità del focheggiatore. e serrare la vite. Interruttore di Coperchio accensione/spegnimento batteria Per installare il cercatore su 70AZ, 90AZ e 102AZ:...


