Herunterladen Inhalt Inhalt Diese Seite drucken

Werbung

Verfügbare Sprachen
  • DE

Verfügbare Sprachen

  • DEUTSCH, seite 18
INSTRUCTION MANUAL
MoDEl # 22023

Werbung

Inhaltsverzeichnis
loading

Inhaltszusammenfassung für Celestron Cosmos FirstScope 76

  • Seite 1 INSTRUCTION MANUAL MoDEl # 22023...
  • Seite 2: What's In The Box

    What’s in thE Box We recommend saving your telescope box so it can be used to store the telescope when it is not in use. Unpack the box carefully as some parts are small. Use the parts list below to verify that all parts and accessories are present. PartS liSt 20 mm Kellner eyepiece (1.25”) Dust cover, large...
  • Seite 3: Assembling Your Telescope

    assEMBling YoUr tElEscopE the Mount & teleScoPe tube Your Firstscope’s mount and telescope tube are fully assembled. simply remove the telescope and mount from the box and set it on a stable surface, such as a table or picnic bench. Be sure to use a support that allows you easy access to the eyepiece as you move the telescope around the sky.
  • Seite 4 the StarPointer FinderScoPe the Firstscope comes with a starpointer red-dot fi nderscope that you will use as a sighting tool when aiming the telescope at a target. To install your StarPointer fi nderscope: 1. remove the two silver nuts from the threaded posts at the top of the tube, near the focuser. 2.
  • Seite 5 aligning the StarPointer FinderScoPe the starpointer finderscope helps you aim your telescope by looking through its round glass window and covering your target with the red dot projected in the window. the first time you assemble your telescope, you’ll need to align the starpointer with the main optics of the telescope. although this step can be done at night, it is significantly easier during the day.
  • Seite 6: Your First Astronomical Observing Session

    You can view many other celestial objects, such as planets, star clusters and nebulae using this same basic technique. For more tips for astronomical observing please visit celestron.com/cosmos there you will find comprehensive tips to help you get the most from your new telescope including: •...
  • Seite 7: Celestron Two Year Limited Warranty

    Note: This warranty is valid to U.S.A. and Canadian customers who have purchased this product from an authorized Celestron dealer in the U.S.A. or Canada. Warranty outside the U.S.A. and Canada is valid only to customers who purchased from a Celestron’s International Distributor or Authorized Celestron Dealer in the specific country.
  • Seite 8 • consult the dealer or an experienced radio/tv technician for help. product design and specifications are subject to change without prior notification. this product is designed and intended for use by those 14 years of age and older. © 2014 celestron • all rights reserved www.celestron.com 22023 2835 columbia street •...
  • Seite 9 TÉLESCOPE MODE D’EMPLOI MoDèlE n° 22023...
  • Seite 10 t élescope contEnU DE la BoîtE nous vous recommandons de conserver la boîte de votre télescope afin que vous puissiez l’utiliser pour stocker le télescope quand il n’est pas utilisé. Déballez la boîte avec précaution car certaines pièces sont petites. Utilisez la liste des pièces ci-dessous pour vérifier que tous les pièces et accessoires sont présents.
  • Seite 11 t élescope MontagE DE votrE télEscopE la Monture et le tube du téleScoPe la monture Firstscope et le tube du télescope sont entièrement montés. retirez simplement le télescope et la monture de la boîte et posez-les sur une surface stable, comme une table ou un banc de pique-nique. n’oubliez pas d’utiliser un support qui vous permet un accès facile à...
  • Seite 12: Le Chercheur Starpointer

    T ÉLESCOPE le chercheur StarPointer le Firstscope vient avec un chercheur à points rouges starpointer que vous utiliserez comme outil d’observation lorsque vous dirigerez le télescope vers une cible. Pour installer votre chercheur StarPointer: 1. retirez les deux écrous argentés des tiges fi letées dans la partie supérieure du tube, près du porte-oculaire. 2.
  • Seite 13 t élescope alignez le chercheur StarPointer le chercheur starpointer vous aide à diriger votre télescope en regardant par sa fenêtre en verre ronde et en couvrant votre cible avec un point rouge projeté dans la fenêtre. la première fois que vous montez votre télescope, vous aurez besoin d’aligner le starpointer avec l’optique principale du télescope.
  • Seite 14: Votre Première Session D'observation Astronomique

    à profiter au maximum de votre nouveau télescope y compris: • comment observer les planètes •...
  • Seite 15 été l’objet d’un remplacement deviendront la propriété de celestron. le client sera responsable de tous les frais de transport et d’assurance, à la fois vers et depuis l’usine de celestron, et devra payer à l’avance ces coûts.
  • Seite 16 • consultez le distributeur ou un technicien radio ou tv d’expérience pour de l’assistance. la conception et la spécification du produit peuvent être modifiées sans préavis. ce produit a été conçu à l’intention des utilisateurs âgés de 14 ans et plus. © 2014 celestron • tous droits réservés. www.celestron.com 22023 2835 columbia street •...
  • Seite 17 T E L E S K O P BEDIENUNGSANLEITUNG MoDEll-nr. 22023...
  • Seite 18: Sonnenstrahlen-Warnhinweis

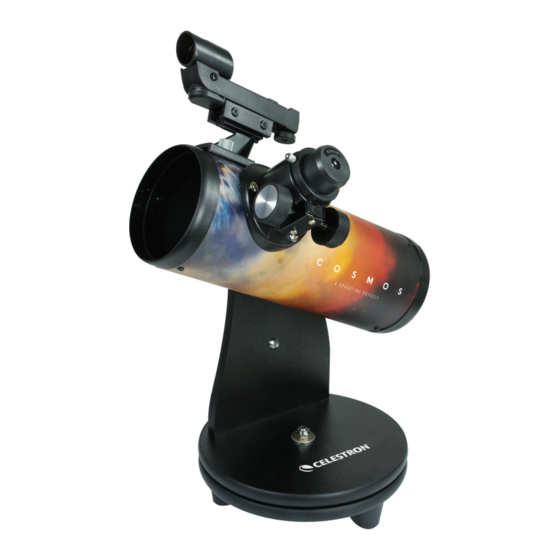
    T E L E S K O P liEFErUMFang Wir empfehlen ihnen, die verpackung ihres teleskops aufzubewahren, um das teleskop bei nichtverwendung darin zu verstauen. gehen sie beim auspacken vorsichtig vor, da Kleinteile enthalten sind. Überprüfen sie anhand der untenstehenden teileliste die vollständigkeit aller teile und Zubehörteile. teileliSte Schutzabdeckung, Teleskoptubus und Montierung...
  • Seite 19: Das Teleskop Aufbauen

    T E L E S K O P Das tElEsKop aUFBaUEn die Montierung und der teleSkoPtubuS Die Montierung ihres Firstscopes sowie der teleskoptubus sind vollständig montiert. nehmen sie teleskop und Montierung einfach aus der verpackung und stellen sie beides auf einen stabilen Untergrund, wie z. B. einen tisch oder eine Bank.
  • Seite 20: Starpointer-Sucherfernrohr

    T E L E S K O P StarPointer-SucherFernrohr Das Firstscope ist mit einem starpointer-sucherfernrohr mit rotem punkt ausgestattet, mit dessen hilfe sie ein Zielobjekt im teleskop anvisieren können. Ihr StarPointer-Sucherfernrohr installieren: 1. Drehen sie die zwei silbermuttern von den gewindestiften oben am tubus in der nähe des Fokussierers ab. 2.
  • Seite 21 T E L E S K O P auSrichten deS StarPointer-SucherFernrohrS Das starpointer-sucherfernrohr unterstützt sie beim ausrichten ihres teleskops, indem sie beim Blick durch das runde glasfenster ihr Zielobjekt mit einem roten punkt, der auf das Fenster projiziert wird, abdecken können. nach dem ersten aufbau ihres teleskops müssen sie den starpointer an der hauptoptik ihres teleskops ausrichten.
  • Seite 22 Besuchen sie für weitere tipps über astronomische Beobachtungen celestron.com/cosmos hier finden sie umfassende tipps, um ihr neues teleskop optimal zu nutzen, einschließlich: • Wie man planeten beobachtet •...
  • Seite 23: Zweijährige Eingeschränkte Garantie Von Celestron

    Diese Garantie ist für Kunden in den USA und Kanada gültig, die dieses Produkt von einem autorisierten Celestron-Händler in den USA oder Kanada gekauft haben. Eine Garantie außerhalb der USA und Kanada gilt nur für Kunden, die bei einem internationalen Celestron-Vertrieb oder einem autorisierten Celestron-Händler im jeweiligen Land eingekauft haben.
  • Seite 24 • Den händler oder einen erfahrenen radio- und Fernsehtechniker um hilfe bitten. produktdesign und technische Daten können ohne vorankündigung geändert werden. Dieses produkt wurde für die verwendung durch personen von 14 Jahren und darüber entworfen und vorgesehen. ©2014 celestron • alle rechte vorbehalten. www.celestron.com 22023 2835 columbia street •...
  • Seite 25 TELESCOPIO MANUAL DE INSTRUCCIONES MoDElo #22023...
  • Seite 26: Contenido De La Caja

    t elescopio contEniDo DE la caJa recomendamos guardar la caja de su telescopio para poder usarla para guardarlo cuando no lo use. Desembale cuidadosamente la caja, algunas piezas son pequeñas. Use la lista de piezas siguiente para comprobar que dispone de todas las piezas y accesorios.
  • Seite 27: Montaje Del Telescopio

    t elescopio MontaJE DEl tElEscopio el SoPorte y el tubo del teleScoPio su soporte y tubo de telescopio del Firstscope están totalmente montados. saque el telescopio y el soporte de la caja y póngalo sobre una superficie estable, como una mesa o banco. asegúrese de utilizar un soporte que le permita acceder fácilmente al ocular cuando mueva el telescopio por el firmamento.
  • Seite 28: Localizador Starpointer

    T ELESCOPIO localizador StarPointer El Firstscope incluye un localizador de punto rojo starpointer que se utiliza como herramienta de mira al apuntar el telescopio a un objetivo. Para instalar el localizador StarPointer: 1. saque las dos roscas plateadas de los soportes estriados en la parte superior del tubo, cerca del enfoque. 2.
  • Seite 29 t elescopio alinear el localizador StarPointer El localizador starpointer le ayuda a apuntar el telescopio mirando por la ventana redonda y cubriendo el objetivo con el punto rojo proyectado en la ventana. la primera vez que monte el telescopio, deberá alinear el starpointer con la óptica principal del telescopio. aunque puede realizar este paso de noche, es notablemente más sencillo de día.
  • Seite 30: Primera Sesión De Observación Astronómica

    • observación de planetas •...
  • Seite 31 Nota: Esta garantía tiene validez para clientes de EE.UU. y Canadá que hayan adquirido este producto en un vendedor autorizado de Celestron en EE.UU. y Canadá. La garantía fuera de EE.UU. y Canadá solamente es válida para clientes que hayan adquirido de un distribuidor internacional de Celestron o un vendedor autorizado de Celestron en el país en cuestión.
  • Seite 32 El diseño y las especificaciones del producto están sujetos a cambios sin notificación previa. Este producto ha sido diseñado y está pensado para ser usado por personas de 14 años o más de edad. © 2014 celestron • todos los derechos reservados. www.celestron.com 22023 2835 columbia street •...
  • Seite 33: Manuale Di Istruzioni

    TELESCOPIO MANUALE DI ISTRUZIONI MoDEllo n. 22023...
  • Seite 34: Contenuto Della Confezione

    t elescopio contEnUto DElla conFEZionE si consiglia di conservare la confezione del telescopio per poter riporre il telescopio al suo interno quando non in uso. aprire la confezione con attenzione, in quanto sono presenti parti di piccole dimensioni. Utilizzare il seguente elenco per verificare che nella confezione non ci siano parti o accessori mancanti.
  • Seite 35 t elescopio assEMBlaggio DEl tElEscopio tubo e SuPPorto teleScoPio il tubo e il supporto del telescopio Firstscope sono già assemblati. Basta rimuovere il telescopio e il supporto dalla confezione e collocarli su una superficie stabile, come un tavolo o una panca. assicurarsi di utilizzare un elemento di appoggio che renda facile l’accesso all’oculare mentre si muove il telescopio durante le osservazioni.
  • Seite 36 T ELESCOPIO il Mirino StarPointer il telescopio Firstscope è dotato di mirino a punto rosso starpointer, utilizzabile come strumento di osservazione quando si punta il telescopio su un oggetto. Per fi ssare il mirino StarPointer: 1. rimuovere i due dadi argentati dai perni fi lettati nella parte superiore del tubo, vicino al focalizzatore. 2.
  • Seite 37 t elescopio allineaMento del Mirino StarPointer il mirino starpointer aiuta a puntare il telescopio mediante l’osservazione attraverso la finestrella circolare, segnalando l’oggetto con il punto rosso proiettato nella finestrella. al primo assemblaggio del telescopio è necessario allineare il mirino starpointer con le ottiche principali del telescopio. sebbene questa operazione possa essere effettuata di notte, è...
  • Seite 38: Prima Sessione Di Osservazione Astronomica

    PriMa oSSerVazione di un oggetto celeSte! per maggiori suggerimenti relativi alle osservazioni astronomiche visitare il sito web celestron.com/cosmos nel sito è possibile trovare suggerimenti esaustivi per ottenere il massimo dal proprio nuovo telescopio: • come osservare i pianeti •...
  • Seite 39: Garanzia Limitata Di Due Anni Celestron

    La presente garanzia è valida per i clienti di Stati Uniti e Canada che hanno acquistato il proprio binocolo da un rivenditore Celestron autorizzato negli Stati Uniti o in Canada. La garanzia al di fuori degli Stati Uniti e il Canada è valida solo per i clienti che hanno acquistato da un distributore Celestron internazionale o un distributore Celestron autorizzato nel specifico Paese.
  • Seite 40 è progettato e destinato all’uso da parte di persone di età pari o superiore ai 14 anni. © 2014 celestron • tutti i diritti riservati. www.celestron.com 22023 2835 columbia street •...

Diese Anleitung auch für:

22023

Inhaltsverzeichnis