Inhaltsverzeichnis
Werbung
Verfügbare Sprachen
Verfügbare Sprachen
Quicklinks
Werbung
Inhaltsverzeichnis

Verwandte Anleitungen für Climadiff Avintage AV7XK


Inhaltszusammenfassung für Climadiff Avintage AV7XK
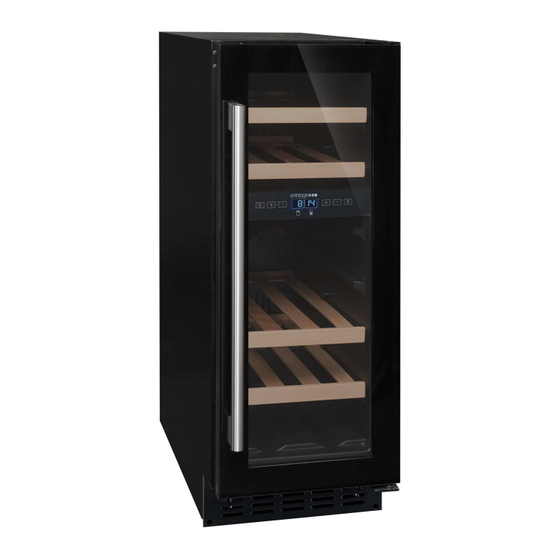
- Seite 1 All manuals and user guides at all-guides.com Cave de mise en température sous plan NOTICE D’UTILISATION AV7XK – AV18CDZ GB – USE INSTRUCTIONS p. 22 NL – HANDLEIDING p. 61 D – GEBRAUCHSANWEISUNG p. 41 SP – MANUAL DE UTILIZACION p. 81...
-
Seite 2: Consignes De Sécurité Importantes
All manuals and user guides at all-guides.com CONSIGNES DE SÉCURITÉ IMPORTANTES Pour votre sécurité et pour une utilisation correcte de l’appareil, avant d’installer et d’utiliser l’appareil pour la première fois, • lisez attentivement cette notice, y compris les mise en garde et les conseils utiles qu’elle contient. Afin d’éviter d’endommager l’appareil et/ou de vous blesser inutilement, il est important que les personnes amenées à... -
Seite 3: Sécurité Électrique
All manuals and user guides at all-guides.com ATTENTION — Si le cordon d’alimentation est endommagé, vous devez le • remplacer immédiatement auprès de votre fabricant, ou d’un revendeur qualifié, afin d’éviter tout risque d’électrocution. ATTENTION — Maintenez les ventilations biens ouvertes, et vérifiez bien que l’air •... -
Seite 4: Utilisation Quotidienne
All manuals and user guides at all-guides.com adaptateur, ni prise multiple. Vérifiez bien que la priser murale n’est pas endommagée. Une prise murale en • mauvais état pourrait entrainer une surchauffe de l’appareil et son explosion. Vérifiez bien que vous pouvez accéder à la prise murale de l’appareil. •... - Seite 5 All manuals and user guides at all-guides.com Si votre appareil est équipé de roulettes, rappelez-vous qu’elles servent • uniquement à faciliter les petits mouvements. Ne le déplacez pas sur de plus longs trajets. N’utilisez jamais l’appareil ou ses éléments pour vous appuyer •...
-
Seite 6: Économies D'énergie
All manuals and user guides at all-guides.com Économies d’énergie Pour limiter la consommation électrique de votre appareil : • Installez-le dans un endroit approprié (voir chapitre « Installation de votre appareil »). Gardez les portes ouvertes le moins de temps possible. Veillez fonctionnement optimal... -
Seite 7: Instructions De Sécurité
All manuals and user guides at all-guides.com R600a Instructions de sécurité Attention: n’obstruer aucune grille de ventilation de l’appareil. Attention : ne pas stocker de substances explosives comme les bombes d'aérosol avec un propulseur inflammables dans cet appareil. Attention : ne pas endommager le circuit frigorifique de l’appareil. - Seite 8 All manuals and user guides at all-guides.com INSTRUCTIONS D’INSTALLATION Avant d’utiliser votre armoire à vin : • Retirer les parties d’emballage intérieures et extérieures • Avant de connecter votre armoire à vin à une prise électrique laissez la reposer à la verticale environ 24 heures. Ceci réduira toute possibilité...
- Seite 9 All manuals and user guides at all-guides.com SCHÉMAS D’ENCASTREMENT AV7XK : AV18CDZ :...
-
Seite 10: Installation De La Poignée
All manuals and user guides at all-guides.com Attention : • Stockez des bouteilles fermées • Ne surchargez pas l’appareil • N’ouvrez pas la porte plus que nécessaire • Ne couvrez pas les clayettes avec des feuilles d’aluminium ou tout autre matériau qui pourrait empêcher une bonne circulation de l’air •... - Seite 11 All manuals and user guides at all-guides.com 1. Retirez la grille de ventilation en dévissant les vis. (Fig. 1) 2. Retirez la charnière inférieure ○,5 en dévissant les 4 vis ○,6. Veillez à bien tenir la porte en verre après avoir retiré les vis. (Fig.
- Seite 12 All manuals and user guides at all-guides.com BOUTON « UP » Pour faire augmenter la température de 1°C ou de 1°F à chaque pression BOUTON « DOWN » Pour faire diminuer la température de 1°C ou de 1°F à chaque pression SELECTEUR D’AFFICHAGE Choisissez d’afficher les températures en degrés Celsius ou Fahrenheit.
-
Seite 13: Afficheur De Température
All manuals and user guides at all-guides.com SÉLECTIONNER LES TEMPÉRATURES Votre cave à vin dispose de deux compartiments distincts. La température des compartiments haut et bas peut être choisie entre + 5 et +22°C (+40° et +72°F). Il est recommandé de régler la température du compartiment bas entre +12°C et + 22°C (55-72°F) qui est une plage idéale pour stocker des vins rouges et de régler la zone haute entre 5 et 12°C (40-55°F) plage adaptée aux champagnes et vins blancs. - Seite 14 All manuals and user guides at all-guides.com ALARME DE LA PORTE Une alarme se met en fonctionnement et l’afficheur se met à clignoter en cas de fermeture incorrecte de la porte pendant une durée supérieure à 60s. Une fois la température paramétrée atteinte, l’alarme cesse de fonctionner et l’afficheur arrête de clignoter.
-
Seite 15: Entretien Et Maintenance
Veillez à ce que le bac contienne toujours de l’eau. Conçu par des spécialistes pour des œnophiles, CLIMADIFF a donc pris en compte la sensibilité des bouchons à une humidité ambiante trop basse. C’est pourquoi le bac est à placer sur la clayette du haut afin d’apporter une humidité... - Seite 16 All manuals and user guides at all-guides.com EXEMPLES DE TEMPERATURES DE SERVICE (A respecter lors de vos dégustations pour éviter de passer à côté de la richesse des arômes de vos vins !) Les opinions varient, la température ambiante également mais beaucoup s’accordent sur : Grands vins de Bordeaux –...
-
Seite 17: En Cas De Panne
All manuals and user guides at all-guides.com Nettoyez soigneusement l’intérieur et l’extérieur de l’appareil Laissez la porte ouverte pour éviter la formation de condensas, odeurs, moisissures. SI VOUS DEVEZ DÉPLACER VOTRE CAVE A VINS Enlevez toutes les bouteilles présentes dans la cuve et fixez les éléments mobiles. Pour éviter d’endommager les vis de mise à... -
Seite 18: Problemes Et Solutions
All manuals and user guides at all-guides.com PROBLEMES ET SOLUTIONS Vous pouvez résoudre beaucoup de simples problèmes de votre cave à vin, en évitant de faire appel à votre service après vente. Essayez avec les suggestions ci-dessous !. PROBLEMES CAUSES POSSIBLES La cave ne démarre pas. - Seite 19 Les garanties des produits de la marque CLIMADIFF sont exclusivement énoncées par les distributeurs que nous avons choisis. Aucun élément des présentes ne peut être interprété comme une garantie supplémentaire. La société CLIMADIFF ne peut être tenu responsable des erreurs ou des omissions techniques et de rédaction dans les présentes. Document non contractuel.
- Seite 20 All manuals and user guides at all-guides.com ANNEXE 1 Modèle Marque: AVINTAGE Référence: AV7XK Catégorie d’appareil de réfrigération ménager : 2 Alimentation 220-240V,50Hz Dimension (LxPxH cm) 52.5 x 14.8 x 82 cm Poids (kg) Classe d’efficacité énergétique Consommation d’énergie annuelle (AEc) Consommation d’énergie de 155 kWh par an calculée sur la base du résultat obtenu pour 24h dans des conditions d’essai normalisées.
- Seite 21 All manuals and user guides at all-guides.com ANNEXE 2 Modèle Marque: AVINTAGE Référence: AV18CDZ Catégorie d’appareil de réfrigération ménager : 2 Alimentation 220-240V,50Hz 57 x 29.5 x 82 cm Dimension (LxPxH cm) 28kg Poids (kg) Classe d’efficacité énergétique Consommation d’énergie de 139 kWh par an calculée sur la base Consommation d’énergie annuelle (AEc) du résultat obtenu pour 24h dans des conditions d’essai normalisées.
-
Seite 22: Important Safeguards
All manuals and user guides at all-guides.com IMPORTANT SAFEGUARDS For your own safety and for the proper utilisation of the appliance, read this manual carefully, including the warnings and recommendations, before installing the appliance and using it for the first time. In order to avoid damage to the appliance and/or personal injury, persons using the appliance should be fully familiar with its operation and safety functions. -
Seite 23: Electrical Safety
All manuals and user guides at all-guides.com circulate, especially if the appliance is recessed into a wall. CAUTION — Do not damage the refrigerating circuit. • CAUTION — Do not use electrical appliances inside the compartment, unless • they are tolerated by the manufacturer. CAUTION —... - Seite 24 All manuals and user guides at all-guides.com If the wall socket is loose, do not connect the cable, as there is a risk of electric • shock or fire. Do not use the appliance if the interior lighting cover is not installed. •...
-
Seite 25: Power Saving
All manuals and user guides at all-guides.com Caution! Cleaning and servicing Before carrying out servicing, switch off the power supply and disconnect the • appliance. When cleaning the appliance, do not use metal objects, steam systems, volatile • fluids, organic solvents or abrasive substances. Do not use sharp or pointed objects to remove ice. - Seite 26 All manuals and user guides at all-guides.com •To ensure that the appliance operates properly, clean the condenser regularly (see “Routine servicing of your appliance”). • Regularly inspect the door seals and ensure that they are still closing properly. If this is not the case, contact your after-sales service. Trouble shooting Any electrical work should be carried out by a qualified and skilled technician.
-
Seite 27: Safety Regulation
All manuals and user guides at all-guides.com R600a Safety regulation Warning: Keep ventilation openings in the appliance enclosure or in the structure clear of obstruction. Do not store explosive substances such as aerosol cans with a flammable propellant in this appliance. Warning: Do not damage the refrigerant circuit. -
Seite 28: Installation Instructions
All manuals and user guides at all-guides.com INSTALLATION INSTRUCTIONS Before Using Your Wine Cooler • Remove all exterior and interior packing. • Before connecting the Wine Cooler to the power source, let it stand upright for approximately 24 hours. • This will reduce the possibility of a malfunction in the cooling system caused by handling during transportation. •... -
Seite 29: Built-In Drawings
All manuals and user guides at all-guides.com BUILT-IN DRAWINGS AV7XK : AV18CDZ :... -
Seite 30: Installing The Handle
All manuals and user guides at all-guides.com Attention: • Store wine in sealed bottles. • Do not overload the cabinet. • Do not open the door unless necessary. • Do not cover shelves with aluminum foil or any other shelf material which may prevent air circulation. Should the wine cooler be left empty for long periods it is suggested that the appliance is unplugged, and after careful cleaning, leave the door ajar to allow air to circulate inside the cabinet in order to avoid possible condensation, mold or odors forming. -
Seite 31: Operating Yourwine Cooler
All manuals and user guides at all-guides.com Remove the ventilation grille ○ ,2 and the adjustable ventilation grille ○ ,1 by unscrewing the screws ○ ,3 & ○ ,4. (Fig. 1) NOTE: For some models without adjustable ventilation grille, the step is not needed. Remove the bottom hinge ○... - Seite 32 All manuals and user guides at all-guides.com Power To turn this appliance on/off, press the bottom and hold for 5 seconds. Pressing the key once can switch off the audible alarm when the alarm is on. LIGHT To control the inner light turn on/off. «...
-
Seite 33: Temperature Display
All manuals and user guides at all-guides.com SELECTOR Select the temperature display setting in Fahrenheit or Celsius degree. To change the temperature from Fahrenheit to Celsius or from Celsius to Fahrenheit, press the button for 5 seconds SETTING THE TEMPERATURE CONTROL The wine cooler has two temperature zones. -
Seite 34: Interior Light
All manuals and user guides at all-guides.com one. The alarm will stop. The relevant temperature display continues to flash until the set temperature has been reached. The display then lights up constantly and the alarm system is fully active again. INTERIOR LIGHT The interior lightmakes it easy to view your wines labels and enhances the display of your collection. - Seite 35 Designed by specialists in oenology as written above, the wine cellar is allowed for a storage period of 2 months maximum. CLIMADIFF has taken care of the cork’s sensibility to the humidity rate. That’s why the plastic reservoir has to be put on the top shelf to ensure a minimum humidity.
-
Seite 36: Energy Saving Tips
All manuals and user guides at all-guides.com DEFROST - CONDENSATION The cabinet is equipped with an automatic defrost cycle. When the cooling cycle is finished, the refrigerated parts of the cabinet are defrosted automatically. The water from the defrost is channelled into an evaporation tray which is located in the back of the cabinet close to the compressor. -
Seite 37: Troubleshooting Guide
All manuals and user guides at all-guides.com IN CASE OF BREAKDOWN Despite the care we bring to our production, a breakdown can never be totally excluded. Before contacting the After- Sales department of your store, please check: the cabinet is properly plugged in there is not a power outage the fault does not have as an origin one of those described in the following table WARNING! Unplug the cabinet before cleaning or repairing the cabinet! - Seite 38 Since we make continuous improvements to our products, we reserve the right to modify technical characteristics without notice. Warranties for CLIMADIFF brand products are offered exclusively by selected retailers. No part of these instructions may be considered as a supplementary warranty.
- Seite 39 All manuals and user guides at all-guides.com APPENDIX 1 Brand: Avintage Reference: AV7XK Model Domestic refrigeration appliance category: 2 220-240 V~ 50 Hz Supply 52.5 x 14.8 x 82 cm Dimensions (L x D x H cm) 19 kg Weight (kg) Energy efficiency class Energy consumption 155 kWh per year calculated on the basis of results obtained over 24 hours under...
- Seite 40 All manuals and user guides at all-guides.com APPENDIX 2 Brand: Avintage Reference: AV18CDZ Model Domestic refrigeration appliance category: 2 220-240 V~ 50 Hz Supply 57 x 29.5 x 82 cm Dimensions (L x D x H cm) 28 kg Weight (kg) Energy efficiency class Energy consumption 139 kWh per year calculated on the basis of results obtained over 24 hours under...
-
Seite 41: Allgemeine Sicherheit
All manuals and user guides at all-guides.com WICHTIGE SICHERHEITSHINWEISE Lesen Sie die Bedienungsanleitung, einschließlich der darin enthaltenen Warnhinweise und nützlichen Tipps, zu Ihrer Sicherheit und zum korrekten Gebrauch des Geräts vor der Installation und Inbetriebnahme des Geräts aufmerksam durch. Um das Gerät nicht zu beschädigen und/oder unnötige Verletzungen zu vermeiden, ist es wichtig, dass die Personen, die das Gerät benutzen, seine Funktionsweise sowie seine Sicherheitsfunktionen gut kennen. -
Seite 42: Achtung! Brandgefahr
All manuals and user guides at all-guides.com ACHTUNG! Ist das Netzkabel beschädigt, muss es zur Vermeidung der • Stromschlaggefahr umgehend durch den Hersteller oder einen Fachhändler ausgetauscht werden. ACHTUNG! Die Lüftungsöffnungen dürfen nicht versperrt werden. Prüfen Sie, • dass die Luft frei durch die Öffnungen zirkulieren kann, vor allem bei Einbaugeräten. ACHTUNG! Den Kältekreislauf auf keinen Fall beschädigen. -
Seite 43: Täglicher Gebrauch
All manuals and user guides at all-guides.com Prüfen, dass die Wandsteckdose nicht beschädigt ist. Eine Wandsteckdose in • schlechtem Zustand kann zur Überhitzung des Geräts und seiner Explosion führen. Prüfen, dass die Wandsteckdose des Geräts leicht erreichbar ist. • Nicht am Netzkabel ziehen. •... - Seite 44 All manuals and user guides at all-guides.com Strecken verschieben. Sich nicht auf dem Gerät bzw. seinen Bauelementen abstützen. • Um das Herabstürzen von Gegenständen und Beschädigungen des Gerätes zu • vermeiden, die Fächer des Gerätes nicht überladen. Achtung! Reinigung und Pflege Vor der Reinigung den Netzstecker aus der Steckdose ziehen und den Strom •...
- Seite 45 All manuals and user guides at all-guides.com ENERGIEEINSPARUNGEN Zur Begrenzung des Stromverbrauchs des Gerätes: Das Gerät an einem geeigneten Ort aufstellen (siehe Abschnitt "Installation des • Gerätes"). Die Türen nur so lange wie unbedingt nötig öffnen. • Durch die periodische Reinigung des Kondensators den optimalen Betrieb des •...
- Seite 46 All manuals and user guides at all-guides.com R600a Sicherheitsvorschrift Achtung: Achten darauf, dass Lüftungsöffnungen im Gerätegehäuse oder in der Struktur frei bleiben. Bewahren Sie keine explosiven Substanzen, wie Spraydosen mit einem entzündlichen Treibgas, in diesem Gerät auf. Achtung: Achten Sie darauf, den Kältekreislauf nicht zu beschädigen.
-
Seite 47: Anweisungen Für Das Einbauen
All manuals and user guides at all-guides.com INSTALLATIONSANWEISUNGEN Vor dem Gebrauch Ihres Weinschranks: • Entfernen Sie alle Teile der Innen- und Außenverpackung • Bevor Sie den Weinschrank an eine Steckdose anschließen, müssen Sie ihn etwa 24 Stunden senkrecht stehen lassen. •... -
Seite 48: Einbauschablonen
All manuals and user guides at all-guides.com EINBAUSCHABLONEN AV7XK : AV18CDZ :... -
Seite 49: Anbringen Des Griffs
All manuals and user guides at all-guides.com Achtung: • Lagern Sie die Flaschen im geschlossenen Zustand • Überladen Sie das Gerät nicht • Öffnen Sie die Tür nicht öfter als unbedingt notwendig • Decken Sie die Roste nicht mit Alufolie oder anderem Material ab, das verhindert die gute Zirkulation der Luft. •... -
Seite 50: Funktionsweise Des Weinschranks
All manuals and user guides at all-guides.com 1. Entfernen Sie die Lüftungsgitter ○, 2 und die einstellbare Lüftungsgitter ○, 1 durch Lösen der Schrauben ○, 3 & ○, 4. (Fig. HINWEIS: Bei einigen Modellen ohne einstellbare Lüftungsgitter wird der Schritt nicht notwendig. 2. -
Seite 51: Auswählen Der Temperaturen
All manuals and user guides at all-guides.com BEDIENFELD DES WEINSCHRANKS MODELL 1 FACH EIN AUS Drücken Sie zum Einschalten oder Ausschalten des Gerätes zumindest 5 Sekunden lang die Taste . Drücken Sie dieselbe Taste, um den Alarm im Falle einer Auslösung zu stoppen. INNENBELEUCHTUNG Zum Einschalten oder Ausschalten der LED-Innenbeleuchtung „UP“... - Seite 52 All manuals and user guides at all-guides.com INNENBELEUCHTUNG Zum Einschalten oder Ausschalten der LED-Innenbeleuchtung „UP“ BUTTON Zum Erhöhen der Temperatur um 1°C oder 1°F bei jeder Betätigung „DOWN“ BUTTON Zum Absenken der Temperatur um 1°C oder 1°F bei jeder Betätigung ANZEIGE-WAHLSCHALTER Entscheiden Sie sich für eine Anzeige der Temperatur in Celsius oder in Fahrenheit.
-
Seite 53: Temperaturalarm
All manuals and user guides at all-guides.com niedrigeren Steuereinheit. • Um die "set" Temperatur in der Zone zu jeder Zeit, berühren Sie die UP-oder DOWN-Marke, die "SET" Temperatur wird vorübergehend "Flash" in der LED-Anzeige für 5 Sekunden. TEMPERATURDISPLAY ACHTUNG: Während des normalen Betriebs zeigt das Temperaturdisplay die Innentemperatur des Weinschranks an. Diese Temperatur ist nicht die, die Sie ausgewählt haben, sondern variiert in Abhängigkeit von den Kühl- und Stillstandszyklen des Geräts. -
Seite 54: Instandhaltung Und Wartung
All manuals and user guides at all-guides.com Warnsignale aus, um den Übergang in den Ruhemodus zu bestätigen. Um im Gegensatz dazu den Ruhemodus abzuwählen, halten Sie die Taste DOWN 5 Sekunden lang gedrückt. Der Schrank sendet 5 Warnsignale aus, um den Übergang in den belüfteten Kühlmodus zu bestätigen. -
Seite 55: Beispiele Für Die Serviertemperatur
All manuals and user guides at all-guides.com Sie wurden anhand von Tests mit einer Musterflasche ermittelt: Die Flasche des Typs „Bordeaux tradition 75 cl“ (die Norm weist jeder Flaschenform eine geographische Herkunft zu: Bordeaux, Burgunder, provenzalisch usw. und dazu einen Typ: Tradition, schwer, leicht, Flöte usw., haben jeweils bestimmte Durchmesser und Höhen. -
Seite 56: Energie Sparen
All manuals and user guides at all-guides.com LAGERN DES WEINSCHRANKS Sollten Sie den Weinschrank während kürzeren Zeitspannen nicht verwenden, lassen Sie die einstellten Werte unverändert. Bei längerem Stillstand: Entfernen Sie alle Flaschen aus dem Weinschrank Ziehen Sie das Netzkabel von Netzstrom ab Reinigen Sie das Gerät sorgfältig innen und außen Lassen Sie seine Tür offen, um das Entstehen von Kondensat, Gerüchen, Schimmelpilz zu vermeiden. -
Seite 57: Probleme Und Ihre Lösung
All manuals and user guides at all-guides.com PROBLEME UND IHRE LÖSUNG Sie können viele einfache Probleme des Weinschranks selbst beheben, ohne gleich den Kundendienst heranzuziehen. Probieren Sie die folgenden Tipps: PROBLEME MÖGLICHE URSACHEN Der Weinschrank schaltet sich nicht ein. Das Netzkabel wurde nicht angesteckt. Der Ein-/Ausschalter steht auf Aus. -
Seite 58: Umweltschutz
In dem Bestreben der kontinuierlichen Qualitätsverbesserung unserer Produkte behalten wir uns die Möglichkeit vor, die technischen Merkmale ohne Vorankündigung zu ändern. Die Garantien für die Produkte der Marke CLIMADIFF werden ausschließlich durch unsere Vertragshändler gewährt. In dieser Bedienungsanleitung gemachte Angaben können nicht als eine Zusatzgarantie ausgelegt werden. -
Seite 59: Anhang
All manuals and user guides at all-guides.com ANHANG 1 Modell Marke: Avintage Modellbezeichnung: AV7XK Gerätekategorie Kühlschrank: 2 Spannungsversorgung 220-240V~ 50Hz Abmessungen (B x T x H cm) 52.5 x 14.8 x 82 cm Gewicht (kg) 19kg Energieeffizienzklasse Jährlicher Energieverbrauch (AEC) Energieverbrauch von 155 kWh pro Jahr, berechnet auf der Basis des für 24h unter standardisierten Testbedingungen erhaltenen Ergebnisses. - Seite 60 All manuals and user guides at all-guides.com ANHANG 2 Modell Marke: AVINTAGE Modellbezeichnung: AV18CDZ Gerätekategorie Kühlschrank: 2 Spannungsversorgung 220-240V, 50Hz Abmessungen (B x T x H cm) 57 x 29.5 x 82 cm Gewicht (kg) Energieeffizienzklasse Jährlicher Energieverbrauch (AEC) Energieverbrauch von 139 kWh pro Jahr, berechnet auf der Basis des für 24h unter standardisierten Testbedingungen erhaltenen Ergebnisses.
-
Seite 61: Belangrijke Veiligheidsaanwijzingen
All manuals and user guides at all-guides.com BELANGRIJKE VEILIGHEIDSAANWIJZINGEN Lees, voor uw veiligheid en voor een correct gebruik van het apparaat, deze handleiding en de hierin vermelde waarschuwingen en adviezen aandachtig door alvorens het apparaat te installeren en voor de eerste keer te gebruiken. Om beschadigingen aan het apparaat te voorkomen en/of u onnodig te verwonden, is het van belang dat de personen die dit apparaat zullen gebruiken de werking en de beveiligingen ervan volledig begrijpen. -
Seite 62: Elektrische Veiligheid
All manuals and user guides at all-guides.com WAARSCHUWING— Houd de ventilatieopeningen volledig open en controleer of • de lucht door de openingen kan stromen, met name als het apparaat in de wand is ingebouwd. WAARSCHUWING - Zorg ervoor het koelcircuit niet te beschadigen. •... -
Seite 63: Dagelijks Gebruik
All manuals and user guides at all-guides.com Trek nooit aan het snoer. • Koppel nooit de aarding af. • Sluit het snoer nooit aan op een loszittend stopcontact. Dit kan leiden tot risico • op elektrocutie of brand. Gebruik het apparaat nooit als het beschermkapje van de binnenverlichting niet is •... -
Seite 64: Energiebesparingen
All manuals and user guides at all-guides.com Overbelast, om het vallen van voorwerpen en beschadigingen aan het apparaat • te voorkomen, de compartimenten van het apparaat niet. Let op! Reiniging en onderhoud Haal, vóór het onderhoud, de stekker van het apparaat uit het stopcontact en •... - Seite 65 All manuals and user guides at all-guides.com • Houd de deuren zo kort mogelijk open. • Zorg voor een optimale werking van het apparaat door regelmatig de condensator te reinigen (zie het hoofdstuk "Gangbaar onderhoud van uw apparaat"). Controleer regelmatig de deurrubbers om er zeker van te zijn dat deze goed sluiten. Neem, indien dit niet het geval is, contact op met de Servicedienst.
- Seite 66 All manuals and user guides at all-guides.com R600a Veiligheidsvoorschriften Waarschuwing: Let erop dat de ventilatieopeningen in de behuizing van het toestel of van de gehele opstelling niet afgedekt zijn. Bewaar in dit toestel geen ontplofbare stoffen, zoals spuitbussen met brandbaar drijfgas. Waarschuwing: het koelmiddelcircuit niet beschadigen Koeleenheden die werken met isobutaan (R600a) mogen niet worden geplaatst in een omgeving waar...
-
Seite 67: Installatie-Instructies
All manuals and user guides at all-guides.com INSTALLATIE-INSTRUCTIES Voor het gebruik van uw wijkast: • Verwijder het verpakkingsmateriaal aan de binnen- en buitenkant. • Laat uw wijnkast ongeveer 24 uur in verticale positie staan voordat u hem aansluit op het stopcontact. •... - Seite 68 All manuals and user guides at all-guides.com INBOUWAFMETINGEN AV7XK: AV18CDZ:...
- Seite 69 All manuals and user guides at all-guides.com Let op: • Sla de flessen gesloten op • Overlaad het apparaat niet • Open de deur niet vaker dan nodig • Bedek de leggers niet met aluminiumfolie of een ander materiaal dat een goede luchtcirculatie kan verhinderen. •...
- Seite 70 All manuals and user guides at all-guides.com 1. Verwijder het ventilatierooster ○, 2 en de verstelbare ventilatierooster ○, 1 door de schroeven ○, 3 & ○, 4. (Fig. 1) OPMERKING: Voor sommige modellen zonder verstelbare ventilatierooster, is de stap niet nodig. 2.
- Seite 71 All manuals and user guides at all-guides.com CONTROLEPANEEL VAN DE WIJNKAST MODEL 1 COMPARTIMENTEN AAN UIT minstens 5 seconden ingedrukt Houd voor het in- of uitschakelen van het apparaat de knop . Druk op deze zelfde toets voor het uitschakelen van het alarm, wanneer dit aan gaat. BINNENVERLICHTING Voor het in- of uitschakelen van de binnenverlichting met LED’s KNOP “UP”...
- Seite 72 All manuals and user guides at all-guides.com BINNENVERLICHTING Voor het in- of uitschakelen van de binnenverlichting met LED’s KNOP “UP” Om bij iedere druk de temperatuur met 1°C of 1°F te verhogen KNOP “DOWN” Om bij iedere druk de temperatuur met 1°C of 1°F te verlagen KEUZEKNOP WEERGAVE Kies voor de weergave van de temperaturen in graden Celsius of Fahrenheit.
-
Seite 73: Temperatuuralarm
All manuals and user guides at all-guides.com Een andere temperatuur is geprogrammeerd Een temperatuur in een van de compartimenten ligt 5°C boven de geprogrammeerde temperatuur. Het knipperen zorgt ervoor dat u gewaarschuwd wordt als de temperatuur abnormaal stijgt of daalt. TEMPERATUURALARM Een alarm gaat aan en de display begint te knipperen in geval van: Een plotselinge verhoging of verlaging van de temperatuur of wanneer de temperatuur buiten de aanbevolen... -
Seite 74: Onderhoud En Reinigen
Vul het reservoir tot ¾ vol. Controleer het waterpeil incidenteel bij te vullen.Toen de wijn koeler is uitgerust met een koolstoffilter Ontwikkeld door specialisten voor wijnliefhebbers, heeft CLIMADIFF rekening gehouden met de gevoeligheid van kurken voor een te lage luchtvochtigheid. Daarom moet de bak op de bovenste legger geplaatst worden om te zorgen voor de minimale vochtigheid. - Seite 75 All manuals and user guides at all-guides.com VOORBEELD VAN SERVEERTEMPERATUREN (Temperaturen die u moet respecteren als u wenst te vermijden dat bij het wijnproeven, het rijke bouquet van uw wijn u ontglipt !) Meningen verschillen, net als de omgevingstemperaturen, maar de meesten zijn het hier over eens : Grand Vin van de Bordeauxstreek –...
-
Seite 76: Als U Uw Wijnkast Moet Verplaatsen
All manuals and user guides at all-guides.com • Verwijder de flessen uit het toestel. • Trek de stekker van het toestel uit de contactdoos. • Maak zorgvuldig de binnen- en buitenkant van het toestel schoon • Laat de deur open om het vormen van condensaat, geurtjes of schimmels te vermijden. ALS U UW WIJNKAST MOET VERPLAATSEN Verwijder alle flessen uit uw kast en maak losse onderdelen vast. -
Seite 77: Problemen En Oplossingen
All manuals and user guides at all-guides.com PROBLEMEN EN OPLOSSINGEN U kan zelf kleine, eenvoudige probleempjes oplossen die u met uw wijnkast ondervindt en waarvoor u niet meteen de klantendienst hoeft te contacteren. Begin alvast met het raadplegen van de suggestielijst hieronder ! PROBLEEM MOGELIJKE OORZAAK De wijnkast start niet... -
Seite 78: Milieubescherming
Omwille van de voortdurende ontwikkeling en verbetering van onze producten behouden wij ons het recht voor om zonder voorafgaande kennisgeving de technische eigenschappen te wijzigen. Garanties op CLIMADIFF producten worden uitsluitend vrijgegeven door de door ons geselecteerde verdelers . Niets van wat hierin gezegd wordt mag beschouwd worden als een bijkomende garantie. - Seite 79 All manuals and user guides at all-guides.com BIJLAGE 1 Model Merk: Avintage Referentie: AV7XK Categorie van huishoudelijk koelapparaat: 2 Voeding 220-240 V,50 Hz Afmetingen (LxBxH cm) 47,5 x 14.5 x 86.5 cm Gewicht (kg) Energie-efficiëntieklasse Jaarlijks energieverbruik (AEc) Energieverbruik van 155 kWh per jaar berekend op basis van het resultaat verkregen voor 24u in genormaliseerde testomstandigheden.
- Seite 80 All manuals and user guides at all-guides.com BIJLAGE 2 Model Merk: Avintage Referentie: AV18CDZ Categorie van huishoudelijk koelapparaat: 2 Voeding 220-240 V,50 Hz Afmetingen (LxBxH cm) 57 x 29.5 x 82 cm Gewicht (kg) Energie-efficiëntieklasse Jaarlijks energieverbruik (AEc) Energieverbruik van 139 kWh per jaar berekend op basis van het resultaat verkregen voor 24u in genormaliseerde testomstandigheden.
-
Seite 81: Consignas Importantes De Seguridad
All manuals and user guides at all-guides.com CONSIGNAS IMPORTANTES DE SEGURIDAD Por su seguridad y para utilizar correctamente el aparato, antes de instalarlo y utilizarlo por primera vez, lea atentamente este manual, así como las advertencias y los consejos útiles que contiene. -
Seite 82: Líquido Refrigerante
All manuals and user guides at all-guides.com ATENCIÓN: Mantenga los orificios de ventilación abiertos y compruebe que el • aire circule correctamente por las aberturas, sobre todo si el aparato está empotrado en la pared. ATENCIÓN: No estropee el circuito de refrigeración. •... - Seite 83 All manuals and user guides at all-guides.com puede ocasionar un calentamiento excesivo del aparato y su explosión. Compruebe que puede acceder a la toma mural del aparato. • No tire en ningún caso del cable principal. • No elimine en ningún caso la toma de tierra. •...
-
Seite 84: Ahorro De Energía
All manuals and user guides at all-guides.com No utilice en ningún caso el aparato o sus elementos para apoyarse. • Para evitar que caigan objetos e impedir el deterioro del aparato, no sobrecargue • los compartimentos del aparato. Atención: Limpieza y mantenimiento Antes de realizar el mantenimiento, desconecte el aparato y corte la corriente. -
Seite 85: Reparación De Averías
All manuals and user guides at all-guides.com • Instálelo en un lugar adecuado (véase el capítulo «Instalación del aparato»). • Mantenga las puertas abiertas el menor tiempo posible. • Para que el aparato funcione correctamente, limpie periódicamente el condensador (véase el capítulo «Mantenimiento normal del aparato»). •... - Seite 86 All manuals and user guides at all-guides.com R600a Reglamento de seguridad Advertencia: mantenga despejadas las aberturas de ventilación del recinto o del armazón del aparato. No guarde en el aparato sustancias explosivas como aerosoles con gases propulsores inflamables. Advertencia: no dañe el circuito del refrigerante. Las unidades de refrigeración que funcionen con isobutano (R600a) no deben colocarse en lugares donde haya fuentes de ignición (ej.: contactos...
- Seite 87 All manuals and user guides at all-guides.com INSTRUCCIONES DE INSTALACIÓN Antes de utilizar el armario de vino: • Retire las partes interiores y exteriores del embalaje. • Antes de conectar el armario de vino a una toma eléctrica, déjelo reposar en vertical unas 24 horas. •...
- Seite 88 All manuals and user guides at all-guides.com GÁLIBOS DE EMPOTRAMIENTO AV7XK: AV18CDZ:...
- Seite 89 All manuals and user guides at all-guides.com ATENCIÓN: • Almacene las botellas cerradas • No sobrecargue el aparato • No abra la puerta más de lo que fuera necesario • No cubra las parrillas con hojas de aluminio o cualquier otro material que pudiese impedir una buena circulación del aire •...
- Seite 90 All manuals and user guides at all-guides.com 1. Retire la rejilla de ventilación ○, 2 y la rejilla de ventilación regulable ○, 1 aflojando los tornillos ○, 3 & ○, 4. (Fig. 1) NOTA: Para algunos modelos sin rejilla de ventilación regulable, no se necesita el paso. 2.
- Seite 91 All manuals and user guides at all-guides.com BOTÓN « DOWN » Para reducir la temperatura en 1°C o en 1°F con cada pulsación. SELECTOR DE VISUALIZACIÓN Seleccione el modo de visualización de las temperaturas en grados Celsius o Fahrenheit. Para elegir el modo de visualización, pulse el botón durante al menos 5 segundos.
- Seite 92 All manuals and user guides at all-guides.com SELECCIONAR LAS TEMPERATURAS La bodega de vino posee dos compartimentos distintos La temperatura de los compartimentos alto y bajo puede elegirse entre + 5 y +22°C (+40° y +72°F). Se recomienda regular la temperatura del compartimento bajo entre +12°C y + 22°C (55- 72°F) que es un campo ideal para almacenar vinos tintos y regular la zona alta entre 5 y 12°C (40-55°F) campo adaptado a los champanes y vinos blancos.
-
Seite 93: Alarma De Temperatura
All manuals and user guides at all-guides.com ALARMA DE TEMPERATURA Se activará una alarma y la pantalla comenzará a parpadear si: se produce un aumento o disminución importante de la temperatura o si la temperatura no está comprendida en el intervalo recomendado;... -
Seite 94: Conservación Y Mantenimiento
MÉTODO DE CARGA Las indicaciones de capacidad de contenido asignadas a los diferentes modelos de bodegas para vinos Climadiff se dan a título indicativo. Las mismas le ayudarán a elegir en función de sus deseos y del espacio del que disponga. Actualmente, estas capacidades de contenido han sido definidas a partir de una botella patrón de tipo "bordelesa tradition 75 cl*". - Seite 95 All manuals and user guides at all-guides.com EJEMPLOS DE TEMPERATURAS DE SERVICIO (¡A respetar durante sus catas para evitar pasar junto a la riqueza de los aromas de sus vinos!) Tipo de vino Temperatura de servicio aconsejada Grandes vinos de Burdeos – Tintos 15-16°C Grandes vinos de Borgoña –...
-
Seite 96: En Caso De Avería
All manuals and user guides at all-guides.com SI DEBIESE DESPLAZAR LA BODEGA DE VINO Saque todas las botellas que estén en la cuba y fije los elementos móviles. Para evitar dañar los tornillos de puesta a nivel de los pies, atorníllelos a fondo en su base. Almacénelo con la puerta cerrada. -
Seite 97: Problemas Y Soluciones
All manuals and user guides at all-guides.com PROBLEMAS Y SOLUCIONES PROBLEMAS CAUSAS POSIBLES La bodega no se enciende. La toma no está conectada. El botón marcha/parada se encuentra en posición parada. El fusible de su instalación eléctrica ha saltado. La bodega no enfría lo suficiente. Controle la temperatura elegida. - Seite 98 Las garantías de los productos de la marca CLIMADIFF son proporcionadas de forma exclusiva por los distribuidores elegidos por nosotros. Ningún elemento del presente manual podrá ser interpretado como una garantía adicional. CLIMADIFF no asume ninguna responsabilidad por los errores u omisiones técnicas y de redacción en el presente manual. Documento no contractual.
- Seite 99 All manuals and user guides at all-guides.com ANEXO 1 Modelo Marca: Avintage Referencia: AV7XK Categoría de aparato de refrigeración doméstica: 2 Alimentación 220-240 V, 50 Hz Dimensiones (largo x ancho x alto en cm) 52.5 x 14.8 x 82 cm Peso (kg) Clase energética Consumo de energía anual (AEc)
- Seite 100 38 ºC (la temperatura más alta) Emisiones acústicas al aire en dB(A) re 1pW 42 dB Tipo de instalación Empotrada Este aparato está diseñado únicamente para el almacenamiento de vinos. CLIMADIFF 143 Boulevard Pierre Lefaucheux 72230 Arnage - FRANCE www.climadiff.com – info@climadiff.com...