Inhaltszusammenfassung für dB Technologies VIO S 115
Seite 1
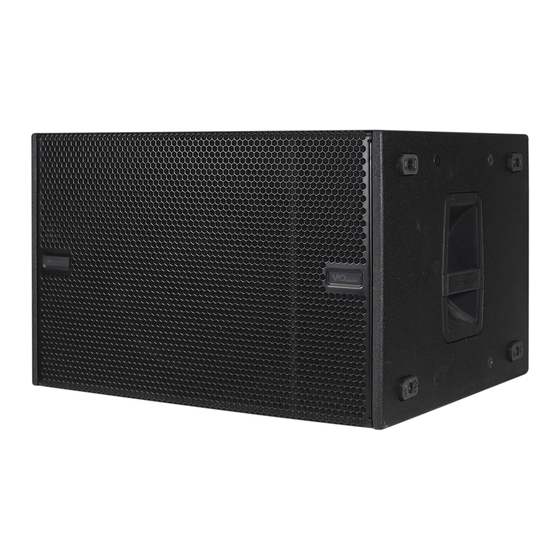
Professional Active Subwoofer 1x 15” - 4” VC LF RDNet ON BOARD MANUALE D’USO – Sezione 1 Le avvertenze nel presente manuale devono essere osservate congiuntamente al “MANUALE D’USO - Sezione2”. USER MANUAL - Section 1 The warnings in this manual must be observed in conjunction with the “USER MANUAL - Section 2”. BEDIENUNGSANLEITUNG –...
Seite 2
Italiano EMI CLASSIFICATION According to the standards EN 55032 and EN 55035 this is Class B equipment, designed to operate in residential environments. FCC CLASS B STATEMENT ACCORDING TO TITLE 47, PART 15, SUBPART B, §15.105 This equipment has been tested and found to comply with the limits for a class B digital device, pursuant to part 15 of the FCC Rules.
Seite 3
Italiano IMPORTANT SAFETY INSTRUCIONS: 1. Read these instructions. 2. Keep these instructions. 3. Heed all warnings. 4. Follow all instructions. 5. Do not use this apparatus near water. 6. Clean only with dry cloth. 7. Do not block any ventilation openings. Install in accordance with the manufacturer’s instructions. 8.
Seite 4
Italiano ITALIANO ENGLISH DEUTSCH FRANÇAIS ESPAÑOL VIO S115 Cod. 420120357 REV. 1.0...
Italiano INDICE 1. INFORMAZIONI GENERALI ......................6 BENVENUTI! ...........................6 PANORAMICA INTRODUTTIVA ......................6 RIFERIMENTI PER L’UTENTE ......................6 CARATTERISTICHE MECCANICHE ED ACUSTICHE ................7 DIMENSIONI E PESO ............................7 MECCANICA ................................. 7 ACCESSORI ................................8 CARATTERISTICHE DELLA SEZIONE DI AMPLIFICAZIONE E DI CONTROLLO ......10 SEZIONE DI INGRESSO, USCITA E CONTROLLO ....................
Italiano 1. INFORMAZIONI GENERALI BENVENUTI! Grazie per aver acquistato un prodotto progettato e sviluppato in Italia da dBTechnologies! Questo subwoofer attivo, potente, compatto e dalla facile installazione, racchiude in sé anni di esperienza ed innovazione nel campo della diffusione sonora, con l’impiego di soluzioni d’avanguardia in campo acustico, elettronico e di ricerca sui materiali.
Italiano CARATTERISTICHE MECCANICHE ED ACUSTICHE DIMENSIONI E PESO La serie VIO è stata progettata con una particolare attenzione all’ottimizzazione di peso e ingombro. Il diffusore finito VIO S115, verniciato in poliurea, pesa 32.8 kg. Le dimensioni sono: 650 mm (L) x 420 mm (A) x 550 mm (P). MECCANICA L’ergonomia del subwoofer ed il rapido montaggio appeso e in appoggio (flown or stacked) sono garantiti da: A.
Italiano ATTENZIONE! Non togliere entrambe le viti di fissaggio, rimuovere solo una vite per ogni punto di appendibilità. ACCESSORI Per un rapido montaggio, sono previsti come opzionali i seguenti accessori: DRK-1 per utilizzo flown di VIO S115 DRK-2 per utilizzo flown di VIO S115 LP-4 per l’aggancio in installazione tra più...
Seite 9
Italiano LP-5 per l’aggancio in installazione stacked o flown tra subwoofer VIO S115 e modulo VIO X-206 RC-1 rain cover per proteggere la sezione di amplificazione e controllo in caso di utilizzo all’esterno Utilizzare solo gli accessori e le configurazioni indicate nel presente manuale ed operare in accordo a quanto indicato nei manuali relativi agli accessori.
Italiano CARATTERISTICHE DELLA SEZIONE DI AMPLIFICAZIONE E DI CONTROLLO L’amplificatore digitale di ultima generazione DIGIPRO G3, in classe D, è il cuore di VIO-S115. Totalmente silenzioso, assicura una potenza di amplificazione di 900W RMS. Tutti gli ingressi e i controlli sono concentrati nel pannello preamplificatore posto sul retro del diffusore.
Seite 11
Italiano 1. INGRESSO (“Balanced audio - Input”) Ingresso compatibile con cavi con connettori XLR bilanciati. E’ utilizzato per il collegamento del segnale audio in ingresso proveniente dal mixer o da un altro subwoofer. 2. USCITA (“Balanced Audio - Link/Xover output) Uscita compatibile con cavi con connettori XLR bilanciati.
Italiano 10. RILANCIO DELLA CONNESSIONE DI RETE RDNet (“Data Out”) Compatibile con cavi di rete dotati di connettori di tipo etherCON/RJ45. Viene utilizzato per il rilancio della rete di controllo remoto ad ulteriori moduli del sistema in configurazione daisy-chain. 11. LED DI CONTROLLO Led relativi al funzionamento in rete (RDNet) del modulo.
Italiano 2. COLLEGAMENTI COLLEGAMENTO E RILANCIO DELL’ ALIMENTAZIONE Per il collegamento e il rilancio dell’alimentazione tra due o più moduli di VIO S115 utilizzare cavi con connettori powerCON TRUE1® seguendo il procedimento di seguito. • Collegare l’alimentazione AUTO-RANGE MAINS INPUT del primo subwoofer (A). •...
Italiano COLLEGAMENTO E RILANCIO DEL SEGNALE RDNET • Per il controllo remoto, collegare il connettore DATA IN (A) del primo subwoofer al controller remoto (RDNet CONTROL 2 oppure RDNet CONTROL 8) con cavi equipaggiati con connettori etherCON®. • Rilanciare il segnale collegando DATA OUT (B) del primo subwoofer a DATA IN (C) del successivo e così...
Italiano 3. CONTROLLO REMOTO Tramite software AURORA NET è possibile gestire in tempo reale diversi parametri del subwoofer VIO S115. In particolare: • Monitorare il segnale in ingresso e in uscita • Visualizzare l’eventuale presenza di compressione audio sul componente acustico •...
Seite 16
Italiano VIO S115 Cod. 420120357 REV. 1.0...
Italiano 4. INSTALLAZIONE E CONFIGURAZIONE Verificare che il contenuto dell’imballo del modulo VIO-S115 sia completo. L’imballo contiene: • subwoofer VIO-S115 • cavo powerCON TRUE1® • quick start e documentazione relativa alla garanzia Per permettere una più facile messa in sicurezza dell’impianto in cui è installato il subwoofer è possibile scaricare dal sito www.dbtechnologies.com il file .GLL relativo a VIO-S115 realizzato per il software EASE FOCUS.
Italiano INSTALLAZIONE FLOWN L’utilizzo appeso (flown) è previsto con il fly-bar DRK-1 oppure DRK-2, nel caso sia richiesta una copertura acustica maggiore. Il diffusore VIO S115 deve essere fissato tramite la staffa LP-4 e le relative viti in dotazione con il flybar. La staffa LP-5 deve essere utilizzata come interfaccia tra il diffusore VIO S115 e il VIO X206.
Italiano ATTENZIONE! • Non utilizzare mai le maniglie presenti sul retro del diffusore per appenderlo ma servirsi delle staffe e accessori omologati dall’azienda • In caso di utilizzo all’aperto è sempre consigliabile ancorare il sistema per prevenire eventali oscillazioni dovute al vento o agli agenti atmosferici 5.
Italiano 6. AGGIORNAMENTO DEL FIRMWARE È molto importante mantenere aggiornato il firmware del prodotto, per garantirne una piena funzionalità. Controllare periodicamente il sito http://www.dbtechnologies.com nella sezione “DOWNLOADS”. 1. Scaricare ed installare USB BURNER MANAGER nella sezione “SOFTWARE & CONTROLLER” sul proprio computer.
Italiano PROCESSORE Calcolo interno: DSP 96 kHz Convertitore A/D D/A: 24 bit / 96 kHz Limiter: Peak, RMS, Termico INTERFACCIA UTENTE Led di segnalazione: Limiter, Signal, Status, ON Led di stato (rete RDNet): Link, Active, Remote Preset Active Polarity (Normal, Reversed), Mode (Link, Xover), Frequenza di Xover Controlli: (da 70 a 120 Hz), Sub attenuation (da 0 a -15 dB, User/Service, Mute), Delay (da 0 a 5 ms)
Italiano DIMENSIONI Materiale: Legno multistrato con verniciatura poliuretanica Griglia: Verniciata / lavorazione CNC Maniglie: Integrate (1x lato) Predisposizioni di montaggio con moduli in Predisposizioni di montaggio per DRK-1 o DRK-2 flown: Predisposizioni di montaggio con moduli in Predisposizioni di montaggio per DRK-1 o DRK-2 stack: Montaggio su palo: Larghezza:...
Seite 23
English CONTENTS 1. GENERAL INFORMATION ......................24 WELCOME! ...........................24 INTRODUCTORY OVERVIEW .......................24 USER INFORMATION ........................24 MECHANICAL AND ACOUSTIC FEATURES ..................25 DIMENSIONS AND WEIGHT ..........................25 MECHANICAL FEATURES ........................... 25 ACCESSORIES ..............................26 AMPLIFIER AND CONTROL SECTION FEATURES ................28 INPUT, OUTPUT AND CONTROL SECTION ......................28 POWER SUPPLY SECTION ..........................
English 1. GENERAL INFORMATION WELCOME! Thanks for purchasing a product that was designed and developed in Italy by dBTechnologies! This active subwoofer is powerful, compact and easy to install, and embodies years of experience and innovation in the field of sound reproduction, with the use of cutting edge solutions in the fields of acoustics, electronics and materials research.
English MECHANICAL AND ACOUSTIC FEATURES DIMENSIONS AND WEIGHT The VIO series has been designed with particular attention to optimising the weight and overall dimensions. The finished VIO S115 with polyurea coating weighs 32.8 kg. The dimensions are: 650 mm (W) x 420 mm (H) x 550 mm (D). MECHANICAL FEATURES The ergonomics of the subwoofer and rapid installation in both flown and stacked configurations are ensured by: A.
English CAUTION! Do not remove both fixing screws; remove only one screw for each flying point. YES! YES! ACCESSORIES The following optional accessories are available for rapid installation: DRK-1 fly bar for use with the VIO S115 DRK-2 multiple fly bar for use with the VIO S115 LP-4 for attaching multiple VIO S115 subwoofers together or for attaching the VIO S115 to the DRK-1 and DRK-2 fly bars...
Seite 27
English LP-5 for attaching the subwoofer VIO S115 to the VIO X-206 module in stacked or flown installations RC-1 rain cover to protect the amplifier and control section when used outdoors Only use the accessories and configurations described in this manual, and proceed in accordance with the instructions given in the manuals for the accessories.
English AMPLIFIER AND CONTROL SECTION FEATURES The latest generation Class D digital amplifier DIGIPRO G3 is the heart of the VIO-S115. Totally silent, it delivers amplification power of 900W RMS. All the inputs and controls are grouped together on the preamp panel on the rear of the speaker.
Seite 29
English 1. INPUT (“Balanced audio - Input”) Input compatible with cables with balanced XLR connectors. Used for connection of the audio signal from the mixer or from another subwoofer. 2. OUTPUT (“Balanced Audio - Link/Xover output) Output compatible with cables with balanced XLR connectors. It is possible to select the type of audio signal output from this connector using the “MODE”...
English 10. RDNet NETWORK LINK CONNECTOR (“Data Out”) Compatible with network cables with etherCON/RJ45 connectors. Used to link the remote control network to other system modules in a daisy-chain configuration. 11. CONTROL LEDS LEDs related to the network (RDNet) operating status. In particular: •...
English 2. CONNECTIONS CONNECTING AND LINKING THE POWER SUPPLY For the connection and linking of the VIO S115 subwoofers use cables with powerCON TRUE1® connectors following the procedure below. • Connect the power supply to the AUTO-RANGE MAINS INPUT of the first subwoofer (A). •...
English CONNECTING AND LINKING THE RDNET SIGNAL • To enable remote control, connect the DATA IN (A) of the first subwoofer to the remote controller (RDNet Control 2 or RDNet Control 8) using cables fitted with etherCON® connectors. • Link the signal by connecting DATA OUT (B) on the first subwoofer to DATA IN (C) on the next subwoofer, and so on.
English 3. REMOTE CONTROL The AURORA NET software allows you to manage in real time several parameters of the VIO S115 subwoofer. In particular: • Monitor the input and output signals • View the presence of audio compression on the acoustic component •...
Seite 34
English VIO S115 Cod. 420120357 REV. 1.0...
English 4. INSTALLATION AND CONFIGURATION Check that no items are missing from the VIO-S115 package. The package contains: • VIO-S115 subwoofer • powerCON TRUE1® cable • quick start manual and warranty documentation To facilitate the safe installation of the subwoofer in your system, you can download from www.dbtechnologies.com the .GLL file for the VIO-S115 created for EASE FOCUS software.
English FLOWN INSTALLATION Flown installations can be created using the DRK-1 or DRK-2 fly bar to achieve greater sound coverage. The VIO S115 must be fixed using the LP-4 link plate and the screws supplied with the fly bar. The LP-5 link plate must be used as an interface between the VIO S115 and the VIO X206 speaker.
English CAUTION! • Never suspend the subwoofer from the handles on the rear! Always use brackets and accessories approved by the manufacturer. • If the subwoofer is to be used outdoors, we recommend that the system is securely anchored to prevent movement due to wind or atmospheric agents 5.
English 6. UPDATING THE FIRMWARE It is very important to keep the product firmware updated to ensure full functionality. Periodically check the “DOWNLOADS” section of the http://www.dbtechnologies.com website. 1. Download and install the USB BURNER MANAGER onto your computer from the “SOFTWARE &...
English DIMENSIONS Material: Plywood cabinet with polyurethane coating Grille: Painted / CNC machined Handles: Integral (1 per side) Provision for installation with other modules in Provision for attaching DRK-1 or DRK-2 fly bars flown configuration: Provision for installation with other modules in Provision for attaching DRK-1 or DRK-2 fly bars stacked configuration: Pole mounting:...
Seite 41
Deutsch INHALTSVERZEICHNIS 1. ALLGEMEINE HINWEISE ......................42 WILLKOMMEN! ..........................42 KURZBESCHREIBUNG ........................42 HINWEISE FÜR DEN BENUTZER ....................42 MECHANISCHE UND AKUSTISCHE EIGENSCHAFTEN ..............43 ABMESSUNGEN UND GEWICHT ........................43 MECHANIK ................................. 43 ZUBEHÖR ................................44 EIGENSCHAFTEN DES VERSTÄRKER- UND STEUERBEREICHS ............46 EINGANGS-, AUSGANGS- UND STEUERBEREICH ....................46 STROMVERSORGUNGSTEIL ..........................
Deutsch 1. ALLGEMEINE HINWEISE WILLKOMMEN! Danke, dass Sie ein Produkt erworben haben, das von dBTechnologies in Italien entworfen und entwickelt wurde! Dieser leistungsstarke, kompakte, installationsfreundliche aktive Subwoofer ist das Ergebnis langjähriger Erfahrung und Innovation im Bereich der Soundsysteme. Er bietet fortschrittliche Lösungen in Sachen Akustik und Elektronik sowie im Hinblick auf die Materialauswahl.
Deutsch MECHANISCHE UND AKUSTISCHE EIGENSCHAFTEN ABMESSUNGEN UND GEWICHT Die Serie VIO zeichnet sich durch optimiertes Gewicht und kompakte Abmessungen aus. Der fertige Lautsprecher VIO S115 mit Polyurea-Beschichtung wiegt 32,8 kg. Abmessungen: 650 mm (B) x 420 mm (H) x 550 mm (T). MECHANIK Die Ergonomie des Subwoofers und die schnelle Montage in hängender sowie gestapelter Konfiguration (flown oder stacked) werden garantiert durch:...
Deutsch WARNUNG! Nicht beide Befestigungsschrauben lösen und nur eine Schraube pro Hängestelle entfernen. NEIN! ZUBEHÖR Für eine schnelle Montage ist folgendes Zubehör als Option erhältlich: DRK-1 zum Aufhängen von VIO S115 DRK-2 zum Aufhängen von VIO S115 LP-4 für die Befestigung zwischen mehreren Sufwoofern VIO S115 oder zwischen VIO S115 und dem Flugbügel DRK-1 bzw.
Seite 45
Deutsch LP-5 für die Befestigung in gestapelter oder hängender Installation zwischen dem Subwoofer VIO S115 und dem Modul VIO X-206 RC-1 Regenabdeckung zum Schutz des Verstärker- und Steuerbereichs bei Einsatz im Freien Nur das Zubehör und die Konfigurationen verwenden, die in dieser Anleitung beschrieben sind, und die Angaben in den mit dem Zubehör mitgelieferten Anleitungen befolgen.
Deutsch EIGENSCHAFTEN DES VERSTÄRKER- UND STEUERBEREICHS Der Digitalverstärker neuester Generation DIGIPRO G3 der Klasse D ist das Herzstück von VIO-S115. Der Verstärker ist extrem leise und hat 900W RMS Leistung. Alle Eingänge und Bedienelemente befinden sich auf dem Bedienfeld des Vorverstärkers an der hinteren Lautsprecherseite.
Seite 47
Deutsch 1. EINGANG („Balanced Audio - Input”) Mit symmetrischen Kabeln mit XLR-Steckern kompatibler Eingang. Wird für die Verbindung des vom Mixer oder einem anderen Subwoofer eingehenden Audiosignals verwendet. 2. AUSGANG („Balanced Audio - Link/Xover Output) Mit symmetrischen Kabeln mit XLR-Steckern kompatibler Ausgang. An diesem Stecker kann der Typ des ausgehenden Audiosignals anhand des Wahlschalters „MODE”...
Deutsch 10. WEITERLEITUNG DES RDNet NETZWERKANSCHLUSSES (“Data Out”) Kompatibel mit Netzwerkkabeln mit etherCON RJ45-Steckverbindern. Wird für die Weiterleitung des Fernsteuerungsnetzwerks an andere Module des Systems in Daisy-Chain-Konfiguration verwendet. 11. Steuer-LEDs LEDs hinsichtlich des Netzwerkbetriebs (RDNet) des Moduls. Insbesondere: • Weist die erleuchtete LED „Link” darauf hin, dass das RDNet-Netzwerk aktiv ist und das Gerät erkannt hat •...
Deutsch 2. ANSCHLÜSSE ANSCHLUSS UND WEITERLEITUNG DER STROMVERSORGUNG Für den Anschluss und die Weiterleitung der Stromversorgung an zwei oder mehrere VIO S115 Module sind Kabel mit powerCON TRUE1® Steckern zu verwenden und folgende Schritte zu befolgen. • Die Stromversorgung AUTO-RANGE MAINS INPUT des ersten Subwoofers (A) anschließen. •...
Deutsch ANSCHLUSS UND WEITERLEITUNG DES RDNET-SIGNALS • Zur entfernten Steuerung den Stecker DATA IN (A) des ersten Subwoofers an die entfernte Steuerung (RDNet CONTROL 2 oder RDNet CONTROL 8) durch Kabel mit etherCON® Steckern anschließen. • Das Signal weiterleiten, indem DATA OUT (B) des ersten Subwoofers mit DATA IN (C) des nächsten usw.
Deutsch 3. ENTFERNTE STEUERUNG Anhand der Software AURORA NET können verschiedene Parameter des Subwoofers VIO S115 in Echtzeit gesteuert werden. Insbesondere: • Überwachung des ein- und ausgehenden Signals • Anzeige der gegebenenfalls verwendeten Audio-Kompression an der akustischen Komponente • Dämpfung des Eingangssignals in 0.5 dB Schritten •...
Seite 52
Deutsch VIO S115 Code 420120357 REV. 1.0...
Deutsch 4. INSTALLATION UND KONFIGURATION Sicherstellen, dass der Packungsinhalt des VIO-S115 Moduls vollständig ist. Die Packung enthält: • VIO-S115 Subwoofer • powerCON TRUE1® Kabel • Quick Start Anleitung und Garantieunterlagen Zur leichteren Sicherung der Anlage, in der der Subwoofer installiert ist, kann über die Website www.dbtechnologies.com die Datei .GLL zum VIO-S115 für die Software EASE FOCUS heruntergeladen werden.
Deutsch FLOWN-INSTALLATION Der hängende Einsatz (flown) ist mit dem Flugbügel DRK-1 oder DRK-2 im Fall einer größeren akustischen Abdeckung vorgesehen. Der Lautsprecher VIO S115 muss mit der Halterung LP-4 und den im Lieferumfang des Flugbügels enthaltenen Schrauben befestigt werden. Die Halterung LP-5 muss als Schnittstelle zwischen dem Lautsprecher VIO S115 und VIO X206 verwendet werden.
Deutsch WARNUNG! • Den Lautsprecher auf keinen Fall an den rückseitigen Griffen aufhängen, sondern dazu die von der Firma zugelassenen Halterungen und Zubehörteile verwenden • Beim Einsatz in Freien sollte das System stets befestigt werden, um Schwingungen durch Windstöße oder Witterungseinflüsse zu vermeiden 5.
Deutsch 6. FIRMWAREAKTUALISIERUNG Um die volle Funktionsfähigkeit des Systems zu gewährleisten, sollte die Firmware des Produktes auf dem neuesten Stand sein. In regelmäßigen Zeitabständen die Website http://www.dbtechnologies.com unter „DOWNLOADS” besuchen. 1. Download und Installation von USB BURNER MANAGER im Bereich "SOFTWARE &...
Deutsch ABMESSUNGEN Material: Mehrschichtholz mit PUR-Beschichtung Schutzgitter: Lackiert/CNC-Verarbeitung Griffe: Integriert (1 pro Seite) Vorbereitung für Montage Vorbereitung für Montage für DRK-1 oder DRK-2 mit hängenden Modulen: Vorbereitung für Montage Vorbereitung für Montage für DRK-1 oder DRK-2 mit gestapelten Modulen: Montage auf Ständer: Breite: 650 mm (25.6 inch) Höhe:...
Seite 59
Français TABLE DES MATIÈRES 1. GÉNÉRALITÉS ..........................60 BIENVENUE ! ..........................60 INTRODUCTION ...........................60 REPÈRES POUR L'UTILISATEUR ....................60 CARACTÉRISTIQUES MÉCANIQUES ET ACOUSTIQUES ...............61 DIMENSIONS ET POIDS............................61 MÉCANIQUE ............................... 61 ACCESSOIRES ..............................62 CARACTÉRISTIQUES DE LA SECTION D'AMPLIFICATION ET DE COMMANDE ......64 SECTION ENTRÉE, SORTIE ET COMMANDE ......................
Français 1. GÉNÉRALITÉS BIENVENUE ! Merci d'avoir acheté un produit conçu et développé en Italie par dBTechnologies ! Ce subwoofer actif, puissant, compact et facile à installer, est le fruit d'une longue expérience et d’années d’innovation dans le domaine du son, il s’appuie sur des solutions d’avant-garde pour l'acoustique et l'électronique auxquelles s’ajoute une recherche poussée sur les matériaux.
Français CARACTÉRISTIQUES MÉCANIQUES ET ACOUSTIQUES DIMENSIONS ET POIDS La série VIO a été étudiée avec une attention particulière pour optimiser le poids et l’encombrement. L’enceinte VIO S115, finie et protégée par un vernis polyuréthane, pèse 32,8 kg. Elle a les dimensions suivantes : 650 mm (L) x 420 mm (H) x 550 mm (P). MÉCANIQUE L’ergonomie du subwoofer et le montage rapide suspendu ou posé...
Français ATTENTION ! Ne pas retirer les deux vis de fixation, n’enlever qu’une seule vis pour chaque point de suspension. OUI ! NON ! OUI ! ACCESSOIRES Pour une installation rapide, les accessoires suivants sont disponibles en option. DRK-1 pour utilisation flown de VIO S115 DRK-2 pour utilisation flown de VIO S115 LP-4 pour la fixation de plusieurs VIO S115 entre eux ou entre VIO S115 et fly-bar DRK-1 ou DRK-2...
Seite 63
Français LP-5 pour la fixation superposée ou flown entre le subwoofer VIO S115 et le module VIO X-206 RC-1 protection contre la pluie de la section d’amplification et de commande à l’extérieur Utiliser uniquement les accessoires et les configurations indiqués dans ce manuel et suivre les instructions données dans le manuel de chaque accessoire.
Français CARACTÉRISTIQUES DE LA SECTION D'AMPLIFICATION ET DE COMMANDE L’amplificateur numérique de dernière génération DIGIPRO G3 de classe D est le cœur du modèle VIO-S115. Totalement silencieux, il distribue une puissance d’amplification de 900 W RMS. Les entrées et les commandes sont concentrées sur le bandeau du préamplificateur, à l’arrière de l’enceinte.
Seite 65
Français 1. ENTRÉE (Balanced audio - Input) Entrée compatible avec câbles et connecteurs XLR symétriques. Connexion du signal audio arrivant de la table de mixage ou d’un autre subwoofer. 2. SORTIE (Balanced Audio - Link/Xover output) Sortie compatible avec câbles et connecteurs XLR symétriques. Le signal audio à...
Français 10. RELANCE DE LA CONNEXION DE RÉSEAU RDNet (« Data Out ») Compatible avec les câbles de réseau équipés de connecteurs type etherCON/RJ45. Elle relance le réseau de commande à distance vers d’autres modules du système en configuration daisy-chain. 11.
Français 2. CONNEXIONS BRANCHEMENT ET RELANCE DE L’ALIMENTATION Pour la connexion et la relance de l’alimentation entre deux ou plusieurs modules VIO S115, utiliser des câbles équipés de connecteurs power CON TRUE1® en suivant la procédure ci-dessous. • Relier l’alimentation AUTO-RANGE MAINS INPUT du premier subwoofer (A). •...
Français BRANCHEMENT ET RELANCE DU SIGNAL RDNET • Pour la commande à distance, relier le connecteur DATA IN (A) du premier subwoofer au contrôleur à distance (RDNet Control 2 ou RDNet Control 8) avec des câbles équipés de connecteurs ethernCON®. •...
Français 3. COMMANDE À DISTANCE Le logiciel AURORA NET gère en temps réel plusieurs paramètres du subwoofer VIO S115. Il permet notamment de commander les fonctions suivantes. • Monitorer le signal en entrée et en sortie. • Afficher la compression audio sur le composant acoustique. •...
Seite 70
Français VIO S115 Code 420120357 REV. 1.0...
Français 4. INSTALLATION ET CONFIGURATION Vérifier que le contenu de l’emballage du module VIO-S115 est complet. L’emballage contient : • un subwoofer VIO-S115 • un câble powerCON TRUE1® • un guide quick start et les documents de garantie Pour faciliter la mise en sécurité de l’installation dans laquelle se trouve le subwoofer, télécharger sur le site www.dbtechnologies.com le fichier.GLL du VIO-S115 pour le logiciel EASE FOCUS.
Français INSTALLATION FLOWN L’utilisation de l’appareil suspendu (flown) est possible avec le fly-bar DRK-1 ou DRK-2, si une couverture sonore plus importante est nécessaire. L’enceinte VIO S115 doit être fixée avec l’étrier LP-4, les vis de série et le flybar. L’étrier LP-5 doit être utilisé...
Français ATTENTION ! • Ne jamais utiliser les poignées à l’arrière de l’enceinte pour la suspendre, utiliser les étriers et les accessoires agréés par l’entreprise • À l’extérieur, il est conseillé de fixer le système pour éviter son oscillation sous l’effet du vent et des agents atmosphériques 5.
Français 6. MISE À JOUR DU MICROLOGICIEL Il est très important de mettre à jour régulièrement le micrologiciel de l’appareil pour garantir son efficacité. Vérifier régulièrement le site http://www.dbtechnologies.com section DOWNLOADS. 1. Télécharger et installer USB BURNER MANAGER dans la section « SOFTWARE &...
Français DIMENSIONS Matériau : bois stratifié protégé par un vernis polyuréthane Grille : vernie/usinage CNC Poignées : intégrées (1 de chaque côté) Préinstallation avec Préinstallation pour DRK-1 ou DRK-2 modules en flown : Préinstallation avec Préinstallation pour DRK-1 ou DRK-2 modules superposés : Montage sur mât : Largeur :...
Seite 77
Español ÍNDICE 1. INFORMACIÓN GENERAL ......................78 ¡ENHORABUENA! ........................78 INTRODUCCIÓN ...........................78 NOTAS PARA EL USUARIO ......................78 CARACTERÍSTICAS MECÁNICAS Y ACÚSTICAS ................79 MEDIDAS Y PESO ............................... 79 MECÁNICA ................................. 79 ACCESORIOS ..............................80 CARACTERÍSTICAS DE LA SECCIÓN DE AMPLIFICACIÓN Y CONTROL ........82 SECCIÓN DE ENTRADA, SALIDA Y CONTROL ....................
Español 1. INFORMACIÓN GENERAL ¡ENHORABUENA! Gracias por elegir un producto diseñado y desarrollado en Italia por dBTechnologies. Este subwoofer activo, potente, compacto y fácil de instalar es fruto de años de experiencia e innovación en los sistemas de sonido, con la utilización de soluciones de vanguardia en el campo acústico y electrónico, así...
Español CARACTERÍSTICAS MECÁNICAS Y ACÚSTICAS MEDIDAS Y PESO La serie VIO se ha diseñado prestando especial atención a la optimización del peso y las dimensiones. El altavoz acabado VIO S115, pintado con poliurea, pesa 32,8 kg. Mide: 650 mm (L) x 420 mm (H) x 550 mm (A). MECÁNICA La ergonomía del subwoofer y su rápido montaje suspendido o apilado son garantizados por: A.
Español ¡ATENCIÓN! No retire ambos tornillos de fijación y utilice solo un cáncamo por cada punto a colgar. ¡SÍ! ¡NO! ¡SÍ! ACCESORIOS Para agilizar el montaje, se ofrecen los siguientes accesorios opcionales: DRK-1 para colgar VIO S115 DRK-2 para colgar VIO S115 LP-4 para montaje entre varios subwoofers VIO S115 o entre VIO S115 y fly-bar DRK-1 o DRK-2 VIO S115...
Seite 81
Español LP-5 para montaje apilado o suspendido entre subwoofer VIO S115 y módulo VIO X-206 RC-1 lona impermeable para proteger la sección de amplificación y control en caso de utilización en exteriores Utilice solo los accesorios y las configuraciones indicadas en este manual y proceda como indicado en los manuales correspondientes a los accesorios.
Español CARACTERÍSTICAS DE LA SECCIÓN DE AMPLIFICACIÓN Y CONTROL El amplificador digital de última generación DIGIPRO G3, clase D, es el corazón de VIO-S115. Totalmente silencioso, garantiza una potencia de amplificación de 900W RMS. Todas las entradas y los controles se concentran en el panel preamplificador en la parte trasera del altavoz.
Seite 83
Español 1. ENTRADA (“Balanced audio - Input”) Entrada compatible con cables con conectores XLR balanceados. Se utiliza para la conexión de la señal audio de entrada procedente de la mesa de mezclas u otro subwoofer. 2. SALIDA (“Balanced Audio - Link/Xover output) Salida compatible con cables con conectores XLR balanceados.
Español 10. TRANSMISIÓN DE LA CONEXIÓN DE RED RDNet ("Data Out") Compatible con cables de red dotados de conectores EtherCON/RJ45. Se utiliza para transmitir la red de control remoto a otros módulos del sistema en cadena de margarita. 11. LEDES DE CONTROL Ledes que indican el funcionamiento del módulo en red (RDNet).
Español 2. CONEXIONES CONEXIÓN Y TRANSMISIÓN DE LA ALIMENTACIÓN Para la conexión y la transmisión de la alimentación entre dos o más módulos de VIO S115, utilice cables con conectores powerCON TRUE1® siguiendo el procedimiento que se indica a continuación. •...
Español CONEXIÓN Y TRANSMISIÓN DE LA SEÑAL DE RDNET • Para el control remoto, conecte el conector DATA IN (A) del primer subwoofer al controlador remoto (RDNet CONTROL 2 o RDNet CONTROL 8) con cables equipados con conectores etherCON®. • Transmita la señal conectando DATA OUT (B) del primer subwoofer a DATA IN (C) del siguiente y así...
Español 3. CONTROL REMOTO Con el software AURORA NET es posible controlar en tiempo real varios parámetros del subwoofer VIO S115. En concreto: • Monitorizar la señal de entrada y salida • Ver la posible presencia de compresión audio en el componente acústico •...
Seite 88
Español VIO S115 Cód. 420120357 REV. 1.0...
Español 4. INSTALACIÓN Y CONFIGURACIÓN Asegúrese de que el embalaje del módulo VIO-S115 contenga todos los elementos declarados. El embalaje contiene: • subwoofer VIO-S115 • Cable powerCON TRUE1® • Guía rápida y documentación de garantía Para asegurar la seguridad del equipo en el que está instalado el subwoofer, es posible descargar del sitio www.dbtechnologies.com el archivo .GLL correspondiente a VIO-S115 realizado para el software EASE FOCUS.
Español MONTAJE SUSPENDIDO Para el montaje suspendido está disponible el fly-bar DRK-1 o DRK-2, si se requiere una cobertura de sonido mayor. El altavoz VIO S115 se debe sujetar utilizando el soporte LP-4 y los tornillos suministrados con el fly-bar. El soporte LP-5 se debe utilizar como interfaz entre el altavoz VIO S115 y el VIO X206.
Español ¡ATENCIÓN! • Para el montaje suspendido, no utilice nunca las asas de la parte trasera del altavoz, sino únicamente los soportes y accesorios homologados por la empresa. • En caso de utilización al aire libre siempre es recomendable anclar el sistema para prevenir posibles oscilaciones debidas al viento o los agentes atmosféricos.
Español 6. ACTUALIZACIÓN DEL FIRMWARE Mantener actualizado el firmware del producto es muy importante para asegurar todas sus prestaciones. Visite periódicamente la sección “DOWNLOAD” del sitio http://www.dbtechnologies.com. 1. Descargue USB BURNER MANAGER de la sección “SOFTWARE & CONTROLLER” e instálelo en su ordenador. 2.
Español PROCESADOR Cálculo interno: DSP 96 kHz Conversor A/D D/A: 24 bits / 96 kHz Limitador: Picos, RMS, Térmico INTERFAZ DE USUARIO LEDs de indicación: Limiter, Signal, Status, ON LEDs de estado (red RDNet): Link, Active, Remote Preset Active Polarity (Normal, Reversed), Mode (Link, Xover), Frecuencia de Xover Controles: (de 70 a 120 Hz), Sub attenuation (de 0 a -15 dB, User/Service, Mute), Delay (de 0 a 5 ms)
Español DIMENSIONES Material: Tablero de contrachapado con pintura de poliuretano Rejilla: Pintada / mecanizado CNC Asas: Integradas (1 por lado) Preparación de montaje Preparación de montaje para DRK-1 o DRK-2 con módulos suspendidos: Preparación de montaje Preparación de montaje para DRK-1 o DRK-2 con módulos apilados: Montaje sobre poste: Ancho:...