Inhaltsverzeichnis
Werbung
Verfügbare Sprachen
Verfügbare Sprachen
Quicklinks
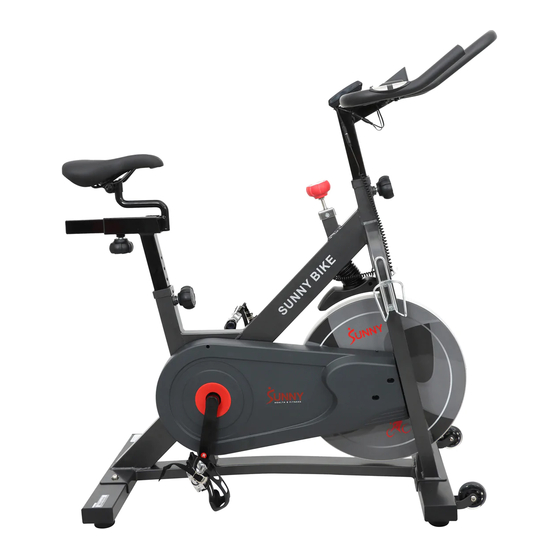
PRO II MAGNETIC INDOOR
English, Page 13~21
Español, Page 22~30
Franç ais, Page 31~39
Deutsch, Seite 40~47
CYCLING BIKE
SF-B1964
USER MANUAL
IMPORTANT! Please retain owner's manual for maintenance and adjustment instructions. Your
satisfaction is very important to us, PLEASE DO NOT RETURN UNTIL YOU HAVE CONTACTED US:
support@sunnyhealthfitness.com or 1-877-90SUNNY (877-907-8669).
¡ IMPORTANTE! Por favor, conserve el manual del usuario para las instrucciones de mantenimiento y
ajuste. Su satisfacción es muy importante para nosotros, SI AL PRODUCTO LE HACE FALTA PARTES,
POR
FAVOR
NO
LO
support@sunnyhealthfitness.com o al 1-877-90SUNNY (877-907-8669).
IMPORTANT! Veuillez conserver le manuel du proprié taire pour les instructions de réglage et d'entretien.
Votre satisfaction est très importante pour nous, VEUILLEZ NE PAS EFFECTUER DE RETOUR AVANT
DE NOUS AVOIR CONTACTÉ : support@sunnyhealthfitness.com ou 1- 877 – 90SUNNY (877-907-
8669).
WICHTIG! Bitte bewahren Sie das Benutzerhandbuch für Wartungs- und Einstellanweisungen auf. Ihre
Zufriedenheit ist besonders wichtig für uns, BITTE SCHICKEN SIE DAS PRODUKT NICHT ZURÜCK,
BEVOR SIE SICH MIT UNS IN VERBINDUNG GESETZT HABEN: support@sunnyhealthfitness.com
oder 1- 877 - 90SUNNY (877-907-8669).
DEVUELVA
HASTA
TENER
CONTACTO
CON
NOSOTROS:
Werbung
Inhaltsverzeichnis

Verwandte Anleitungen für Sunny Health & Fitness PRO II SF-B1964


Inhaltszusammenfassung für Sunny Health & Fitness PRO II SF-B1964
- Seite 1 PRO II MAGNETIC INDOOR CYCLING BIKE SF-B1964 USER MANUAL IMPORTANT! Please retain owner’s manual for maintenance and adjustment instructions. Your English, Page 13~21 satisfaction is very important to us, PLEASE DO NOT RETURN UNTIL YOU HAVE CONTACTED US: support@sunnyhealthfitness.com or 1-877-90SUNNY (877-907-8669). Español, Page 22~30 ¡...
-
Seite 2: Important Safety Information
IMPORTANT SAFETY INFORMATION We thank you for choosing our product. To ensure your safety and health, please use this equipment correctly. It is important to read this entire manual before assembling and using the equipment. Safe and effective use can only be achieved if the equipment is assembled, maintained, and used properly. -
Seite 3: Informations De Sécurité Importantes
INFORMATIONS DE SÉCURITÉ IMPORTANTES Nous vous remercions d’avoir choisi notre produit. Pour votre santé et votre sé curité, veuillez utiliser correctement cet appareil. Il est important de lire entièrement le présent manuel avant d’assembler l’appareil et de l’utiliser. L’utilisation sûre et efficace n’est possible que si l’appareil est correctement assemblé, entretenu et utilisé... -
Seite 4: Exploded Diagram
EXPLODED DIAGRAM... -
Seite 5: Parts List
PARTS LIST Description Spec. Qty. Description Spec. Qty. Main Frame C-Clip Washer Front Stabilizer 35L/R 1pr. Nylon Nut 9/16 Rear Stabilizer Wire Plug Seat Post Flat Washer D8*D16*1.5 Seat Slider Nylon Nut Handlebar Post Nylon Nut Handlebar Nylon Nut Adjustable Belt Bolt Hex Nut Magnet Holder Hex Nut... -
Seite 6: Lista De Piezas
Phillips Screw M6*12 Plastic Washer Phillips Tapping Screw ST4.2*16 Plastic Spacer Idler Wheel Tension Knob Brake Rod Pop-pin Knob Pull Arm Extension Sleeve Tension Spring Magnet Holder Cover Tension Knob Block 94L/R Pedal 1pr. Square Magnet Seat Inner Belt Cover Meter Outer Belt Cover Handlebar Cover... - Seite 7 Φ12.2*Φ24*2 Perno Allen M8*12 Arandela Plana Perno Allen M6*12 Tuerca Hexagonal M12*1 Perno Cilí ndrico Allen M6*12 Tuerca de Brida M12*1 Tuerca Delgada Arandela Plana D10*D20*2 M12*1 Hexagonal Espaciador del Eje del Arandela Plana D10*D20*2 Volante Arandela Plana D8*D20*2 Soporte Inferior Tapa de la Manivela Espaciador Espaciador del...
-
Seite 8: Liste Des Éléments
Envoltura de Plástico Asiento Manga del Barral del Medidor Asiento Rueda de Transporte Cobertor del Manubrio Almohadilla para Pies Tapa Redonda Agarre de Espuma Cinta Central Cubierta del Soporte Agarre de Espuma Inferior Buje de Freno Cable del Sensor Arandela de Plástico Perno Hexagonal M5*10 Espaciador de... - Seite 9 Embout de Manivelle Support Inférieur Rondelle Plate D6 × D12 × 1,2 Entretoise Entretoise du Boulon de Carrosserie M10 × 33 × 10 Support Inférieur Roulement 6004RZ Poulie de Courroie Roulement 608ZZ 60L/R Manivelle 1 paire D20 × Ø26,5 × 0 Rondelle Ondulée Porte-Bouteille Support Pour...
- Seite 10 Courroie Couvercle de Guidon Couvercle du Support Embout Arrondi Inférieur Poignée en Mousse Bague de Frein Centrale Rondelle en Plastique Poignée en Mousse Entretoise en Câble de Capteur Plastique Bouton de Tension Boulon Hexagonal M5 × 10 Bouton à Cliquet Rondelle à...
- Seite 11 Kugellager 608ZZ Riemenscheibe D20 x Φ26,5 x 0,6 Wellscheibe 60L/R Kurbel 1 P. C-Clip-Scheibe Flaschenhalter C-Clip-Scheibe Hantelablage 35L/R 1 P. Kreuzschlitzschraube M5 x 15 Nylonmutter 9/16 Kabelstecker Kreuzschlitzschraube M5 x 10 Phillips- Unterlegscheibe D8 x D16 x 1,5 M5 x 12 Flachschraube D5 x Φ10 x 1 Nylonmutter...
- Seite 12 Bremsbuchse Runde Kappe Kunststoff- Mittlerer Unterlegscheibe Schaumstoffgriff Kunststoffabstandha Schaumstoffgriff lter Spannknopf Sensordraht Pop-Pin-Knopf Sechskantschraube M5 x 10 Verlängerungshülse Federscheibe Magnethalter- Schraubenschlüssel S14,15,17 Abdeckung 94L/R Pedal 1 P. Inbusschlüssel Sitz Schraubenschlüssel S8,14,22 Messgeräts Schraubenschlüssel S13,15 Lenkerabdeckung HARDWARE PACKAGE #24 D10*D20*2 4PCS #16 M10*25 4PCS #91 3PCS #38 M10 2PCS...
- Seite 13 Ordering Replacement Parts (U.S. and Canadian Customers only) Please provide the following information in order for us to accurately identify the part(s) needed: ✓ The model number (found on cover of manual) ✓ The product name (found on cover of manual) ✓...
- Seite 14 ASSEMBLY INSTRUCTIONS We value your experience using Sunny Health and Fitness products. For assistance with parts or troubleshooting, please contact us at support@sunnyhealthfitness.com or 1-877-90SUNNY (877- 907-8669) STEP 1: Use Allen Wrench (No. 105) to unscrew 4 Allen Bolts (No. B), 4 Flat Washers (No. C) and 2 Shipping Tubes (No.
- Seite 15 We value your experience using Sunny Health and Fitness products. For assistance with parts or troubleshooting, please contact us at support@sunnyhealthfitness.com or 1-877-90SUNNY (877- 907-8669) STEP 3: IMPORTANT! Read instructions carefully, failure to do so may cause permanent damage to your bike. Remove the Left &...
- Seite 16 We value your experience using Sunny Health and Fitness products. For assistance with parts or troubleshooting, please contact us at support@sunnyhealthfitness.com or 1-877-90SUNNY (877- 907-8669) STEP 4: Loosen and pull out the [main frame seat post] Pop-pin Knob (No. 91). Insert Seat Post (No.
- Seite 17 We value your experience using Sunny Health and Fitness products. For assistance with parts or troubleshooting, please contact us at support@sunnyhealthfitness.com or 1-877-90SUNNY (877- 907-8669) STEP 6: Remove the preassembled Phillips Screw (No. 64) from Handlebar (No. 7). Then attach Handlebar Cover (No. 97) to Handlebar (No.
- Seite 18 ADJUSTMENT GUIDE ADJUSTING THE BALANCE: In order to achieve a smooth and comfortable ride during use, you must ensure the stability of the bike. If you notice that the bike is unbalanced, you can adjust the Foot Pads (No. 84) located beneath the Front &...
-
Seite 19: Adjusting The Seat
ADJUSTING THE PEDAL STRAP Place the ball of each foot in the toe clips so the front of your shoe fits snugly in the toe clip cage. Rotate one foot to within arm’s reach and pull the strap until the toe clip cage fits your shoe snugly. Insert the strap back into the hoop of the toe clip. -
Seite 20: Maintenance Instructions
MAINTENANCE INSTRUCTIONS This is general information for daily, weekly and monthly maintenance to be performed on your bike. DAILY MAINTENANCE MONTHLY MAINTENANCE After each exercise session, wipe down all the 1. Check all hardware is secure, such as: bottle equipment: seat, frame and handlebars. Pay holder, flywheel nuts, belt/chain guard bolts, special attention to the seat post, handlebar brake caliper lock nuts and brake caliper... -
Seite 21: Battery Installation & Replacement
BATTERY INSTALLATION & REPLACEMENT BATTERY INSTALLATION The meter uses 2 AAA batteries. Open the battery cover from the back of meter, then put 2 batteries into the battery compartment. Make sure the (+) and (-) ends of the batteries are in the correct position. Put the battery cover back. BATTERY REPLACEMENT If there is a problem with the display, try changing the batteries first. - Seite 22 EXERCISE METER FUNCTION BUTTON: MODE: 1. Press the button for selection function display value on LCD. 2. Press the button and hold for 2 seconds to reset all values except odometer to zero. Note: When the user replaces batteries, all the values will reset to ZERO automatically.
-
Seite 23: Instrucciones De Montaje
INSTRUCCIONES DE MONTAJE Valoramos su experiencia con los productos de Sunny Health and Fitness. Para obtener ayuda piezas resolver algún problema, escrí banos a dirección correo support@sunnyhealthfitness.com, o llá menos al 1-877-90SUNNY (877-907-8669). PASO 1: Use una Llave Allen (n.° 105) para desentornillar 4 Pernos Allen (n.°... - Seite 24 Valoramos su experiencia con los productos de Sunny Health and Fitness. Para obtener ayuda piezas resolver algún problema, escrí banos a dirección correo support@sunnyhealthfitness.com, o llá menos al 1-877-90SUNNY (877-907-8669). PASO 3: ¡ IMPORTANTE! atentamente instrucciones, ya que su incumplimiento podrí...
- Seite 25 Valoramos su experiencia con los productos de Sunny Health and Fitness. Para obtener ayuda piezas resolver algún problema, escrí banos a dirección correo support@sunnyhealthfitness.com, o llá menos al 1-877-90SUNNY (877-907-8669). PASO 4: Afloje y extraiga la Perilla del Resorte de Regulación (n.°...
- Seite 26 Valoramos su experiencia con los productos de Sunny Health and Fitness. Para obtener ayuda piezas resolver algún problema, escrí banos a dirección correo support@sunnyhealthfitness.com, o llá menos al 1-877-90SUNNY (877-907-8669). PASO 6: Retire Tornillo Phillips (n.° 64) preinstalado del Manubrio (n.° 7). Luego, fije la Cobertor del Manubrio (n.°...
- Seite 27 GUÍ A DE AJUSTES AJUSTE DEL BALANCE: Para lograr una conducción suave y cómoda durante el uso, debe asegurar la estabilidad de la bicicleta. Si nota que la bicicleta está desequilibrada, puede ajustar las Almohadillas para Pies (n.° 84) ubicadas debajo de los Estabilizadores Delanteros y Traseros (n.°...
- Seite 28 AJUSTE DE LA CORREA DEL PEDAL Coloque la punta de cada pie en las punteras hasta que sus zapatillas encajen perfectamente en la caja de la puntera. Gire un pie hasta el alcance de su brazo y tire de la correa hasta que la caja de la puntera encaje perfectamente con su zapatilla.
-
Seite 29: Mantenimiento Y Cuidado
MANTENIMIENTO Y CUIDADO Esta es información general para realizar el mantenimiento diario, semanal y mensual en su bicicleta. MANTENIMIENTO DIARIO MANTENIMIENTO MENSUAL Después de cada sesión de ejercicio, limpie 1. Verifique que todas las herramientas estén seguras como: soporte de botella, tuercas del volante, todo equipo: asiento,... -
Seite 30: Instalación De Las Pilas
INSTALACIÓN Y REEMPLAZO DE LAS PILAS INSTALACIÓN DE LAS PILAS El medidor usa 2 pilas AAA. Abra la tapa de las pilas de la parte posterior del medidor, luego, coloque 2 pilas en el compartimiento de las pilas. Asegúrese de que los extremos (+) y (-) de las pilas estén en la posición correcta. - Seite 31 MEDIDOR DE EJERCICIO BOTÓN DE FUNCIÓN: MODE (MODO): 1. Presione el botón para seleccionar el valor de visualización de la funció n en la pantalla LCD. 2. Presione el botón y manténgalo presionado durante 2 segundos para restablecer todos los valores, excepto el odómetro, a cero. Nota: Cuando el usuario reemplaza las pilas, todos los valores se restablecerán a CERO automáticamente.
-
Seite 32: Instructions D'assemblage
INSTRUCTIONS D’ASSEMBLAGE Votre expérience d’utilisation des produits Sunny Health and Fitness compte pour nous. Pour obtenir de l’aide avec les pièces et le dépannage, veuillez nous contacter à l’adresse: support@sunnyhealthfitness.com ou au 1-877-90SUNNY (877-907-8669). ÉTAPE 1 : Se servir de la Clé Allen (Nº 105) pour dévisser les 4 Boulons Allen (Nº... - Seite 33 Votre expérience d’utilisation des produits Sunny Health and Fitness compte pour nous. Pour obtenir de l’aide avec les pièces et le dépannage, veuillez nous contacter à l’adresse: support@sunnyhealthfitness.com ou au 1-877-90SUNNY (877-907-8669). ÉTAPE 3 : IMPORTANT! Lire attentivement instructions, le non-respect de celles-ci pourrait entraî...
- Seite 34 Votre expérience d’utilisation des produits Sunny Health and Fitness compte pour nous. Pour obtenir de l’aide avec les pièces et le dépannage, veuillez nous contacter à l’adresse: support@sunnyhealthfitness.com ou au 1-877-90SUNNY (877-907-8669). ÉTAPE 4 : Desserrer et tirer le Bouton à Cliquet (Nº...
- Seite 35 Votre expérience d’utilisation des produits Sunny Health and Fitness compte pour nous. Pour obtenir de l’aide avec les pièces et le dépannage, veuillez nous contacter à l’adresse: support@sunnyhealthfitness.com ou au 1-877-90SUNNY (877-907-8669). ÉTAPE 6 : Retirer Cruciforme (Nº 64) préassemblé e du Guidon (Nº 7). Fixer ensuite le Couvercle de Guidon (Nº...
- Seite 36 GUIDE DE RÉGLAGE RÉGLAGE DE L’ÉQUILIBRE Pour une séance d’entraînement confortable, vérifier que le vélo est stable. Si le vélo est instable, il est possible de ré gler les Patins de Pied (Nº 84) situés sous les Stabilisateurs Avant et Arriè re (Nº 2 et Nº 3). Pour ce faire, utiliser la Clé...
-
Seite 37: Réglage De La Selle
RÉGLAGE DE LA COURROIE DE PÉDALE Placer la pointe des pieds dans les cale-pieds de manière à ce que l’avant de la chaussure soit bien logé dans la cage des cale-pieds. Ramener un pied à portée de bras et tirer sur la courroie jusqu’à ce que la cage du cale-pied épouse bien la chaussure. -
Seite 38: Maintenance Et Entretien
MAINTENANCE ET ENTRETIEN Il s’agit d’informations générales concernant l’entretien quotidien, hebdomadaire et mensuel à effectuer sur votre vélo. ENTRETIEN QUOTIDIEN ENTRETIEN MENSUEL Après chaque séance d’exercice, essuyer 1. Vérifier que toute la quincaillerie est bien serré e, tout l’équipement : la selle, le cadre et le notamment : le porte-bouteille, les é... -
Seite 39: Installation Et Remplacement Des Piles
INSTALLATION ET REMPLACEMENT DES PILES INSTALLATION DES PILES Le compteur utilise 2 piles de type AAA. Ouvrir le couvercle du compartiment à piles situé à l’arrière du compteur, puis placer 2 piles. Vérifier que les pôles (+) et (-) des piles sont dans la bonne position. -
Seite 40: Touches De Fonction
COMPTEUR D’EXERCICE TOUCHES DE FONCTION : MODE : 1. Appuyer sur la touche pour sélectionner l’affichage de la valeur de fonction sur l’écran ACL. 2. Appuyer sur la touche et la maintenir enfoncée pendant 2 secondes pour remettre à zéro toutes les valeurs, excepté celles de l’odomètre. Remarque : Lorsque l’utilisateur remplace les piles, toutes les valeurs sont automatiquement remises à... - Seite 41 MONTAGEANLEITUNG Wir schätzen Ihre Erfahrung im Umgang mit den Produkten von Sunny Health and Fitness. Für Fragen zu Teilen oder Hilfe bei der Fehlerbehebung kontaktieren Sie uns bitte unter support@sunnyhealthfitness.com oder 1-877-90SUNNY (877-907-8669). SCHRITT 1: Verwenden Sie den Inbusschlüssel (Nr. 105) schrauben Inbusschrauben...
-
Seite 42: Im Uhrzeigersinn In Die Rechte Kurbel
Wir schätzen Ihre Erfahrung im Umgang mit den Produkten von Sunny Health and Fitness. Für Fragen zu Teilen oder Hilfe bei der Fehlerbehebung kontaktieren Sie uns bitte unter support@sunnyhealthfitness.com oder 1-877-90SUNNY (877-907-8669). SCHRITT 3: WICHTIG! Lesen Sie die Anweisungen sorgfältig durch, da eine Nichtbeachtung zu dauerhaften Schäden am Fahrrad führen kann. - Seite 43 Wir schätzen Ihre Erfahrung im Umgang mit den Produkten von Sunny Health and Fitness. Für Fragen zu Teilen oder Hilfe bei der Fehlerbehebung kontaktieren Sie uns bitte unter support@sunnyhealthfitness.com oder 1-877-90SUNNY (877-907-8669). SCHRITT 4: Lösen und ziehen Sie den Pop-Pin-Knopf (Nr.
- Seite 44 Wir schätzen Ihre Erfahrung im Umgang mit den Produkten von Sunny Health and Fitness. Für Fragen zu Teilen oder Hilfe bei der Fehlerbehebung kontaktieren Sie uns bitte unter support@sunnyhealthfitness.com oder 1-877-90SUNNY (877-907-8669). SCHRITT 6: Entfernen vormontierte Kreuzschlitzschraube (Nr. 64) von der Lenkstange (Nr.
- Seite 45 EINSTELLUNGSANLEITUNG EINSTELLEN DER BALANCE: Um eine gleichmäßige und komfortable Bewegung zu erreichen, müssen Sie sicherstellen, dass die Standsicherheit des Fahrrads gewährleistet ist. Wenn Sie feststellen, dass das Fahrrad nicht im Gleichgewicht ist, sollten Sie die Fußpolster (Nr. 84) unterhalb der Vorderen und Hinteren Stabilisatoren (Nr. 2 und Nr.
-
Seite 46: Einstellen Des Pedalriemens
EINSTELLEN DES PEDALRIEMENS Platzieren Sie den Fußballen in die Pedalhaken, sodass die Vorderseite Ihres Schuhs eng in den Pedalhaken-Käfig passt. Bringen Sie einen Fuß in Armreichweite und ziehen Sie am Riemen, bis der Pedalhaken-Kä fig genau zu Ihrem Schuh passt. Stecken Sie den Riemen wieder in den Bügel des Pedalhakens. -
Seite 47: Einlegen Und Austauschen Der Batterie
EINLEGEN UND AUSTAUSCHEN DER BATTERIE EINLEGEN DER BATTERIEN Der Zähler verwendet 2 AAA-Batterien. Öffnen Sie die Batterieabdeckung von der Rückseite des Zählers aus und legen Sie dann 2 Batterien in das Batteriefach ein. Vergewissern Sie sich, dass die Enden (+) und (-) der Batterien in der richtigen Position sind. -
Seite 48: Funktionstaste: Mode
TRAININGSMESSGERÄT FUNKTIONSTASTE: MODE: 1. Drücken Sie die Taste zur Auswahl des Funktionsanzeigewerts der LCD- Anzeige. 2. Halten Sie die Taste 2 Sekunden lang gedrückt, um alle Werte außer dem Kilometerzähler auf Null zurückzusetzen. Hinweis: Wenn der Benutzer die Batterien austauscht, werden alle Werte automatisch auf NULL zurückgesetzt.