Makita DMR110N Betriebsanleitung
Baustellenradio
Vorschau ausblenden
Andere Handbücher für DMR110N:
- Betriebsanleitung (128 Seiten) ,
- Betriebsanleitung (12 Seiten)
Inhaltsverzeichnis
Werbung
Verfügbare Sprachen
Verfügbare Sprachen
Quicklinks
EN
Job Site Radio
FR
Radio de chantier
DE
Baustellenradio
IT
Radio da cantiere
NL
Bouwradio
ES
Radio de Trabajo
PT
Rádio a Bateria
DA
Byggepladsradio
EL
Ραδιόφωνο εργοταξίου
TR
Şantiye Radyosu
DMR110N
4
12
21
30
38
46
55
63
70
79
Werbung
Inhaltsverzeichnis

Verwandte Anleitungen für Makita DMR110N


Inhaltszusammenfassung für Makita DMR110N
-
Seite 1: Inhaltsverzeichnis
Instruction manual Radio de chantier Manuel d’instructions Baustellenradio Betriebsanleitung Radio da cantiere Manuale delle Istruzioni Bouwradio Gebruiksaanwijzing Radio de Trabajo Manual de instrucciones Rádio a Bateria Manual de instruções Byggepladsradio Instruktionsmanual Ραδιόφωνο εργοταξίου Οδηγίες χρήσης Şantiye Radyosu Kullanma kilavuzu DMR110N... - Seite 2 1 2 3 4...
-
Seite 4: Instruction Manual
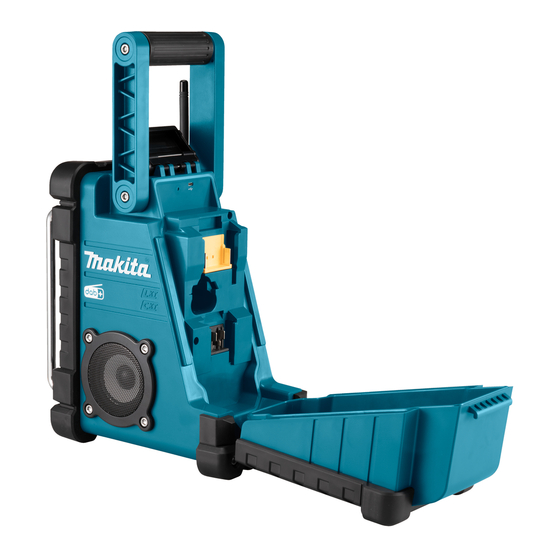
● Stereo speaker for rich sound performance (Original instructions) ● Ultra rugged design ● Water resistant to IP64 EXPLANATION OF GENERAL ● Powered by both Makita battery pack and supplied power adaptor VIEW (Fig. 1) SYMBOLS 1. Power button 2. Band button The following show the symbols used for the equipment. -
Seite 5: Important Safety Instructions
13. Do not expose a battery pack or tool to fire 13. Use the batteries only with the products specified or excessive temperature. Exposure to fire or by Makita. Installing the batteries to non-compliant temperature above 130°C may cause explosion. products may result in a fire, excessive heat, explosion, or leak of electrolyte. - Seite 6 ● Danger of explosion if battery is incorrectly replaced. ● Replace only with the same or equivalent type. ● Only use genuine Makita batteries. Use of non- genuine Makita batteries, or batteries that have been altered, may result in the battery bursting causing fires personal injury and damage.
-
Seite 7: Operating Time
OPERATING TIME The following tables indicate the operating time with a full charged battery. Battery cartridge voltage At speaker output = Battery capacity 50 mW + 50 mW 10.8V - 12V max 14.4V Unit: Hour (Approximately) BL1013 1.3Ah BL1014 BL1016 1.5Ah BL1415N BL1815N... - Seite 8 INSTALLATION Indicating the remaining battery capacity (Fig. 6 & 7) Installing or removing Slide battery 1. Indicator lamps 2. Check button cartridge (Fig. 2 & 3 & 4) Only for slide battery cartridges with the indicator Press the check button on the battery cartridge to indicate CAUTION: the remaining battery capacity.
- Seite 9 frequencies. As new stations are found, the station OPERATION counter on the left side in the display will increase and This radio has three tuning methods- Scan tuning, Manual stations will be added to the list. tuning and Memory presets recall. Manual tuning –...
-
Seite 10: Storing Stations In Preset Memories (Dab And Fm)
5. Press the Volume/Tuning Control/Select knob to a. Program Indicates the name of the station being confirm the setting. station listened to. Scan Tuning – FM b. Radio text Indicates text message such as new items, etc. 1. Press the Power button to turn on the radio. c. -
Seite 11: Softwareversion
As software updates become available software and information on how to update your radio can be found at Makita website. AUXILIARY INPUT SOCKET A 3.5mm Auxiliary input socket is provided at the front of your radio to permit an audio signal to be fed into the unit from an external audio device such as a MP3 or CD player. -
Seite 12: Instructions Importantes De Securite
● Résiste à l’eau selon la norme IP64 4. N’utilisez que les extensions/accessoires spécifiés ● Alimentation par un bloc-batterie Makita et un par le fabricant. adaptateur secteur fourni 5. Débranchez cet appareil lors des orages ou lorsqu’il est inutilisé... - Seite 13 13. Utilisez les batteries uniquement avec les produits spécifiés par Makita. L’installation des batteries ENREGISTRER SES INSTRUCTIONS dans des produits non conformes peut entraîner un incendie, une chaleur excessive, une explosion ou une fuite d’électrolyte.
- Seite 14 ● Risque d’explosion si la batterie est incorrectement remplacée. ● Remplacez uniquement avec le même type ou équivalent. ● N’utilisez que des batteries Makita authentiques. L’utilisation de batteries Makita non authentiques, ou des batteries qui ont été modifiées, peut provoquer une explosion de la batterie provoquant des incendies, des blessures et des dégâts.
-
Seite 15: Temps De Fonctionnement
TEMPS DE FONCTIONNEMENT Les tableaux suivants indiquent le temps de fonctionnement avec une batterie entièrement chargée. Tension de la batterie SORTIE DU HAUT-PARLEUR = Capacité de la 50mW + 50mW batterie 10.8V - 12V max 14.4V Unité: Heures (Approximative) BL1013 1.3Ah BL1014 BL1016... - Seite 16 saccadé » sont des signes qui indiquent que la batterie INSTALLATION doit être remplacée. Remarque: Installation et retrait d’une batterie Le bloc-batteries ne peut pas être chargé via l’adaptateur coulissante (Fig. 2 & 3 & 4) secteur fourni. MISE EN GARDE: Indication de l’autonomie restante de la Mettez toujours la radio hors tension avant de retirer la batterie (Fig.
- Seite 17 Utilisation de l’adaptateur secteur e. Fréquence et canal Indique la fréquence et le numéro fourni (Fig. 9) de canal de la station DAB actuellement syntonisée. Retirez le capuchon en caoutchouc et insérez la fiche de f. Débit binaire/ Indique le débit binaire de l’audio l’adaptateur dans la prise d’entrée secteur sur la façade Format audio numérique et le format audio...
-
Seite 18: Modes D'affichage - Fm
stations » apparaisse sur l’affichage, puis appuyez sur la station suivante disponible, sauf si l’opérateur appuie ce bouton pour sélectionner le paramètre. sur le bouton Auto Tune pour arrêter le balayage. 3. Tournez le bouton de sélection/commande de 4. Tournez le bouton de sélection/commande de syntonisation/volume pour sélectionner les options syntonisation/volume pour obtenir le niveau suivantes, puis appuyez sur ce bouton pour confirmer... - Seite 19 à jour votre radio sur le site internet de 1. Appuyez sur le bouton Paramètres avancés. Makita. 2. Tournez le bouton de sélection/commande de syntonisation/volume jusqu’à ce que « Langue » PRISE D’ENTRÉE AUXILIAIRE apparaisse sur l’écran.
- Seite 20 3. Appuyez à plusieurs reprises sur le bouton Bande jusqu’à ce que AUX 1 s’affiche. 4. Pour avoir une meilleure qualité sonore, nous vous conseillons de régler le volume à plus des deux tiers sur votre appareil Bluetooth, puis ajustez le volume sur la radio au besoin.
-
Seite 21: Erläuterung Der Gesamtdarstellung
5. Ziehen Sie bei einem Gewitter, oder wenn Sie ● Spritzwasser geschützt gemäß IP64 das Gerät für längere Zeit nicht verwenden, den ● Stromversorgung durch Makita Akkublock oder über Netzstecker dieses Geräts. den mitgelieferten Netzadapter 6. Ein akkubetriebenes Radio mit eingebauten Akkus... -
Seite 22: Besondere Sicherheitshinweise Für Batteriehalterung
Sie diese an einem sicheren Ort. Beachten DIESE BEDIENUNGSANLEITUNG Sie alle örtlich geltenden Vorschriften bzgl. der AUFBEWAHREN Entsorgung von Batterien. 13. Verwenden Sie die Batterien nur mit den von Makita vorgegebenen Produkten. Falls Sie die Batterien BESONDERE in nicht kompatiblen Produkten installieren, können SICHERHEITSHINWEISE FÜR Feuer, Überhitzung und Explosion verursacht werden... -
Seite 23: Tipps Für Eine Maximale Nutzungsdauer Der Batterie
Explosionsgefahr. ● Als Ersatzteile dürfen nur Akkus des gleichen Typs verwendet werden. ● Verwenden Sie nur echte Makita Batterien. Unechte Makita Batterien oder modifizierte Batterien können zum Zerplatzen der Batterie führen und dadurch Feuer, Verletzungen und Schäden verursachen. In solch einem Fall wird außerdem die Makita Garantie... - Seite 24 BETRIEBSDAUER In der folgenden Tabelle ist die jeweilige Betriebsdauer bei vollständig geladenem Akku angegeben. Nennspannung des Akkublocks BEI AUTSPRECHERAUSGABE = Akkuladung 50mW + 50mW 10.8V - 12V max 14.4V Einheit: Stunden (Ca.) BL1013 1.3Ah BL1014 BL1016 1.5Ah BL1415N BL1815N BL1021B 10.0 2.0Ah BL1820B...
-
Seite 25: Halterung Für Cluster-Batterien Installieren Oder Entfernen (Abb. 2 & 5)
Bringen Sie die Batteriefachverriegelung in die INSTALLATION Ausgangsposition zurück. Verringerte Leistung, Verzerrungen und ein „stotternder“ Einschubakku einsetzen bzw. entfernen Ton sind Anzeichen dafür, dass der Akku ausgetauscht (Abb. 2 & 3 & 4) werden muss. Hinweis: ACHTUNG: Die Batterie kann nicht via AC-Netzteil aufgeladen Schalten Sie stets das Gerät aus, bevor Sie den werden. -
Seite 26: Betrieb
Betrieb mit mitgeliefertem Netzadapter d. Time & date Zeigt das aktuelle Datum und (Abb. 9) (Uhrzeit und Datum) die aktuelle Uhrzeit an. e. Frequency Zeigt die Frequenz und die Nehmen Sie den Gummischutz ab, und stecken Sie den and channel Kanalnummer des eingestellten Adapterstecker in die Gleichspannungsbuchse (DC IN) an (Frequenz und Kanal) -
Seite 27: Festlegen Der Reihenfolge Der Sender
5. Drücken Sie anschließend auf den Drehknopf Festlegen der Reihenfolge der Sender VOLUME für Lautstärke/Sendereinstellung/Auswahl, – DAB um die Einstellung zu übernehmen. Das Radio verfügt über 3 Einstellungen für die Sendersuchlauf – FM Reihenfolge der Sender, von der eine ausgewählt werden kann. -
Seite 28: Regelung Der Helligkeit
Auswahl suchen möchten, drücken Sie den Drehknopf Aufrufen von Sendern aus dem VOLUME für Lautstärke/Sendereinstellung/Auswahl Senderspeicher (DAB und FM) und halten Sie den Drehknopf gedrückt, um zum 1. Drücken Sie die Ein/Aus-Taste, um das Radio Modus „Sendereinstellung“ zu wechseln. einzuschalten. 4. -
Seite 29: Micro-Usb-Port Für Softwareaktualisierung
Wenn Softwareaktualisierungen verfügbar werden und wie Sie eine Aktualisierung der Software Ihres Radios vornehmen können, erfahren Sie auf der Website von Makita. AUX-EINGANGSBUCHSE An der Vorderseite des Radios befindet sich ein 3,5mm Aux-Eingang für den Anschluss und die Wiedergabe eines externen Audiogeräts, wie z.B. -
Seite 30: Caratteristiche
6. Le radio con batteria integrata o separata devono ● Resistente all’acqua fino a IP64 essere ricaricate solo con il caricabatteria specifico ● Alimentazione mediante batteria Makita e alimentatore per quel tipo di batteria. Un caricabatteria destinato ad supplementare un determinato tipo di batteria potrebbe comportare il pericolo di incendio se utilizzato con batterie diverse. - Seite 31 (1) Non toccare i poli con materiali conduttori; rischio di esplosioni, lesioni personali e danni, ed (2) Non riporre il pacco delle batterie in contenitori inficerebbe la garanzia Makita per lo strumento e il con altri oggetti metallici, quali chiodi, monete e caricabatteria Makita.
-
Seite 32: Autonomia Operativa
2. Non ricaricare mai delle batterie già completamente ricaricarle. cariche. L’eccesiva ricarica può compromettere la 4. Rimuovi la cartuccia della batteria dall’apparecchio o durata complessiva delle batterie. dal caricabatteria quando non è in uso. 3. Ricaricare le batterie a temperatura ambiente (10°C 5. - Seite 33 Nota: INSTALLAZIONE Il pacco batteria può essere ricaricato tramite il caricabatteria CA in dotazione. Inserimento o rimozione della batteria a scorrimento (Fig. 2 & 3 & 4) Indicazione della capacità residua della batteria (Fig. 6 & 7) ATTENZIONE: Spegnere sempre la radio prima di rimuovere la batteria. 1.
- Seite 34 USO DELL’ADATTATORE AC INCLUSO f. Velocità in bit/ Indica la velocità in bit dell’audio (Fig. 9) Tipo di audio digitale e il tipo di audio per la stazione DAB attualmente Rimuovere la protezione in gomma e inserire la spina sintonizzata. dell’alimentatore nella presa CC IN sulla parte anteriore g.
-
Seite 35: Sintonizzazione Manuale - Fm
3. Ruotare la manopola Volume/Tuning/Select (volume/ desiderato per l’audio. Il quadrante LCD indicherà le sintonizzazione/selezione) per selezionare una tra le modifiche al volume. seguenti opzioni, e premerla per confermare. Nota: Per utilizzare la manopola Volume/Tuning/Select Alfanumerico Le stazioni vengono elencate in (volume/sintonizzazione/selezione) per trovare la ordine alfanumerico (0~9 A~Z). -
Seite 36: Ripristino Del Sistema
Gli aggiornamenti del software disponibili sono reperibili 3. Ruotare la manopola Volume/Tuning/Select (volume/ nel sito Internet di Makita insieme alle informazioni su sintonizzazione/selezione) per scegliere la lingua come aggiornare la radio. desiderata. Premere la manopola Volume/Tuning/... -
Seite 37: Specifiche Tecniche
Nota: Il cavo audio non è incluso come accessorio standard. MANUTENZIONE ATTENZIONE: ● Evitare assolutamente l’uso di benzine, diluenti, solventi, alcol o sostanze simili. In caso contrario, potrebbero verificarsi scoloriture, deformazioni e incrinature. SPECIFICHE TECNICHE Alimentazione DC 12V 1A, ago centrale Adattatore AC positivo Pacco batteria: 10,8V... -
Seite 38: Uitleg Algemeen Overzicht (Fig. 1)
5. Haal de stekker van het apparaat uit het stopcontact ● Bijzonder duurzaam ontwerp ● Waterdicht tot IP64 tijdens onweer of als het apparaat voor lange tijd niet ● Stroomvoorziening door Makita-accu en meegeleverde wordt gebruikt. netspanningsadapter 6. Een radio op batterijen met inwendige batterijen of... - Seite 39 ● Alleen vervangen door accu van hetzelfde of (2) Bewaar de accu niet in een doos met andere soortgelijk type. metalen voorwerpen, zoals spijkers, muntjes, etc. ● Gebruik alleen originele accu’s van Makita. Het (3) Stel de accu niet bloot aan water of regen. 39 NEDERLANDS...
- Seite 40 Het zal er bovendien toe leiden dat de garantie van 3. Laad de accu op bij een kamertemperatuurvan 10°C Makita op het gereedschap en op oplader vervalt. - 40°C (50°F - 104°F). Laat een warme accu afkoelen alvorens hem op te laden.
- Seite 41 INSTALLATIE Aanduiding van de resterende acculading (Fig. 6 & 7) De schuifaccu aanbrengen en 1. Indicatorlampjes 2. Controleknop verwijderen (Fig. 2 & 3 & 4) Alleen voor schuifaccu’s met de indicator Druk op de testknop op de accu om de resterende LET OP: accucapaciteit af te lezen.
-
Seite 42: Handmatig Afstemmen - Dab
Om de radio de beschikbare zenders te kunnen laten GEBRUIK vinden, adviseren wij u alle frequenties van de DAB Band Deze radio heeft drie afstemmethoden - automatisch III af te zoeken. 1. Druk op de Auto Tune-knop. afstemmen, handmatig afstemmen en voorkeurzenders oproepen. - Seite 43 FM: 0.05 of 0.1MHz. DRC 0 Er wordt geen compressie toegepast. Opmerking: DRC 1/2 Er wordt een gemiddelde compressie Om een gewenste zender te zoeken met behulp van toegepast. de Volumeknop/Afstemknop/Keuzeknop, houdt u de DRC 1 Er wordt maximale compressie toegepast. Volumeknop/Afstemknop/Keuzeknop ingedrukt om over te schakelen naar de afstembediening.
- Seite 44 Wanneer nieuwe software beschikbaar komt, zal de Er zijn acht taalkeuzemogelijkheden beschikbaar in de software en informatie over het installeren ervan op uw radio: Engels, Duits, Italiaans, Frans, Nederlands, Deens, radio worden gepubliceerd op de Makita-website. Noors en Pools. 1. Druk op de Advanced-instelknop. AUX-INGANG 2.
-
Seite 45: Technische Gegevens
TECHNISCHE GEGEVENS Voedingsvereisten Netspanningsadapter 12V DC 1A, middenpen positief Blokaccu: 10,8 V Batterij Schuifaccu: 10.8V - 18V FM 87.50-108 MHz Frequentiebereik DAB/DAB+ 174.928-239.200 MHz DAB/DAB+ DAB (Band III) 5A-13F Kanaalblokkering Compatibele norm DAB/DAB+ Circuitfunctie Luidspreker 3inch, 8ohm 10.8V: 1.2W x 2 Uitgangsvermogen 14.4V: 2.2W x 2 18V: 3.5W x 2... -
Seite 46: Características
● Diseño extra resistente calor. ● Resistente al agua hasta IP64 4. Utilice únicamente accesorios especificados por el ● Alimentación por paquete de baterías Makita o fabricante. mediante el adaptador de alimentación de corriente 5. Desenchufe este aparato durante las tormentas o alterna incluido cuando no vaya a usarlo por un periodo prolongado. - Seite 47 Cargar 13. Use las baterías solo con los productos especificados incorrectamente o a temperaturas fuera del rango por Makita. La instalación de las baterías con especificado podrían dañar la batería e incrementar productos no conformes podría resultar en un el riesgo de fuego.
- Seite 48 ● Reemplace solo con una del mismo tipo o uno equivalente. ● Use solo baterías originales Makita. El uso de baterías Makita no originales o de baterías que hayan sido alteradas podría provocar la explosión de la batería causando incendios, lesiones personales y daños.
-
Seite 49: Tiempo De Funcionamiento
TIEMPO DE FUNCIONAMIENTO En la siguiente tabla se indica el tiempo de funcionamiento con una batería totalmente cargada. Tensión del cartucho de batería CON LA SALIDA DEL ALTAVOZ = Capacidad de la 50mW + 50mW batería 10.8V - 12V máx 14.4V Unidad: hora (aproximadamente) BL1013... - Seite 50 batería se debe reemplazar. INSTALACIÓN Nota: La batería no puede cargarse con el adaptador de CA Instalación o extracción del cartucho suministrado. de la batería deslizante (Fig. 2 & 3 & 4) Indicación de la capacidad restante de PRECAUCIÓN: la batería (Fig. 6 & 7) Apague siempre la radio antes de extraer el cartucho de 1.
- Seite 51 Enchufe el adaptador a una toma de la red eléctrica g. Signal strength Indica la intensidad de estándar. Cuando se usa el adaptador, la batería se (Intensidad de la señal) señal de la emisora DAB desconecta automáticamente. actualmente sintonizada. El adaptador de CA debe desconectarse del suministro principal cuando no esté...
-
Seite 52: Sintonización Manual - Fm
sintonización/selección a fin de encontrar la emisora Alphanumeric Ordena la lista de emisoras que desee, mantenga pulsado el mando de volumen/ (Alfanuméricamente) alfanuméricamente 0...9 A...Z. control de sintonización/selección para cambiar al Ensemble Organiza la lista de emisoras modo de control de sintonización. (por multiplex DAB) por multiplex DAB. - Seite 53 A medida que las actualizaciones de software vayan polish. estando disponibles, en el sitio web de Makita encontrará 1. Pulse el botón de configuración avanzada. el software y la información necesaria para actualizar la 2.
- Seite 54 MANTENIMIENTO PRECAUCIÓN: ● Nunca utilice gasolina, benceno, disolvente, alcohol o un producto similar. Se puede provocar una decoloración, una deformación o grietas. ESPECIFICACIONES Requisitos de alimentación Adaptador de DC 12V 1A, clavija central alimentación CA positiva Batería de clúster: 10,8 V Batería Batería deslizante: 10.8V - 18V FM 87.50-108 MHz...
-
Seite 55: Manual De Instruções
5. Desligue este aparelho quando houver trovoada ou ● Resistente à água IP64 quando não seja usado por um longo período de ● Alimentado por baterias Makita e adaptador de tempo. alimentação fornecido 6. Um rádio a bateria com bateria integrada ou uma bateria separada tem de ser recarregado apenas SÍMBOLOS... - Seite 56 13. Use as baterias apenas com os produtos especificados pela Makita. A instalação das baterias GUARDE ESTAS INSTRUÇÕES em produtos não conformes pode resultar em incêndio, superaquecimento, explosão ou vazamento de eletrólito.
-
Seite 57: Tempo De Funcionamento
● Substitua apenas pelo mesmo tipo ou equivalente. da bateria quando notar uma menor potência da ● Utilize apenas baterias Makita genuínas. O uso ferramenta. de baterias Makita não genuínas, ou baterias que 2. Nunca recarregue um cartucho de bateria tenham sido alteradas, pode resultar na explosão... -
Seite 58: Instalação
INSTALAÇÃO Indicar a carga restante da bateria (Fig. 6 & 7) Instalar ou retirar a bateria de deslize 1. Lâmpadas do indicador 2. Botão de verificação (Fig. 2 & 3 & 4) Apenas para baterias de deslize com o indicador Prima o botão de verificação na bateria para indicar CUIDADO: a carga restante da bateria. - Seite 59 Para que o rádio encontre as estações disponíveis, é FUNCIONAMENTO recomendável realizar uma pesquisa completa de todas Este rádio tem três métodos de sintonia – pesquisa de as frequências DAB Banda III. 1. Prima o botão de sintonização automática. sintonia, sintonia manual e chamada de pré-sintonias de memória.
- Seite 60 Controlo de gama dinâmica (Dynamic Sintonia manual – FM Range Control, DRC) – DAB 1. Prima o botão de alimentação para ligar o rádio. 2. Prima o botão de banda para selecionar a onda A funcionalidade DRC pode fazer com que seja mais fácil pretendida.
-
Seite 61: Entrada Auxiliar
2. Rode o manípulo de Volume/Comando Sintonização/ como atualizar o rádio podem encontrar-se no website da Seletor até que a indicação “Language” (Idioma) seja Makita. apresentada no visor. Prima o manípulo de Volume/ ENTRADA AUXILIAR Comando Sintonização/Seletor para introduzir a definição. -
Seite 62: Especificações
ESPECIFICAÇÕES Requisitos de alimentação Adaptador de CC 12V 1A, pino central positivo alimentação CA Bateria em grupo: 10.8V Pilhas Bateria de deslize: 10.8V - 18V FM 87.50-108 MHz Cobertura de DAB/DAB+ frequências 174.928-239.200 MHz Bloqueio de canais DAB (Banda III) 5A-13F DAB/DAB+ Norma compatível DAB/DAB+... -
Seite 63: Vigtige Sikkerhedsinstruktioner
● Ultra robust design 6. En batteridrevet radio med indbygget batteri eller ● Vandtæt til IP64 ● Strømforsyning via både Makita-batteripakke og en separat batteripakke må kun oplades med den medfølgende strømadapter specificerede oplader til batteriet. En oplader, der muligvis passer til én type batteri, kan medføre risiko... - Seite 64 Ukorrekt opladning eller ved temperaturer uden for 13. Brug kun batterierne sammen med de produkter, der det angivne område kan beskadige batteriet og øge er specificeret af Makita. Installation af batterier i ikke- risikoen for brand. kompatible produkter kan resultere i brand, ekstrem varmeudvikling, eksplosion eller lækage af elektrolyt.
- Seite 65 du bemærker at værktøjets styrke mindskes. batteripakke køle ned, før den oplades. 2. Oplad aldrig en batteripakke, som allerede er fuldt 4. Når du ikke bruger batteripakken, skal du fjerne den fra opladet. Overopladning forkorter batteriets levetid. værktøjet eller opladeren. 3.
- Seite 66 INSTALLATION Angivelse af den resterende batterikapacitet (Fig. 6 & 7) Montering eller fjernelse af 1. Indikatorlamper 2. Kontrolknap skydebatteripakken (Fig. 2 & 3 & 4) Kun til indskydningsbatteripatroner med indikatoren Tryk på kontrolknappen på batteripakken for at få angivet ADVARSEL: den resterende batterikapacitet.
- Seite 67 af landet. I dette tilfælde er du muligvis nødt til at aktivere BETJENING din radio til at scanne efter nye stationer. Radioen har tre kanalsøgningsmetoder - automatisk For at give radioen mulighed for at finde alle de tilgængelige stationer anbefales det, at du udfører en fuld kanalsøgning, manual kanalsøgning og forprogrammerede kanaler.
- Seite 68 FM: 0.05 eller 0.1MHz. DRC 0 Der anvendes ingen komprimering. Bemærk: DRC 1/2 Der anvendes medium komprimering. For at kunne bruge lydstyrke-/kanalsøgnings-/ DRC 1 Der anvendes maksimal komprimering. valgknappen til at finde din ønskede station, skal du trykke og holde på lydstyrke-/kanalsøgnings-/ 1.
-
Seite 69: Vedligeholdelse
AUX-INDGANGSSTIK Sprogindstillinger Der er otte sprogindstillinger til rådighed i radioen: En 3,5mm AUX-indgang findes på forsiden af radioen. Engelsk, tysk, italiensk, fransk, hollandsk, dansk, norsk og Den kan bruges til at overføre signaler fra en ekstern polsk. lydenhed som f.eks. en mp3- eller cd-afspiller. 1. -
Seite 70: Σημαντικεσ Οδηγιεσ Ασφαλειασ
καλοριφέρ, ανοίγματα εκροής θερμού αέρα, σόμπες ή ● Εξαιρετικά στιβαρή σχεδίαση άλλες συσκευές (συμπεριλαμβανομένων ενισχυτών) ● Αδιάβροχο ως IP64 ● Τροφοδοτείται και από κασέτα μπαταρίας Makita και που παράγουν θερμότητα. από παρεχόμενο μετασχηματιστή ρεύματος 4. Χρησιμοποιείτε μόνο εξαρτήματα/αξεσουάρ που καθορίζονται από τον κατασκευαστή. - Seite 71 κανονισμούς σχετικά με τη διάθεση των μπαταριών. ΦΥΛΑΞΤΕ ΑΥΤΕΣ ΤΙΣ ΟΔΗΓΙΕΣ 13. Χρησιμοποιείτε τις μπαταρίες μόνο με τα προϊόντα που ορίζει η Makita. Η τοποθέτηση των μπαταριών σε μη συμμορφούμενα προϊόντα ενδέχεται να προκαλέσει ΕΙΔΙΚΟΙ ΚΑΝΟΝΕΣ πυρκαγιά, υπερβολική έκλυση θερμότητας, έκρηξη, ή...
- Seite 72 ● Αντικαταστήστε μόνο με τον ίδιο ή ισοδύναμο τύπο. ● Χρησιμοποιείτε μόνο γνήσιες μπαταρίες Makita. Η χρήση μπαταριών που δεν είναι γνήσιες Makita ή μπαταριών που έχουν αλλοιωθεί μπορεί να έχει ως αποτέλεσμα την έκρηξη της μπαταρίας με πρόκληση πυρκαγιάς, τραυματισμό και βλάβη.
- Seite 73 ΧΡΟΝΟΣ ΛΕΙΤΟΥΡΓΙΑΣ Οι παρακάτω πίνακες εμφανίζουν το χρόνο λειτουργίας με μία πλήρως φορτισμένη μπαταρία. Τάση κασέτας μπαταρίας ΣΕ ΕΞΟΔΟ ΗΧΟΥ = Χωρητικότητα 50mW + 50mW μπαταρίας 10.8V - 12V μεγ 14.4V Μονάδα: Ώρα (περίπου) BL1013 1.3Ah BL1014 BL1016 1.5Ah BL1415N BL1815N BL1021B 10.0...
- Seite 74 Επιστρέψτε τον χώρο της μπαταρίας στην αρχική του ΕΓΚΑΤΑΣΤΑΣΗ θέση. Η μειωμένη ισχύς, η αλλοίωση και ένας “τραυλιστός ήχος” Τοποθέτηση ή αφαίρεση της συρόμενης είναι οι ενδείξεις ότι η μπαταρία χρειάζεται αντικατάσταση. κασέτας μπαταρίας (Εικ. 2 & 3 & 4) Σημείωση: Η...
- Seite 75 Χρήση του παρεχόμενου e. Συχνότητα και Δείχνει τη συχνότητα και τον μετασχηματιστή εναλλασσόμενου κανάλι αριθμό καναλιού για τον τρέχοντα ρεύματος (Εικ. 9) συντονισμένο σταθμό DAB. f. Ρυθμός μπιτ/ Δείχνει το ρυθμό μπιτ του Αφαιρέστε το προστατευτικό από καουτσούκ και Τύπος ήχου ψηφιακού...
- Seite 76 2. Περιστρέψτε το κουμπί έντασης/ελέγχου συντονισμού/ σταματήσει αυτόματα όταν εντοπίσει ένα ραδιοφωνικό επιλογής μέχρι να εμφανιστεί στην οθόνη το “Σειρά σταθμό. Το ραδιόφωνο θα συνεχίσει να αναζητά τον επόμενο διαθέσιμο σταθμό εκτός εάν ο χειριστής σταθμών”, στη συνέχεια πατήστε το κουμπί έντασης/ πατήσει...
- Seite 77 ραδιόφωνο: Αγγλικά, Γερμανικά, Ιταλικά, Γαλλικά, σας μπορεί να είναι διαθέσιμες. Ολλανδικά, Δανικά, Νορβηγικά και Πολωνικά. Στην ιστοσελίδα Makita μπορούν να βρεθούν οι διαθέσιμες 1. Πατήστε το κουμπί προηγμένων ρυθμίσεων. ενημερώσεις λογισμικού και οι πληροφορίες για το πως 2. Περιστρέψτε το κουμπί έντασης/ελέγχου συντονισμού/ θα...
- Seite 78 ΒΟΗΘΗΤΙΚΗ ΥΠΟΔΟΧΗ Προδιαγραφές ΕΙΣΟΔΟΥ Απαιτήσεις ηλεκτρικού ρεύματος Στην πρόσοψη του ραδιοφώνου υπάρχει βοηθητική Μετασχηματιστής DC 12V 1A, θετικός πόλος η υποδοχή εισόδου 3,5mm που επιτρέπει την είσοδο ρεύματος AC κεντρική ακίδα ηχητικού σήματος στη μονάδα από μια εξωτερική συσκευή Σύνθετη μπαταρία: 10,8V ήχου, όπως...
-
Seite 79: Önemli̇ Güvenli̇k Tali̇matlari
● IP64’e göre suya dayanıklı takımlarıyla birlikte kullanın. Başka pillerin kullanımı yangın riski oluşturabilir. ● Hem Makita pil takımı hem de birlikte verilen güç adaptörü tarafından desteklenir. 8. Pil takımı kullanımda değilken pil takımını; kağıt ataçı, bozuk para, anahtar, çivi, cıvata veya diğer küçük SİMGELER... - Seite 80 Bu aynı zamanda Makita aracı (3) Pil kartuşunu suya veya yağmura maruz ve şarj cihazı için Makita garantisini de geçersiz bırakmayın. Pilin kısa devre yapması büyük bir kılacaktır. akıma, aşırı ısınmaya, olası yanıklara ve hatta arızaya neden olabilir.
- Seite 81 ÇALIŞMA SÜRESİ Aşağıdaki tablolar, tam dolu bir pil ile çalışma süresini gösterir. Pil kartuşu voltajı HOPARLÖR ÇIKIŞINDA = Pil kapasitesi 50mW + 50mW 10.8V - 12V maks 14.4V Birim: Saat (Yaklaşık) BL1013 1.3Ah BL1014 BL1016 1.5Ah BL1415N BL1815N BL1021B 10.0 2.0Ah BL1820B 10.0...
- Seite 82 TAKMA Gösterge veya lambalar Kalan kapasite Kayan pil kartuşunun takılması ve Yanıyor Kapalı Yanıp Sönüyor çıkarılması (Resim 2 & 3 & 4) 75% ~ 100% DİKKAT: Pil kartuşunu çıkarmadan önce radyoyu mutlaka kapatın. 50% ~ 75% ● Pil kartuşunu takmadan ya da çıkarmadan önce radyoyu her zaman kapatın.
- Seite 83 4. Dinlenebilir istasyonlar listesi arasında gezinmek için düğmesini çevirin. Manuel ayar moduna girmek için Ses/Ayar Kontrol/Seçim düğmesini çevirin. İstasyon Ses/Ayar Kontrol/Seçim düğmesine basın. seçmek için düğmeye basın. 2. İstenilen DAB kanalını seçmek için Ses/Ayar Kontrol/ 5. Ses/Ayar Kontrol/Seçim düğmesini çevirerek istediğiniz Seçim düğmesini çevirin.
- Seite 84 3. Otomatik ayar düğmesine bastığınızda radyonuz İstasyonların ön ayarlı hafızalara arama yapacak ve bir istasyon bulduğunda otomatik kaydedilmesi (DAB ve FM) olarak duracaktır. Radyo, operatör taramayı durdurmak Her dalga bandı için 5 hafıza ön ayarı vardır. için Otomatik arama düğmesine basana kadar sonraki 1.
-
Seite 85: Teknik Özellikler
Gelecekte radyonuz için yazılım güncellemeleri olabilir. 10.8V: 1.2W x 2 Yazılım güncellemeleri çıktıkça, radyonuzu nasıl Çıkış gücü 14.4V: 2.2W x 2 güncelleyeceğinize dair yazılı ve bilgiler Makita web 18V: 3.5W x 2 sitesinde bulunabilir. Giriş terminali 3.5mm çap (AUX GİRİŞİ) YARDIMCI GİRİŞ... - Seite 86 Makita Europe N.V. Jan-Baptist Vinkstraat 2, 3070 Kortenberg, Belgium Makita Corporation 3-11-8, Sumiyoshi-cho, Anjo, Aichi 446-8502 Japan DMR110N-10L-2101 www.makita.com 3A81eB5Z00000 (2021.04.19)