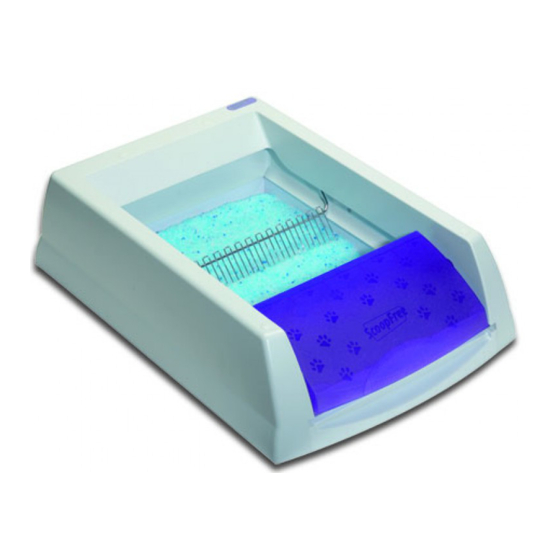
Petsafe ScoopFree Erste Schritte
Selbstreinigende katzentoilette
Vorschau ausblenden
Andere Handbücher für ScoopFree:
- Bedienungsanleitung (9 Seiten) ,
- Bedienungsanleitung
Get started!
Commençons !
Aan de slag!
¡En marcha!
Inizio!
Auf geht's!
ScoopFree
Self-Cleaning Litter Box
™
e
Bac à litière auto-nettoyant ScoopFree
f
ScoopFree
Zelfreinigende kattenbak
™
d
Arenero con autolimpieza ScoopFree
s
Lettiera autopulente ScoopFree
i
Selbstreinigende Katzentoilette ScoopFree
g
™
™
™
™
Inhaltsverzeichnis

Verwandte Anleitungen für Petsafe ScoopFree


Inhaltszusammenfassung für Petsafe ScoopFree
- Seite 1 ScoopFree Self-Cleaning Litter Box ™ Bac à litière auto-nettoyant ScoopFree ™ ScoopFree Zelfreinigende kattenbak ™ Arenero con autolimpieza ScoopFree ™ Lettiera autopulente ScoopFree ™ Selbstreinigende Katzentoilette ScoopFree ™ Get started! Commençons ! Aan de slag! ¡En marcha! Inizio! Auf geht’s!
-
Seite 2: Avant De Commencer
Voici quelques conseils pour vous aider à to help you get off to a good start: bien démarrer : • Place the new ScoopFree™ Self-Cleaning Litter Box next to your cat’s • Placez le nouveau bac à litière autonettoyant ScoopFree ™... -
Seite 3: Voordat We Beginnen
Siga estos consejos para empezar con buen pie: Hier ein paar Tipps für einen guten Start: • Ponga el Arenero con autolimpieza ScoopFree al lado del arenero que • Stellen Sie die neue Selbstreinigende Katzentoilette ScoopFree neben ™ ™... - Seite 4 Set up your new litter box Instalar el arenero Installez votre nouveau bac à litière Prepara la nuova lettiera Je nieuwe kattenbak klaarmaken Katzentoilette in Betrieb nehmen Kies een goede plek voor de kattenbak, in de buurt van een standaard stopcontact.
- Seite 5 Insérez la petite extrémité de l'adaptateur dans la prise située en bas du cadre du bac à litière. Faites glisser le câble de l'adaptateur sous les clips de chaque côté de la prise pour le sécuriser. Branchez l’adaptateur sur la prise secteur. (Important : si vous avez un chaton, ne branchez pas le bac à...
- Seite 6 Insert the tabs on the waste trap cover into the slots at the front of the litter box frame. Press down on the waste trap cover until it snaps into place. Insérez les languettes de la trappe d'évacuation des déchets dans les fentes situées à...
- Seite 7 Lift the front of the litter box frame. Place the litter tray under it, making sure the waste trap on the tray is under the waste trap cover on the litter box frame. Soulevez l'avant du cadre du bac à litière. Placez le bac à litière dessous, en veillant à...
- Seite 8 If your litter box came with a privacy cover, place it on top of the litter box, lining up the tabs at the bottom of the privacy cover with the notches in the top edge of the litter box. Press down firmly on the privacy cover to ensure all four tabs snap into place.
- Seite 9 Health counter reset button Rake button Bouton de réinitialisation du compteur santé Bouton du râteau Resetknop voor gezondheidsteller Knop voor harken Botón de reinicio del contador sanitario Botón del rastrillo Tasto di ripristino del contatore igienico Tasto del pettine Rückstelltaste des Gesundheitsmonitors Rechen-Taste Health counter Compteur santé...
- Seite 10 Le bouton du râteau s'allume pour indiquer le statut du bac à litière : Votre nouveau bac à litière est prêt à être utilisé. Voici son fonctionnement : Couleur du voyant Statut Des capteurs dans le bac à litière détectent la présence du chat. Lorsque votre Bleu, fixe Le bac à...
- Seite 11 Il tasto del pettine si illumina per indicare lo stato della lettiera: La nuova lettiera è pronta per l'uso. Ecco come funziona: I sensori all'interno della lettiera rilevano la presenza del gatto. Quando il micio Colore della spia Stato esce, il tasto del pettine lampeggia e il timer inizia un conto alla rovescia di 20 Blu fisso La lettiera è...
- Seite 12 Keep the litter box fresh Mantener limpio el arenero Veillez à ce que le bac à litière reste propre Mantieni pulita la lettiera Houd je kattenbak fris Katzentoilette reinigen Haal de stekker van de kattenbak uit het stopcontact en til de kattenbak van de lade met kristallen kattenbakvulling.
- Seite 13 Change the crystal litter tray Cambiar la bandeja de arena de cristal Changez le bac à litière de cristaux Cambia il vassoio della lettiera in cristalli De lade met kristallen kattenbakvulling verschonen Katzenstreu-Schale austauschen Lift the litter box frame and remove the used litter tray. Important: See the customer care guide for safety instructions related to cat litter waste and toxoplasmosis.
- Seite 14 Replacement Litter Trays. The Utilice exclusivamente bandejas de arena de reemplazo para ScoopFree ™ ™ ™ crystal litter is specially designed and pre-measured to work with PetSafe de PetSafe . La arena de cristal se ha diseñado especialmente y está ™ ™...
- Seite 15 Fresh clean litter, happy healthy cat. Une litière toujours fraîche pour un chat heureux. Schone bak, blije kat. Arenero siempre limpio, gatitos sanos y felices. Lettiera pulita, gatto felice! Frische, saubere Katzenstreu für zufriedene Katzen...
- Seite 16 00 800 18 18 20 20 00 800 18 18 20 20 800-457-3911 Radio Systems Corporation Radio Systems PetSafe Europe Ltd. Radio Systems Australia Pty Ltd. 10427 PetSafe Way 2nd Floor, Elgee Building, Market Square Suite 11001 Australia Fair Office Towers Knoxville, TN 37932 USA Dundalk, Co.