
Verwandte Anleitungen für Horizon Hobby Ultra Stick PNP


Inhaltszusammenfassung für Horizon Hobby Ultra Stick PNP
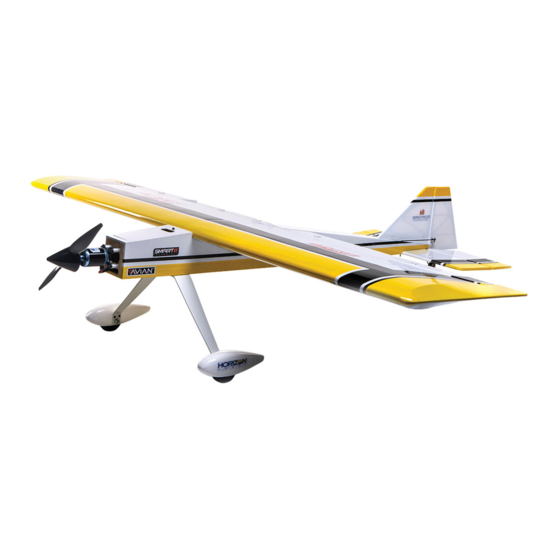
- Seite 1 ™ Ultra Stick Instruction Manual Bedienungsanleitung Manuel d’utilisation Manuale di Istruzioni...
-
Seite 2: Safe Operating Recommendations
• For a computer radio, create a model memory for this particular model. of Horizon Hobby, LLC. This manual contains instructions for safety, operation and maintenance. It is essential to • Bind your transmitter and receiver, using your radio system’s instructions. -
Seite 3: Inhaltsverzeichnis
HAN477510 Aileron Set Warranty and Service Contact Information ........................12 HAN477511 Hardware Set Academy of Model Aeronautics National Model Aircraft Safety Code ................12 HAN477513 Hatch HAN477515 Battery Tray HAN477516 Pushrod Set SPMXAE1060 Avian 60Amp Brushless Smart ESC 6S Ultra Stick PNP... -
Seite 4: Required For Completion
OPTIONAL FLOAT INSTALLATION SPMR8200 NX8 8 Ch DSMX Transmitter Only The Ultra Stick PNP fuselage has been prepared for fl oat installation. For additional details, we recommend SPMX40006S30 4000mAh 6S 22.2V Smart 30C; IC5 downloading the Ultra Stick 10cc manual (HAN2345). -
Seite 5: Receiver Installation
Label the extensions for the ailerons and fl aps. Fit the tail wheel bracket over the rear fi n mounting post. Thread an M3 locknut on the mounting post. Ultra Stick PNP... -
Seite 6: Landing Gear Installation
Use a #2 Phillips screwdriver to install the M3 x 10 self- LANDING GEAR INSTALLATION tapping screw through the hole in the bracket and into the fuselage. Do not over-tighten the screw and damage the Slide an M4 washer on the M4 x 20 socket head cap screw. Place a drop of threadlock on the screw. -
Seite 7: Elevator And Rudder Linkage Connections
Repeat the steps for the elevator to attach the rudder pushrod Slide the wing panels together. They will fi t tightly together and ball end to the rudder control horn. when in the correct position. Ultra Stick PNP... -
Seite 8: Motor Battery And Propeller Installation
Connect the leads for the fl aps and ailerons. MOTOR BATTERY AND PROPELLER INSTALLATION Make sure the extensions will not interfere with the The photo shows the order of the items as installed on the operation of the rudder and elevator servos. motor. -
Seite 9: Center Of Gravity
fi nd the feel that you prefer. Allow the model to rest overnight so the remaining water can evaporate. CAUTION: You must adjust your aircraft’s center of gravity and balance your model properly before attempting fl ights. 4 inches (102mm) Ultra Stick PNP... -
Seite 10: Control Throws
CONTROL THROWS AEROBATIC MIXING The Ultra Stick 10cc is confi gured with separate aileron and fl ap servos which allows you to add a variety of mixes that Turn on the transmitter and receiver of your model. Check the movement of the rudder using the transmitter. will greatly enhance the maneuverability of your model. -
Seite 11: Daily Flight Checks
A copy of your original sales receipt must be included for warranty consideration. Be sure your name, address, any part of the Product, (iv) attempted service by anyone other than a Horizon Hobby authorized service center, (v) Product and RMA number are clearly written on the outside of the shipping carton. -
Seite 12: Warranty And Service Contact Information
Union D 22885 Barsbüttel, Germany Sales: Horizon Hobby GmbH +49 (0) 4121 2655 100 • I will not operate any model aircraft while I am under the infl uence of alcohol or any drug that could adversely affect my ability to safely control the model. -
Seite 13: Warnungen Und Sicherheits-Vorkehrungen
Halten Sie lose Gegenstände, die sich im Propeller verfangen können, immer vom Propeller fern. Dazu gehören lose Alle Anweisungen, Garantien und andere Begleitdokumente können von Horizon Hobby, LLC nach eigenem Ermessen Kleidung oder andere Gegenstände wie Stifte und Schraubendreher. Halten Sie Ihre Hände vom Propeller fern, da es zu geändert werden. -
Seite 14: Han477502 Han477503 Han477504
INHALTSVERZEICHNIS ERSATZTEILE Warnungen und Sicherheits-vorkehrungen .........................13 Teile-Nr. Beschreibung Empfehlungen zum sicheren Betrieb ...........................13 APC13080E Elektro Propeller, 13 x 8 Vor dem Zusammenbau ..............................13 EFLM7450 BL50 Bürstenloser Außenläufer-Motor, 525 kV Ersatzteile ...................................14 Zur Fertigstellung erforderlich .............................15 EFLR7145 26 g Digitaler MG Mini-Servo Optionale Teile ................................15 HAN234506 Fahrwerk Set Erforderliche Werkzeuge und Klebstoffe ........................15... -
Seite 15: Zur Fertigstellung Erforderlich
Anz. MONTAGE DER OPTIONALEN SCHWIMMER SPMAR8360T AR8360T SAFE-Telemetrieempfänger mit 8 Kanälen Der Rumpf des Ultra Stick PNP eignet sich zum Montieren von Schwimmern. Für weitere Einzelheiten empfehlen wir SPMR6775 Nur NX6 6-Kanal-Sender den Download des Ultra Stick 10cc Handbuchs (HAN2345). -
Seite 16: Montage Des Empfängers
MONTAGE DES EMPFÄNGERS MONTAGE DER SEITEN- UND HÖHENRUDER Die Servos von Seitenruder und Höhenruder mit dem Die 3-mm-Mutter aus dem Halterungspfosten des Empfänger verbinden. Auch die Erweiterungen für Klappen Seitenleitwerks entfernen. Mit einem 1,5 mm Sechskant und Querruder anschließen. die Feststellschraube lösen, die die Anschlaghülse auf dem Spornrad sichert. -
Seite 17: Montage Des Fahrwerks
Radverkleidungen weisen in die dargestellte Richtung. Es wird empfohlen, einen Tropfen Gewindesicherung auf die Mutter zu geben, um ein Lösen unter Vibrationen zu verhindern. Gewindesicherung muss nicht aufgetragen werden, wenn das Modell zum Transport demontiert wird. Ultra Stick PNP... -
Seite 18: Verbindung Von Höhenruder Und Gestänge
VERBINDUNG VON HÖHENRUDER UND GESTÄNGE MONTAGE DER TRAGFLÄCHE Die 2-mm-Mutter vom Kugelgelenk des Höhenruders Die Leitungen der Klappen- und Querrudererweiterungen entfernen. Die Schraube festziehen. Die Schraube mithilfe an den Leitungen des Empfängers anschließen. Jede eines 1,5-mm-Sechskant durch das mittlere Loch auf dem Leitung markieren, um sie wieder in den gleichen Positionen Steuerhorn des Höhenruders befestigen. -
Seite 19: Montage Von Motor-Akku Und Propeller
Spinnerkegel mithilfe der mitgelieferten Schraube und eines 1,5-mm-Sechskants sichern. Den Motor-Akku mit den Klettbändern im Rumpf sichern. Klettband (nicht im Lieferumfang enthalten) zwischen Akku und Akkufach verwenden, damit der Akku bei aggressivem Flugstil in Position bleibt. Ultra Stick PNP... -
Seite 20: Anbringen Der Decals
Die Akkuabdeckung wird mithilfe von Magneten gesichert DER SCHWERPUNKT und ist kein Strukturbauteil des Flugzeugs. Ein wichtiger Teil bei der Vorbereitung des Flugzeugs für den Flug ist das ordnungsgemäße Ausbalancieren des Daumenschraube und M3-Unterlegscheibe sind Modells. im Lieferumfang enthalten, um die Abdeckung bei Die Tragfl... -
Seite 21: Ruderausschlag
Höhenruder zu Klappe. Dabei 35 mm nach unten ausgefahrene Klappen zu vollständig nach oben ausgefahrenem Flaps Landen 45–60mm Höhenruder mischen. Mischung mit Querruder zu Klappe: Die Rollrate kann erhöht werden, indem die Klappen so kombiniert werden, dass sie den Ausschlägen der Querruder entsprechen. Ultra Stick PNP... -
Seite 22: Vorfl Ugkontrolle
Ausschlägen). Garantiezeitraum Exklusive Garantie Horizon Hobby LLC (Horizon) garantiert, dass dasgekaufte Produkt frei von Material- und • Überprüfen Sie alle Teile der Anlenkungen (Ruderhörner, Servohebel und Gabelköpfe) und stellen sicher dass diese Montagefehlern ist. Der Garantiezeitraum entspricht den gesetzlichen Bestimmung des Landes, in dem das Produkt gut befestigt und in einwandfreiem Zustand sind. -
Seite 23: Garantie Und Service Kontaktinformationen
Es ist unabdingbar, diese Hinweise vor der ersten Inbetriebnahme zu lesen und zu verstehen. Nur so kann der falsche Umgang verhindert und Unfälle mit Verletzungen und Beschädigungen vermieden werden. Hiermit erklärt Horizon Hobby, LLC, dass das Dieses Gerät ist gemäß der Europäischen Gerät den folgenden Richtlinien entspricht:... -
Seite 24: Avertissements Relatifs À La Sécurité
• Si un élément est endommagé, contactez votre revendeur. avec des composants incompatibles hors des instructions fournies par Horizon Hobby, LLC. Ce manuel comporte des instructions relatives à la sécurité, au fonctionnement et à l’entretien. Il est capital de lire et de respecter la totalité... -
Seite 25: Han234517 Han477501
Checklist d’avant vol ..............................33 HAN477515 Support de batterie Contrôles systématiques .............................33 Coordonnées de Garantie et réparations ........................34 HAN477516 Tringleries Informations de IC...............................34 SPMXAE1060 Variateur ESC sans balais 60 A Smart Avian 6S Informations de conformité pour l’Union européenne ....................34 Ultra Stick PNP... -
Seite 26: Nécessaire Pour Terminer L'appareil
INSTALLATION DES FLOTTEURS FACULTATIFS SPMAR8360T Récepteur avec télémétrie 8 canaux SAFE AR8360T Le fuselage de l'Ultra Stick PNP a été préparé pour l'installation des fl otteurs. Pour plus de détails, nous recommandons SPMR6775 Émetteur uniquement 6 canaux NX6 le téléchargement du manuel Ultra Stick 10cc (HAN2345). -
Seite 27: Installation Du Récepteur
Étiquetez les rallonges pour les ailerons et les volets. Installez le support de la roue de queue par-dessus le montant arrière de la dérive. Vissez un écrou de blocage M3 sur le montant. Ultra Stick PNP... -
Seite 28: Installation Du Train D'atterrissage
Utilisez un tournevis cruciforme n° 2 pour installer la vis INSTALLATION DU TRAIN D'ATTERRISSAGE autotaraudeuse M3 x 10 à travers l'orifi ce dans le support et dans le fuselage. Ne serrez pas excessivement la vis pour ne Faites glisser une rondelle M4 sur la vis d'assemblage creuse M4 x 20. -
Seite 29: Raccordements De La Tringlerie Des Gouvernes De Profondeur Et De Direction
Rassemblez les panneaux d'aile en les faisant glisser. Ils sont pour raccorder la barre de liaison et l'extrémité à bille de bien ajustés l'un contre l'autre quand ils sont correctement la gouverne de direction au guignol de commande de la positionnés. gouverne de direction. Ultra Stick PNP... -
Seite 30: Installation Du Moteur, De La Batterie Et De L'hélice
Connectez les câbles pour les volets et les ailerons. INSTALLATION DU MOTEUR, DE LA BATTERIE ET DE L'HÉLICE Assurez-vous que les rallonges ne vont pas gêner le fonctionnement des servos des La photo montre l'ordre des éléments tels qu'ils sont installés gouvernes de profondeur et de direction. -
Seite 31: Application Des Autocollants
Comme le style de pilotage et les préférences de chaque pilote sont différents, nous vous recommandons d’ajuster légèrement le centre de gravité jusqu’à trouver votre préférence. ATTENTION: Le centre de gravité de votre modèle doit être parfaitement réglé avant de tenter un vol. 4 inches (102mm) Ultra Stick PNP... -
Seite 32: Débattements
DÉBATTEMENTS MIXAGE ACROBATIQUE Le Ultra Stick 10 cc est confi guré avec des servos d'aileron et de volet séparés, ce qui vous permet d'ajouter plusieurs Mettez l’émetteur et le récepteur de votre maquette sous tension. Vérifi ez le mouvement de la dérive à l’aide mixages qui amélioreront grandement la manœuvrabilité... -
Seite 33: Garantie Et Réparations
électroniques. Garantie exclusive - Horizon Hobby, LLC (Horizon) garantit que le Produit acheté (le « Produit ») sera exempt de défauts matériels et de fabrication à sa date d’achat par l’Acheteur. La durée de garantie correspond aux dispositions légales •... -
Seite 34: Coordonnées De Garantie Et Réparations
C’est uniquement ainsi qu’il sera possible d’éviter une manipulation erronée et des accidents entraînant des blessures et des dégâts. Horizon Hobby ne saurait être tenu responsable d’une utilisation ne respectant pas les lois, les règles ou règlementations en vigueur. -
Seite 35: Raccomandazioni Per Operare In Sicurezza
Non usare componenti non compatibili • Caricare il trasmettitore e la batteria di volo. o alterare il prodotto in nessuna maniera al di fuori delle istruzioni fornite da Horizon Hobby, LLC. Questo manuale • Centrare stick e trim sul trasmettitore. -
Seite 36: Pezzi Di Ricambio
INDICE PEZZI DI RICAMBIO Necessario per completare ............................37 Pezzo # Descrizione Parti opzionali ................................37 APC13080E Elica elettrica sottile, 13 x 8 Attrezzi e adesivi richiesti ............................37 EFLM7450 Motore BL50 BL Outrunner, 525 Kv Precauzioni di montaggio ............................37 Rimozione delle grinze ..............................37 EFLR7145 Mini servo MG digitale 26 g Montaggio dei galleggianti opzionali ...........................37... -
Seite 37: Necessario Per Completare
MONTAGGIO DEI GALLEGGIANTI OPZIONALI SPMR8200 NX8 8 canali DSMX solo trasmittente La fusoliera dell’Ultra Stick PNP è stata preparata per l’installazione dei galleggianti. Per ulteriori dettagli, si consiglia di SPMX40006S30 4000mAh 6S 22.2V Smart 30C; IC5 scaricare il manuale Ultra Stick 10cc (HAN2345). -
Seite 38: Montaggio Del Ricevitore
MONTAGGIO DEL RICEVITORE INSTALLAZIONE DI EQUILIBRATORE E TIMONE Collegare i connettori dei servo di equilibratore e timone Rimuovere il dado da 3 mm dal montante dell’aletta. Utilizzare al ricevitore. Collegare anche le estensioni per i fl ap e gli una chiave esagonale da 1,5 mm per allentare il grano che alettoni. -
Seite 39: Montaggio Del Carrello Di Atterraggio
Si consiglia di applicare una goccia di frenafiletti sul grano per evitarne l’allentamento a causa delle vibrazioni in volo. Non è essenziale usare il frenafiletti se il modello sarà smontato per il trasporto. Ultra Stick PNP... -
Seite 40: Collegamento Dei Leveraggi Di Equilibratoree Timone
COLLEGAMENTO DEI LEVERAGGI DI EQUILIBRATORE MONTAGGIO DELL’ALA E TIMONE Collegare i cavi delle estensioni di fl ap e alettoni ai cavi dall’ala. Contrassegnare ogni cavo in modo che possano Rimuovere il dado da 2 mm dall’attacco a sfera essere ricollegati nelle stesse posizioni. dell’equilibratore. -
Seite 41: Montaggio Di Elica E Batteria Motore
fi ssarlo utilizzando la vite in dotazione e la chiave esagonale da 1,5 mm. Fissare la batteria motore nella fusoliera con del nastro a strappo. Applicare nastro a strappo (non incluso) tra la batteria e il suo vassoio per fissarla batteria durante le manovre più aggressive. Ultra Stick PNP... -
Seite 42: Applicazione Delle Decalcomanie
Il coperchio della batteria è tenuto in posizione mediante BARICENTRO magneti e non è una parte strutturale della cellula. Una parte molto importante nella preparazione del modello riguarda il suo bilanciamento. Una vite a testa zigrinata e una rondella di sicurezza M3 vengono fornite per fissare il coperchio se si prevede di eseguire manovre aggressive che potrebbero Fissare le ali alla fusoliera. -
Seite 43: Corse Dei Comandi
20mm Miscelazione alettone-fl ap: Destra 90mm Alto la velocità di rollio può essere aumentata miscelando i fl ap per accordarli alle corse degli alettoni. Sinistra 90mm Timone Destra 45mm Basso Sinistra 45mm Decollo 30mm Flaps Atterraggio 45–60mm Ultra Stick PNP... -
Seite 44: Lista Dei Controlli Prima Del Volo
Seguire tutte le istruzioni del produttore relative ai componenti elettronici. Garanzia esclusiva - Horizon Hobby, LLC (Horizon) garantisce che il prodotto acquistato (il “Prodotto”) sarà privo di difetti relativi ai materiali e di eventuali errori di montaggio alla data di acquisto. Il periodo di garanzia è conforme alle •... -
Seite 45: Contatti Per La Garanzia E L'assistenza
è ben visibile la data di acquisto. Se la garanzia viene confermata, Champaign, IL 61822 USA allora il prodotto verrà riparato o sostituito. Questa decisione spetta esclusivamente a Horizon Hobby. Importatore uffi ciale dell’UE: Riparazioni a pagamento Horizon Hobby, GmbH Se bisogna effettuare una riparazione a pagamento, effettueremo un preventivo che verrà... - Seite 46 BUILDING AND FLYING NOTES • NOTIZEN ZUM AUFBAU UND FLIEGEN • REMARQUES SUR LE MONTAGE ET LE PILOTAGE • NOTE DI MONTAGGIO E DI VOLO...
- Seite 47 SPECIFICATIONS • SPEZIFIKATIONEN • SPÉCIFICATIONS • SPECIFICHE 60.0 in (1524 mm) 60-inches (1524mm) 810 sq in (52.3 dm2) 58 in (1473 mm) 7.0–9.0 lbs (3.18–4.08 kg) 5-channel (or greater) 5-Kanal (oder größer) 5 voies (ou plus) a 5 canali (o più) -inches (540mm) 10-inches (254mm) 58-inches (1473mm)
- Seite 48 © 2021 Horizon Hobby, LLC. Hangar 9, Ultra Stick, DSMX, Avian, IC5 and the Horizon Hobby logo are trademarks or registered trademarks of Horizon Hobby, LLC. The Spektrum trademark is used with permission of Bachmann Industries, Inc. All other trademarks, service marks and logos are the property of their respective owners.