Kapitel
Inhaltsverzeichnis

Verwandte Anleitungen für Sonnenkönig PHÖNIX


Inhaltszusammenfassung für Sonnenkönig PHÖNIX
- Seite 1 PHÖNIX GARTENFLAMME FIRMA Sonnenkönig of Switzerland Olensbachstrasse 9-15 Artikelnr. 3 0 3 1 0 1 8 8 CH-9631 Ulisbach Tel. Int. +41 58 611 60 00 Version 22.04.2021 Tel. Nat. 0848 870 850...
-
Seite 2: Inhaltsverzeichnis
01 - INHALTSVERZEICHNIS 01 - INHALTSVERZEICHNIS 02 - WARNHINWEISE 03 - LIEFERUMFANG 04 - MONTAGE 05 - DICHTIGKEITSPRÜFUNG 06 - BEDIENUNG 07 - INBETRIEBNAHME 08 - REINIGUNG, PFLEGE UND WARTUNG 09 - TECHNISCHE DATEN 10 - KONFORMITÄT / PROBLEMLÖSUNG... -
Seite 3: Warnhinweise
02 - WARNHINWEISE Bitte lesen und verstehen Sie diese Anleitung vollständig, bevor Sie versuchen, das Produkt zu montieren, zu betreiben oder zu installieren. Dieses Handbuch enthält wichtige Informationen über die Montage, den Betrieb und die Wartung dieses Terrassenheizers. Allgemeine Sicherheitsinformationen werden auf diesen ersten Seiten vor- gestellt und finden sich auch im gesamten Handbuch. -
Seite 4: Dienstleistungssicherheit
• Dieses Heizgerät ist während des Gebrauchs hochglühend und kann brennbare Stoffe in der Nähe des Brenners entzünden. Halten Sie die entflammbaren Stoffe mindestens 100 cm von den Seiten und 100 cm von oben entfernt. Benzin und andere entflammbare Flüssigkeiten und Gase von dem Heizgerät fernhalten. -
Seite 5: Lieferumfang
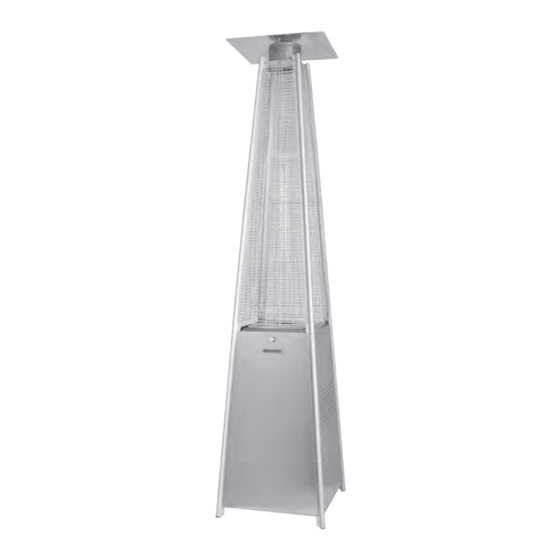
03 - LIEFERUMFANG Nr Beschreibung Menge 450 mm 1 Reflektor Panel hler schutz 2 Flammenschutz 3 Glasrohr 4 Schutzvorrichtung 5 Obere Stütze 6 Frontverkleidung rrichtung 7 Seitenverkleidung 8 Untere Stütze 9 Bodenplatte ütze 10 Kette 11 Schraubkappe 12 Flanschmutter M8 13 Flügelmutter 14 Befestigungswinkel kleidung... -
Seite 6: Montage
04 - MONTAGE HILFSMITTEL Nr Beschreibung Menge Nr Beschreibung Menge A Reflektor Panel I Frontverkleidung unten B Flammenschutz J Gasschlauch + Regler C Deckplatte K Basiseinheit mit Brenner D Glasrohr L Schaltkasten E Obere Stütze M Untere Stütze F Schutzverkleidung oben N Räder G Schwarzer Silikonring O Bodenplatte... - Seite 7 Nr Beschreibung Menge N Räder O Bodenplatte 12 Flanschmutter M8 18 Schraube M8 * 12 mm Schritt 1 Montieren Sie die Räder (N) an der Bodenplatte (O). Befestigen Sie die Radbaugruppe (N) mit 4 Stück Schraube M8x12 mm (18) und 4 Stück Flanschmutter M8 (12) an der Bodenplatte (O).
- Seite 8 Nr Beschreibung Menge Basiseinheit mit Brenner L Schaltkasten 19 Schraube 3/16“ Schritt 3 Montieren Sie den Schaltkasten (L). Befestigen Sie den Schaltkas- ten (L) mit 4 Stück Schraube 3/16“ (19) auf der Basiseinheit mit Bren- ner (K). Nr Beschreibung Menge E Obere Stütze Basiseinheit mit Brenner...
- Seite 9 Nr Beschreibung Menge C Deckplatte E Obere Stütze 19 Schraube 3/16“ Schritt 5 Montieren Sie die obere Platte (C) an der oberen Halterung (E). Be- festigen Sie die Deckplatte (C) mit 8 Stück Schraube 3/16“ (19) an der oberen Stütze (E). Nr Beschreibung Menge A Reflektor Panel...
- Seite 10 Nr Beschreibung Menge C Deckplatte D Glassrohr G Schwarzer Silikonring Zur Erleichterung Basiseinheit mit der Installation den Brenner schwarzen Silikon- (K) befestigt ist. Über- Schritt 7 ring auf die mittlere Montieren Sie das Glas- prüfen und sicherstellen, Platte setzen und rohr (D) vorsichtig, indem dass das Glasrohr (D) dann das Glasrohr...
- Seite 11 Nr Beschreibung Menge Seitenverkleidung unten 19 Schraube 3/16“ Schritt 9 Befestigen Sie die drei Seitenver- kleidungen unten (H) am Heizge- rät mit 12 Schrauben 3/16“ (19). Hinweis: Bedecken Sie nicht die Vorderseite, auf der sich der Be- dienknopf befindet. Nr Beschreibung Menge Frontverkleidung unten...
- Seite 12 Nr Beschreibung Menge L Schaltkasten 22 Batterie AAA Schritt 11 Tipp: Wir Schlauchanschluss für Propan. empfehlen, Gas- schläuche alle WARNUNG: Achten Sie darauf, acht bis zehn dass der Schlauch nicht in Kontakt Jahre auszutau- mit den Hochtemperatur-Ober- schen. flächen kommt, dies könnte zu Schmelzungen oder einem Leck führen, was einen Brand auslösen könnte.
-
Seite 13: Dichtigkeitsprüfung
05 - DICHTIGKEITSPRÜFUNG Die Gasanschlüsse werden im Werk vor der Auslieferung auf ihre Dichtigkeit geprüft. Eine vollständi- ge Dichtigkeitsprüfung muss am Aufstellort nach der Installation durchgeführt werden. Während der Prüfung dürfen keine Hitze- und Feuerquellen in der Nähe des Gerätes vorhanden sein! 1. -
Seite 14: Inbetriebnahme
07 - INBETRIEBNAHME Wichtig: Bei der ersten Inbetriebnahme oder nach Austausch einer Gasflasche bei Schritt 2 mindes- tens 60 Sekunden lang warten, um die Luft aus den Leitungen zu entfernen. 1. Drehen Sie das Ventil der Gasflasche vollständig auf. 2. Drücken Sie den Gasregler und drehen Sie ihn auf die Pilot-Position. 3. -
Seite 15: Reinigung, Pflege Und Wartung
08 - REINIGUNG, PFLEGE UND WARTUNG Lagerung Bevor Sie das Gerät einlagern, das Ventil der Gasflasche fest zudrehen und den Gasschlauch und den Druckregler entfernen. Bringen Sie die Wetterschutzhaube erst an, wenn das Gerät vollständig aus- gekühlt ist. Reinigung Reinigen Sie beschichtete Oberflächen mit einem weichen, feuchten Tuch. Reinigen Sie die Heizungnie- mals mit brennbaren oder ätzenden Reinigern. -
Seite 16: Konformität / Problemlösung
10 - KONFORMITÄT / PROBLEMLÖSUNG Garantie Die Geräte werden vor der Auslieferung genau kontrolliert. Sollte trotzdem einmal ein Mangel an Ihrem Gerät auftreten, wenden Sie sich vertrauensvoll an Ihren Verkäufer. Bitte bringen Sie den Kaufbeleg mit, denn dieser ist für jede Garantieleistung vorzulegen. Bitte behalten Sie das Verpackungsmaterial für das Gerät auf. - Seite 17 ENTSORGUNGSHINWEISE FÜR DEN ELEKTRISCHEN TEIL DES PRODUKTS Gemäss Artikel 26 des Gesetzeserlass vom 14. März 2014 zur Umsetzung der Richtlinie 2012/19/EG und des Erlasses vom 31. März 2015 zur Umsetzung der Richtlinie 2015/863/EU zur Verringerung der Verwendung gefährlicher Stoffe in Elektro- und Elektronikgeräten und zur Abfallentsorgung. Das Symbol der durchgestrichenen Mülltonne auf dem Gerät oder der Verpackung weist darauf hin, dass das Gerät am Ende seiner Lebensdauer getrennt von anderen Abfällen über entsprechende Sam- melstellen zu entsorgen ist.
- Seite 18 FRANCAIS...
- Seite 19 PHÖNIX FLAMME DE JARDIN MAISON Sonnenkönig of Switzerland Olensbachstrasse 9-15 Nº Article 3 0 3 1 0 1 8 8 CH-9631 Ulisbach Tel. Int. +41 58 611 60 00 Version 22.04.2021 Tel. Nat. 0848 870 850...
-
Seite 20: Table Des Matières
01 - TABLE DES MATIÈRES 01 - TABLE DES MATIÈRES 02 - AVERTISSEMENTS 03 - CONTENU 04 - ASSEMBLÉE 05 - CONTRÔLE D’ÉTANCHÉITÉ 06 - UTILISATION 07 - MISE EN SERVICE 08 - NETTOYAGE, ENTRETIEN ET MAINTENANCE 09 - DONNÉES TECHNIQUES 10 - CONFORMITÉ... -
Seite 21: Avertissements
02 - AVERTISSEMENTS Veuillez lire et comprendre entièrement ce mode d‘emploi avant d‘essayer d‘assembler, d‘instal- ler et d‘utiliser le produit! Ce manuel contient des informations essentielles sur l‘assemblage, l‘utilisation et l‘entretien de cet appareil. Des informations générales de sécurité sont présentées sur ces premières pages et se trouvent également tout au long du manuel. - Seite 22 • Cet appareil de chauffage est hautement combustible pendant son utilisation et peut enflammer des matériaux inflammables à proximité du brûleur. Maintenez les matériaux inflammables à au moins 100 cm des côtés et 100 cm du haut. Gardez l‘essence et les autres liquides et gaz inflam- mables à...
-
Seite 23: Contenu
03 - CONTENU N° Description Qté 450 mm 1 Panneau réflecteur hler schutz 2 Protection de la flamme 3 Tube en verre 4 Protecteur 5 Support supérieur 6 Revêtement frontal rrichtung 7 Revêtement latéral 8 Support inférieur 9 Plaque de base ütze 10 Chaîne 11 Bouchon à... -
Seite 24: Assemblée
04 - ASSEMBLÉE RESOURCES N° Description Qté N° Description Qté A Panneau réflecteur H Fond du revêtement latéral B Protection de la flamme I Fond de carénage avant C Plaque de recouvrement J Tuyau de gaz + régulateur D Tube en verre K Unité... - Seite 25 N° Description Qté N Roues O Plaque de base 12 Écrou à bride M8 18 Vis M8 * 12 mm Étape 1 Montez les roues (N) sur la plaque de base (O). Fixez l‘ensemble de la roue (N) à la plaque de base (O) avec 4 vis M8x12 mm (18) et 4 écrous à...
- Seite 26 N° Description Qté Unité de base avec brûleur L Boîte de contrôle 19 Vis 3/16" Étape 3 Installez le boîtier de commande (L). Fixez le boîtier de commande (L) à la Unité de base avec brûleur (K) avec 4 vis 3/16“ (19). N°...
- Seite 27 N° Description Qté Plaque de recouv- rement E Support supérieur 19 Vis 3/16" Étape 5 Assemblez la plaque supérieure (C) au support supérieur (E). Fi- xez la plaque supérieure (C) au support supérieur (E) à l‘aide de 8 morceaux de vis 3/16“ (19). N°...
- Seite 28 N° Description Qté C Plaque de recouvrement D Tube en verre G Anneau de silicone noir Pour faciliter K Unité de base avec brûleur l‘installation, placez avec brûleur (K). Vérifiez la bague en silicone Étape 7 noire sur la plaque Assemblez soigneuse- et assurez-vous que le...
- Seite 29 N° Description Qté Fond du panneau latéral 19 Vis 3/16" Étape 9 Fixez les trois panneaux latéraux à la partie inférieure (H) de l‘appa- reil de chauffage à l‘aide de 12 vis de 3/16 po (19). Remarque: Ne couvrez pas la par- tie avant où...
-
Seite 30: Schlauch- Und Regleranschluss
N° Description Qté L Boîte de contrôle 22 Pile AAA Étape 10 Conseil: Nous Raccordement du tuyau pour le recommandons propane. de remplacer les tuyaux de AVERTISSEMENT: Veillez à ne pas gaz tous les huit laisser le tuyau entrer en contact à... -
Seite 31: Contrôle D'étanchéité
05 - CONTRÔLE D’ÉTANCHÉITÉ L‘étanchéité des raccordements de gaz est contrôlée à l’usine avant la livraison. Un contrôle total de l’étanchéité doit être effectué sur le lieu où l’appareil se trouve après son installation. Pendant la vérification, aucune source de chaleur et d’inflammation ne doit se trouver à proximité de l’appareil! 1. -
Seite 32: Mise En Service
07 - MISE EN SERVICE Important: Lors de la première utilisation ou après avoir remplacé une bouteille de gaz à l‘étape 2, attendez au moins 60 secondes pour purger l‘air des conduites. 1. Ouvrez complètement la valve de la bouteille de gaz. 2. -
Seite 33: Nettoyage, Entretien Et Maintenance
08 - NETTOYAGE, ENTRETIEN ET MAINTENANCE Stockage Avant de ranger l’appareil. Fermez la valve de la bouteille de gaz en serrant bien et retirez le tuyau de gaz et le régulateur. Puis appuyez sur le régulateur pour le mettre sur Pilot. Ne mettez le capot de protection que lorsque l‘appareil a refroidi. -
Seite 34: Conformité / Résolution De Problèmes
10 - CONFORMITÉ / RÉSOLUTION DE PROBLÈMES Garantie L‘appareil sont contrôlés de manière précise avant la livraison. Si malgré tout un vice devait être constaté sur votre appareil, adressez-vous en toute confiance à notre revendeur. Veuillez joindre la preuve d‘achat, car celle-ci doit être présentée pour la prestation de garantie. - Seite 35 INSTRUCTIONS D’ÉLIMINATION DES COMPOSANTS ÉLECTRIQUES DU PRODUIT Conformément à l’article 26 du décret-loi du 31 mars 2015 portant application de la directive 2015/863/EU et à la loi du 4 mars 2014 portant application de la directive 2011/65/CE concernant la réduction de l’utilisation de substances dangereuses dans les équipements électriques et électroniques et la gestion des déchets.
- Seite 36 ITALIANO...
- Seite 37 PHÖNIX RISCALDATORE PER ESTERNI DITTA Sonnenkönig of Switzerland Olensbachstrasse 9-15 Nº articolo 3 0 3 1 0 1 8 8 CH-9631 Ulisbach Tel. Int. +41 58 611 60 00 Versione 22.04.2020 Tel. Nat. 0848 870 850...
-
Seite 38: Indice
01 - INDICE 01 - INDICE 02 - AVVISI 03 - CONTENUTO 04 - MONTAGGIO 05 - CONTROLLO DELL‘IMPERMEABILITÀ 06 - UTILIZZO 07 - STARTUP MESSA IN SERVIZIO 08 - PULIZIA, CURA E MANUTENZIONE 09 - DATI TECNICI 10 - CONFORMITÀ / RISOLUZIONE DEI PROBLEMI... -
Seite 39: Avvisi
02 - AVVISI Si prega di leggere e comprendere completamente questo manuale di istruzioni prima di tentare di montare, installare e utilizzare il prodotto! Questo manuale contiene informazioni critiche sul montaggio, l‘uso e la manutenzione di questo dispo- sitivo. Le informazioni generali sulla sicurezza sono presentate in queste prime pagine e possono essere trovate anche in tutto il manuale. - Seite 40 • Questo riscaldatore è altamente combustibile durante l‘uso e può incendiare materiali infiamma- bili vicino al bruciatore. Tenere i materiali infiammabili ad almeno 100 cm dai lati e 100 cm dalla cima. Tenere la benzina e altri liquidi e gas infiammabili lontano dal riscaldatore. •...
-
Seite 41: Contenuto
03 - CONTENUTO N° Descrizione Qtà 450 mm 1 Pannello riflettente hler schutz 2 Protezione dalle fiamme 3 Tubo di vetro 4 Dispositivo di protezione 5 Supporto superiore 6 Rivestimento anteriore rrichtung 7 Pannello laterale 8 Supporto inferiore 9 Piastra di base ütze 10 Catena 11 Tappo a vite... -
Seite 42: Montaggio
04 - MONTAGGIO AIUTO N° Descrizione Qtà N° Descrizione Qtà A Pannello riflettore Carenatura anteriore inferiore B Protezione dalla fiamma J Tubo del gas + regolatore C Piastra di copertura Unità di base con brucia- D Tubo di vetro tore E Supporto superiore L Scatola di controllo Coperchio di protezione... - Seite 43 N° Descrizione Qtà N Ruote O Piastra di base 12 Dado flangiato M8 18 Vite M8 * 12 mm Passo 1 Montare le ruote (N) sulla piastra di base (O). Fissare il gruppo ruo- ta (N) alla piastra di base (O) con 4 pezzi di vite M8x12 mm (18) e 4 pezzi di dado flangiato M8 (12).
- Seite 44 N° Descrizione Qtà Unità di base con bruciatore L Scatola di controllo 19 Vite 3/16" Passo 3 Montare la scatola di controllo (L). Fissare la scatola di controllo (L) all‘unità di base con il brucia- tore (K) usando 4 viti da 3/16“ (19). N°...
- Seite 45 N° Descrizione Qtà C Piastra di copertura E Supporto superiore 19 Vite 3/16" Passo 5 Assemblare la piastra superio- re (C) al supporto superiore (E). Fissare la piastra superiore (C) al supporto superiore (E) con 8 pezzi di vite da 3/16“ (19). N°...
- Seite 46 N° Descrizione Qtà C Piastra di copertura D Tubo di vetro G Anello in silicone nero Per facilitare l‘in- K Unità di base con bruciatore stallazione, mettere l‘anello di silicone base con il bruciatore (K). Passo 7 nero sulla piastra Assemblare con cura il Controllare e assicurarsi centrale e poi...
- Seite 47 N° Descrizione Qtà Pannello laterale inferiore 19 Vite 3/16" Passo 9 Fissare i tre pannelli laterali al fondo (H) del riscaldatore con 12 viti da 3/16“ (19). Nota: Non coprire la parte ante- riore dove si trova la manopola di controllo.
-
Seite 48: Schlauch- Und Regleranschluss
N° Descrizione Qtà L Scatola di controllo 22 Batteria AAA Passo 11 Suggerimento: Attacco del tubo flessibile per il Si consiglia di propano. sostituire i tubi del gas ogni ATTENZIONE: Fare attenzione a otto-dieci anni. non far entrare in contatto il tubo con le superfici ad alta tempera- tura, questo potrebbe causare la fusione o una perdita che potrebbe... -
Seite 49: Controllo Dell'impermeabilità
05 - CONTROLLO DELL‘IMPERMEABILITÀ L‘impermeabilità dei raccordi del gas viene controllata in fabbrica prima della consegna. Un con- trollo totale dell‘impermeabilità deve essere effettuato nel luogo in cui viene installato l‘articolo. Durante il controllo non ci devono essere fonti di calore e di accensione vicine alla stufa! 1. -
Seite 50: Startup Messa In Servizio
07 - STARTUP MESSA IN SERVIZIO Importante: Quando si usa per la prima volta o dopo aver sostituito una bombola di gas al punto 2, attendere almeno 60 secondi per spurgare l‘aria dalle linee. 1. Aprire completamente la valvola della bombola del gas. 2. -
Seite 51: Pulizia, Cura E Manutenzione
08 - PULIZIA, CURA E MANUTENZIONE Stoccaggio Prima di riporre lo strumento. Chiudere bene la valvola della bombola del gas e rimuovere il tubo del gas e il regolatore. Poi premere il regolatore e metterlo su Pilot. Indossare il cappuccio di protezione solo quando il dispositivo si è... -
Seite 52: Conformità / Risoluzione Dei Problemi
10 - CONFORMITÀ / RISOLUZIONE DEI PROBLEMI Garanzia I prodotti vengono controllati attentamente prima della spedizione. Se dovesse comunque presentarsi un vizio sul vostro apparecchio, vi invitiamo a rivolgervi in tutta tranquillità al vostro rivenditore. Vi rammentiamo di portare appresso la ricevuta d’acquisto, che deve essere presentata per ogni prestazione in garanzia. Il periodo di garanzia è... - Seite 53 INFORMATIVA SMALTIMENTO RELATIVA ALLA PARTE ELETTRICA DEL PRODOTTO Ai sensi del D.L. 31 marzo 2015 art. 26, di attuazione della direttiva 2015/863/EU e del D.L. 27 del 31 marzo 2015, di attuazione della direttiva 2015/863/EU relativa alla riduzione dell‘uso di sostanze pericolose nelle apparecchia- ture elettriche ed elettroniche, nonché...
- Seite 54 ENGLISH...
- Seite 55 PHÖNIX GARDEN FLAME COMPANY Sonnenkönig of Switzerland Olensbachstrasse 9-15 Item No. 3 0 3 1 0 1 8 8 CH-9631 Ulisbach Tel. Int. +41 58 611 60 00 Version 22.04.2020 Tel. Nat. 0848 870 850...
-
Seite 56: Content
01 - CONTENT 01 - CONTENT 02 - WARNING NOTICE 03 - SCOPE OF DELIVERY 04 - ASSEMBLY 05 - GASLEAK TESTING 06 - CONTROL 07 - STARTUP 08 - CLEANING, CARE AND MAINTENANCE 09 - TECHNICAL DETAILS 10 - CONFORMITY / TROUBLE SHOOTING... -
Seite 57: Warning Notice
02 - WARNING NOTICE Please read and understand this instruction manual completly before attempting to assemble, install and use the product! This Manual contains critical information about the assembly, usage and maintenance of this device. General safety information is presented on these first pages and can also be found throughout the manual. - Seite 58 • This heater is highly incandescent during use and may ignite flammable materials near the bur- ner. Keep flammable materials at least 100 cm from the sides and 100 cm from the top. Keep gasoline and other flammable liquids and gases away from the heater. •...
-
Seite 59: Scope Of Delivery
03 - SCOPE OF DELIVERY No Description 450 mm 1 Reflector panel hler schutz 2 Flameguard 3 Glass tube 4 Protective device 5 Upper support 6 Front cover rrichtung 7 Side cover 8 Lower support 9 Bottom plate ütze 10 Chain 11 Screw cap 12 Flange nut M8 13 Wing nut... -
Seite 60: Assembly
04 - ASSEMBLY RESOURCES No Description No Description A Reflector Panel I Front cover bottom B Flame guard J Gas hose + regulator C Cover plate K Base unit with burner D Glass tube L Control box E Upper support M Lower support F Protective cover on top N Wheels... - Seite 61 No Description N Wheels O Base plate 12 Flange nut M8 18 Screw M8 * 12 mm Step 1 Mount the wheels (N) to the base plate (O). Fasten the wheel assem- bly (N) to the base plate (O) with 4 pieces M8x12 mm screw (18) and 4 pieces M8 flange nut (12).
- Seite 62 No Description K Base unit with burner L Control box 19 Screw 3/16" Step 3 Mount the control box (L). Fasten the control box (L) to the base unit with burner (K) using 4 pieces of 3/16“ (19) screw. No Description E Upper support K Base unit with burner 19 Screw 3/16"...
- Seite 63 No Description C Cover plate E Upper support 19 Screw 3/16" Step 5 Mount the top plate (C) to the upper support (E). Fasten the top plate (C) to the upper support (E) with 8 pieces of 3/16“ (19) screw. No Description A Reflector Panel B Flame guard...
- Seite 64 No Description C Cover plate D Glass tube G Black silicone ring To facilitate ins- K Base unit with burner tallation, place the black silicone ring Step 7 sure that the glass tube on the center plate (D) is correctly positioned Carefully assemble the and then install the glass tube (D) by lifting...
- Seite 65 No Description H Side panel bottom 19 Screw 3/16" Step 9 Attach the three side panels to the bottom (H) of the heater with 12 3/16“ (19) screws. Note: Do not cover the front where the control knob is located. No Description I Front panel bottom L Control box...
- Seite 66 No Description L Control box 22 Battery AAA Step 11 Tip: We recom- Hose connection for propane. mend replacing gas hoses every WARNING: Be careful that the eight to ten hose does not come in contact years. with the high temperature surfa- ces, this could cause melting or leakage, which could cause a fire.
-
Seite 67: Gasleak Testing
05 - GASLEAK TESTING The gas connections are tested for tightness in the factory before delivery. A complete leak test must be carried out at the installation site after installation. During the test, no heat and fire sources can be present in the vicinity of the device! 1. -
Seite 68: Startup
07 - STARTUP Important: When using for the first time or after replacing a gas cylinder in step 2, wait at least 60 seconds to remove air from the lines. 1. Turn the valve of the gas bottle fully open. 2. -
Seite 69: Cleaning, Care And Maintenance
08 - CLEANING, CARE AND MAINTENANCE Storage Before you store the device, make sure that the gasvalve is completly closed and the pressure regulator disconnected from the gastank. Only put the protection hood on, when device has cooled. Cleaning Clean coated surfaces with a soft, damp cloth. Never clean the heater with flammable or caustic clea- ning agents. -
Seite 70: Conformity / Trouble Shooting
10 - CONFORMITY / TROUBLE SHOOTING Warranty All products are checked from our company before the delivery. In case that there is a lack on your product, please contact the vendor. Please bring your proof of purchase for guarantees. Please save the packaging materials of the unit. - Seite 71 DISPOSAL INSTRUCTIONS FOR THE ELECTRICAL PART OF THE PRODUCT In accordance with Article 26 of the Decree-Law of 14 March 2014 implementing Directive 2012/19/EC, and the Law of 31 March 2015 implementing Directive 2015/863/EU on the reduction of the use of hazardous substances in electrical and electronic equipment and on waste management.