Inhaltsverzeichnis
Werbung
Verfügbare Sprachen
Verfügbare Sprachen
Quicklinks
• FCP815X E0/E
• FCP825XL E0/E
• FCS200X WIFI
• FCS600X WIFI
• FCT615X WIFI
• FCT615XNF WIFI
• FCT825XL WIFI
• FCP602X E0/E
• FCP602X E0C/E
• FCP602X E0E/E
• FCT612X WIFI
• FCEX65WIFI
• FCXP825X E0/E
• FCXP645X E0/E
• FCXT600X WIFI
• FCT600N WIFI
• FCT605X WIFI
• OCNTA05I WIFI
• FCT615N WIFI
CANDY HOOVER GROUP S.R.L. • Via Comolli 16 • 20861 Brugherio (MB) - Italy
USER INSTRUCTIONS
OVENS
KULLANIM KILAVUZU
FIRINLAR
NOTICE D'EMPLOI ET D'INSTALLATION
DES FOURS ENCASTRABLES
MANUALE D'ISTRUZIONI
FORNO
INSTRUCCIONES DE USO
HORNOS EMPOTRABLES
PIEKARNIKI DO ZABUDOWY
INSTRUKJA OBSŁUGI
FORNOS
MANUAL DE INSTRUÇÕES DE UTILIZAÇÃO
EINBAUBACKKÖFEN
BEDIENUNGSANLEITUNG
02
EN
14
TR
28
FR
40
IT
52
ES
64
PL
76
PT
88
DE
Werbung
Kapitel
Inhaltsverzeichnis

Verwandte Anleitungen für Candy FCP815X E0/E


Inhaltszusammenfassung für Candy FCP815X E0/E
- Seite 1 PIEKARNIKI DO ZABUDOWY • FCXT600X WIFI INSTRUKJA OBSŁUGI • FCT600N WIFI FORNOS • FCT605X WIFI MANUAL DE INSTRUÇÕES DE UTILIZAÇÃO • OCNTA05I WIFI EINBAUBACKKÖFEN • FCT615N WIFI BEDIENUNGSANLEITUNG CANDY HOOVER GROUP S.R.L. • Via Comolli 16 • 20861 Brugherio (MB) - Italy...
-
Seite 2: General Warnings
General Warnings • During cooking, moisture may condense inside • Only use the meat probe recommended for this the oven cavity or on the glass of the door. This is a oven. normal condition. To reduce this effect, wait 10- •... - Seite 3 • A long power supply failure during an occurring cooking phase may cause a malfunction of the monitor. ln this case contact customer service. • The appliance must not be installed behind a decorative door in order to avoid overheating. •...
-
Seite 4: Inhaltsverzeichnis
Summary General Instructions 1.1 Safety indications 1.2 Electrical safety 1.3 Recommendations 1.4 Installation 1.5 Waste management 1.6 Declaration of compliance 2.1 Overview Product Description 2.2 Accessories 2.3 First use Use of the Oven 3.1 Display description 3.2 Cooking modes Oven Cleaning and Maintenance 4.1 General notes on cleaning 4.2 Aquactiva Function 4.3 Maintenance... -
Seite 5: General Instructions
1. General Instructions We thank you for choosing one of our products. For the best results with your oven, you should read this manual carefully and retain it for future reference. Before installing the oven, take note of the serial number so that you can give it to customer service staff if any repairs are required. -
Seite 6: Declaration Of Compliance
• By placing the mark on the appliance, we are confirming compliance • Hereby, Candy Hoover Group Srl declares that the radio equipment is in to all relevant European safety, health and environmental requirements compliance with Directive 2014/53/EU. The full text of the EU declaration which are applicable in legislation for this product. -
Seite 7: Display Description
3. Use of the Oven (According to model) 3.1 Display description WARNING : the first operation to carry out after the oven has been installed or following the interruption 1. Thermostat selector knob of power supply (this is recognizable the display pulsating and showing 12:00 ) is setting the correct time. - Seite 8 2,0 W ports are connected and all wireless 8.0 or higher) devices. network ports are activated: • If you already have a Candy simply-Fi user profile, you can login using your credentials. Starting from an oven that is not STEP 3 enrolled, putting the right knob on the R e s e t p o s i t i o n .
- Seite 9 In this case, we highly recommend you to bring the router near • Return to the Candy simply-Fi App and wait for the App to detect the the appliance (if possible) or contact your internet provider to purchase a appliance.
-
Seite 10: Cooking Modes
3.2 Cooking Modes Function T °C T °C Function (Depends on the oven model) Dial Suggested Range LAMP: Turns on the oven light. DEFROST: When the dial is set to this position. The fan circulates air at room temperature around the frozen food so that it defrosts in a few minutes without the protein content of the food being changed or altered. -
Seite 11: General Notes On Cleaning
4. Oven cleaning and maintenance 4.1 General notes on cleaning The lifecycle of the appliance can be extended through regular cleaning. ACCESSORIES Wait for the oven to cool before carrying out manual cleaning operations. Clean accessories with a wet, soapy sponge before rinsing and drying them: Never use abrasive detergents, steel wool or sharp objects for cleaning, so avoid using abrasive detergents. -
Seite 12: Removal And Cleaning Of The Glass Door
REMOVAL AND CLEANING OF THE GLASS DOOR 1. Open the oven door. 2.3.4. Lock the hinges, remove the screws and remove the upper metal cover by pulling it upwards. 5.6. Remove the glass, carefully extracting it from the oven door (NB: in pyrolytic ovens, also remove the second and third glass (if present)). 7. -
Seite 13: Changing The Bulb
CHANGING THE BULB 1. Disconnect the oven from the mains supply. 2. Undo the glass cover, unscrew the bulb and replace it with a new bulb of the same type. 3. Once the defective bulb is replaced, replace the glass cover. 5. -
Seite 14: Güvenlik Uyarıları
Güvenlik uyarıları • Pişirme sırasında fırın bölmesinde veya kapağın • Yalnızca bu fırın için tavsiye edilen et probunu camında nem yoğunlaşabilir. Bu normal bir kullanın. durumdur. Bu etkiyi azaltmak için yemeği fırının • Temizlik işlemleri için buharlı temizleyici içine yerleştirmeden önce ve gücü açtıktan sonra kullanmayın. - Seite 15 elektrik kesintisi, monitörün arızalanmasına neden olabilir. Bu durumda müşteri hizmetleriyle iletişime geçin. • Cihaz, aşırı ısınmayı önlemek için dekoratif bir kapının arkasına monte edilmemelidir. • Rafı fırının içine yerleştirirken stopun yukarıya baktığından ve bölmenin arka tarafında olduğundan emin olun. Raf, bölmeye tamamen girerek yerleştirilmelidir.
-
Seite 16: Sorun Giderme
Özet Genel Açıklamalar 1.1 Güvenlik ipuçları 1.2 Elektriksel güvenlik 1.3 Tavsiyeler 1.4 Kurulum 1.5 Atık yönetimi 1.6 Uygunluk beyanı 2.1 Genel bakış Ürün Açıklaması 2.2 Aksesuarlar 2.3 İlk kullanım Fırının Kullanımı 3.1 Gösterge açıklamaları 3.2 Pişirme modları Fırının Temizlenmesi ve Bakımı 4.1 Temizleme hakkında genel notlar 4.2 Kolay Temizlenme Fonksiyonu 4.3 Bakım... -
Seite 17: Genel Açıklamalar
1. Genel Açıklamalar Ürünlerimizden birini tercih ettiğiniz için teşekkür ederiz. Fırınınızdan en iyi sonuçları almak için bu kılavuzu dikkatle okuyun ve daha sonra başvurmak için saklayın. Fırının montajından önce, herhangi bir onarım gerekmesi halinde müşteri hizmetleri personeline vermek üzere seri numarasını not edin. Fırını ambalajından çıkardıktan sonra nakliye sırasında hasar almamış... -
Seite 18: Uygunluk Beyanı
• Bu cihazın üzerinde bulunan işareti, mevzuata uygun şekilde bu • Candy Hoover Group Srl, işbu belge ile telsiz ekipmanın 2014/53/EU sayılı ürün için geçerli olan tüm Avrupa güvenlik, sağlık ve çevre gereksinimlerine Direktife uygun olduğunu beyan eder. AB uygunluk beyanının tam metni şu uygunluğun garanti edildiği anlamına gelir. - Seite 19 3. Fırının Kullanımı (Modele göre değişmektedir.) 3.1 Gösterge açıklamaları UYARI: Fırın yerine monte edilip elektrik bağlantısı yapıldığında veya elektrik beslemesi kesilip tekrar geri 1- Sıcaklık seçici düğme geldiğinde, gösterge yanıp sönmeye başlar. Bu aşamada saatin ( 12:00 ) ayarlanması gerekir. Sağ alt LED 2- Termostat sinyal lambası...
- Seite 20 2. ADIM • Mağazadan Candy simply-Fi Uygulamasını indirin. Ağa bağlı ekipmanlar için ürün bilgileri • Candy simply-Fi Uygulamasını açın ve “Kayıt Ol” öğesine dokunarak kullanıcı profilinizi oluşturun. Gizlilik politikasını kabul edin ve gerekli Tüm kablolu ağ bağlantı noktalarının alanları doldurun.
- Seite 21 • Program seçim düğmesini WI-FI konumuna döndürün: wifi ışığı açılacaktır • Mağazadan Candy simply-Fi Uygulamasını indirin. ve artık fırını uzaktan kumanda edebilirsiniz. • Candy simply-Fi Uygulamasını açın ve “Kayıt Ol” öğesine dokunarak kullanıcı profilinizi oluşturun. Gizlilik politikasını kabul edin ve gerekli alanları doldurun.
- Seite 22 3.2 Pişirme Modları Fonksiyon Varsayılan Önerilen Fonksiyon (Fırın modeline bağlıdır) ikonu Sıcaklık °C sıcaklık °C LAMBA: Fırın lambasını yakar. BUZ ÇÖZME: Düğme bu konuma alındığı zaman fan oda sıcaklığında havayı donmuş gıdanın etrafında dolaştırır, böylece gıdanın protein içeriği değişmeden birkaç dakika içinde buzu çözülür. FANLI PİŞİRME: Bu yöntemi kümes hayvanları, çörekler, balık ve sebzeler için kullanmanızı...
- Seite 23 4. Fırının Temizlenmesi ve Bakımı 4.1 Temizleme hakkında genel notlar Düzenli temizlik ile cihazın kullanım ömrü uzatılabilir. Elle temizlik AKSESUARLAR işlemlerini yapmadan önce fırının soğumasını bekleyin. Temizlik için asla Aksesuarları sabunlu su ile ıslatılmış bir süngerle temizleyin, ardından aşındırıcı deterjanlar, çelik tel veya keskin nesneler kullanmayın, aksi durulayın ve kurutun: aşındırıcı...
- Seite 24 CAMIN SÖKÜLMESİ VE TEMİZLENMESİ 1. Fırının kapağını açın. 2.3.4. Menteşeleri kilitleyin, vidaları çıkarın ve yukarı doğru çekerek üst metal kapağı çıkarın. 5.6. Camı dikkatli bir şekilde fırın kapağından çekerek çıkarın (Not: pirolitik fırınlarda ikinci ve üçüncü camı (eğer varsa) da çıkarın). 7.
- Seite 25 AMPULÜN DEĞİŞTİRİLMESİ 1. Fırını elektrik beslemesinden ayırın. 2. Cam kapağı sökün, ampulü sökün ve aynı türde yeni bir ampul ile değiştirin. 3. Arızalı ampul değiştirildikten sonra cam kapağı yerine takın. 5. Sorun Giderme 5.1 Sorun giderme SORUN OLASI NEDENİ ÇÖZÜMÜ Fırın ısınmıyor Saat ayarlanmamış...
-
Seite 26: Tüketi̇ci̇ Hi̇zmetleri̇
Candy Hoover Euroasia tarafından sağlanan garanti şartları aşağıdaki koşullarda geçersiz olacaktır. • Ürüne, yetkili servis dışındaki kişiler tarafından müdahale edilmesi, elektrik-su kesintisi ve üründen kaynaklanmayan kaçaklar garanti kapsamı... -
Seite 27: Garanti̇ Belgesi̇
şahıslar tarafından bakımı, onarımı veya başka bir nedenle müdahale edilmemiş olması şartıyla bütün parçaları dahil olmak üzere tamamı malzeme, işçilik ve üretim hatalarına karşı ürünün teslim tarihinden itibaren 3 ( ÜÇ ) YIL SÜRE İLE CANDY HOOVER EUROASIA A.Ş. TARAFINDAN GARANTİ EDİLMİŞTİR. Malın bütün parçaları dahil olmak üzere tamamı garanti kapsamındadır. - Seite 28 Conseils De Securite • Pendant la cuisson, de l’humidité peut se surface et provoquer la rupture de la vitre. condenser à l’intérieur de la cavité ou sur la vitre de • Coupez le four avant de retirer les pièces la porte. Il s’agit d’un phénomène normal. Pour amovibles.
- Seite 29 personnel qualifié. Le conducteur de mise à la terre (jaune et vert) doit être environ 10 mm plus long que les autres conducteurs. Pour toutes réparations, contactez le service après-vente en insistant sur l’utilisation de pièces de rechange d’origine. • Le non-respect des consignes ci-dessus peut compromettre la sécurité...
- Seite 30 SOMMAIRE Instructions Générales 1.1 Indications de sécurité 1.2 Sécurité électrique 1.3 Recommandations 1.4 Installation 1.5 La gestion des déchets et la protection de l'environnement 1.6 Déclaration de conformité 2.1 Vue d'ensemble Description du produit 2.2 Accessoires 2.3 Première utilisation Utilisation du Four 3.1 Description de l'affichage 3.2 Mode de cuisson Nettoyage du four et maintenance...
-
Seite 31: Instructions Générales
1. Instructions générales Nous vous remercions d'avoir choisi un de nos produits. Pour obtenir les meilleurs résultats avec votre four, vous devez lire attentivement ce manuel et le conserver pour toute consultation ultérieure. Avant d'installer le four, notez le numéro de série, il vous sera demandé par le support technique si des réparations sont nécessaires. Après avoir enlevé... -
Seite 32: Déclaration De Conformité
• En plaçant la marque sur ce produit, nous confirmons la conformité à • Le soussigné, Candy Hoover Group Srl, déclare que l'équipement toutes les exigences européennes concernant la protection de l’environnement radioélectrique est conforme à la directive 2014/53/UE. Le texte complet de la et de la santé, ainsi que la sécurité, applicables selon la loi à... -
Seite 33: Description De L'affichage
3. Utilisation du Four (Selon le modèle) 3.1 Description de l'affichage ATTENTION: la première opération à exécuter après l'installation ou après une coupure de 1. Bouton sélecteur de thermostat courant (de telles situations se reconnaissent parce que le atticheur est sur 12:00 et clignote)est 2. - Seite 34 (version 8.0 ou ultérieure). tous les ports de réseau sans fil sont • Si vous possédez déjà un profil d'utilisateur Candy simply-Fi, vous pouvez activés : vous connecter en utilisant vos informations d'identification.
- Seite 35 NOTES • L'application est disponible pour les appareils Android (version 4.4 ou supérieure) et iOS (version 8.0 ou ultérieure). • Si vous possédez déjà un profil d'utilisateur Candy simply-Fi, vous pouvez vous connecter en utilisant vos informations d'identification. L'ÉTAPE 3 •...
-
Seite 36: Mode De Cuisson
3.2 Mode de cuisson Bouton de T °C T °C Fonction (selon modèle) sélection Suggéré Gamme L'AMPOULE: Allumage de l’éclairage du four DÉCONGÉLATION: fonctionnement de la turbine de cuisson qui brasse l'air dans l'enceinte du four. Idéale pour réaliser une décongélation avant une cuisson. -
Seite 37: Aquactiva Fonction
4. Nettoyage du four et maintenance 4.1 Remarques générales sur le nettoyage Le cycle de vie de l'appareil peut être étendu grâce à un nettoyage régulier. humide. Attendez le refroidissement du four avant de procéder à des opérations de ACCESSOIRES nettoyage manuel. -
Seite 38: Retrait Et Nettoyage Des Vitres
RETRAIT ET NETTOYAGE DES VITRES 1. Ouvrez la porte du four. 2.3.4. Bloquer les charnières, enlever les vis et retirez le couvercle métallique supérieur en le tirant vers le haut. 5.6. Retirez le verre, l'extraire soigneusement de la porte du four (NB: dans les fours de pyrolyse, retirez également les deuxième et troisième verre (le cas échéant)). -
Seite 39: Remplacement De L'ampoule
REMPLACEMENT DE L'AMPOULE 1. Débranchez le four de la prise. 2. Défaire le couvercle en verre, dévisser l'ampoule et la remplacer par une ampoule du même modèle. 3. Une fois l'ampoule remplacée, remettre le couvercle en verre. 5. Dépannage 5.1 FAQ PROBLEMES CAUSE POSSIBLE SOLUTION... -
Seite 40: Indicazioni Di Sicurezza
Indicazioni di Sicurezza • Durante la cottura, l'umidità può condensarsi vetro del forno, dato che possono graffiare la all'interno del vano cottura o sul vetro della porta. superficie e causare la frantumazione del vetro. Questa è una condizione normale. Per ridurre •... - Seite 41 • Questa operazione deve essere eseguita solo da un tecnico adeguatamente addestrato. Il conduttore di terra (giallo-verde) deve essere circa 10 mm più lungo degli altri conduttori. Per qualsiasi tipo di riparazione, fare riferimento unicamente al Reparto di Assistenza Cliente e richiedere l'utilizzo di ricambi originali.
- Seite 42 Sommario Avvertenze Generali 1.1 Suggerimenti sulla sicurezza 1.2 Sicurezza elettrica 1.3 Raccomandazioni 1.4 Installazione 1.5 Gestione dei rifiuti 1.6 Dichiarazione di conformità 2.1 Panoramica Descrizione del Prodotto 2.2 Accessori 2.3 Primo utilizzo Utilizzo del Forno 3.1 Descrizione del display 3.2 Modalità di cottura Pulizia e Manutenzione del Forno 4.1.
-
Seite 43: Avvertenze Generali 1.1 Suggerimenti Sulla Sicurezza
1.6 Dichiarazione di conformità Apponendo il marchio su questo prodotto, confermiamo la conformità a tutti Con la presente il Candy Hoover Group, dichiara che questo elettrodomestico i requisiti di legge europei in materia di sicurezza, salute e tutela ambientale contrassegnato con è... -
Seite 44: Descrizione Del Prodotto
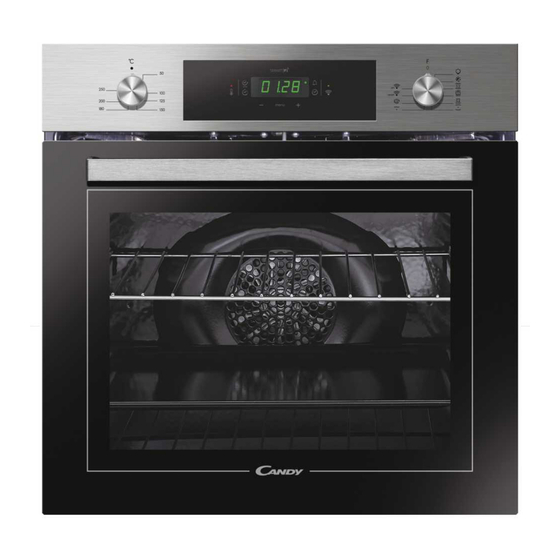
2. Descrizione del Prodotto 2.1 Panoramica 1. Pannello di controllo 2. Posizioni ripiani (castelletto se previsto) 3. Griglia metallica 4. Leccarda 5. Ventola (dietro alla piastra di acciaio) 6. Porta forno 2.2 Accessori (A seconda del modello Griglie laterali a rete Leccarda Raccoglie i residui di cibo che gocciolano durante la cottura. -
Seite 45: Utilizzo Del Forno
3. Utilizzo del Forno 3.1 Descrizione del display ATTENZIONE: la prima operazione da eseguire dopo l’installazione o dopo una interruzione 1. Manopola del termostato di corrente (tali situazioni si riconoscono perchè sul dispay lampeggia l’ora 12:00 ) è la 2. Spia del termostato regolazione dell’ora, come di seguito descritto. - Seite 46 STEP 2 • Scarica l'App Candy simply-Fi dallo store. • Apri l'App Candy simply-Fi e crea il tuo profilo utente facendo tap su “Registrati”. Accetta l'informativa sulla privacy e completa i campi. Informazioni sui prodotti per apparecchiature collegate in rete...
- Seite 47 STEP 2 forno da remoto. • Scarica l'App Candy simply-Fi dallo store. • Apri l'App Candy simply-Fi e crea il tuo profilo utente facendo tap su “Registrati”. Accetta l'informativa sulla privacy e completa i campi. NOTA • L'App è disponibile per dispositivi Android (dalla versione 4.4) e iOS (dalla versione 8).
-
Seite 48: Modalità Di Cottura
3.2 Modalità di cottura Manopola T° Intervallo Funzione (a seconda del modello) commutatore preimpostata di T° Accende la luce interna. SCONGELAMENTO: questa posizione permette di far circolare l’aria a temperatura ambiente intorno al cibo surgelato facendolo così scongelare in pochi minuti senza modificare od alterare il contenuto proteico. FORNO VENTILATO: l’aria calda viene ripartita sui diversi ripiani. -
Seite 49: Pulizia E Manutenzione Del Forno
4. Pulizia e manutenzione del forno 4.1 Note generiche di pulizia La vita di servizio dell’apparecchio si allunga se questo viene pulito ad inumidita. intervalli regolari. Attendere che il forno si raffreddi prima di effettuare le ACCESSORI operazioni di pulizia manuali. Non utilizzare mai detergenti abrasivi, Pulire gli accessori con una spugna imbevuta con acqua e sapone, pagliette di ferro o oggetti appuntiti per lapulizia, per non danneggiare in sciacquarli e asciugarli : evitare di usare detergenti abrasivi. -
Seite 50: Rimozione E Pulizia Della Porta In Vetro
RIMOZIONE E PULIZIA DELLA PORTA IN VETRO 1. Aprile la porta del forno. 2.3.4. Bloccare le cerniere, rimuovere le viti e rimuovere la copertura metallica superiore tirandola verso l’alto. 5.6. Rimuovere il vetro, estraendolo con molta cura, dalla controporta del forno (NB: nei forni pirolitici, rimuovere anche il secondo e terzo vetro (se presente)). -
Seite 51: Sostituzione Della Lampadina
SOSTITUZIONE DELLA LAMPADINA 1. Scollegare il forno alla rete. 2. Allentare la copertura in vetro, svitare la lampadina e sostituirla con una nuova dello stesso modello. 3. Una volta sostituita la lampadina difettosa, riavvitare la copertura in vetro. 5. Risoluzione dei Problemi 5.1 FAQ PROBLEMA POSSIBLE CAUSE... - Seite 52 Indicaciones de seguridad • Durante la cocción, podría condensarse humedad • Utilice únicamente la sonda térmica recomendada dentro de la cavidad del horno o en el cristal de la para este horno. puerta. Esto es normal. Para reducir este efecto, •...
- Seite 53 • Una interrupción prolongada de la corriente durante una fase de cocción puede causar una avería en el monitor. Póngase en contacto con el servicio de atención al cliente si esto ocurre. • El electrodoméstico no debe instalarse detrás de una puerta decorativa para evitar que se caliente en exceso.
- Seite 54 Resumen Advertencias generales 1.1 Recomendaciones de seguridad 1.2 Seguridad eléctrica 1.3 Recomendaciones 1.4 Instalación 1.5 Gestión de residuos 1.6 Declaración de conformidad 2.1 Descripción general Descripción del producto 2.2 Accesorios 2.3 Primer uso Utilización del horno 3.1 Descripción de la pantalla 3.2 Modalidades de cocción Limpieza y mantenimiento del horno 4.1 Notas genéricas de limpieza...
-
Seite 55: Advertencias Generales
1. Advertencias Generales Le agradecemos que haya elegido uno de nuestros productos. Para utilizar el horno de forma óptima es aconsejable leer con atención este manual y conservarlo para poder consultarlo en el futuro. Antes de instalar el horno, anote el número de serie para poder facilitárselo al personal del servicio de asistencia técnica en caso de solicitar su intervención. -
Seite 56: Descripción Del Producto
• Al colocar la marca en este producto, declaramos, bajo nuestra propia • Por la presente, Candy Hoover Group Srl declara que el equipo radioeléctrico responsabilidad, el cumplimiento de todos los requisitos europeos en términos es conforme con la Directiva 2014/53/UE. El texto completo de la declaración de seguridad, salud y medio ambiente, establecidos en la legislación para este... -
Seite 57: Utilización Del Horno
3. Utilización del horno ( De acuerdo con el modelo 3.1 Descripción de la pantalla ATENCIÓN: la primera operación que hay que efectuar después de la instalación o después de 1. Perilla selectora del termostato una interrupción de la corriente (este tipo de situaciones se reconocen al observar que en la 2. - Seite 58 -98 dBm • Descarga la App Candy simply-Fi desde la Store. • Abre la App Candy simply-Fi y crea tu perfil de usuario pulsando sobre “Registrar”. Acepta la política de privacidad y cumplimenta los campos Información de producto para equipos en red solicitados.
- Seite 59 • Sal del menú Ajustes de tu dispositivo. para conseguir un “Dispositivo que Amplie la Señal Wi-Fi” para incrementar • Vuelve a la APP Candy simply-Fi y espera a que la App detecte el la potencia de la señal. electrodoméstico.
- Seite 60 3.2 Modalidades de cocción Mando Rango T°C FUNCIÓN ( dependiendo del modelo selector de T°C establecida LAMPARA: Conecta la luz interior DESCONGELACIÓN: Funcionamiento de la turbina de cocción que hace circular el aire dentro del espacio del horno. Ideal para realizar una descongelación previa a una cocción.
-
Seite 61: Limpieza Y Mantenimiento Del Horno
4. Limpieza y mantenimiento del horno 4.1 Notas genéricas de limpieza La vida útil del aparato se prolonga si se limpia a intervalos regulares. Espere a JUNTA DE LA PUERTA DEL HORNO que el horno se enfríe antes de llevar a cabo las operaciones de limpieza Si se ensucia, la junta se puede limpiar con una esponja ligeramente húmeda. - Seite 62 EXTRACCIÓN Y LIMPIEZA DE LA PUERTA DE VIDRIO 1. Abra la puerta del horno. 2.3.4. Bloquee las bisagras, desenrosque los tornillos y extraiga la cubierta metálica superior tirando hacia arriba. 5.6. Extraiga el vidrio con mucho cuidado de la contrapuerta del horno (N. B.: si se trata de un horno pirolítico, extraiga también el segundo y el tercer vidrio si los hubiera).
-
Seite 63: Solución De Problemas
SUSTITUCIÓN DE LA BOMBILLA 1. Desenchufe el horno de la red eléctrica. 2. Suelte la cubierta de vidrio, desenrosque la bombilla y sustitúyala por una nueva del mismo modelo. 3. Una vez sustituida la bombilla defectuosa, vuelva a atornillar la cubierta de vidrio. 5. -
Seite 64: Instrukcje Bezpieczeństwa
Instrukcje Bezpieczeństwa ruchomych części. • Podczas gotowania wilgoć może skraplać się do komory piekarnika lub na szybkę drzwiczek. Jest to • Po wyczyszczeniu zmontować je zgodnie z zjawisko normalne. Aby je ograniczyć, należy instrukcjami. poczekać od 10 do 15 minut po włączeniu •... - Seite 65 do działu obsługi klienta i zażądać zastosowania oryginalnych części zamiennych. • Nieprzestrzeganie powyższej wskazówki może zakłócić bezpieczeństwo urządzenia i spowodować utratę gwarancji. • Nadmiar rozlanych substancji należy usunąć przed czyszczeniem urządzenia. • Długa awaria zasilania podczas etapu gotowania może spowodować usterkę monitora. W takiej sytuacji należy się...
- Seite 66 Spis treści Instrukcje ogólne 1.1 Wskazówki dotyczące bezpieczeństwa 1.2 Bezpieczeństwo elektryczne 1.3 Zalecenia 1.4 Instalacja 1.5 Zarządzanie odpadami 1.6 Deklaracja zgodności 2.1 Informacje ogólne Opis produktu 2.2 Akcesoria 2.3 Pierwsze użycie Obsługa piekarnika 3.1 Opis wyświetlacza 3.2 Tryby pieczenia Czyszczenie i konserwacja piekarnika 4.1 Ogólne informacje dotyczące czyszczenia 4.2 Funkcja Aquactiva 4.3 Konserwacja...
-
Seite 67: Instrukcje Ogólne 1.1 Wskazówki Dotyczące Bezpieczeństwa
1. Instrukcje ogólne Dziękujemy za wybór jednego z naszych produktów. Aby jak najlepiej wykorzystywać posiadany piekarnik, zachęcamy do uważnego przeczytania niniejszej instrukcji i starannego przechowywania jej, aby móc z niej skorzystać w razie potrzeby w przyszłości. Przed zainstalowaniem piekarnika należy zanotować jego numer seryjny, aby móc podać... -
Seite 68: Deklaracja Zgodności
• Poprzez umieszczenie oznaczenia na tym produkcie potwierdzamy, • Niniejszym firma Candy Hoover Group Srl oświadcza, że sprzęt radiowy że urządzenie to jest zgodne ze wszelkimi dotyczącymi tego produktu jest zgodny z dyrektywą 2014/53/UE. Cały tekst deklaracji zgodności UE jest obowiązującymi prawnie wymogami europejskimi w zakresie... -
Seite 69: Opis Wyświetlacza
3. Obsługa piekarnika (w zależności od modelu) 3.1 Opis wyświetlacza UWAGA 1. Pokrętło wyboru termostatu Pierwszą czynnością po zainstalowaniu piekarnika lub po przerwie w dolływie prądu jest ustawienia 2. Lampka kontrolna termostatu zegara. Brak ustawienia jest sygnalizowany znakiem 12:00 na wyświetlaczu. Dioda LED na dole po 3. - Seite 70 • Aplikacja jest dostępna dla urządzeń z systemem Android (wersja 4.4 lub wyższa) oraz iOS (wersja 8.0 lub wyższa). Informacje o produkcje w zakresie wyposażenia sieciowego • Jeśli mamy już profil użytkownika Candy simply-Fi, można zalogować się przy użyciu swoich danych dostępowych. Zużycie energii przez produkt w trybie ETAP 3 czuwania przy podłączeniu do sieci, jeśli...
- Seite 71 ETAP 6 wyższa) oraz iOS (wersja 8.0 lub wyższa). Na urządzeniu: • Jeśli mamy już profil użytkownika Candy simply-Fi, można zalogować się 1) Obrócić pokrętłem na program WI-FI RESET i poczekać 30 sekund. przy użyciu swoich danych dostępowych. 2) Gdy wskaźnik Wi-Fi zaczyna szybko migać, Bluetooth uruchomi się na 5 ETAP 3 sekund i w ciągu 5 minut można dokonać...
-
Seite 72: Tryby Pieczenia
3.2 Tryby pieczenia Pokrętło T ° C T °C Funkcja w zależności od modelu wyboru Zasuge- zakres funkcji rował LAMPA: Włącza lampkę piekarnika. ROZMRAŻAĆ: Gdy pokrętło ustawione jest w tej pozycji. Wentylator cyrkuluje powietrze w temperaturze pokojowej wokół zamrożonej żywności, dzięki czemu rozmraża się w ciągu kilku minut bez zmiany zawartości białka w żywności lub jej zmiany. FAN GOTOWANIE: Zalecamy stosowanie tej metody dla drobiu, ciastek, ryb i warzyw. -
Seite 73: Ogólne Informacje Dotyczące Czyszczenia
4. Czyszczenie i konserwacja piekarnika 4.1 Ogólne informacje dotyczące czyszczenia Żywotność urządzenia będzie dłuższa, jeśli będzie ono regularnie delikatnie zwilżoną gąbką. czyszczone. Należy poczekać na ochłodzenie się piekarnika przed AKCESORIA wykonaniem czyszczenia ręcznego. Nie używać nigdy do czyszczenia Akcesoria należy czyścić gąbką zwilżoną wodą i mydłem, przepłukać je i ściernych detergentów, myjek drucianych lub ostrych przedmiotów, aby nie wysuszyć: unikać... -
Seite 74: Wyjmowanie I Czyszczenie Drzwiczek
WYJMOWANIE I CZYSZCZENIE DRZWICZEK 1. Otwórz drzwiczki piekarnika. 2.3.4. Zablokuj zawiasy, odkręć śruby i zdejmij górną metalową pokrywę, pociągając ją do góry. 5.6. Wyjmij szybę, ostrożnie wyjmując ją z drzwiczek piekarnika (uwaga: w kuchenkach pirolitycznych usuń również drugą i trzecią szklankę (jeśli są obecne)). -
Seite 75: Wymiana Żarówki
WYMIANA ŻARÓWKI 1. Odłączyć piekarnik od zasilania. 2. Odłączyć pokrywę szklaną, odkręcić żarówkę i wymienić ją na nową tego samego typu. 3. Po wymienieniu przepalonej żarówki włożyć na miejsce szklaną pokrywę. 5. Rozwiązywanie problemów 5.1 Często zadawane pytania PROBLEM MOŻLIWA PRZYCZYNA ROZWIĄZANIE Piekarnik nie rozgrzewa się... -
Seite 76: Instruções De Segurança
Instruções De Segurança • Durante a cozedura, a humidade pode condensar raspadores metálicos afiados para limpar o vidro da no interior da cavidade do forno ou no vidro da porta do forno, pois podem arranhar a superfície e porta. Esta é uma condição normal. Para reduzir fazer com que o vidro se parta. - Seite 77 Departamento de Serviço ao Cliente e solicite o uso de peças originais. • O não cumprimento das indicações acima pode comprometer a segurança do aparelho e anular a garantia. • Todos os excessos ou materiais derramados devem ser removidos antes de limpar o aparelho. •...
- Seite 78 Índice 1.1 Indicações de segurança Instruções gerais 1.2 Segurança elétrica 1.3 Recomendações 1.4 Instalação 1.5 Gestão de resíduos 1.6 Declaração de conformidade 2.1 Visão geral Descrição do produto 2.2 Acessórios 2.3 Primeira utilização 3.1 Descrição do visor Utilização do forno 3.2 Modos de cozedura 4.1 Notas gerais sobre limpeza Limpeza e manutenção do forno...
-
Seite 79: Indicações De Carácter Geral
• Ao colocar a marca neste produto, declaramos, sob a nossa • O(a) abaixo assinado(a) Candy Hoover Group Srl declara que o presente responsabilidade, a conformidade do mesmo com todos os requisitos Europeus de equipamento de rádio está em conformidade com a Diretiva 2014/53/UE. O texto segurança, de saúde e ambientais mencionados na legislação para este produto. -
Seite 80: Descrição Do Produto
2. Descrição do produto 2.1 Visão geral 1. Painel de controlo 2. Posições da prateleira (grelha metálica lateral, se incluída) 3. Grelha metálica 4. Tabuleiro de molho 5. Ventoinha (atrás do painel em aço) 6. Porta do forno 2.2 Acessórios (De acordo com o modelo) Grelhas metálicas laterais Grelha metálica Recolhe os resíduos que pingam durante a cozedura dos alimentos nas... -
Seite 81: Descrição Do Visor
3. Utilização do forno (De acordo com o modelo) 3.1 Descrição do visor ATENÇÃO: a primeira operação que deve ser levada a cabo após a instalação do forno ou após 1. Botão seletor do termostato um corte de energia (facilmente detectado no display onde pisca 12:00) é o acertar das horas. 2. - Seite 82 -98 dBm • Descarregue a App Candy simply-Fi da loja online. • Abra a App Candy simply-Fi e crie o seu perfil de utilizador digitando a palavra “Registar”. Aceite a informação sobre política de privacidade e Informações sobre produtos para equipamentos em rede complete os campos seguintes.
- Seite 83 PASSO 2 • Descarregue a App Candy simply-Fi da loja online. • Abra a App Candy simply-Fi e crie o seu perfil de utilizador digitando a palavra “Registar”. Aceite a informação sobre política de privacidade e complete os campos seguintes.
- Seite 84 3.2 Modos de cozedura Indicador T °C T °C Função (depende do modelo do forno) de função predef. intervalo LUZ: Acende a luz do forno DESCONGELAR: Quando o indicador é definido para esta posição. A ventoinha promove a circulação de ar à temperatura ambiente em torno do alimento congelado para que o mesmo descongele em alguns minutos sem alterar o teor de proteína dos alimentos.
-
Seite 85: Limpeza E Manutenção Do Forno
4. Limpeza e manutenção do forno 4.1 Notas gerais sobre limpeza O ciclo de vida do equipamento pode ser aumentado com a limpeza regular ACESSÓRIOS do mesmo. Aguardar que o forno arrefeça antes de realizar algum tipo de Limpar os acessórios com uma esponja húmida e embebida em detergente operação de limpeza manual. - Seite 86 REMOÇÃO E LIMPEZA DA JANELA DO FORNO 1. Abrir a porta do forno. 2.3.4. Fechar as dobradiças, retirar os parafusos e a tampa superior metálica, puxando a mesma para cima. 5,6. Retirar o vidro, extraindo-o cuidadosamente da porta do forno (Nota: em fornos pirolíticos, retirar ainda o segundo e o terceiro vidro (se presente)).
-
Seite 87: Resolução De Problemas
MUDANDO O BULBO 1. Desligue o forno da fonte de alimentação. 2. Desaperte a tampa de vidro, desaperte a lâmpada e substitua-a por uma nova lâmpada do mesmo tipo. 3. Quando a lâmpada defeituosa for substituída, substitua a tampa de vidro. 5. - Seite 88 Sicherheitshinweise • Während des Garvorgangs kann Feuchtigkeit im Oberfläche zerkratzen und das Glas zerbrechen Ofenraum oder auf dem Glas der Tür können. kondensieren. Dies ist ein normaler Zustand. • Der Ofen muss ausgeschaltet werden, bevor die Um diesen Effekt zu verringern, warten Sie 10-15 herausnehmbaren Teile entfernt werden.
-
Seite 89: Der Einlegeboden Muss Vollständig In Den Hohlraum Eingesetzt Werden
durchgeführt werden. Der Schutzleiter /gelb-grün) muss ca. 10 mm länger sein als die anderen Leiter. Wenden Sie sich bei Reparaturen nur an den Kundendienst und fordern Sie die Verwendung von Original- Ersatzteilen an. • Die Nichteinhaltung der oben genannten Bestimmungen kann die Sicherheit des Gerätes beeinträchtigen und zum Erlöschen der Garantie führen. - Seite 90 Zusammenfassung Allgemeine Anweisungen 1.1 Sicherheitshinweise 1.2 Elektrische Sicherheit 1.3 Empfehlungen 1.4 Installation 1.5 Abfallentsorgung 1.6 Konformitätserklärung 2.1 Übersicht Produktbeschreibung 2.2 Zubehör 2.3 Inbetriebnahme Betrieb des Backofens 3.1 Beschreibung der Anzeige 3.2 Funktionen zum Garen Reinigung und Wartung des Backofens 4.1 Allgemeine Reinigungshinweise 4.2 Aquactiva Funktion 4.3 Wartung •...
-
Seite 91: Allgemeine Anweisungen
1. Allgemeine Anweisungen Vielen Dank, dass Sie sich für eins unserer Produkte entschieden haben. Damit Sie lange Freude mit Ihrem Backofen haben, sollten Sie diese Bedienungsanleitung sorgfältig durchlesen und zum Nachschlagen in der Zukunft aufbewahren. Notieren Sie sich vor dem Anschließen des Backofens die Seriennummer, sodass Sie diese im Reparaturfall an den Kundendienst weitergeben können. -
Seite 92: Konformitätserklärung
1.6 Konformitätserklärung • Mit der Verwendung des -Kennzeichens auf diesem Produkt • Hiermit erklärt Candy Hoover Group Srl , dass das Funkgerät der Richtlinie bestätigen wir, das sämtliche relevanten Sicherheits-, Gesundheits- und 2014/53/EU entspricht. Der vollständige Text der EU-Konformitätserklärung Umweltvorschriften eingehalten werden, die für dieses Produkt in Europa ist unter der folgenden Internetadresse verfügbar: www.candy-group.com... -
Seite 93: Beschreibung Der Anzeige
3. Betrieb des Backofens (Hängt vom Modell ab.) 3.1 Beschreibung der Anzeige HINWEIS: Das erste, was nach der Installation des Ofens oder nach der Unterbrechung der 1. Thermostatwahlschalter Stromversorgung (die am blinkenden Display mir der Anzeige 12:00 zu erkennen ist) gemacht werden 2. - Seite 94 Weitere Infos finden Sie im Handbuch. -98 dbm Schritt 2 • Laden Sie sich die App Candy simply-Fi aus dem S tore herunter. • Öffnen Sie die App Candy simply-Fi und erstellen Sie durch Tippen auf Produktinformationen für vernetzte Geräte „Register“...
- Seite 95 • Verlassen Sie die Einstellungen des Smartphones oder Tablets. dass, dass Ihr Router das Haushaltsgerät nicht erkennt. Wir empfehlen • Öffnen Sie wieder die App Candy simply-Fi und warten Sie, bis die App Ihnen in diesem Fall dringend, den Abstand zwischen Router und das Haushaltsgerät erkannt hat.
-
Seite 96: Funktionen Zum Garen
3.2 Funktionen zum Garen Funktion T °C T ° C Funktion (abhängig vom Ofenmodell) Wählen Bereich Empfohlen LAMPE: Schaltet das Licht im Backofen an. AUFTAUEN: Wenn die Auswahl auf diese Funktion eingestellt wird. Der Ventilator wälzt die Luft bei Raumtemperatur um, sodass das Tiefkühlprodukt innerhalb weniger Minuten aufgetaut wird, ohne dass sein Eiweißgehalt sich ändert. -
Seite 97: Reinigung Und Wartung Des Backofens
4. Reinigung und Wartung des Backofens 4.1 Allgemeine Reinigungshinweise Die Lebensdauer des Geräts lässt sich durch eine regelmäßige Reinigung verlängern. ZUBEHÖR Den Ofen vor der Reinigung abkühlen lassen. Keine Scheuermittel, Stahlwolle oder Zubehörteile mit einem feuchten Reinigungsschwamm säubern, abwaschen und scharfkantige Gegenstände für die Reinigung verwenden, um die abtrocknen. - Seite 98 ENTFERNEN UND REINIGEN DER GLASTÜR 1. Die Backofentür öffnen. 2.3.4. Scharniere sperren, Schrauben entfernen und die obere Metallkappe nach oben abziehen. 5.6. Die Glasscheibe vorsichtig aus der Ofentür ziehen (Hinweis: Bei Backöfen mit Pyrolyse-Reinigungsfunktion auch die zweite (falls vorhanden) und dritte Scheibe herausnehmen).
-
Seite 99: Häufig Gestellte Fragen
WECHSELN DER GLÜHBIRNE 1. Den Backofen von der Stromversorgung trennen. 2. Glasabdeckung abnehmen, Glühbirne herausschrauben und durch eine neue vom selben Typ ersetzen. 3. Nach dem Austausch der kaputten Glühbirne die Glasabdeckung wieder aufsetzen. 5. Fehlerbehebung 5.1 Häufig gestellte fragen STÖRUNG MÖGLICHE URSACHE LÖSUNG... - Seite 100 INSTALLATION KURULUM INSTALLATION DU FOUR INSTALLAZIONE INSTALACIÓN INSTALACJA INSTALAÇÃO INSTALLATION 560 mm Opening / Açıklık / Ouverture / Apertura / Apertura/Otwarcie / Abertura/ 595 mm 580 mm Öffnung 460mm x 15 mm 546 mm 595 mm 22 mm If the furniture is equpped with a bottom at the back part, provide an opening for the power supply cable.
- Seite 101 42834614 • 70 gr - A4 • 02.2020 • Rev_0 The manufacturer will not be responsible for any inaccuracy resulting from printing or transcript errors contained in this brochure. We reserve the right to carry out modifications to products as required, including the interests of consumption, without prejudice to the characteristics relating to safety or function.