
Inhaltszusammenfassung für Hercules HT 102
- Seite 1 Bedienungsanleitung Herkules Rasentraktor HT 102 / HT 122 / HT 102 4WD HT 110 / HT 110 4WD user’s manual - manuel d’utilisation - manuale di istruzioni - bedienungsanleitung...
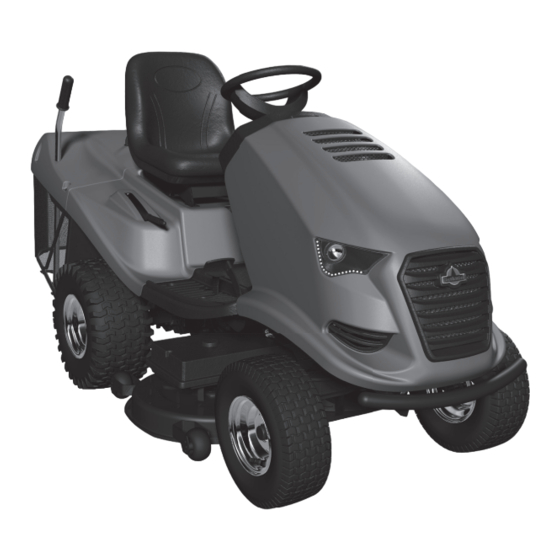
- Seite 3 User’s manual Bedienungsanleitung Manuel d’utilisation et d’entretien Manuale uso e manutenzione...
- Seite 6 3.3.1a...
- Seite 7 3.3.1b 3.3.1c 3.3.1d...
- Seite 8 3.3.1e 3.3.1f 3.3.2a...
- Seite 9 3.3.2b 3.3.2c...
- Seite 10 3.3.2d 3.3.2e...
- Seite 11 3.3.2f 3.3.2g 3.3.2h...
- Seite 12 3.3.2i 3.3.2j...
- Seite 13 3.3.2k 3.3.2l 3.4.1 3.4.5...
- Seite 14 4.1a...
- Seite 15 4.1b 5.4.4 5.6a 5.6b...
- Seite 16 6.2.2 6.3.3 6.3.6a 6.3.6b...
- Seite 17 6.3.7a 6.3.7b...
- Seite 18 6.3.8a 6.3.8b 6.3.9a...
- Seite 19 6.3.9b 6.3.9c 6.3.9d...
- Seite 20 6.3.10a 6.3.10b 6.3.10c...
- Seite 21 6.3.10d 6.3.11 6.3.12a...
- Seite 22 6.3.12b 6.3.14...
-
Seite 25: About This Manual
FOREWORD Dear customer, Thank you for purchasing this riding mower from Seco Industries, s.r.o., a company renowned both in Europe and internationally as a manufacturer of quality machines and accessories for the maintenance of grass areas. ABOUT THIS MANUAL This manual should guide you through, in the most simple way possible, the safe installation, operation and maintenance of your machine and provide information about its options and capabilities. -
Seite 26: Technical Information
TECHNICAL INFORMATION APPLICATION The UJ102, UJ102 4x4, UJ110 and UJ122 STARJET is a two-axle self-propelled riding mower designed for mowing even, maintained grass areas with a maximum vegetation height of 10 cm, e.g. in parks, gardens and sports fields, possibly on minor slopes, on which there are no foreign objects (fallen branches, rocks, solid items, etc.). - Seite 27 PRODUCT IDENTIFICATION LABEL AND OTHER LABELS WITH SYMBOLS USED ON THE MACHINE MODEL IDENTIFICATION PLATE (A) Machine model 2. Engine model 3. Year of production Weight 5. Name and address of the manufacturer 6. Compliance mark of the product Logo of the manufacturer The seller will write down the serial number on the other side of the front page of this manual when handing over the machine.
- Seite 28 FUEL TANK PLATE (G) Fuel tank capacity LABEL AT THE BRAKE PEDAL (H): Brake LABEL AT THE DIFFERENTIAL LOCK PEDAL (I) Differential Differential lock lock engaged disengaged It is strictly forbidden to remove or damage labels and symbols attached to the mower. In the event of damage or illegibility of the label, please contact the supplier or machine manufacturer and request a replacement.
-
Seite 29: Technical Parameters
TECHNICAL PARAMETERS MODEL PARAMETER (units) UJ102 UJ102 4x4 UJ110 UJ122 210 x 116 x 125 Dimensions 264 x 127 x [cm] 242 x 106 x 116 (without the grass (Length x Width x Height)* catcher) Weight [kg] (without the grass (without fuel, oil and driver) catcher) Wheelbase... - Seite 30 UJ102 Declared emission level of Guaranteed acoustic Declared vibration level ( m.s Revolu- acoustic pressure at the power level L (dB) Engine tions place of operation L (dB) according to directive transferred total vibrations a (min to the hand - arm a 2000/14/EC BS 4155 2700...
-
Seite 31: General Safety Instructions
WORK SAFETY AND HEALTH Riding mowers model number UJ102, UJ102 4x4, UJ110 and UJ122 under the brand name STARJET are manufactured according to valid European safety norms. The machine's manufacturer confirms this fact in the Statement of compliance, which is included at the end of this user's manual ( 10). - Seite 32 ! Remedy all defects before further use. Before starting work, thoroughly check that the belts are tensioned, the blades are sharp and that the area inside the mowing deck is clear. 2.1.4 WHILE OPERATING THE MACHINE ! The machine must not be used for work on slopes with an incline greater than 12° (21%), and when using the 4x4-drive on slopes with an incline greater than 15°...
-
Seite 33: Child Safety
! Avoid starting up or stopping on a slope. In the event that the wheels lose traction, turn off the power to the blades and drive slowly down the hill. ! Start driving very carefully and slowly when on a slope so that the machine does not "skip". Always reduce the machine's driving speed before a slope, and especially when driving down a hill lower the driving speed to minimum to take advantage of the braking effect of the transmission. -
Seite 34: Disposal Of Packaging Materials
PREPARATION FOR PUTTING INTO OPERATION UNPACKING AND INSPECTING THE CONTENTS The riding mower is supplied wooden crate cover. For transportation reasons some machine assemblies are disassembled at the production plant and it is necessary to install them before putting the machine into operation. The unpacking and preparation for operation is performed by the seller within the scope of the pre-sale service. - Seite 35 ASSEMBLY OF THE SEPARATELY PACKED ASSEMBLIES Due to the technical nature of this task, the machine is prepared for operation by the vendor of your riding mower (according to the following instructions). Before starting the installation, remove all covering protective materials, locate the riding mower on an even surface and align the front wheels to face forward.
-
Seite 36: Grass Catcher
3.3.2 GRASS CATCHER The grass catcher is supplied packed in a separate box. For transportation reasons some of its parts are demounted and they first need to be assembled. The following chapters provide a rough indication of their assembly. A detailed procedure is provided on the CD included with the mower, or we can send it to you on request. - Seite 37 INSTALLATION OF THE GRASS CATCHER Screw the grass catcher hinges (1) on to the rear plate. For this purpose use the installation markings on the plate indicating the correct position of the hitches. 3.3.2c 2) if you will be using a trailer (optional equipment). Screw the front tube under the lid of the top frame.
-
Seite 38: Checking The Battery
CHECKS PRIOR TO STARTING UP 3.4.1 CHECKING THE MOTOR OIL The tractor must be in a horizontal position before the oil level can be checked. The oil cap is accessible after tilting open the hood. Screw out the oil dipstick, wipe it dry, reinsert it and screw in. Then again screw it out and take the oil level reading. (1) - (ADD) low oil level 3.3.2g (2) - (FULL) maximum oil level... - Seite 39 3.4.5 CHECKING THE OIL LEVEL IN THE HYDRAULIC CIRCUIT (ONLY ON MACHINE UJ102 4X4) The machine UJ102 4x4 is supplied with a bled hydraulic circuit and with an equalisation tank with the prescribed amount of oil. The oil level in the tank may decline during transport. The equalisation tank is located under the hood 3.4.5 at the steering column Check that the oil level is between the two marks on the equalisation tank, if necessary fill up with the necessary amount of the...
-
Seite 40: Operating The Machine
OPERATING THE MACHINE LOCATION OF THE MAIN CONTROL ELEMENTS AND INDICATORS (1) Throttle lever (2) Information panel (optional accessory) (3) 12V socket (optional accessory) (4) AUT/MAN switch - control of the function of mowing when the grass catcher is full (optional accessory) (5) Deactivation of the mowing deck disengagement for reversing (6) Mowing deck engagement switch (7) Main power switch... -
Seite 41: Throttle Lever
DESCRIPTION AND FUNCTIONS OF THE CONTROL ELEMENTS The shown locations of control elements may differ from their actual locations depending on the selected configuration of the machine. (1) THROTTLE LEVER Serves to regulate the engine speed. It has the following three positions: CHOKE* Starting a cold engine Maximum engine speed... - Seite 42 (3) 12V SOCKET (optional accessory) The 12V socket is located on the right side of the cover under the steering wheel. The socket can, for example, be used for the following tasks: - connecting/recharging a mobile telephone DC 12V - connecting a portable flashlight The socket cannot be used for recharging the battery! (4) SWITCH FOR CONTROLLING THE FUNCTION OF MOWING WHEN THE GRASS CATCHER IS FULL (optional accessory) The AUT/MAN switch serves to activate and deactivate the control of the mowing function (mowing deck) when the grass catcher is...
-
Seite 43: Main Power Switch
(7) MAIN POWER SWITCH Serves to start up / shut off the engine. It has the following 4 positions: Ignition off / turn off the ignition STOP STOP Turn on / turn off the headlights on the hood Ignition on, the engine is running. Start engine –... - Seite 44 (12) BRAKE PEDAL AND PARKING BRAKE INDICATOR LIGHT The indicator light serves to signal that the brake is being applied and that the parking brake is engaged. Parking brake engaged signal ( ) ) Brake pedal applied signal (13) DIFFERENTIAL LOCK PEDAL The pedal is used only if necessary and only when driving directly forward.
- Seite 45 (17) MULCHING FLAP LEVER The lever has two functions: Grass collection – grass clippings are collected in the grass catcher 2) Mulching – grass clippings are spread out under the lawnmower Prior to shifting the lever from the grass collection position to the mulching position (down), first stop the machine and allow the mowing deck to run approximately 20 seconds without the mowing function so that remaining glass clippings are blown out the cause the incorrect function of the flap and the clogging of the ejection chute.
- Seite 46 (21) AND (22) BY-PASS LEVER – FREE MOVEMENT OF THE REAR WHEELS The by-pass lever serves to disengage the transmission for the rear wheel drive and is used to push or pull the machine without using the engine. Depending on the type of transmission used, it is located either behind the rear left wheel or in front of the rear left wheel.
- Seite 47 OPERATION AND HANDLING OF THE MACHINE Information which it is good to know before the riding mower is first turned on: The riding mower is equipped with safety contacts, which are engaged by: - a switch located under the seat - a switch on an attached grass catcher or deflector - a full grass catcher switch - a brake pedal switch...
-
Seite 48: Turning Off The Engine
The duration of starting up must not exceed 10 seconds, otherwise there is danger of damage to the switch! Never use fixed external starters to start the machine. This could damage the electrical wiring. It is possible to connect a higher capacity 12V battery. 6) Push in the choke 7) Slowly move the throttle lever to position "MIN". -
Seite 49: Driving The Machine
Conditions for engaging the mowing deck: - the driver is sitting in the seat of the machine - the grass catcher, or the deflector or the exhaust chute cover is installed - the AUT/MAN switch (optional accessory) is in position "AUT" and the grass catcher is empty - the AUT/MAN switch (optional accessory) is in position "MAN". - Seite 50 Slowly step on the drive pedal depending on the desired direction of travel (forward or reverse). Changing the direction of travel forward-reverse is possible only after stopping the machine. If the machine is not still, there is a danger of damaging the transmission. Never use the travel pedal and the brake pedal at the same time The system is equipped with an automatic mowing deck disengagement for reversing function at a speed higher than 0.3 m/s (approx.
-
Seite 51: Emptying The Grass Catcher
5.5.4 TRAVELLING ON A SLOPE The UJ102/UJ110/UJ122 riding mower may work on slopes with an incline of up to 12° (21%), when 4x4 drive is used, the slope incline must to be greater than 15° (27%). When working on a slope it is necessary to adhere to the following fundamentals: Max 12 (21%) UJ102 / UJ110 / UJ122:... -
Seite 52: Maintenance And Adjustment
MAINTENANCE AND ADJUSTMENT Properly performed regular maintenance and inspection of the riding mower helps to increase its problem-free operating lifetime. Worn or damaged parts must be replaced in time. When replacing parts use only original spare parts, using non-original parts may damage the machine, endanger the health of the driver or other persons and during the warranty period it voids the warranty. - Seite 53 (continued) INTERVAL ASSEMBLY ACTIVITY Air filter and spark plugs Inspection, replacement if necessary AFTER 50 HOURS Lubrication Lubrication of parts according to lubrication plan AFTER 50 ENGINE Hydrostatic transmission on HOURS 4x4 systems Engine, transmission, AFTER 100 HOURS Inspection and adjustment of motion electromagnetic transmission AFTER 200 ENGINE Hydrostatic transmission on...
-
Seite 54: Before Starting Work
DAILY CHECKS AND MAINTENANCE Before starting any maintenance or repair works, thoroughly reacquaint yourself with all instructions, restrictions and recommendations in this user's manual. Always remove the key from the ignition and disconnect the spark plug cables before performing any cleaning, maintenance or repairs. -
Seite 55: Changing Oil
WASHING THE MACHINE Before washing, park the machine on a suitable even surface. Grass catcher: - remove the grass catcher from the machine, wash it and allow it to dry naturally. Plastic parts on the machine: - clean using a sponge and soapy water Mowing deck: - wash the inside including the part of the ejection chute - slide a hose of a suitable diameter on to the fittings on the mowing deck cover. -
Seite 56: Replacing Light Bulbs
If you come into contact with used oil, we recommend that you thoroughly wash your hands with soap and water. Dispose of used oil according to environment protection laws. It is appropriate to deliver the oil in a closed container to a used oil collection point. -
Seite 57: Sharpening The Blades
6.3.5 LIFTING THE MACHINE If you wish to lift the riding mower, use a jack and supports. Proceed as follows: Place the jack underneath the gear box on the rear axle and lift the rear part of the machine. Insert two supports underneath the ends of the axles from the inner side of the rear wheels. Lift the front part of the machine and insert two supports under both ends of the front wheel axles. - Seite 58 Screw on the new blades. During installation, ensure that the bend of the blades points upwards into the mowing deck body. Do not interchange the left and right blades. The right blade has a bolt with a left thread. Carefully tighten the fastening bolts using a torque wrench using the prescribed tightening torque of Nm.
- Seite 59 The belt is correctly tensioned when a force of 4 kP (40 N; 72 Hz) acting on the middle distance between the belt pulleys (1) and (5) results in the belt bending by approximately 0.5 cm. 6.3.9c To measure force you can use a standard mechanical dynamometer available in stores selling such products. Tighten the lock nut (2) of the tensioning mechanism and again tighten the nut of the cogged belt pulley (1).
-
Seite 60: Replacing Belts
6.3.13 REPLACING BELTS Replacing drive belts is a relatively demanding operation, which needs to performed by an authorised service centre. 6.3.14 REPLACING WHEELS Before replacing one of the wheels, park the machine on a horizontal and rigid surface, turn off the engine and remove the key from the ignition. - Seite 61 6.3.17 OVERVIEW OF THE TIGHTENING TORQUE OF BOLT CONNECTIONS Mowing deck: Torque Central blade bolt 3 Nm Nuts M12 on the mowing drive pulleys 45 – 55 Nm Bolt 10x25 KL 100 RIPP on the arm of the mowing drive belt tensioning pulley 55 - 65 Nm Steering: Bolt M8x30 of the steering segment...
- Seite 62 REPAIRING MALFUNCTIONS AND DEFECTS Do not perform any repairs if you do not have the appropriate technical equipment and qualifications. The repairs described below warranty. The manufacturer takes no responsibility for damages resulting from poorly performed unapproved repairs by the user. ENGINE PROBLEMS PROBLEM POSSIBLE CAUSES...
- Seite 63 PROBLEMS WITH TRAVEL PROBLEM POSSIBLE CAUSES REMEDY A "SCREECHING" Check the condition of the belts and the tensioning Worn out or damaged belts, guide or SOUND IS MADE pulleys. If the problem persists, immediately contact tensioning pulleys WHEN TRAVELLING an authorised service centre. Check the condition of the belt pulleys.
- Seite 64 MOWING DECK PROBLEMS PROBLEM POSSIBLE CAUSES REMEDY Grass and dirt accumulated inside the Remove the dirt from the underside of the mowing mowing deck deck. Check the condition of the blades and sharpen or Blunt or deformed blades THE MOWING DECK replace as necessary ( 6.3.6) MOWS UNEVENLY...
- Seite 65 MOWING DECK PROBLEMS (continued) PROBLEM POSSIBLE CAUSES REMEDY Check the condition of the belt pulleys. Perhaps the Damaged mowing deck drive belt belt jumped out of the belt pulley or it was damaged. Replace it if necessary. Check the tension of the drive belt ( 6.3.8 and 6.3.9) The drive belt is insufficiently tensioned and tension it if necessary.
-
Seite 66: Ordering Spare Parts
MOWING DECK PROBLEMS (continued) PROBLEM POSSIBLE CAUSES REMEDY Check that the blades are not bent or twisted, also Damaged blades check that they are balanced. If they are deformed, replace them. Check that the belt does not have burned areas or Damaged blade drive belt irregularities, which could cause the vibrations. - Seite 67 POST-SEASONAL MAINTENANCE, PUTTING THE MACHINE OUT OF OPERATION After the end of the season or if you will not be using your riding mower for more than 30 days, make sure to prepare your machine for storage as soon as possible. If fuel remains in the petrol tank without movement for more than 30 days, a sticky deposit may form, which can have a negative effect on the carburettor and cause poor engine operation.
-
Seite 68: Disposal Of The Machine
DISPOSAL OF THE MACHINE After the operational life of the machine is over, the owner of the machine is responsible for its disposal. This may be performed in two ways: a) Hand the machine over to an authorised company (scrap yard, secondary waste collection point, etc.). You will receive documented confirmation of the handover for disposal. - Seite 69 ES STATEMENT OF COMPLIANCE (original) pursuant to: EP and Council Directive No. 2006/42/EC (Government directive NV 176/2008 Coll.) EP and Council Directive No. 2014/30/EC (Government directive NV 117/2016 Coll.) EP and Council Directive No. 2000/14/EC (Government directive NV 9/2002 Coll.) issue the following statement: B.
- Seite 70 ES STATEMENT OF COMPLIANCE (original) pursuant to: EP and Council Directive No. 2006/42/EC (Government directive NV 176/2008 Coll.) EP and Council Directive No. 2014/30/EC (Government directive NV 117/2016 Coll.) EP and Council Directive No. 2000/14/EC (Government directive NV 9/2002 Coll.) issue the following statement: B.
- Seite 71 ES STATEMENT OF COMPLIANCE (original) pursuant to: EP and Council Directive No. 2006/42/EC (Government directive NV 176/2008 Coll.) EP and Council Directive No. 2014/30/EC (Government directive NV 117/2016 Coll.) EP and Council Directive No. 2000/14/EC (Government directive NV 9/2002 Coll.) issue the following statement: B.
- Seite 72 ES STATEMENT OF COMPLIANCE (original) pursuant to: EP and Council Directive No. 2006/42/EC (Government directive NV 176/2008 Coll.) EP and Council Directive No. 2014/30/EC (Government directive NV 117/2016 Coll.) EP and Council Directive No. 2000/14/EC (Government directive NV 9/2002 Coll.) issue the following statement: B.
-
Seite 73: In Dieser Bedienungsanleitung Verwendete Symbole
VORWORT Sehr geehrter Kunde, Vielen Dank für den Kauf dieses Aufsitzmähers von Seco Industries, s.r.o., ein sowohl in Europa als auch international renommiertes Unternehmen als Hersteller von hochwertigen Maschinen und Zubehör für die Pflege von Rasenflächen. ÜBER DIESE BEDIENUNGSANLEITUNG Dieses Handbuch soll Sie auf einfachste Weise durch die sichere Installation, Bedienung und Wartung Ihrer Maschine führen und Installation, Bedienung und Wartung in Kontakt mit der Maschine kommen. -
Seite 74: Hauptelemente Des Aufsitzmähers
TECHNISCHE INFORMATIONEN ANWENDUNG Der UJ102, UJ102 4x4, UJ110 and UJ122 STARJET ist ein zweiachsiger Aufsitzmäher mit Eigenantrieb zum Mähen von ebenen, gepflegten Rasenflächen mit einer maximalen Wuchshöhe von 10 cm, z. B. in Parks, Gärten und auf Sportplätzen, auch geeignet für Hänge mit leichter Neigung, auf denen sich keine Gegenstände befinden (herabgefallene Äste, Steine, feste Gegenstände usw.). - Seite 75 KENNZEICHNUNGSETIKETT DES PRODUKTS UND ANDERE ETIKETTEN MIT SYMBOLEN, DIE AN DER MASCHINE VERWENDET WERDEN MODELL-TYPENSCHILD (A) Maschinenmodell 2. Motormodell 3. Baujahr Gewicht 5. Name und Adresse des Herstellers 6. Compliance-Zeichen des Produkts Hersteller-Logo ETIKETTEN AN DER VERKLEIDUNG UNTER DEM SITZ (B) UND (C) Maschine Nicht Bei der...
- Seite 76 KRAFTSTOFFTANKPLATTE (G) Fas- sungsver- mögen des Kraftstoff- tanks ETIKETT AM BREMSPEDAL (H): Bremse ETIKETT AM PEDAL DIFFERENTIALSPERRE (I) Differen- Differen- tialsperre tialsperre aktiviert deaktiviert verboten Etiketten und Symbole zu entfernen oder beschädigen. Bei...
-
Seite 77: Technische Parameter
TECHNISCHE PARAMETER MODELL PARAMETER (Einheiten) UJ102 UJ102 4x4 UJ110 UJ122 Abmessungen inkl. 210 x 116 x 125 258 x 127 x Grasfangvorrichtung [cm] 242 x 106 x 116 (ohne (Länge x Breite x Höhe)* Grasfangvorrichtung) Gewicht [kg] (ohne (ohne Kraftstoff, Öl und Fahrer)* Grasfangvorrichtung) Radstand [cm]... - Seite 78 UJ102 Angegebener Vibrationspegel (m.s Angegebener Emissions- Garantierter Dre- schalldruckpegel am Schallleistungspegel Motor hzahl Einsatzort L (dB) (dB) gemäß Gesamtschwingungen übertragen (min Richtlinie 2000/14/EG auf Hand - Arm a BS 4155 2700 85 + 4 0,55 + 0,28 < 2,5 BS 16 Vanguard 2800 83 + 4 <...
-
Seite 79: Arbeitssicherheit Und Gesundheit
ARBEITSSICHERHEIT UND GESUNDHEIT Aufsitzmäher der Modellnummer UJ102, UJ102 4x4, UJ110 und UJ122 unter dem Markennamen STARJET werden gemäß geltenden europäischen Sicherheitsnormen hergestellt. Der Hersteller der Maschine bestätigt diese Tatsache in der Compliance- Erklärung am Ende dieser Bedienungsanleitung ( 10). Wenn diese Maschine richtig und gemäß der Bedienungsanleitung verwendet wird, ist sie sehr sicher. Wenn die Arbeitssicherheit nicht eingehalten und nicht alle Warnungen in diesem Handbuch beachtet werden, kann dieser Aufsitzmäher Hände oder Beine abtrennen oder Gegenstände ablenken und dadurch schwere Verletzungen oder den Tod von Personen, Beschädigung oder Zerstörung der Maschine oder eines ihrer Teile oder des Zubehörs verursachen. -
Seite 80: Während Der Benutzung Der Maschine
! Bevor Sie die Maschine in Betrieb nehmen, informieren Sie sich gründlich über alle Bedienelemente und sorgen Sie dafür, dass Sie diese so bedienen können, dass Sie, wenn nötig, den Motor sofort anhalten oder ausschalten können. ! Verstellen Sie nicht den Motorregler oder den Drehzahlbegrenzer des Motors. ! Bevor Sie mit der Maschine zu arbeiten beginnen, entfernen Sie alle Steine, Holzstücke, Drähte, Knochen, heruntergefallenen Äste und anderen Gegenstände, die während des Mähvorgangs abgelenkt werden könnten, von der zu mähenden Fläche. -
Seite 81: Sicherheitsvorschriften Für Die Arbeit An Hängen
SICHERHEITSVORSCHRIFTEN FÜR DIE ARBEIT AN HÄNGEN Hänge sind die Hauptursache für Unfälle, Kontrollverlust über die Maschine oder nachfolgendes Umkippen, was jeweils zu schweren Verletzungen oder zum Tod führen kann. Das Mähen an Hängen erfordert immer ein erhöhtes Maß an Aufmerksamkeit. Wenn Sie nicht sicher sind oder es Ihre Fähigkeiten übersteigt, mähen Sie nicht an Hängen. -
Seite 82: Auspacken Und Kontrolle Des Inhalts
VORBEREITEN DER INBETRIEBNAHME AUSPACKEN UND KONTROLLE DES INHALTS Der Aufsitzmäher wird in einer Holzkiste geliefert. Aus Transportgründen werden einige Bauteile der Maschine im Fertigungswerk demontiert und es ist notwendig, diese vor Inbetriebnahme der Maschine zu montieren. Das Auspacken und die Vorbereitung für den Betrieb wird vom Verkäufer im Rahmen des Kundendienstes durchgeführt. -
Seite 83: Grasfangvorrichtung
b) Installieren des Sitzschiebemechanismus: Schieben Sie den Sitzpositionierungsmechanismus (5) in die Kante der inneren Öffnung der Konsole. Setzen Sie die Platte (6) von der Unterseite der Konsole her gegen den Mechanismus und führen Sie die Schrauben (7) in die Löcher ein. Ziehen Sie sie leicht an. 3.3.1b Stellen Sie die Sitzposition ein und ziehen Sie die Schrauben (3) und (7) fest. -
Seite 84: Benötigte Werkzeuge
BENÖTIGTE WERKZEUGE Halten Sie für die Montage der Grasfangvorrichtung folgende Werkzeuge bereit: Ein Messer zum Entfernen von Einen Satz Steckschlüssel mit Sechskant- Kreuzschlitzschraubendreher oder Verpackungsmaterialien und Inbusschlüsseln Elektroschrauber AUSPACKEN Entfernen Sie die Verpackungsmaterialien. Nehmen Sie zuerst Deckel, Rahmen und Sack und dann die eingepackten Einzelteile heraus. -
Seite 85: Einstellung Der Position Grasfangvorrichtung Nach Der Installation
Befestigen Sie die Kontaktfeder für den Sensor für volle Grasfangvorrichtung auf der linken Seite der oberen Rahmenplatte. 3.3.2e Schrauben Sie das schräge Rohr in die Grasfangvorrichtung ein. Verwenden Sie bei einer Grasfangvorrichtung mit einem Fassungsvermögen von 320 l die Löcher, die sich näher am vorderen Rohr befinden. Verwenden Sie bei der Grasfangvorrichtung mit einem Fassungsvermögen von 380 l die Löcher. -
Seite 86: Kraftstoff In Den Tank Einfüllen
3.4.3 KRAFTSTOFF IN DEN TANK EINFÜLLEN Aus Sicherheitsgründen wird der Aufsitzmäher ohne Kraftstoff geliefert. Daher muss er vor der ersten Inbetriebnahme betankt werden. Je nach Bauart der Maschine befindet sich der Kraftstoffbehälter entweder unter der vorderen Haube oder im linken Kotflügel und hat ein Fassungsvermögen von 14 Litern. -
Seite 87: Bedienung Der Maschine
BEDIENUNG DER MASCHINE LAGE DER HAUPTBEDIENELEMENTE UND ANZEIGEN (1) Gashebel (2) Informationsfeld (optionales Zubehör) (3) 12V Steckdose (optionales Zubehör) (4) Schalter AUT/MAN - Steuerung der Mähfunktion, wenn die Grasfangvorrichtung voll ist (optionales Zubehör) (5) Deaktivierung der Rückzugsfunktion des Mähwerks beim Rückwärtsfahren (6) Aktivierungsschalter Mähwerk (7) Hauptschalter (8) Summer... - Seite 88 (2) INFORMATIONSFELD (optionales Zubehör) Das Informationsfeld enthält Anzeigeleuchten, die den Status der Grundfunktionen der Maschine signalisieren. Anzeigeleuchte für das Vorhandensein der Grasfangvorrichtung und wenn sie voll ist Leuchtet: Die Grasfangvorrichtung ist nicht an der Maschine montiert Blinkt: Die Grasfangvorrichtung ist mit Gras gefüllt Motoröldruck Wenn der Öldruck im Motor fällt, leuchtet die Anzeigeleuchte rot Feststellbremse und Betriebsbremse...
-
Seite 89: Deaktivierung Der Rückzugsfunktion Des Mähwerks Beim Rückwärtsfahren
Stellung Grasfangvorrichtung ist voll Mähwerk NEIN AKTIVIERT DEAKTIVIERT NEIN AKTIVIERT AKTIVIERT (5) DEAKTIVIERUNG DER RÜCKZUGSFUNKTION DES MÄHWERKS BEIM RÜCKWÄRTSFAHREN Schalter R dient dazu, die automatische Rückzugsfunktion des Mähwerks beim Rückwärtsfahren zu deaktivieren ( 5.5.1). Der Schalter muss betätigt werden, wenn das Mähwerk bereits automatisch deaktiviert wurde, aber die Klingen noch nicht zum Stillstand gekommen sind (ca. -
Seite 90: Bremspedal Und Anzeigeleuchte Für Feststellbremse
(9) FESTSTELLBREMSHEBEL Die Feststellbremse hat zwei Stellungen. In der Stellung eingedrückt ist die Bremse nicht aktiviert. Nach dem Hochziehen und Treten des Bremspedals wird die Feststellbremse aktiviert (sie bremst). Das Treten des Bremspedals deaktiviert die Feststellbremse und der Hebel wird automatisch freigegeben und begibt sich in Stellung eingedrückt. -
Seite 91: Pedal Rückwärtsfahrt
(14) BREMSPEDAL Durch Treten des Bremspedals wird der Aufsitzmäher gebremst. Das Pedal wird beim Starten der Maschine verwendet – es ist nur möglich zu starten, wenn das Bremspedal getreten wird. (15) PEDAL RÜCKWÄRTSFAHRT Das Pedal steuert die Kraftübertragung auf die Räder und regelt die Geschwindigkeit der Maschine rückwärts. Je stärker das Pedal gedrückt wird, desto schneller wird die Maschine –... -
Seite 92: Hebel Zum Feststellen Der Mähwerksposition
(19) HEBEL ZUM FESTSTELLEN DER MÄHWERKSPOSITION Der Hebel dient dazu, die Position des Mähwerks zu verriegeln. Der Hebel kann für die ersten vier Stellungen des Mähwerks verwendet werden. Schwenken Sie als erstes den Feststellhebel nach oben aus. Stellen Sie dann den Mähwerkhebel in die entsprechende Position und verriegeln Sie diese Position durch Kippen des Verriegelungshebels nach unten. -
Seite 93: Feder, Um Die Grasfangvorrichtung Bei Geländefahrten In Position Zu Halten
(24) FEDER, UM DIE GRASFANGVORRICHTUNG BEI GELÄNDEFAHRTEN IN POSITION ZU HALTEN Hält die Grasfangvorrichtung in ihrer Position, wenn die Maschine über unebenes Gelände fährt. (25) SENSOR FÜR DIE FEDER FÜR VOLLE GRASFANGVORRICHTUNG Aktiviert die Feder für die volle Grasfangvorrichtung. -
Seite 94: Betrieb Und Handhabung Der Maschine
BETRIEB UND HANDHABUNG DER MASCHINE Informationen, die man kennen sollte, bevor der Aufsitzmäher zum ersten Mal eingeschaltet wird: Der Aufsitzmäher ist mit Sicherheitskontakten ausgestattet, die aktiviert werden durch: - einen Schalter unter dem Sitz - einen Schalter an einer angebrachten Grasfangvorrichtung oder einem Leitblech - einen Schalter für volle Grasfangvorrichtung - einen Bremspedalschalter Der Motor schaltet automatisch ab, wenn der Fahrer den Sitz verlässt und die Maschine nicht mit der... -
Seite 95: Fahren Im Notfall
Der Startvorgang darf 10 Sekunden nicht überschreiten, da sonst der Schalter beschädigt werden könnte! Verwenden Sie niemals ortsfeste externe Anlasser, um die Maschine zu starten. Dies könnte die elektrische Verkabelung beschädigen. Es ist möglich eine 12V-Batterie mit höherer Kapazität anzuschließen. 6) Drücken Sie den Choke hinein (nur bei Maschinen mit Zweizylindermotor). -
Seite 96: Fahren Der Maschine
Bedingungen zum Aktivieren des Mähwerks: - Der Fahrer sitzt auf dem Sitz der Maschine - Grasfangvorrichtung oder Leitblech oder Abgasschachtabdeckung ist installiert - Der Schalter AUT/MAN (optionales Zubehör) befindet sich in Position "AUT" und die Grasfangvorrichtung ist leer - Der Schalter AUT/MAN (optionales Zubehör) befindet sich in Position "MAN" 5.4.2 DEAKTIVIEREN DES MÄHWERKS abgestellt. -
Seite 97: Vorwärts- / Rückwärtsfahren
5.5.1 VORWÄRTS- / RÜCKWÄRTSFAHREN Stellen Sie den Gashebel langsam in die Stellung "MIN". Dies senkt die Motordrehzahl. Treten Sie langsam auf das Fahrpedal für die gewünschte Fahrtrichtung (vorwärts oder rückwärts). Das Ändern der Fahrtrichtung vorwärts/rückwärts ist nachdem die Maschine gestoppt wurde. Verwenden Sie niemals das Fahrpedal und das Bremspedal gleichzeitig. -
Seite 98: Fahren Am Hang
5.5.4 FAHREN AM HANG Richtig Der UJ102/UJ110/UJ122 Aufsitzmäher kann auf Hängen mit einer Neigung bis zu 12° (21 %) gefahren werden; wenn der 4x4-Antrieb verwendet wird, darf die Neigung nicht größer als 15° (27 %) sein. Beim Arbeiten am Hang sind folgende Grundsätze zu beachten: Seien Sie beim Fahren an einem Hang besonders aufmerksam. -
Seite 99: Wartung Und Einstellung
WARTUNG UND EINSTELLUNG Die richtig durchgeführte regelmäßige Wartung und Inspektion des Aufsitzmähers kann seine Betriebsdauer erhöhen, ohne dass Probleme auftreten. Verschlissene oder beschädigte Teile müssen rechtzeitig ersetzt werden. Beim Austausch von Teilen nur Original-Ersatzteile verwenden. Der Einsatz von Nicht-Originalteilen kann die Maschine beschädigen, die Gesundheit des Fahrers oder anderer Personen gefährden, und während der Garantiezeit erlischt die Garantie. - Seite 100 (Fortsetzung) INTERVALL BAUGRUPPE MASSNAHME Luftfilter und Zündkerzen Inspektion, bei Bedarf austauschen NACH 50 STUNDEN Schmierung Schmierung von Teilen nach Schmierplan NACH 50 Hydrostatikgetriebe an 4x4- MOTORBE- Ölwechsel Systemen TRIEBSSTUNDEN Motor, Getriebe, NACH elektromagnetische Überprüfung und Einstellung der Bewegung 100 STUNDEN Übertragung NACH 200 Hydrostatikgetriebe an 4x4-...
- Seite 101 TÄGLICHE KONTROLLEN UND WARTUNGSARBEITEN Ziehen Sie immer den Schlüssel aus dem Zündschloss oder Reparaturarbeiten durchführen. Führen Sie keine größeren Reparaturen durch, wenn Sie nicht über die notwendigen Werkzeuge und gute Kenntnisse zur Reparatur von Verbrennungsmotoren verfügen! Umweltschutzvorschriften. 6.2.1 VOR BEGINN DER ARBEIT KONTROLLIEREN SIE DEN REIFENDRUCK Halten Sie den vorgeschriebenen Reifendruck ein und überprüfen Sie ihn regelmäßig.
-
Seite 102: Waschen Der Maschine
WASCHEN DER MASCHINE Parken Sie die Maschine vor dem Waschen auf einer geeigneten ebenen Fläche. Grasfangvorrichtung: - Nehmen Sie die Grasfangvorrichtung von der Maschine ab, waschen Sie sie und lassen Sie sie an der Luft trocknen. Kunststoffteile an der Maschine: - Mit Schwamm und Seifenwasser reinigen Mähwerk: - Waschen Sie die Innenseite inklusive des Teils des Auswurfschachts... -
Seite 103: Austausch Von Glühlampen
Motorherstellers. WARTUNG DES LUFTFILTERS Lassen Sie niemals den Motor ohne Luftfilter laufen. Dies führt zu schnellem Motorverschleiß. WARTUNG DER ZÜNDKERZE Damit der Motor perfekt läuft, muss die Zündkerze richtig eingestellt und frei von Ablagerungen sein. vorsichtig, um sich nicht zu verbrennen. 0,7 - 0,8 mm Ziehen Sie den Zündkerzenstecker ab und entfernen die Zündkerze mit einem Schraubenschlüssel. -
Seite 104: Austauschen Einer Sicherung
6.3.4 AUSTAUSCHEN EINER SICHERUNG Wenn eine Sicherung beschädigt ist, schaltet der Motor sofort ab, das Mähwerk stoppt und alle Kontrollleuchten am Armaturenbrett erlöschen. In diesem Fall ist es notwendig, die defekte Sicherung zu finden und sie durch eine neue zu ersetzen. Unter keinen Umständen sollten Sie eine defekte Sicherung durch eine Sicherung ersetzen, die eine höhere Strombelastbarkeit hat! Sicherungen sind nach dem Entfernen der Batterieabdeckung unter dem Lenkrad und... -
Seite 105: Austausch Der Messer
Setzen Sie zum Ausgleichen den Schraubendreher in die Zentrieröffnung und stellen Sie das Messer waagerecht ein. Wenn das Messer in dieser Position bleibt, ist es ausgewuchtet. Wenn ein Ende nach unten hängt, diese Seite so lange abschleifen, bis das Messer ausgewuchtet ist. Wenn beim Auswuchten geschliffen wird, dabei nicht die Länge des Messers verkürzen! Das zulässige statische Ungleichgewicht darf 2g nicht überschreiten. -
Seite 106: Mähwerk - Prüfen Und Einstellen Des Keilriemens
Maschinen UJ110: Abstand A ist die Vorderkante des Mähwerks in Fahrtrichtung und muss 30-34 mm über dem Boden liegen. Überprüfen Sie ihn auf beiden Seiten des Mähwerks. Wenn der Höhenunterschied anders ist, lösen Sie die Sicherungsmuttern (2) auf der entsprechenden Zugstange (1) und stellen Sie die Höhe durch Drehen der Muttern (3) ein. -
Seite 107: Wartung Der Lenkung
Schieben Sie die Federstifte (4) von beiden hinteren Aufhängungswellenzapfen des Mähwerks (5). Schrauben Sie die Mutter (6) vom vorderen Wellenzapfen und ziehen Sie den Wellenzapfen (7) heraus. Schieben Sie mit einer Zange beide Stifte (5) heraus. Für die Mulchoption des Mähwerks entfernen Sie zuerst den Teil des 6.3.10c Mulchklappenhebels, der über den Boden der Maschine herausragt. -
Seite 108: Reparatur Einer Reifenpanne
6.3.15 REPARATUR EINER REIFENPANNE Die Maschine ist mit schlauchlosen Reifen ausgerüstet. Bei einer Reifenpanne lassen Sie die Reparatur in einer spezialisierten Reifenwerkstatt oder in einer autorisierten Seco-Werkstatt durchführen. 6.3.16 WARTUNG DES HYDROSTATISCHEN GETRIEBES Für den zuverlässigen Betrieb des Getriebes muss der richtige Ölstand beibehalten werden. Die Einfüllöffnungen an den Getrieben sind nach Abnahme des Auswurfs von der Maschine zugänglich ( 6.3.10). - Seite 109 SCHMIERUNG Schmieren Sie die Maschine gemäß Abbildung 6.4 und der folgenden Tabelle. Falls die Maschine unter sehr staubigen oder sandigen Betriebsbedingungen betrieben wird, schmieren Sie sie häufiger. Kugellager der Spannriemenscheiben, Umlenkscheiben und Lager am Mähwerk sind selbstschmierend. Vor Beginn der Schmierung muss der Motor ausgeschaltet werden und alle beweglichen Teile der Maschine müssen stillstehen. Symbol Erläuterung Maßnahme...
-
Seite 110: Reparatur Von Fehlern Und Defekten
REPARATUR VON FEHLERN UND DEFEKTEN Die unten beschriebenen Reparaturen können vom Benutzer der Maschine durchgeführt werden. Werden andere Reparaturen durch den Benutzer durchgeführt, die hier nicht aufgeführt sind, erlischt die Garantie. Der Hersteller übernimmt keine Verantwortung für Schäden, die durch falsch durchgeführt, ungenehmigte Reparaturen durch den Benutzer entstehen. MOTORPROBLEME PROBLEM MÖGLICHE URSACHEN... - Seite 111 PROBLEME BEIM FAHREN PROBLEM MÖGLICHE URSACHEN BEHEBUNG Überprüfen Sie den Zustand der Riemen und ES "KREISCHT" BEIM Abgenutzte oder beschädigte Riemen, Spannrollen. Wenn das Problem weiterhin besteht, FAHREN Führungs- oder Spannrollen wenden Sie sich sofort an ein autorisiertes Service- Center Beschädigte oder verformte Überprüfen Sie den Zustand der Riemenscheiben.
- Seite 112 MÄHWERKPROBLEME PROBLEM MÖGLICHE URSACHEN BEHEBUNG Gras und Schmutz haben sich im Entfernen Sie den Schmutz von der Unterseite des Mähwerk angesammelt Mähwerks. Überprüfen Sie den Zustand der Messer und schärfen Stumpfe oder deformierte Messer oder ersetzen Sie sie gegebenenfalls ( 6.3.6) DAS MÄHWERK MÄHT UNGLEICHMÄSSIG...
- Seite 113 MÄHWERKPROBLEME (Fortsetzung) PROBLEM MÖGLICHE URSACHEN BEHEBUNG Überprüfen Sie den Zustand der Riemenscheiben. Vielleicht Beschädigter Antriebsriemen des ist der Riemen aus der Riemenscheibe gesprungen oder er Mähwerks wurde beschädigt. Bei Bedarf ersetzen. Überprüfen Sie die Spannung des Antriebsriemens Der Antriebsriemen ist unzureichend 6.3.8 und 6.3.9) und spannen ihn gegebenenfalls.
-
Seite 114: Bestellung Von Ersatzteilen
MÄHWERKPROBLEME (Fortsetzung) PROBLEM MÖGLICHE URSACHEN BEHEBUNG Überprüfen Sie, dass die Messer nicht verbogen oder Beschädigte Messer verdreht sind und dass sie ausgewuchtet sind. Wenn sie deformiert sind, ersetzen Sie sie. Überprüfen Sie, dass der Riemen keine verbrannten Stellen oder Unregelmäßigkeiten aufweist, Beschädigter Messerantriebsriemen Vibrationen verursachen könnten. -
Seite 115: Wartung Nach Der Saison, Ausserbetriebnahme Der Maschine
WARTUNG NACH DER SAISON, AUSSERBETRIEBNAHME DER MASCHINE Nach der Saison oder bei Nichtverwendung der Maschine für mehr als 30 Tage sollte das Gerät für die Lagerung vorbereitet werden. Wenn ohne Bewegung von mehr als 30 Tagen Kraftstoff im Tank bleibt, kann sich eine klebrige Ablagerung bilden, die sich negativ auf die Leistung von Vergaser und Motor auswirken kann. -
Seite 116: Entsorgung Der Maschine
ENTSORGUNG DER MASCHINE Nach Ablauf der Lebensdauer der Maschine ist der Eigentümer zu ihrer Entsorgung verpflichtet. Dies kann auf zwei Arten erfolgen: a) Geben Sie die Maschine an ein spezialisiertes Unternehmen (Schrottplatz, Sekundärmüllsammelstelle, usw.). Sie erhalten eine dokumentierte Bestätigung über die Übergabe zur Entsorgung. Entsorgen Sie die Maschine selbst. -
Seite 117: Es Compliance-Erklärung (Original)
ES COMPLIANCE-ERKLÄRUNG (Original) gemäß: Richtlinie des Rates Nr. 2006/42/EC (Regierungsrichtlinie NV 176/2008 Coll.) Richtlinie des Rates Nr. 2014/30/EC (Regierungsrichtlinie NV 117/2016 Coll.) Richtlinie des Rates Nr. 2000/14/EC (Regierungsrichtlinie NV 9/2002 Coll.) erklären Folgendes: B. Mechanische Ausrüstung - Name: Aufsitzmäher - Modell: UJ 102 - Seriennummer: 11 500 - 30 000 Beschreibung:... - Seite 118 ES COMPLIANCE-ERKLÄRUNG (Original) gemäß: Richtlinie des Rates Nr. 2006/42/EC (Regierungsrichtlinie NV 176/2008 Coll.) Richtlinie des Rates Nr. 2014/30/EC (Regierungsrichtlinie NV 117/2016 Coll.) Richtlinie des Rates Nr. 2000/14/EC (Regierungsrichtlinie NV 9/2002 Coll.) erklären Folgendes: B. Mechanische Ausrüstung - Name: Aufsitzmäher - Modell: UJ 102 4x4 - Seriennummer: 11 500 - 30 000 Beschreibung:...
- Seite 119 ES COMPLIANCE-ERKLÄRUNG (Original) gemäß: Richtlinie des Rates Nr. 2006/42/EC (Regierungsrichtlinie NV 176/2008 Coll.) Richtlinie des Rates Nr. 2014/30/EC (Regierungsrichtlinie NV 117/2016 Coll.) Richtlinie des Rates Nr. 2000/14/EC (Regierungsrichtlinie NV 9/2002 Coll.) erklären Folgendes: B. Mechanische Ausrüstung - Name: Aufsitzmäher - Modell: UJ 122 - Seriennummer: 11 500 - 30 000 Beschreibung:...
- Seite 120 ES COMPLIANCE-ERKLÄRUNG (Original) gemäß: Richtlinie des Rates Nr. 2006/42/EC (Regierungsrichtlinie NV 176/2008 Coll.) Richtlinie des Rates Nr. 2014/30/EC (Regierungsrichtlinie NV 117/2016 Coll.) Richtlinie des Rates Nr. 2000/14/EC (Regierungsrichtlinie NV 9/2002 Coll.) erklären Folgendes: B. Mechanische Ausrüstung - Name: Aufsitzmäher - Modell: UJ 110 - Seriennummer: 11 500 - 30 000 Beschreibung:...
-
Seite 121: Avant-Propos
AVANT-PROPOS Cher client, Seco Industries, s.r.o. A PROPOS DE CE MANUEL qui entrent en contact avec la machine que ce soit pendant son installation, son utilisation ou sa maintenance. instructions contenues dans ce manuel afin de faciliter le fonctionnement de la machine et de l'utiliser de manière optimale pour Dans ce manuel utilisateur vous trouverez des symboles ayant la signification suivante : SIGNIFICATION DES SYMBOLES... -
Seite 122: Informations Techniques
INFORMATIONS TECHNIQUES 1.1 | APPLICATION Le UJ102, UJ102 4x4, UJ110 et UJ122 STARJET tondre les zones engazonnées nivelées et entretenues dont la hauteur de végétation maximum est de 10 cm, comme par exemple des et sur lesquelles il n'existe aucun corps étranger L'inclinaison de la pente ne doit pas dépassée 12°... - Seite 123 1.3 | PLAQUE D'IDENTIFICATION DU MODÈLE (A) Modèle de la machine Modèle du moteur Poids 1.3.1a Nom et adresse du constructeur Logo du constructeur Ne quittez Respectez Ne touchez pas la le manuel Danger pas pendant machine pendant les l'utilisation pendant la conduite Ne tondez pas...
- Seite 124 1.3.1b Frein 1.3.1b Verrouillage 1.3.1b Il est strictement interdit de retirer ou d'endommager les étiquettes et les symboles...
-
Seite 125: Paramètres Techniques
1.4 | PARAMÈTRES TECHNIQUES MODÈLE DU TRACTEUR DE TONTE PARAMÈTRES DE BASE UJ102 UJ102 4x4 UJ110 UJ122 210 x 116 x 125 258 x 127 d'herbe [cm] 248 x 106 x 116 x 129 (longueur x largeur x hauteur) d'herbe) Poids (sans carburant, ni huile, ni [kg] chauffeur) - Seite 126 UJ102 Niveau de puissance Tours sonore garantie Moteur (min le lieu d'utilisation L (dB) (dB) selon la vibrations totales a au mains - bras, a directive 2000/14/CE BS 4155 2700 85 + 4 0,55 + 0,28 < 2,5 BS 16 Vanguard 2800 83 + 4 <...
- Seite 127 UJ102, UJ102 4x4, UJ110 et UJ122 de marque STARJET déclaration de conformité 10). sécurité est maximale. En cas de non-respect des règles de sécurité du travail et de tous les avertissements de ce manuel, ce tracteur à pelouse peut sectionner les mains et les jambes ou dévier des objets, causant ainsi de graves blessures ou la mort, et endommager ou détruire la machine ou l'une de ses pièces ou accessoires.
- Seite 128 2.1.4 Pendant l'utilisation de la machine 12° (21%) et, en cas 15° (27%). ! Le transport d'autres passagers, animaux ou charges, directement sur la machine, est interdit. Le transport de charges n'est et soulevez-le en position de transport. patiner. se retourner. ! Il est interdit de conduire la machine sur la voie publique.
- Seite 129 brusque. lentement en descente. pente pour profiter de l'effet de frein de la transmission. 2.3 | ! Ne laissez pas les enfants sans surveillance dans les zones où vous tondez. ! Soyez toujours prêt et si les enfants s'approchent de vous, arrêtez la machine. ! Avant et pendant une marche arrière, regardez derrière vous et au sol.
- Seite 130 3.1 | Dans l'emballage, vous devez trouver : (1) Caisse en bois (2) Rampes (attention - elles ne sont pas fournies) (3) Volant (4) Siège manuel utilisateur de la batterie, carnet d'entretien) l'assemblage. 1), sortez tous les ensembles 3.1 position 2) pour descendre la machine de la palette. Si vous n'utilisez pas de rampes, vous courrez le risque d'endommager des pièces de la machine.
- Seite 131 3.3.1 SIÈGE, VOLANT ET BATTERIE a) Installer le mécanisme coulissant du siège et les boulons de fixation : Inclinez la console du siège (1) d'environ 90 ° 2), placez une plaque (4 3) avec 3.3.1a 5), le renfort (6) et les boulons pour la fixation b) Fixer le siège à...
- Seite 132 Des tournevis Philips ou un tournevis d'emballage (2) Sac (5) Tube avant (6) Tube oblique 3.3.2a (12) Bouclier de protection d'herbe. Conservez ces goupilles pour une future utilisation. 3.3.2a. (1) Couvercle (2) Sac (5) Tube avant (6) Tube oblique 3.3.2b...
- Seite 133 1) sur la plaque arrière. Pour ce faire, utilisez les repères d'installation de la plaque qui indiquent la position exacte des attaches. 3.3.2c 3.3.2d 3.3.2e 320 l utilisez les trous les plus proches 380 l utilisez les trous 3.3.2f les plus éloignés du tube avant. °...
- Seite 134 3.4 | Jauge de niveau d'huile : (1) - (AJOUTER) niveau d'huile faible 3.3.2g (2) - (PLEIN) niveau d'huile maximum Le niveau d'huile doit se trouver entre les deux repères sur la jauge. Si ce n'est pas le cas, faites le plein d'huile moteur afin d'atteindre le repère "PLEIN batterie.
- Seite 135 3.4.5 CONTRÔLE DU NIVEAU D'HUILE DANS LE CIRCUIT HYDRAULIQUE (modèle UJ102 4x4 uniquement) 3.4.5 sous le capot au niveau de la colonne de direction 3.4.6 PURGER L'AIR DANS LE CIRCUIT HYDRAULIQUE (modèle UJ102 4x4 uniquement) constatez des fuites, informez votre centre d'assistance.
-
Seite 136: Utilisation De La Machine
UTILISATION DE LA MACHINE 4.1 | (1) Manette de gaz (2) Panneau d'informations (accessoire en option) option) (4) Prise 12V (accessoire en option) (6) Interrupteur d'enclenchement du plateau de coupe (7) Interrupteur d'alimentation principal (8) Buzzer (9) Frein de stationnement (11) Starter 4.1a (15) Levier du volet de paillage... - Seite 137 4.2 | de machine choisie. (1) MANETTE DE GAZ STARTER* (2) PANNEAU D'INFORMATIONS (accessoire en option) Voyant indiquant la présence du récupérateur d'herbe et le fait qu'il soit plein Pression de l'huile moteur Lorsque la pression de l'huile moteur chute, le voyant s'allume rouge Frein de stationnement et frein de conduite le voyant s'allume rouge Charge de la batterie *...
- Seite 138 (accessoire en option) d'herbe est plein. En position MAN En position AUT Position Plateau de coupe (4) PRISE 12V (accessoire en option) DC 12V - branchement d'une baladeuse L'interrupteur R 5.5.1). (6) INTERRUPTEUR D'ENCLENCHEMENT DU PLATEAU DE COUPE Enclenchement du plateau de coupe / le plateau de...
- Seite 139 (7) INTERRUPTEUR D'ALIMENTATION PRINCIPAL STOP STOP Allumage / extinction des phares sur le capot (8) BUZZER (9) LEVIER DU FREIN DE STATIONNEMENT Le frein de stationnement dispose de 2 positions. En position enfoncée le frein n'est pas tiré vers le haut Enclencher le régulateur de vitesse : Désenclencher le régulateur de vitesse : (11) STARTER...
- Seite 140 Signal d'enclenchement du frein de stationnement N'utilisez jamais le verrouillage différentiel lors d'un changement du sens de déplacement. Dans le cas contraire, vous risqueriez d'endommager gravement la transmission ! il n'est possible de démarrer que si la pédale de frein est enfoncée. (15) LEVIER DU VOLET DE PAILLAGE Le levier dispose de deux fonctions : 1) Récupération de l'herbe...
- Seite 141 en marche arrière. inversement. s'arrête. Plus d'informations 5.5. Le changement de direction (marche avant/marche arrière) n'est possible qu'après avoir immobilisé la machine ! en marche avant. inversement. s'arrête. Plus d'informations 5.5. Le changement de direction (marche avant/marche arrière) n'est possible qu'après avoir immobilisé la machine ! Le levier possède 7 3 à...
- Seite 142 derrière la roue arrière gauche, soit devant la roue arrière gauche. Il dispose des deux positions suivantes : Position Train arrière Utilisation Lorsque vous poussez la machine, moteur En conduisant, le moteur tourne ATTENTION ! ne permet pas, pour des raisons de fabrication, le démontage de la transmission de l'essieu avant , poussez-la toujours en allégeant l'essieu avant.
- Seite 143 UTILISATION ET MANIPULATION DE LA MACHINE Informations utiles à connaître avant la première mise en marche du tracteur de tonte : par le frein de stationnement. 5.1 | MACHINE Niveau d'huile moteur ( 3.4.1) Niveau de charge de la batterie ( 3.4.2) Niveau du carburant ( 3.4.3)
-
Seite 144: Arrêt Du Moteur
MIN". jamais Tenez vos mains, vos jambes et vos vêtements éloignés Procédure pour activer le système de déplacement d'urgence : asseyez-vous sur le siège Appuyez 5 fois sur le bouton R 5.3 | ARRÊT DU MOTEUR MIN". STOP Placez toujours la clé en position "OFF", puis retirez-la du contact. une personne sans autorisation ou un enfant. -
Seite 145: Plateau De Coupe
dans une position plus élevée par rapport au sol en hauteur du plateau de coupe tonte vers le haut. dans une position plus rapprochée par rapport au sol vers le bas. PLATEAU DE COUPE est de 93 mm pour le UJ102, 115 mm pour le UJ110 et 110 mm pour le UJ122 5.4.4 6.3.7 "... - Seite 146 Lorsque vous utilisez le désengagement de cette fonction à l'aide du bouton R, soyez particulièrement vigilant à la zone derrière la machine pendant la marche arrière. La marche avant/arrière de la machine est interrompue en retirant graduellement votre pied de la pédale de transmission et en appuyant ensuite sur la pédale de frein.
- Seite 147 5.6 | feuilles, etc.). 5.6a Procédure pour le vidage : êtes en pente, utilisez le frein de stationnement. AUT". MIN". 5.6b place.
- Seite 148 Lors du remplacement de pièces, n'utilisez que des pièces de rechange d'origine. L'utilisation de pièces différentes peut endommager la machine, mettre en danger le conducteur ou les autres personnes et annuler la garantie si cette dernière est encore applicable. Pour commander des pièces de rechange, INTERVALLE ENSEMBLE Moteur et transmission...
- Seite 149 (suite) INTERVALLE ENSEMBLE APRÈS 50 HEURES Lubrification des pièces en fonction du programme de Lubrification lubrification APRÈS 50 HEURES DE Transmission hydrostatique sur FONCTIONNEMENT DU Vidange de l'huile les systèmes 4x4 MOTEUR Moteur, transmission, APRÈS 100 HEURES APRÈS 200 HEURES Transmission hydrostatique sur DE FONCTIONNEMENT Vidange de l'huile...
-
Seite 150: Avant De Commencer Le Travail
6.2 | recommandations de ce manuel utilisateur. Retirez toujours la clé du démarreur Évitez de renverser du carburant, de l'huile ou d'autres substances nocives. N'effectuez aucune réparation importante si vous ne disposez pas des outils nécessaires et d'une bonne connaissance des réparations sur les moteurs à... - Seite 151 Pièces en plastique sur la machine : Plateau de coupe : enclenchez le plateau de coupe et rincez ce dernier au jet d'eau pendant 10 minutes. 6.2.2 6.3 | 6.3.1 BATTERIE dysfonctionnement de la fonction de recharge du moteur ! batteries sans entretien).
-
Seite 152: Remplacement Des Ampoules
à ne pas vous brûler. 0,7 - 0,8 mm Manuel utilisateur du moteur). par son constructeur. constructeur. 6.3.3 REMPLACEMENT DES AMPOULES les suivants : Type d'ampoule : Douille/réflecteur : Remplacer par : M light type HSS-510 Ampoule halogène 10W / 12V diamètre 51 mm (cap GU5.3) Lorsque vous remplacez l'ampoule halogène appuyez d'abord sur la patte (1) puis glissez l'ampoule hors de la douille (2... - Seite 153 6.3.6 PLATEAU DE COUPE - AFFÛTAGE ET REMPLACEMENT DES LAMES Ne réparez pas une lame déformée ou endommagée d'une quelconque manière, mais remplacez-la immédiatement. Portez toujours des gants de travail épais lorsque vous manipulez les lames de coupe. Procédure d'affûtage : partie de la machine ou de vous blesser.
- Seite 154 6.3.7 plateau doivent être de niveau. Placez la machine sur une surface bien plane, gonflez tous les pneus à la pression prescrite ±10 Kpa entre chaque pneu) et immobilisez toute la machine pour l'empêcher de bouger (en utilisant par exemple une cale Retirez ensuite le cache de la machine.
-
Seite 155: Remplacement Des Courroies
Machines UJ110 : La courroie d'entraînement du plateau de coupe est correctement tendue lorsque la longueur du ressort de tension (2) est de 135±1 mm 1) de la barre de tension. 6.3.9d 6.3.10 PLATEAU DE COUPE - LE RETIRER DE LA MACHINE 6.3.10a complètement par la plaque arrière. -
Seite 156: Remplacement Des Roues
6.3.14 REMPLACEMENT DES ROUES de contact. Effectuez le remplacement comme suit : pas qu'elle roule. 6.3.14 Retirez l'enjoliveur (1) de la roue (uniquement les roues avant). 2) et la rondelle (3). La lubrification est essentielle pour faciliter le prochain retrait de la roue, notamment pour les roues de l'essieu arrière. - Seite 157 6.4 | LUBRIFICATION Symbole Explication Activité Lubrifiant plastique A00 Huile SAE 30 Intervalle en heures Lubrifiez par le système de Axe central rotatif du carter d'essieu lubrification Lubrifiez par le système de Roulements des deux roues avant et axes du carter d'essieu lubrification Raccord d'angle des bielles de direction Retirez et lubrifiez...
- Seite 158 PROBLÈMES MOTEUR PROBLÈME CAUSES POSSIBLES SOLUTION Pas assez de carburant dans le Ajoutez du carburant incorrecte Remplacez le fusible être de 12 V. Si ce n'est pas le cas, rechargez la batterie ou installez en une neuve. Sur une machine neuve : de mauvaise manipulation, l'absence d'huile sur le LE MOTEUR NE cylindre...
- Seite 159 PROBLÈME CAUSES POSSIBLES SOLUTION UN « SIFFLEMENT » Courroies, guide ou poulies de tension ACCOMPAGNE LES La courroie d'entraînement de VIBRATIONS EXTRÊMES PENDANT 6.3.12). PROBLÈMES DE COURROIE PROBLÈME CAUSES POSSIBLES SOLUTION La courroie d'entraînement de 6.3.12) tendue La courroie d'entraînement du LA COURROIE La poulie de courroie du moteur ou la MACHINE PATINE...
- Seite 160 PROBLÈMES AVEC LE PLATEAU DE COUPE PROBLÈME CAUSES POSSIBLES SOLUTION Retirez l'herbe sous le plateau de coupe. LE PLATEAU DE COUPE NE TOND 6.3.6) PAS DE FAÇON HOMOGÈNE Une courroie ou les deux sont insuffisamment tendues ( 6.3.8 et 6.3.9). 6.3.6) UNE BANDE RESTE l'herbe tondue est dense ou trop humide, une bande...
- Seite 161 PROBLÈMES AVEC LE PLATEAU DE COUPE (suite) PROBLÈME CAUSES POSSIBLES SOLUTION Courroie d'entraînement du plateau de La courroie d'entraînement n'est pas 6.3.8 et 6.3.9 suffisamment tendue LA COURROIE PLATEAU DE COUPE mouvement de la courroie S'ARRÊTE PENDANT LE FONCTIONNEMENT remplacer la poulie. Si l'herbe est trop haute ou humide, la courroie remplacez-la.
- Seite 162 PROBLÈMES AVEC LE PLATEAU DE COUPE (suite) PROBLÈME CAUSES POSSIBLES SOLUTION Courroie d'entraînement de la lame LES COURROIES VIBRENT Fonctionnement incorrect correctement. Si l'embrayage ne fonctionne pas LORSQUE LE PLATEAU DE COUPE EST MIS EN MARCHE Poulie courroie moteur remplacer la poulie. plateau de coupe Erreur sur le support du moteur La courroie d'entraînement n'est pas...
- Seite 163 MAINTENANCE EN FIN DE SAISON ET IMMOBILISATION DE LA MACHINE Ne conservez jamais le tracteur à pelouse, réservoir plein, dans des bâtiments ou des zones mal aérées, en présence de vapeurs de carburant, de flammes nues, d'étincelles ou de flammes de brûleur, de chaudières, de chauffage central, de chiffons secs, etc.
-
Seite 164: Mise Au Rebut De La Machine
MISE AU REBUT DE LA MACHINE deux manière : recevrez un document de cession pour la mise au rebut. b) Mettez vous-même la machine au rebut. caoutchouc (joints), restes de lubrifiant dans les roulements ou sur les engrenages. Les composants dangereux Reprise des pneus Nos partenaires commerciaux et partenaires d'assistance reprennent les pneus en fin de vie dans le cadre du programme Reprise disponibles sur www.seco-traktory.cz). - Seite 165 (d'origine) Directive du Parlement et du Conseil Européen nº 2006/42/CE (directive gouvernementale NV 176/2008 Coll.) Directive du Parlement et du Conseil Européen nº 2014/30/CE (directive gouvernementale NV 117/2016 Coll.) Directive du Parlement et du Conseil Européen nº 2000/14/CE (directive gouvernementale NV 9/2002 Coll.) déclarons ce qui suit : - nom : Tracteur de tonte...
- Seite 166 (d'origine) Directive du Parlement et du Conseil Européen nº 2006/42/CE (directive gouvernementale NV 176/2008 Coll.) Directive du Parlement et du Conseil Européen nº 2014/30/CE (directive gouvernementale NV 117/2016 Coll.) Directive du Parlement et du Conseil Européen nº 2000/14/CE (directive gouvernementale NV 9/2002 Coll.) déclarons ce qui suit : - nom : Tracteur de tonte...
- Seite 167 (d'origine) Directive du Parlement et du Conseil Européen nº 2006/42/CE (directive gouvernementale NV 176/2008 Coll.) Directive du Parlement et du Conseil Européen nº 2014/30/CE (directive gouvernementale NV 117/2016 Coll.) Directive du Parlement et du Conseil Européen nº 2000/14/CE (directive gouvernementale NV 9/2002 Coll.) déclarons ce qui suit : - nom : Tracteur de tonte...
- Seite 168 (d'origine) Directive du Parlement et du Conseil Européen nº 2006/42/CE (directive gouvernementale NV 176/2008 Coll.) Directive du Parlement et du Conseil Européen nº 2014/30/CE (directive gouvernementale NV 117/2016 Coll.) Directive du Parlement et du Conseil Européen nº 2000/14/CE (directive gouvernementale NV 9/2002 Coll.) ID No.: 60193450 déclarons ce qui suit : - nom :...
-
Seite 169: Informazioni Sul Presente Manuale
PREMESSA Gentile cliente, Grazie per aver acquistato un trattorino tosaerba del Seco Industries, s.r.o. INFORMAZIONI SUL PRESENTE MANUALE Il presente manuale riporta le istruzioni per procedere, nel modo più semplice possibile, nell'installazione, nel funzionamento e nella che entreranno in contatto con la macchina durante la sua installazione, funzionamento e manutenzione. La preghiamo di studiare bene il presente manuale di istruzioni prima di eseguire qualsiasi operazione con la macchina. -
Seite 170: Dati Tecnici
DATI TECNICI 1.1 | UTILIZZO La macchina UJ102, UJ102 4x4, UJ110 e UJ122 STARJET è un trattorino tosaerba semovente a doppio asse progettato per il taglio di prati curati e uniformi con un'altezza di crescita massima pari a 10 cm, ad esempio parchi, giardini e campi sportivi, possibilmente su pendenze ridotte, su cui non siano presenti oggetti estranei (rami caduti, pietre, oggetti solidi, ecc.). - Seite 171 1.3 | ETICHETTA DI IDENTIFICAZIONE DEL PRODOTTO E ALTRE ETICHETTE CON I SIMBOLI UTILIZZATI SULLA MACCHINA TARGA DI IDENTIFICAZIONE DEL MODELLO (A) Modello della macchina Modello del motore Anno di fabbricazione Peso 1.3.1a Nome e indirizzo del produttore Logo del produttore Il venditore iscriverà...
- Seite 172 serbatoio del 1.3.1b carburante Freno 1.3.1b Bloccaggio Bloccaggio differenziale differenziale 1.3.1b innestato disinnestato È severamente vietato rimuovere o danneggiare etichette e simboli rivolga al rivenditore o al produttore per ottenerne la sostituzione.
-
Seite 173: Parametri Tecnici
1.4 | PARAMETRI TECNICI MODELLO DEL TRATTORINO TOSAERBA PARAMETRI DI BASE UJ102 UJ102 4x4 UJ110 UJ122 Dimensioni compreso il contenitore 210 x 116 x 125 258 x 127 dell'erba [cm] 248 x 106 x 116 (senza il contenitore x 129 (Lunghezza x Larghezza x Altezza) dell'erba) Peso (senza carburante, olio... - Seite 174 UJ102 Livello di emissione di Livello di potenza Livello di vibrazioni dichiarato ( m.s Giri pressione acustica dichiarato acustica garantito L Motore (min presso l'operatore L (dB) (dB) ai sensi della trasferite alla mano - al vibrazioni totali a braccio a normativa 2000/14/CE BS 4155 2700...
-
Seite 175: Sicurezza Sul Lavoro
SICUREZZA SUL LAVORO Le falciatrici semoventi modello numero UJ102, UJ102 4x4, UJ110 e UJ122 a marchio STARJET sono fabbricate ai sensi delle norme sulla sicurezza vigenti in Europa. Il produttore della macchina lo conferma nella Dichiarazione di conformità, riportata al fondo del presente manuale d'uso ( 10). - Seite 176 ! Correggere ogni problema prima di ogni ulteriore utilizzo. Prima di iniziare a lavorare, controllare la tensione delle cinghie, l'affilatezza delle lame di taglio e la pulizia dell'area interna all'elemento tagliaerba. 2.1.4 Durante l'utilizzo della macchina ! La macchina non deve essere utilizzata per lavorare su pendenze con un gradiente superiore a 12° (21%), e quando si utilizza la trazione 4x4 su pendii con un gradiente superiore a 15°...
-
Seite 177: Sicurezza Dei Bambini
! Nelle pendenze, accelerare molto gradualmente e con la massima attenzione, per evitare sbandate della macchina. Prima di una avvalersi dell'effetto frenante della trasmissione. 2.3 | SICUREZZA DEI BAMBINI Se l'operatore del trattorino tosaerba non vigila attentamente per l'eventuale presenza di bambini, si possono verificare incidenti tragici. -
Seite 178: Smaltimento Dei Materiali Di Imballaggio
PREPARAZIONE PER LA MESSA IN FUNZIONAMENTO 3.1 | DISIMBALLAGGIO E ISPEZIONE DEL CONTENUTO Il trattorino tosaerba è fornito in un imballo di trasporto con cassa. Alcune parti della macchina sono state smontate per il trasporto presso la fabbrica e devono essere installate prima del funzionamento. La macchina viene tolta dall'imballo e predisposta per il funzionamento dal rivenditore nell'ambito del servizio prevendita. - Seite 179 3.3.1 SEDILE, VOLANTE E BATTERIA a) Montare il meccanismo di scorrimento del sedile e i bulloni di montaggio: Inclinare la console del sedile (1) di circa 90 meccanismo di scorrimento del sedile (2), posizionare una piastra (4) contro un lato della console e i bulloni (3) 3.3.1a con rondelle sull'altro lato.
- Seite 180 3.3.2 CONTENITORE DELL'ERBA Il contenitore dell'erba viene fornito in una scatola a parte. Alcune parti sono state smontate per il trasporto e devono essere Per montare il contenitore, preparare i seguenti utensili: Una taglierina per rimuovere i materiali di Cacciaviti a stella e un avvitatore manuale Un set di chiavi a brugola ed esagonali imballaggio elettrico...
- Seite 181 Avvitare i ganci del contenitore dell'erba (1) alla piastra posteriore. A questo scopo utilizzare le marcature dell'installazione sulla piastra che indicano la posizione corretta dei ganci. 3.3.2c Avvitare soltanto il gancio inferiire (2) se si utilizza un rimorchio (apparecchio opzionale). Avvitare il tubo anteriore sotto il coperchio del telaio superiore.
-
Seite 182: Controllo Della Pressione Dei Pneumatici
3.4 | ISPEZIONI PRIMA DELL'AVVIO 3.4.1 CONTROLLO DELL'OLIO DEL MOTORE Prima di controllare l'olio, il trattore deve essere posto orizzontalmente. Il tappo dell'olio è accessibile dopo aver inclinato il cofano Livello dell'olio sull'astina: (1) - (AGGIUNGERE) basso livello dell'olio 3.3.2g Il livello dell'olio deve trovarsi tra i due segni presenti sull'astina. - Seite 183 3.4.5 CONTROLLO DEL LIVELLO DELL'OLIO NEL CIRCUITO IDRAULICO (si applica solo al modello UJ102 4x4) La macchina UJ102 4x4 viene fornita con un circuito idraulico spurgato e con un serbatoio di compensazione riempito 3.4.5 serbatoio di compensazione è situato sotto il cofano sullo sterzo necessaria dell'olio prescritto.
-
Seite 184: Funzionamento Della Macchina
FUNZIONAMENTO DELLA MACCHINA 4.1 | DISPOSIZIONE DEI COMANDI E DEGLI INDICATORI (1) Leva dell'acceleratore (2) Pannello delle informazioni (accessorio opzionale) (3) Interruttore AUT/MAN - controllo della funzione di taglio quando il contenitore dell'erba è pieno (accessorio opzionale) (4) Presa da 12V (accessorio opzionale) (5) Disattivazione del disinnesto dell'elemento di taglio per l'inversione (6) Interruttore di innesto dell'elemento tagliaerba (7) Interruttore principale... -
Seite 185: Leva Dell'acceleratore
4.2 | DESCRIZIONE E FUNZIONI DEI COMANDI macchina selezionata. (1) LEVA DELL'ACCELERATORE VALVOLA Avvio a freddo del motore DELL'ARIA* (2) PANNELLO DELLE INFORMAZIONI (accessorio opzionale) Il pannello delle informazioni contiene le spie dell'indicatore, che servono per segnalare lo stato delle funzioni di base della macchina. Indicatore luminoso per la presenza e il livello pieno del contenitore dell'erba Acceso:... - Seite 186 (3) INTERRUTTORE PER IL CONTROLLO DELLA FUNZIONE DI TAGLIO QUANDO IL CONTENITORE DELL'ERBA È PIENO (accessorio opzionale) L'interruttore AUT/MAN serve per attivare e disattivare il controllo della funzione di taglio (elemento di taglio) quando il contenitore dell'erba è pieno. Nella posizione MAN, il taglio viene attivato permanentemente quando il contenitore dell'erba è pieno, e l'erba tagliata potrebbe accumularsi nello scivolo di espulsione.
-
Seite 187: Interruttore Principale
(7) INTERRUTTORE PRINCIPALE Serve per accendere / spegnere il motore. Presenta le 4 posizioni seguenti: Accensione spenta / spegnere l'accensione STOP STOP Accensione / spegnimento dei fari del cofano Accensione attiva, il motore è in funzione. Avvio del motore – posizione di avvio (8) CICALINO Il cicalino emette un segnale acustio quando il contenitore dell'erba è... - Seite 188 (12) SPIA DELL'INDICATORE DEL FRENO A PEDALE E DEL FRENO DI STAZIONAMENTO La spia dell'indicatore serve per segnalare che il freno è applicato e che il freno di stazionamento è inserito. Segnale di freno di stazionamento inserito Segnale pedale del freno applicato (13) PEDALE DI BLOCCAGGIO DEL DIFFERENZIALE Il pedale si utilizza solo se necessario e se si guida direttamente in avanti.
- Seite 189 (16) PEDALE MARCIA INDIETRO Il pedale controlla la potenza trasmessa alle ruote e regola la velocità della macchina indietro. Per ulteriori informazioni, 5.5. è possibile cambiare la direzione di marcia avanti / retromarcia solo dopo aver arrestato la macchina! (17) PEDALE MARCIA AVANTI Il pedale controlla la potenza trasmessa alle ruote e regola la velocità...
- Seite 190 (21) E (22) LEVA DI ESCLUSIONE – MOVIMENTO LIBERO DELLE RUOTE POSTERIORI La leva di esclusione serve per interrompere la potenza alle ruote posteriori in modo che la macchina possa essere spinta o tirata senza motore. A seconda del tipo di trasmissione utilizzata, questa si trova dietro la ruota posteriore sinistra o davanti alla ruota posteriore sinistra.
-
Seite 191: Avvio Del Motore
FUNZIONAMENTO E MOVIMENTAZIONE DELLA MACCHINA Informazioni utili da sapere prima di avviare per la prima volta il trattorino tosaerba: Il trattorino tosaerba è dotato di contatti di sicurezza, che sono inseriti tramite: - un interruttore posto sotto il sedile - un interruttore su un contenitore dell'erba fissato o un deflettore - un interruttore del contenitore dell'erba pieno - un interruttore del freno a pedale Il motore si arresta automaticamente se l'operatore lascia il sedile e la macchina non è... -
Seite 192: Spegnimento Del Motore
mai che il motore resti in funzione in un'area chiusa o con scarsa ventilazione. I gas di scarico possono mettere in pericolo la salute. Tenere piedi, mani e abbigliamento largo a distanza dai componenti di scarico o mobili. 5.2.1 SISTEMA DI MARCIA DI EMERGENZA La macchina è... - Seite 193 l'indicatore delle ore del motore. 5.4.3 REGOLAZIONE DELL'ELEVAZIONE DELL'ELEMENTO TAGLIAERBA PER IL TAGLIO Se si desidera impostare l'elemento tagliaerba in una posizione più alta rispetto al terreno, spostare la leva di regolazione del sollevamento dell'elemento tagliaerba verso l'alto. Se si desidera impostare l'elemento tagliaerba in una posizione più alta rispetto al terreno, spostare la leva di regolazione del sollevamento dell'elemento tagliaerba verso il basso.
- Seite 194 Quando si utilizza il disinnesto di questa funzione con il pulsante R, prestare particolare attenzione alla zona dietro la macchina durante l'inversione di marcia. 5.5.2 ARRESTO La marcia avanti/retromarcia della macchina viene arrestata togliendo gradualmente il piede dal pedale di marcia e successivamente spingendo sul freno a pedale.
- Seite 195 5.6 | SVUOTAMENTO DEL CONTENITORE DELL'ERBA regolare il livello pieno del contenitore dell'erba spostando il componente mobile del cestello (estendendo o accorciando il braccio) e in tal modo ottimizzando il suo riempimento per diversi tipi di vegetazione raccolta (erba secca, erba bagnata, fogliame, ecc.).
-
Seite 196: Manutenzione E Regolazioni
MANUTENZIONE E REGOLAZIONI Corrette e regolari procedure di manutenzione e ispezione della macchina contribuiscono alla sua durata e al suo funzionamento senza problemi. I componenti usurati o danneggiati devono essere tempestivamente sostituiti. Utilizzare sempre pezzi di ricambio originali. Pezzi di ricambio diversi possono danneggiare la macchina e mettere in pericolo il guidatore e altre persone, nonché... - Seite 197 (continuazione) INTERVALLO ASSEMBLAGGIO Filtro dell'aria e candele Controllo, sostituzione se necessario DOPO 50 ORE Lubrificazione delle parti secondo un piano di Lubrificazione lubrificazione DOPO 50 ORE DI Trasmissione idrostatica negli FUNZIONAMENTO Cambio olio impianti 4x4 MOTORE Motore, trasmissione, DOPO 100 ORE Controllo e regolazione del movimento trasmissione elettromagnetica DOPO 200 ORE DI...
-
Seite 198: Prima Di Iniziare Il Lavoro
6.2 | ISPEZIONE E MANUTENZIONE QUOTIDIANA Prima di iniziare interventi di manutenzione o assistenza, si consiglia di riesaminare con attenzione tutte le istruzioni, le limitazioni e le raccomandazioni riportate nel presente manuale d'uso. Prima di eseguire interventi di pulizia, manutenzione o riparazione, togliere sempre la chiave dall'accensione e disinserire le candele. - Seite 199 Contenitore dell'erba: - rimuovere il contenitore dell'erba dalla macchina, lavarlo e lasciarlo asciugare naturalmente. Parti in plastica sulla macchina: - pulire con una spugna e acqua saponata Elemento tagliaerba: - lavare l'interno compresa la parte dello scivolo di espulsione - inserire una manichetta di diametro adatto sui raccordi sulla copertura dell'elemento di taglio. Avviare il motore, innestare l'elemento di taglio e lavare l'elemento di taglio sotto una corrente d'acqua per 10 minuti.
-
Seite 200: Sostituzione Di Fusibili
Per ottenere un funzionamento ottimale del motore, occorre che la candela sia installata correttamente e sia priva di incrostazioni. attenzione ad evitare ustioni. 0,7 - 0,8 mm Scollegare il cavo della candela e togliere la candela con l'apposita chiave. Controllare visivamente l'aspetto esterno della candela. Se è evidentemente molto usurata o presenta un isolatore rotto o incrostato, è... - Seite 201 Non riparare una lama deformata o altrimenti danneggiata, sostituirla immediatamente. Quando si manipolano le lame, indossare guanti da lavoro spessi. Procedura di affilatura: Rimuovere il contenitore dell'erba, inclinare la macchina sul lato destro e sostenerla con gli appositi supporti. Si consiglia di richiedere l'assistenza di un'altra persona quando si inclina la macchina onde evitare di danneggiare parte della macchina o provocare lesioni.
- Seite 202 Posizionare la macchina su una superficie il più possibile uniforme, gonfiare tutti i pneumatici alla pressione indicata (80 -140 Kpa, differenza di ± 10 Kpa tra i singoli pneumatici)e fissare l'intera macchina per immobilizzarne i movimenti (es. utilizzando un apposito cuneo, ecc.). Muovere la leva di regolazione del sollevamento dell'elemento tagliaerba in posizione 1.
- Seite 203 Macchine UJ110: La cinghia di trasmissione dell'elemento tagliaerba è corretta quando la lunghezza della molla di tensionamento (2) è di 135±1 mm mm. Se la lunghezza è diversa, regolarla ruotando il dado (1) della barra di tensionamento. 6.3.9d 6.3.10 ELEMENTO TAGLIAERBA - RIMOZIONE DALLA MACCHINA Impostare l'elemento tagliaerba alla posizione più...
- Seite 204 sotto un componente rigido del telaio o sul braccio della trasmissione. Stabilizzare la macchina sotto con un idoneo blocco di legno. 6.3.14 Togliere la copertura protettiva (1) della ruota (solo ruote anteriori). Utilizzare un cacciavite adatto per rimuovere l'anello di tenuta (2) e togliere la rondella (3). e ingrassare leggermente l'assale con un lubrificante plastico.
- Seite 205 6.4 | LUBRIFICAZIONE Lubrificare la macchina secondo la figura 6.4 e la tabella sotto riportata. Nel caso in cui la macchina sia utilizzata in presenza di condizioni di funzionamento molto polverose o sabbiose, lubrificare con maggior frequenza. I cuscinetti delle pulegge di tensionamento, delle pulegge della guida e del meccanismo di taglio sono autolubrificanti. Prima di iniziare la lubrificazione, il motore deve essere spento e tutte le parti mobili della macchina devono essere ferme.
- Seite 206 7 | RIPARAZIONE DI MALFUNZIONAMENTI E DIFETTI indicati più avanti possono essere eseguiti dall'utilizzatore. Interventi di assistenza diversi da quelli indicati renderanno nulla la da parte dell'utilizzatore di interventi di assistenza vietati. PROBLEMI AL MOTORE PROBLEMA POSSIBILI CAUSE SOLUZIONE Carburante insufficiente o assente nel Aggiungere carburante serbatoio del carburante Procedura di avviamento del motore...
- Seite 207 PROBLEMI CON LA MARCIA PROBLEMA POSSIBILI CAUSE SOLUZIONE VIENE EMESSO UN Verificare lo stato delle cinghie e delle pulegge di Cinghie, pulegge di guida SUONO "STRIDULO" tensionamento. Se il problema persiste, contattare o trasmissione usurate o danneggiate DURANTE LA MARCIA immediatamente un centro di assistenza autorizzato.
- Seite 208 PROBLEMI ALL'ELEMENTO TAGLIAERBA PROBLEMA POSSIBILI CAUSE SOLUZIONE Erba e sporcizia accumulati all'interno Rimuovere lo sporco dal lato inferiore dell'elemento dell'elemento tagliaerba tagliaerba. Verificare lo stato delle lame e affilare o sostituire L'ELEMENTO Lame smussate o deformate 6.3.6) TAGLIAERBA NON TAGLIA IN MODO Albero delle lame danneggiato od Verificare lo stato dell'albero.
- Seite 209 PROBLEMI ALL'ELEMENTO TAGLIAERBA (continuazione) PROBLEMA POSSIBILI CAUSE SOLUZIONE Verificare lo stato delle pulegge delle cinghie. Forse Cinghia di trasmissione dell'elemento la cinghia è fuoriuscita dalla puleggia della cinghia tagliaerba danneggiata o è stata danneggiata. Se occorre, procedere alla sostituzione. Controllare la tensione della cinghia di trasmissione La cinghia di trasmissione non 6.3.8 e 6.3.9) e tenderla se necessario.
-
Seite 210: Garanzia
PROBLEMI ALL'ELEMENTO TAGLIAERBA (continuazione) PROBLEMA POSSIBILI CAUSE SOLUZIONE Controllare le lame, per verificare se siano non uniformi Lame danneggiate o distorte; controllare anche la loro equilibratura. Se risultano deformante, procedere alla sostituzione. Controllare l'eventuale presenza di superfici bruciate Cinghia di trasmissione della lama danneggiata vibrazioni. - Seite 211 8 | MANUTENZIONE DI FINE STAGIONE E DEPOSITO DELLA MACCHINA Al termine della stagione o se non si utilizza la macchina per oltre 30 giorni, predisporla per il deposito appena possibile. Se resta carburante nel serbatoio per oltre 30 giorni, potrebbe creare un sedimento appiccicoso, che potrebbe danneggiare il carburatore e provocare prestazioni scadenti del motore.
-
Seite 212: Smaltimento Della Macchina
9 | SMALTIMENTO DELLA MACCHINA (deposito di rottami, centro di raccolta di b) Smaltimento autonomo della macchina. In questo caso, si consiglia la seguente procedura: Smaltire il prodotto riciclando i materiali secondari in base alle norme sullo smaltimento dei rifiuti. Smontare tutta la macchina. - Seite 213 10 | (originale) ai sensi di: EP e Regolamento n. 2006/42/CE (comunicazione governativa NV 176/2008 Coll.) EP e Regolamento n. 2014/30/CE (comunicazione governativa NV 117/2016 Coll.) EP e Regolamento n. 2000/14/CE (comunicazione governativa NV 9/2002 Coll.) con il presente atto dichiara quanto segue: B.
- Seite 214 (originale) ai sensi di: EP e Regolamento n. 2006/42/CE (comunicazione governativa NV 176/2008 Coll.) EP e Regolamento n. 2014/30/CE (comunicazione governativa NV 117/2016 Coll.) EP e Regolamento n. 2000/14/CE (comunicazione governativa NV 9/2002 Coll.) con il presente atto dichiara quanto segue: B.
- Seite 215 (originale) ai sensi di: EP e Regolamento n. 2006/42/CE (comunicazione governativa NV 176/2008 Coll.) EP e Regolamento n. 2014/30/CE (comunicazione governativa NV 117/2016 Coll.) EP e Regolamento n. 2000/14/CE (comunicazione governativa NV 9/2002 Coll.) con il presente atto dichiara quanto segue: B.
- Seite 216 (originale) ai sensi di: EP e Regolamento n. 2006/42/CE (comunicazione governativa NV 176/2008 Coll.) EP e Regolamento n. 2014/30/CE (comunicazione governativa NV 117/2016 Coll.) EP e Regolamento n. 2000/14/CE (comunicazione governativa NV 9/2002 Coll.) con il presente atto dichiara quanto segue: B.
- Seite 218 Seco Industries, s.r.o. Jungmannova 11 © Seco Industries, s.r.o., 2019 CZECH REPUBLIC...