Herunterladen Inhalt Inhalt Diese Seite drucken
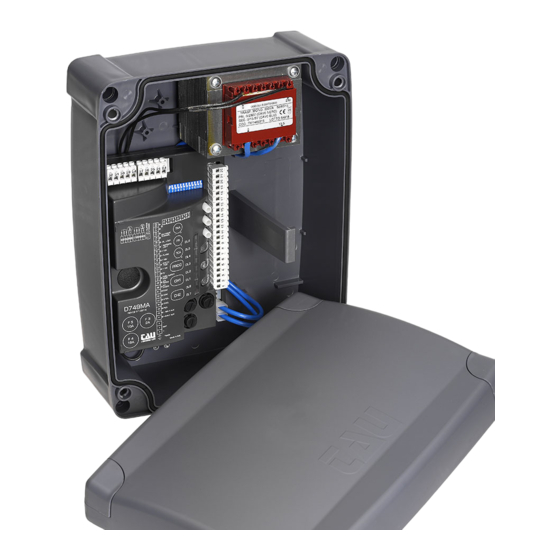
tau DIAMOND Serie Installationsanleitung
Vorschau ausblenden Andere Handbücher für DIAMOND Serie:

Werbung

Verfügbare Sprachen
  • DE

Verfügbare Sprachen

  • DEUTSCH, seite 26
GUIDA ALL'INSTALLAZIONE
INSTALLATION GUIDE
INSTALLATIONSANLEITUNG
NOTICE D'INSTALLATION
GUÍA PARA LA INSTALACIÓN
GUIA DE INSTALAÇÃO
D749MA
IT - Istruzioni originali

Werbung

Inhaltsverzeichnis
loading

Inhaltszusammenfassung für tau DIAMOND Serie

  • Seite 1 GUIDA ALL’INSTALLAZIONE INSTALLATION GUIDE INSTALLATIONSANLEITUNG NOTICE D’INSTALLATION GUÍA PARA LA INSTALACIÓN GUIA DE INSTALAÇÃO D749MA IT - Istruzioni originali...
  • Seite 2 SCHEMA D749MA SCHALTPLAN SCHÉMA ESQUEMA DEL ESQUEMA CABLAGGIO WIRING DER D749MA CÂBLAGE CABLEADO DE LIGAÇÕES D749MA DIAGRAM D749MA D749MA D749MA Dip-switches 9 10 11 12 Trimmer: 9 10 11 12 D749MA LEDs: FIXED SAFETY EDGE PROG EXT. PHOTO INT. PHOTO STOP OPEN/CLOSE PEDESTRIAN...
  • Seite 3: Power Supply

    - Morsetti 1 - 2: Attenzione a NON invertire la polarità. - Se il jumper 6 non è inserito, verrà attivata la modalità basso consumo e le uscite 11-12, 12-13, 14-15, 16-17 e 16-18 verranno spente. - Terminals 1 – 2: Careful NOT to invert polarity. - If the jumper J6 is not plugged in, at the end of each maneuver output 11 and 12 will be switched off (energy saving mode).
  • Seite 4: Avvertenze Importanti

    Nella progettazione delle proprie apparecchiture, TAU rispetta le normative applicabili al prodotto (vedere la dichiarazione di conformità allegata); è fondamentale che anche l’installatore, nel realizzare gli impianti, prosegua nel rispetto scrupoloso delle norme.
  • Seite 5 COMPATIBILITÁ CON L’APP TAUOPEN E TAUAPP ATTENZIONE: Per un corretto funzionamento si deve utilizzare il cavo TAU cod. M-030000CC50 per il colle- gamento dei motori alla centrale di comando oppure cavi di sezione non inferiore a 2,5 mm non utilizzare cavi unifilari (a conduttore unico), es. quelli citofonici, al fine di evitare inter- ruzioni sulla linea e falsi contatti;...
  • Seite 6 (vedi nota alla fine del paragrafo). ATTENZIONE: l’uscita di default è monostabile attiva 2 sec. Per com- mutarla in bistabile attiva oppure per modificare il tempo di attiva- zione è necessario operare tramite programmatore palmare TAU- PROG (vedi istruzioni relative).
  • Seite 7: Regolazioni Logiche

    ingresso antenna radioricevente ad innesto solo per ricevitori 433,92 21 - 22 ANTENNA MHz. (21= MASSA - 22= SEGNALE) uscita alimentazione motore (M2) 18V DC 23 - 24 MOTORE (M2) (23= POSITIVO - 24= NEGATIVO) usare cavi 2,5 mm alimentazione e ingresso encoder (25= BIANCO segnale - 26= BLU nega- 25 - 26 - 27 ENCODER (M2) tivo - 27= MARRONE positivo) uscita alimentazione motore (M1) 18V DC...
  • Seite 8: Procedura Di Memorizzazione

    l’automazione ignora i comandi di chiusura durante l’apertura e il tempo di pausa. NO REVERSE l’automazione si comporta come stabilito dal dip switch nr. 2. la funzione prelampeggio è inserita. PRE- LAMPEGGIO la funzione prelampeggio è disinserita. la funzione “verifica delle fotocellule” è inserita. FOTOTEST la funzione “verifica delle fotocellule”...
  • Seite 9 raggiunta la battuta in apertura, l’automazione inizia a chiudere alla ricerca della battuta in chiusura (in questa fase la centrale acquisisce tutti i parametri relativi alla corsa); l’automazione esegue un’apertura completa per l’ottimizzazione della forza motore in apertura; dopo una piccola pausa, l’automazione esegue una chiusura completa per l’ottimizzazione della forza motore in chiusura.
  • Seite 10 batteria in carica; sempre acceso (Giallo): batteria carica, tensione di rete assente; 1 lampeggio ogni 4 sec (Verde): Controllare l’alimentazione di rete; alimentazione con pannello fotovoltaico (morsetti 1-2), ca- 1 lampeggio ogni 4 sec (Giallo): ricabatteria disattivato; batteria scarica; 1 lampeggio ogni 2 sec (Rosso): Caricare la batteria, sostituire la batteria;...
  • Seite 11 Intervento sicurezza bordo sensibile 7 lampeggi (Rosso): È necessario un impulso di comando per effettuare la chiusura; errore memoria Eeprom esterna; 8 lampeggi (Rosso): Sostituire il modulo di memoria esterna; errore dati in Eeprom (interna/esterna); 8 lampeggi (Giallo): Eseguire procedura di RESET MEMORIA RADIO; Oltre agli avvisi/errori della parte logica, il led DL8 indica anche lo stato della centrale durante la me- morizzazione dei radiocomandi.
  • Seite 12 APPRENDIMENTO RADIOCOMANDI CH1 = 1° canale (APRE/CHIUDE) CH2 = 2° canale CH3 = 3° canale (PEDONALE) 1_ Premere brevemente il tasto CH1 se si desidera associare un radiocomando alla funzione APRE/ CHIUDE; 2_ il led DL8 (verde) si accende fisso per indicare la modalità di apprendimento dei codici (se non viene immesso nessun codice entro 10 secondi, la scheda esce dalla modalità...
  • Seite 13 Invertire tra loro i collegamenti del motore sulla morsettiera (morsetti 28 - 29 per M1, morsetti 23 e 24 per M2). 13. GARANZIA: CONDIZIONI GENERALI La garanzia della TAU ha durata di 24 mesi dalla data di acquisto dei prodotti (fa fede il documento fiscale di vendita, scontrino o fattura).
  • Seite 14 La garanzia comprende la riparazione con sostituzione gratuita (franco sede TAU: spese di imballo e di trasporto sono a carico del cliente) delle parti che presentano difetti di lavorazione o vizi di materiale riconosciuti dalla TAU. In caso di intervento a domicilio, anche nel periodo coperto da garanzia, l’utente è tenuto a corrispon- dere il “Diritto fisso di chiamata”...
  • Seite 15 COMPATIBILITY WITH OUR APPS: TAUOPEN AND TAUAPP ATTENTION: For correct operation, you have to use the TAU cable cod. M-030000CC50 for connecting the motors to the control unit or cables with a section of not less than 2.5 mm do not use single cables (with one single wire), ex. telephone cables, in order to avoid break-...
  • Seite 16: Technical Characteristics

    downs of the line and false contacts; do not re-use old pre-existing cables; In case of long sections of cables (> 20 m) for N.O./N.C. controls (e.g. OPEN / CLOSE, STOP, PEDESTRIAN, etc.), in order to avoid gate malfunctions, it will be necessary to uncouple the various controls using RELAYS or using our 750T-RELE device.
  • Seite 17 PHOTOCELL OR SAFETY DEVICE input INSIDE the automation (Normally Closed contact). When these devices trigger during the opening phase, they INTERNAL 7 - 8 temporarily stop the automation until the obstacle has been removed; PHOTOCELLS during the closing phase they stop the automation and then totally open it again.
  • Seite 18 tion is shown in the table. If Jumper J6 is not plugged in, energy saving mode will be activated and, at the end of each manouvre, outputs 11-12, 12-13, 14-15, 16-17 and 16-18 will be switched off. IMPORTANT: • Do not connect auxiliary relays or other devices tot he 18 V DC output (terminals 11 – 12) to avoid malfunctions of the control unit.
  • Seite 19 Dip 9 Dip 10 Dip 11 Automation ARM, ZIP12 up to 200 Kg or leaf less than 3 m.; ARM, ZIP12 over 200 kg and leaf less than 3 m R18BENC BIUNO-BT ARM, ZIP12 with leaf above 3 m and 400 Kg max EASY12QR;...
  • Seite 20: Obstacle Detection

    be programmed so that, at the desired opening time, the relay contact closes until the desired closing time (when the timer’s relay contact opens, enabling the automatic closing of the gate). Note: the automatic closing function must be enabled by setting Dip-switch no. 1 to ON). BATTERY CHARGER BOARD (INTEGRATED) If the battery is connected the automation will operate in any case if there is no mains power supply.
  • Seite 21 obstacle for motor 1; 2 flashes (red): Make sure there are no obstacles across the path of the automation and that it slides smoothly; With an active automatic closing feature, after the intervention meant to detect the obstacle, the automatic closing is deactivated. A command pulse is required to carry out the closing;...
  • Seite 22: Mhz Built-In Radio Receiver

    cancelling of channel CH2 in progress; always on (yellow): When LEDs DL7 and DL8 flash at the same time they indicate: factory reset procedure waiting for confirmation; flashing (red + red): waiting for total cancellation of the radio channels; flashing (yellow + yellow): Multiple errors are signalled by a 2-second pause between signals.
  • Seite 23: Memory Capacity

    In case of Hard Reset the memory of the radio receiver will not be erased: all existing transmitters remain programmed. 11. SET-UP FOR OPERATION WITH TAU APPS In order to use the TauApp and TauOpen apps, it will be necessary to connect to input J4 of the D749MA control unit using the supplied cable, the respective T-WIFI and T-CONNECT devices.
  • Seite 24 Invert the motor connections on the terminal block (terminals 28 and 29 for M1; terminals 23 and 24 for M2). 12. GUARANTEE: GENERAL CONDITIONS TAU guarantees this product for a period of 24 months from the date of purchase (as proved by the sales document, receipt or invoice).
  • Seite 25 MANUFACTURER’S DECLARATION OF INCORPORATION (in accordance with European Directive 2006/42/EC App. II.B) Manufacturer: TAU S.r.l. Address: Via E. Fermi, 43 - 36066 Sandrigo (Vi) ITALY Declares under its sole responsibility, that the product: Electronic control unit designed for automatic movement of:...
  • Seite 26: Wichtige Hinweise

    Personal in Übereinstimmung mit den Verordnungen der gültigen Gesetze, Normen und Vorschriften ausgeführt werden dürfen. Bei der Planung ihrer Apparaturen hält sich TAU an die für das Produkt anwendbaren Vorschriften (siehe anliegende Konformitätserklärung); von grundlegender Wichtigkeit ist, dass sich auch der Instal- lateur bei der Durchführung der Anlage genauestens an die Vorschriften hält.
  • Seite 27: Einführung

    mit einem Querschnitt von mindestens 2,5 mm zum Anschließen der Motoren an die Steuerung verwenden Verwenden Sie keine Leitungen mit einzeldraht wie z.b. bei den Sprechanlagen, um unterbrechungen auf der Linie und zu vermeiden; Verwenden Sie keine alte vorhandene verkabelung; Im Falle langer Kabelverläufe (>...
  • Seite 28 NC-Eingang, Taste STOPP – hält die Automatisierung unabhängig von 5 - 6 STOP seiner Position an; stellt die automatische Schließung vorübergehend ab, falls programmiert. (5= STOP - 6= GEM.) Eingang für FOTOZELLEN oder SICHERHEITSVORRICHTUNGEN AUF DER INNENSEITE der Automatisierung (normal geschlossener Kon- takt).
  • Seite 29: Einstellung Der Logik

    Ausgang 2. Funkkanal – zum Steuern einer anderen Automatisierung oder zum Einschalten von Lichtern usw..(potentialfreier NO-Kontakt). Achtung: für die Lichtsteuerung (oder andere Belastungen) mit dem 2. Kanal des Funkempfängers entsprechend stärkere Hilfsrelais unbedingt verwenden (siehe Hinweis am Ende des Absatzes). 19 - 20* 2.
  • Seite 30: Funktion

    bei funktionierender Automatisierung, verursacht eine Auf/Zu Befeh- lesequenz eine ÖFFNUNG-SCHLIEßUNG-ÖFFNUNG-SCHLIEßUNG usw. der Automatisierung. 2 / 4 TAKT unter denselben Bedingungen verursacht die gleiche Befehlesequenz eine ÖFFNUNG-STOPP-SCHLIEßUNG-STOPP-ÖFFNUNG-STOPP usw. der Auto- matisierung (Funktion Schrittbetrieb) (siehe auch Dip-Switch 4). ERNEUT SCHLIES- Nach dem Einsetzen des Fotozellenkontaktes (Eingang 7-18) schließt sich die Automasierung automatisch nach 5 Sekunden.
  • Seite 31 Das Verfahren sollte vorzugsweise mit dem Tor auf ungefähr 0,5 m vom mechanischen Anschlag in Schließung begonnen werden. Drücken Sie die Taste PROG und halten Sie sie gedrückt, bis die LED DL8 (gelb) zu blinken beginnt: Die Automatisierung beginnt, sich langsam auf der Suche des Endschalter Öffnung zu öffnen; Halten Sie die Bewegung des Tors an (mit den Fotozellen oder durch Schließung des Kon- takts STOP), vertauschen Sie die Polarität des schließenden Motors, das Tor in geschlossene Position bringen (auf mechanischen Anschlag) und das Verfahren vom Beginn wiederholen,...
  • Seite 32: Stromversorgung Mit Photovoltaik-Modul (Klemmen 1-2), Ladegerät Deaktiviert

    DL4 - Grüne LED für INNEN FOTOZELLEN DL5 - Grüne LED für AUSSEN FOTOZELLEN DL6 - Grüne LED für SICHERHEITSLEISTE LED - DL7 Die LED DL7 zeigt das Vorhandensein der Batterie sowie außerdem eventuelle Fehler durch Aufblinken in verschiedenen Farben an: Zeichenerklärung: Immer an LED;...
  • Seite 33 Kein Signal Encoder Motor 1; 4 Aufblinken (rot): Kontrollieren Sie die Verkabelung, stellen Sie sicher, dass sich der Motor ungehindert dreht, wenn er direkt von der Batterie gespeist wird, über- prüfen Sie die Sicherung F5; Kein Signal Encoder Motor 2; 4 Aufblinken (gelb): Kontrollieren Sie die Verkabelung, stellen Sie sicher, dass sich der Motor ungehindert dreht, wenn er direkt von der Batterie gespeist wird, über- prüfen Sie die Sicherung F5;...
  • Seite 34: Rückstellung Automatischer Betrieb

    9. RÜCKSTELLUNG AUTOMATISCHER BETRIEB Betätigen Sie die manuelle Entsperrung, wenn es erforderlich ist, die Schließung oder die Öffnung der Automatisierung von Hand auszuführen. Bei der Wiederherstellung der normalen (automatischen) Betriebsweise muss das Folgende beachtet werden: • Bei der Wiederherstellung nach einem Stromausfall (die Karte bleibt für eine gewisse Zeit ohne Stromversorgung) wechselt das Automatisierung bei der Suche des Anschlags Schließung zur ver- langsamten Phase (Manöver VERLANGSAMUNG);...
  • Seite 35: Vorbereitung Für Den Betrieb Mit Tau-Applikationen

    Beim Hard Reset ist die Funkempfänger-Speicher nicht betroffen: die eingelernten Handsender bleiben erhalten. 11. VORBEREITUNG FÜR DEN BETRIEB MIT TAU-APPLIKATIONEN Um die Applikationen TauApp und TauOpen verwenden zu können, müssen die entsprechenden T- WIFI- und T-CONNECT-Geräte mit dem mitgelieferten Kabel an den Eingang J4 der D749MA-Steuerung angeschlossen werden.
  • Seite 36: Betriebsstörungen: Mögliche Ursachen Und Abhilfen

    M1; Klemmen 23 und 24 durch die M2). 13. GARANTIE: ALLGEMEINE BEDINGUGEN Die Garantie der Firma TAU hat 24 Monate Gültigkeit ab Kaufdatum (das Datum muss durch eine Quit- tung oder Rechnung belegt sein). Die Garantie schließt die Reparatur mit kostenlosem Ersatz (ab Werk der Firma TAU: Verpackungs- und Transportkosten gehen zu Lasten des Kunden) jener Teile ein, die von TAU anerkannte Fabrikations- oder Materialfehler aufweisen.
  • Seite 37 MANUFACTURER’S DECLARATION OF INCORPORATION (in accordance with European Directive 2006/42/EC App. II.B) Manufacturer: TAU S.r.l. Address: Via E. Fermi, 43 - 36066 Sandrigo (Vi) ITALY Declares under its sole responsibility, that the product: Electronic control unit designed for automatic movement of: Swing Gates...
  • Seite 38 Dans le projet de ses appareils, TAU respecte les normes applicables au produit (voir la déclaration de confor- mité jointe) ; il est fondamental que l’installateur lui aussi, lorsque qu’il réalise l’installation, respecte scrupu- leusement les normes.
  • Seite 39: Caractéristiques Techniques

    • COMPATIBILITE AVEC L’APP TAUOPEN ET TAUAPP ATTENTION : Pour un fonctionnement correct, on conseille d’utiliser le câble TAU réf. M-03000CC50 pour la connexion des moteurs aux centrales de commande ou à des câbles d’une section d’au moins 2,5 mm ne pas utiliser les câbles unifilaires (à...
  • Seite 40 entrée N.O. touche PIÉTON - Commande l’ouverture et la fermeure totale 3 - 6 PIÉTON di moteur 1 (M1) et est réglée dans le fonctionnement par les dip-switchs 2 et 4. (3= PIET. - 6= COM) entrée N.O. touche OUVRE/FERME – Commande l’ouverture et la fermeture 4 - 6 OUVRE/FERME de l’automatisme et est réglée dans le fonctionnement par les dip-switchs...
  • Seite 41 ATTENTION : la sortie par défaut est monostable active 2 sec. Pour la commuter en bistable active ou bien pour modifier le temps d’activa- tion il est nécessaire d’actionner avec le programmateur de poche TAU- PROG (voir instructions relatives). entrée antenne radioréceptrice embrochable seulement pour récepteurs...
  • Seite 42: Procédure De Mémorisation

    “RÉGLAGES DE FABRIQUE“ (voir page 46). BARRE PALPEUSE RESISTIF (étau n ° 10). BARRE PALPEUSE BARRE PALPEUSE CONTACT N.C. ( étau n ° 10). Remarque: s’il n’est pas utilisé, maintenir le dip sur OFF. 6. PROCÉDURE DE MÉMORISATION ATTENTION : Après avoir alimenté...
  • Seite 43: Détection Des Obstacles

    en ouverture qu’en fermeture [voir instructions moteur]. Après avoir terminé l’installation de l’automatisme : Vérifier la position des dip 9, 10 et 11. Les dip-switchs doivent être réglé selon le modèle d’automatisation (voir tableau dip 9-10-11, section «Réglages logiques»). Il est préférable de commencer la procédure avec le portail à environ 0,5 m de l’arrêt mécanique de fermeture.
  • Seite 44 8. LEDS DE DIAGNOSTICS DL1 - Rouge led de signalisation touche PIÉTON DL2 - Rouge led de signalisation touche OUVRE/FERME DL3 - Verte led de signalisation touche STOP DL4 - Verte led de signalisation PHOTOCELLULES INTERNES DL5 - Verte led de signalisation PHOTOCELLULES EXTERNES DL6 - Verte led de signalisation BARRE PALPEUSE LED - DL7...
  • Seite 45 présence obstacle pour le moteur 2 2 clignotement (jaune): Contrôler l’absence d’obstacles le long de la course de l’automatisme et son coulissement fluide. Dans le cas d’une intervention obstacle avec la fonction de fermeture au- tomatique habilitée, la manœuvre automatique de fermeture du portail sera désactivée.
  • Seite 46 L’indication de plusieurs erreurs est effectuée avec une pause de 2 secondes entre une signalisation et la suivante. Dans le cas d’une intervention par l’encodeur (détection d’obstacle) pendant la phase de fermeture, le centrale de commande inverse le mouvement et il commence la phase de ralentissement de la course en ouverture, avec l’arrêt de la fermeture automatique.
  • Seite 47 cédure de programmation reculée des nouveaux émetteurs. Suivre la procédure mentionnée sur les notices techniques concernant l’émetteur T-4RP / K-SLIM-RP / S-2RP / S-4RP (V 4.X). EFFACEMENT ÉMETTEURS 1_ Maintenir enfoncée pendant environ 3 secondes la touche CH1 pour effacer tous les émetteurs qui lui sont associés ;...
  • Seite 48 24 pour le moteur 2). 13. GARANTIE: CONDITIONS GÉNÉRALES La garantie TAU a une durée de 24 mois à compter de la date d’achat des produits (le document fiscal de vente, ticket de caisse ou facture). La garantie comprend la réparation avec remplacement gratuit (départ usine TAU: frais d’emballage et de transport à...
  • Seite 49 DÉCLARATION D’INCORPORATION DU FABRICANT (conformément à la Directive européenne 2006/42/CE Annexe II.B) Fabricant : TAU S.r.l. Adresse : Via E. Fermi, 43 - 36066 Sandrigo (Vi) - ITALY Déclare sous sa propre responsabilité que le produit : Logique électronique de commande réalisé...
  • Seite 50 Durante el diseño de sus equipos, TAU respeta las normativas aplicables al producto (véase la declaración de conformidad adjunta); también es fundamental que el instalador, al realizar la instalación, respete escrupulo- samente las normas.
  • Seite 51: Características Técnicas

    los motores con el cuadro electrico de mando o cables con una sección de no menos de 2.5 no utilizen cables monoconductores (como por ejemplo los del interfono) para evitar inte- rrupciones en la linea y falsos contactos; no utilizen cables viejos preexistentes; En caso de tramos largos de cable ( >...
  • Seite 52 entrada N.C. botón STOP – Detiene el automatismo dondequiera que se 5 - 6 STOP encuentre, inhibiendo momentáneamente el cierre automático, de haber sido programado. (5= STOP - 6= COM) entrada FOTOCÉLULAS O DISPOSITIVOS DE SEGURIDAD SITUADOS AL INTERNO respecto de l’automatismo ( contacto Normalmente Cerrado). FOTOCÊLULAS Su accionamiento, durante la apertura, provoca el paro momentáneo 7 - 8...
  • Seite 53 alimentación y entrada codificador. (25= BLANCO señal - 26= AZUL nega- 25 - 26 - 27 ENCODER (M2) tivo - 27= MARRÓN positivo) salida alimentación motor M1 18V DC (28= POSITIVO - 29= NEGATIVO) 28 - 29 MOTOR (M1) utilizar cables de 2.5 mm alimentación y entrada codificador.
  • Seite 54 la función “golpe a la apertura” está activada. Permite desenganchar la cerradura GOLPE A LA eléctrica (se puede utilizar sólo si se dispone de cerradura eléctrica); APERTURA la función “golpe a la apertura” está desactivada; está habilitado el uso de un solo motor (M1). SELECCIÓN MOTORES está...
  • Seite 55: Led De Diagnóstico

    Recuerde que la presencia de un obstáculo durante la memorización es interpretada como un tope mecánico (el sistema no interviene realizando movimientos de seguridad, sino solo deteniendo los motores). Por lo tanto, asegúrese de no estar cerca del automatismo durante el proceso de memo- rización.
  • Seite 56 El LED DL8 señala los avisos/errores de la lógica de la tarjeta con una serie de destellos predetermina- dos de diferentes colores: Leyenda: led siempre encendido; led intermitente; funcionamiento regular; 1 destello (Verde) cada 4 s: destello alternado: memorización a realizar; (Rojo/Verde) memorización realizándose;...
  • Seite 57 Realice el proceso de RESET DE LA MEMORIA RADIO; Además de los avisos/errores de la parte lógica, el LED DL8 también indica el estado de la central du- rante la memorización de los emisores. canal CH1 esperando programación; siempre encendido (Verde): memoria canal CH1 llena;...
  • Seite 58 derlo inmediatamente esperando otros radiocontroles (si así no fuera, tratar de volver a transmitir o espere 10 segundos y reinicie desde el punto 1); 5_ si quiere memorizar otros radiocontroles, pulse la tecla en otros dispositivos dentro de 2-3 segundos. Después de este periodo de tiempo (el LED DL8 se apaga) debe repetir el procedimiento desde el punto 1 (hasta un máximo de 30 transmisores);...
  • Seite 59 1; bornes 23 y 24 por el motor 13. GARANTÍA: CONDICIONES GENERALES a garantía de TAU tiene una cobertura de 24 meses a partir de la fecha de compra de los productos (la fecha válida es la que figura en el comprobante de venta, recibo o factura).
  • Seite 60 • Si no se han utilizado todos los componentes originales TAU para la instalación del automatis- • Si los daños han sido causados por catástrofes naturales, modificaciones, sobrecargas de ten- sión, alimentación incorrecta, reparaciones inadecuadas, instalación incorrecta u otras causas no imputables a TAU.
  • Seite 61: Informação Importante

    Este producto pode unicamente ser instalado e mantido por pessoal qualificado em conformidade com as actuais leis, normas e directivas. Ao conceber os seus produtos a TAU cumpre todos as normas aplicáveis ( por favor consulte a declaração de conformidade anexa). É de suprema importância que os instaladores observem escrupulosamente as mesmas normas quando instalam o producto.
  • Seite 62 COMPATIBILIDADE COM O APP TAUOPEN E TAUAPP ATENÇÂO: Para uma operação correta, recomendamos a utilização do cabo TAU cód. M-03000CC50 para aligação do motor à central de comando ou cabos com uma seção não inferior a 2,5 mm Não utilizar cabos unifilares, ex.: cabos telefónicos, de modo a evitar interrupções na linha e falsos contactos;...
  • Seite 63 Botão DE ABERTURA / FECHO N.A. – Controla a abertura e fecho da 4 - 6 ABERTURA / FECHO automação e é controlado através das funções dos dip-switch 2 e 4. (4= ABERTURA / FECHO - 6= COMUM). Entrada botão STOP N.F. – para a automação em qualquer posição, 5 - 6 STOP temporariamente impedindo o fecho automático, se programado...
  • Seite 64: Fecho Automático

    Entrada de antena sómente para receptores 433,92 MHz. 21 - 22 ANTENA (21= MASSA - 22= SINAL). Saída alimentação motor 18V DC (23= POSITIVO – 24= NEGATIVO) 23 - 24 MOTOR (M2) use cabos de 2,5 mm Conector rápido para a ligação do ENCODER. (25 = BRANCO sinal - 26= 25 - 26 - 27 ENCODER (M2) AZUL negativo - 27= CASTANHO positivo).
  • Seite 65 A função pré-lampejo está activa. PRÉ-LAMPEJO A função pré-lampejo está inactiva. A função ‘teste de fotocélulas’ está activa. FOTOTESTE A função ‘teste de fotocélulas’ está inactiva. Nota: deixar em OFF quando não se utilizam as fotocélulas. A função ‘golpe de ariéte’ está activa. Isto permite actuar /libertar o trinco GOLPE DE eléctrico ( para ser usada na presença de uma fechadura eléctrica);...
  • Seite 66 é interrompido. Para reiniciar (com o LED DL8 piscando), use o controlo AP/CH, o comando remoto (se programado) ou pressione brevemente o botão PROG. Por favor lembre-se que a presença de um obstáculo durante a memorização é inter- pretado como um fim de curso mecânico ( o sistema não incia nenhuma operação de segurança, sómente pára os motores).
  • Seite 67 bateria defeituosa; piscar rápido (vermelho): Substitua a bateria; LED - DL8 O LED DL8 indica erros na placa electrónica com uma série de pré-lampejos em difrentes côres: Indicação: led sempre aceso; led piscando; operação normal; 1 piscar a cada 4 segundos (verde): piscar alternativo guarda de dados a ser realizada;...
  • Seite 68 fecho automático desactivado após 5 tentativas conse- 6 piscar (vermelho): cutivas falhadas; É necessário um impulso de comando para efetuar o fecho; Intervenção de segurança de borda sensível 7 piscar (vermelho): Um pulso de comando é necessário para realizar o fecha- mento;...
  • Seite 69 SISTEMA DE APRENDIZAGEM RÁDIO COMANDOS CH1 = 1º canal (ABERTURA / FECHO) CH2 = 2º canal CH3 = 3º canal (PEDONAL) 1_ Pressione breve o botão CH1 para associar um rádio comando à função ABRIR / FECHAR. 2_ O LED DL8 (verde) está aceso indicando que o modo de aprendizagem está activo (se não introduzir nenhum código no período de 10 segundos, a placa sai do modo de programação).
  • Seite 70 24 para o motor 2). 13. GARANTIA: CONDIÇÕES GERAIS A garantia TAU tem uma duração de 24 meses a contar da data de compra dos produtos (o documento fiscal de venda, recibo ou factura). Esta garantia cobre a reparação ou substituição a espensas TAU (à saída da fábrica: embalagem e trans- porte por conta do cliente) das peças que que apresentem defeitos de fabrico ou material defeituoso...
  • Seite 71 Se a avaria for motivada por uma instalação que não respeita as instruções fornecidas pelo fa- bricante que se encontram dentro de cada embalagem. • Se não foram utilizados sómente peças originais TAU para a instalação do automatismo. • Se os danos forem causados por calamidades naturais, modificações, sobrecargas de tensão, alimentação incorrecta, reparações inadequadas, instalação incorrecta ou outros casos não im-...
  • Seite 72: Hard Reset

    ITALIANO - VIDEO TUTORIAL - Come memorizzare un ra- - Come effettuare l' HARD - Come effettuare un HARD diocomando Rolling Code su RESET sulla centrale RESET della RADIORICEVENTE centrali Diamond. cancello automatico ENGLISH - VIDEO TUTORIA - How to learn a Rolling Code HARD RESET - How to HARD RESET the...

Diese Anleitung auch für:

D749ma750d749ma

Inhaltsverzeichnis