
Verwandte Anleitungen für geo-FENNEL Maxi-Liner FL 65 HP


Inhaltszusammenfassung für geo-FENNEL Maxi-Liner FL 65 HP
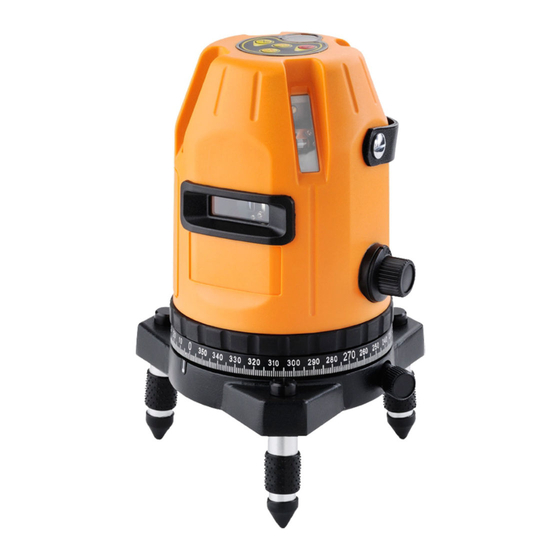
- Seite 1 All manuals and user guides at all-guides.com Bedienungsanleitung User manual Vollautomatischer Linienlaser Fully Automatic Laser Cross Level Maxi-Liner FL 65 HP...
-
Seite 2: Technische Daten
All manuals and user guides at all-guides.com LIEFERUMFANG KIT CONSISTS OF Maxi-Liner FL 65 HP, Empfänger FR 55 mit Maxi-Liner FL 65 HP, receiver FR 55 with clamp Halteklammer, Universal-Bodenstativ, magn. for levelling staff, integrated floor tripod, mag- Zieltafel, Laserbrille, Akku und Ladegerät, netic target, laser intensive glasses, recharge- Batteriefach für Alkalinebatterien, Kunststoff-... - Seite 3 All manuals and user guides at all-guides.com FUNKTIONEN FUNCTIONS Zum Übertragen von Höhen, Abhängen von For transferring levels, hanging suspended Decken, Ausrichten von Ständerwänden, Fen- ceilings or aligning stud walls, windows, stern, Türen sowie für Fluchtungen, rechte doors and for alignments, right angles and Winkel, Ablotungen plumb lines BEDIENELEMENTE...
-
Seite 4: Battery And Charger
All manuals and user guides at all-guides.com STROMVERSORGUNG BATTERY AND CHARGER Der Laser kann mit NiMH-Akku und alternativ Both the standard NiMH battery or 4 x AA mit handelsüblichen Alkalinebatterien betrieben alkaline batteries can be used. werden. NiMH-Akku NiMH battery pack Der Laser ist mit einem wiederaufladbaren FL 65 HP comes with NiMH rechargeable bat- NiMH-Akkupack ausgestattet. -
Seite 5: Bedienung
All manuals and user guides at all-guides.com BEDIENUNG OPERATION Gerät aufstellen Set up laser 1) Auf Stativ: Gerät mit der 5/8“-Stativanzugs- 1) On a tripod: Connect laser to 5/8“ retaining schraube eines handelsüblichen Baustativs bolt of builder‘s tripod. verbinden. 2) On the floor: Set up on floor tripod. 2) Auf dem Fußboden: Mit Bodenstativ (5) (fest mit dem Gerät verbunden) aufstellen. - Seite 6 • All manuals and user guides at all-guides.com • EINSCHALTEN SWITCH ON An-/Aus-Schalter (3) in Position „ON“ bringen. Set On/Off knob (3) in position „ON“. Instru- Das Gerät ist nun betriebsbereit (Bedienfeld ist ment is now ready for use (keypad is illumi- erleuchtet).
-
Seite 7: Auswahl Der Laserlinien
All manuals and user guides at all-guides.com AUSWAHL DER LASERLINIEN SELECTION OF LASER LINES Nach dem Einschalten des Gerätes können die After switching FL 65 HP on laser lines can be Laserlinien wie folgt geschaltet werden: chosen as follows: Auswahlknopf Nr. 1 = H1,V1,V2,D Press selection button no. -
Seite 8: Manual Function
All manuals and user guides at all-guides.com MANUELL-FUNKTION MANUAL FUNCTION Die Manuell-Funktion ist nur möglich im OFF- Manual function is only available in OFF mode Zustand des Gerätes (da andernfalls Kompen- (as otherwise compensator alarm would start). satoralarm ausgelöst würde). Dazu Manuell- Press manual key (3) and choose desired Taste (3) drücken und dann gewünschte Linien laser lines. -
Seite 9: Optionales Zubehör
All manuals and user guides at all-guides.com OPTIONALES ZUBEHÖR OPTIONAL ACCESSORIES Aluminiumstativ Kurbelstativ Kurbelstativ Kurbelstativ Aluminium tripod Elevating tripod Elevating tripod Elevating tripod FS 23 FS 30-M FS 30-L FS 30-XL Länge / Length Länge / Length Länge / Length Länge / Length 105 -170 cm 80 - 200 cm... - Seite 10 All manuals and user guides at all-guides.com EMPFÄNGER FR 55 MIT HALTEKLAMMER RECEIVER FR 55 WITH CLAMP LIEFERUMFANG SUPPLIED WITH Empfänger FR 55, Batterie, Halteklammer, Receiver FR 55, battery, clamp, case, Etui, Bedienungsanleitung user manual TECHNISCHE DATEN TECHNICAL DATA Anzeige Display vorn Indication Front display...
-
Seite 11: Einlegen Der Batterie
All manuals and user guides at all-guides.com SYMBOLE SYMBOLE 1) Empfänger an / aus 1) Power indicator 2) Batteriezustandsanzeige 2) Low battery indicator 3) Empfangsindikator 3) Detection indicator 4) Ton an / aus 4) Sound indicator 5) Empfangsposition Laserstrahl 5) Detected position indicator EINLEGEN DER BATTERIE INSTALLATION OF BATTERIES • Batteriefachdeckel (14) öffnen. -
Seite 12: Halteklammer Für Nivellierlatte
All manuals and user guides at all-guides.com Optionales Zubehör WICHTIG – den Empfänger langsam auf IMPORTANT – move receiver FR 55 up und ab bewegen, um den Laserstrahl zu and down carefully to detect the laser beam. empfangen. FL 65 HP und FR 55 arbeiten mit FL 65 HP and FR 55 are working with another einer anderen Technik, als Sie es eventuell technology than rotating laser levels. -
Seite 13: Warn- Und Sicherheitshinweise
All manuals and user guides at all-guides.com WARN- UND SICHERHEITSHINWEISE SAFETY INSTRUCTIONS • Richten Sie sich nach den Anweisungen der • Follow up instructions given in user manual. Bedienungsanleitung. • Do not stare into beam. Laser beam can lead • Anleitung vor Benutzung des Gerätes lesen. to eye injury. - Seite 14 All manuals and user guides at all-guides.com UMGANG UND PFLEGE CARE AND CLEANING Messinstrumente generell sorgsam behandeln. Please handle measuring instruments with care. Nach Benutzung mit weichem Tuch reinigen Clean with soft cloth only after any use. If ne- (ggfs. Tuch in etwas Wasser tränken). Wenn das cessary damp cloth with some water.
-
Seite 15: Warranty
All manuals and user guides at all-guides.com CE-KONFORMITÄT CE-CONFORMITY Das Gerät hat das CE-Zeichen gemäß den Normen Instrument has CE-mark according to EN 61010-1:2001 + Korr. 1 + 2 und EN 61010-1:2001 + corr. 1 + 2 and IEC 60825-1:2008-05. IEC 60825-1:2008-05. - Seite 16 Hersteller verursacht wurden. by wrong movement or action due to connec- ting with other products. geo-FENNEL GmbH Kupferstraße 6 D-34225 Baunatal Tel. +49 561 49 21 45 Fax +49 561 49 72 34 Email: info@geo-fennel.de...