Herunterladen Inhalt Inhalt Diese Seite drucken

Werbung

Verfügbare Sprachen
  • DE

Verfügbare Sprachen

DO263A
Handleiding
Mode d'emploi
Gebrauchsanleitung
Instruction booklet
Návod k použití
Mobiele airco
Climatiseur mobile
Mobile Klimaanlage
Mobile air conditioning
Mobilní klimatizace
PRODUCT OF

Werbung

Inhaltsverzeichnis
loading

Inhaltszusammenfassung für Linea 2000 DOMO DO263A

  • Seite 1 DO263A Handleiding Mobiele airco Mode d’emploi Climatiseur mobile Gebrauchsanleitung Mobile Klimaanlage Instruction booklet Mobile air conditioning Návod k použití Mobilní klimatizace PRODUCT OF...
  • Seite 2 Lees aandachtig alle instructies - bewaar deze handleiding voor latere raadpleging. Lisez attentivement les instructions - gardez le mode d’emploi pour utilisation ultérieur. Lesen Sie genau die Anweisungen - bewahren Sie die Gebrauchsanleitung für spätere heranziehung. Read all instructions carefully - save this instruction manual for future reference. Před použitím si důkladně...
  • Seite 3: Garantie

    GARANTIE Geachte klant, Al onze producten ondergaan steeds een strenge kwaliteitscontrole, alvorens ze aan je worden aangeboden. Mocht je desondanks toch nog problemen hebben met jouw toestel, dan betreuren wij dit ten zeerste. In dat geval verzoeken wij je contact op te nemen met onze klantendienst. Onze medewerkers zullen je met plezier verder helpen.
  • Seite 4: Veiligheidsvoorschriften

    VEILIGHEIDSVOORSCHRIFTEN Wanneer je elektrische toestellen gebruikt, moeten volgende veiligheidsinstructies in acht genomen worden: · Lees deze instructies zorgvuldig door. Bewaar deze handleiding om later te raadplegen. · Verwijder voor het eerste gebruik alle verpakkingsmaterialen en eventuele promotionele stickers. Zorg ervoor dat kinderen niet met de verpakkingsmaterialen spelen. ·...
  • Seite 5 · Zet dit toestel nooit op of in de buurt van een gasvuur of elektrisch vuur of op een plaats waar het in contact zou kunnen komen met een warm toestel. · Gebruik het toestel niet buiten. · Gebruik het toestel enkel voor het doel waarvoor het bestemd is. ·...
  • Seite 6 · Zorg ervoor dat de airco steeds beschermd is tegen vocht, zoals condensatie, spatwater, etc. Zorg ervoor dat de airco zo staat dat hij niet in water of een andere vloeistof kan vallen. Wanneer hij toch in water of een vloeistof moest vallen, verwijder dan onmiddellijk de stekker uit het stopcontact.
  • Seite 7 · Het mag niet worden doorprikt of verbrand. · Koelgassen kunnen geurloos zijn. · Het apparaat moet worden geïnstalleerd, gebruikt en bewaard in een ruimte die groter is dan 8 m · Dit apparaat bevat een aantal grammen R290 koelgas (zie het typeplaatje achteraan op het systeem).
  • Seite 8 ONDERDELEN Voorzijde Controlepaneel Luchtuitlaat Achterzijde Luchtfilter Luchtinlaat Luchtuitlaat Drainage Onderdelen Drainageslang Afstandsbediening Muurbevestiging afstandsbediening 10. Luchtuitlaatslang 10 a. Koppelstuk luchtuitlaatslang 11. Muurbevestiging 11 a. Muuradapter 11 b. Koppelstuk muurbevestiging 12. Raambevestiging 12 a. Raamadapter 12 b. Koppelstuk raambevestiging 12 c. Dichtingen 12 d.
  • Seite 9 INSTALLATIE · Plaats de airco op een solide en stabiele ondergrond, om de geluidshinder en vibratie tot een minimum te beperken. Zorg er ook voor dat de ondergrond sterk genoeg is om het gewicht van het toestel te dragen. · Om het toestel makkelijk te kunnen verplaatsen, is het voorzien van wieltjes.
  • Seite 10 INSTALLATIE MUURBEVESTIGING · Plaats het koppelstuk van de luchtuitlaatslang op het uiteinde van de slang. · Plaats de luchtuitlaatslang op de luchtuitlaat aan de achterzijde van het toestel. · Maak een opening in de muur ter grootte van de muuradapter. ·...
  • Seite 11 GEBRUIK De horizontale lamellen aan de voorzijde van de airco kan je manueel open en dicht klappen om zo de luchtuitlaat beter te kunnen richten. CONTROLEPANEEL ON-OFF - toets Om het toestel in en uit te schakelen. “+” en “-” - toetsen Om de temperatuurinstelling aan te passen.
  • Seite 12 SLEEP dis Displays w SLEEP fun is activated ON-OFF - toets FOLLOW M Om het toestel in en uit te schakelen. display Indicates th MODE - toets the FOLLO function is Met deze toets selecteer je de gewenste gebruiksinstelling. Telkens je op de toets drukt, zal de gebruiksinstelling wijzigen: AUTO, COOL, DRY en FAN.
  • Seite 13 HEAT signal to unit Lights up when remote se MODE TIMER TEMP ECO display signal to unit Transmission Indicator TIMER Not available for ON/OFF display Lights up when remote sends this unit signal to unit MODE display ON/OFF display Appears when the unit is turne FOLLOW SLEEP SWING...
  • Seite 14 Als je de timer wil uitschakelen, druk dan meerdere keren op de TIMER ON - toets, tot de teller op “0” komt te staan. Of houd de toets ingedrukt. Timer off Met deze functie kan je het toestel automatisch laten uitschakelen na verloop van tijd. Druk op de TIMER OFF - toets op de afstandsbediening.
  • Seite 15: Reiniging En Onderhoud

    REINIGING EN ONDERHOUD DRAINAGE Permanente drainage Tijdens het ontvochtigen, kan je een permanente drainage gebruiken. Verwijder de drainage afsluiting en het rubber dopje in het midden, achteraan het toestel. Bevestig de drainageslang aan de drainage opening. Zorg ervoor dat het water op een veilige en permanente manier kan wegvloeien. Drainage bij P1 code Wanneer je geen gebruik maakt van de permanente drainage, zal het water opgevangen worden in de drainagebak, onderaan het toestel.
  • Seite 16 · Was het toestel nooit met water of een andere vloeistof, dit kan elektrocutie tot gevolg hebben. · Wanneer het elektrisch snoer beschadigd is, moet het vervangen of hersteld worden door de dienst na verkoop van de fabrikant of een gekwalificeerd persoon. Luchtfilter ·...
  • Seite 17: Error Codes

    · De luchtuitlaatslang is niet aangesloten of geblokkeerd. Sluit de slang aan en zorg ervoor dat ze naar behoren kan functioneren. · De ingestelde temperatuur is te hoog. Pas de ingestelde temperatuur aan. · De luchtfilter is vuil. Reinig de luchtfilter. Het toestel maakt te veel lawaai of zorgt voor trillingen.
  • Seite 18: Milieurichtlijnen

    MILIEURICHTLIJNEN Dit symbool op het product of op de verpakking wijst erop dat dit product niet als huishoudafval mag worden behandeld. Het moet naar een plaats worden gebracht waar elektrische en elektronische apparatuur wordt gerecycleerd. Als je ervoor zorgt dat dit product op de correcte manier wordt verwijderd, voorkom je mogelijk voor mens en milieu negatieve gevolgen die zich zouden kunnen voordoen in geval van verkeerde afvalbehandeling.
  • Seite 19: Garantie

    GARANTIE Cher client, Tous nos produits sont soumis à des contrôles qualité stricts avant d’être proposés à la vente. Si vous deviez toutefois rencontrer un problème avec votre appareil, nous le déplorons vivement. Dans ce cas, nous vous invitons à prendre contact avec notre service clientèle. Nos collaboratrices se feront un plaisir de vous aider ! +32 14 21 71 91 info@linea2000.be...
  • Seite 20: Consignes De Sécurité

    CONSIGNES DE SÉCURITÉ Les consignes de sécurité suivantes doivent être respectées lors de l’utilisation de tout appareil électrique: · Lisez ces consignes très attentivement. Conservez ce mode d’emploi afin de pouvoir le consulter ultérieurement. · Avant la première utilisation, enlevez tous les éléments d’emballage et les éventuels autocollants promotionnels.
  • Seite 21 · Ne placez jamais cet appareil sur ou à proximité d’un feu au gaz ou d’un feu électrique où il pourrait entrer en contact avec un appareil chaud. · N’utilisez pas l’appareil à l’extérieur. · Utilisez l’appareil uniquement dans le but auquel il est destiné. ·...
  • Seite 22 · Veillez toujours à éteindre l’appareil avant d’enlever ou de replacer la grille d’arrivée d’air. · Veillez toujours à protéger le climatiseur contre l’humidité, la condensation, les projections d’eau, etc. · Veillez à installer le climatiseur de telle manière qu’il ne puisse pas tomber dans l’eau ou un autre liquide.
  • Seite 23 Informations spécifiques concernant les appareils contenant du fluide frigorigène R290 · Lisez attentivement tous les avertissements. · Lors du dégivrage et du nettoyage de l’appareil, n’utilisez pas d’outils autres que ceux conseillés par le fabricant. · L’appareil doit être installé dans un espace sans sources continues d’inflammation, par exemple,des flammes nues, des appareils électriques ou fonctionnant au gaz en continu.
  • Seite 24 PARTIES Face avant Panneau de commande Évacuation d’air Face arrière Filtre d’arrivée d’air Arrivée d’air Évacuation d’air Vidange Parties Flexible de vidange Télécommande Fixation murale télécommande 10. Tuyau d’évacuation d’air 10 a. Connecteur tuyau d’évacuation d’air 11. Kit de fixation murale 11 a.
  • Seite 25: Installation

    INSTALLATION · Placez la climatisation sur une surface stable et solide, afin de limiter à un minimum les nuisances sonores et les vibrations. Veillez à ce que la surface soit suffisamment solide pour supporter le poids de l’appareil. · L’appareil est muni de roulettes, pour pouvoir le déplacer facilement.
  • Seite 26 min 30 cm INSTALLATION KIT DE FIXATION MURALE · Placez l’embout du tuyau d’évacuation d’air à l’extrémité du tuyau. · Placez le tuyau d’évacuation d’air sur la sortie d’air prévue à l’arrière de l’appareil. · Faites dans le mur une ouverture de la taille de l’adaptateur mural. ·...
  • Seite 27: Panneau De Commande

    UTILISATION Vous pouvez orienter le flux d’air manuellement en relevant ou en abaissant les lamelles de la grille située à l’avant de l’appareil. PANNEAU DE COMMANDE Touche MARCHE-ARRÊT Pour allumer et éteindre l’appareil. Touches «+» et «-» Utilisez ces touches pour modifier le paramètre de température. Vous pouvez choisir une température comprise entre 17 °C et 30 °C.
  • Seite 28 Touche MARCHE-ARRÊT Pour allumer et éteindre l’appareil. Touche MODE Cette touche vous permet de sélectionner le paramètre utilisateur souhaité. Chaque pression sur la touche modifie le paramètre d’utilisation : FROID, SEC et VENTILATEUR. Le témoin correspondant s’allume sur le panneau de commande. SILENT display FAN SPEED display SILENT display...
  • Seite 29 HEAT Transmission Indicator MODE Remote LED Screen Indicators How To Use The TEMP ECO display Transmission Indicator Lights up when remote sends Not available for Lights up when remote sen signal to unit this unit signal to unit Transmission Indicator SLEEP SWING UTILISATION DES MODES ET FONCTION...
  • Seite 30 TIMER ON ». Deux petits indicateurs ronds seront en outre allumés sur le panneau de commande. Si vous souhaitez désactiver la minuterie, appuyez à plusieurs reprises sur le bouton « TIMER ON » jusqu’à ce que la durée affichée soit « 0 ». Vous pouvez également maintenir le bouton appuyé.
  • Seite 31: Nettoyage Et Entretien

    NETTOYAGE ET ENTRETIEN ÉVACUATION D’EAU Vidange permanente Vous pouvez utiliser une vidange permanente pendant la déshumidification. Enlevez le bouchon de vidange et le capuchon en caoutchouc, au milieu à l’arrière de votre appareil. Fixez le tuyau de vidange sur l’ouverture de vidange. Veillez à...
  • Seite 32 · Ne lavez jamais l’appareil à l’eau ou avec d’autres liquides car cela pourrait provoquer une électrocution. · Lorsque le cordon électrique est endommagé, il doit être remplacé ou réparé par le service après-vente du fabricant ou par une personne qualifiée. Filtre à...
  • Seite 33 · Le tuyau d’évacuation d’air n’est pas raccordé ou est bloqué. Raccordez le tuyau et veillez à ce qu’il fonctionne correctement. · La température réglée est trop élevée. Adaptez la température réglée. L’appareil fait trop de bruit ou génère des vibrations. ·...
  • Seite 34: Mise Au Rebut

    MISE AU REBUT Ce symbole sur le produit ou son emballage indique que ce produit ne peut être traité comme déchet ménager. Il doit plutôt être remis au point de ramassage concerné, se chargeant du recyclage du matériel électrique et électronique. En vous assurant que ce produit est éliminé...
  • Seite 35 GARANTIE Sehr geehrter Kunde, Sämtliche unserer Produkte unterliegen einer strengen Qualitätskontrolle, bevor Sie Ihnen angeboten werden. Sollten dennoch Probleme mit Ihrem Gerät auftreten, bedauern wir dies zutiefst. Wir möchten Sie in diesem Fall bitten, unseren Kundenservice zu kontaktieren. Unsere Mitarbeiter helfen Ihnen gern weiter! +32 14 21 71 91 info@linea2000.be Montag –...
  • Seite 36: Sicherheitsvorkehrungen

    SICHERHEITSVORKEHRUNGEN Wenn Sie elektrische Geräte verwenden, müssen folgende Sicherheitshinweise beachtet werden: · Lesen Sie diese Hinweise sorgfältig durch. Bewahren Sie diese Bedienungsanleitung zum späteren Nachschlagen auf. · Entfernen Sie vor dem ersten Gebrauch alle Verpackungsmaterialien und möglichen Werbeaufkleber. Sorgen Sie dafür, dass Kinder nicht mit den Verpackungsmaterialien spielen.
  • Seite 37 · Stellen Sie das Gerät nicht in der Nähe oder auf einer Gasflamme, einer elektrischen Platte oder an einer Stelle ab, auf der es in Kontakt mit einem Elektroofen oder einem anderen heißen Geräten kommen kann. · Benutzen Sie das Gerät nicht im Freien. ·...
  • Seite 38 · Zur Verlängerung der Lebensdauer des Gerätes entfernen Sie stets das Wasser aus dem Gerät, sofern Sie es für längere Zeit wegstellen und nicht benutzen. · Benutzen Sie zur Reinigung des Gerätes keine chemischen Mittel, da diese das Gerät beschädigen könnten. ·...
  • Seite 39 Detaillierte Informationen bezüglich der Geräte mit dem Kältemittel R290 · Bitte lesen Sie alle Warnhinweise aufmerksam durch. · Verwenden Sie beim Abtauen oder bei der Reinigung des Geräts keine anderen als vom Hersteller empfohlenen Werkzeuge. · Das Gerät muss in einem Raum aufbewahrt werden, in dem keine permanent betriebenen Zündquellen vorhanden sind (zum Beispiel: offene Flammen, ein eingeschaltetes Gasgerät oder laufende Elektroheizung).
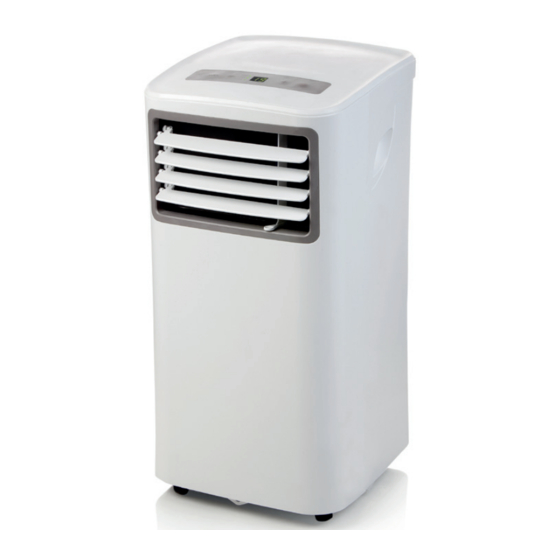
  • Seite 40 TEILE Vorderseite Bedienpanel Luftauslass Rückseite Luftfilter Lufteinlass Luftauslass Drainage Teile Drainageschlauch Fernbedienung Fernbedienung Wandbefestigung 10. Luftauslassschlauch 10 a. Kopplung Luftauslassschlauch 11. Wandbefestigungssatz 11 a. Wandadapter 11 b.Kopplung 12. Fensterbefestigungssatz 12 a. Fensteradapter 12 b. Kopplung Fensterbefestigungssatz 12 c. Fensterdichtung 12 d. Adapterstecker 12 e.
  • Seite 41: Montage

    MONTAGE · Stellen Sie die Klimaanlage auf einen soliden, stabilen Untergrund, um Lärmbelästigung und Vibrationen zu reduzieren. · Achten Sie darauf, dass der Untergrund stark genug ist, um dass Gewicht des Gerätes zu tragen. · Um das Gerät einfach transportieren zu können hat es Rollen. Rollen Sie das Gerät ausschließlich über glatte, flache Böden und nicht über Gegenstände.
  • Seite 42: Montage Der Wand-Luftabfuhr

    max 120 cm min 30 cm · Setzen Sie die gewünschte Länge des Fensteradapters mit dem mitgelieferten Fensteradapterstopper fest. · Auf Wunsch können Sie das Fenster mit dem L-Eisen und 2 Schrauben befestigen. MONTAGE DER WAND-LUFTABFUHR · Bringen Sie die Koppelung des Luftauslassschlauchs am Schlauchende an. ·...
  • Seite 43: On-Off-Taste

    GEBRAUCH Die horizontalen Lamellen an der Vorderseite der Klimaanlage können Sie manuell öffnen und schließen, um so den Luftauslass besser ausrichten zu können. BEDIENPANEL ON-OFF-Taste Mit dieser Taste können Sie das Gerät an- oder ausschalten. “+” und “-”-Tasten Diese Tasten müssen Sie benutzen, wenn Sie die Temperatureinstellung ändern wollen. Die Temperatur kann auf einen Wert zwischen 17 °C und 30 °C eingestellt werden.
  • Seite 44 ON-OFF-Taste Mit dieser Taste können Sie das Gerät an- oder ausschalten. MODE-Taste Mit dieser Taste können Sie die gewünschte Gebrauchseinstellung wählen. Bei jedem Druck auf diese Taste wird die Gebrauchseinstellung verändern: COOL, DRY und FAN. Das entsprechende Kontrolllämpchen auf dem Panel wird aufleuchten. SILEN FAN SPEED display Not ava...
  • Seite 45 ECO d HEAT Remote LED Screen Indicators MODE TIMER TEMP ECO display Not av TIMER Not available for this un Transmission Indicator this unit Transmiss Lights up when remote sends FOLLOW SLEEP SWING EINSTELLUNG DER FUNKTIONEN signal to unit Lights up w Battery display Batter Low battery...
  • Seite 46 Drücken Sie mehrmals auf die Taste TIMER ON, um den Wert der Zeit zu erhöhen. Oder halten Sie die Taste eingedrückt. Erst wenn die gewünschte Zeit eingestellt ist, wird auf dem Display der Fernbedienung „Timer on“ stehen. Auf dem Display des Bedienfelds sind 2 erleuchtete Kugeln zu sehen. Wenn Sie den Timer ausschalten möchten, drücken Sie mehrmals auf die Taste TIMER ON, bis der Zähler auf „0“...
  • Seite 47: Reinigung Und Wartung

    Lüftungsgeschwindigkeit (FAN) und eventuell auch noch die SLEEP-Einstellung. Zu dem Zeitpunkt, an dem Sie die SHORTCUT-Taste betätigen, arbeitet das Gerät in Übereinstimmung mit den zuvor festgelegten Einstellungen. REINIGUNG UND WARTUNG WASSERABFUHR Permanente Drainage Während des Entfeuchtungsvorgangs können Sie am Besten eine permanente Drainage benutzen.
  • Seite 48 · HINWEIS: Verschließen Sie immer erst wieder die Drainage-Öffnung, bevor Sie das Gerät wieder einschalten. REINIGUNG · Ziehen Sie immer erst den Stecker aus der Steckdose, bevor Sie das Gerät reinigen. · Benutzen Sie keine chemischen oder scheuernden Reinigungsmittel. · Spülen Sie das Gerät niemals mit Wasser ab, da dies zu Kurzschlüssen und Unfällen führen kann.
  • Seite 49: Mögliche Probleme Und Problemlösungen

    MÖGLICHE PROBLEME UND PROBLEMLÖSUNGEN Das Gerät springt nicht an, wenn man auf den ON/OFF-Taste drückt · Auf dem Display steht „P1“. Entfernen Sie das Wasser aus dem Gerät. · Die Zimmertemperatur ist niedriger als die Temperatur, die Sie eingestellt haben. Ändern Sie entsprechend die Temperatureinstellung am Gerät.
  • Seite 50 P1: Das Wasserreservoir ist voll. Schließen Sie den Drainageschlauch unten am Gerät an und lassen Sie das Wasser ablaufen. Sollte die gleiche Error-Meldung auf dem Display erscheinen nehmen Sie bitte Kontakt mit dem Reparaturservice auf. ENTSORGEN Dieses Symbol auf dem Produkt oder seiner Verpackung weist darauf hin, dass dieses Produkt nicht als normaler Haushaltsabfall zu behandeln ist, sondern an einem Sammelpunkt für das Recyling von elektrischen und...
  • Seite 51: Warranty

    WARRANTY Dear client , All of our products are always submitted to a strict quality control before they are sold to you. Should you nevertheless experience problems with your device, we sincerely regret this. In that case, we kindly request you to contact our customer service. Our staff will gladly assist you.
  • Seite 52: Safety Instructions

    SAFETY INSTRUCTIONS When using electrical appliances, basic safety precautions should always be taken, including the following: · Read all instructions carefully. Keep this manual for future reference. · Make sure all packaging materials and promotional stickers have been removed before using the appliance for the first time.
  • Seite 53 · Only use the appliance for its intended use. · Always use the appliance on a steady, dry and level surface. · Only use the appliance for domestic use. The manufacturer cannot be held responsible for accidents that result from improper use of the appliance or not following the instructions described in this manual.
  • Seite 54 · Never remove fixed parts from the air conditioning. Never use the unit when it is not working properly, or when the unit has fallen or has been damaged. · Never use the plug to turn the unit on or off. Always use the buttons on the control panel. ·...
  • Seite 55: Energy Tips

    · The appliance must be stored in such a way as to prevent mechanical failure. · Individuals who operate or work on the refrigerant circuit must have the appropriate certification issued by an accredited organisation that ensures competence in handling refrigerants according to a specific evaluation recognized by associations in the industry.
  • Seite 56 PARTS Front Control panel Air outlet Back Air filter Air inlet Air outlet Drain Parts Drain hose Remote control Remote control wall mount 10. Air outlet hose 10 a. Air outlet hose connection 11. Wall installation kit 11 a. Wall adaptor 11 b.
  • Seite 57 INSTALLATION · Place the air conditioning on a solid and stable floor, this way you will prevent excessive noise and vibrations. Make sure that the floor is strong enough to support the weight of the appliance. max 120 cm · The appliance has small wheels for easy moving. Make sure only to move the air conditioning over a flat and level surface.
  • Seite 58: Control Panel

    INSTALLATION WALL KIT · Place the coupling of the air outlet hose on the end of the hose. · Place the air outlet hose on the air outlet at the back of the appliance. · Make an opening in the wall the size of the wall adapter. ·...
  • Seite 59: Remote Control

    Transmission Indica Lights up when remote sends signal to unit Lights up when remo signal to unit ON/OFF display MODE- touch MODE display Appears when the unit is ON/OFF dis With this touch you can select the desired function. Every time when pressing this touch the MODE display Displays the current and disappears when it is...
  • Seite 60 Transmission Indicator Transmission Indicator Lights up when remote sends SHORT CUT touch Lights up when remote sends signal to unit With this button you can fix and switch on a preferential setting. signal to unit ON/OFF display MODE display Appears when the unit is turned on, ON/OFF display TIMER ON touch MODE display...
  • Seite 61 Displays when SLEEP function is activated FOLLOW ME display COOL operation Indicates that the FOLLOW ME 1. Press the MODE button to select function is on SILENT display COOL mode. FAN SPEED display 2. Set your desired temperature using SILENT display Not available for this unit Not available for Press the MODE button until the FAN indicator lamp is on.
  • Seite 62: Cleaning And Maintenance

    Sleep When pressing the “sleep” touch, the selected temperature will be elevated with 1 °C after 30 min. After another 30 min the temperature will increase with another 1°C. The air conditioning will maintain this temperature for 7 hours. After this time, the air conditioning will go back to the original set temperature and the “sleep”...
  • Seite 63 · Remove the drain plug at the bottom of your unit (A) and drain the water. · After fully draining the water tank, place the drain plug back on the drain opening. · Restart the unit, make sure the error code P1 is no longer displayed.
  • Seite 64 · Clean the filters and place them back in the unit. · Store the unit in a dry, dark place. POSSIBLE PROBLEMS AND THEIR SOLUTIONS The appliance isn’t working when pressing the on/off touch. · The error code P1 is displayed , drain the water from the air conditioning. ·...
  • Seite 65 ENVIRONMENTAL GUIDELINES This symbol on the product or on its packaging indicates that this product may not be treated as household waste. Instead it must be brought to the applicable collection point for recycling of electrical and electronic equipment. By ensuring this product is disposed of correctly, you will help prevent potential negative consequences for the environment and human health, which could otherwise be caused by...
  • Seite 66 ZÁRUKA Práva a povinnosti prodávajícího a kupujícího ohledně práv z vadného plnění se řídí příslušnými obecně závaznými předpisy dle občanského zákoníku. Trvání záruky: 2 roky Záruka se nevztahuje a) na mechanické poškození b) nesprávné používání v rozporu s návodem k použití Záruka zaniká: - při použití...
  • Seite 67: Bezpečnostní Pokyny

    BEZPEČNOSTNÍ POKYNY Při používání jakkéhokoli el. spotřebiče dbejte zvýšené opatrnosti a dodržujte určitá bezpečnostní pravidla: · Pečlivě si přečtěte tyto informace a manuál nechte i pro pozdější nahlédnutí. · Ujistěte se, že před použitím odlepíte a odstraníte veškeré reklamní a ochranné fólie. ·...
  • Seite 68 · Abyste zachovali barvu přístroje, nestavte jej na přímé sluneční světlo. · Nikdy při manipulaci s přístroje nenaklánějte přístroj o více než 35o. Nikdy přístroj nepokládejte, nebo neotáčejte dnem vzhůru. · Přístroj vždy umístěte na rovný a stabilní povrch. · Než přístroj uschováte, nezapomeňte z něj vylít zkondenzovanou vodu. Zajistíte tak Vaší klimatizaci dobrou funkčnost po delší...
  • Seite 69 · Přívodní kabel nikdy neveďte pod kobercem ani ho nijak nezakrývejte. Nepokládejte kabel pod nábytek ani pod přístroj samotný. Přívodní kabel by měl být veden tak, aby o něj nemohl nikdo zakopnout a přitom nebyl překrytý ani zatížený žádným předmětem. ·...
  • Seite 70 TENTO MANUÁL SI USCHOVEJTE I PRO POZDĚJŠÍ NAHLÉDNUTÍ. ČÁSTI Přední část Ovládací panel Výstup vzduchu Zadní část Vzduchový filtr Vstup vzduchu Výstup vzduchu Odtok Části Hadice odtoku Dálkový ovladač Nástěnný držák dálkového ovládání 10. Výfuková hadice 10 a. Napojení výfukové hadice 11.
  • Seite 71 ZAPOJENÍ A INSTALACE · Umístěte přístroj na stabilní a rovnou plochu. Tak předejdete obtěžujícím zvukům a vibracím. Ujistěte se, že podlaha pod přístrojem je dostatečně pevná, aby přístroj unesla. max 120 cm · Přístroj má malá kolečka pro snazší manipulaci. Přesouvejte přístroj pouze po rovné...
  • Seite 72: Instalace Na Zeď

    INSTALACE NA ZEĎ · Nejdříve na výfukovou hadici nasaďte spojku k okenní koncovce. · Potom celou hadici nasaďte na otvor výfuku v zadní části přístroje. · Na druhý konec hadice napevno připojte koncovku do zdi . · Ve zdi připravte otvor s odpovídajícím rozměrem vůči koncovce ·...
  • Seite 73: Dálkové Ovládání

    Transmission Indicator Lights up when remote sends Transmission Indica 17°C do 30°C. Na přístroji si můžete volit mezi nastavení stupňů “°C “a “°F”. Změnu jednotek signal to unit Lights up when remo provedete stiskem obou tlačítek na ráz. signal to unit ON/OFF display MODE display ON/OFF disp...
  • Seite 74 Tlačítko TEMP (teplota) Na přístroji si můžete nastavit požadovanou teplotu v rozmezí 17-30 °C. Jakmile stisknete obě tlačítka zároveň, tak se přehodí jednotky teploty “°C” a “°F”. Tlačítko RYCHLÉ VOLBY (SHORTCUT) K tomuto tlačítku si můžete nastavit předvolenou funkci a následně jí jedním stiskem zapínat/ vypínat.
  • Seite 75 Low battery detection SLEEP display Displays when SLEEP function Pomocí šipek na panelu nebo na ovladači si nastavte požadovanou hodnotu. is activated Pro tuto funkci nelze nastavovat rychlost ventilátoru. FOLLOW ME display COOL operation Indicates that the FOLLOW ME 1. Press the MODE but function is on FAN –...
  • Seite 76: Čištění A Údržba

    Sleep Po aktivaci funkce „sleep“ se po 30 minutách zvýší teplota o 1oC. Za dalších 30 minut se teplota zvýší o další 1oC. Klimatizace bude tuto teplotu udržovat dalších 7 hodin. Po uplynutí tohoto času se klimatizace přepne zpět do původního nastavení teploty a funkce „sleep“ se ukončí.
  • Seite 77 · Přesuňte přístroj na místo, kde můžete snadno vodu vypustit/ vylít. · Vyjměte vypouštěcí zátku na spodní části přístroje (A) a vypusťte vodu. · Po úplném vypuštění nádržky na vodu umístěte vypouštěcí zátku zpět na otvor pro odtok. · Restartujte přístroj a ujistěte se, že chybový kód P1 na displeji již...
  • Seite 78: Chybové Kódy

    · Přístroj vypněte, vytáhněte zástrčku ze zásuvky a odejměte baterie z dálkového ovládání. · Vyčistěte filtry a umístěte je zpět do přístroje. · Uchovávejte přístroj na suchém a tmavém místě. MOŽNÉ PROBLÉMY A JEJICH ŘEŠENÍ Přístroj nefunguje, když mačkáte tlačítko on/off. ·...
  • Seite 79 P1: Nádržka na vodu je plná. Připojte vypouštěcí hadici na dolní místo pro odtok kondenzátu. Když chybový kód přetrvává, kontaktujte servis. OHLED NA ŽÍVOTNÍ PROSTŘEDÍ Symbol na přístroji či na jeho obalu znamená, že s tímto výrobkem není možno nakládat jako s běžným domovním odpadem, nýbrž...
  • Seite 80 EXCESSIVE OPERATING DISCHARGE 2.6MPa PRESSURE SUCTION 1.0MPa POWER SOURCE 220-240V~ 50Hz, 1Ph REFRIGERANT R290/0.15kg CURRENT 4.10A COOLING STANDARD INPUT 900W RATING CURRENT CONDITIONS HEATING INPUT RATED CURRENT 5.80A RATED INPUT 1100W ELECTRICAL HEATER INPUT MOISTURE RESISTANCE CLASS IPX0 WARNING Appliance sh ould be ins talled, operate d and sto red in a roo m with a oor a rea lar ger tha n 8 m .
  • Seite 81 www.domo-elektro.be DO263A...
  • Seite 82 DO263A...
  • Seite 83 www.domo-elektro.be DO263A...
  • Seite 84 über: webshop.domo-elektro.be or scan here: oder hier scannen: of scan hier: ou scannez ici: LINEA 2000 BV - Dompel 9 - 2200 Herentals - Belgium - Tel: +32 14 21 71 91 - Fax: +32 14 21 54 63...

Inhaltsverzeichnis