Herunterladen Inhalt Inhalt Diese Seite drucken

Werbung

Verfügbare Sprachen
  • DE

Verfügbare Sprachen

  • DEUTSCH, seite 11
Compact 280R
400Ri
ROBOTIC MOWER
GB
NL
Installation Guide
MÄHROBOTER
DE
CZ
Installationsanleitung
ROBOT-TONDEUSE
FR
PL
Guide d'installation
Nov. 2019
V2.0
20-30cm
> 10 cm
ROBOTMAAIER
Gebruiksaanwijzing
ROBOSEKAČKA
Průvodce instalací
ROBOT KOSZĄCY
Instrukcja instalacji
20-30cm
20-30cm
>2m
20-30cm

Werbung

Inhaltsverzeichnis
loading

Inhaltszusammenfassung für Yard Force Compact 280R

  • Seite 1 20-30cm 20-30cm 20-30cm >2m > 10 cm Compact 280R 400Ri ROBOTMAAIER ROBOTIC MOWER Gebruiksaanwijzing Installation Guide MÄHROBOTER ROBOSEKAČKA Installationsanleitung Průvodce instalací ROBOT-TONDEUSE ROBOT KOSZĄCY Guide d’installation Instrukcja instalacji Nov. 2019 20-30cm V2.0...
  • Seite 2: Inhaltsverzeichnis

    CONTENT Description of product STOP button Ultrasonic sensor Description of product ............1 Charging port Rear wheel Installation ..............2 Height adjustment dial Control panel Operation ..............10 USB interface On/Off switch Technical data ..............13 Maintenance and storage ..........14 Troubleshooting ............16 Parts included within this box Robotic mower Docking station Spare blades...
  • Seite 3: Installation

    Installation Stones We recommend clearing the lawn of small (less than 100mm high) rocks and stones and any stones with a round or sloped edge. The Robotic Mower might try and climb such rocks instead Installation Guide of recognising them as a barrier. A Robotic Mower getting stuck on such a stone requires user intervention to restart mowing.
  • Seite 4 Do not place the docking station too close to a slope, such as at the top of a hill or the bottom of If the driveway and lawn are at the same level, feel free to use the boundary wire to create a a furrow.
  • Seite 5 When initially placing the pegs, do not drive them fully into the ground. Use a light hammer to drive Ponds and Pools them in a little bit. Also locate the fixing pegs and lay each one on the lawn at approximately the While the Robotic Mower is protected against rain and spray water, being submerged is likely to correct distance from lawn edges (20-30cm) and obstacles.
  • Seite 6 Once the blue LED confirms all is OK, test the Robotic Mower's function. Check the LED regularly Signal selection to ensure fixing the boundary wire has not affected the connection and signal shows S1 on the There are two signals which can be selected, S1(blue indicator) and S2(red indicator). charging satation.
  • Seite 7: Operation

    Operation Control panel Home button: First press the Home Compact 280R Compact 400Ri button and the press the OK button, robotic Mower will return to docking station. Start button: Frist press the Start button and then press the OK button, robotic...
  • Seite 8: Emergency Stop

    Technical Data Return to Docking station Model 280R 400Ri APP control Max cutting area 280 m 400 m Battery pack 20V/2000mAh 20V/2000mAh Input: 100-240V AC, 50/60Hz, Input: 100-240V AC, 50/60Hz, Switch power supply Output:24VDC, CC1.5A Output:24VDC, CC1.5A Mowing time on one charge 60 min 60 min Rated voltage...
  • Seite 9: Maintenance And Storage

    Maintenance and storage Cleaning the underside Ensure the main power switch is in OFF position. Wearing protective gloves, turn the Robotic Maintenance works that have not been instructed within the manual should only be carried out by Mower onto its side to expose its underside. Clean the blade disc and frame using a soft brush or a recommended servicing agency.
  • Seite 10: Troubleshooting

    Troubleshooting Robotic Mower cannot dock with docking station • Check that the boundary wire in front and underneath the charger is in a straight line. • Check that the docking station's position is suitable as explained in this manual. Robotic Mower runs in circles while mowing or while following boundary wire back to docking station.
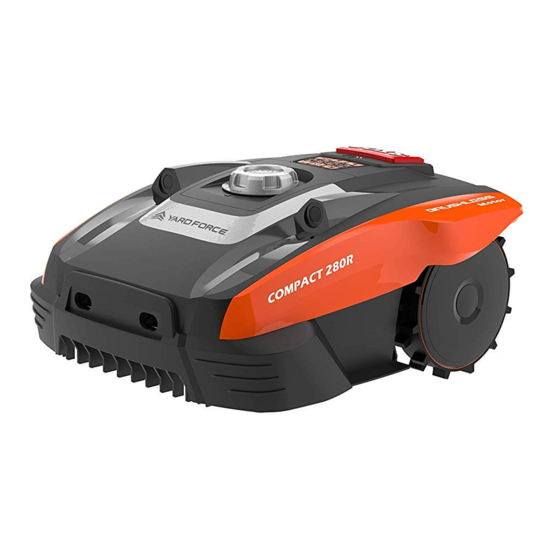
  • Seite 11: Produktbeschreibung

    INHALT Produktbeschreibung STOP-Taste Ultraschallsensor Produktbeschreibung ............1 Ladekontakte Hinterrad Vorbereitung ..............2 Drehknopf zur Schnitthöhenverstellung Bedienfeld Betrieb ..............10 USB-Schnittstelle (Service) Ein-/Ausschalter Technische Daten............13 Wartung und Lagerung ..........14 Fehlerbehebung ............16 Lieferumfang Compact Mähroboter Ladestation Heringe für das Ersatzmesser Kabelverbinder Begrenzungskabel Verlängerungskabel Netzteil Lineal Begrenzungskabel Bedienungsanleitung...
  • Seite 12: Vorbereitung

    Vorbereitung Steine Wir empfehlen, kleine (niedriger als 10 cm) Steine und Felsbrocken sowie alle Steine mit einer abgerundeten oder schrägen Kante vom Rasen zu entfernen oder mit dem Begrenzungskabel aus Installationsanleitung zu grenzen. Auf Grund der Form werden diese unter Umständen nicht direkt als Hindernis erkannt. Um zu verhindern, dass sich der Mähroboter an diesen Stellen festfahren kann oder die Messer In diesem Kapitel wird beschrieben, wie der Mähroboter für den Betrieb vorbereitet wird.
  • Seite 13: Unebene Rasenflächen

    Achten Sie darauf, dass die Ladestation waagerecht aufgestellt wird. Vermeiden Sie Neigungen Wenn der Weg und der Rasen auf gleicher Höhe sind, steht es Ihnen frei, ob Sie einen Streifen mit dem Begrenzungskabel abgrenzen. Der Mähroboter kann den Weg überqueren und auf die andere von mehr als 5 Grad.
  • Seite 14: Teiche Und Pools

    Treiben Sie die Heringe zunächst nur ein wenig mit einem leichten Hammer in den Boden, bis Teiche und Pools Sie sich sicher sind, dass sie korrekt positioniert sind. Um sicherzustellen, dass Sie die Heringe Der Mähroboter ist zwar vor Regen und Spritzwasser geschützt, unter Wasser würden die korrekt positionieren, empfiehlt es sich, dass Sie die Heringe zuerst auf dem Rasen auslegen und elektronischen Teile jedoch schweren Schaden nehmen.
  • Seite 15 Sobald die blaue LED bestätigt, dass alles in Ordnung ist, prüfen Sie die Funktion des Signalauswahl Mähroboters. Während Sie das Begrenzungskabel fixieren, prüfen Sie die LED, um sicherzustellen, Es stehen zwei Signale zur Auswahl, SI (blaue LED) und S2 (rote LED). dass die Verbindung nicht unterbrochen ist.
  • Seite 16: Betrieb

    Betrieb Bedienfeld Home-Taste: Drücken Sie die Compact 280R Compact 400Ri Home-Taste und bestätigen Sie den Befehl mit der OK-Taste. Der Mähroboter kehrt nun zur Ladestation Starttaste: zurück. Drücken Sie die Start- Taste und besätigen Sie den Befehl mit der OK-Taste. Der Regensensoranzeige Mähroboter beginnt...
  • Seite 17: Rückkehr Zur Ladestation

    Technische Daten Rückkehr zur Ladestation Modell 280R 400Ri Wifi Max. Schnittbereich 280 m 400 m Akku 20V/2000mAh 20V/2000mAh Input: 100-240V AC, 50/60Hz, Input: 100-240V AC, Schaltleistung 50/60Hz, 42W Output:24VDC, CC1.5A Output:24VDC, CC1.5A Mähzeit mit einer Akkuladung 60 min 60 min Nennspannung 20 V 20 V...
  • Seite 18: Wartung Und Lagerung

    Wartung und Lagerung Reinigung der Unterseite Achten Sie darauf, dass der Betriebsschalter auf OFF gestellt ist. Tragen Sie Schutzhandschuhe, Wartungsarbeiten, die nicht in dieser Bedienungsanleitung beschrieben werden, müssen von drehen Sie den Mähroboter auf die Seite, um auf seine Unterseite zugreifen zu können. Reinigen einer vom Hersteller zugelassenen Reparaturstelle durchgeführt werden.
  • Seite 19: Fehlerbehebung

    Fehlerbehebung Mähroboter kann nicht an der Ladestation andocken. • Prüfen Sie, ob das Begrenzungskabel vor und unter dem Ladegerät in einer geraden Linie verläuft. • Prüfen Sie, ob die Position der Ladestation gemäß den Anleitungen in dieser Bedienungsanleitung geeignet ist. Mähroboter fährt beim Mähen im Kreis oder während er dem Begrenzungskabel zurück zur Ladestation folgt.
  • Seite 20: Description Du Produit

    SOMMAIRE Description du produit Bouton STOP Capteur ultrasonique Description du produit ............1 Prise de chargement Roue arrière Installation ..............2 Molette de réglage de la hauteur Panneau de commandes Utilisation ..............10 Interface USB Bouton Marche/Arrêt Données techniques .............13 Entretien et rangement ..........14 Dépannage ............16 Éléments fournis Tondeuse Robomower...
  • Seite 21: Installation

    Installation Pierres Nous vous recommandons de débarrasser la pelouse des petites pierres et petits rochers (d’une hauteur inférieure à 100 mm) ainsi que des cailloux aux bords ronds ou biseautés. Le Robomower Guide d’installation pourrait en effet tenter de grimper sur ces pierres au lieu de les considérer comme un obstacle. Si le Robomower reste bloqué...
  • Seite 22 Ne placez pas la station de chargement à proximité d’une pente, comme en haut d’une colline ou Si l’allée et la pelouse sont au même niveau, vous pouvez utiliser le câble de délimitation pour créer un couloir. Cela permettra à votre Robomower de traverser l’allée et d’atteindre la pelouse en bas d’un sillon.
  • Seite 23 Premièrement, enfoncez légèrement les piquets avec un marteau léger jusqu’à ce que vous soyez Mares et piscines sûr de leur positionnement. Pour vous assurer du bon positionnement des piquets, il est conseillé Même si le Robomower est protégé de la pluie et des éclaboussures d’eau, une submersion de placer d’abord les piquets sur la pelouse, puis de mesurer la distance entre les bords de la causera d’importants dommages aux composants électroniques.
  • Seite 24 Une fois que l’indicateur LED bleu confirme que l’installation est réussie, vous pouvez tester le Sélection du signal fonctionnement du Robomower. Lors de l’installation du câble de délimitation, vérifiez l’indicateur Deux signaux peuvent être sélectionnés : S1 (indicateur bleu) et S2 (indicateur rouge). LED pour vous assurer que la connexion n’est pas interrompue.
  • Seite 25: Utilisation

    Utilisation Panneau de commandes Bouton « Maison » : Appuyez d’abord sur Compact 280R Compact 400Ri le bouton Accueil et sur le bouton OK. Robotic Mower retournera à la station d’accueil. Bouton Marche : Appuyez d’abord sur le bouton Démarrer, puis sur le bouton OK.
  • Seite 26: Arrêt D'urgence

    Données techniques Retour à la station de chargement Modèle 280R 400Ri Wifi Zone de coupe max. 280 m 400 m Batterie 20V/2000mAh 20V/2000mAh Input: 100-240V AC, Input: 100-240V AC, Bouton marche/arrêt 50/60Hz, 42W 50/60Hz, 42W Output:24VDC, CC1.5A Output:24VDC, CC1.5A Temps de coupe avec une charge 60 min 60 min Tension nominale...
  • Seite 27: Entretien Et Rangement

    Entretien et rangement Les travaux d’entretien qui ne sont pas décrits dans les instructions de ce guide doivent être effectués par une agence d’entretien agréée par le fabricant. Seules des pièces d'origine peuvent être utilisées. Entretien Vérifiez et nettoyez votre Robomower de façon régulière et remplacez les éléments usés au besoin.
  • Seite 28: Dépannage

    Dépannage Le Robomower ne retourne pas correctement sur la station de chargement. • Vérifiez que le câble de délimitation devant et sous le chargeur est bien droit. • Vérifiez que l’emplacement de la station de chargement est adapté, comme expliqué dans ce guide.
  • Seite 29: Beschrijving Van Het Product

    INHOUD Beschrijving van het product STOP knop Ultrasone sensor Beschrijving van het product .........1 Oplaadaansluiting Achterwiel Installatie ..............2 Regelaar voor hoogte/instelling Bedieningspaneel Werking ..............10 USB-interface Aan/uit-schakelaar Technische gegevens ..........13 Onderhoud en opslag ..........14 Probleemoplossing ............16 Inhoud van de verpakking Robotmaaier Laadstation Haringen...
  • Seite 30: Installatie

    Installatie Stenen We bevelen aan om kleine (lager dan 100 mm) rotsen en stenen of stenen met een ronde rand uit het gazon te verwijderen. De robotmaaier kan op dergelijke stenen of rotsen rijden in plaats van ze Installatiehandleiding als een obstakel te zien. Als de robotmaaier op een steen vast komt te zitten, dient de gebruiker de maaier opnieuw in te schakelen.
  • Seite 31 Plaats het laadstation niet in de buurt van een helling, zoals bovenop een heuvel of in een greppel. Als de oprit en het gazon zich op gelijke hoogte bevinden, gebruik de omheiningsdraad om een gang te creëren. Dit zorgt ervoor dat uw robotmaaier de oprit probleemloos over kan rijden om het Vermijd een linker of rechter helling van meer dan 5 graden.
  • Seite 32 Sla de haringen eerst lichtjes in de grond met behulp van een hamer, totdat u er zeker van bent dat Vijvers en zwembaden ze zich op de juiste positie bevinden. Om te waarborgen dat de haringen zich op de juiste positie De robotmaaier is beschermd tegen regen en opspattend water.
  • Seite 33 Wanneer de blauwe LED brand, betekent dat alles OK is, wanneer deze knippert is de Een signaal kiezen omheiningsdraad niet juist geinstalleerd. U hebt keuze uit twee signalen: S1 (blauw controlelampje) en S2 (rood controlelampje). Controleer de LED na het vastmaken van de omheiningsdraad dat de verbinding niet onderbroken Zorg dat uw robotmaaier en het laadstation hetzelfde signaal gebruiken.
  • Seite 34: Werking

    Werking Bedieningspaneel Huisknop: Compact 280R Compact 400Ri Druk eerst op de Home-knop en vervolgens op de OK-knop, de robotmaaier keert terug naar het dokstation. Startknop: Druk eerst op de Start- knop en vervolgens op de OK-knop, de Regensensor- robotmaaier begint te controlelampje werken.
  • Seite 35: De Maaihoogte Afstellen

    Technische gegevens Naar het laadstation terugkeren Model 280R 400Ri Wifi Max maaigebied 280 m 400 m Accu 20V/2000mAh 20V/2000mAh Input: 100-240V AC, Input: 100-240V AC, Schakelvermogen 50/60Hz, 42W 50/60Hz, 42W Output:24VDC, CC1.5A Output:24VDC, CC1.5A Maaiduur met één laadbeurt 60 min 60 min Nominale spanning 20 V...
  • Seite 36: Onderhoud En Opslag

    Onderhoud en opslag Reinig de contactpennen en de laadstroken. Reinig de contactpennen en de laadstroken van uw grasmaaier en laadstation met staalwol, Alle werkzaamheden die niet in deze gebruikershandleiding zijn vermeld mogen alleen door een een metaalreiniger of fijnkorrelig schuurpapier. Verwijder eventueel vuil, bladeren, gras rond de erkend servicecentrum worden uitgevoerd.
  • Seite 37: Probleemoplossing

    Probleemoplossing Robotmaaier kan niet met laadstation worden verbonden. • Controleer of de omheiningsdraad voor en onder het laadstation zich in een rechte lijn bevindt. • Controleer of het laadstation op een juiste plaats is geïnstalleerd, zoals vermeld in deze handleiding. De robotmaaier rijdt in cirkels tijdens het maaien of tijdens het volgen van de omheiningsdraad op weg naar het laadstation.
  • Seite 38: Popis Výrobku

    OBSAH Popis výrobku Tlačítko STOP Ultrazvukový senzor Popis výrobku ............1 Nabíjecí port Zadní kolo Instalace ..............2 Kolečko pro nastavení výšky Ovládací panel Provoz ..............10 USB rozhraní Tlačítko zap / vyp Technické údaje ............13 Údržba a skladování ..........14 Řešení problémů ............16 Rozsah dodávky Robotická...
  • Seite 39: Instalace

    Instalace Kameny Doporučujeme odstranit z trávníku malé (méně než 100 mm vysoké) skály a kameny a jakékoli kameny s kulatým nebo šikmým okrajem. Robotická sekačka by se mohla pokusit vylézt na Pokyny k instalaci takovéto kameny místo toho, aby je rozpoznala jako překážku. Robotická sekačka, která na takovém kameni uvízne, vyžaduje zásah uživatele pro restartování...
  • Seite 40: Umístění Nabíjecí Stanice

    Neumisťujte nabíjecí stanici příliš blízko ke svahu, například na vrchol kopce nebo na dno brázdy. Pokud jsou příjezdová cesta a trávník na stejné úrovni, můžete použít ohraničující kabel pro vytvoření průchodu. To umožňuje, aby robotická sekačka překročila příjezdovou cestu a dosáhla Vyhněte se levému a pravému sklonu většímu než...
  • Seite 41 Nejprve lehce zatlačte kolíky pomocí malého kladívka, dokud se neujistíte, že máte správné Hraniční průchod umístění. Abyste zajistili správné umístění kolíků, doporučujeme, abyste nejprve položili kolíky na Pokud jste vytvořili hraniční průchod uvnitř pracovní plochy, musí mít šířku nejméně 2 m a trávník a změřili vzdálenost od okrajů...
  • Seite 42 Jakmile modrá LED potvrdí, že je vše v pořádku, otestujte funkci robotické sekačky. Při upevňování Výběr signálu ohraničujícího kabelu kontrolujte LED, abyste se ujistili, že spojení není přerušeno. Na nabíjecí K dispozici jsou dva signály, S1 (modrá kontrolka) a S2 (červená kontrolka). stanici se ujistěte, že signál je stejný...
  • Seite 43: Provoz

    Provoz Ovládací panel Tlačítko Domů: Nejprve stiskněte tlačítko Domů a poté Compact 280R Compact 400Ri stiskněte tlačítko OK, robotická sekačka se vrátí do dokovací stanice. Tlačítko Start: Nejprve stiskněte tlačítko Start a poté stiskněte tlačítko OK, Kontrolka dešťového robotická sekačka senzoru začne pracovat.
  • Seite 44: Technické Údaje

    Technické údaje Návrat do nabíjecí stanice Model 280R 400Ri Wifi Maximální plocha sekání 280 m 400 m Akumulátor 20V/2000mAh 20V/2000mAh Input: 100-240V AC, 50/60Hz, Input: 100-240V AC, Hlavní vypínač 50/60Hz, 42W Output:24VDC, CC1.5A Output:24VDC, CC1.5A Doba sekání na jedno nabití 60 min 60 min Jmenovité...
  • Seite 45: Údržba A Skladování

    Údržba a skladování Servisní práce, které nebyly popsány v tomto návodu, musí provádět servisní společnost autorizovaná výrobcem. Používejte pouze originální náhradní díly. Údržba Pravidelně kontrolujte a čistěte robotickou sekačku a v případě potřeby vyměňte opotřebované díly. Přednostně používejte suchý kartáč, vlhký hadřík nebo zaostřený dřevěný špalek. Nikdy nepoužívejte stříkající...
  • Seite 46: Řešení Problémů

    Řešení problémů Robotická sekačka se nedokáže připojit k nabíjecí stanici • Zkontrolujte, zda je ohraničující kabel před a pod nabíječkou v přímce. • Zkontrolujte, zda je poloha nabíjecí stanice vhodná, jak je vysvětleno v této příručce. Robotická sekačka se pohybuje v kruzích během sekání nebo při sledování...
  • Seite 47: Opis Produktu

    SPIS TREŚCI Opis produktu Przycisk STOP Czujnik ultradźwiękowy Opis produktu ............1 Port ładowania Koło tylne Instalacja ............... 2 Pokrętło regulacji wysokości Panel sterowania Użytkowanie ..............10 Interfejs USB Przełącznik wł./wył. Dane techniczne ............13 Konserwacja i przechowywanie ........14 Rozwiązywanie problemów .........16 Zakres dostawy Robokosiarka Stacja ładowania Zapasowe ostrza...
  • Seite 48: Instalacja

    Instalacja Kamienie Zalecamy, aby z trawnika usunąć małe (do 100 mm wysokości) kawałki skał i kamienie oraz wszystkie kamienie o zaokrąglonych lub nachylonych krawędziach. Robokosiarka może próbować Instrukcja instalacji wjeżdżać na takie kamienie zamiast rozpoznania ich jako przeszkodzę. Aby wznowić koszenie, robokosiarka, która zaklinuje się...
  • Seite 49 Stacji ładowania nie należy umieszczać zbyt blisko pochyłości, np. na szczycie pagórka lub na Jeśli podjazd i trawnik znajdują się na tym samym poziomie, przewodu granicznego należy użyć do wyznaczenia korytarza. Dzięki temu robokosiarka będzie mogła przejeżdżać przez podjazd na dnie niecki.
  • Seite 50 Najpierw kołki należy wbić w w ziemię lekkim młotkiem, na tyle, aby mieć pewność, że znajdują Oczka wodne i baseny się one we właściwej pozycji. . Aby mieć pewność, że kołki znajdują się we właściwych miejscach, O ile robokosiarka jest zabezpieczona przed deszczem i bryzgami wody, o tyle zanurzenie jej w radzimy, aby najpierw ułożyć...
  • Seite 51 Gdy tylko niebieska dioda LED potwierdzi, że wszystko jest w porządku, należy przetestować Wybór sygnału działanie robokosiarki. Podczas mocowania przewodu granicznego należy sprawdzać, czy dioda Użytkownik ma do wyboru dwa sygnały, S1 (kontrolka niebieska) i S2 (kontrolka czerwona). LED świeci, aby wykluczyć ewentualne przerwania połączenia. W stacji ładowania należy upewnić Należy pilnować, aby zarówno w robokosiarce jak i w stacji ładowania używać...
  • Seite 52: Użytkowanie

    Użytkowanie Panel sterowania Przycisk Baza: Najpierw naciśnij Compact 280R Compact 400Ri przycisk Home, a następnie przycisk OK, kosiarka zautomatyzowana powróci do stacji dokującej. Przycisk Start: Najpierw naciśnij przycisk Start, a następnie przycisk Wskaźnik czujnika OK, kosiarka deszczu zautomatyzowana Kiedy zacznie padać, zacznie działać.
  • Seite 53: Zatrzymanie Awaryjne

    Dane techniczne Powrót do stacji ładowania Model 280R 400Ri Wifi Maks. powierzchnia koszenia 280 m 400 m Akumulator 20V/2000mAh 20V/2000mAh Input: 100-240V AC, Input: 100-240V AC, Zasilacz 50/60Hz, 42W 50/60Hz, 42W Output:24VDC, CC1.5A Output:24VDC, CC1.5A Czas koszenia na 1 60 min 60 min naładowaniu Napięcie znamionowe...
  • Seite 54: Konserwacja I Przechowywanie

    Konserwacja i przechowywanie Czyszczenie styków, bolców i listew do ładowania Bolce i listwy do ładowania zarówno w kosiarce jak i w stacji ładowania należy czyścić za pomocą Czynności konserwacyjne nieopisane w instrukcji muszą być wykonane przez punkt serwisowy wełny stalowej, środka do czyszczenia metalu lub bardzo drobnoziarnistego papieru ściernego. autoryzowany przez producenta.
  • Seite 55: Rozwiązywanie Problemów

    Rozwiązywanie problemów Robokosiarka nie jest w stanie zaparkować w stacji ładowania • Sprawdzić, czy kabel graniczny przed ładowarką i pod nią jest ułożony w linii prostej. • Sprawdzić, czy stacja ładowania jest ustawiona zgodnie z zaleceniami podanymi w instrukcji. W czasie koszenia lub wracając do stacji ładowania wzdłuż przewodu granicznego robokosiarka zatacza koła.

Diese Anleitung auch für:

Compact 400ri

Inhaltsverzeichnis