Werbung
Verfügbare Sprachen
Verfügbare Sprachen
Werbung
Kapitel

Verwandte Anleitungen für Märklin H0 76495


Inhaltszusammenfassung für Märklin H0 76495
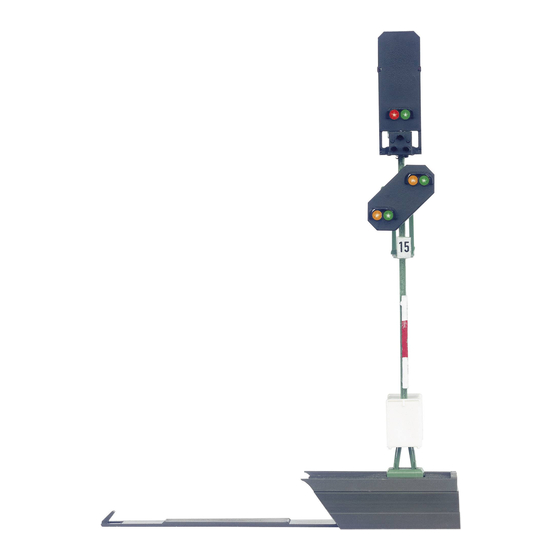
- Seite 1 Lichtsignal mit Vorsignal 76495/76496/76497...
-
Seite 3: Inhaltsverzeichnis
Inhaltsverzeichnis Seite Sommaire Page Signalbilder beim Vorbild Positions signalétiques réelles Bestimmungsgemäße Verwendung Utilisation conforme Lieferumfang Livraison Sicherheitshinweise Consignes de sécurité Wichtige Hinweise Consignes importantes Technische Daten Caractéristiques techniques Funktionen Fonctions Signal-Einbau Montage du signal Programmierung mit CS 2 / CS3 Programmation avec CS 2 / CS3 Betrieb unter mfx Exploitation sous mfx... -
Seite 4: Signalbilder Beim Vorbild
Signalbilder beim Vorbild Positions signalétiques réelles Signal Aspects in the Prototyp Seinbeelden bij het voorbeeld Signalbild Hauptsignal: Signal aspect for a home signal: Position de signal principal: Seinbeeld hoofdsein: 76495 76496 76497 76495 76496 76497 76496 76497 Bedeutung: Fahrt Langsamfahrt Halt Meaning: Proceed Slowly... - Seite 5 Fahrstrom: Track Current: Courant traction : Rijstroom: 76495 76496 76497 76496 76495 76497 débranché branché...
-
Seite 6: Bestimmungsgemäße Verwendung
Bestimmungsgemäße Verwendung Wichtige Hinweise • Das Signal ist zum Einbau in H0 Digital-Modellbahn-Anlagen. • Die Bedienungsanleitung ist Bestandteil des Produktes und • Das Signal darf für den Analogbetrieb nur mit Stellpult 72760 muss deshalb aufbewahrt sowie bei Weitergabe des Produk- verwendet werden. -
Seite 7: Signal-Einbau
Signal-Einbau se automatisch vergeben. Diese Adresse kann nicht verändert werden. Vor dem eigentlichen Einbau muss das Signal programmiert Während des Programmiervorganges blinkt die Signallampe, werden. abweichend davon wird während des programmierens mit der Folgende Arbeitsschritte dürfen nur im spannungslosen Zustand Central Station das Signal geschaltet. - Seite 8 CV Bedeutung Werte CV Bedeutung Werte Adresse 1 - 255 1-255 (1) nur DCC Vorsignal 0 = 0s Umschaltzeit 1 = 0,175s Adressen 256 - 2040 0-7 (0) nur DCC PoM* 0 - 3 LED an/aus 2 = 0,35s 33 Anzahl Ausgangs- nur DCC lesen —...
-
Seite 9: Betrieb Unter Mfx
Betrieb unter mfx Die richtige Adressierung MM: Adresse 5 Die mfx-Anmeldung kann unter MM oder DCC erfolgen. Entscheidend ist die über den Dip-Schalter 10 eingestellte Betriebsart. Die mfx-Anmeldung wird mit der CS2 60213/60214/60215 in der Magnetartikelkonfiguration über > und mit der CS3 60216/60226 in der Magnetartikelkonfiguration über >„mfx-Artikel suchen“... -
Seite 10: Intended Use Of The Product
Intended Use of the Product Safety Notes • IMPORTANT! The product has sharp edges and points due to • This signal is for installation on H0 digital model railroad layouts. the way it works. • This signal may only be used for analog operation with the •... -
Seite 11: Signal Installation
• Programmable addresses by means of CVs The following CVs can be changed in fx (MM): CV 40, 45, 46, 48 , 1-2.040 DCC 50, 52 and 54. • Characteristics can be changed by means of CVs The address for the distant signal located on the mast, the •... - Seite 12 CV for fx (MM) and DCC CV Meaning Values Cross fading behavior 0 - 3 0 = simultaneously With fx (MM) the address can be set only with the DIP switches. Home signal 1 = one after the other The values in parentheses are factory default settings. PoM* 2 = one after the other CV Meaning...
-
Seite 13: Operation With Mfx
Operation with mfx Sample of the correct address assignment for MM: Adress 5 mfx registration can be done with MM or DCC.The mode of ope- ration that has been set by means of Dip Switch 10 is critical. The mfx registration is initiated with the 60213/60214/60215 CS2 >... -
Seite 14: Utilisation Conforme
Utilisation conforme • Utiliser le signal uniquement avec la tension autorisée (cf. caractéristiques techniques). • Le signal est conçu pour être monté sur des circuits ferrovi- aires miniatures numériques H0. Consignes importantes • Le signal ne doit être utilisé en mode analogue qu’avec un •... -
Seite 15: Montage Du Signal
Montage du signal 48, 50, 52 et 54. L’adresse automatiquement attribuée pour le signal d’annonce Avant le montage à proprement parler, vous devez programmer situé sur le mât est pour 76495 l’adresse consécutive, pour 76496 le signal. et 76497, celle d’après. Cette adresse ne peut pas être modifiée. Vous réaliserez les étapes suivantes uniquement lorsque le Pendant la programmation, la lampe du signal clignote, et, in- circuit est hors tension :... - Seite 16 CV pour fx (MM) et DCC CV Éclairage Valeur Signal d’annonce 0 =0s Dans fx (MM), vous pouvez configurer l’adresse uniquement Temps de commutation 1 = 0,175s via l’interrupteur DIP. Les valeurs entre parenthèses sont les PoM* 0 - 3 LED allumée/éteinte 2 = 0,35s paramètres d’usine.
-
Seite 17: Exploitation Sous Mfx
Exploitation sous mfx Exemple pour l‘adressage correct MM: Adresse 5 L’enregistrement mfx peut se faire sous MM ou DCC. C‘est le mode d’exploitation défini via le commutateur Dip 10 qui importe ici. Avec la CS2 60213/60214/60215, l’enregistrement mfx est lancé dans la configuration des articles électromagnétiques via >... -
Seite 18: Beoogd Gebruik
Beoogd gebruik Veiligheidsvoorschriften • LET OP! Heeft vanwege de functionaliteit scherpe kanten en • Het sein is bestemd voor het inbouwen in H0-modelbanen. punten. • Het sein mag in analoogbedrijf alleen in combinatie met het • Bedrading en montagewerkzaamheden alleen in spanninglo- schakelkastje 72760 gebruikt worden. -
Seite 19: Sein Inbouwen
• Programmeerbare adressen via CV De volgende CV’s kunnen bij fx (MM) veranderd worden: 40, 45, 1-2040 DCC 46, 48, 50, 52 en 54. • Veranderen van de eigenschappen via CV Het adres voor het aan de mast bevestigde voorsein wordt •... - Seite 20 CV voor fx (MM) en DCC CV Omschrijving Waarde 50 Hoofdsein 0=gelijktijdig Onder fx (MM) kan het adres alleen met de dipschakelaar Overvloei gedrag 1=na elkaar worden ingesteld. De waarden tussen haakjes zijn de fabrieks- 0 - 3 2=na elkaar 0,1s pauze instellingen.
-
Seite 21: Bedrijf Met Mfx
Bedrijf met mfx Voorbeeld voor de juiste adressering MM: De mfx aanmelding kan zowel onder MM als onder DCC Adres 5 gebeuren. Bepalend daarvoor is het ingestelde bedrijfstype met dip- schakelaar 10. De mfx aanmelding wordt met het CS2 60213/60214/60215 in de magneetartikel configuratie via >... -
Seite 22: Bedrijfsmodus En Adres Instellen
Betriebsart und Adressen einstellen Setting the mode of operation and addresses keyboard 10 ( 0/1 ) Définir le mode d’exploitation et les adresses fx (MM)/DCC fx (MM)/DCC Bedrijfsmodus en adres instellen fx (MM)/DCC fx (MM)/DCC on = DCC fx (MM)/DCC fx (MM)/DCC off = fx (MM) 1 2 3... - Seite 23 keyboard keyboard 10 ( 0/1 ) 10 ( 0/1 ) fx (MM)/DCC fx (MM)/DCC 3 4 5 fx (MM)/DCC fx (MM)/DCC 3 4 5 fx (MM)/DCC fx (MM)/DCC 2 3 4 5 fx (MM)/DCC 1 2 3 fx (MM)/DCC 1 2 3 4 5 fx (MM)/DCC 4 5 6 fx (MM)/DCC...
- Seite 24 keyboard keyboard 10 ( 0/1 ) 10 ( 0/1 ) fx (MM)/DCC fx (MM)/DCC 2 3 4 fx (MM)/DCC 1 2 3 fx (MM)/DCC 1 2 3 4 fx (MM)/DCC fx (MM)/DCC fx (MM)/DCC fx (MM)/DCC fx (MM)/DCC fx (MM)/DCC fx (MM)/DCC fx (MM)/DCC fx (MM)/DCC...
- Seite 25 keyboard keyboard 10 ( 0/1 ) 10 ( 0/1 ) fx (MM)/DCC fx (MM)/DCC fx (MM)/DCC fx (MM)/DCC fx (MM)/DCC 3 4 5 fx (MM)/DCC fx (MM)/DCC 3 4 5 fx (MM)/DCC fx (MM)/DCC 2 3 4 5 fx (MM)/DCC fx (MM)/DCC 1 2 3 4 5 fx (MM)/DCC...
- Seite 26 keyboard keyboard 10 ( 0/1 ) 10 ( 0/1 ) fx (MM)/DCC 2 3 4 fx (MM)/DCC fx (MM)/DCC 1 2 3 4 fx (MM)/DCC fx (MM)/DCC fx (MM)/DCC 1 2 3 fx (MM)/DCC fx (MM)/DCC 4 5 6 fx (MM)/DCC fx (MM)/DCC 4 5 6 fx (MM)/DCC...
- Seite 27 keyboard keyboard 10 ( 0/1 ) 10 ( 0/1 ) 9 fx (MM)/DCC 6 7 8 fx (MM)/DCC 9 fx (MM)/DCC 6 7 8 fx (MM)/DCC 9 fx (MM)/DCC 6 7 8 fx (MM)/DCC 9 fx (MM)/DCC 6 7 8 fx (MM)/DCC 9 fx (MM)/DCC 6 7 8...
- Seite 28 keyboard keyboard 10 ( 0/1 ) 10 ( 0/1 ) 3 4 5 9 fx (MM)/DCC 9 fx (MM)/DCC 3 4 5 9 fx (MM)/DCC 1 2 3 9 fx (MM)/DCC 2 3 4 5 9 fx (MM)/DCC 4 5 6 9 fx (MM)/DCC 1 2 3 4 5 9 fx (MM)/DCC...
- Seite 29 keyboard keyboard 10 ( 0/1 ) 10 ( 0/1 ) - - - / DCC - - - / DCC - - - / DCC - - - / DCC - - - / DCC - - - / DCC - - - / DCC - - - / DCC - - - / DCC...
- Seite 30 keyboard keyboard 10 ( 0/1 ) 10 ( 0/1 ) - - - / DCC 2 3 4 5 - - - / DCC - - - / DCC 1 2 3 4 5 - - - / DCC - - - / DCC - - - / DCC 1 2 3 - - - / DCC...
- Seite 31 keyboard keyboard 10 ( 0/1 ) 10 ( 0/1 ) 4 5 6 - - - / DCC 7 8 9 - - - / DCC 4 5 6 - - - / DCC 7 8 9 - - - / DCC 4 5 6 - - - / DCC 7 8 9...
- Seite 32 Adressen größer 511 können nur im DCC Format ausgegeben werden und müssen mit der CV Programmierung über das Programmiergleis durchgeführt werden. keyboard 10 ( 0/1 ) 6 7 8 9 - - - / DCC Addresses larger than 511 can only be assigned in the DCC 6 7 8 9 - - - / DCC format and must be done by programming a CV using the...
- Seite 33 Aufbau • Setup • Montage • Opbouwen Anschluss Programmiergleis Kabelfarben Connections for the Programming Track Branchement voie de programmation rot / red / rouge / rood / Aansluiten op het programmeerspoor braun / brown / brun / bruin gelb / yellow / jaune / geel violett / violett /violet / paars rot-braun / red-brown / rouge-brun / rood-bruin rot-grün / red-green/ rouge-vert / rood-groen...
- Seite 34 Decoder in das C-Gleis einbauen Unterflurmontage des Decoders: Installing Decoders in C Track Below-baseboard installation of the decoder: Intégration du décodeur dans la voie C Montage du décodeur sous le plateau Decoder onder de C-rail inbouwen Ondervloermontage van de decoder...
- Seite 35 Befestigung am C-Gleis • Installation with C Track • Fixation à la voie C • Bevestiging aan C-rail •...
- Seite 36 Märklin C-Gleis E255765 76495 76497 76496 Signalabschnitt Isolieren und Anschließen Insulating the Signal Block and Making Its Connections Isoler la partie du signal et brancher Stopsectie isoleren en aansluiten...
- Seite 37 Trix C-Gleis 76495 76497 76496 Signalabschnitt Isolieren und Anschließen Insulating the Signal Block and Making Its Connections Isoler la partie du signal et brancher Stopsectie isoleren en aansluiten...
- Seite 38 Montage auf K-Gleis Fundament • Slide the mast onto the K Track base • Glisser le mât sur la plaque de voie K • Mast op de K-rail plaat schuiven...
- Seite 40 7504 7500 76495 76497 76496 Signalabschnitt isolieren und anschließen; zusätzlich benötigen Sie 1x 7504 u. 1x 7500 Isolate and connect the signal block; additional materials required 1 x 7504 and 1 x 7500 Isolez et raccordez la section du signal ; il vous faut en outre 1x 7504 u. 1x 7500 Stopsectie isoleren en aansluiten;...
- Seite 41 Anschluss Bremsmodul • Connections for the Braking Module • Branchement module de freinage Aansluiten afremmodule 72441/72442 max 16V AC...
- Seite 42 Steigung oder Gefälle beim Signalmast ausgleichen (3 % oder 5 %) Level out an Ascending or Descending Grade at a Signal Mast (3% or 5%) Equilibrage de la pente près d‘un mât de signal (3 % ou 5 %) Bij stijging of daling de mast bijstellen (3 % of 5 %)
- Seite 43 Aufkleber anbringen • Attach decals • Fixez les autocollants • Bevestig stickers...
- Seite 44 Gebr. Märklin & Cie. GmbH Stuttgarter Straße 55 - 57 73033 Göppingen 243413/0520/Sc4Pw Germany Änderungen vorbehalten www.maerklin.com/en/imprint.html www.maerklin.com © Gebr. Märklin & Cie. GmbH...
- Seite 45 Lichtsignal mit Vorsignal 76495/76496/76497...
- Seite 47 Indice de contenido Página Innehållsförteckning Sidan Posiciones de las señales en la realidad Signalbilder hos förebilden Uso previsto Användningsområde Alcance de suministro Innehåll Instrucciones de seguridad Säkerhetsföreskrifter Consejos importantes Viktig information Datos técnicos Tekniska data Funciones Funktioner Montaje de la señal Signal-inbyggnad Programación con CS 2 / CS3 Programmering med CS 2 / CS3...
-
Seite 48: Aspetti Del Segnalamento Nel Caso Del Prototipo
Posiciones de las señales en la realidad Signalbilder hos förebilden Aspetti del segnalamento nel caso del prototipo Signalbilleder på forbilledet Posición señal principal: Aspetti di segnalamento di un segnale principale: Signalbild huvudsignal: Signalbillede for hovedsignal: 76495 76496 76497 76495 76496 76497 76496 76497... - Seite 49 Corriente de tracción: Corrente di trazione: Körström: Kørestrøm: 76495 76496 76497 76496 76495 76497 apagada encendida esclusa inserita från till...
-
Seite 50: Uso Previsto
Uso previsto Instrucciones de seguridad • ¡ATENCIÓN! Por su funcionalidad, incluye aristas cortantes y • La señal ha sido concebida para su montaje en maquetas de puntas. trenes digitales H0. • Realizar los trabajos de cableado y montaje siempre sin •... -
Seite 51: Montaje De La Señal
Funciones Programación con CS 2 / CS3 • Apta para multiprotocolo: fx (MM), mfx y DCC fx (MM) • Selección del modo de funcionamiento con microint. DIP La programación de variables CV debe realizarse en la vía de • Direcciones configurables con microint. DIP: programación. - Seite 52 Significado Valores La programación de las CVs debe realizarse en la vía de Tipo de señal Señal avanzada Pertenece a programación. Está permitido conectar a la vía de programación Señal de bloqueo PoM* siempre solo una señal. Señal de entrada a estación Durante la transmisión de datos, a modo de comprobación, luce Señal de salida de...
-
Seite 53: Funcionamiento En Modo Mfx
Funcionamiento en modo mfx *La programación en marcha PoM, siempre que así lo soporte la unidad de control, puede realizarse en la vía principal. El inicio de sesión en mfx se puede realizar en modo MM o DCC. Configuración y cálculo de las direcciones mayores que 255 (DCC): El modo de funcionamiento se selecciona con el microinterrup- P. -
Seite 54: Impiego Commisurato Alla Destinazione
Impiego commisurato alla destinazione • Si faccia funzionare il segnale solamente con la tensione ammissibile (si vedano i dati tecnici). • Tale segnale è da installare in impianti di ferrovia in miniatura H0 digitali. Avvertenze importanti • Per il funzionamento analogico tale segnale deve venire •... -
Seite 55: Montaggio Del Segnale
Montaggio del segnale Come indirizzo per il segnale di preavviso che si trova sul palo viene assegnato automaticamente nel caso del 76495 l’indirizzo Prima del vero e proprio montaggio il segnale deve venire successivo, nel caso del 76496 e 76497 il secondo indirizzo programmato. - Seite 56 CV per fx (MM) e DCC CV Significato Valore Segnale di preavviso 0 =0s Sotto fx (MM) l’indirizzo può venire impostato solo con il commu- Tempo di commutazione 1 = 0,175s tatore DIP. I valore in parentesi sono le impostazioni di fabbrica. PoM* 0 - 3 LED acceso/spento...
-
Seite 57: Esercizio Sotto Mfx
Esercizio sotto mfx Esempio per il corretto indirizzamento MM: La registrazione mfx può avvenire sotto MM oppure DCC. Indirizzo 5 È discriminante il tipo di funzionamento impostato tramite il commutatore Dip 10. La registrazione mfx viene avviata con la CS2 60213/60214/60215 nella configurazione degli apparati elettromagnetici tramite >... -
Seite 58: Användningsområde
Användningsområde • Signalen får endast matas med tillåten/korrekt spänning! (Se tekniska data i bruksanvisningen.) • Signal avsedd för inbyggnad i digitala H0-modelljärnvägar. • Vid analog drift får signalen endast användas tillsammans Viktig information med ställpult nr 72760. • Bruksanvisningen är en del av denna produkt och måste där- •... -
Seite 59: Signal-Inbyggnad
Signal-inbyggnad 76496 och 76497 som ytterligare efterföljande följeadresser. Dessa följeadresser kan inte ändras. Innan signalen byggs in/kopplas in i anläggningen måaste den Under pågående programmering blinkar signalens lyktor, ev. programmeras. avvikelser under programmeringen kan ändras med Central Sta- Följande arbetsmoment får endast utföras i spänningslöst tion. - Seite 60 CV Innebörd Värde CV Innebörd Värde Adresser 1 - 255 1-255 (1) endast DCC Försignal 0 = samtidigt Signalomslags-ordning 1 = efter varandra Adresser 256 - 2040 0-7 (0) endast DCC PoM* 2 = efter varandra 33 Antalet utgångsadresser — Endast läsning 0 - 3 0,1s paus...
-
Seite 61: Körning Med Mfx
Körning med mfx Exempel för korrekt adressering MM: Mfx-inställning kan göras med både MM och DCC. Adress 5 Drifttyp ställs in med hjälp av dip-switch nr 10. Mfx-inställningen görs med CS2 60213/60214/60215 i magnetarti- kelkonfigurationen via > och med CS3 60216/60226 i magnetartikelkonfigurationen via >“sökning av mfx-artiklar “. -
Seite 62: Hensigtsmæssig Anvendelse
Hensigtsmæssig anvendelse Vigtig information • Signalet er til indbygning i H0 digital-modelbaneanlæg. • Betjeningsvejledningen er del af produktet og skal derfor • Signalet må til analogdrift kun anvendes med kontrolpanel opbevares sammen med produktet og gives videre til tredje- 72760. mand sammen med produktet. -
Seite 63: Signalindbygning
Signalindbygning Signallampen blinker under programmeringen; uafhængigt deraf aktiveres signalet med Central Station under programmeringen. Signalet skal programmeres inden indbygning. Efter afsluttet programmering, indstilles signalet på „Kørsel“. Følgende arbejdstrin må kun udføres i spændingsfri tilstand: Inden programmering af den mobile station 2 skal der oprettes Indstilling af adresser og driftsform via DIP-kontakten: f. - Seite 64 CV Betydning Værdier CV Betydning Værdier Belysning 0 - 15 (15) 0 lys fra Advarselssignal 0 = samtidig dimmer 0-15, hvor Overblændingsforhold = efter hinanden PoM* PoM* 15 = svarer til 100 % 2 = efter hinanden 0 - 3 lyshed 0,1s pause 3 = efter hinanden...
-
Seite 65: Drift Med Mfx
Drift med mfx Eksempel på den korrekte adressering MM: mfx-registreringen kan ske med MM eller DCC. Adresse 5 Den ved hjælp af dip-omskifter indstillede driftsmodus er afgørende. mfx-registreringen indledes med CS2 60213/60214/60215 i magne- tartikelkonfigurationen via > og med CS3 60216/60226 i magnetartikelkonfigurationen via >... - Seite 66 Configuración de modo de funcionamiento y direcciones Impostate tipo di funzionamento e indirizzi keyboard 10 ( 0/1 ) Ställ in driftstyp och adress fx (MM)/DCC fx (MM)/DCC Indstil driftsart og adresser fx (MM)/DCC fx (MM)/DCC on = DCC fx (MM)/DCC fx (MM)/DCC off = fx (MM) 1 2 3...
- Seite 67 keyboard keyboard 10 ( 0/1 ) 10 ( 0/1 ) fx (MM)/DCC fx (MM)/DCC 3 4 5 fx (MM)/DCC fx (MM)/DCC 3 4 5 fx (MM)/DCC fx (MM)/DCC 2 3 4 5 fx (MM)/DCC 1 2 3 fx (MM)/DCC 1 2 3 4 5 fx (MM)/DCC 4 5 6 fx (MM)/DCC...
- Seite 68 keyboard keyboard 10 ( 0/1 ) 10 ( 0/1 ) fx (MM)/DCC fx (MM)/DCC 2 3 4 fx (MM)/DCC 1 2 3 fx (MM)/DCC 1 2 3 4 fx (MM)/DCC fx (MM)/DCC fx (MM)/DCC fx (MM)/DCC fx (MM)/DCC fx (MM)/DCC fx (MM)/DCC fx (MM)/DCC fx (MM)/DCC...
- Seite 69 keyboard keyboard 10 ( 0/1 ) 10 ( 0/1 ) fx (MM)/DCC fx (MM)/DCC fx (MM)/DCC fx (MM)/DCC fx (MM)/DCC 3 4 5 fx (MM)/DCC fx (MM)/DCC 3 4 5 fx (MM)/DCC fx (MM)/DCC 2 3 4 5 fx (MM)/DCC fx (MM)/DCC 1 2 3 4 5 fx (MM)/DCC...
- Seite 70 keyboard keyboard 10 ( 0/1 ) 10 ( 0/1 ) fx (MM)/DCC 2 3 4 fx (MM)/DCC fx (MM)/DCC 1 2 3 4 fx (MM)/DCC fx (MM)/DCC fx (MM)/DCC 1 2 3 fx (MM)/DCC fx (MM)/DCC 4 5 6 fx (MM)/DCC fx (MM)/DCC 4 5 6 fx (MM)/DCC...
- Seite 71 keyboard keyboard 10 ( 0/1 ) 10 ( 0/1 ) 9 fx (MM)/DCC 6 7 8 fx (MM)/DCC 9 fx (MM)/DCC 6 7 8 fx (MM)/DCC 9 fx (MM)/DCC 6 7 8 fx (MM)/DCC 9 fx (MM)/DCC 6 7 8 fx (MM)/DCC 9 fx (MM)/DCC 6 7 8...
- Seite 72 keyboard keyboard 10 ( 0/1 ) 10 ( 0/1 ) 3 4 5 9 fx (MM)/DCC 9 fx (MM)/DCC 3 4 5 9 fx (MM)/DCC 1 2 3 9 fx (MM)/DCC 2 3 4 5 9 fx (MM)/DCC 4 5 6 9 fx (MM)/DCC 1 2 3 4 5 9 fx (MM)/DCC...
- Seite 73 keyboard keyboard 10 ( 0/1 ) 10 ( 0/1 ) - - - / DCC - - - / DCC - - - / DCC - - - / DCC - - - / DCC - - - / DCC - - - / DCC - - - / DCC - - - / DCC...
- Seite 74 keyboard keyboard 10 ( 0/1 ) 10 ( 0/1 ) - - - / DCC 2 3 4 5 - - - / DCC - - - / DCC 1 2 3 4 5 - - - / DCC - - - / DCC - - - / DCC 1 2 3 - - - / DCC...
- Seite 75 keyboard keyboard 10 ( 0/1 ) 10 ( 0/1 ) 4 5 6 - - - / DCC 7 8 9 - - - / DCC 4 5 6 - - - / DCC 7 8 9 - - - / DCC 4 5 6 - - - / DCC 7 8 9...
- Seite 76 Las direcciones superiores a 511 pueden mostrarse en el formato DCC y deben configurarse con la función Programación de CVs mediante la vía de programación. keyboard 10 ( 0/1 ) 6 7 8 9 - - - / DCC Indirizzi maggiori di 511 possono essere assegnati solo nel 6 7 8 9 - - - / DCC formato DCC e si devono eseguire con la programmazione delle...
-
Seite 77: Forsamling
Montaje • Montaggio • Montering • Forsamling Conexión de la vía de programación Kabelfarben Collegamento del binario di programmazione Anslutning till programmeringsspåret rojo / rosso / röd / rød Tilslutning programmeringsskinne marrón / marrone / brun / brun amarillo / giallo / gul / gul violeta / viola / violett / violet rojo-marrón / rosso-marrone / röd-brun / rød-brun rojo-verde / rosso-verde / röd-grön /rød-grøn... - Seite 78 Montar el decoder en la vía C Montaje bajo el suelo del decoder Montaggio del Decoder nel binario C Montaggio del Decoder sotto plancia Inbyggnad av dekodern i C-skenan Montering av dekodern under anläggningsplattan Integrering af dekoder i C-skinnen Underhængt montage af dekoderen...
- Seite 79 Sujeción a la vía C • Fissaggio al binario C • Fastsättning vid C-räls • Fastgørelse på C-skinne...
- Seite 80 Märklin C-Gleis E255765 76471 76472 76491 76493 76494 Aislamiento y conexión del tramo de señal Isolanento e connessioni della tratta del segnale Isolering av och anslutning av ett spåravsnitt Isolér og tilslut signalafsnit...
- Seite 81 Trix C-Gleis 76471 76472 76491 76493 76494 Aislamiento y conexión del tramo de señal Isolanento e connessioni della tratta del segnale Isolering av och anslutning av ett spåravsnitt Isolér og tilslut signalafsnit...
- Seite 82 Colocar el mástil sobre la placa de vía K • Montare in sede il palo sulla piastra del binario K • Masten skjuts fast på K-räls-plattan • Sæt masten op på K-skinnens plade...
- Seite 84 7504 7500 76471 76472 76491 76493 76494 Aislar y conectar el tramo de señal; además, necesitará 1 x 7504 y 1 x 7500 Isolare e collegare la sezione del segnale; avete bisogno in aggiunta 1x 7504 e 1x 7500 Signalsträckan isoleras och ansluts;...
- Seite 85 Conexión del módulo de frenado • Connessioni del modulo di frenatura Anslutning av bromsmodul • Tilslutning bremsemodul 72441/72442 max 16V AC...
- Seite 86 Corregir la inclinación del poste (3 % resp. 5 %) Adattamento delle salite o delle discese presso il paletto di un segnale (3 % oppure 5 %) Stigning eller lutning utjämnas vid signalstolpe (3 % eller 5 %) Stigninger eller fald ved signalmasten skal udjævnes (3% eller 5%)
-
Seite 87: Vedhæft Decals
Allega decalcomanie • Coloque las calcomanías • Bifoga dekaler • Vedhæft decals... - Seite 88 Gebr. Märklin & Cie. GmbH Stuttgarter Straße 55 - 57 73033 Göppingen 243414/0520/Sc4Pw Germany Änderungen vorbehalten www.maerklin.com/en/imprint.html www.maerklin.com © Gebr. Märklin & Cie. GmbH...