Herunterladen Diese Seite drucken
SPORTSTECH FX300 Benutzerhandbuch
Vorschau ausblenden Andere Handbücher für FX300:

Werbung

Verfügbare Sprachen
  • DE

Verfügbare Sprachen

  • DEUTSCH, seite 1
FX300
DE
EN
ES
FR
IT
NL

Werbung

loading

Inhaltszusammenfassung für SPORTSTECH FX300
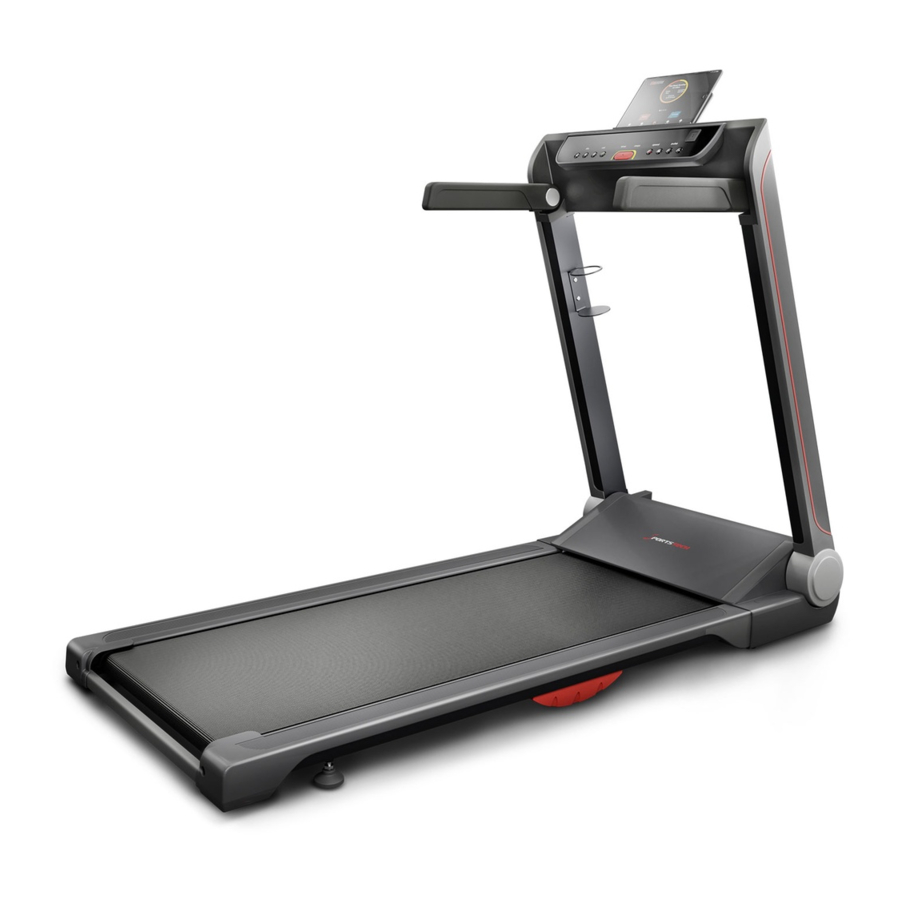
  • Seite 1 FX300...
  • Seite 3 DEUTSCH Sehr geehrter Kunde, wir freuen uns, dass Sie sich für ein Gerät aus der SPORTSTECH Produktpalette entschieden haben. SPORTSTECH Sportgeräte bieten Ihnen höchste Qualität und neueste Technologie. Um die Leistungsfähigkeit des Gerätes voll nutzen zu können und viele Jahre Freude an Ihrem Gerät zu haben, lesen Sie bitte vor der Inbetriebnahme und dem Beginn des Trainings dieses Benutzerhandbuch sorgfältig durch...
  • Seite 4: Video Tutorials

    Aufbau, Benutzung, Abbau. 1. QR-Code scannen 2. Videos anschauen 3. Schnell und sicher starten Link zu den Videos: https://service.innovamaxx.de/fx300_video Uns gibt es auch auf Social Media! Hol dir die neuesten Produktinfos, Trainingsinhalte uvm. auf unserer: Instagram-Seite Facebook-Seite https://www.instagram.com/sportstech.de https://www.facebook.com/sportstech.de...
  • Seite 5: Inhaltsverzeichnis

    INHALTSVERZEICHNIS WICHTIGE SICHERHEITSHINWEISE ....................6 MONTAGE-HARDWARE ........................8 EXPLOSIONSZEICHNUNG / ERSATZTEILELISTE ...................8 MONTAGEANLEITUNG ........................9 WARTUNG UND PFLEGE ........................11 KLAPPANLEITUNG ..........................13 AUFBEWAHRUNG ..........................15 WIE MAN DAS LAUFBAND UMSTELLT  .....................16 WICHTIGE ELEKTRISCHE INFORMATIONEN ..................17 FUNKTION ............................17 ÜBUNGSANLEITUNG .........................18 HERZFREQUENZMESSUNG .......................18 FUNKTIONEN DER KONSOLE......................19 HERZFREQUENZREGELUNG ......................22 FEHLERBEHEBUNG ..........................23 WICHTIGE INFORMATIONEN ......................24 ANWENDUNGSSOFTWARE (APP) ......................25...
  • Seite 6: Wichtige Sicherheitshinweise

    WICHTIGE SICHERHEITSHINWEISE Diese allgemeinen Sicherheitsinformationen müssen unbedingt für die Benutzung dieses Produkts beachtet werden. Lesen Sie alle Hinweise, bevor Sie das Produkt in Benutzung nehmen. ACHTUNG: Um die Gefahr eines Stromschlags zu reduzieren, ziehen Sie den Stromstecker des Produkts nach der Benutzung, beim Auf- oder Abbau und für Wartungs- oder Reinigungszwecke.
  • Seite 7 • Lassen Sie Kinder nicht unbeaufsichtigt in der Nähe des Geräts. • Schalten Sie den Stromschutzschalter an der Rückseite aus, bevor Sie das Stromkabel ziehen. • Dieses Gerät darf nicht von Personen (Kinder eingeschlossen) genutzt werden, welche körperliche oder mentale Einschränkungen oder nicht über genügend Erfahrung zur Nutzung verfügen. •...
  • Seite 8: Montage-Hardware

    MONTAGE-HARDWARE Beschreibung Menge Laufband Schraubendreher- und schlüssel Inbusschlüssel Sicherheitsschlüssel Stromkabel Schmiermittel EXPLOSIONSZEICHNUNG / ERSATZTEILELISTE Unter folgendem Link Unter folgendem Link finden Sie die Explosionszeichnung finden Sie die Explosionszeichnung und die Ersatzteileliste: und die Ersatzteileliste: https://service.innovamaxx.de/fx300_spareparts https://service.innovamaxx.de/fx300_spareparts...
  • Seite 9: Montageanleitung

    MONTAGEANLEITUNG Alle Bauteile und vormontierten Teile fest anziehen! SCHRITT 1 Öffnen Sie die Verpackung und ent- nehmen Sie den Inhalt. Stellen Sie das Laufband (A) auf eine ebene Fläche. Stellen Sie sicher, dass Ihr Arbeits- bereich sauber ist und Sie genügend Platz haben.
  • Seite 10 SCHRITT 3 Ziehen Sie den linken und rechten Griff nach unten (Nr. C10 und C11) in die feste Position. SCHRITT 4 Stellen Sie sich hinter das Laufband. Ziehen Sie die Kunststoffmutter heraus, halten Sie sie (Nr. C09) mit der linken Hand fest und drehen Sie den Halter (Nr.
  • Seite 11: Wartung Und Pflege

    WARTUNG UND PFLEGE Allgemeine Wartung und Pflege helfen, die Lebensdauer und Leistung Ihres Laufbandes zu erhalten. Halten Sie das Gerät sauber, indem Sie die Komponenten regelmäßig abstauben. Reinigen Sie beide Seiten des Laufban- des, damit sich kein Staub unter dem Band ansammelt. Halten Sie Ihre Laufschuhe sauber, damit die Lauffläche und das Band nicht verschmutzen.
  • Seite 12: Schmiermittel Für Das Laufband

    WICHTIGER HINWEIS: Sie müssen Ihr Laufband vor dem ersten Gebrauch schmieren. SCHMIERMITTEL FÜR DAS LAUFBAND: Die Schmierung von Lauffläche und Laufband ist unerlässlich, da die Reibung zwischen beiden die Lebens- dauer und Funktion des Laufbandes beeinflusst. Deshalb wird empfohlen, Lauffläche und Band regelmäßig zu kontrollieren.
  • Seite 13: Klappanleitung

    KLAPPANLEITUNG SCHRITT 1 Hinweis: Trennen Sie das Laufband immer vom Strom, bevor Sie es zusammenklappen. Ziehen Sie die Kunststoffmutter heraus, halten Sie sie (Nr. C09) mit der linken Hand fest und senken Sie den Halter (Nr. C08) mit der rechten Hand. Sobald der Halter einen geeigneten Winkel erreicht, lassen Sie die Plastikmutter los (Nr.
  • Seite 14 SCHRITT 4 Legen Sie Ihre Hand auf Position E und heben Sie das Laufband an. SCHRITT 5 Legen Sie Ihre Hand auf Position E und drehen Sie mit dem Fuß die klappbare feste Platte (Nr. A13) in eine horizontale Position. SCHRITT 6 Legen Sie Ihre Hand auf Position E und drücken Sie mit dem Fuß...
  • Seite 15: Aufbewahrung

    AUFBEWAHRUNG Dieses Laufband wurde entwickelt, um Platz zu sparen. Sie können sich aussuchen, ob Sie das Lauf- band vertikal oder horizontal lagern möchten. A. VERTIKALE AUFBEWAHRUNG Stellen Sie das Gerät nach dem Klappen in der Nähe der Wand auf, damit es nicht umfällt. Für Kinder unzugänglich aufbewahren.
  • Seite 16: Wie Man Das Laufband Umstellt

    WIE MAN DAS LAUFBAND UMSTELLT  Legen Sie Ihre Hände auf Position E. Legen Sie den Klapprahmen (A05) in den Boden des Laufban- des und drehen Sie die klappbare feste Platte (A13) mit dem Fuß in eine vertikale Position, um den Klapprahmen (A05) zu fixieren.
  • Seite 17: Wichtige Elektrische Informationen

    WICHTIGE ELEKTRISCHE INFORMATIONEN WARNUNG: Dieses Laufband benötigt die richtige Stromquelle, um korrekt zu funktionieren. Zu Ihrer Sicherheit und der Sicherheit anderer überprüfen Sie bitte, ob die Stromquelle korrekt ist, bevor Sie das Gerät anschließen. Jede Stromquelle, die über oder unter diesem Wert liegt, kann zu erheblichen Schäden am Gerät und/oder am Benutzer führen.
  • Seite 18: Sicherheitshinweis

    SICHERHEITSHINWEIS: 1. Wir empfehlen Ihnen, zu Beginn eine langsame Geschwindigkeit beizubehalten und die Handläufe festzu- halten, bis Sie sich mit dem Laufband vertraut gemacht haben. 2. Stecken Sie das Magnetende des Sicherheitsschlüssels (Nr. D07) in die Computerkonsole und befestigen Sie das gegenüberliegende Ende (mit dem Sicherheitsclip) an Ihrer Kleidung, bevor Sie mit dem Training beginnen.
  • Seite 19: Funktionen Der Konsole

    FUNKTIONEN DER KONSOLE SCHNELLSTART: 1. Stecken Sie das Magnetende des Sicherheitsschlüssels in die Computerkonsole. Schalten Sie den Netzschalter ein. 2. Drücken Sie die START-Taste und das System zeigt automatisch einen Countdown von 3 Sekunden an. Sobald der Countdown bei Null angelangt ist, startet das Laufband mit der anfänglichen Standardgeschwindigkeit von 1 km/h.
  • Seite 20: Funktionstasten

    3. KALORIEN/STRECKE: Zeigt die Menge der verbrannten Kalorien von 0 bis 999 KCAL an. Wenn der Zählerstand 999 erreicht, wird er zurückgesetzt und beginnt wieder bei 0. Im Countdown-Modus wird von der gewünschten Einstellung auf 0 heruntergezählt. Sobald 0 erreicht wurde, stoppt das Gerät langsam und zeigt „Ende“...
  • Seite 21 ERINNERUNG ZUM SCHMIEREN Ihr Laufband muss alle 300 km geschmiert werden. Das System gibt alle 10 Sekunden einen Signalton und zeigt ein „ÖL“-Symbol auf Ihrem Display an, um Sie an das Schmieren zu erinnern. Bitte lesen Sie den Abschnitt SCHMIEREN DES LAUFBANDS, um die richtigen Schritte zur Schmierung Ihres Gerätes zu erfahren.
  • Seite 22: Herzfrequenzregelung

    HERZFREQUENZREGELUNG HRC PARAMETER BPM (Schläge pro Minute) BPM (Schläge pro Minute) BPM (Schläge pro Minute) Alter Alter Alter STANDART STANDART STANDART 1. Drücken Sie die Taste „P“ im Standby-Modus kontinuierlich. Die Herzfrequenzregelung finden Sie unter HP1 bis HP2. Die Höchstgeschwindigkeit für HP1 beträgt 10,0 km/h und die Höchstgeschwindigkeit für HP2 12,0 km/h. Drücken Sie dann direkt die START-Taste und das System empfiehlt ein Alter von 30 Jahren und ein Herzfre- quenz-Ziel von 114.
  • Seite 23: Fehlerbehebung

    FEHLERBEHEBUNG PROBLEM MÖGLICHE URSACHE LÖSUNGSVORSCHLAG Nicht eingesteckt. Kabel einstecken. Laufband startet nicht  Sicherheitsschlüssel nicht Sicherheitsschlüssel einstecken. eingesteckt. Die Laufbandspannung ist auf Ziehen Sie die Einstellschrauben auf der linken Laufband nicht zentriert der linken oder rechten Seite der und rechten Seite der hinteren Rolle an.  Trittfläche nicht korrekt.
  • Seite 24: Wichtige Informationen

    WICHTIGE INFORMATIONEN WARNUNG Bitte konsultieren Sie Ihren Arzt und erhalten Sie eine vollständige körperliche Untersuchung, bevor Sie das Ge- rät zu benutzen beginnen. Bitte keine häufigen und heftigen Übungen ohne Erlaubnis des Arztes. Bitte beenden Sie die Benutzung und wenden Sie sich an Ihren Arzt wenn Sie sich beim Training unwohl fühlen. Das Produkt soll ordnungsgemäß...
  • Seite 25: Anwendungssoftware (App)

    ANWENDUNGSSOFTWARE (APP) Sie können die Apps über die hier abgebildeten QR-Codes herunterladen oder in Ihrem Store suchen. Voraussetzung für mobiles Gerät: Android 5.0 oder höher mit Bluetooth 4.0, iOS 8.0 oder höher. Android Kinomap Hinweise zur Nutzung der App: Als Android-Nutzer stellen Sie bitte sicher, dass unter dem Punkt "Einstellungen -> Gerätesicherheit" ein Haken unter "Unbekannte Quellen"...
  • Seite 26 Recyclingkreislauf Verpackungsmaterialien können wieder dem Rohstoffkreislauf zugeführt werden. Entsorgen Sie die Verpackung gemäß den aktuellen Bestimmungen. Informationen erhalten Sie bei den Rückgabe- und Sammelsystemen Ihrer Gemeinde. Hinweise zum Elektro- und Elektronikgerätegesetz (ElektroG) Wir weisen Besitzer von Elektro- und Elektronikaltgeräten darauf hin, dass Elektroaltgeräte gemäß...
  • Seite 27 ENGLISH Dear customer, We are pleased you chose a device from the SPORTSTECH product range. With sports equipment from SPORTSTECH you get the highest quality and latest technology. In order to fully use the potential of your device and be able to enjoy it for many years, please read this ma- nual carefully before starting up and beginning of training, and use the device according to the instructions.
  • Seite 28 1. Scan the QR code 2. Watch videos 3. Start fast and safely Link to the videos: https://service.innovamaxx.de/fx300_video We are also on social media! Get the latest product information, training content and much more on our: Instagram-page Facebook-page https://www.instagram.com/sportstech.de https://www.facebook.com/sportstech.de...
  • Seite 29 INDEX IMPORTANT SAFETY INSTRUCTIONS ....................30 CONFIGURATION LIST ........................32 EXPLODED DRAWING/SPARE PARTS LIST ..................32 STEPS OF ASSEMBLY ........................33 MAINTENANCE AND CARE ........................35 FOLDING INSTRUCTION ........................37 STORAGE ............................39 HOW TO MOVE THE TREADMILL  .....................40 IMPORTANT ELECTRICAL INFORMATION ...................41 FUNCTIONS .............................41 EXERCISE INSTRUCTIONS .........................42 HEART RATE MEASUREMENTS ......................42 FUNCTION OF THE CONSOLE ......................43 HEART RATE CONTROL ........................46...
  • Seite 30: Important Safety Instructions

    IMPORTANT SAFETY INSTRUCTIONS Basic precautions, including the following important safety instructions should always be followed when using this treadmill. Read all instructions before using this treadmill. DANGER: To reduce the risk of electric shock, always unplug the treadmill from the electrical outlet immediately after using and before cleaning, assembling, or servicing the treadmill.
  • Seite 31 • Children should not be allowed to play on or near the treadmill at any time. • CAUTION - RISK OF INJURY TO PERSONS - To avoid injury, use extreme caution when stepping onto or off of a moving treadmill belt. Carefully read this instruction manual before use. •...
  • Seite 32: Configuration List

    CONFIGURATION LIST Specification Treadmill Spanner W/ Screw Driver Allen Wrench Safety Key Power Wire Lubricant Oil EXPLODED DRAWING/SPARE PARTS LIST At the following link At the following link you will find the exploded drawing you will find the exploded drawing and the spare parts list: and the spare parts list: https://service.innovamaxx.de/fx300_spareparts...
  • Seite 33: Steps Of Assembly

    STEPS OF ASSEMBLY Firmly tighten all component parts and pre-assembled parts! STEP 1 Open the box and remove contents. Place the treadmill (A) on level ground. Ensure that your work area is clean and you have adequate space. STEP 2 Pull out the Rotating Plate (No.
  • Seite 34 STEP 3 Pull down the left and right handle bars (No. C10 and C11) to the fixed position. STEP 4 Stand behind the treadmill. Pull out and hold the plastic nut (No. C09) with your left hand and turn up the holder (No. C08) with your right hand.
  • Seite 35: Maintenance And Care

    MAINTENANCE AND CARE General maintenance and care will help to maintain the life and performance of your treadmill. Keep the unit clean by dusting the components on a regular basis. Clean both sides of the running belt to prevent dust from accumulating underneath the belt.
  • Seite 36 IMPORTANT NOTE: You will need to lubricate your treadmill before the first use. RUNNING BELTS & TREADMILL LUBRICANT: Lubricating the running board and running belt is essential as the friction between the two affects the life span and function of the treadmill. That is why it is recommended that the running board and belt will be inspected regularly.
  • Seite 37: Folding Instruction

    FOLDING INSTRUCTION STEP 1 NOTE: Always unplug the treadmill from the elec- trical outlet before folding. Pull out and hold the plastic nut (No. C09) with your left hand and pull down the holder (No. C08) with your right hand. Once the holder reaches a suitable angle, let go of the plastic nut (No.
  • Seite 38 STEP 4 Place your hand at position E and lift up the treadmill. STEP 5 Place your hand at position E and use your foot to turn the folding fixed board (No. A13) to a horizontal position. STEP 6 Place your hand at position E and use your foot to firmly push against position J on the treadmill.
  • Seite 39: Storage

    STORAGE This treadmill is designed for saving space. You can choose to store treadmill vertically or horizontally. A. VERTICAL STORAGE After folding, place the machine near the wall to avoid falling down. Keep out of reach of children. B. HORIZONTAL STORAGE After folding, you can store the machine under a table or any other available space.
  • Seite 40: How To Move The Treadmill

    HOW TO MOVE THE TREADMILL  Place your hands at Position E. Put the folding frame (A05) inside the bottom of the treadmill and turn the folding fixed board (A13) to a vertical position with your foot to fix the folding frame (A05). For transportation just hold the treadmill at position E and tilt it until the wheels can move smoothly.
  • Seite 41: Important Electrical Information

    IMPORTANT ELECTRICAL INFORMATION WARNING: This treadmill needs the right power source to work properly. For your safety and the safety of others, please check that the power source is correct before connecting the device. Any power source that is stronger or weaker than the prescribed value can cause significant damage to the device and / or the user.
  • Seite 42: Safety Note

    SAFETY NOTE: 1. We recommend that you maintain a slow speed at the beginning of a session and hold the handrails until you have become familiar with the treadmill. 2. Insert the magnet end of the Safety Key (No. D07) into the computer console and attach the opposite end (containing the safety clip on it) to your clothing before starting your workout.
  • Seite 43: Function Of The Console

    FUNCTION OF THE CONSOLE QUICK START: 1. Insert the magnet end of the safety key into the computer console. Turn on the power switch. 2. Press the START button, and the system will automatically display a 3 second countdown. Once the countdown reaches zero, the running belt will start at the initial default speed of 1.0 KM/H.
  • Seite 44: Function Keys

    reaches 99.9, it will reset to 0.00 and begin counting again from 0.0. When in countdown mode, it will count down from the setting data to 0.00. When it reaches 0.00, the machine will stop smoothly and display “End” and automatically reset to the initial setting after 5 seconds. When setting PROGRAMS, the speed is programmed in intervals;...
  • Seite 45 LUBRICATION REMINDER Your treadmill needs lubrication maintenance every 300 KM. The system will release a beeping sound every 10 seconds and display an “OIL” icon on your display to remind you when it’s time. Please read the LUBRICATING THE TREADMILL to learn the proper steps to lubricating your machine. Apply the lubricating oil to the middle of the running deck on both sides.
  • Seite 46: Heart Rate Control

    HEART RATE CONTROL HRC PARAMETER DEFAULT DEFAULT DEFAULT 1. Press “P” button continuously under the stand-by mode. You can find heart rate control from HP1 to HP2. The ma- ximum speed for HP1 is 10.0 km/h and the maximum speed for HP2 is 12.0 km/h. Then push START key directly and the system will recommend the age of 30 years and heart rate target of 114.
  • Seite 47: Troubleshooting

    TROUBLESHOOTING PROBLEM POSSIBLE CAUSE SUGGESTED ACTION Not plugged in Plug cord into outlet Treadmill will not start Safety Key not inserted Insert Safety Key Running belt tension not Tighten the adjustment bolts on the left Running belt not centered correct on the left or right and right side of the rear roller.
  • Seite 48: Important Matter

    IMPORTANT MATTER WARNING Please consult your doctor and receive complete physical examination before using the product. Don’t carry out frequent and violent exercise without permission of doctor. Please stop using the product and consult your doctor if you feel unwell in use. The product shall be used correctly. Please read service manual in detail before exercise.
  • Seite 49: Application Software (App)

    APPLICATION SOFTWARE (APP) You can download the app using the QR codes shown here or search in your store. Minimum compatibility specifica- tions for mobile device; android 5.0 or higher with Bluetooth 4.0, iOS 8.0 or higher. Android Kinomap Notes on using the App: As an android user, please make sure that under "Settings ->...
  • Seite 50 Recycling loop Packaging material can be conveyed back to the raw material cycle. Dispose of packaging material in accordance with legal provisions. Information can be retrieved from the return or collections systems of your community. Notes on the Electrical and Electronic Equipment Act (ElektroG) We would like to point out to owners of electrical and electronic equipment that, according to the applicable legal regulations, electrical devices must be disposed of separately from municipal waste.
  • Seite 51 ESPAÑOL Estimado cliente, Nos complace que haya elegido un dispositivo de la línea de productos SPORTSTECH. Con el equipo deportivo de SPORTSTECH usted obtiene la más alta calidad y la mejor tecnología. Con el fin de usar todo el potencial de su dispositivo y para que pueda disfrutarlo durante muchos años, por favor lea este manual cuidadosamente antes de comenzar a ejercitarse, y use el dispositivo de acuerdo a las instrucciones.
  • Seite 52 Montaje, Utilizar, Desmontaje. 1. Escanear el código QR 2. Ver vídeos 3. Comienza rápido y seguro Enlace a los videos: https://service.innovamaxx.de/fx300_video ¡También estamos en redes sociales! Obtenga la última información sobre nuestros productos, entrenamientos y mucho más aquí: Instagram Facebook https://www.instagram.com/sportstech.de https://www.facebook.com/sportstech.de...
  • Seite 53 CONTENIDO INSTRUCCIONES DE SEGURIDAD IMPORTANTES ................54 LISTA DE ACCESORIOS ........................56 DIBUJO DE EXPLOSIÓN/LISTA DE REPUESTOS ...................56 INSTRUCCIONES DE MONTAJE ......................57 MANTENIMIENTO Y CUIDADO ......................59 INSTRUCCIONES DE PLEGUE ......................61 ALMACENAMIENTO..........................63 CÓMO DESPLAZAR LA CINTA DE CORRER  ..................64 INFORMACIÓN IMPORTANTE SOBRE LA SEGURIDAD ELÉCTRICA ............65 FUNCIONES .............................65 INSTRUCCIONES DE ENTRENAMIENTO ....................66 MEDICIÓN DE LA FRECUENCIA CARDÍACA ..................66...
  • Seite 54: Instrucciones De Seguridad Importantes

    INSTRUCCIONES DE SEGURIDAD IMPORTANTES Al usar la caminadora siempre se deben seguir las precauciones básicas, incluyendo las siguientes instrucciones de seguridad importantes. Lea todas las instrucciones antes de usar esta caminadora. DANGER: Para reducir el riesgo de choque eléctrico, desconecte siempre la caminadora de la toma eléctrica inmediatamente después de usarla y antes de limpiarla, ensamblarla o hacerle mantenimiento.
  • Seite 55 • Mantenga las manos libres de elementos móviles. Nunca ubique las manos o los pies debajo de la ca- minadora mientras está en uso. • No use la caminadora sobre una alfombra que tenga más de 1.3 cm de altura. •...
  • Seite 56: Lista De Accesorios

    LISTA DE ACCESORIOS Descripción Cantidad Cinta de correr Llave y destornillador Llave Allen Clave de seguridad Cable de alimentación Lubricante DIBUJO DE EXPLOSIÓN/LISTA DE REPUESTOS En el siguiente enlace En el siguiente enlace encontrarás el dibujo de explosión encontrarás el dibujo de explosión y la lista de repuestos: y la lista de repuestos: https://service.innovamaxx.de/fx300_spareparts...
  • Seite 57: Instrucciones De Montaje

    INSTRUCCIONES DE MONTAJE Apriete todos los componentes y piezas premontadas! PASO 1 Abra el caja y saque todo lo que contiene. Coloque la cinta de correr (A) sobre una superficie plana. Asegúrese de que el espacio dedicado al montaje esté limpio y sea lo suficientemente espacioso.
  • Seite 58 PASO 3 Tire en mango izquierdo y derecho hacia abajo (No.C10 y C11) hasta que estén fijos. PASO 4 Póngase de pie detrás de la cinta de correr. Tire la tuerca de plástico y sosténgala (No.C09) con la mano iz- quierda mientras que, con la mano de- recha gire el soporte (No.C08).
  • Seite 59: Mantenimiento Y Cuidado

    MANTENIMIENTO Y CUIDADO El mantenimiento y la atención generales ayudarán a prolongar la vida y mejorar rendimiento de su cinta de correr. Mantenga el dispositivo limpio, desempolvando regularmente los componentes. Limpie ambos lados de la cinta de correr para evitar la acumulación de polvo debajo del cinturón. Mantenga limpias sus zapatillas de correr para no ensuciar la cinta de andar.
  • Seite 60 NOTA IMPORTANTE: La cinta de correr se debe lubricar antes del primer uso. LUBRICANTE PARA LA CINTA DE CORRER: La lubricación de la superficie de rodadura y la cinta de correr es esencial ya que la fricción entre estas dos par- tes afecta la vida útil y el funcionamiento de la cinta de correr.
  • Seite 61: Instrucciones De Plegue

    INSTRUCCIONES DE PLEGUE PASO 1 NOTA: Esenchufe siempre la cinta de correr antes de plegarla. Tire de la tuerca de plástico y sosténgala (No.C09) con su mano izquierda y baje el soporte (No.C08) con su mano derecha. Cuando el soporte alcance el angúlo deseado, suelte la tuerca de plástico (No.
  • Seite 62 PASO 4 Coloque su mano en la posición E y levante la cinta de correr. PASO 5 Coloque su mano según la posición E y use su pie para girar la placa fija con bisagras (No.A13) a una posición horizontal. PASO 6 Coloque su mano según la posición E y presione firmemente contra la posición J en la máquina para...
  • Seite 63: Almacenamiento

    ALMACENAMIENTO Esta cinta está diseñada para ahorrar espacio. Puede elegir almacenar la cinta de correr vertical u horizontalmente. A. ALMACENAMIENTO VERTICAL Esta cinta está diseñada para ahorrar espacio. Puede elegir almacenar la cinta de correr vertical u horizontal- mente. B. ALMACENAMIENTO HORIZONTAL Después de plegar, puede guardar la cinta debajo de una mesa u otro espacio libre.
  • Seite 64: Cómo Desplazar La Cinta De Correr

    CÓMO DESPLAZAR LA CINTA DE CORRER  Posicionar los brazos según la posición E. Coloque el marco plegable (A05) en la parte inferior de la cinta de correr y use el pie para girar la placa fija plegable (A13) a una posición vertical para fijar el marco plegable (A05). Para el transporte, simplemente sostenga la cinta de correr según la posición E e inclínela hasta que las ruedas se muevan...
  • Seite 65: Información Importante Sobre La Seguridad Eléctrica

    INFORMACIÓN IMPORTANTE SOBRE LA SEGURIDAD ELÉCTRICA ADVERTENCIA: Esta cinta necesita una fuente de alimentación adecuada para funcionar correctamente. Para su seguridad y la de los demás, compruebe que la fuente de alimentación sea correcta antes de conectar el dispositivo. Cualquier fuente de alimentación que esté por encima o por debajo de este valor puede causar daños importantes al equipo y/o al usuario.
  • Seite 66: Instrucciones De Entrenamiento

    SEGURIDAD: 1. Recomendamos disminuir la velocidad al principio y sujetarse a los pasamanos hasta que se haya familia- rizado con la cinta de correr. 2. Inserte el extremo magnético de la llave de seguridad (No.D07) en la consola del ordenador y enganche el extremo opuesto (con el clip de seguridad) a su ropa antes de empezar a entrenar.
  • Seite 67: Function Of The Console

    FUNCTION OF THE CONSOLE INICIO RÁPIDO: 1. Inserte el extremo magnético de la llave de seguridad en la consola del ordenador. Encienda el interruptor. 2. Presionando el botón START y el sistema mostrará automáticamente una cuenta regresiva de 3 segundos. Una vez que la cuenta regresiva llegue a cero, la cinta empezará...
  • Seite 68: Funcionamiento De Los Botones

    después de lo cual se restablecerá automáticamente a la configuración predeterminada después de 5 segundos. Muestra la distancia recorrida (0.0-99.9 KM). Cuando se alcanza 99.9, se restablece a 00.00 y comienza a contar nuevamente desde 00.00. En modo de cuenta atrás, cuenta desde el valor establecido a 00.00.
  • Seite 69 NOTIFICACIÓN DE LUBRICACIÓN La cinta de correr se debe lubricar cada 300 km. El sistema emite un pitido cada 10 segundos y muestra un símbolo de „OIL“ en la pantalla para recordarle que necesita lubricación. Lea la LUBRICACIÓN DE LA CINTA DE CORRER para entender correctamente los pasos a seguir para lubricar su dispositivo.
  • Seite 70: Control De La Frecuencia Cardíaca

    CONTROL DE LA FRECUENCIA CARDÍACA PARÁMETRO HRC Edad Edad Edad DEFAULT DEFAULT DEFAULT 1. Presione“ „P“ „continuamente en modo de espera. El control de la frecuencia cardíaca se puede encontrar en HP1 a HP2. La velocidad máxima para HP1 es de 10.0 km/h y la velocidad máxima para HP2 es de 12.0 km/h. A continuación, presione el botón START directamente y el sistema recomendará...
  • Seite 71: Solución De Problemas

    SOLUCIÓN DE PROBLEMAS PROBLEMA POSIBLE CAUSA SOLUCIÓN PROPUESTA No enchufado Enchufe el cable. La cinta no parte La clave de seguridad no está Inserta la clave de seguridad. conectada. La tensión de la cinta no es correcta en el lado izquierdo Apriete los tornillos de ajuste en el lado Cinta de correr no centrada o derecho de la banda de...
  • Seite 72: Recomendaciones

    RECOMENDACIONES ADVERTENCIA Por favor consulte a su médico y reciba un examen médico completo antes de usar el producto. No realice ejercicio fuerte y constante sin autorización de su médico. Por favor deje de usar el producto y consulte a su médico si no se siente bien al usarlo.
  • Seite 73: Software (Aplicación)

    SOFTWARE (APLICACIÓN) Puede descargar las aplicaciones usando los códigos QR mostrados aquí o buscarlos en la tienda. Requisitos para dispositivos móviles: Android 5.0 o superior con Bluetooth 4.0, iOS 8.0 o superior. Android Kinomap Consejos para el uso de las aplicaciones: Como usuario de Android, por favor, asegúrese de marcar la opción "Fuentes desconocidas"...
  • Seite 74 Reciclaje loop El material de empaque puede trasladarse de nuevo al ciclo de materias primas. Deshágase del material de empaque de acuerdo a las normativas legales. Puede encontrar información en los sistemas de recolección de su comunidad. Notas sobre la Ley sobre aparatos eléctricos y electrónicos (ElektroG) Quisiéramos señalar a los propietarios de aparatos eléctricos y electrónicos viejos que éstos deben desecarse por separado de los residuos municipales de conformidad con las normas legales aplicables.
  • Seite 75 FRANÇAIS Cher client, Nous sommes ravis que vous ayez choisi un appareil de la gamme de produits SPORTSTECH. Avec les équipe- ments sportifs de SPORTSTECH, vous obtenez la plus haute qualité et la meilleure technologie. Afin d‘utiliser pleinement le potentiel de votre appareil et de pouvoir l‘apprécier pendant de nombreuses années, lisez attentivement ce manuel avant l‘utilisation et le début de votre entraînement et utilisez l‘appareil...
  • Seite 76 3. Démarrez rapidement et en toute sécurité Lien vers les vidéos: https://service.innovamaxx.de/fx300_video Vous pouvez aussi nous trouver sur les réseaux sociaux! Retrouve les dernières informations sur les produits, le contenu des entraînements et bien plus encore sur notre: la page Instagram la page Facebook https://www.instagram.com/sportstech.de https://www.facebook.com/sportstech.de...
  • Seite 77 SOMMAIRE DES INFORMATIONS DE SÉCURITÉ IMPORTANTES ................78 LISTE DES CONFIGURATIONS......................80 DESSIN ÉCLATÉ/LISTE DES PIÈCES DE RECHANGE ................80 INSTRUCTIONS DE MONTAGE ......................81 MAINTENANCE ET ENTRETIEN ......................83 INSTRUCTIONS DE PLIAGE .......................85 RANGEMENT ...........................87 COMMENT DÉPLACER LE TAPIS DE COURSE ..................88 INFORMATIONS ÉLECTRIQUES IMPORTANTES ...................89 FONCTIONS .............................89 INSTRUCTIONS D‘EXERCICE ......................90 MESURES DE FRÉQUENCE CARDIAQUE .....................90...
  • Seite 78: Des Informations De Sécurité Importantes

    DES INFORMATIONS DE SÉCURITÉ IMPORTANTES Les précautions de base, y compris les consignes de sécurité importantes suivantes doivent toujours être respectées lorsque vous utilisez ce tapis roulant. Lisez toutes les instructions avant d‘utiliser ce tapis roulant. DANGER: Pour réduire le risque de choc électrique, débranchez toujours le t pis roulant de la prise électrique immédiatement après utilisation et avant le nettoyage, l‘assemblage ou l‘entretien du tapis roulant.
  • Seite 79 la terre. • Garder les mains claires de toutes les pièces mobiles. Ne jamais placer les mains ou les pieds sous le tapis roulant pendant son utilisation. • Ne laissez pas les enfants agés de moins de 12 ans sans surveillance à proximité ou sur le tapis roulant. •...
  • Seite 80: Liste Des Configurations

    LISTE DES CONFIGURATIONS N° Description Quantité Tapis de course Clé et tournevis Clé Allen Clé de sécurité Câble électrique Huile de lubrification DESSIN ÉCLATÉ/LISTE DES PIÈCES DE RECHANGE A l‘adresse suivante A l‘adresse suivante vous trouverez le dessin éclaté vous trouverez le dessin éclaté et la liste des pièces de rechange: et la liste des pièces de rechange: https://service.innovamaxx.de/fx300_spareparts...
  • Seite 81: Instructions De Montage

    INSTRUCTIONS DE MONTAGE Serrez fermement tous les composants et les pièces préassemblées! ÉTAPE 1 Ouvrez l‘emballage et retirez le cont- enu. Placez le tapis de course (A) sur une surface plane. Assurez-vous que votre espace de travail est propre et que vous avez suffisamment d‘espace.
  • Seite 82 ÉTAPE 3 Tirez les poignées gauche et droite (N°C10 et C11) vers la position fixe. ÉTAPE 4 Tenez-vous derrière le tapis de course. Retirez et maintenez l‘écrou en plas- tique (N°C09) avec votre main gauche et faites pivoter le support (N°C08) avec votre main droite.
  • Seite 83: Maintenance Et Entretien

    MAINTENANCE ET ENTRETIEN L‘entretien général aide à maintenir l‘état et les performances de votre tapis de course. Gardez l‘appareil propre en époussetant régulièrement les composants. Nettoyez les deux côtés du tapis de course pour éviter que la poussière ne s’accumule sous la bande roulement. Gardez vos chaussures de course propres pour empêcher la bande de roulement de se salir.
  • Seite 84: Lubrification

    NOTE IMPORTANTE: Vous devez lubrifier votre tapis de course avant la première utilisation. LUBRIFICATION DU TAPIS DE COURSE: La lubrification de la bande de roulement et du tapis roulant est essentielle car la friction entre celles-ci affecte la durée de vie et le fonctionnement du tapis de course. Par conséquent, il est recommandé de vérifier régu- lièrement la bande de roulement et le tapis roulant.
  • Seite 85: Instructions De Pliage

    INSTRUCTIONS DE PLIAGE ÉTAPE 1 REMARQUE: Débranchez toujours le tapis de course du secteur avant de le plier. Retirez l‘écrou en plastique et maintenez-le (N° C09) avec votre main gauche puis abaissez le support (N° C08) avec votre main droite. Lorsque le support at- teint un angle approprié, relâchez l’écrou en plastique (N°...
  • Seite 86 ÉTAPE 4 Placez votre main en position E et soulevez le tapis de course. ÉTAPE 5 Placez votre main en position E et utilisez votre pied pour faire pivoter la plaque pliante fixe (N° A13) en position horizontale. ÉTAPE 6 Placez votre main en position E et pousser fermement avec votre pied contre la position J du tapis de course.
  • Seite 87: Rangement

    RANGEMENT Ce tapis de course est conçu pour économiser de l‘espace. Vous pouvez choisir de ranger le tapis verticalement ou horizontalement. A. RANGEMENT VERTICAL Après le pliage, placez l‘appareil près du mur afin qu‘il ne tombe pas. Tenir hors de portée des enfants. B.
  • Seite 88: Comment Déplacer Le Tapis De Course

    COMMENT DÉPLACER LE TAPIS DE COURSE Mettez vos mains sur la position E. Placez le cadre pliant (A05) dans le bas du tapis de course et utilisez le pied pour faire pivoter la plaque pliante fixe (A13) en position verticale pour fixer le cadre de pliage (A05). Pour le transport, tenez simplement le tapis de course en position E et inclinez-le jusqu‘à...
  • Seite 89: Informations Électriques Importantes

    INFORMATIONS ÉLECTRIQUES IMPORTANTES AVERTISSEMENT: Ce tapis de course a besoin de la bonne source d‘alimentation pour fonctionner correctement. Pour votre sécurité et celle des autres, veuillez vérifier si la source d‘alimentation est correcte avant de brancher l‘appareil. Toute source d‘alimentation supérieure ou inférieure à cette valeur peut causer des dommages importants à...
  • Seite 90: Consigne De Sécurité

    CONSIGNE DE SÉCURITÉ : 1. Au début, nous vous recommandons de maintenir une vitesse lente et de vous tenir aux mains courantes jusqu‘à ce que vous soyez familiarisé avec le tapis de course. 2. Insérez l‘extrémité magnétique de la clé de sécurité (#D07) dans la console et accrochez l‘extrémité op- posée (avec le clip de sécurité) à...
  • Seite 91: Fonction De La Console

    FONCTION DE LA CONSOLE PRISE EN MAIN RAPIDE: 1. Insérez l‘extrémité magnétique de la clé de sécurité dans la console de l‘ordinateur. Allumez l‘interrupteur d‘alimentation. 2. Appuyez sur le bouton START et le système affichera automatiquement un compte à rebours de 3 secondes. Une fois que le compte à...
  • Seite 92: Touches De Fonction

    3. CALORIES/DISTANCE: Affiche la quantité de calories brûlées de 0 à 999 KCAL. Lorsque le compte atteint 999, il se réinitialisera et recommencera à partir de 0. En mode compte à rebours, le réglage souhaité sera décompté à 0. Lorsque 0 est atteint, l‘appareil s‘arrête lentement et affiche „End“, après quoi il revient automatiquement au réglage par défaut après 5 secondes.
  • Seite 93 RAPPEL DE LUBRIFICATION Votre tapis de course doit être lubrifié tous les 300 km. Le système émet un bip toutes les 10 secondes et affiche un symbole „OIL“ sur votre écran pour vous rappeler de le lubrifier. Veuillez lire la partie „LUBRIFICATION DU TAPIS DE COURSE“...
  • Seite 94: Contrôle De La Fréquence Cardiaque

    CONTRÔLE DE LA FRÉQUENCE CARDIAQUE PARAMETERE HRC (paramètre de contrôle de la fréquence cardiaque) ÂGE ÂGE ÂGE DEFAULT DEFAULT DEFAULT 1. Appuyez continuellement sur „P“ en mode veille. Le contrôle de la fréquence cardiaque est disponible sur HP1 et HP2. La vitesse maximale pour HP1 est de 10,0 km/h et de 12,0 km/h pour HP2. Appuyez directement sur le bouton START.
  • Seite 95: Dépannage

    DÉPANNAGE PROBLEME CAUSE POSSIBLE SOLUTION PROPOSEE Pas branché Branchez le câble. Le tapis de course ne démarre Clé de sécurité non branchée Insérez la clé de sécurité. La tension de la bande de Bande de roulement non Serrez les boulons de réglage gauche et roulement n‘est pas correcte centrée droit du rouleau arrière.
  • Seite 96: Fait Important

    FAIT IMPORTANT ATTENTION Veuillez consulter votre médecin pour recevoir un examen physique complet avant d‘utiliser le produit. N’effec- tuez pas des exercices fréquents et violents sans la permission du médecin. Veuillez cesser d‘utiliser le produit et consulter votre médecin si vous tombez malade au cours de son utilisation. Le produit doit être utilisé cor- rectement.
  • Seite 97: Logiciel D'application (App)

    LOGICIEL D’APPLICATION (APP) Pour télécharger l’application, scannez son code QR ou recherchez-la dans votre App Store. Conditions requises : l’appareil mobile doit correspondre à un Android 5.0 ou davantage avec Bluetooth 4.0 ou un iOS 8.0 ou davantage. Android Kinomap Informations sur l’utilisation de l’application : Les utilisateurs d’Android doivent veiller à...
  • Seite 98 Chaîne du recyclage Les matériaux d‘emballage peuvent être transportés vers le cycle des matières premières. La disposition des matériaux d‘emballage, conformément aux dispositions légales. Les informations peuvent être récupérées à partir des systèmes de retour ou de collections. Information relative à la législation sur les équipements électriques et électroniques (ElektroG) Nous tenons à...
  • Seite 99 ITALIANO Gentile cliente, Siamo lieti che abbiate scelto un dispositivo della gamma SPORTSTECH. Con le attrezzature sportive di SPOR- STECH potrete usufruire della più alta qualità e della più recente tecnologia. Per sfruttare a pieno il potenziale del dispositivo e poterlo utilizzare per molti anni, raccomandiamo di leggere attentamente questo manuale prima di iniziare l’allenamento e di utilizzare il dispositivo seguendo le istruzioni.
  • Seite 100 2. Guarda il video 3. Inizia ad allenarti veloce e sicuro Link per il Video: https://service.innovamaxx.de/fx300_video Ci siamo anche sui social! Scopri le ultime novità sui prodotti, contenuti per l'allenamento e molto altro ancora sul nostro: pagina Instagram pagina Facebook https://www.instagram.com/sportstech.de https://www.facebook.com/sportstech.de...
  • Seite 101 INDICE IMPORTANTI ISTRUZIONI DI SICUREZZA ....................102 LISTA DI CONFIGURAZIONE ......................104 DISEGNO ESPLOSO/LISTA DEI PEZZI DI RICAMBIO ................104 ISTRUZIONI DI MONTAGGIO ......................105 MANUTENZIONE E PULIZIA .......................107 SISTEMA DI PIEGAMENTO ........................109 CUSTODIA ............................111 IL TRASPORTO CORRETTO .......................112 INFORMAZIONI IMPORTANTI SULLE COMPONENTI ELETTRICHE ............113 FUNZIONI ............................113 ESERCIZI ............................114 MISURAZIONE FREQUENZA CARDIACA ....................114...
  • Seite 102: Importanti Istruzioni Di Sicurezza

    IMPORTANTI ISTRUZIONI DI SICUREZZA Precauzioni minime, incluse importanti istruzioni di sicurezza incluse nel presente manual dovrebbero essere sempre seguite durante l’uso del tapisroulant. Leggere tutte le istruzioni prima di usare il tapis-roulant. PERICOLO: Precauzioni minime, incluse importanti istruzioni di sicurezza incluse nel presente manual dovrebbero essere sempre seguite durante l’uso del tapisroulant.
  • Seite 103 quando si piega e si sposta il tapis roulant. • Non lasciare bambini sotto i 12 anni senza supervizione mentre sono vicini o usano il tapis roulant. • Per disconnettere l’attrezzo, posizionare tutti i pulsanti su off e rimuovere la spina dalla presa a parete. •...
  • Seite 104: Lista Di Configurazione

    LISTA DI CONFIGURAZIONE Descrizione Quantità Tapis roulant Chiave inglese e cacciavite Brugola Chiave di accesso di sicurezza Cavo elettrico Olio lubrificante DISEGNO ESPLOSO/LISTA DEI PEZZI DI RICAMBIO Al seguente link Al seguente link troverete il disegno esploso troverete il disegno esploso e la lista dei pezzi di ricambio: e la lista dei pezzi di ricambio: https://service.innovamaxx.de/fx300_spareparts...
  • Seite 105: Istruzioni Di Montaggio

    ISTRUZIONI DI MONTAGGIO Avvitare bene tutti gli elementi e i pezzi preassemblati! PASSO 1 Rimuovere l‘imballaggio ed estrarre il contenuto. Posizionate il tapis roulant (A) su una superficie piana. Assicura- tevi che la vostra zona di lavoro sia pulita e assicuratevi di avere spazio sufficiente.
  • Seite 106 PASSO 3 Tirate il manubrio dx e sx verso il basso (Nr. C10 und C11) per collocarli nella posizione fissa. PASSO 4 Posizionatevi sotto il tapis roulant. Estraete il dado di plastica, con la mano sinistra (Nr. C09) tenete fermo il pezzo e con la mano destra (Nr.
  • Seite 107: Manutenzione E Pulizia

    MANUTENZIONE E PULIZIA Manutenzione e pulizia in generale allungano la durata di vita del macchinario, migliorandone la prestazione. Mantenete pulito il tapis roulant spolverando regolarmente tutti i suoi componenti. Pulite entrambi i lati del macchinario in modo tale che la polvere non si depositi sotto il nastro scorrevole. Pulite regolarmente le vostre scarpe da corsa per non sporcare la superficie di corsa.
  • Seite 108: Informazione Importante

    INFORMAZIONE IMPORTANTE: Prima del primo utilizzo si prega di lubrificare il macchinario. LUBRIFICANTE PER IL TAPIS ROULANT: E‘ indispensabile lubrificare correttamente la superficie di corsa e il tapis roulant perchè l‘attrito presente tra le due influenza la durata di vita e la funzionalità del macchinario. Per questo motivo è necessario controllare regolarmente la superficie di corsa e il nastro.
  • Seite 109: Sistema Di Piegamento

    SISTEMA DI PIEGAMENTO PASSO 1 INDICAZIONI: Staccate la corrente dal tapis rou- lant prima di ripiegarlo. Estraete il dado di plastica, con la mano sinistra (Nr. C09) tenete fermo il pezzo e con la mano destra (Nr. C08) rotate il supporto. Potrete rilasciare il dado di plastica solo non appena il supporto è...
  • Seite 110 PASSO 4 Mettete la vostra mano come mostrato in figura E e sollevate il tapis roulant. PASSO 5 Mettete la vostra mano come mostrato in figura E e mettete la piastra fissa ribaltabile (Nr. A13) in posizione orizzontale aiutandovi col piede. PASSO 6 Mettete la vostra mano come mostrato in figura E e premete col piede sul tapis roulant contro la...
  • Seite 111: Custodia

    CUSTODIA Questo tapis roulant è stato progettato per far risparmiare spazio. Il macchinario può essere riposto in posizione verticale oppure orizzontale. A. IN VERTICALE Dopo averlo chiuso posizionate il tapis roulant vicino al muro in modo che non cada. Tenere lontano dalla portata dei bambini.
  • Seite 112: Il Trasporto Corretto

    IL TRASPORTO CORRETTO Mettete le mani come in figura E. Per fissare il telaio ribaltabile (A05) mettetelo a terra dalla parte della base di appoggio e girate la piastra fissa ribaltabile (A13) fino a raggiungere la posizione verticale. Aiutatevi col piede. Per trasportare il tapis roulant mettetevi in posizione E e piegatelo finchè...
  • Seite 113: Informazioni Importanti Sulle Componenti Elettriche

    INFORMAZIONI IMPORTANTI SULLE COMPONENTI ELETTRICHE ATTENZIONE: Questo tapis roulant deve essere allacciato ad una fonte di corrente elettrica per poter essere utilizzato. Per la vostra sicurezza e di chi vi sta intorno è necessario verificare che la fonte di elettricità sia corretta prima di collegare l‘apparecchio.
  • Seite 114: Esercizi

    AVVISO DI SICUREZZA: 1. Raccomandiamo di partire a bassa velocità e di tenere i corrimano fino a quando non si è a proprio agio con il tapis roulant. 2. Inserite l‘estremità magnetica della chiave di sicurezza (#D07) nella console del computer e fissate l‘estre- mità...
  • Seite 115: Funzioni Della Console

    FUNZIONI DELLA CONSOLE INIZIO VELOCE: 1. Inserite l‘estremità magnetica della chiave di accesso di sicurezza nella console del computer. Azionate poi l‘interruttore di rete. 2. Premere il tasto START in modo che il sistema attivi automaticamente un countdown di 3 secondi. Non appena il countdown è...
  • Seite 116: Tasti Funzione

    3. CALORIE/DISTANZA: Mostra la quantità di calorie bruciate da 0 a 999 KCAL. Se si raggiunge 999 si ricomincia nuovamente da 0. In modalità countdown si conta dal valore impostato fino a 0. Una volta raggiunto lo 0 il tapis roulant si ferma lentamente e mostra la scritta „Ende“ (fine). Dopo 5 secondi ritorna automaticamente all‘impostazione iniziale.
  • Seite 117 RICORDATEVI DI LUBRIFICARLO Il vostro tapis roulant deve essere lubrificato ogni 300 km. Ogni 10 secondi il sistema emette un segnale e mostra un simbolo dell‘olio sul dispolay per ricordarvi di lubrificare il tapis roulant. Si prega di leggere attentamente il capitolo LUBRIFICAZIONE DEL TAPIS ROULANT per avere maggiori informazioni in merito. Cospargete l‘olio di lubrificazione su entrambe le superfici laterali nel mezzo della superficie di ingresso.
  • Seite 118: Regolazione Frequenza Cardiaca

    REGOLAZIONE FREQUENZA CARDIACA PARAMETERE HRC (paramètre de contrôle de la fréquence cardiaque) ETA‘ ETA‘ ETA‘ DEFAULT DEFAULT DEFAULT 1. Premere il tasto „P“ in modalità standby. La frequenza cardiaca è regolabile da HP1 a HP2. La velocità massima per HP1 è di 10,0 km/h mentre per HP2 è di 12,0 km/h. Premere direttamente il tasto START e il sistema mostrerà direttamente un’eltà...
  • Seite 119: Risoluzione Errore

    RISOLUZIONE ERRORE PROBLEMA POSSIBILE CAUSA PROPOSTA DI SOLUZIONE Errore di inserimento. Inserire cavo. Il tapis roulant non sia avvia La chiave di accesso di Inserire chiave di accesso di sicurezza. sicurezza non è stata inserita. Il tapis roulant non è stato correttamente teso vedi Inserire la vite di regolazione su lato sx e Il tapis roulant non è...
  • Seite 120: Questioni Importanti

    QUESTIONI IMPORTANTI ATTENZIONE Si prega di consultare il proprio medico e sottoporsi ad un esame fisico completo prima di utilizzare il prodotto. Non allenarsi in maniera frequente e violenta senza il permesso del medico. Si prega di interrompere l’utilizzo del prodotto e consultare il proprio medico in caso di malessere durante uso. Il prodotto deve essere utilizzato in modo corretto.
  • Seite 121: Software Di Utilizzo (App)

    SOFTWARE DI UTILIZZO (APP) Puoi scaricare l'app utilizzando i codici QR mostrati qui o cercando direttamente nel negozio. Prerequisito per il dispositivo mobile: Android 5.0 o versioni successive con Bluetooth 4.0, iOS 8.0 o versioni successive. Android Kinomap Note sull'uso dell'app: Come utente Android, assicurati che in "Impostazioni ->...
  • Seite 122 Riciclaggio dei rifiuti Il materiale di imballaggio può essere trasportato di nuovo al ciclo delle materie prime. Smaltire il materiale di imballaggio in conformità alle disposizioni di legge. Le informazioni possono essere recuperate dai sistemi di ritorno o di raccolta della vostra comunità. Avviso sulla legge degli apparecchi elettrici ed elettronici (ElektroG) Desideriamo far notare ai proprietari di vecchie apparecchiature elettriche ed elettroniche che le apparecchiature elettriche devono essere raccolte separatamente dai rifiuti urbani, in conformità...
  • Seite 123 NEDERLANDS Geachte klant, We zijn blij dat je een apparaat uit het SPORTSTECH-assortiment hebt gekozen. De sportuitrusting van SPORT- STECH biedt je de hoogste kwaliteit en de nieuwste technologie. Lees deze gebruikershandleiding vóór gebruik aandachtig door en gebruik het apparaat zoals aangegeven. Zo zul je ten volle van de prestaties van het apparaat kunnen profiteren en er vele jaren geniet van hebben.
  • Seite 124 1. Scan de QR-code 2. Bekijk video‘s 3. Begin snel en veilig Link naar de video's: https://service.innovamaxx.de/fx300_video We zijn ook actief op social media! Raadpleeg voor de meest recente productinformatie, trainingen en nog veel meer, onze: Instagram-pagina Facebook-pagina https://www.instagram.com/sportstech.de https://www.facebook.com/sportstech.de...
  • Seite 125 INHOUD BELANGRIJKE VEILIGHEIDSINSTRUCTIES ...................126 MONTAGE - ONDERDELEN .......................128 EXPLOSIETEKENING/ONDERDELENLIJST ...................128 MONTAGE-INSTRUCTIES ........................129 ONDERHOUD EN ZORG ........................131 OPKLAPMECHANISME........................133 OPSLAG ............................135 TRANSPORT ............................136 BELANGRIJKE ELEKTRISCHE INFORMATIE ..................137 WERKING ............................137 TRAININGSINSTRUCTIES ........................138 HARTSLAGMETING...........................138 FUNCTIES VAN DE CONSOLE ......................139 HARTSLAGCONTROLE ........................142 FOUTMELDINGEN ..........................143 BELANGRIJKE INFORMATIE.......................144 APPLICATIESOFTWARE (APP) ......................145 DECLARATION OF CONFORMITY .......................147...
  • Seite 126: Belangrijke Veiligheidsinstructies

    BELANGRIJKE VEILIGHEIDSINSTRUCTIES Deze algemene veiligheidsinformatie moet strikt worden nageleefd bij het gebruik van dit product. Lees alle instructies voordat je het apparaat gebruikt. LET OP: Trek de stekker uit het apparaat na gebruik, tijdens montage of demontage en voor onderhouds- of reinigingsdoeleinden om het risico op elektrische schokken te vermin deren.
  • Seite 127 kingen of gebrek aan ervaring om het te gebruiken. • Geen gebruik voor medische doeleinden. • Kinderen mogen nooit in de buurt van het apparaat spelen. • WAARSCHUWING - GEVAAR VOOR LETSEL: Om letsel te voorkomen, mag je het loopvlak niet betreden terwijl het in beweging is.
  • Seite 128: Montage - Onderdelen

    MONTAGE - ONDERDELEN Beschrijving Aantal Loopband Schroevendraaier en sleutel Inbussleutel Veiligheidssleutel Stroomkabel Smeermiddel EXPLOSIETEKENING/ONDERDELENLIJST In de volgende link In de volgende link vind je de explosietekening vind je de explosietekening en de onderdelenlijst: en de onderdelenlijst: https://service.innovamaxx.de/fx300_spareparts https://service.innovamaxx.de/fx300_spareparts...
  • Seite 129: Montage-Instructies

    MONTAGE-INSTRUCTIES DRAAI Alle componenten en voorgemonteerde onderdelen GOED vast! STAP 1 Open de verpakking en verwijder de inhoud. Plaats de loopband (A) op een vlakke ondergrond. Zorg ervoor dat je werkplek schoon is en dat je voldoen- de ruimte hebt. STAP 2 Trek met je rechterhand de draaiende plaat (A12) eruit.
  • Seite 130 STAP 3 Trek de linker en rechter handgreep naar beneden (C10 en C11) naar de vaste positie. STAP 4 Ga achter de loopband staan. Trek de plastic moer eruit, houd ze vast (C09) met je linkerhand en draai met je recht- erhand aan de houder (C08).
  • Seite 131: Onderhoud En Zorg

    ONDERHOUD EN ZORG lgemeen onderhoud en zorg helpen de levensduur en prestaties van je loopband te behouden. Houd het ap- paraat schoon door de componenten regelmatig af te stoffen. Reinig beide zijden van de loopband, zodat er zich geen stof onder de band ophoopt. Houd je sportschoenen schoon zodat het loopvlak en de band niet vuil worden.
  • Seite 132: Belangrijke Opmerking

    BELANGRIJKE OPMERKING: Je moet de loopband smeren voordat je hem voor het eerst gebruikt. SMEERMIDDEL VOOR DE LOOPBAND: Het smeren van het loopvlak en de loopband is noodzakelijk, omdat de wrijving tussen beide de levensduur en de functie van de loopband beïnvloedt. Het is daarom aan te raden om het loopvlak en de band regelmatig te controleren.
  • Seite 133: Opklapmechanisme

    OPKLAPMECHANISME STAP 1 Opmerking: ontkoppel de loopband altijd van de stroomvoorziening voordat je hem inklapt. Trek de plastic moer uit, houd deze (C09) met je linkerhand vast en laat de houder (C08) met je recht- erhand zakken. Zodra de houder een geschikte hoek heeft bereikt, laat je de plastic moer (C09) los.
  • Seite 134 STAP 4 Plaats je hand op positie E en til de loopband op. STAP 5 Plaats je hand op positie E en gebruik je voet om de inklapbare vaste plaat (A13) in een horizontale positie te draaien. STAP 6 Plaats je hand op positie E en druk je voet stevig tegen positie J op de loopband.
  • Seite 135: Opslag

    OPSLAG Deze loopband is ontworpen om ruimte te besparen. Je kunt ervoor kiezen om de loopband verticaal of horizontaal op te bergen. A. VERTICAAL OPBERGEN Plaats het apparaat na het inklappen bij de muur, zodat het niet omvalt. Zorg ervoor dat hij buiten het bereik van kinderen blijft! B.
  • Seite 136: Transport

    TRANSPORT Zet je handen in positie E. Plaats het klikframe (A05) op de bodem van de loopband en draai de inklapbare vaste plaat (A13) met je voet naar een verti- cale positie om het klikframe (A05) vast te zetten. Hou voor het transport de loopband gewoon in een hellende positie totdat de wielen soepel bewegen.
  • Seite 137: Belangrijke Elektrische Informatie

    BELANGRIJKE ELEKTRISCHE INFORMATIE WAARSCHUWING: Deze loopband heeft de juiste stroombron nodig om goed te kunnen werken. Voor je veiligheid en de veiligheid van anderen moet je controleren of de voedingsbron correct is voordat je het apparaat aansluit. Elke stroombron boven of onder deze waarde kan ernstige schade veroorzaken aan het apparaat en/of de gebruiker. AARDINGSMETHODEN: Dit product moet geaard zijn.
  • Seite 138: Trainingsinstructies

    VEILIGHEIDSINSTRUCTIE: 1. We raden je aan om met een lage snelheid te starten en de leuningen vast te houden tot je comfortabel bent met de loopband. 2. Steek het magnetische uiteinde van de veiligheidssleutel (68) in de computerconsole en bevestig het ande- re uiteinde (met de veiligheidsclip) aan je kleding voordat je gaat trainen.
  • Seite 139: Functies Van De Console

    FUNCTIES VAN DE CONSOLE Consolefuncties SNELSTART: 1. Steek het magnetische uiteinde van de beveiligingssleutel in de computerconsole. Zet de aan/uit- schakelaar aan. 2. Druk op de START-knop en het systeem geeft automatisch een aftelling van 3 seconden weer. Als het aftellen eenmaal op nul staat, begint de loopband met de initiële standaardsnelheid van 1 km/u.
  • Seite 140: Usb-Aansluiting

    worden weergegeven, worden ze geteld van 0 tot 9999. Als 9999 is bereikt, begint hij weer vanaf 0 te tellen. 3. DIS./CAL. (afstand/calorieën): Geeft de hoeveelheid verbrande calorieën weer van 0 tot 999 Kcal. Als de teller op 999 staat, wordt hij gereset en begint hij weer vanaf 0. In de aftelmodus telt hij af van de gewenste instelling naar 0.
  • Seite 141 HERINNERING OM TE SMEREN Je loopband moet elke 300 km gesmeerd worden. Het apparaat piept elke 10 seconden en toont een „OIL“- symbool op je display om je eraan te herinneren dat je het moet smeren. Lees de sectie HET SMEREN DOE JE ALS VOLGT om de juiste stappen te weten om je apparaat te smeren.
  • Seite 142: Hartslagcontrole

    HARTSLAGCONTROLE HRC-PARAMETERS BPM (slagen per minuut) BPM (slagen per minuut) BPM (slagen per minuut) Alter Alter Alter STANDAARD STANDAARD STANDAARD 1. Blijf de de „P“-knop in de stand-bymodus ingedrukt houden. De hartslagregeling is te vinden onder HP1 tot en met HP2.
  • Seite 143: Foutmeldingen

    FOUTMELDINGEN WEERGAVE DISPLAY MOGELIJKE OORZAAK VOORGESTELDE OPLOSSINGEN Niet aangesloten. Kabel insteken. Loopband start niet Veiligheidssleutel niet ingestoken. Veiligheidssleutel insteken. De spanning van de loopband Draai de instelschroeven aan de linker- en Loopband niet gecentreerd is niet correct aan de linker- of rechterkant van de achterste rol vast.  ...
  • Seite 144: Belangrijke Informatie

    BELANGRIJKE INFORMATIE WAARSCHUWING • Neem contact op met je arts en laat je volledig lichamelijk onderzoeken voordat je het apparaat gaat ge- bruiken. Doe geen frequente en zware oefeningen zonder toestemming van de arts. Stop met het gebruik en raadpleeg je arts als je je ongemakkelijk voelt tijdens het sporten. Het product moet op de juiste manier worden gebruikt.
  • Seite 145: Applicatiesoftware (App)

    APPLICATIESOFTWARE (APP) Je kunt de app's downloaden met behulp van de hier weergegeven QR-codes of zoeken in je store. Voorwaarde voor mobiel apparaat: Android 5.0 of hoger met Bluetooth 4.0, iOS 8.0 of hoger. Android Kinomap Opmerkingen over het gebruik van de app: Zorg er als Android-gebruiker voor dat onder "Instellingen ->...
  • Seite 146 Recyclingcyclus Verpakkingsmaterialen kunnen worden teruggebracht in de grondstoffenkringloop. Voer de verpakking af volgens de geldende voorschriften. Informatie kan worden verkregen uit de retournerings- en ophaalsystemen van je gemeente.. Informatie volgens de wet op elektrische en elektronische apparatuur (ElektroG - Duitse norm) We wijzen de eigenaren van elektrische en elektronische apparatuur erop dat oude elektrische apparatuur gescheiden van het gemeentelijk afval moet worden ingezameld volgens de geldende...
  • Seite 147: Declaration Of Conformity

    DECLARATION OF CONFORMITY Unter folgendem Link finden Sie die Konformitätserklärung: At the following link you will find the declaration of conformity: https://service.innovamaxx.de/fx300_conformity...
  • Seite 148 Verkauf durch / Distributed by / Distribuido por / Distribué / Distribuito da / Verkoop via InnovaMaxx GmbH Potsdamer Platz 11 10785 Berlin +49 30 220 663 569 service@innovamaxx.de http://www.sportstech.de...