Herunterladen Inhalt Inhalt Diese Seite drucken
JOOLZ Day Bedienungsanleitung
Vorschau ausblenden Andere Handbücher für Day:

Werbung

Verfügbare Sprachen
  • DE

Verfügbare Sprachen

  • DEUTSCH, seite 17
GEBRUIKSAANWIJZING
INSTRUCTION MANUAL
BEDIENUNGSANWEISUNG
MODO DE EMPLEO
INSTRUZIONE PER L USO
NAVOD K POUZITI
BELANGRIJK !
Garantie pagina 20
WARNING !
Warranty page 30
WICHTIG !
Garantie Seite 4 1
IMPORTANTE !
Garantía página 50
IMPORTANTE !
Garanzia pagina 61
VAROVáNí !
Záruční podmínky 71 Záruka se vztahuje = pouze na kočárky s registračním číslem !
Designed in The Netherlands
Geen registratie = geen service !
No registration = no service !
Keine Ausrichtung = kein Service !
Ningún registro = ningún servicio !
Nessun registro = nessun servizio !

Werbung

Inhaltsverzeichnis
loading

Inhaltszusammenfassung für JOOLZ Day

  • Seite 1 Designed in The Netherlands GEBRUIKSAANWIJZING INSTRUCTION MANUAL BEDIENUNGSANWEISUNG MODO DE EMPLEO INSTRUZIONE PER L USO NAVOD K POUZITI BELANGRIJK ! Garantie pagina 20 Geen registratie = geen service ! WARNING ! Warranty page 30 No registration = no service ! WICHTIG ! Garantie Seite 4 1 Keine Ausrichtung = kein Service ! IMPORTANTE ! Garantía página 50...
  • Seite 2 Joolz Day Carton box 1 Carton box 2 Carton box 3 instruction manual instruction manual...
  • Seite 3 Carton box 1 click! click! click! instruction manual instruction manual...
  • Seite 4 *47-54: my-joolz.com + youtube.com/joolzhq instruction manual | instruction manual 7...
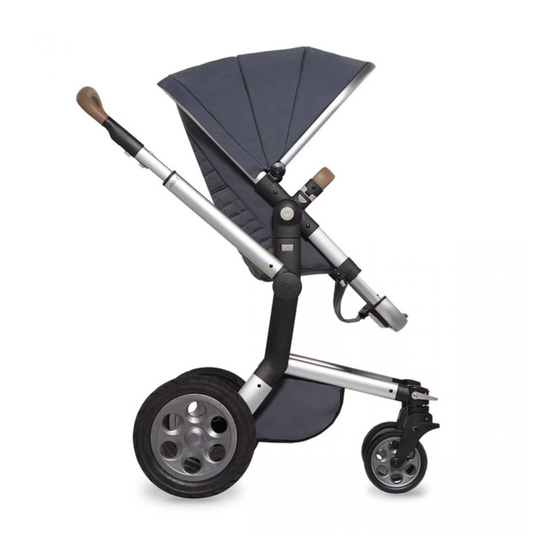
  • Seite 5 NL / EN / DE / ES / IT / CR 1. D uwstang / handlebar / Schiebebügel / manillar / manubrio / rukojeť 2. H oogte verstelknoppen / height adjusting buttons / Knöpfe zur Höhenverstellung / botones para ajuste de altura / pulsanti per la regolazione dell’altezza / ovládání nastavení výšky rukojeti 3. S econd lock / second lock / Sekundärverschluss / segundo seguro / secondo blocco / druhý zámek 4. S toelframe / seat frame / Sitzrahmen / bastidor de la sillita / telaio del sedile / rám sedátka 5. O nderstel / chassis / Gestell / soporte / telaio / rám kočárku 6. R onde knoppen / round positions buttons / runde Knöpfe / botones redondos / pulsanti rotondi / ovládací tlačítka kulaté 7. R echthoekige knoppen / unlock buttons / rechteckige Knöpfe / botones rectangulares / pulsanti rettangolari / ovládací tlačítka podélné...
  • Seite 6 19. K apklem / hood clamp / Kappenklemmen / pinza de la capota / punto blocco cappottina / svorka pro upevnění stříšky 20. V erzorgingstasbevestiging / nursery bag attachment / Wickeltaschebefestigung / fijación para bolso cambiador / fissaggio per la borsa del cambio / háček k upevnění tašky 21. Z onnekap frame / sun hood frame / Verdeckrahmen / estructura de la capota parasol / telaio cappottina parasole / rám sluneční stříšky 22. Z onnekap / sun hood / Verdeck / capota parasol / cappottina parasole / sluneční stříška 23. W iegframe / cot frame / Wannerahmen / estructura del capazo / telaio culla / rám hlubokého dílu 24. B oodschappenmand / shopping basket / Einkaufskorb / cesta de compra / cestello / nákupní koš INDEX Nederlands.............. English..............Deutsch..............Español..............Italiano..............Česky................ instruction manual instruction manual...
  • Seite 7: Gebruiksaanwijzing

    1. Uitpakken van de Joolz Day GEBRUIKSAANWIJZING Let op: C ontroleer op de sticker van de doos of alle items 4. Bevestigen van de voorwielen (zwenkwielen) aanwezig zijn, indien u een Joolz Day special of – illustratie 5 Beste Joolz Day gebruiker, Controleer eerst de dozen van de Joolz Day voordat u limited edition heeft gekocht. De voorwielen (11) zijn eenvoudig te bevestigen. Klik het deze gaat monteren. Als u iets mist neem dan contact op voorwiel vast op de voorwielhouder van het onderstel. Gefeliciteerd met de aanschaf van de Joolz Day. De Joolz met de winkel. De volgende onderdelen vindt u in de 2. Rijklaar maken Day is niet alleen technisch vernuftig, maar ook bijzonder, ver s chillende dozen: 5. Vergrendelen voorwielen – illustraties 6-7 origineel en niet alledaags. Handig voor u en comfortabel...
  • Seite 8 B evestig de zonnekap. Zie 6. punt b. en c. beugel aan één van de kanten loskoppelen, en de 17. Gebruik van de veiligheidsgordel – illustraties 40-46 beugel eenvoudig wegdraaien. e. B evestig de veiligheidsbeugel (draagbeugel). De Joolz Day is uitgerust met een veiligheidsgordel (18). 9. Duwbeugel op de juiste hoogte – illustraties 14-12 f. A ls u de wieg wilt inklappen: volg dan de stappen Zie 6. punt e. Gebruik de veiligheidsgordel wanneer uw kindje in de Om de duwbeugel op de juiste hoogte te krijgen duwt u e. t/m a.
  • Seite 9: Tips Voor Gebruik

    - BELANGRIJK: De Joolz Day is uitsluitend bedoeld om - Gebruik altijd de wieg voor pasgeboren baby’s. bevestigd aan de beide zijden van het zitvlak. dit de veiligheid van uw kind in gevaar brengen. één kind te vervoeren. - D e Joolz Day wieg is geschikt voor pasgeboren baby’s tot - BELANGRIJK: Laat uw kinderen nooit alleen in de - BELANGRIJK: Gebruik altijd de kruisgordel in een maximum gewicht van 9 KG, die niet zelfstandig kinderwagen achter; zorg ervoor dat er altijd toezicht is kunnen zitten, rollen of zich omhoog duwen op hun 18. Joolz inklappen en opbergen – illustraties 47-54 combinatie met de schoudergordel. Het inklappen gaat net zo eenvoudig als het uitklappen. van een volwassene. - BELANGRIJK: Gebruik de 5-puntsveiligheidsgordel handen en knieën. U kunt de Joolz Day zonder stoel of mét stoel inklappen - BELANGRIJK: Laat uw kind niet met dit product spelen. altijd als u de Joolz Day stoel gebruikt. Indien u de Joolz - W anneer u gebruik maakt van de Joolz Day stoel zet uw (alleen met het stoel van u af). - BELANGRIJK: Controleer voor gebruik van de Joolz Day slaapzak of Baby bodyguard in combinatie met de kind dan altijd vast in de gordel.
  • Seite 10 Accessoires - W anneer u de wagen in en uit elkaar vouwt, houdt uw - D e zwarte banden kunnen op sommige gladde vloeren - Parasol: deze kan d.m.v. de klem op het stoel- of kind dan uit de buurt van de bewegende onderdelen. (vooral vinyl kunststoflaminaat, parket en linoleum) wiegframe bevestigd worden. Let er tevens op dat uw kind nooit alleen in de kinder- sporen achterlaten. De Joolz Day wordt standaard geleverd met de volgende - Muskietennet: het muskietennet kan gebruikt worden wagen klimt. - D e Joolz Day wieg en stoel zijn alleen compatibel met een accessoires: voor de wieg en stoel. Bevestig deze aan de zonnekap - Z et de kinderwagen bij stilstand of het in- en uittillen van Joolz Day onderstel en vice versa. - Regenhoes: de regenhoes kan gebruikt worden voor de d.m.v. de drukknopen op de zwarte zonnekap klemmen uw kind altijd op het rempedaal. Het rempedaal gebruikt - L aat geen gewicht aan de duwbeugel hangen wanneer de wieg en stoel. Bevestig deze over de zonnekap en aan (19). Trek de onderzijde van het muskietennet over het u door het pedaal tussen de achterwielen met uw voet kinderwagen niet in gebruik is. Overlaad de duwbeugel het voeteneinde van de wieg of het stoel. De regenhoes voeteneinde van de wieg of stoel.
  • Seite 11: Garantie

    - v erkleuringen/ kringen door wassen, regenwater of agressief reinigingsmiddel. Behandel de wielen en metalen het product. De garantie kan alleen worden verleend als delen periodiek (eens per maand) met teflon of siliconen- u, samen met het defecte product, het volgende aan de zon of spray, om ervoor te zorgen dat de wagen soepel blijft rijden. winkelier aanlevert: - n ormaal te verwachten slijtage bij dagelijks gebruik of 1) compleet en correct ingevulde garantiekaart, - s chade die is ontstaan door gebruik van meerijdplankjes 2) kopie van de aankoopbon, die niet door Joolz zijn gecertificeerd. 3) duidelijke beschrijving van het defect. Veiligheid is een belangrijk aspect in de ontwikkeling van Wanneer de winkelier het defect niet kan verhelpen, neemt de Joolz Day kinderwagens en wiegen. De Joolz Day De aluminium onderdelen van uw Joolz Day kinderwagen deze contact op met de fabrikant. Eventuele reparaties voldoet daarom ook aan de hoogste veiligheidsnormen: zijn geanodiseerd om deze tegen invloeden van buitenaf geven geen recht op verlenging van de garantietermijn. te beschermen en om o.a. roestvorming tegen te gaan. Europa: EN 1888:2012 Geanodiseerde aluminium delen kunnen niet tegen zuur- De garantiekaart is te vinden op my-joolz.com. Deze kaart Australië/New Zeeland: AS/NZS 2088:2008 graag compleet en correct invullen en digitaal verzenden. UK: BS EN 1888:2003 houdende schoonmaakmiddelen of vetten, dit kan vlekken en/ of verkleuringen veroorzaken. Wij adviseren u daarom Er wordt ook gevraagd om het framenummer in te vullen.
  • Seite 12 1. Unpacking the Joolz Day INSTRUCTION MANUAL Note: P lease check availability of items included on the 5. Locking the front wheels – figures 6-7 sticker of the box for special or limited editions of Press down the clip above the front wheels (13) with your Dear Joolz Day user, Check the content of the boxes before assembling the the Joolz Day. foot to lock the front wheels. The pushchair will only move Joolz Day. Contact your retailer if something is missing. in a straight line. Pulling this clip upwards releases the We would like to congratulate you on choosing the Joolz The following components should be included in the front wheels. The front wheels will swivel again, making 2. Assembling the Joolz Day the Joolz Day easy to manoeuvre. Day. The Joolz Day is not only technically sophisticated, various boxes: but also unique, original and out of the ordinary. It is handy for you and comfortable for your child.
  • Seite 13 F ix the seat cushion using the velcro strips. 18. Folding up and storage – figures 47-54 Push the safety bar into the appropriate slots on either b. F asten the seat fabric by zipping it closed from right 17. Using the restraint system – figures 40-46 Folding is just as easy as unfolding. You can fold up the side of the cot frame until they click into place. to left. The Joolz Day is provided with a restraint system (18). Joolz Day with or without the seat (seat facing away from To easily lift your child in and out of the seat detach c. T hen attach it to the footrest by zipping the bottom Always use the restraint system when your child is sitting you). the safety bar on one side and turn it out of the way. of the fabric to the footrest from right to left. in the seat.
  • Seite 14: Tips For Use

    - W ARNING: Always use the restraint system when using who cannot sit unaided. e. N ow press the grey safety buttons (second lock) (3) these instructions. the Joolz Day seat unit. When using the sleeping bag or - M ake sure that your children are in a safe distance from and turn the handlebar downwards. - W ARNING: Never leave your child unattended. Baby Bodyguard in combination with the Joolz Day seat, the moving parts whenever you unfold or fold up the f. T he handlebar automatically turns down. The Joolz - W ARNING: Do not let your child play with this product. always secure it with the restraint system. pushchair. Make sure that your child does not climb into Day can now be stored in an upright position. - W ARNING: Ensure that all the locking devices are - W ARNING: This product is not suitable for skating or the pushchair. engaged before use. running.
  • Seite 15 Accessories - T he Joolz Day cot and seat units are only compatible with - Mosquito net: the mosquito net can be used for the cot Note: F ollow the recommended storage options and do the Joolz Day chassis and vice versa. and the seat. Attach the mosquito net to the sun hood not exceed the maximum permitted weight. - D o not leave any load hanging from the handlebar when The Joolz Day is supplied with the following standard using the press-studs on the sun hood clamps (19) and Go to my-joolz.com for photographs and a detailed not in usage. Do not overload the handlebar. accessories: then pull the net over the foot end of the cot or seat. description of the accessories. The maximum weight you can hang from the handlebar - Rain cover: the rain cover can be used for the cot and the - Comfort screen: this screen protects your baby from is 5KG; this applies when using in combination with the seat. Attach the cover over the sun hood and pull it over wind, rain, snow and cold. Attach it in the same way as Joolz XL shopping bag and/or the Joolz nursery bag. the foot end of the seat. The cover is provided with the mosquito net. - T he Joolz Day nursery bag can hold a maximum weight ventilation holes; nevertheless, because heat can build up - UV Sunhood: this hood protects your child against sun of 3 KG. Greater loads may affect the stability of the...
  • Seite 16: Maintenance

    - t he defects and/or damage are caused by improper use chemical detergents. Periodically (approximately once a not the exchange or return of the product. The warranty is and/or by modifications made by the customer, month) treat the wheels and metal parts with Teflon or only valid if you supply the following items to your retailer - t he discolouration/stains were caused by washing, silicon spray to ensure the pushchair continues to run along with the defective product: rain or sun, smoothly. 1) a completed and correctly filledin the warranty card, - t he wear and tear is a result of normal usage, 2) a copy of the receipt of purchase, - t he defect is the result of using a non-Joolz Day certified 3) a detailed description of the defect. footboard. If your retailer cannot assist you with your complaint, Safety was an important consideration throughout the contact the manufacturer. Any repairs do not extend the development of the Joolz Day pushchair and cot. Joolz The aluminum parts of your Joolz Day pushchair are warranty period. therefore meets the highest safety standards: anodized to protect it from external influences such as corrosion. Anodized aluminum parts are vulnerable to The warranty card can be found on my-joolz.com. Europe: EN 1888:2012 acidic cleaners or grease, which can cause stains and...
  • Seite 17: Joolz Day Auspacken

    1. Joolz Day auspacken BEDIENUNGSANWEISUNG Wichtig: B itte überprüfen Sie, ob alle auf dem Aufkleber 4. Befestigen der Vorderräder (Schwenkräder) am Karton für die Joolz Day special oder limited – Abbildung 5 Lieber Joolz Day-Kunde, Vor der Montage den Inhalt der Joolz Day Lieferkartons editions aufgelisteten Artikel enthalten sind. Die Befestigung der Schwenkräder (11) ist einfach. überprüfen. Sollte etwas fehlen, wenden Sie sich an das Rasten Sie das Vorderrad auf dem Vorderradhalter ein. Herzlichen Glückwunsch zu Ihrem neuen Joolz Day. Geschäft oder den Lieferanten, von dem Sie den Joolz 2. Zusammenbau Kinderwagen bezogen haben. Die verschiedenen Kartons Joolz Day besticht nicht nur durch seine ausgeklügelte 5. Verriegelung der Schwenkräder – Abbildung 6-7 Technik, er ist auch etwas Besonderes, originell und nicht beinhalten folgende Teile: Wenn der Clip (13) an den Vorderrädern herunterge- alltäglich. Praktisch für Sie und bequem für Ihr Kind.
  • Seite 18 Hinterrädern. Verknüpfen Sie daraufhin die zwei Laschen beidseitig gelöst und einfach zur Seite weg g edreht c. B ringen Sie das Verdeck an. Siehe 6., Punkt b) und c). 17. Verwendung des Sicherheitsgurtes – Abbildung 40-46 werden. d. B efestigen Sie den Sicherheitsbügel (Tragebügel). in der Mitte. Fixieren Sie zuletzt die vorderen zwei Die Joolz Day ist mit einem Sicherheitsgurt (18) ausgerüstet. Laschen mit dem Klettverschluss. f. W enn Sie die Wanne einklappen möchten, führen Siehe 6., Punkt e). Legen Sie Ihrem Kind den Gurt immer an, wenn es in dem Sie die beschriebenen Schritte in umgekehrter Sitz sitzt. 9. Höhenverstellung der Schiebestange – Abbildung 14-15 Reihenfolge aus.
  • Seite 19: Tipps Für Die Benutzung

    Kombination mit den Leibriemen verwenden. - D er Sitz eignet sich bis zu einem Höchstgewicht von anderfalten. Sie können den Joolz Day ohne oder mit Sitz Produkt spielen. - W ICHTIG: Benutzen Sie immer den Sicherheitsgurt, 15 kg. (jedoch nur von Ihnen weggerichtet) zusammenfalten. - W ICHTIG: Überprüfen Sie vor der Nutzung, ob die wenn Sie die Joolz Day Sitzeinheit verwenden. Wenn Sie - B ei Nutzung des Adapters zur Befestigung des a. D ie Bremse des Joolz Day anziehen (9) (Wanne und Wanne, der Sitz oder die Autositzbefestigung korrekt den Fußsack in Kombination mit dem Joolz Day Sitz Autositzes ist das für den jeweiligen Autositz angegebene eventuell den Sitz entfernen). befestigt sind. benutzen, sichern Sie ihn immer mit dem Sicherheitsgurt. Gewicht einzuhalten. b. D ie Vorderräder (Schwenkräder) verriegeln (13). - W ICHTIG: Lassen Sie andere Kinder nicht unbeaufsich- - W ICHTIG: Dieses Produkt ist nicht für die Nutzung - D er Sitz lässt sich in 3 verschiedene Positionen einstellen:...
  • Seite 20 - Wickeltasche: Sie können die Tasche mit den beiden Sitzen zu unterstützen. - V ermeiden Sie es, den Joolz in die Nähe offenen Schleifen der Tasche am Gestell befestigen. Dazu dienen - Becherhalter: Sie befestigen den Becherhalter am Joolz Feuers und anderer Hitzequellen wie elektrische oder die Wickeltaschenbefestigungen (20) an den Innenseiten Schiebebügel, indem Sie den Clip solange drücken bis Gas-Heizelemente usw. zu bringen. der Schiebestangenstreben. er einrastet. Der Joolz Becherhalter bietet einen - D ie schwarzen Reifen können auf einigen glatten geeigneten Platz, um eine Flasche oder einen Becher zu - Schlafsack: Er kann mit dem Sicherheitsgurt am Sitz Oberflächen (insbesondere Vinyl-Kunststoffl aminat, befestigt werden. transportieren. Die Drehfunktion gewährleistet, dass Ihre Parket- und Linoleumböden) Reifenspuren hinterlassen. - Autositzadapter: Mit diesen Sets setzen Sie problemlos Flaschen immer in einer aufrechten Position sind. - D ie Joolz Day Wanneneinheit und Sitzeinheit sind allein einen Maxi-Cosi Pebble, Maxi-Cosi Cabrio(Fix), Cybex - Sommersitz: An warmen Sommertagen oder während mit dem Joolz Day Gestell kompatibel und ebenso Aton und BeSafe auf Ihren Joolz. Ihres Urlaubes belüftet der Sommersitz und bietet umgekehrt. Komfort. instruction manual instruction manual...
  • Seite 21: Wartung

    1) e ine vollständig und korrekt ausgefüllte Garantiekarte, Benutzers, möglichkeiten und überschreiten Sie nicht das 2) e ine Kopie der Quittung, - V erfärbungen/Ringe durch Wäsche, Regenwasser oder zulässige Höchstgewicht. Fotos und ausführliche 3) e ine deutliche Beschreibung des Defekts vorlegen Sonne, Beschreibungen des Zubehörs finden sich unter können. - n ormaler Verschleiß durch täglichen Gebrauch, www.my-joolz.com - S chäden durch die Nutzung eines nicht von Joolz Wenn der Händler den Defekt nicht beheben kann, zertifizierten Mitfahrbrettes. Das Aluminium am Joolz Day Kinderwagen ist anodisiert, nimmt er Kontakt zum Hersteller auf. Durch eventuelle um es vor äußeren Einflüssen wie Korrosion zu schützen. Reparaturen haben Sie keinen Anspruch auf Sicherheit spielt eine wichtige Rolle bei der Entwicklung Anodisiertes Aluminium wird durch säurehaltige Reini- Verlängerung der Garantie. von Joolz Day-Kinderwagen und –Wannen. Die Produkte von Joolz Day erfüllen daher auch höchste Sicherheitsnor- gungsmittel oder Fette angegriffen, sodass Flecken oder Verfärbungen der Aluminiumteile entstehen können.
  • Seite 22: Modo De Empleo

    1. Desembalaje del Joolz Day MODO DE EMPLEO Atención: P or favor comprobar disponibilidad de los 4. Fijación de las ruedas delanteras (pivotantes) productos incluidos en la pegatina de la caja en – ilustración 5 Estimado usuario de Joolz Day, Compruebe primero las cajas de Joolz Day antes de las ediciones especiales o limitadas de Joolz Day Las ruedas delanteras (11) se pueden fijar fácilmente. iniciar el montaje. Si faltase algo póngase en contacto con Fije la rueda delantera al soporte de la rueda del bastidor Nos alegramos de poder felicitarle por la adquisición de la tienda. En las diversas cajas encontrará los siguientes hasta que oiga un clic. 2. Preparación Joolz Day. Joolz Day no es sólo ingenioso en su técnica, sino componentes: también especial, original e innovador. Manejable para 5. Bloqueo de las ruedas pivotantes – ilustraciones 6-7 usted y cómodo para su niño.
  • Seite 23 A continuación, ajuste el tapizado a la parte inferior 17. Utilización del cinturón de seguridad Para colocar la cesta de la compra (24) en primer lugar capazo y sacarlo de él con facilidad puede soltar el asa por medio de una cremallera, de izquierda a derecha, – ilustraciones 40-46 situarla por encima del freno y ajustar las cuatro hebillas por uno de los lados y girarla. al reposapiés. El Joolz Day está provisto de un cinturón de seguridad entre las ruedas traseras usando los corchetes. Luego f. P ara plegar el capazo siga los pasos en sentido inverso. dc. F ije la capota parasol. Consulte el apartado 6., (18). Úselo cuando su hijo esté en la sillita. conectar las dos hebillas del medio. Finalmente ajustar las puntos b. y c. a. C oloque a su hijo en la sillita. Pase la banda inguinal dos hebillas delanteras usando las tiras de velcro.
  • Seite 24: Recomendaciones De Uso

    Recomendaciones de uso: 18. Plegado y almacenado del Joolz – ilustraciones 47-54 - I MPORTANTE: Cualquier carga que se añada a los - C uando se utiliza el adaptador para fijar la sillita de El plegado del Joolz Day es tan fácil como su desplegado. laterales o el manillar de la silla de paseo Joolz Day puede coche se deberá respetar el peso tal y como se indica en Puede hacerlo con o sin silla (como usted prefiera). Si no cumple correctamente estas instrucciones, puede afectar su estabilidad la correspondiente sillita de coche. a. E che el freno (9) (y retire el capazo o la sillita). poner en peligro la seguridad de suniño. - I MPORTANTE: No usar un colchón de más de 30mm. - L os grupos 0 que se usan en conjunción con las estruc- b. B loquee las ruedas delanteras (13).
  • Seite 25: Accesorios Suministrados

    - Saco de dormir: el saco de dormir se fija a la sillita con el este asiento ofrece ventilación y comodidad. chasis Jools Day y viceversa. cinturón de seguridad. - Plataforma: Un niño mayor puede descansar del paseo - N o dejar pesos colgando del manillar cuando no se use el - Sets de adaptación: Con estos sets podrá colocar fácilmen- mientras echa un vistazo a su hermano o hermana carrito. No sobrecargar el manillar. El peso máximo que te en el Joolz sillitas de coche Maxi-Cosi Pebble, Maxi- pequeño mientras se pasea el carrito. La plataforma se se puede cargar en el manillar es 5 kg.: esto es aplicable Cosi Cabrio(Fix), Cybex Aton ó BeSafe. puede guardar con facilidad y la silla de paseo se puede cuando se usa con la bolsa de compra Joolz XL y/o el - Sombrilla: la sombrilla se fija al bastidor de la sillita o del plegar con facilidad incluso sin quitar el patinete. bolso con cambiador Joolz Day. capazo por medio de la pinza. - E l bolso con cambiador Joolz Day puede llevar un peso - Mosquitera: la mosquitera se puede usar en el capazo máximo de 3 kg. Pesos mayores pueden afectar la y en la sillita. Fíjela al parasol con los botones de presión estabilidad del carrito. de las pinzas negras del capota (19). instruction manual instruction manual...
  • Seite 26: Mantenimiento

    Mantenimiento Garantía Rellene el número de chasis, que encontrará en una pegatina transparente colocada en el tubo grueso entre la Limpie la tela con agua tibia y jabón, y a continuación El período de garantía abarca 24 meses y comienza el día parte del boomerang de su Joolz Day. enjuague con agua limpia y deje secar. No utilice nunca de la compra. La garantía otorga el derecho a la reparación lejías ni otros detergentes agresivos. Trate regularmente de defectos de fábrica pero no al cambio o la devolución La garantía queda anulada si: (una vez al mes) las ruedas y las partes metálicas con teflón del producto. Se le concederá la garantía sólo si junto con - e l producto se devuelve sin el ticket de compra original, o espray de silicona para asegurar un funcionamiento el producto defectuoso entrega al comerciante lo siguiente: - e l (los) defecto(s) o daño(s) se ha(n) producido por un uso suave de la silla. 1) u na tarjeta de garantía con todos los datos correctos - i ncorrecto y/o por manipulación del producto por parte introducidos, del usuario, o 2) u na copia del ticket de compra, - l a decoloración / manchas producidas son consecuencia...
  • Seite 27: Istruzioni Per L'uso

    1. Disimballare il passeggino Joolz Day ISTRUZIONI PER L’USO Attenzione: S i prega di controllare l’effettiva presenza dei 4. Montaggio delle ruote anteriori (piroettanti)– immagine 5 prodotti riportati sull’etichetta delle confezioni Anche le ruote anteriori (11) sono facili da montare. Gentile cliente, Prima di montare il passeggino Joolz Day, controllare il per le edizioni speciali o limitate del Joolz Day. Fare scattare in posizione la ruota anteriore sull’apposito contenuto delle scatole. Si prega di controllare l’effettiva alloggiamento del telaio. Desideriamo ringraziarla e complimentarci con lei per presenza dei prodotti riportati sull’etichetta delle confezioni 2. Montaggio aver acquistato un passeggino Joolz Day! Oltre ad essere per le edizioni speciali o limitate del Joolz Day. Se manca 5. Blocco delle ruote anteriori – immagini 6-7 tecnicamente all’avanguardia, Joolz Day è un passeggino...
  • Seite 28 M ontare la cappottina parasole. Cfr. 6., punti b. e c. basso con i pollici i pulsanti color argento (2) all’interno modo. È necessario sistemarla in modo tale da poter e. M ontare la barra di sicurezza (staffa di supporto). 17. Utilizzo della cintura di sicurezza – immagini 40-46 del manubrio. Per allungare o accorciare il manubrio, guardare al suo interno quando si spinge il passeggino. Cfr. 6. punto e. Il passeggino Joolz Day è dotato di una cintura di spingerlo verso il basso o tirarlo verso l’alto. Fare scorrere la culla negli appositi giunti (8) fino ad sicurezza (18). Deve essere usata quando il bambino è avvertire un click. 14. Posizione della seduta – immagine 35 seduto sul passeggino. 10. Apertura della culla – immagini 16-24 La seduta può essere utilizzata in tre diverse posizioni:...
  • Seite 29 - I MPORTANTE: Non lasciare mai il bambino incustodito borsa del cambio Joolz è di 3 KG. di salirci da soli, girarsi e non sono in grado di alzarsi fondo della culla e ad ambo i lati della seduta. nel passeggino ma assicurarsi che sia sempre sotto il - I MPORTANTE: Non utilizzare materassini aventi uno utilizzando le mani e le braccia e/o le ginocchia. controllo di un adulto. spessore superiore ai 30 mm. - L a seduta Joolz Day è indicata per bambini con peso 18. Come ripiegare e riporre il passeggino Joolz Day - I MPORTANTE: non lasciare giocare il vostro bambino - I MPORTANTE: Evitare di utilizzare il passeggino in massimo non superiore ai 15 Kg. – immagini 47-54 con questo prodotto. caso di componenti rotti, lacerati o mancanti. I seggiolini auto montati sui telai Joolz Day non sostitui- Ripiegare il passeggino è semplice come aprirlo. - I MPORTANTE: Prima di utilizzare il passeggino Joolz - I MPORTANTE: La seduta o la culla del passeggino scono né la culla né il letto. Se il vostro bambino necessita...
  • Seite 30 - S u alcune tipologie di pavimentazione liscia (soprattutto - Borsa per il cambio: va fissata al telaio tramite i due - Porta Bevande: inserire questo accessorio sul manubrio e su laminati in materiale sintetico, parquet e linoleum), occhielli situati sulla borsa. Fissare la borsa al dispositivo spingerlo nell’attacco fino a che non si avverte lo scatto. Il i pneumatici neri possono lasciare delle tracce. di fissaggio apposito (20) situato all’interno del manubrio. porta bevande Joolz Day permette di ottenere uno spazio - L e sedute e le culle Joolz Day sono compatibili solo con i - Sacco imbottito: va fissato alla seduta tramite la cintura comodo per portare una bottiglia o una tazza. La sua telai Joolz Day e viceversa. di sicurezza. forma a perno garantisce che le bottiglie inserite restino - Set di adattatori: questi set consentono di fissare con sempre in posizione verticale. estrema facilità al passeggino Joolz Day un seggiolino - Seduta traspirante: questa seduta traspirante offre per auto Maxi-Cosi Pebble, Maxi-Cosi Cabrio(Fix), un’ottima ventilazione e confort durante le stagioni più...
  • Seite 31: Manutenzione

    Manutenzione Garanzia - Pedana: il figlio più grande può riposarsi ed interreagire Compilare numero di telaio, riportato su un adesivo con il fratellino o la sorellina, mentre la mamma o il trasparente applicato all’interno della forcella posteriore papà continuano a spingere il passeggino. La pedana può Il rivestimento può essere lavato con acqua tiepida e La garanzia di 24 mesi decorre dal giorno dell’acquisto e destra del telaio. essere riposta facilmente ed il passeggino Joolz Day può sapone. Risciacquare bene con acqua pulita e lasciare dà diritto alla riparazione gratuita di eventuali difetti di essere chiuso facilmente persino con la pedana ancora asciugare. Non utilizzare mai candeggina o altri detergenti fabbricazione, ma non alla sostituzione o alla restituzione La garanzia non viene riconosciuta nei seguenti casi: inserita. aggressivi. Trattare periodicamente le ruote e le parti del prodotto al negoziante. La garanzia viene riconosciuta - i l prodotto viene restituito sprovvisto di scontrino metalliche (una volta al mese) con teflon o spray siliconico consegnando al negoziante il prodotto difettoso accompa- d’acquisto, Attenzione: s eguire i consigli raccomandati per per garantire la scorrevolezza di marcia del passeggino. gnato da: - i l/i difetto/i o i danni derivano da utilizzo non corretto...
  • Seite 32 1. Vybalení kočárku Joolz Day z kartonu Poznámka: P rosím zkontrolujte dostupnost všech položek 5. Uzamknutí - aretace předních kol – ilustrace 6-7 obsažených na nálepce umístěné na krabici, Stlačením šedého klipu předních kol (13) uzamknete kola Vážený zákazníku, Dříve než začnete s kompletací se ujistěte, že balení která je určená pro speciální nebo limitovanou pro jízdu přímým směrem. Opačným vytlačením klipu obsahuje veškeré součásti. V případě, že cokoliv postrádáte, edici Joolz Day. směrem nahoru kola uvolníte. Kolečka se začnou opět Blahopřejeme k nákupu kočárku holandského výrobce obratem kontaktujte vašeho prodejce nebo distributora. libovolně otáčet a kočárek se stane lehce ovladatelným. Joolz Day. Kočárek není pouze technickou vymožeností. Komponenty jsou baleny v několika kartonech: 2. Kompletace kočárku Joolz Day Je unikátní, originální a neobyčejný. Pro vás rodiče velmi 6. Odejmutí předních kol – ilustrace 8-9 dobře ovladatelný a pro dítko vysoce komfortní.
  • Seite 33 9. Nastavení rukojeti kočárku do správné polohy a výšky f. T uto akci vykonávejte stejně na obou stranách, 14. Polohování sedátka – ilustrace 35 a. P osaďte dítě do sedátka. Vytáhněte sponu, která se – ilustrace 14-15 aby jste předešly upadnutí hlubokého dílu. Sedátko můžete polohovat do sedací pozice, do polohy nachází mezi nohama dítka. Nastavte základ sedátka k Nastavení rukojeti (1) do správné polohy docílíte zmáčknu- polo-lehu a také do ležící polohy. Polohy měňte pomocí nastavení požadované délky hlavní spony popruhu. tím stříbrných motýlků umístěných na vnitřních stranách oboustranného stlačení kulatých knoflíků (6) nacházejících b. N astavte délku rameních popruhů dle výšky vašeho 11. Uložení hlubokého dílu do podvozku kočárku rukojeti (2) a následných povytažením nebo opačným –...
  • Seite 34 18. Skládání a skladování – ilustrace 47-54 - VAROVáNí: Jakýkoliv náklad upevněný po stranách Skládání kočárku je stejně jednoduché, jako je rozkládání. kočárku nebo upevněný na rukojeti kočárku může Kočárek může být složen bez sedací části, ale také včetně V případě, že nebudete dodržovat následující pokyny, negativně ovlivnit stabilitu kočárku Joolz Day. - P ro novorozence používejte vždy pouze hluboký díl. sedátka. V tomto případě musí sedátko směřovat čelem můžete zanedbat bezpečnost dítěte. - VAROVáNí: Nepoužívejte matraci silnější než 30 mm. - H luboký díl Joolz Day je určen pro dítě od narození do směrem k vám. - VAROVáNí: Nikdy kočárek nepoužívejte v případě, že maximální váhy 9kg, které neumí samostatně sedět, a. N ejprve musíte kočárek zabrzdit (9) (popřípadě - VAROVáNí: Nikdy dítě neponechávejte v kočárku bez postrádá nebo má poničené jakékoliv součásti. kutálet se, a které nedokáže samostatně lézt nebo se odejměte hluboký díl nebo sedací část). dozoru dospělé osoby. Nikdy neponechávejte dítě - VAROVáNí: Joolz Day sedátko nebo hluboký díl může odrážet nohama.
  • Seite 35 Mimo doplňky základní výbavy představujeme nabídku - Baby ochranná vložka: tato ochranná prodyšná podložka užitečných doplňků, kterými můžete kočárek Joolz Day je určena do sedací části Joolz Day kočárku a slouží jako s bezpečnostními nařízeními. - D bejte opatrnosti a neponechávejte kočárek v blízkosti obohatit: extra podpora zad nebo hlavičky malinkého děťátka. otevřeného ohně nebo tepelného zdroje. - Přebalovací taška: přebalovací tašku je možné zavěsit za - Držadlo na nápoj: umístěte na rukojeť kočárku Joolz Day - Č erné pneumatiky mohou zanechávat stopy na některém spěciální ouška na vnitřní straně rukojeti (20). Součástí zatlačením na klip až do jeho zacvaknutí. Držadlo na typu podlahy (obzvláště na syntetických laminátových přebalovací tašky jsou dvě termo izolační kapsy a nápoj Joolz poskytuje skvělé místo k uložení kojenecké podlahách, parketách a linoleum). přebalovací podložka. láhve nebo jakéhokoliv nápoje. Vzhledem k pohyblivosti - H luboký díl a sedátko Joolz Day je kompaktibilní pouze - Sleeping bag: Fusak musí být upevněn bezpečnostními držadla bude láhev vždy ve svislé poloze.
  • Seite 36 V případě, že potřebujete povést opravu v záruční době, - o potřebení kočárku a jeho koleček v důsledku každoden- popisky naleznete na webových stránkách kočárek pravidelně udržovat. jste povinni předložit prodejci následující: ního používání www.my-joolz.com a nebo na www.joolz.cz 1) kompletní a správně vyplněný záruční list - p oškození vzniklé používáním přídavného neoriginálního 2) kopii pokladního dokladu stupátka (je dovoleno použít pouze certifikované stupátko 3) detailní zápis závady Joolz Day) V případě, že prodejce nebude ochoten opravu učinit, Bezpečnost a kvalita je hlavním kritériem, na který se Aluminiový rám kočárku Joolz Day je opatřen anodizova- kontaktujte výrobce. Jakékoliv opravy nebudou možností klade důraz při rozvoji kočárků značky Joolz. Mimo jiné nou povrchovou úpravou k ochraně před nežádoucími prodloužení záruční doby. Joolz značka naplňuje nejvyšší kritéria pro kvalitu dle vlivy mezi které se vztahuje koroze. Anodizované norem: aluminiové části jsou náchylné na čistící prostředky na Záruční list naleznete na webu www.my-joolz.com. bázi kyselin a olejů, které mohou způsobit skvrny a změnu Zde nutné vyplnit výrobní číslo rámu kočárku, které je Evropských: EN 1888:2012 barvy aluminiových částí. Aluminiové části doporučujeme natištěno na průhledné nálepce umístěné na spodní...
  • Seite 37 facebook.com/myjoolz...

Inhaltsverzeichnis