Herunterladen Inhalt Inhalt Diese Seite drucken
Inhaltsverzeichnis

Werbung

Verfügbare Sprachen
  • DE

Verfügbare Sprachen

  • DEUTSCH, seite 1

Werbung

Inhaltsverzeichnis
loading

Inhaltszusammenfassung für auna IR-260

  • Seite 3: Inhaltsverzeichnis

    Sehr geehrter Kunde, wir gratulieren Ihnen zum Erwerb Ihres Gerätes. Lesen Sie die folgenden Hinweise sorgfältig durch und befolgen Sie diese, um möglichen Schäden vorzubeugen. Für Schäden, die durch Missachtung der Hinweise und unsachgemäßen Gebrauch entstehen, übernehmen wir keine Haftung. Scannen Sie den folgenden QR-Code, um Zugriff auf die aktuellste Bedienungsanleitung und weitere Informationen rund um das Produkt zu erhalten:...
  • Seite 4: Technische Daten

    TECHNISCHE DATEN Artikelnummer 10034908, 10034909 Netzwerk 802.11 b/g/n (WLAN) : WEP, WPA, Verschlüsselung WEP, WPA, WPA 2 (PSK), WPS Streaming UPnP, DLNA Unterstützte Dateitypen WMA, MP3, DC, 3.5 mm Line-Out-Anschluss, Verbindungen 3.5 mm Aux-in-Anschluss Input 100 – 240 V ~ 50/60 Hz, 0,2 A max Output 5 V / 1.5 A h 27...
  • Seite 5: Sicherheitshinweise

    SICHERHEITSHINWEISE Allgemeine Hinweise • Blitzschlag - Wenn Sie das Gerät länger nicht benutzen oder es gewittert, ziehen Sie den Stecker aus der Steckdose oder trennen Sie das Gerät vom Antennenanschluss. Dadurch werden Schäden am Produkt durch Blitzschlag und Überspannung vermieden. •...
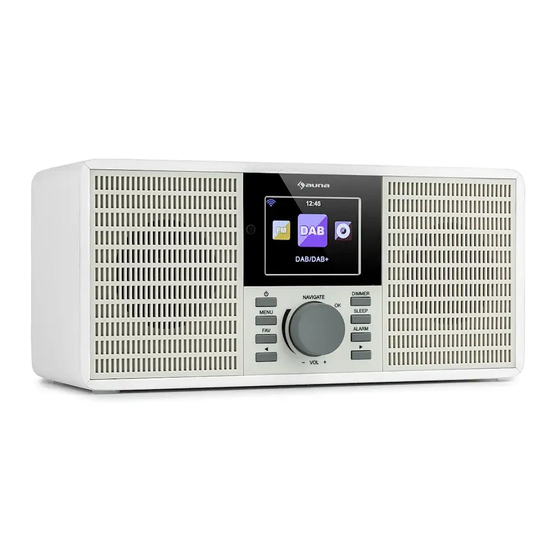
  • Seite 6: Geräteübersicht

    Besondere Hinweise • Kinder ab 8 Jahren, psychisch, sensorisch und körperlich eingeschränkte Menschen dürfen das Gerät nur benutzen, wenn sie vorher von einer für sie verantwortlichen Aufsichtsperson ausführlich mit den Funktionen und den Sicherheitsvorkehrungen vertraut gemacht wurden und die damit verbundenen Risiken verstehen. •...
  • Seite 7 POWER-Taste Nach rechts Menütaste Alarm Nach links Netzschalter (Ein/Aus) Favoriten Netzanschluss Navigieren/Lautstärke (zur Line-Out-Anschluss Auswahl drücken) Dimmer AUX-Anschluss Schlummertaste USB-Anschluss...
  • Seite 8: Fernbedienung

    FERNBEDIENUNG...
  • Seite 9 Taste zur Eingabe von Zahlen POWER-Taste und Buchstaben Taste zur Eingabe von Zahlen Nach oben und Buchstaben Taste zur Eingabe von Zahlen Nach links und Buchstaben Auswahltaste Equalizer Nach unten Stummschalten Home-Bildschirm Lautstärke erhöhen Modus Lautstärke senken Alarm Speichertaste Schlummertaste Dimmen Wiedergabe/ Pause Nächster Titel...
  • Seite 10: Installation

    INSTALLATION • Entpacken Sie alle Gerätebestandteile und entfernen Sie sämtliches Verpackungsmaterial. • Stecken Sie den Netzstecker des Geräts erst dann in die Steckdose, wenn Sie die Spannung der Steckdose überprüft haben und alle Verbindungen hergestellt wurden. INBETRIEBNAHME UND BEDIENUNG Erste Verwendung Stellen Sie vor der Verwendung sicher, dass die auf dem Typenschild des Geräts angegebene Spannung der Spannung der Steckdose entspricht.
  • Seite 11: Netzwerkeinstellung

    NETZWERKEINSTELLUNG Normale Netzwerkeinstellung Wählen Sie für die normale Netzwerkeinstellung „Yes“ (Ja) aus: Wählen Sie die benötigte AP mit dem Drehregler NAVIGATE/OK/VOL aus und bestätigen Sie Ihre Auswahl durch Drücken des Drehreglers. Geben Sie das für das gewünschte WLAN-Netzwerk benötigte WEP- oder WPA-Passwort mithilfe des Drehreglers NAVIGATE/VOL ein.
  • Seite 12: Internetradio

    INTERNETRADIO Versetzen Sie das Gerät in den Standbymodus und lassen Sie sich mit dem Drehregler NAVIGATE/OK/VOL im Hauptmenü die verschiedenen Optionen anzeigen. Drücken Sie den Drehregler, um in die Untermenüs zu gelangen oder um eine Einstellung zu bestätigen. Drücken Sie die Taste [<], um zum vorherigen Menü...
  • Seite 13 Verlauf Die 10 zuletzt gehörten Sender werden angezeigt. Suche Geben Sie den Namen des Radiosenders, welchen Sie hören möchten, in der Favoritenliste ein, falls dieser dort bereits gespeichert ist. Geben Sie die IP eines neuen Senders ein, um diesen in der Favoritenliste zu speichern. Es können maximal 250 Sender in der Favoritenliste gespeichert werden.
  • Seite 14: Usb-Wiedergabe

    USB-WIEDERGABE Menüs werden aus den Ordnern auf dem USB-Gerät generiert. Die Formate WMA/ MP3/ AAC/ AAC+/ FLAC und WAV werden unterstützt. FLAC unterstützt 16 Bit/ 8K ~ 48K Sampling Rate, 64 Kbps. Durchsuchen Sie die Ordner mit dem Drehregler NAVIGATE/OK/VOL. Auf dem Bildschirm werden der Name des Ordners und die Namen der Dateien angezeigt (nicht zwingend die Namen der Titel).
  • Seite 15: Informationscenter

    Wenn Sie alle Einstellungen erfolgreich abgeschlossen haben, können Sie Ihre eigene mediaU Senderliste speichern und anzeigen lassen. Falls im Radio noch zusätzliche Accounts gespeichert sind, können Sie den Account, welchen Sie aktuell nutzen im Einstellungsmenü aufrufen. Auf der Website können Sie Ihre Lieblingssender speichern, Ihren bevorzugten Standort/ das Genre/ Ihre Stadt einstellen.
  • Seite 16: Einstellungen

    EINSTELLUNGEN Analog/Digital Zeitanzeige Sobald es aktiviert wurde, wird My mediaU im My MediaU Hauptmenü angezeigt. Wenn mehrere mediaU Accounts im Radio existieren, wählen Sie zum Login den gewünschten Account aus. Drahtlose Netzwerkeinstellung: WLAN-Netzwerk Netzwerk aktivieren/ deaktivieren. Wenn Sie das WLAN- Netzwerk aktivieren, wählt das Gerät automatisch die benötigte AP aus.
  • Seite 17 Das Gerät verfügt über drei voneinander unabhängige Alarm Alarme. Zwei Alarme für die Einstellung der absoluten Zeit (Alarm 1 und Alarm 2) und einen Alarm für die Einstellung der relativen Zeit (NAP). Die werkseitig voreingestellt Alarmquelle ist Internetradio. Für Alarm 1 und Alarm 2 kann nur der gleiche Internetradiosender ausgewählt werden.
  • Seite 18 Stellen Sie das Gerät so ein, dass es nach einer Energiespar- bestimmten Zeit im Menü/ ohne Netzwerkverbindung modus automatisch in den Standbymodus wechselt. Stellen Sie die Zeit ein (5/15 30 Minuten) nach welcher das Gerät, wenn es nicht verwendet wird, automatisch in den Standbymodus wechselt.
  • Seite 19 Der werkseitig eingestellte Name des Geräts ist Gerät „AirMusic“. Sie können das Gerät in der DLNA- Einstellung am PC oder an einem mobilen Endgerät umbenennen. Scannen Sie den QR-Code, um zum Download der Air-Music-App zu gelangen. Sie können Local Radio, my mediaU, Internet Radio, Menü...
  • Seite 20: Dlna/ Upnp

    DLNA/ UPNP Sie können den Gerätenamen beliebig ändern. Die nachfolgenden Informationen sind eine Einführung, wie Sie Medien von einem PC oder einem anderen Medienserver streamen können. Lesen Sie sich gegebenenfalls die jeweiligen Informationen der Software/ Apps durch, welche Sie zum Streamen von Musik verwenden Stellen Sie sicher, dass die Musikdateien zum Streamen auf das Radio im Format MP3, WHA, WAV oder AAC sind.
  • Seite 21: Spotify Connect

    Wenn Sie ein Andoid Gerät oder iPhone/iPad verwenden, können Sie im jeweiligen App Store nach einer DLNA-App suchen und diese installieren. Für Androidgeräte werden die Apps „bubble UPnP“ und „Twonky Beam“ empfohlen und für iPads und iPhones die App „Twonky Beam“. Es kann vorkommen, dass einige Apps das Streamen von iPhones/iPods nicht unterstützen.
  • Seite 22: Aux-In-Anschluss

    Audio-Quellgerät niedrig ein. Schließen Sie die externe Audioquelle an die 3,5-mm-Stereobuchse AUX IN an. BT-VERBINDUNG Hinweis: Der Pairing-Name des Geräte lautet IR-260. Drücken Sie entweder so lange die Taste MODE, bis auf dem Bildschirm „BT“ angezeigt wird oder wählen Sie im Hauptmenü BT aus. Wählen Sie in der Geräteliste Ihres mobilen Endgeräts das Radio aus und klicken Sie zum...
  • Seite 23: Fm-Betrieb

    FM-BETRIEB Wählen Sie auf dem Hauptbildschirm den FM-Modus mit dem Navigationsknopf oder mit den Navigationstasten der Fernbedienung aus. Nach der Auswahl startet der FM-Modus auf der Frequenz 87.5 MHz. Um alle Sender mit starkem Signal zu speichern, drücken Sie den Navigationsknopf. Der Bildschirm zeigt [Auto-Scan?] an. Wählen Sie „Yes“ (JA).
  • Seite 24: Dab+ Betrieb

    DAB+ BETRIEB Wählen Sie auf dem Hauptbildschirm den DAB/DAB+ Modus mit dem Navigationsknopf oder mit den Navigationstasten der Fernbedienung aus. Bei der ersten Verwendung des DAB-Modus startet das Gerät mit der Suche nach DAB-Sendern. Der Bildschirm zeigt [Scanning] an. Während der Suche zeigt der Bildschirm an, wie viele Sender bereits gefunden wurden.
  • Seite 25: Hinweise Zur Entsorgung

    HINWEISE ZUR ENTSORGUNG Befindet sich die linke Abbildung (durchgestrichene Mülltonne auf Rädern) auf dem Produkt, gilt die Europäische Richtlinie 2012/19/EU. Diese Produkte dürfen nicht mit dem normalen Hausmüll entsorgt werden. Informieren Sie sich über die örtlichen Regelungen zur getrennten Sammlung elektrischer und elektronischer Gerätschaften.
  • Seite 27 Dear Customer, Congratulations on purchasing this device. Please read the following instructions carefully and follow them to prevent possible damages. We assume no liability for damage caused by disregard of the instructions and improper use. Scan the QR code to get access to the latest user manual and more product information.
  • Seite 28: Technical Data

    TECHNICAL DATA Item number 10034908, 10034909 Network 802.11 b/g/n (WLAN) : WEP, WPA, Encryption WEP, WPA, WPA 2 (PSK), WPS Streaming UPnP, DLNA Supported file types WMA, MP3, DC, 3.5 mm Line-Out connection, Connections 3.5 mm Aux-in connection Input 100 – 240 V ~ 50/60 Hz, 0,2 A max Output 5 V / 1.5 A Power consumption...
  • Seite 29: Safety Instructions

    SAFETY INSTRUCTIONS General information • Lightning - If you are not going to use the device for a long time or if there is a storm, disconnect the plug from the electrical outlet and disconnect the device from the antenna connector. This will avoid damage to the product that may be caused by lightning or overvoltage.
  • Seite 30: Product Overview

    Special Instructions • This device may be only used by children 8 years old or older and persons with limited physical, sensory and mental capabilities and / or lack of experience and knowledge, provided that they have been instructed in use of the device by a responsible person who understands the associated risks.
  • Seite 31 POWER button To the right Menu button Alarm To the left Power switch (On/Off) Favorites DC IN Navigating/Volume (press to Line-Out connection select) Dimmer AUX connection Sleep button USB connection...
  • Seite 32: Remote Control

    REMOTE CONTROL...
  • Seite 33 Key for entering numbers POWER button and letters Key for entering numbers To the top and letters Key for entering numbers To the left and letters Selection key Equalizer Down Mute Home screen Increase volume Mode Decrease volume Alarm Preset button Sleep button Dimming Play/Pause...
  • Seite 34: Installation

    INSTALLATION • Unpack all parts of the device and remove all packing material. • Do not insert the power plug of the appliance into the power outlet until you have checked the voltage of the outlet and all connections have been made.
  • Seite 35: Network Setting

    NETWORK SETTING Normal network setting Select „Yes“ for the normal network setting: Select the AP you need with the NAVIGATE/OK/VOL knob and confirm your selection by pressing the knob. Enter the WEP or WPA password required for the desired wireless network using the NAVIGATE/VOL knob.
  • Seite 36: Internet Radio

    INTERNET RADIO Put the unit in standby mode and use the NAVIGATE/OK/VOL knob in the main menu to display the various options. Press the control dial to enter the submenus or to confirm a setting. Press the [<] button to return to the previous menu.
  • Seite 37 History The 10 most recently listened to stations are displayed. Search Enter the name of the radio station you want to listen to in the Favourites list if it is already stored there. Enter the IP of a new station to save it in the Favourites list.
  • Seite 38: Usb Playback

    USB PLAYBACK Menus are generated from the folders on the USB device. WMA/ MP3/ AAC/ AAC+/ FLAC and WAV formats are supported. FLAC supports 16 bit/ 8K ~ 48K sampling rate, 64 Kbps. Browse the folders using the NAVIGATE/ OK/VOL. knob. The name of the folder and the names of the files will be displayed on the screen (not necessarily the names of the tracks).
  • Seite 39: Information Center

    When you have successfully completed all settings, you can save and display your own mediaU channel list. If there are additional accounts stored in the radio, you can call up the account you are currently using in the settings menu. On the website you can save your favourite stations, set your preferred location/ genre/ city.
  • Seite 40: Settings

    SETTINGS Analogue/digital Time display Once activated, My mediaU is displayed in the main My mediaU menu. If there are several mediaU accounts on the radio, select the desired account to login. Wireless network setting: Enable/disable wireless Network network. When you enable the wireless network, the unit automatically selects the AP you need.
  • Seite 41 The device has three independent alarms. Two alarms Alarm for setting the absolute time (Alarm 1 and Alarm 2) and one alarm for setting the relative time (NAP). The factory default alarm source is Internet radio. Only the same Internet radio station can be selected for Alarm 1 and Alarm 2.
  • Seite 42 Set the unit to automatically enter standby mode after Energy-saving a certain time in the menu/no network connection. mode Set the time (5/15 30 minutes) after which the unit automatically enters standby mode when not in use. It is also possible to disable this function. You can use the Sleep Timer to set the time until the Sleep timer unit switches off automatically.
  • Seite 43 The factory default name of the unit is "AirMusic". You Device can rename the unit in the DLNA setting on a PC or mobile device. Scan the QR code to access the AirMusic app download. You can display Local Radio, my mediaU, Internet Menu Radio, Sleep Radio, USB, UPNP, Media Center, Spotify Connect, Information Center, BT, Timer and Alarm on...
  • Seite 44: Dlna/ Upnp

    DLNA/ UPNP You can change the device name as required. The following information is an introduction to how to stream media from a PC or other media server. If necessary, check the information of the software/apps you are using to stream music.
  • Seite 45: Spotify Connect

    If you are using an Andoid device or iPhone/iPad, you can search for and install a DLNA app in the respective App Store. For Android devices the apps „bubble UPnP“ and „Twonky Beam“ are recommended and for iPads and iPhones the app „Twonky Beam“. It may happen that some apps do not support streaming from iPhones/iPods.
  • Seite 46: Aux-In Connection

    Connect the external audio source to the 3.5 mm stereo AUX IN jack. BT CONNECTION Note: The pairing name of the device is IR-260. Either press the MODE button until the screen displays „BT“ or select BT from the main menu. Select the radio in the device list of your mobile device and click on it to pair.
  • Seite 47: Fm Operation

    FM OPERATION Select FM mode on the main screen using the navigation knob or the navigation buttons on the remote control. After selection, the FM mode starts on the 87.5 MHz frequency. To store all stations with strong signals, press the navigation knob. The screen displays [Auto Scan?].
  • Seite 48: Dab+ Operation

    DAB+ OPERATION On the main screen, select DAB/DAB+ mode using the navigation knob or the navigation buttons on the remote control. The first time you use DAB mode, the unit will start searching for DAB stations. The screen displays [Scanning]. While scanning, the screen shows how many stations have already been found.
  • Seite 49: Hints On Disposal

    HINTS ON DISPOSAL According to the European waste regulation 2012/19/ EU this symbol on the product or on its packaging indicates that this product may not be treated as household waste. Instead it should be taken to the appropriate collection point for the recycling of electrical and electronic equipment.
  • Seite 51 Estimado cliente: Le felicitamos por la adquisición de este producto. atentamente siguiente manual siga cuidadosamente las instrucciones de uso con el fin de evitar posibles daños. La empresa no se responsabiliza de los daños ocasionados por un uso indebido del producto o por haber desatendido las indicaciones de seguridad.
  • Seite 52: Datos Técnicos

    DATOS TÉCNICOS Número de artículo 10034908, 10034909 802,11 b/g/n (WLAN): WEP, WPA, Codificación WPA 2(PSK), WPS Transmisión UPnP, DLNA Tipo de archivo compatible WMA, MP3, Conexiones CC, salida de línea de 3,5 mm Entrada 100 – 240 V ~ 50/60 Hz, 0,2 A máx. Salida 5V/1,5A Consumo eléctrico...
  • Seite 53: Indicaciones De Seguridad

    INDICACIONES DE SEGURIDAD Indicaciones generales • Relámpago - Si no va a utilizar el aparato durante un periodo largo de tiempo o si hay una tormenta eléctrica, desenchufe el aparato de la toma de corriente y desconecte el conector de antena. De este modo, protegerá...
  • Seite 54: Vista General Del Aparato

    Indicaciones especiales • Este aparato puede ser utilizado por niños mayores de 8 años y personas con discapacidades físicas, sensoriales y mentales y/o con falta de experiencia y conocimientos, siempre y cuando hayan sido instruidos sobre el uso del aparato y comprendan los peligros y riesgos asociados.
  • Seite 55 Botón de encendido A la derecha Botón de menú Alarma Interruptor de encendido A la izquierda (On/Off) Favoritos Conexión a la red Navegación/Volumen (pulse Conexión de la línea de para seleccionar) salida Dimmer Conexión AUX Botón para dormir Conexión USB...
  • Seite 56: Mando A Distancia

    MANDO A DISTANCIA...
  • Seite 57 Botón para introducir Botón POWER números y letras Botón para introducir Flecha Arriba números y letras Botón para introducir Botón Atrás números y letras Botón Seleccionar Ecualizador Flecha Abajo Función Silencio Botón Pantalla inicio Aumentar volumen Modo Disminuir volumen Alarma Botón de Memoria Botón Silencio (MUTE) Botón de Atenuación...
  • Seite 58: Instalación

    INSTALACIÓN • Extraiga todas las piezas y retire el material de embalaje. • Antes de conectar la radio a la toma de corriente, compruebe que la tensión de su toma de corriente es compatible con la tensión especificada en la placa técnica del aparato y que ha conectado todas las piezas.
  • Seite 59: Configuración De Red

    CONFIGURACIÓN DE RED Configuración de red normal Seleccione «Sí» para configurar la configuración de red normal. Seleccione el punto de acceso (AP) necesario girando la perilla NAVIGATE/OK/VOL. Púlsela para confirmar. Con la ayuda de la perilla NAVIGATE/OK/VOL, introduzca la contraseña WEP o WPA necesaria para la red WLAN elegida. Pulse [>] para seleccionar el siguiente carácter.
  • Seite 60: Radio De Internet

    RADIO DE INTERNET Pulse POWER para que la radio entre en modo Standby y utilice la perilla NAVIGATE/OK/VOL para navegar por el menú principal. Pulse la perilla para acceder a los submenús o para confirmar las configuraciones. Pulse el botón [<] para acceder al menú anterior. Después de conectarse con éxito a una emisora de radio, verá...
  • Seite 61 Historial Se muestran las 10 últimas emisoras escuchadas. Buscar Introduzca en la lista de favoritos el nombre de la emisora de radio que desea escuchar (en caso de que está guardada). Añada una nueva radio introduciendo la dirección IP para guardarla en la lista de favoritos. Puede guardar hasta 250 emisoras en la lista de favoritos.
  • Seite 62: Reproducción Mediante Usb

    REPRODUCCIÓN MEDIANTE USB Los menús se generan a partir de las carpetas ubicadas en el dispositivo USB. La radio es compatible con los formatos WMA/MP3/AAC/AAC+/FLAC y WAV. FLAC soporta 16 Bit/ 8K ~ 48K de frecuencia de muestreo, 64 Kbps. Navegue por las carpetas con la perilla NAVIGATE/OK/VOL.
  • Seite 63: Centro De Información

    Una vez configurado correctamente el sistema, podrá guardar y visualizar su propia lista de emisoras mediaU. Si tiene varias cuentas guardadas en el aparato, puede seleccionar la cuenta utilizada actualmente en la configuración. En la página web puede guardar sus emisoras favoritas y clasificarlas según la ubicación, el género o la ciudad.
  • Seite 64: Ajustes

    AJUSTES Analógico, digital Indicador de hora Cuando está activada, MyMediaU aparece en el menú Mi MediaU principal. Si ha creado distintas cuentas en la radio de internet, inicie sesión en la cuenta deseada. Configuración de la red inalámbrica: activar o desactivar la red WLAN.
  • Seite 65 La radio dispone de 3 alarmas independientes: 2 Alarma alarmas para una hora fija configurada (Alarma 1, Alarma 2) y una alarma de repetición (NAP). El tono de alarma por defecto es la radio de internet. Para la Alarma 1 y la Alarma 2 solo se puede seleccionar la misma emisora.
  • Seite 66 Configurar el tiempo después del cual la radio entra Modo de ahor- en modo Standby si se encontraba en el menú o sin ro de energía conexión a red. Seleccione el tiempo (5/15/30 minutos) después del cual el aparato pase al modo Standby automáticamente si no se utiliza.
  • Seite 67 El nombre por defecto de la radio es «AirMusic». Puede Aparato renombrar el aparato en la configuración DLNA en el PC o dispositivo móvil. Escanee el código QR para descargar la aplicación Air Music. Puede ver en la pantalla radio local, mi mediaU, radio Menú...
  • Seite 68: Dlna/Upnp

    DLNA/UPNP Puede modificar el nombre de la radio como desee. La información presentada más abajo es una introducción de cómo puede transmitir los archivos desde un PC o de otros servidores de medios. Lea las instrucciones del software o la aplicación que utilice para la reproducción de música y asegúrese de que los archivos que desea reproducir en la radio tengan el formato MP3, WHA, WAV o AAC.
  • Seite 69: Conexión A Spotify

    Si utiliza un smartphone con sistema operativo Android o iPhone/iPad, puede utilizar cualquier aplicación DLNA comercial de la Google Play Store o App Store. Para los dispositivos Android, se recomiendan las aplicaciones «bubble UpnP» y «Twonky Beam». Para los iPads y iPhones se recomienda la aplicación «Twonky Beam».
  • Seite 70: Conexión Aux-In

    AUX IN estéreo de 3,5 mm. CONEXIÓN BT Nota: El nombre de la pareja del dispositivo es IR-260. Mantenga pulsado el botón MODE hasta que en la pantalla aparezca BT o seleccione BT en el menú principal. Busque en la lista de dispositivos BT del dispositivo externo el nombre de la radio y haga clic en acoplar.
  • Seite 71: Modo Fm

    MODO FM Seleccione en el menú principal el modo FM con el regulador de navegación de la radio o con los botones de navegación del mando a distancia. Tras la selección, la radio empieza a funcionar en modo FM en la frecuencia 87,5 MHz.
  • Seite 72: Modo Dab

    MODO DAB+ Seleccione en el menú principal el modo DAB/DAB+ con el regulador de navegación de la radio o con los botones de navegación del mando a distancia. Si inicia el modo DAB por primera vez, la radio comienza a buscar emisoras DAB disponibles.
  • Seite 73: Retirada Del Aparato

    RETIRADA DEL APARATO Si el aparato lleva adherida la ilustración de la izquierda (el contenedor de basura tachado) entonces rige la normativa europea, directiva 2012/19/UE. Este producto no debe arrojarse a un contenedor de basura común. Infórmese sobre las leyes territoriales que regulan la recogida separada de aparatos eléctricos y electrónicos.
  • Seite 75 Cher client, Toutes nos félicitations pour l’acquisition de ce nouvel appareil. Veuillez lire attentivement les instructions suivantes de branchement et d’utilisation afin d’éviter d’éventuels dommages. Le fabricant ne saurait être tenu pour responsable des dommages dus au non-respect des consignes de sécurité et à la mauvaise utilisation de l’appareil.
  • Seite 76: Fiche Technique

    FICHE TECHNIQUE Numéro d'article 10034908, 10034909 Réseau 802.11 b/g/n (WLAN) : WEP, WPA, Cryptage WPA 2(PSK), WPS Streaming UPnP, DLNA Formats de fichiers compatibles WMA,MP3, Connexions CC, 3,5 mm prise Line Out Entrée 100 – 240 V ~ 50/60 Hz, 0,2 A max Sortie 5 V/ 1,5 A Consommation...
  • Seite 77: Consignes De Sécurité

    CONSIGNES DE SÉCURITÉ Consignes générales • Foudre - Si vous n‘utilisez pas l‘appareil pendant une longue période ou s‘il y a de l‘orage, débranchez la fiche de la prise et débranchez l‘antenne de l‘appareil. Cela évite d‘endommager le produit à cause de la foudre et des surtensions.
  • Seite 78: Aperçu De L'appareil

    Consignes particulières • Cet appareil peut être utilisé par des enfants de 8 ans ou plus et des personnes ayant des capacités physiques, sensorielles et mentales limitées et / ou dénuées d‘expérience et de connaissances, à condition d‘avoir été instruits au fonctionnement de l‘appareil par une personne responsable et d‘en comprendre les risques associés.
  • Seite 79 Bouton POWER A droite Bouton de menu Alarme Interrupteur d'alimentation A gauche (On/Off) Favoris Connexion au réseau Naviguer/Volume (appuyer Connexion en sortie de ligne sur pour sélectionner) Dimmer Connexion AUX Bouton de répétition Connexion USB...
  • Seite 80: Télécommande

    TÉLÉCOMMANDE...
  • Seite 81 Touche pour saisir des Bouton POWER chiffres et des lettres Touche pour saisir des Vers le haut chiffres et des lettres Touche pour saisir des Vers la gauche chiffres et des lettres Touche de sélection Egaliseur Vers le bas Fonction muet Ecran d'accueil Pour augmenter le volume Mode...
  • Seite 82: Installation

    INSTALLATION • Déballez tous les composants de l‘appareil et retirez tout le matériel d‘emballage. • N‘insérez pas la fiche secteur de l‘appareil dans la prise tant que vous n‘avez pas vérifié la tension de la prise et que toutes les connexions n‘ont pas été...
  • Seite 83: Configuration Du Réseau

    CONFIGURATION DU RÉSEAU Configuration normale du réseau Sélectionnez „Yes“ („Oui“) pour une configuration normale du réseau : Sélectionnez l‘AP requis avec la commande NAVIGATE / OK / VOL et confirmez votre sélection en appuyant sur la commande. Saisissez le mot de passe WEP ou WPA requis pour le réseau Wifi souhaité...
  • Seite 84: Radio Internet

    RADIO INTERNET Mettez l‘appareil en mode veille et utilisez la commande NAVIGATE / OK / VOL pour afficher les différentes options dans le menu principal. Appuyez sur la molette de commande pour accéder aux sous-menus ou pour confirmer un paramètre. Appuyez sur la touche [<] pour revenir au menu précédent.
  • Seite 85 Historique Liste des 10 dernières stations écoutées. Recherche Saisissez le nom de la station de radio que vous souhaitez écouter dans la liste des favoris si elle y est déjà enregistrée. Saisissez l‘IP d‘une nouvelle station pour l‘enregistrer dans la liste des favoris. Vous pouvez enregistrer un maximum de 250 stations dans la liste des favoris.
  • Seite 86: Lecture Par Usb

    LECTURE PAR USB Les menus sont générés à partir des dossiers sur le périphérique USB. Les formats WMA / MP3 / AAC / AAC + / FLAC et WAV sont pris en charge. FLAC prend en charge un taux d‘échantillonnage de 16 bits / 8K ~ 48K, 64 Kbps. Recherchez les dossiers avec la commande NAVIGATE / OK / VOL.
  • Seite 87: Centre D'information

    Une fois tous les réglages effectués, vous pouvez enregistrer et afficher votre propre liste de stations mediaU. S‘il y a des comptes supplémentaires enregistrés sur la radio, vous pouvez appeler le compte que vous utilisez actuellement dans le menu des paramètres.
  • Seite 88: Paramètres

    PARAMÈTRES Analogique / numérique Affichage de l'heure Dès qu'il est activé, My mediaU s'affiche dans le menu My MediaU principal. S'il y a plusieurs comptes mediaU sur la radio, sélectionnez le compte souhaité pour vous connecter. Configuration du réseau sans fil : activer / désactiver Réseau le réseau Wifi.
  • Seite 89 L'appareil dispose de trois alarmes indépendantes. Alarme Deux alarmes pour régler l'heure absolue (alarme 1 et alarme 2) et une alarme pour régler l'heure relative (NAP). La source d'alarme par défaut est la radio Internet. Les alarme 1 et 2 ne peuvent pas avoir pour source des stations de radio Internet différentes.
  • Seite 90: Minuterie D'arrêt Programmable

    Réglez l'appareil pour qu'il passe automatiquement Mode écono- en veille après un certain temps dans le menu / sans mie d'énergie connexion réseau. Réglez la durée (5/15 30 minutes) après laquelle l'appareil passe automatiquement en mode veille lorsqu'il n'est pas utilisé. Vous pouvez également désactiver cette fonction.
  • Seite 91 Le nom d'usine de l'appareil est "AirMusic". Vous Appareil pouvez renommer l'appareil dans le paramètre DLNA sur le PC ou sur un appareil mobile. Scannez le code QR pour télécharger l'application Air Music. Vous pouvez afficher sur l'écran Local Radio, my Menu mediaU, Internet Radio, Sleep Radio, USB, UPNP, Media Center, Spotify Connect, Information Center, BT, et...
  • Seite 92: Dlna/ Upnp

    DLNA/ UPNP Vous pouvez modifier le nom de l‘appareil comme vous le souhaitez. Les informations suivantes vous présentent comment diffuser du contenu multimédia à partir d‘un PC ou d‘un autre serveur multimédia. Si nécessaire, lisez les informations respectives des logiciels / applications que vous utilisez pour diffuser de la musique.
  • Seite 93: Spotify Connect

    Si vous utilisez un appareil Andoid ou un iPhone / iPad, vous pouvez rechercher et installer une application DLNA dans l‘app store respectif. Les applications „bubble UPnP“ et „Twonky Beam“ sont recommandées pour les appareils Android et l‘application „Twonky Beam“ pour iPads et iPhones. Certaines applications peuvent ne pas prendre en charge les iPhones / iPods en streaming.
  • Seite 94: Connexion Aux-In

    Connectez la source audio externe à la prise AUX IN stéréo de 3,5 CONNEXION BT Remarque : le nom d‘appariement de l‘appareil est IR-260. Appuyez sur le bouton MODE jusqu‘à ce que „BT“ apparaisse à l‘écran ou sélectionnez BT dans le menu principal. Sélectionnez la radio dans la liste des appareils de votre appareil mobile et cliquez dessus pour l‘appairer.
  • Seite 95: Utilisation De La Fm

    UTILISATION DE LA FM Sur l‘écran principal, sélectionnez le mode FM avec le bouton de navigation ou avec les touches de navigation de la télécommande. Après sélection, le mode FM démarre sur la fréquence 87,5 MHz. Pour mémoriser toutes les stations ayant un signal fort, appuyez sur le bouton de navigation.
  • Seite 96: Utilisation De La Radio Dab

    UTILISATION DE LA RADIO DAB+ Sur l‘écran principal, sélectionnez le mode DAB / DAB + avec le bouton de navigation ou avec les touches de navigation de la télécommande. Lorsque vous utilisez le mode DAB pour la première fois, l‘appareil démarre la recherche des stations DAB.
  • Seite 97: Conseils Pour Le Recyclage

    CONSEILS POUR LE RECYCLAGE Le pictogramme ci-contre apposé sur le produit signifie que la directive européenne 2012/19/UE s‘applique (poubelle à roues barrée d’une croix). Ces produits ne peuvent être jetés dans les poubelles domestiques courantes. Renseignez-vous concernant les règles appliquées pour la collecte d’appareils électriques et électroniques.
  • Seite 99 Gentile cliente, La ringraziamo per aver acquistato il dispositivo. La preghiamo di leggere attentamente le seguenti istruzioni per l’uso e di seguirle per evitare possibili danni tecnici. Non ci assumiamo alcuna responsabilità per danni scaturiti da una mancata osservazione delle avvertenze di sicurezza e da un uso improprio del dispositivo.
  • Seite 100: Dati Tecnici

    DATI TECNICI Numero articolo 10034908, 10034909 Rete 802.11 b/g/n (Wi-Fi): WEP, WPA, Codifica WPA 2(PSK), WPS Streaming UPnP, DLNA File supportati WMA, MP3 Connessioni DC, connessione Line-Out 3,5 mm Input 100 – 240 V ~ 50/60 Hz, 0,2 A max. Output 5 V/1,5 A Consumo energetico...
  • Seite 101: Avvertenze Di Sicurezza

    AVVERTENZE DI SICUREZZA Avvertenze generali • Colpo di fulmine – Se il dispositivo non viene utilizzato o c’è un temporale, staccare la spina dalla presa di corrente e scollegare il dispositivo dalla connessione dell’antenna. In questo modo si evitano danni al dispositivo dovuti a colpi di fulmine o sovratensione. •...
  • Seite 102: Descrizione Del Dispositivo

    Avvertenze particolari • Questo dispositivo può essere utilizzato da bambini a partire da 8 anni e da persone con limitate capacità fisiche e psichiche o con conoscenza ed esperienza limitate, solo se sono stati istruiti sulle modalità d’uso e comprendono i rischi e i pericoli connessi. •...
  • Seite 103 Pulsante POWER A destra Tasto menu Allarme Interruttore di alimentazione A sinistra (On/Off) Preferiti Collegamento alla rete Navigazione/Volume Collegamento Line-Out (premere per selezionare) Dimmer Collegamento AUX Pulsante Snooze Collegamento USB...
  • Seite 104: Telecomando

    TELECOMANDO...
  • Seite 105 Power Inserimento numeri e lettere In alto Inserimento numeri e lettere Sinistra Inserimento numeri e lettere Selezione Equalizzatore In basso Muto Schermata Home Alzare il volume Modalità Abbassare il volume Sveglia Salvataggio Snooze Dimmer Play/Pausa Titolo successivo Titolo precedente/Indietro Inserimento numeri e lettere Inserimento numeri e lettere Inserimento numeri e lettere Inserimento numeri e lettere...
  • Seite 106: Installazione

    INSTALLAZIONE • Disimballare tutti i componenti del dispositivo e rimuovere tutto il materiale d’imballaggio. • Collegare la spina del dispositivo alla presa elettrica solo dopo aver controllato la tensione della presa in questione e aver realizzato tutti i collegamenti. MESSA IN FUNZIONE E UTILIZZO Primo utilizzo Prima di ogni utilizzo, assicurarsi che la tensione sulla targhetta del dispositivo coincida con quella della presa elettrica.
  • Seite 107: Impostazioni Di Rete

    IMPOSTAZIONI DI RETE Impostazioni di rete generiche Selezionare “Yes” (sì) per la configurazione di rete normale. Selezionare il punto di accesso necessario (AP) ruotando la manopola NAVIGATE/OK/VOL e confermare premendo la manopola. Inserire la password WEP o WPA per la rete Wi-Fi desiderata utilizzando la manopola NAVIGATE/VOL. Premere > per selezionare la lettera/la cifra successiva.
  • Seite 108: Internet Radio

    INTERNET RADIO Mettere il dispositivo in modalità standby e farsi mostrare le diverse opzioni nel menu principale con la manopola NAVIGATE/OK/VOL. Premere la manopola per accedere ai sottomenu o per confermare un’impostazione. Premere < per tornare al menu precedente. Quando è stato stabilito il collegamento con un’emittente a piacere, vengono mostrate le relative informazioni sul display.
  • Seite 109 Ricerca Inserire il nome dell’emittente che si desidera ascoltare nella lista dei preferiti, se questa è già stata salvata. Inserire l’IP di una nuova emittente per salvarla nella lista dei preferiti. Nella lista possono essere salvate fino a 250 emittenti. Media Center Selezionare la modalità...
  • Seite 110: Riproduzione Usb

    RIPRODUZIONE USB I menu vengono generati dalle cartelle sul dispositivo USB. Sono supportati formati WMA/MP3/AAC/AAC+/FLAC e WAV. FLAC supporta 16 Bit/8K ~ 48K sampling rate, 64 kbps. Cercare nelle cartelle con NAVIGATE/OK/ VOL. Sullo schermo vengono mostrati il nome della cartella e i nomi dei file (non necessariamente i nomi dei titoli).
  • Seite 111: Centro Informazioni

    Una volta concluse le impostazioni con successo, è possibile salvare e visualizzare la lista personale delle emittenti mediaU. Non è necessario inserire nome utente e password nel dispositivo. Se nel dispositivo sono salvati diversi account, è possibile selezionare l’account attualmente in uso nel menu delle impostazioni. Sulla pagina web è...
  • Seite 112: Impostazioni

    IMPOSTAZIONI Analogica/digitale Indicazione dell’ora Quando attivato, My MediaU si trova nel menu My MediaU principale. Se sono disponibili diversi account My MediaU, selezionare l’account desiderato per il login. Impostazione rete senza fili: attivare/disattivare la rete Rete Wi-Fi. Se si attiva la rete Wi-Fi, il dispositivo seleziona automaticamente il punto di accesso (AP) necessario.
  • Seite 113 Ci sono tre sveglie indipendenti. Due sveglie con Sveglia impostazione dell’ora fissa (Sveglia 1 e Sveglia 2) e una sveglia per impostare il tempo relativo (NAP). La fonte audio della sveglia predefinita è la web radio. Per Sveglia 1 e Sveglia 2 è possibile impostare la stessa emittente radio.
  • Seite 114 Impostare il dispositivo in modo tale che passi alla Gestione ener- modalità standby dopo un determinato tempo nel getica menu/senza connessione alla rete. Selezionare il tempo desiderato (5/15/30 minuti) prima del passaggio automatico alla modalità standby. Questa modalità può essere disattivata. Impostare il tempo che deve trascorrere prima dello Timer di spegnimento automatico.
  • Seite 115 Il nome predefinito in fabbrica del dispositivo è Dispositivo “AirMusic”. Il dispositivo può essere rinominato nell’impostazione DLNA su PC o dispositivo mobile. Scansionare il codice QR per raggiungere il download della app Air-Music. L’impostazione predefinita in fabbrica è “Normal”. Sono Equalizzatore disponibili Flat, Jazz, Rock, Soundtrack, Classical, Pop, News o My EQ.
  • Seite 116: Dlna/Upnp

    DLNA/UPNP Il nome del dispositivo può essere modificato a piacere. Le informazioni seguenti sono un’introduzione alla creazione di streaming di file da PC o altri server. Leggere la guida al software/all’app che si utilizza per lo streaming musicale. I file musicali devono essere in formato MP3, WHA, WAV o AAC per permettere lo streaming dalla radio.
  • Seite 117: Spotify Connect

    Se si utilizza un dispositivo Android o un iPhone/iPad, è possibile cercare nei rispettivi App Store una App DLNA e installarla. Per dispositivi Android consigliamo le app “bubble UPnP” e “Twonky Beam”, mentre per iPhone e iPad “Twonky Beam”. Alcune app potrebbero non supportare lo streaming da iPhone/iPod.
  • Seite 118: Collegamento Aux-In

    Collegare la sorgente audio esterna alla presa AUX IN stereo da 3,5 mm. COLLEGAMENTO BT Nota: Il nome di accoppiamento del dispositivo è IR-260. Premere MODE fino a quando compare “BT” sul display o selezionare BT nel menu principale. Cercare nella lista dei dispositivi del dispositivo esterno la radio e cliccarci sopra per l’accoppiamento.
  • Seite 119: Modalità Fm

    MODALITÀ FM Selezionare la modalità FM nella schermata principale con la manopola di navigazione o con i tasti di navigazione sul telecomando. Dopo la selezione, la modalità FM inizia dalla frequenza 87,5 MHz. Per salvare tutte le emittenti con segnale intenso, premere la manopola di navigazione.
  • Seite 120: Modalità Dab

    MODALITÀ DAB+ Selezionare la modalità DAB/DAB+ nella schermata principale con la manopola di navigazione o con i tasti di navigazione sul telecomando. Quando si utilizza la modalità DAB per la prima volta, il dispositivo inizia la ricerca di emittenti DAB. Lo schermo mostra [Scanning]. Durante la ricerca, lo schermo indica quante emittenti sono già...
  • Seite 121: Smaltimento

    SMALTIMENTO Se sul prodotto è presente la figura a sinistra (il cassonetto dei rifiuti mobile sbarrato), si applica la direttiva europea 2012/19/UE. Questi prodotti non possono essere smaltiti con i rifiuti normali. Informarsi sulle disposizioni vigenti in merito alla raccolta separata di dispositivi elettrici ed elettronici. Non smaltire i vecchi dispositivi con i rifiuti domestici.

Inhaltsverzeichnis