Herunterladen Inhalt Inhalt Diese Seite drucken
auna 10009125 Bedienungsanleitung
Vorschau ausblenden Andere Handbücher für 10009125:

Werbung

Verfügbare Sprachen
  • DE

Verfügbare Sprachen

  • DEUTSCH, seite 1
IR 130 Internetradio
10009125 10022777
www.auna-multimedia.com

Werbung

Inhaltsverzeichnis
loading

Inhaltszusammenfassung für auna 10009125

  • Seite 1 IR 130 Internetradio 10009125 10022777 www.auna-multimedia.com...
  • Seite 2: Inhaltsverzeichnis

    Inhaltsverzeichnis Warnung Bedienelemente Erste Inbetriebnahme / Einstellungen Hauptmenü / Funktionen Meine Favoriten Internet Radio Mediacenter UPnP Mediendateien mittels Radio und UPnP finden und wiedergeben Windows PC für den Zugriff d. Radios auf Audiodateien via UPnP Server einstellen Wecker Sleep Timer Einstellungen Favoriten hinzufügen Streaming von Mobilgeräten...
  • Seite 3: Warnung

    Sehr geehrter Kunde, zunächst möchten wir Ihnen zum Erwerb Ihres Gerätes gratulieren. Bitte lesen Sie die folgenden Anschluss- und Anwendungshinweise sorgfältig durch und befolgen Sie diese um möglichen technischen Schäden vorzubeugen. Warnung • Das Gerät enthält Teile, die dem Benutzer nicht zugänglich sind. Reparaturen dürfen nur von qualifizier- ten Fachkräften durchgeführt werden.
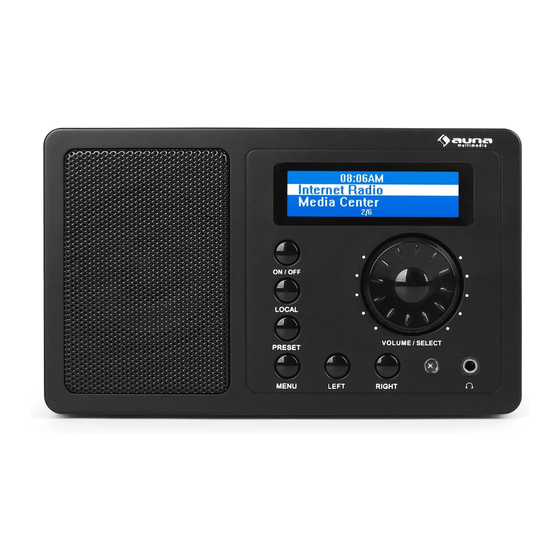
  • Seite 4: Bedienelemente

    Bedienelemente...
  • Seite 5 PRESET Display Sender als Favorit speichern (gedrückt hal- ten) bzw. aufrufen (kurz drücken) VOLUME / SELECT LEFT Drehen, um Lautstärke zu verändern; Zum vorigen Menü / Sender drücken, um aktuelle Auswahl zu bestätigen RIGHT Lautsprecher Ins nächste Menü / nächster Sender ON/OFF Kopfhöreranschluss LOCAL...
  • Seite 6: Erste Inbetriebnahme / Einstellungen

    Erste Inbetriebnahme / Einstellungen Folgen Sie diesen Schritten, um das Radio mit Ihrem W-LAN Netzwerk zu verbinden. • Schalten Sie das Radio ein: Stecken Sie das Stromkabel des Netzgerätes in den DC-Stromanschluss auf der Rückseite des Gerätes und schalten dann das Gerät ein. Achtung: Verwenden Sie nur das mitgelieferte Netzgerät.
  • Seite 7: Hauptmenü / Funktionen

    Das Gerät zeigt den Verbindungsaufbau generell mit dem Symbol in der linken oberen Display-Ecke an. Bei bestehender Verbindung erscheint an gleicher Stelle die Anzeige der Verbindungsqualität: Hauptmenü und Funktionen Drücken Sie MENU am Gerät oder auf der Fernbedienung, um das Hauptmenü anzuzeigen. Das Haupt- menü...
  • Seite 8: Upnp

    Mediencenter UPNP Sie können Medieninhalte von UPnP-fähigen Geräten (gewöhnlicherweise Computer) zum Beispiel via Win- dows Media Player streamen. Mediendateien mittels Radio und UPnP finden und wiedergeben: Sobald Sie den UPnP Server zum Teilen von Mediendateien mit dem Radio eingerichtet haben, können Sie diese über diese wie folgt wiedergeben.
  • Seite 9 Wählen Sie MEDIA SHARING und markieren Sie das UNKNOWN DEVICE. Klicken Sie auf ALLOW.
  • Seite 10: Wecker

    Wecker Wählen Sie ALARM im Hauptmenü oder drücken Sie die „ALARM“-Taste auf der Fernbedienung. Wählen Sie zwischen ALARM1 und ALARM2, um die unabhängig einstellbaren Weckzeiten einzustellen. Folgen Sie dem Alarm-Wizard, um die einzelnen Parameter zu editieren: • TIME: Stellen Sie die Weck-Uhrzeit ein. •...
  • Seite 11: Favorite Url Hinzufügen

    Datum und Uhrzeit: Stellen Sie hier die Uhrzeit sowie das Datum manuell ein oder wählen Sie USE NET- WORK TIME, damit das Gerät Datum und Uhrzeit automatisch aus dem Netzwerk bezieht. Sprache: Deutsch / Englisch Local Radio: Standard: Europa/UK; Ändern Sie, um über den Skytune-Weg direkten Zugriff auf die lokalen Sender zu haben.
  • Seite 12: Technische Daten

    Technische Daten Art. no. 10009125, 10022777 Stromversorgung Netzteil (AC 230-240V-50Hz -> DC 5V) Netzwerk IEEE802.11b/g/n Sicherheit WEP/WPA/WPA2 Maße 164 x 98 x 98 mm (B x H x T) Lieferumfang Gerät. Netzteil, Fernbedienung m. Batterie, Bedienungsanleitung Hinweise zur Entsorgung Befindet sich die linke Abbildung (durchgestrichene Mülltonne auf Rädern) auf dem Produkt, gilt die Europäische Richtlinie 2002/96/EG.
  • Seite 13: Important Safety Advice

    Dear Customer, Congratulations on purchasing this product. Please read and follow these instructions, in order to avoid damaging the item. We do not cover any damages that may arise from improper use of the item or the disregard of the safety instructions. Important Safety Advice •...
  • Seite 14 Controls...
  • Seite 15: Remote Control

    PRESET Display Save current station to presets VOLUME / SELECT LEFT Dial to change volume; Back / Previous / Left press to enter/confirm RIGHT Speaker Next / Right ON/OFF Headphones jack LOCAL Line Out Search local stations MENU DC socket Remote Control: Power Standby / On...
  • Seite 16: Initial Use

    Initial Use • Insert the adaptor plug into the DC socket located at the rear side of the radio. Plug the adaptor into a wall socket outlet. Caution: Use only the adaptor supplied with the radio. Connecting a power supply with a different rating will cause permanent damage to the radio and may be hazardous.
  • Seite 17 Main Menu & Operation Press <Menu> to return to the main menu or the key on the remote controller. You will see the item list: M . Use the SELECT-dial to scroll avouriteS nternet adio edia enter larM leep iMer onFiguration through (rotate) and press to select the currently highlighted item.
  • Seite 18: Media Center

    Media Center UPnP (Universal Plug and Play) You can stream music from the Networked device which supports UPnP function. For instance, most of the latest computer laptop supports UPnP, and you can stream music from Windows Media Player application on the computer and listen on your radio. •...
  • Seite 19 5. From the ‘Media Sharing’ windows , the radio will be listed as an unknown device. Click on the unknown device listed, then click the ‘Allow’ button and then click ‘OK’. Allowing the Radio to Connect: Music streaming via UPnP •...
  • Seite 20: Alarm Setting

    Alarm Setting Choose <Alarm> from the main menu or press the <Alarm> button on the remote controller. Select either Alarm 1 or Alarm 2, and choose <Turn on> to activate the Alarm. Follow the alarm wizard instructions to set the alarm. The wizard will guide you through the settings below: •...
  • Seite 21 • The DNS is set <Dynamic> by default. Select to change <Fixed> DNS according to your network con- dition. WIFI Channels Not all of the Wi-Fi channels are available in every country. There may be variation between different coun- tries. Therefore it is necessary to choose the Wi-Fi channels to ensure the Wi-Fi performs satisfactory. We have already set the channels according to the requirement in different countries.
  • Seite 22 Power Saving – the display will dim down after 15 seconds if no operation is made on the radio. Level: Bright and Dim Bright - the display will stay at the selected level when there is operation on the radio or if the mode is selected in <Normal>...
  • Seite 23: Technical Data

    Technical Data Art. no. 10009125, 10022777 Power supply AC adaptor (AC 230-240V-50Hz -> DC 5V Wireless network IEEE802.11b/g/n Security Protocol WEP/WPA/WPA2 Dimensions 164 x 98 x 98 mm (L x H x D) Scope of delivery Device, AC adaptor, RC w/ battery, instruction manual...
  • Seite 24 Chère cliente, cher client, Toutes nos félicitations pour l’acquisition de ce nouvel appareil. Veuillez lire attentivement et respecter les consignes suivantes de branchements et d’utilisation pour éviter d’éventuels dommages techniques. Avertissement • L’appareil contient des éléments non accessibles à l’utilisateur. Seul un professionnel qualifié est auto- risé...
  • Seite 25: Éléments De Commande

    Éléments de commande...
  • Seite 26 PRESET Affichage Enregistrer une station comme favorite (rester appuyer) ou la diffuser (appuyer brièvement VOLUME / SELECT LEFT Tourner pour modifier le volume ; Menu / station précédent(e) appuyer pour confirmer une sélection RIGHT Haut-parleur Menu / station suivant(e) ON/OFF Prise casque LOCAL Sortie Line...
  • Seite 27 Premier démarrage / Paramètres Suivre les étapes suivantes pour connecter la radio au réseau Wi-Fi. • Allumer la radio : brancher le câble d’alimentation de l’appareil à la prise secteur DC située à l’arrière de l’appareil et mettre l’appareil en marche. Attention : utiliser uniquement le bloc d’alimentation fourni.
  • Seite 28: Mes Favoris

    En général, le symbole apparaît dans le coin supérieur gauche de l’affichage pour signifier que la connexion est en cours. Lorsque la connexion est établie, le symbole apparaît au même endroit sur l’affichage pour indiquer la qualité de la connexion. Menu principal et fonctions Appuyer sur la touche MENU de l’appareil ou de la télécommande pour accéder au menu principal.
  • Seite 29: Centre Multimédia

    Centre multimédia UPNP Il est possible de diffuser en streaming des contenus de médias d’appareils configurés pour le UPnP.(habi- tuellement un ordinateur) via Windows Media Player. Trouver et diffuser des fichiers multimédia par la radio ou par UPnP : Une fois que le serveur UPnP a été configuré pour le partage de fichiers multimédia avec la radio, il est possible de lire ceux-ci comme suit : •...
  • Seite 30 Sélectionner MEDIA SHARING et cliquer sur UNKNOWN DEVICE. Puis cliquer sur ALLOW.
  • Seite 31 Réveil Sélectionner ALARM dans le menu principal ou appuyer sur la touche « ALARM » de la télécommande. Choi- sir entre ALARM1 et ALARM2 pour paramétrer indépendamment deux horaires de réveil différents. Suivre les étapes suivantes pour paramétrer chaque réveil : •...
  • Seite 32 • WIFI Channels Configurer ici les chaînes Wi-Fi (Standard : Europe et Royaume-Uni). Date & Time : régler manuellement l’heure et la date et sélectionner USE NETWORK TIME pour que la date et l’heure se synchronise automatiquement avec le réseau. Langues : Deutsch (Allemand) / English Local Radio: Standard : Europe/Royaume-Uni ;...
  • Seite 33: Fiche Technique

    Fiche technique Numéro d’article 10009125, 10022777 Alimentation électrique Bloc d’alimentation (AC 230-240V-50Hz -> DC 5V) Réseau IEEE802.11b/g/n Sécurité WEP/WPA/WPA2 Dimensions 164 x 98 x 98 mm (L x H x P) Appareil. Bloc d’alimentation, télécommande avec piles, mode Contenu de l’emballage d’emploi...
  • Seite 34: Avvertenze Di Sicurezza

    Gentile cliente, La ringraziamo per aver acquistato il nostro dispositivo. La preghiamo di leggere attentamente le seguenti istruzioni e di seguirle per evitare eventuali danni. Non ci assumiamo alcuna responsabilità per danni derivati da una mancata osservazione delle avvertenze di sicurezza e da un uso improprio del dispositivo.
  • Seite 35 Comandi...
  • Seite 36 PRESET Memorizzare una stazione tra i preferiti (tene- Display re premuto) e accedere alla stazione memoriz- zata (premere brevemente) VOLUME / SELECT LEFT Ruotare la manopola per regolare il volume; Tornare al menu precedente/canale premere per confermare la selezione attuale RIGHT Altoparlanti Passare al menu successivo/alla stazione successiva...
  • Seite 37: Prima Messa In Funzione / Impostazioni

    Prima messa in funzione / Impostazioni Seguire questa procedura per collegare la radio alla rete wireless. Accendere la radio: collegare l’alimentatore alla presa DC sul retro, quindi accendere il dispositivo. Attenzione: Utilizzare esclusivamente l‘alimentatore incluso nella consegna. Un alimentatore con di- versi valori di tensione può...
  • Seite 38 Sul display in alto a sinistra compare il simbolo che indica che il dispositivo si sta connettendo. Una volta che la connessione è avvenuta con successo, compare il simbolo che indica la qualità del colle- gamento. Menu principale e funzioni Premere MENU sul dispositivo oppure sul telecomando per visualizzare il menu principale: I miei prefer- iti, Internet Radio, Media Center, Sveglia, Sleep Timer, Impostazioni.
  • Seite 39 Media Center UPNP È possibile riprodurre contenuti multimediali da dispositivi dotati di UPnP (di solito computer) ad esempio tramite Windows Media Player. Riproduzione di file multimediali tramite la radio e l’UPnP: Una volta installato il server UPnP per condividere file multimediali con la radio, è possibile riprodurli se- guendo la seguente procedura: Premere MENU per passare al livello superiore del menu.
  • Seite 40 Una colta selezionato MEDIA SHARING, cliccare su UNKOWN DEVICE (periferica sconosciuta). Infine clic- care su ALLOW (consenti).
  • Seite 41 Sveglia Selezionare ALARM dal menu principale oppure premere il tasto „ALARM“ sul telecomando. Scegliere tra ALARM1 e ALARM2 ed impostare le due sveglie. Modificare i singoli parametri: • TIME: impostare l‘ora della sveglia. • SOUND: scegliere tra WAKE TO RADIO (= radiosveglia) e WAKE TO MELODY (Melodia standard) •...
  • Seite 42 Datum und Uhrzeit: impostare l‘ora e la data manualmente oppure tramite la rete internet selezionando USE NETWORK TIME. Sprache: tedesco / inglese Local Radio: standard: Europa / UK; modificare per avere accesso alle stazioni locali tramite Skytune. Playback Setup: selezionare una modalità di riproduzione per lo streaming UPnP (Ripeti, Ripeti tutto, Shuff- le).
  • Seite 43: Dati Tecnici

    Dati tecnici Numero articolo 10009125, 10022777 Alimentazione Alimentatore (AC 230-240V-50Hz -> DC 5V) Rete IEEE802.11b/g/n Sicurezza WEP/WPA/WPA2 Dimensioni 164 x 98 x 98 mm (L x A x P) Dispositivo, alimentatore, telecomando, batterie, manuale Consegna d’istruzioni. Smaltimento Dispositivi elettrici Se sul prodotto è presente la figura a sinistra (il cassonetto dei rifiuti mobile sbarra- to), si applica la direttiva europea 2002/96/CE.
  • Seite 44: Manual De Instrucciones

    Estimado cliente: Le felicitamos por la adquisición de este producto. Lea atentamente el siguiente manual y siga cuidado- samente las instrucciones de uso con el fin de evitar posibles daños. La empresa no se responsabiliza de los daños ocasionados por un uso indebido del producto o por haber desatendido las indicaciones de seguridad.
  • Seite 45 Controles...
  • Seite 46 PRESET Display Guardar la emisora como favorita (mante- ner pulsado) o acceder (pulsar) VOLUME / SELECT LEFT Gire el interruptor para controlar el volumen; Menú/emisora anterior pulse para confirmar la selección actual. RIGHT Altavoz Menú/emisora siguiente ON/OFF Conexión para auriculares LOCAL Salida Line out Buscar emisoras locales...
  • Seite 47 Primera puesta en funcionamiento / ajustes Siga estos pasos para conectar la radio a su red W-LAN. • Encienda la radio: conecte el cable de alimentación del aparato a la conexión DC situada en su parte trasera y encienda el aparato. Advertencia: utilice solamente el cable de alimentación incluido.
  • Seite 48 El aparato muestra establecimiento de la conexión con el símbolo en la esquina superior izquierda del display. Si la conexión está disponible, junto al anterior símbolo aparecerá Menú principal y funciones Pulse MENU en el aparato o en el mando a distancia para mostrar el menú principal. Este incluye los puntos My Favourites, Internet Radio, Media Center, Alarm, Sleep Timer, Configuration.
  • Seite 49 Centro multimedia (Media Center) UPNP Puede reproducir contenido multimedia desde dispositivos compatibles con UPnP (normalmente ordena- dor), por ejemplo por medio del reproductor de Windows Media. Localizar y reproducir archivos multimedia vía radio y UPnP: Una vez haya configurado el servidor UPnP para compartir archivos multimedia, puede reproducirlos sigu- iendo estos pasos: •...
  • Seite 50 Seleccione MEDIA SHARING y marque la opción UNKNOWN DEVICE. A continuación, haga clic en ALLOW.
  • Seite 51: Despertador (Alarm)

    Despertador (Alarm) Seleccione ALARM en el menú principal o pulse “ALARM” en el mando a distancia. Elija entre ALARM1 y ALARM2 para ajustar las alarmas de manera independiente. Siga el asistente de la alarma para editar los siguientes parámetros: • TIME: ajuste la hora de alarma.
  • Seite 52 Date & Time: ajuste la hora y la fecha de manera manual o seleccione USE NETWORK TIME para que el aparato detecte la hora y la fecha de la red de manera automática. Language: alemán / inglés Local Radio: estándar: Europa/RU; modifíquelo para tener acceso directo a las emisoras locales. Playback Setup: seleccione un modo de reproducción para la transmisión UPnP (Repeat, Repeat All, Shuff- le).
  • Seite 53: Indicaciones Para La Retirada Del Aparato

    Datos técnicos Número de artículo 10009125, 10022777 Suministro eléctrico Fuente de alimentación (AC 230-240V-50Hz -> DC 5V) Red IEEE802.11b/g/n Seguridad WEP/WPA/WPA2 Dimensiones 164 x 98 x 98 mm (ancho x alto x largo) Dispositivo, cable de alimentación, mando a distancia con pilas, Contenido del envío...

Diese Anleitung auch für:

10022777Ir 130

Inhaltsverzeichnis