ItsImagical Aracno-Bot Montageanleitung
Inhaltsverzeichnis
Quicklinks
Inhaltsverzeichnis
Fehlerbehebung

Verwandte Anleitungen für ItsImagical Aracno-Bot


Inhaltszusammenfassung für ItsImagical Aracno-Bot
- Seite 1 Aracno-Bot...
-
Seite 2: Mechanical Parts List
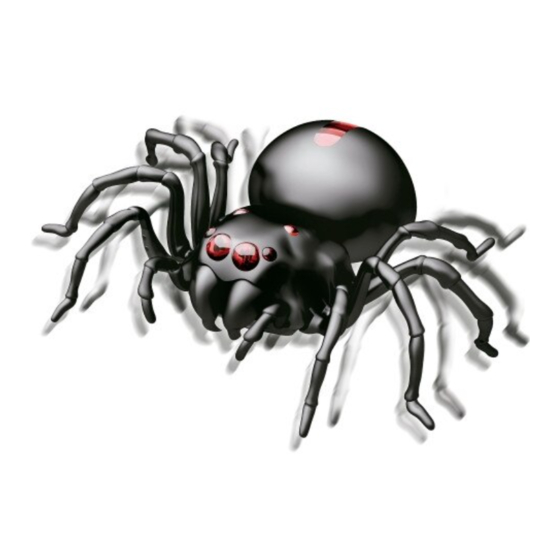
This is a concept of an environmentally and friendly fuel cell spider. The kit teaches children about new forms of clean energy. Be amazed that by just adding a few drops of salt water the spider will come alive and move along in a frightening manner. All materials used in this kit are environmentally safe and clean, no toxic substances or disposal concerns. -
Seite 3: Plastic Parts
Gear(Red) Gear With Shaft Round Shaft Sponge Air Cathode(Black) Nonwoven Fabric Magnesium Sheet Plastic dropper (Spare part:1pc) Magnesium Sheet Plastic Dropper (Spare parts:2pcs) 3. Plastic Parts Cut the plastic parts when they are required but do not cut them in advance. 19 20... -
Seite 4: Mechanical Assembly
4. Mechanical Assembly STEP STEP P3 (Orange) - Seite 5 STEP STEP...
- Seite 6 STEP STEP...
- Seite 7 STEP 1 INSIDE 2 BOTTOM...
- Seite 8 STEP (Red) STEP Cut off the 3 burrs Cut off the 3 burrs before assembly. before assembly. Note:Parts B3 and B4 must be parallel.
- Seite 9 PUSH STEP (Orange) (Red) (Green)
- Seite 10 STEP (Orange) (Red) (Green)
- Seite 11 STEP STEP Make sure to attach the sponges to the bottom vertically as shown below. Black STEP 2 Black STEP 1 Red Noted:each connector must be set in right position. STEP Black...
- Seite 12 STEP Black STEP...
- Seite 13 STEP P8 (Air Cathode) P9 (Nonwoven Fabric) P10 (Magnesium Sheet) 1 Black Side Up Make sure the above 3 parts placed in correct sequence and position. STEP Cut off the 2 burrs before assembly. Cut off the 3 burrs before assembly. (Fuel Cell Plate)
- Seite 14 STEP Ensure to insert Fuel Cell plate to the end. Fuel Cell Plate STEP Finished Product!
-
Seite 15: How It Works
5. How It Works After a period of time the salt water will be exhausted ( about 15 minutes ), the spider will begin to get slower and stop. Add a few more drops of salt water to start it again ( as in fig Each Magnesium sheet can work for 4 hours continuously, then it will become fragmented. - Seite 16 Cover Magnesium Sheet Reassemble cover and Go your spider now Insert Fuel Cell plate magnesium sheet Remove Fuel Cell plate to stop your spider as shown below: It is necessary to clean Fuel Cell plate every time when not in use, gently rinse air cathode under tap water, don’t hand rub the surface to ensure the quality of air cathode.
- Seite 17 Flush the parts shown below and hand rub the surface. Make sure that there is no salt residue. Dry all parts separately. (Important: if there is salt residue left on the magnesium sheet it will shorten the life of the sheet.) 1.Magnesium 2.Nonwoven Fabric 3.Cover...
-
Seite 18: Troubleshooting
6. Trouble Shooting Check the steps below if your spider doesn’t move after adding salt water. Make sure motor and gears are installed in right position. STEP Make sure each connector must be set in right position (Ref: STEP Make sure cut off the burrs clearly on part B3 and B4.(Ref: Make sure Fuel Cell plate is inserted entirely. - Seite 19 Dust or lint might be stuck your spider and have it go unsmoothy or stop. Please uncover the case as per figure Use slotted screwdriver gently as per figure and clean the inside as per figure...
-
Seite 20: Solución De Problemas
(ES) correcta. Paso 19. 1) Necesitas: 7. Asegúrate de que la pieza P8 cátodo de aire (negro) está hacia arriba. Paso 19. Vaso 8. La pieza P9 tela no tejida sirve para aislar las pieza P8 cátodo de aire de la pieza P10 lámina de magnesio, asegúrate que las 2 piezas P8 y P10 no entran en contacto Palo o podría producirse un cortocircuito. -
Seite 21: Résolution De Problèmes
indiqué sur le dessin. Ne pas verser de solution saline sur les extrémités des 1) Ansetzen der Salzlösung: 1 Teil Salz auf 5 Teile Wasser (Leitungswasser oder connecteurs ; ils pourraient se rouiller. Important (si la toile est complètement sèche, destilliertes Wasser). -
Seite 22: Risoluzione Di Problemi
Fase 21 Assicurati di inserire la pila a combustibile fino alla fine P4 (vermelho) P5 (verde) 1. Pila a combustibile. Passo 12 Assegura-te de inserir a esponja na posição vertical, tal como se indica Fase 22 Hai finito di montare il tuo ragno. no desenho Passo 15 1 (vermelho) 2 (preto) 5) Funzionamento... -
Seite 23: Rozwiązywanie Problemów
P7) Burete (PL) P8) Catod de aer (negru) 1) Potrzebujesz P9) Material neţesut (1 bucată extra) Szklankę P10) Plăcuţă de magneziu (2 bucăţi extra) Sól P11) Pipetă Patyk Śrubokręt 3) Piesele din plastic Szczypce z nożem bocznym Tăiaţi piesele în momentul în care aveţi nevoie de ele. Nu le tăiaţi înainte. 2) Części mechaniczne 4) Asamblarea mecanismului P1) Silnik ze złączami (nie podłączać... - Seite 24 7. Upewnij się, że część P8 katoda powietrzna (czarna) jest wierzchem do góry. Krok damlası gelmemesine özen gösterin. Önemli: eğer kumaş tamamen kuruysa, yakıt plakasını sökün ve şekil 2C'de görüldüğü gibi tuz ve su ekleyin. Kumaşın tamamen 8. Część P9 włóknina służy do odizolowania części P8 katody powietrznej od części ıslanması...
-
Seite 25: Επιλυση Προβληματων
2) Γεμίστε την αράχνη με το αλατούχο διάλυμα. Шаг 20 Обрежь 2 выступа перед сборкой a. Βγάλτε την πλάκα καυσίμου Обрежь 3 выступа перед сборкой b. Απομακρύνετε το κάλυμμα και το φύλλο μαγνησίου P10 Шаг 21 Убедись в том, что пластина топливного элемента вставлена до упора c. - Seite 26 步骤 10 按压 P3(橙色) P4(红色) P5 (绿色) 步骤 11 按压 P3(橙色) P4(红色) P5 (绿色) 步骤 12 确保海绵保持竖直,如图所示 步骤 15 1(红色) 2(黑色) 步骤 16 1(红色) 2(黑色) 每个连接器都必须处于正确位置。 步骤 19 非常重要 P8(空气阴极) 1. 黑色面朝上 P9(无纺布) P10(镁片) 确保 3 个部件都依序摆放并置于正确的位置。 步骤 20 组装之前剪切 2 个凸缘 组装前剪切...
- Seite 27 (AR) : 1( ﺳﺘﺤﺘﺎج إﻟﻰ ﻛﺄس ﻣﻠﺢ ﻋﺼﺎ ﻣﻔﻚ ﻣﻠﻘﻂ ﺟﺎﻧﺒﻲ 2( أﺟﺰاء ﻣﻴﻜﺎﻧﻴﻜﻴﺔ ﻳﺠﺐ ﻋﺪم ﺗﻮﺻﻴﻞ اﻟﻜﺎﺑﻼت ﺑﺎﻷﺳﺎس ﻣﺤﺮك ﺑﻤﻮﺻﻼت ج أﺑﻴﺾ ﺗﺮس ﻣﺴﻨﻦ ج ﺑﺮﺗﻘﺎﻟﻴﺔ ﻣﺴﻨﻨﺔ ج ﺣﻤﺮاء ﻣﺴﻨﻨﺔ ج ﻣﺴﻨﻨﺔ ﺑﻤﺤﻮر ج ﻣﺤﻮر داﺋﺮي ج إﺳﻔﻨﺠﺔ ج أﺳﻮد...
- Seite 28 (ES) INFORMACIÓN PARA LOS USUARIOS Este producto lleva el símbolo de clasificación selectiva para residuos de aparatos eléctricos y electrónicos (RAEE).Esto significa que debe llevar este producto a los puntos de recogida locales o devolverlo a su vendedor cuando adquiera un nuevo producto del mismo tipo conforme a la Directiva Europea 2002/96/CE para reciclarlo o eliminarlo y minimizar así...
- Seite 29 (TR) KULLANICILARA YÖNELİK BİLGİ Bu ürün, elektrikli ve elektronik cihaz atıklarına yönelik selektif ayırma sembolü taşır (RAEE). Bu sembol, 2002/96/AB sayılı Avrupa Yönergesi uyarınca dönüştürülmesi, bertaraf edilmesi ya da çevreye vereceği zararın minimum seviyeye indirilmesi için ürünü yerel toplama noktalarına götürmeniz ya da aynı...
- Seite 30 .( ﺣﺎﻓﻆ ﻋﻠﻰ ﻫﺬه اﻟﻤﻌﻠﻮﻣﺎت ﻛﻤﺮﺟﻊ ﻓﻲ اﻟﻤﺴﺘﻘﺒﻞAR)● ●(RO) Păstraţi aceste informaţii pentru consultări viitoare. Importado por: ●(PL) Zachować tę informację do późniejszego wglądu. Imaginarium, S.A. Plataforma Logística ARACNO-BOT PLA-ZA, C./ Osca, nº4 50197 Zaragoza - España PID: 89882 // RefNo(s): 21751 // 01112016 CIF A-50524727...
- Seite 31 89882 Aracno-Bot Zelená energie (CZ) Jde o koncept pavouka s palivovým článkem přátelského k životnímu prostředí. Díky sadě se děti dozvědí nové informace o nových formách čisté energie. Užasnete, až zjistíte, že stačí přidat pár kapek slané vody a pavouk ožije a začne děsivě lézt kupředu.
- Seite 32 89882 Str. 7 Krok 8 – použijte červené kolečko P4 Krok 9 – Pozor, před montáží odštípněte všechny 3 výčnělky u B4 i B3 Poznámka: Díly B3 a B4 musejí být rovnoběžné Str. 8 – krok 10 – Zatlačte P3 (oranžová) P4 (červená) P5 (zelená) Str.
- Seite 33 89882 5. Jak výrobek funguje Po určité době se slaná voda vyčerpá (cca po 15 minutách), pavouk se začne zpomalovat a zastaví se. Přidejte pár dalších kapek slané vody, abyste pavouka zase nastartovali (viz obr. 6) Každý hořčíkový plíšek může fungovat bez přestávky po 4 hodiny. Potom se začne rozpadat. Vyměňte plíšek za nový, abyste pavoukovi dodali energii.
- Seite 34 89882 6) Ujistěte se, že deska palivového článku je umístěna ve správném pořadí a pozici (vzduchová katoda – netkaná textilie – hořčíkový plíšek (viz krok 19). 7) Ujistěte se, že je vzduchová katoda černou stranou nahoru (viz krok 19). 8) Netkaná textilie se používá také k izolaci vzduchové katody a hořčíkového plíšku, ujistěte se, že tyto dva díly se vzájemně...