Herunterladen Inhalt Inhalt Diese Seite drucken
Silvercrest SWWS 240 C1 Bedienungsanleitung

Silvercrest SWWS 240 C1 Bedienungsanleitung

Warmwachs-set
Vorschau ausblenden Andere Handbücher für SWWS 240 C1:

Werbung

Verfügbare Sprachen

Verfügbare Sprachen

HOT WAX KIT SWWS 240 C1
HOT WAX KIT
Operating instructions
WARMWACHS-SET
Bedienungsanleitung
IAN 339566_1910
ΣΕΤ ΑΠΟΤΡΙΧΩΣΗΣ ΜΕ ΚΕΡΙ
Οδηүίες χρήσης

Werbung

Inhaltsverzeichnis
loading

Inhaltszusammenfassung für Silvercrest SWWS 240 C1

  • Seite 1 HOT WAX KIT SWWS 240 C1 HOT WAX KIT ΣΕΤ ΑΠΟΤΡΙΧΩΣΗΣ ΜΕ ΚΕΡΙ Operating instructions Οδηүίες χρήσης WARMWACHS-SET Bedienungsanleitung IAN 339566_1910...
  • Seite 2 Before reading, unfold the page containing the illustrations and familiarise yourself with all functions of the device. Πριν ξεκινήσετε την ανάγνωση, ανοίξτε τη σελίδα με τις εικόνες και εξοικειω- θείτε με όλες τις λειτουργίες της συσκευής. Klappen Sie vor dem Lesen die Seite mit den Abbildungen aus und machen Sie sich anschließend mit allen Funktionen des Gerätes vertraut.
  • Seite 4: Inhaltsverzeichnis

    Importer ..........22 GB │ IE │ NI │ CY │    1 ■ SWWS 240 C1...
  • Seite 5: Introduction

    Do not use it for commercial purposes. Package contents Hot Wax Kit 18 wax discs Spatula Operating instructions │ GB │ IE │ NI │ CY ■ 2    SWWS 240 C1...
  • Seite 6: Appliance Description

    9 Wax disc Technical details 220 - 240 V ~ (AC), Voltage 50 Hz Power consumption 20 W Capacity approx. 530 ml Protection class II / (Double insulation) GB │ IE │ NI │ CY │    3 ■ SWWS 240 C1...
  • Seite 7: Safety Information

    Check the appliance for visible external ► damage before use. Do not operate a appli- ance that has been damaged or dropped! │ GB │ IE │ NI │ CY ■ 4    SWWS 240 C1...
  • Seite 8 Do not allow children to play with the ► appliance. GB │ IE │ NI │ CY │    5 ■ SWWS 240 C1...
  • Seite 9 There is a risk of injury if the appliance is ► misused. Use the appliance only as de- scribed in the instructions! │ GB │ IE │ NI │ CY ■ 6    SWWS 240 C1...
  • Seite 10 Do not use the appliance if you have heart ► disease, skin redness, inflammation, swelling, sensitive areas, diabetes, open wounds, burns, eczema or psoriasis. GB │ IE │ NI │ CY │    7 ■ SWWS 240 C1...
  • Seite 11 Do not use an external timer switch or a ► separate remote control system to operate the appliance. Never use pointed or sharp objects to re- ► move solidified wax from the appliance. │ GB │ IE │ NI │ CY ■ 8    SWWS 240 C1...
  • Seite 12: Before First Use

    2) Add the required number of wax discs 9 to the inner bowl 1. Use the following standard values as an orientation aid. The values may vary. GB │ IE │ NI │ CY │    9 ■ SWWS 240 C1...
  • Seite 13 6) Stir the wax occasionally while it is melting. As soon as the wax discs 9 have melted (this takes about 25–30 minutes for 6 discs), you can start epilating. │ GB │ IE │ NI │ CY ■ 10    SWWS 240 C1...
  • Seite 14: Epilation

    Always pull off the wax strips as close as possible to the skin surface. ► Make sure that you don’t get any wax on your clothes. Wax residue can be very difficult to remove and may discolour clothing. GB │ IE │ NI │ CY │    11 ■ SWWS 240 C1...
  • Seite 15: Legs

    7) When you are finished with the treatment, pull the plug from the mains power socket to turn off the appliance. The control lamp 2 goes out. │ GB │ IE │ NI │ CY ■ 12    SWWS 240 C1...
  • Seite 16: Armpits

    8) To depilate the lower part of the armpit, apply the wax from the middle of the armpit towards the bottom. 9) Wait about 30–60 seconds until the wax is dry. GB │ IE │ NI │ CY │    13 ■ SWWS 240 C1...
  • Seite 17: Bikini Zone

    7) When you are finished with the treatment, pull the plug from the mains power socket to turn off the appliance. The control lamp 2 goes out. │ GB │ IE │ NI │ CY ■ 14    SWWS 240 C1...
  • Seite 18: After Epilation

    Never use pointed or sharp objects to remove solidified wax from the appliance! ► Do not use any chemical, abrasive or aggressive cleaning agents to clean the appliance! GB │ IE │ NI │ CY │    15 ■ SWWS 240 C1...
  • Seite 19 Make sure that no wax residue remains in the grooves 5 for – locking the lid 7! Remove any oil residue with a clean paper towel. – │ GB │ IE │ NI │ CY ■ 16    SWWS 240 C1...
  • Seite 20: Storage

    In this case, heat up the appliance for about 10 minutes (depending on the amount of wax) with the lid 7 closed. The wax will soften and the lid 7 can now be removed. GB │ IE │ NI │ CY │    17 ■ SWWS 240 C1...
  • Seite 21: Disposal

    1–7: Plastics, 20–22: Paper and cardboard, 80–98: Composites Your local community or municipal authorities can provide information on how to dispose of the worn-out product. │ GB │ IE │ NI │ CY ■ 18    SWWS 240 C1...
  • Seite 22: Ordering Spare Parts

    Ordering spare parts You can order the following spare parts for the product SWWS 240 C1: ► Wax discs (18 pc.) Order the spare parts via the Service Hotline (see section „Service“) or simply visit our website at www.kompernass.com. With this QR code you can go directly to our website and order the...
  • Seite 23: Kompernass Handels Gmbh Warranty

    Scope of the warranty This appliance has been manufactured in accordance with strict quality guidelines and inspected meticulously prior to delivery. │ GB │ IE │ NI │ CY ■ 20    SWWS 240 C1...
  • Seite 24: Warranty Claim Procedure

    Ensure that you enclose the proof of purchase (till receipt) and information about what the defect is and when it occurred. GB │ IE │ NI │ CY │    21 ■ SWWS 240 C1...
  • Seite 25: Service

    Please note that the following address is not the service address. Please use the service address provided in the operating instructions. KOMPERNASS HANDELS GMBH BURGSTRASSE 21 • 44867 BOCHUM GERMANY www.kompernass.com │ GB │ IE │ NI │ CY ■ 22    SWWS 240 C1...
  • Seite 26 Εισαγωγέας ......... .44 GR │ CY │    23 ■ SWWS 240 C1...
  • Seite 27: Εισαγωγή

    πόδια, τις μασχάλες και την περιοχή του μπικίνι σε ανθρώπινο σώμα. Αυτή η συσκευή προορίζεται αποκλειστικά για χρήση σε νοικοκυριά. Μην τη χρησιμοποιείτε επαγγελματικά. Παραδοτέος εξοπλισμός Σετ αποτρίχωσης με κερί 18 δίσκοι κεριού Σπάτουλα Οδηγίες χρήσης │ GR │ CY ■ 24    SWWS 240 C1...
  • Seite 28: Περιγραφή Συσκευής

    8 Σπάτουλα 9 Δίσκος κεριού Τεχνικά χαρακτηριστικά 220 - 240 V ∼ (εναλλασσόμενο ρεύμα), Τάση 50 Hz Κατανάλωση ισχύος 20 W Χωρητικότητα περ. 530 ml Κατηγορία II / (διπλή θωράκιση) προστασίας GR │ CY │    25 ■ SWWS 240 C1...
  • Seite 29: Υποδείξεις Ασφαλείας

    καλώδιο δικτύου με βρεγμένα χέρια. Πριν από τη χρήση, ελέγχετε τη συσκευή ► ως προς εξωτερικές εμφανείς φθορές. Μη θέτετε σε λειτουργία μία συσκευή που έχει υποστεί φθορές ή έχει πέσει κάτω. │ GR │ CY ■ 26    SWWS 240 C1...
  • Seite 30 Ποτέ μην χρησιμοποιείτε τη συσκευή κοντά σε νερό, κυρίως όχι κοντά σε λεκάνες πλύσης, μπανιέρες ή παρό- μοια σημεία. Δεν επιτρέπεται να υπερχειλίζουν υγρά από ► τη σύνδεση φις της συσκευής. GR │ CY │    27 ■ SWWS 240 C1...
  • Seite 31 Μετά τη χρήση, συνεχίζει να υπάρχει υπο- ► λειπόμενη θερμότητα στην επιφάνεια του θερμαντικού στοιχείου. Σε περίπτωση εσφαλμένης χρήσης της συ- ► σκευής, υπάρχει κίνδυνος τραυματισμού. Χρησιμοποιείτε τη συσκευή πάντα όπως προβλέπεται! │ GR │ CY ■ 28    SWWS 240 C1...
  • Seite 32 Ποτέ μη βυθίζετε τη συσκευή σε νερό ή σε ► άλλα υγρά! Μη χρησιμοποιείτε τη συσκευή σε περίπτωση ► καρδιοπάθειας, σε κοκκινίλες, ερεθισμούς, οιδήματα, ευαίσθητα σημεία, διαβήτη, ανοι- χτές πληγές, εγκαύματα, εκζέματα ή ψωρίαση. GR │ CY │    29 ■ SWWS 240 C1...
  • Seite 33 Μη χρησιμοποιείτε εξωτερικό χρονοδιακόπτη ► ή ξεχωριστό τηλεχειριστήριο για να χρησι- μοποιήσετε τη συσκευή. Μη χρησιμοποιείτε μυτερά ή αιχμηρά αντι- ► κείμενα για να απομακρύνετε κερί που έχει κρυώσει από τη συσκευή. │ GR │ CY ■ 30    SWWS 240 C1...
  • Seite 34: Πριν Την Πρώτη Χρήση

    1) Βγάλτε τους δίσκους κεριού 9 από τη συσκευασία. 2) Βάλτε τον απαιτούμενο αριθμό δίσκων κεριού 9 στο εσωτερικό δοχείο 1. Ανατρέξτε στις ακόλουθες τιμές αναφοράς, οι οποί- ες ενδέχεται να διαφέρουν λίγο: GR │ CY │    31 ■ SWWS 240 C1...
  • Seite 35 6) Κατά το λιώσιμο του κεριού, να ανακατεύετε ανά τακτά χρονικά διαστήματα. Μόλις λιώσουν οι δίσκοι κεριού 9 (για 6 δίσκους κεριού περ. 25 - 30 λεπτά), μπορείτε να ξεκινήσετε την αποτρίχωση. │ GR │ CY ■ 32    SWWS 240 C1...
  • Seite 36: Αποτρίχωση

    Αφαιρείτε πάντα τις ταινίες κεριού όσο πιο κοντά γίνεται στην επιδερμίδα. ► Προσέχετε ώστε να μην πέσει κερί στα ρούχα. Τα υπολείμματα κεριού απομακρύνονται δύσκολα και μπορούν να οδηγήσουν σε αποχρωματισμούς στα ρούχα. GR │ CY │    33 ■ SWWS 240 C1...
  • Seite 37: Πόδια

    Ακολουθήστε την ίδια διαδικασία στα υπόλοιπα μέρη του σώματος. 7) Όταν ολοκληρώσετε τη χρήση, τραβήξτε το βύσμα δικτύου από την πρίζα, ώστε να απενεργοποιήσετε τη συσκευή. Η λυχνία ελέγχου 2 σβήνει. │ GR │ CY ■ 34    SWWS 240 C1...
  • Seite 38: Μασχάλες

    8) Για να αποτριχώσετε το κάτω τμήμα της μασχάλης, απλώστε το κερί από το μέσο της μασχάλης προς τα κάτω. 9) Περιμένετε 30 - 60 δευτερόλεπτα, έως ότου στεγνώσει το κερί. GR │ CY │    35 ■ SWWS 240 C1...
  • Seite 39: Περιοχή Μπικίνι

    Ακολουθήστε την ίδια διαδικασία στα υπόλοιπα μέρη του σώματος. 7) Όταν ολοκληρώσετε τη χρήση, τραβήξτε το βύσμα δικτύου από την πρίζα, ώστε να απενεργοποιήσετε τη συσκευή. Η λυχνία ελέγχου 2 σβήνει. │ GR │ CY ■ 36    SWWS 240 C1...
  • Seite 40: Μετά Την Αποτρίχωση

    ► Μη χρησιμοποιείτε μυτερά και αιχμηρά αντικείμενα για να απομακρύνετε κερί που έχει κρυώσει από τη συσκευή. ► Μη χρησιμοποιείτε χημικά, τριβικά ή επιθετικά απορρυπαντικά για να καθαρίσετε τη συσκευή! GR │ CY │    37 ■ SWWS 240 C1...
  • Seite 41 Σκουπίστε τις εξωτερικές πλευρές με ένα πανί νοτισμένο με λάδι. – Προσέχετε, ιδιαίτερα, ώστε να μην υπάρχουν υπολείμματα – κεριού στις ράγες 5 ασφάλισης του καπακιού 7! Απομακρύνετε υπολείμματα λαδιού με καθαρό, στεγνό χαρτί – κουζίνας. │ GR │ CY ■ 38    SWWS 240 C1...
  • Seite 42: Αποθήκευση

    Σε αυτή την περίπτωση, αφήστε τη συσκευή με κλειστό το καπά- κι 7 να ζεσταθεί περ. για 10 λεπτά (ανάλογα με την ποσότητα κεριού). Το κερί μαλακώνει και το καπάκι 7 μπορεί να ανοίξει. GR │ CY │    39 ■ SWWS 240 C1...
  • Seite 43: Απόρριψη

    20–22: Χαρτί και χαρτόνι, 80–98: Συνθετικά υλικά. Για πληροφορίες σχετικά με τις δυνατότητες απόρριψης του προϊόντος που δεν χρησιμοποιείται πλέον, απευθυνθείτε στις αρμόδιες υπηρεσίες της κοινότητας ή του δήμου σας. │ GR │ CY ■ 40    SWWS 240 C1...
  • Seite 44: Παραγγελία Ανταλλακτικών

    Παραγγελία ανταλλακτικών Μπορείτε να παραγγείλετε τα παρακάτω ανταλλακτικά για το προϊόν SWWS 240 C1: ► Δίσκοι κεριού (18 τεμάχια) Παραγγείλετε τα ανταλλακτικά μέσω της ανοιχτής γραμμής σέρβις (βλ. Κεφάλαιο «Σέρβις») ή πολύ εύκολα μέσω της ιστοσελίδας μας, www.kompernass.com. Με αυτόν τον κωδικό QR μεταβαίνετε απευθείας στον ιστότοπό μας...
  • Seite 45: Εγγύηση Της Kompernass Handels Gmbh

    Αυτό ισχύει και για εξαρτήματα, τα οποία έχουν αντικατασταθεί και επισκευαστεί. Ενδεχόμενες ήδη υπάρχουσες ζημιές και ελλείψεις κατά την αγορά πρέπει να γνωστοποιούνται αμέσως μετά την αποσυ- σκευασία. Μετά τη λήξη του χρόνου εγγύησης, τυχόν εμφανιζόμενες επισκευές χρεώνονται. │ GR │ CY ■ 42    SWWS 240 C1...
  • Seite 46 χρήσης (κάτω αριστερά) ή σε ένα αυτοκόλλητο στην πίσω ή κάτω πλευρά του προϊόντος. ■ Εάν προκύψουν σφάλματα λειτουργίας ή άλλες ελλείψεις, επικοι- νωνήστε κατ’ αρχήν με το ακόλουθο αναφερόμενο τμήμα σέρβις τηλεφωνικά ή με E-Mail. GR │ CY │    43 ■ SWWS 240 C1...
  • Seite 47: Σέρβις

    Tel.: 8009 4409 E-Mail: kompernass@lidl.com.cy IAN 339566_1910 Εισαγωγέας Η ακόλουθη διεύθυνση δεν είναι διεύθυνση σέρβις. Επικοινωνήστε, κατ’ αρχήν, με την αναφερόμενη υπηρεσία σέρβις. KOMPERNASS HANDELS GMBH BURGSTRASSE 21 44867 BOCHUM ΓΕΡΜΑΝΙΑ www.kompernass.com │ GR │ CY ■ 44    SWWS 240 C1...
  • Seite 48 Importeur ..........67 DE │ AT │ CH │    45 ■ SWWS 240 C1...
  • Seite 49: Einführung

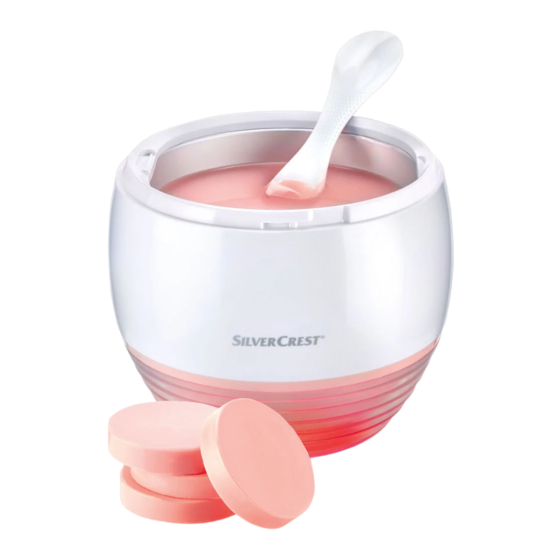
    Achseln und der Bikinizone am menschlichen Körper. Dieses Gerät ist ausschließlich für die Benutzung in privaten Haushalten bestimmt. Benutzen Sie es nicht gewerblich. Lieferumfang Warmwachs-Set 18 Wachsscheiben Spatel Bedienungsanleitung │ DE │ AT │ CH ■ 46    SWWS 240 C1...
  • Seite 50: Gerätebeschreibung

    7 Deckel 8 Spatel 9 Wachsscheiben Technische Daten 220 - 240 V ∼ (Wechselstrom), Spannung 50 Hz Leistungsaufnahme 20 W Fassungsvermögen ca. 530 ml Schutzklasse II / (Doppelisolierung) DE │ AT │ CH │    47 ■ SWWS 240 C1...
  • Seite 51: Sicherheitshinweise

    Händen an. Kontrollieren Sie das Gerät vor der Ver- ► wendung auf äußere, sichtbare Schäden. Nehmen Sie ein beschädigtes oder herunter- gefallenes Gerät nicht in Betrieb. │ DE │ AT │ CH ■ 48    SWWS 240 C1...
  • Seite 52 Erfahrung und Wissen benutzt werden, wenn sie beaufsichtigt oder bezüglich des sicheren Gebrauchs des Gerätes unterwie- sen wurden und die daraus resultierenden Gefahren verstehen. Kinder dürfen nicht mit dem Gerät spielen. ► DE │ AT │ CH │    49 ■ SWWS 240 C1...
  • Seite 53 Verwendung. Nach der Anwendung verfügt die Oberfläche ► des Heiz elements noch über Restwärme. Bei Missbrauch des Gerätes besteht Ver- ► letzungsgefahr. Verwenden Sie das Gerät immer bestimmungsgemäß! │ DE │ AT │ CH ■ 50    SWWS 240 C1...
  • Seite 54 Tauchen Sie das Gerät niemals in Wasser ► oder andere Flüssigkeiten! Verwenden Sie das Gerät nicht bei Herz- ► erkrankungen, Hautrötungen, Entzündungen, Schwellungen, empfindlichen Stellen, Dia- betes, offenen Wunden, Verbrennungen, Ekzemen oder Schuppenflechte. DE │ AT │ CH │    51 ■ SWWS 240 C1...
  • Seite 55 Benutzen Sie keine externe Zeitschaltuhr ► oder ein separates Fernwirksystem, um das Gerät zu betreiben. Benutzen Sie keine spitzen oder scharfen ► Gegenstände, um das erkaltete Wachs aus dem Gerät zu entfernen. │ DE │ AT │ CH ■ 52    SWWS 240 C1...
  • Seite 56: Vor Dem Ersten Gebrauch

    1) Entnehmen Sie die Wachsscheiben 9 aus der Verpackung. 2) Geben Sie die benötigte Anzahl Wachsscheiben 9 in die Innen- schale 1. Orientieren Sie sich nach folgenden Richtwerten, die jedoch etwas variieren können: DE │ AT │ CH │    53 ■ SWWS 240 C1...
  • Seite 57 6) Rühren Sie das Wachs während des Schmelzens gelegentlich um. Sobald die Wachsscheiben 9 geschmolzen sind (bei 6 Wachsschei- ben ca. 25 - 30 Minuten), können Sie mit der Enthaarung beginnen. │ DE │ AT │ CH ■ 54    SWWS 240 C1...
  • Seite 58: Enthaaren

    Hautoberfläche ab. ► Achten Sie darauf, dass kein Wachs auf Ihre Kleidung gelangt. Wachsreste können nur schwer entfernt werden und führen eventuell zu Verfärbungen auf der Kleidung. DE │ AT │ CH │    55 ■ SWWS 240 C1...
  • Seite 59: Beine

    Gehen Sie bei weiteren Hautpartien genauso vor. 7) Wenn Sie mit der Anwendung fertig sind, ziehen Sie den Netz- stecker aus der Netzsteckdose, um das Gerät auszuschalten. Die Kontrollleuchte 2 erlischt. │ DE │ AT │ CH ■ 56    SWWS 240 C1...
  • Seite 60: Achseln

    8) Um den unteren Teil der Achselhöhle zu enthaaren, tragen Sie das Wachs von der Mitte der Achselhöhle nach unten hin auf. 9) Warten Sie 30 - 60 Sekunden, bis das Wachs trocken ist. DE │ AT │ CH │    57 ■ SWWS 240 C1...
  • Seite 61: Bikinizone

    Gehen Sie bei weiteren Hautpartien genauso vor. 7) Wenn Sie mit der Anwendung fertig sind, ziehen Sie den Netz- stecker aus der Netzsteckdose, um das Gerät auszuschalten. Die Kontrollleuchte 2 erlischt. │ DE │ AT │ CH ■ 58    SWWS 240 C1...
  • Seite 62: Nach Dem Enthaaren

    Benutzen Sie keine spitzen und scharfen Gegenstände, um erkaltetes Wachs aus dem Gerät zu entfernen! ► Benutzen Sie keine chemischen, scheuernden oder aggressiven Reinigungsmittel, um das Gerät zu reinigen! DE │ AT │ CH │    59 ■ SWWS 240 C1...
  • Seite 63 Achten Sie besonders darauf, dass sich keine Wachsreste in – den Schienen 5 für die Verriegelung des Deckels 7 befinden! Entfernen Sie Ölreste mit einem sauberen, trockenen Papiertuch. – │ DE │ AT │ CH ■ 60    SWWS 240 C1...
  • Seite 64: Aufbewahrung

    Lassen Sie in diesem Fall das Gerät mit geschlossenem Deckel 7 ca. 10 Minuten (je nach Wachsmenge) aufheizen. Das Wachs wird weich und der Deckel 7 lässt sich öffnen. DE │ AT │ CH │    61 ■ SWWS 240 C1...
  • Seite 65: Entsorgung

    Abkürzungen (a) und Ziffern (b) mit folgender Bedeutung: 1–7: Kunststoffe, 20–22: Papier und Pappe, 80–98: Verbundstoffe Möglichkeiten zur Entsorgung des ausgedienten Produkts erfahren Sie bei Ihrer Gemeinde- oder Stadtverwaltung │ DE │ AT │ CH ■ 62    SWWS 240 C1...
  • Seite 66: Ersatzteile Bestellen

    Ersatzteile bestellen Folgende Ersatzteile können Sie zum Produkt SWWS 240 C1 bestellen: ► Wachsscheiben (18 Stück) Bestellen Sie die Ersatzteile über unsere Service-Hotline (siehe Kapitel „Service″) oder bequem auf unserer Webseite unter www.kompernass.com. Mit diesem QR-Code gelangen Sie direkt auf unsere Website und können die verfügbaren Ersatzteile bestellen:...
  • Seite 67: Garantie Der Kompernaß Handels Gmbh

    Dies gilt auch für ersetzte und reparierte Teile. Eventuell schon beim Kauf vorhandene Schäden und Mängel müssen sofort nach dem Aus- packen gemeldet werden. Nach Ablauf der Garantiezeit anfallende Reparaturen sind kostenpflichtig. │ DE │ AT │ CH ■ 64    SWWS 240 C1...
  • Seite 68: Abwicklung Im Garantiefall

    Die Artikelnummer entnehmen Sie bitte dem Typenschild am Produkt, einer Gravur am Produkt, dem Titelblatt der Bedienungs- anleitung (unten links) oder dem Aufkleber auf der Rück- oder Unterseite des Produktes. DE │ AT │ CH │    65 ■ SWWS 240 C1...
  • Seite 69: Service

    (kostenfrei aus dem dt. Festnetz/Mobilfunknetz) E-Mail: kompernass@lidl.de Service Österreich Tel.: 0820 201 222 (0,15 EUR/Min.) E-Mail: kompernass@lidl.at Service Schweiz Tel.: 0842 665566 (0,08 CHF/Min., Mobilfunk max. 0,40 CHF/Min.) E-Mail: kompernass@lidl.ch IAN 339566_1910 │ DE │ AT │ CH ■ 66    SWWS 240 C1...
  • Seite 70: Importeur

    Importeur Bitte beachten Sie, dass die folgende Anschrift keine Serviceanschrift ist. Kontaktieren Sie zunächst die benannte Servicestelle. KOMPERNASS HANDELS GMBH BURGSTRASSE 21 44867 BOCHUM DEUTSCHLAND www.kompernass.com DE │ AT │ CH │    67 ■ SWWS 240 C1...
  • Seite 71 │ DE │ AT │ CH ■ 68    SWWS 240 C1...
  • Seite 72 KOMPERNASS HANDELS GMBH BURGSTRASSE 21 44867 BOCHUM GERMANY www.kompernass.com Last Information Update · Έκδοση των πληροφοριών Stand der Informationen: 12 / 2019 · Ident.-No.: SWWS240C1-122019-1 IAN 339566_1910...

Inhaltsverzeichnis