Herunterladen Inhalt Inhalt Diese Seite drucken

Werbung

Verfügbare Sprachen
  • DE

Verfügbare Sprachen

  • DEUTSCH, seite 47
all'interno · DRAWINGS inside
DISEGNI
DESSINS
a l'interieur · ZEICHNUNGEN innen
en el interior · P
DIBUJOS
ИСУНКИВНУТРИ РУКОВОДСТВА
Руководство по установке
1
2
3
ХРАНИТЬ БЕРЕЖНО

Werbung

Inhaltsverzeichnis
loading

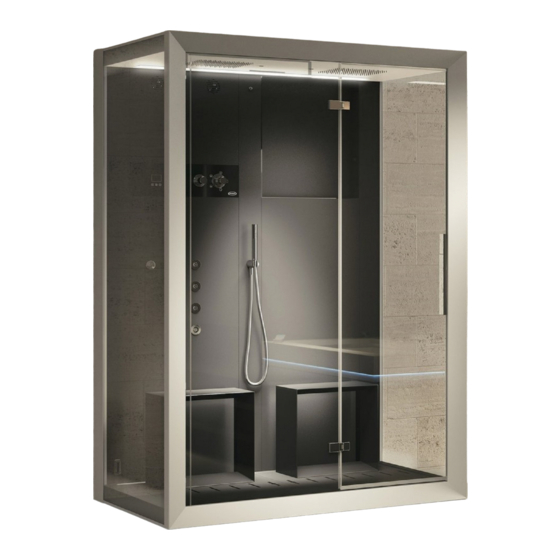
Inhaltszusammenfassung für Jacuzzi Frame serie

  • Seite 1 all’interno · DRAWINGS inside DISEGNI DESSINS a l’interieur · ZEICHNUNGEN innen en el interior · P DIBUJOS ИСУНКИВНУТРИ РУКОВОДСТВА Руководство по установке ХРАНИТЬ БЕРЕЖНО...
  • Seite 2 Italiano Installazione .........3 English Installation ........7 Français Installation ......... 11 Deutsch Installation ........ 47 Español Instalación ......... 51 Русский Устnновкn ......... 55...
  • Seite 3 LEGGERE ATTENTAMENTE LE ISTRUZIONI PRIMA 1) Rimuovere la pellicola protettiva e fissare i profili-cri- DI PROCEDERE ALL’INSTALLAZIONE stallo al piatto. 2) Fissare quindi le viti sul lato frontale del piatto. Prima di iniziare... 3) Collegare la piletta al tubo di scarico (A) già predispo- Verificare che sia stato predisposto lo scarico nonché, per i sto, siliconando accuratamente i punti di giunzione.
  • Seite 4 10) Fissare le staffe al muro. Verificare la perpendicolarità Per garantire la protezione contro i getti d’acqua, il pressaca- e l’allineamento. vo dell’uscita allarme viene chiuso in fabbrica con un tappo, che dev’essere pertanto rimosso solo se viene effettuato il col- legamento.
  • Seite 5: Sicurezza Elettrica

    22) Effettuare i collegamenti descritti in figura. Appoggia- Si consiglia di procedere prima al montaggio della re il cavo antenna sul tetto. Riposizionare il pannello, ricollegare guarnizione e quindi tagliarla, curandone il posiziona- i cavetti, fissare le viti, applicare i cappucci alle viti. mento.
  • Seite 6 Nel caso l’impianto elettrico dell’immobile non sia - L’apparecchio venga riparato da personale non autorizzato o in grado di assicurare un’alimentazione costante, si usando parti di ricambio non originali della Jacuzzi Europe S.p.A consiglia d’installare uno stabilizzatore di tensione prima dell’apparecchiatura, opportunamente dimen- sionato per la potenza della stessa.
  • Seite 7 PLEASE READ THESE INSTRUCTIONS THOROUGH- 1) Remove the protective film and fix the glass panel LY BEFORE PROCEEDING WITH INSTALLATION structures to the tray. 2) Attach the screws to the front of the tray. Before starting... 3) Connect the drainage column to the already prepared Check to ensure that the drain is operative, as well as connec- drainage pipe (A), carefully gluing the meeting points.
  • Seite 8 10) Fix the brackets to the wall. Check the perpendicular- We recommend using clamps to gather tubes and cables ity and alignment. and check that there are no obstacles which could hinder as- sembly and attachment of the panel. Installation of panel with brassware 15) Attach the panel to the frame using the relevant screws.
  • Seite 9: Electrical Safety

    Installation of the glass door Insert the spout (C) in the indicated opening and fix the cover. Position the duckboards and seats on top of the shower tray (en- 23) Bring the metal dowel, present on the inner cornice suring the hole (F) allowing for movement is opposite the drain). (see Chapter “Installing the cornice”) so that it rests against the base of this cornice.
  • Seite 10 - If any components or parts of the appliance are altered in rela- tion to the original state when supplied, releasing the Manufacturer from any liability. - If the appliance is repaired by unauthorised personnel or if spare parts are used other than the original ones supplied by Jacuzzi Eu- rope S.p.A.
  • Seite 11 LIRE ATTENTIVEMENT TOUTES LES INSTRUC- 1) Retirer le film de protection et fixer les profils de la TIONS AVANT DE PROCÉDER À L'INSTALLATION paroi vitrée sur le receveur. 2) Fixer les vis sur le côté frontal du receveur. Avant de commencer... 3) Raccorder la bonde au tuyau d’évacuation (A) déjà...
  • Seite 12 Installation du panneau avec porte-objets et du - Le raccordement du circuit d'alarme devra être effectué moyen- panneau de compensation nant un câble avec des caractéristiques non inférieures au type H 05 VV-F 2x0,75 mm . L’utilisation de ce câble est indispensable 8-9) Fixer la bride.
  • Seite 13: Sécurité Électrique

    Effectuer les raccordements : Il est conseillé de procéder d'abord au montage du - aux pommes de douche (A) ; joint, puis de le couper, en veillant au positionnement. - à la cascade (B) ; - aux jets nébulisants (C). 30) Appliquer du silicone à...
  • Seite 14 ATTENTION ! Débrancher l'appareil de la ligne d'ali- mentation électrique avant d'effectuer toute inter- vention d'entretien. JACUZZI EUROPE S.p.A. décline toute responsabilité dans les cas suivants : Installation réalisée par du personnel non qualifié et/ou non auto- risé à effectuer l'installation.
  • Seite 16 installazione a nicchia o su angolo destro • recess or right corner installation • installation à niche ou sur angle droit • Einbau in einer Nische oder einer rechten Ecke • instalación en nicho o en rincón derecho • установка в нише или на правом углу •...
  • Seite 17 • installazione a nicchia, su angolo sinistro, o centro parete • recess , left corner or wall mounted installation • installation à niche, sur angle gauche, ou au centre du mur • Einbau in einer Nische, einer linken Ecke oder der Wandmitte •...
  • Seite 19 7 mm 7 mm...
  • Seite 20 ~18 mm...
  • Seite 21 ~18 mm...
  • Seite 22 —...
  • Seite 29 220-240 V~ 380-415 V 2N~ 220-240V 12-24V 12-24V 220-240 V~ 50/60Hz 1x20A max L1-L2 (SHORTED) 380-415 V 2N~ 50/60Hz 2x16A max L1-L2 (OPEN)
  • Seite 30 220-240 V~ 380-415 V 2N~ RIGHT LEFT L+ L- L+ L- 220-240 V~ 380-415 V 2N~ 220-240 V~ 380-415 V 2N~ 50/60Hz 1x20A max 50/60Hz 2x16A max L1-L2 (SHORTED) L1-L2 (OPEN)
  • Seite 31 generatore steam générateur generador Dampfgenerator парогенератор di vapore generator de vapeur de vapor cassetta luci light box boîtier d'éclairage Lichtkasten caja de luces коробка подсветки termostato automatic reset thermostat à réar- Thermostat mit auto- termostato de термостат с автоматиче- a riarmo autom. thermostat mement autom.
  • Seite 37 L– R– antenna aerial antenne Antenne antena антенна...
  • Seite 41 5 mm 5 mm...
  • Seite 47: Einbau Der Duschtasse

    DIE ANLEITUNG IST VOR DER INSTALLATION 1) Die Schutzfolie entfernen und das Glasprofil an der Tas- AUFMERKSAM DURCHZULESEN se befestigen. 2) Dann die Schrauben an der Vorderseite der Tasse be- Vor Beginn... festigen. 3) Den Ablauf an das bereits vorgesehene Ablaufrohr (A) Prüfen Sie, dass der Abfluss sowie, für elektronische Modelle, der Anschluss an das Wasser- und Stromnetz vorgesehen wurde.
  • Seite 48: Installation Des Paneels Mit Ablage Und Des Ab- Deckpaneels

    Installation des Paneels mit Ablage und des Ab- - Der Anschluss des Alarmkreises muss mithilfe eines Kabels er- deckpaneels folgen, dessen Charakteristika nicht unter denen des Typs H 05 VV-F 2x0,75 mm liegen. Der Gebrauch dieses Kabels ist unver- 8-9) Den Haltebügel befestigen. Die Dichtung anbringen. zichtbar, damit die Kabelklemme am Kasten eine angemessene Das Paneel anheben und darin das Abdeckprofil einsetzen.
  • Seite 49: Elektrische Sicherheit

    Einbau des Dachs Ergänzungen 20) Die Dichtung anbringen. 29) Die Dichtung in den folgenden Bereichen anbringen: 21) Acht geben, dass das Dach in die Rillen des oberen - Glasprofil (Det.1); Elements der Einfassung einrastet. - zwischen Einfassung und Glasscheibe (Det.2). Die Dichtung muss sich über die gesamte Höhe des betroffe- Dann die folgenden Anschlüsse vornehmen: nen Bereichs erstrecken.
  • Seite 50 Die elektrische oder die Erdungsanlage müssen ein- JACUZZI EUROPE S.p.A. lehnt jede Haftung ab, falls: wandfrei funktionstüchtig sein und den geltenden gesetzlichen Vorschriften und spezifischen nationa- - Die Installation nicht durch Personal durchgeführt wird, das nicht len Normen entsprechen. qualifiziert und/oder nicht zur Installation befugt ist.
  • Seite 51 LEA DETENIDAMENTE LAS INSTRUCCIONES AN- 1) Retire la película de protección y fije los perfiles del TES DE INICIAR A LA INSTALACIÓN. cristal al plato. 2) A continuación fije los tornillos en el lado frontal del plato. Antes de comenzar... 3) Conecte la válvula de desagüe al tubo de desagüe (A) Compruebe que se haya preparado el desagüe y, para los mo- ya preparado, sellando cuidadosamente con silicona los puntos...
  • Seite 52 Instalación del panel con balda porta-objetos y - La conexión del circuito de alarma deberá realizarse utilizando del panel de cierre un cable de características no inferiores a las del tipo H 05 VV-F 2x0,75 mm . El uso de este cable es indispensable para garanti- 8-9) Fije la pletina.
  • Seite 53: Operaciones Finales

    Operaciones finales A continuación realice las conexiones: - a los rociadores de ducha (A); 29) Monte la junta en las siguientes zonas: - a la cascada (B); - a los chorros nebulizadores (C). - perfil cristales (det.1); 22) Realice las conexiones descritas en la figura. Apoye el - entre marco y cristal (det.2).
  • Seite 54 JACUZZI EUROPE S.p.A. no se responsabiliza en caso de que: Para la conexión a la red eléctrica, se impone la instalación de - La instalación sea realizada por parte de personal no cualificado un interruptor omnipolar de corte, que asegure la desconexión...
  • Seite 55 ВНИМАТЕЛЬНО ОЗНАКОМИТЬСЯ С ИНСТРУК- 1) Снять защитную пленку и прикрепить стеклянные ЦИЯМИ ПЕРЕД УСТАНОВКОЙ профили к поддону. Перед тем как начать... 2) Затем закрепить винты с передней стороны поддона. Проверить, что был предусмотрен слив, а также для элек- 3) Подсоединить слив к уже предусмотренной слив- тронных...
  • Seite 56 Монтаж панели с полкой и заполняющей панели - Подключение аварийного контура должно производиться при использовании кабеля с характеристиками не менее H 8-9) Прикрепить скобу. Позиционировать прокладку. Под- 05 VV-F 2x0,75 мм . Использование данного кабеля является нять панель и вставить ее вовнутрь заполняющего профиля. необходимым...
  • Seite 57: Электрическая Безопасность

    Монтаж крыши Дополнения 20) Позиционировать прокладку. 29) Монтировать прокладку на следующие участки: 21) Соблюдать осторожность в целях сцепления крыши - профиль стекол (дет.1); с каналами, присутствующими на верхнем элементе рамы. - между рамой и стеклом (дет.2). Прокладка должна закрыть всю высоту соответствую- Затем...
  • Seite 58 Электрическая и заземляющая система помеще- JACUZZI EUROPE S.p.A. не несет ответственность в случае если: ния должны быть эффективными и соответство- вать действующим положениям закона, а также - Установка осуществляется неквалифицированным и/или не специфическим национальным нормативам. имеющим разрешение на выполнение установки персоналом.
  • Seite 60 I dati e le caratteristiche non impegnano la Jacuzzi Europe S.p.A., che si riserva il diritto di apportare tutte le modifiche ritenute opportune senza obbligo di preavviso o di sostituzione The data and characteristics indicated do not oblige Jacuzzi Europe, who reserves the right to make the necessary changes they feel opportune without forewarning or substitution Les caractéristiques indiquées, n’engagent pas la Jacuzzi Europe, qui se réserve le droit d’apporter...

Diese Anleitung auch für:

Frame in2

Inhaltsverzeichnis